В этой статье мы напишем классическую «Змейку» на Python с помощью инструмента для создания GUI Kivy.
Kivy — это популярный инструмент для создания пользовательских интерфейсов, который отлично подходит для разработки приложений и несложных игр. Одним из основных достоинств Kivy является портируемость — возможность безболезненного переноса ваших проектов с одной платформы на другую. Наша «Змейка» будет работать на платформе Android.
Kivy эффективно использует Cython — язык программирования, сочетающий в себе оптимизированность C++ и синтаксис Python — что положительно сказывается на производительности. Также Kivy активно использует GPU для графических процессов, освобождая CPU для других вычислений.
Рекомендуемые ресурсы для начала работы с Kivy:
- официальная документация;
- Wiki по Kivy;
- примеры готовых проектов.
Устанавливаем Kivy
Зависимости
Прим. перев. Код проверен на Ubuntu 16.04, Cython 0.25, Pygame 1.9.4.dev0, Buildozer 0.33, Kyvi 1.10.
Для правильной работы Kivy нам требуется три основных пакета: Cython, pygame и python-dev. Если вы используете Ubuntu, вам также может понадобиться библиотека gstreamer, которая используется для поддержки некоторых видеовозможностей фреймворка.
Устанавливаем Cython:
sudo pip install cythonУстанавливаем зависимости pygame:
sudo apt-get build-dep python-pygame
sudo apt-get install python-dev build-essential
Устанавливаем pygame:
sudo pip install hg+http://bitbucket.org/pygame/pygame
Устанавливаем gstreamer:
sudo apt-get install gstreamer1.0-libavДобавляем репозиторий Kivy:
sudo add-apt-repository ppa:kivy-team/kivy
sudo apt-get update
Устанавливаем:
sudo apt-get install python-kivyBuildozer
Этот пакет нам понадобится для упрощения процесса установки нашего Android-приложения:
sudo pip install buildozerНам также понадобится Java JDK. И если вы используете 64-битную систему, вам понадобятся 32-битные версии зависимостей.
Устанавливаем Java JDK:
sudo apt-get install openjdk-7-jdkУстанавливаем 32-битные зависимости:
sudo dpkg --add-architecture i386
sudo apt-get update
sudo apt-get install libncurses5:i386 libstdc++6:i386 zlib1g:i386
Оно работает?
Прежде чем начать писать нашу «Змейку», давайте проверим, правильно ли у нас все установилось. Иначе в дальнейшем может обнаружиться, что проект не компилируется из-за какого-нибудь недостающего пакета.
Для проверки напишем старый добрый «Hello, world!».
Приступим к созданию проекта. Нужно перейти в рабочую папку и выполнить команду:
buildozer initТеперь откроем файл с расширением .spec в любом текстовом редакторе и изменим следующие строки:
- имя нашего приложения
title = Hello World;
- название пакета
package.name = helloworldapp; - домен пакета (нужен для android/ios сборки)
package.domain = org.helloworldapp; - закомментируйте эти строки, если они ещё не закомментированы:
# version.regex = __version__ = ['"](.*)['"]
# version.filename = %(source.dir)s/main.py- строка
version = 1.0.0должна быть раскомментированной.
Создайте файл main.py и добавьте в него следующий код:
import kivy
kivy.require('1.8.0') # Ваша версия может отличаться

from kivy.app import App
from kivy.uix.button import Button

class DummyApp(App):
    def build(self):
        return Button(text="Hello World")

if __name__ == '__main__':
    DummyApp().run()
Теперь все готово к сборке. Вернемся к терминалу.
buildozer android debug # Эта команда создает apk файл в папке ./bin

buildozer android debug deploy # Если вы хотите установить apk непосредственно на ваше устройство
Примечание В случае возникновения каких-либо ошибок установите значение log_level = 2 в файле buildozer.spec. Это даст более развернутое описание ошибки. Теперь мы точно готовы приступить к написанию «Змейки».
Прим. перев. Обратите внимание, что в проекте используется один файл и в статье разбираются лишь куски кода из этого файла. Весь исходный код вы можете просмотреть, перейдя по ссылке на страницу проекта в gitHub.
Цели
В этой части урока мы напишем игровой движок нашей «Змейки». И под созданием игрового движка подразумевается:
1. Написание классов, которые станут скелетом нашего приложения.
2. Предоставление им правильных методов и свойств, чтобы мы могли управлять ими по своему усмотрению.
3. Соединение всего в основном цикле приложения.
Классы
Теперь давайте разберем нашу игру на составные элементы: змея и игровое поле. Змея состоит из двух основных элементов: головы и хвоста. И надо не забыть, что змее нужно что-то есть.
Таким образом нам потребуется организовать следующую иерархию виджетов:
Игровое поле (Playground)
    Фрукты (Fruit)
    Змея (Snake)
        Голова (SnakeHead)
        Хвост (SnakeTail)
Мы объявим наши классы в файлах main.py и snake.kv, чтобы отделить дизайн от логики:
main.py
import kivy
kivy.require('1.8.0')

# Импортируем элементы Kivy, которые будем использовать в классах
from kivy.app import App
from kivy.uix.widget import Widget
from kivy.properties import ObjectProperty


class Playground(Widget):
    # Привязываем переменным элементы из .kv
    fruit = ObjectProperty(None)
    snake = ObjectProperty(None)


class Fruit(Widget):
    pass


class Snake(Widget):
    head = ObjectProperty(None)
    tail = ObjectProperty(None)


class SnakeHead(Widget):
    pass


class SnakeTail(Widget):
    pass


class SnakeApp(App):

    def build(self):
        game = Playground()
        return game

if __name__ == '__main__':
    SnakeApp().run()
snake.kv
#:kivy 1.8.0

<Playground>
    snake: snake_id
    fruit: fruit_id

    Snake:
        id: snake_id

    Fruit:
        id: fruit_id

<Snake>
    head: snake_head_id
    tail: snake_tail_id

    SnakeHead:
        id: snake_head_id

    SnakeTail:
        id: snake_tail_id
Свойства
Теперь, когда мы реализовали классы, можно задуматься о содержимом.
Playground — это корневой виджет. Мы разделим его на сетку. Эта матрица поможет позиционировать и перемещать объекты по полю. Представление каждого дочернего виджета будет занимать одну клетку. Также нужно реализовать возможность сохранения счета и изменения частоты появления фруктов.
И последнее, но не менее важное: нужно реализовать управление вводом, но сделаем мы это в следующем разделе.
class Playground(Widget):
    fruit = ObjectProperty(None)
    snake = ObjectProperty(None)

    # Задаем размер сетки
    col_number = 16
    row_number = 9

    # Игровые переменные
    score = NumericProperty(0)
    turn_counter = NumericProperty(0)
    fruit_rythme = NumericProperty(0)

    # Одработка входных данных
    touch_start_pos = ListProperty()
    action_triggered = BooleanProperty(False)
Змея
Объект змеи не должен содержать ничего, кроме двух ее деталей: головы и хвоста.
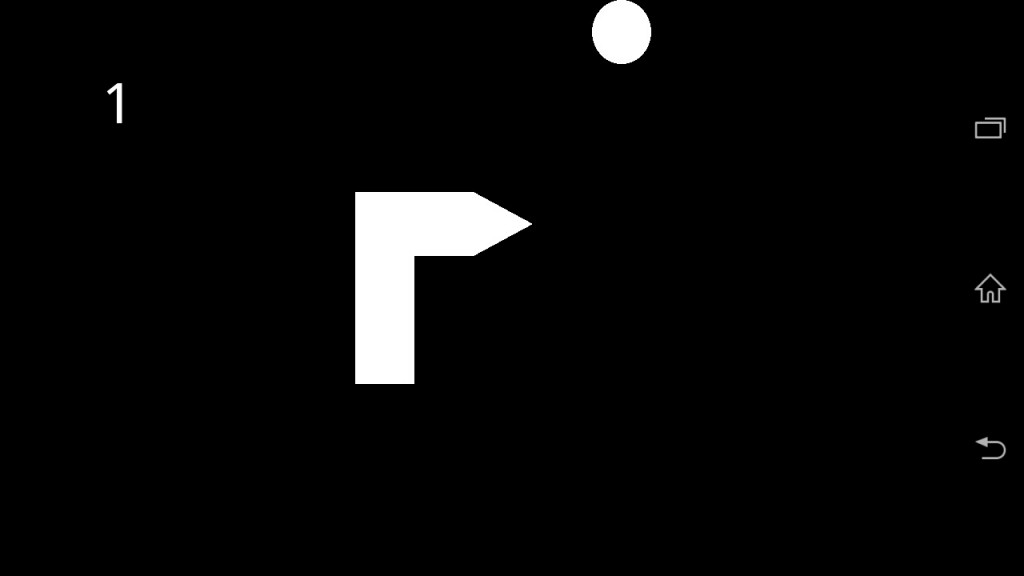
Для головы мы должны знать текущее положение и направление движения для правильного графического представления: если змея движется направо — рисуем треугольник повернутый вправо, если змея движется влево — рисуем треугольник повернутый влево.
Позиция и направление будут соответствовать определенным инструкциям рисования. Для рисования треугольника нам нужно шесть точек (две координаты на одну вершину). Эти координаты будут не ячейками сетки, а определенными пикселями на холсте
Наконец, нам надо хранить информацию об объекте, нарисованном на холсте, чтобы удалить его позже (например, для перезапуска игры). Мы добавим логическую переменную, указывающую, должен ли объект быть нарисован на холсте:
class SnakeHead(Widget):
    # Направление головы и ее позиция
    direction = OptionProperty(
        "Right", options=["Up", "Down", "Left", "Right"])
    x_position = NumericProperty(0)
    y_position = NumericProperty(0)
    position = ReferenceListProperty(x_position, y_position)

    # Представление на холсте
    points = ListProperty([0]*6)
    object_on_board = ObjectProperty(None)
    state = BooleanProperty(False)
Теперь хвост. Он состоит из блоков (изначально трех), занимающих одну ячейку. Когда «Змейка» будет двигаться, мы будем убирать самый последний блок хвоста и добавлять новый на предыдущую позицию головы:
class SnakeTail(Widget):
    # Длинна хвоста. Измеряется в количестве блоков
    size = NumericProperty(3)

    # Позицию каждого блока хвоста мы будем хранить здесь
    blocks_positions = ListProperty()

    # Обьекты (виджеты) хвоста будут находиться в этой переменной
    tail_blocks_objects = ListProperty()
Фрукт
Поведение фрукта похоже на поведение змеиной головы. Нам понадобится отслеживать его позицию, состояние и интервал появления:
class Fruit(Widget):
    # Эти значения будем использовать для определения частоты появления fruit_rhythme
    duration = NumericProperty(10) # Продолжительность существования
    interval = NumericProperty(3) # Продолжительность отсутствия

    # Представление на поле
    object_on_board = ObjectProperty(None)
    state = BooleanProperty(False)
В классе SnakeApp будет происходить запуск нашего приложения:
class SnakeApp(App):
    game_engine = ObjectProperty(None)

    def build(self):
        self.game_engine = Playground()
        return self.game_engine
Кое-что еще: нужно задать размеры виджетов. Каждый элемент будет занимать одну ячейку поля. Значит:
- высота виджета = высота поля / количество строк сетки;
- ширина виджета = ширина поля / количество колонок сетки.
Также нам нужно добавить виджет отображающий текущий счет.
Теперь snake.kv выглядит так:
#:kivy 1.8.0

<Playground>
    snake: snake_id
    fruit: fruit_id

    Snake:
        id: snake_id
        width: root.width/root.col_number
        height: root.height/root.row_number

    Fruit:
        id: fruit_id
        width: root.width/root.col_number
        height: root.height/root.row_number

    Label:
        font_size: 70
        center_x: root.x + root.width/root.col_number*2
        top: root.top - root.height/root.row_number
        text: str(root.score)

<Snake>
    head: snake_head_id
    tail: snake_tail_id

    SnakeHead:
        id: snake_head_id
        width: root.width
        height: root.height

    SnakeTail:
        id: snake_tail_id
        width: root.width
        height: root.height
Методы
Начнем с класса змеи. Мы хотим устанавливать ее в начальное положение и получать информацию о том, где она находится и как взаимодействует с объектами поля:
class Snake(Widget):
...
    def move(self):
        """
        Движение змеи будет происходить в 3 этапа:
            - сохранить текущее положение головы.
            - передвинуть голову на одну позицию вперед.
            - переместить последний блок хвоста на предыдущие координаты головы .
        """
        next_tail_pos = list(self.head.position)
        self.head.move()
        self.tail.add_block(next_tail_pos)

    def remove(self):
        """
        Здесь мы опишем, удаление элементов хвоста и головы
        """
        self.head.remove()
        self.tail.remove()

    def set_position(self, position):
        self.head.position = position

    def get_position(self):
        """
        Положение змеи равно положению ее головы на поле.
        """
        return self.head.position

    def get_full_position(self):
        """
        Но иногда нам нужно будет узнавать, какое пространство занимает змея.
        """
        return self.head.position + self.tail.blocks_positions

    def set_direction(self, direction):
        self.head.direction = direction

    def get_direction(self):
        return self.head.direction
Мы назвали ряд методов. Теперь давайте их реализуем. Начнем с remove() и add_block():
class SnakeTail(Widget):
...

    def remove(self):
        # Сбрасываем счетчик длины
        self.size = 3

        # Удаляем каждый блок хвоста
        for block in self.tail_blocks_objects:
            self.canvas.remove(block)

        # Обнуляем списки с координатами блоков
        # и их представления на холсте
        self.blocks_positions = []
        self.tail_blocks_objects = []

    def add_block(self, pos):
        """
        Здесь действуем в 3 этапа :
            - Передаем позицию нового блока как аргумент и добавляем блок в список объектов.
            - Проверяем равенство длины хвоста и количества блоков и изменяем, если требуется.
            - Рисуем блоки на холсте, до тех пор, пока количество нарисованных блоков не станет равно длине хвоста.
        """
        # Добавляем координаты блоков в список
        self.blocks_positions.append(pos)

        # Делаем проверку соответствия количеству блоков змеи на холсте и переменной отражающей длину
        if len(self.blocks_positions) > self.size:
            self.blocks_positions.pop(0)

        with self.canvas:
            # Рисуем блоки используя координаты из списка
            for block_pos in self.blocks_positions:
                x = (block_pos[0] - 1) * self.width
                y = (block_pos[1] - 1) * self.height
                coord = (x, y)
                block = Rectangle(pos=coord, size=(self.width, self.height))

                # Добавляем новый блок к списку объектов
                self.tail_blocks_objects.append(block)

                # Делаем проверку длины и удаляем лишние блоки с холста, если необходимо
                if len(self.tail_blocks_objects) > self.size:
                    last_block = self.tail_blocks_objects.pop(0)
                    self.canvas.remove(last_block)
Теперь работаем с головой. Она будет иметь две функции: move() и remove():
class SnakeHead(Widget):
    # Представление головы на "сетке"
    direction = OptionProperty(
        "Right", options=["Up", "Down", "Left", "Right"])
    x_position = NumericProperty(0)
    y_position = NumericProperty(0)
    position = ReferenceListProperty(x_position, y_position)

    # Представление головы на поле
    points = ListProperty([0] * 6)
    object_on_board = ObjectProperty(None)
    state = BooleanProperty(False)

    def is_on_board(self):
        return self.state

    def remove(self):
        if self.is_on_board():
            self.canvas.remove(self.object_on_board)
            self.object_on_board = ObjectProperty(None)
            self.state = False

    def show(self):
        """
        Размещаем голову на холсте.
        """
        with self.canvas:
            if not self.is_on_board():
                self.object_on_board = Triangle(points=self.points)
                self.state = True
            else:
                # Если объект должен быть на поле - удаляем старую голову
                # и рисуем новую
                self.canvas.remove(self.object_on_board)
                self.object_on_board = Triangle(points=self.points)

    def move(self):
        """
        Не самое элегантное решение, но это работает.
        Здесь мы описываем изображение треугольника для каждого положения головы.
        """
        if self.direction == "Right":
            # Обновляем позицию
            self.position[0] += 1

            # Вычисляем положения точек
            x0 = self.position[0] * self.width
            y0 = (self.position[1] - 0.5) * self.height
            x1 = x0 - self.width
            y1 = y0 + self.height / 2
            x2 = x0 - self.width
            y2 = y0 - self.height / 2
        elif self.direction == "Left":
            self.position[0] -= 1
            x0 = (self.position[0] - 1) * self.width
            y0 = (self.position[1] - 0.5) * self.height
            x1 = x0 + self.width
            y1 = y0 - self.height / 2
            x2 = x0 + self.width
            y2 = y0 + self.height / 2
        elif self.direction == "Up":
            self.position[1] += 1
            x0 = (self.position[0] - 0.5) * self.width
            y0 = self.position[1] * self.height
            x1 = x0 - self.width / 2
            y1 = y0 - self.height
            x2 = x0 + self.width / 2
            y2 = y0 - self.height
        elif self.direction == "Down":
            self.position[1] -= 1
            x0 = (self.position[0] - 0.5) * self.width
            y0 = (self.position[1] - 1) * self.height
            x1 = x0 + self.width / 2
            y1 = y0 + self.height
            x2 = x0 - self.width / 2
            y2 = y0 + self.height

        # Записываем положения точек
        self.points = [x0, y0, x1, y1, x2, y2]

        # Рисуем голову
        self.show()
А что там с фруктами? Мы должны уметь помещать их в заданные координаты и удалять, когда нам это понадобится:
class Fruit(Widget):
...

    def is_on_board(self):
        return self.state

    def remove(self, *args):
        # Удаляем объект с поля и указываем, что он сейчас стерт
        if self.is_on_board():
            self.canvas.remove(self.object_on_board)
            self.object_on_board = ObjectProperty(None)
            self.state = False

    def pop(self, pos):
        self.pos = pos  # объявляем, что фрукт находится на поле

        # Рисуем фрукт
        with self.canvas:
            x = (pos[0] - 1) * self.size[0]
            y = (pos[1] - 1) * self.size[1]
            coord = (x, y)

            # Сохраняем представление и обновляем состояние объекта
            self.object_on_board = Ellipse(pos=coord, size=self.size)
            self.state = True
Почти готово, не сдавайтесь! Теперь нужно организовать весь игровой процесс, который будет происходить в классе Playground. Рассмотрим логику игры: она начинается с того, что змея помещается в случайные координаты. Игра обновляется при каждом перемещении змеи. Во время обновлений мы проверяем направление змеи и ее положение. Если змея сталкивается сама с собой или выходит за пределы поля — мы засчитываем поражение и игра начинается сначала.
Как будет осуществляться управление? Когда игрок касается экрана, мы сохраняем координаты касания. Когда палец будет перемещаться, мы будем сравнивать новое положение с исходным. Если позиция будет изменена на 10 % от размера экрана, мы будем определять это как инструкцию и обрабатывать ее:
class Playground(Widget):
   ...

    def start(self):
        # Добавляем змею на поле
        self.new_snake()

        # Начинаем основной цикл обновления игры
        self.update()

    def reset(self):
        # Сбрасываем игровые переменные
        self.turn_counter = 0
        self.score = 0

        # Удаляем образы змеи и фрукта с поля
        self.snake.remove()
        self.fruit.remove()

    def new_snake(self):
        # Генерируем случайные координаты
        start_coord = (
            randint(2, self.col_number - 2), randint(2, self.row_number - 2))

        # Устанавливаем для змеи новые координаты
        self.snake.set_position(start_coord)

        # Генерируем случайное направление
        rand_index = randint(0, 3)
        start_direction = ["Up", "Down", "Left", "Right"][rand_index]

        # Задаем змее случайное направление
        self.snake.set_direction(start_direction)

    def pop_fruit(self, *args):
        # Генерируем случайные координаты для фрукта
        random_coord = [
            randint(1, self.col_number), randint(1, self.row_number)]

        # получаем координаты всех клеток занимаемых змеей
        snake_space = self.snake.get_full_position()

        # Если координаты фрукта совпадают с координатами клеток змеи - генерируем
        # новые координаты
        while random_coord in snake_space:
            random_coord = [
                randint(1, self.col_number), randint(1, self.row_number)]

        # Помещаем образ фрукта на поле
        self.fruit.pop(random_coord)

    def is_defeated(self):
        """
        Проверяем, является ли позиция змеи проигрышной.
        """
        snake_position = self.snake.get_position()

        # Если змея кусает свой хвост - поражение
        if snake_position in self.snake.tail.blocks_positions:
            return True

        # Если вышла за пределы поля - поражение
        if snake_position[0] > self.col_number
                or snake_position[0] < 1
                or snake_position[1] > self.row_number
                or snake_position[1] < 1:
            return True

        return False

    def update(self, *args):
        """
        Используется для смены игровых ходов.
        """
        # Перемещаем змею на следующую позицию
        self.snake.move()

        # Проверяем на поражение
        # Если поражение - сбрасываем игру
        if self.is_defeated():
            self.reset()
            self.start()
            return

        # Проверяем, находится ли фрукт на поле
        if self.fruit.is_on_board():
            # Если змея съела фрукт - увеличиваем счет и длину змеи
            if self.snake.get_position() == self.fruit.pos:
                self.fruit.remove()
                self.score += 1
                self.snake.tail.size += 1

        # Увеличиваем счетчик ходов
        self.turn_counter += 1

    def on_touch_down(self, touch):
        self.touch_start_pos = touch.spos

    def on_touch_move(self, touch):
        # Вычисляем изменение позиции пальца
        delta = Vector(*touch.spos) - Vector(*self.touch_start_pos)


        # Проверяем, изменение > 10% от размера экрана:
        if not self.action_triggered
                and (abs(delta[0]) > 0.1 or abs(delta[1]) > 0.1):
            # Если да, задаем змее подходящее направление
            if abs(delta[0]) > abs(delta[1]):
                if delta[0] > 0:
                    self.snake.set_direction("Right")
                else:
                    self.snake.set_direction("Left")
            else:
                if delta[1] > 0:
                    self.snake.set_direction("Up")
                else:
                    self.snake.set_direction("Down")
            # Здесь мы регистрируем, что действие закончено, для того, чтобы оно не             # происходило более одного раза за ход
            self.action_triggered = True

    def on_touch_up(self, touch):
        # Указываем, что мы готовы принять новые инструкции
        self.action_triggered = False
Основной цикл
Здесь происходят процессы, устанавливающие положение фрукта, управляющие движением змеи и определяющие проигрыш:
   def update(self, *args):
        """
        Используется для смены игровых ходов.
        """
        # Регистрация последовательности появления фруктов в планировщике событий
        if self.turn_counter == 0:
            self.fruit_rythme = self.fruit.interval + self.fruit.duration
            Clock.schedule_interval(
                self.fruit.remove, self.fruit_rythme)
        elif self.turn_counter == self.fruit.interval:
            self.pop_fruit()
            Clock.schedule_interval(
                self.pop_fruit, self.fruit_rythme)
...
        # Каждое обновление будет происходить ежесекундно (1'')
        Clock.schedule_once(self.update, 1)
Нужно добавить обработчик для события сброса игры:
    def reset(self):
...
        Clock.unschedule(self.pop_fruit)
        Clock.unschedule(self.fruit.remove)
        Clock.unschedule(self.update)
Теперь мы можем протестировать игру.
Одна важная деталь. Чтобы приложение запустилось с правильным разрешением экрана, нужно сделать так:
class SnakeApp(App):
    game_engine = ObjectProperty(None)

    def on_start(self):
        self.game_engine.start()
...
И вуаля! Теперь вы можете запустить приложение. Остается только упаковать его с помощью buildozer и загрузить на устройство.
Создаем экраны
В приложении будет два экрана: приветствия и игровой. Также будет всплывающее меню настроек. Сначала мы сделаем макеты наших виджетов в .kv-файле, а потом напишем соответствующие классы Python.
Внешняя оболочка
PlaygroundScreen содержит только игровое поле:
<PlaygroundScreen>:
    game_engine: playground_widget_id

    Playground:
        id: playground_widget_id
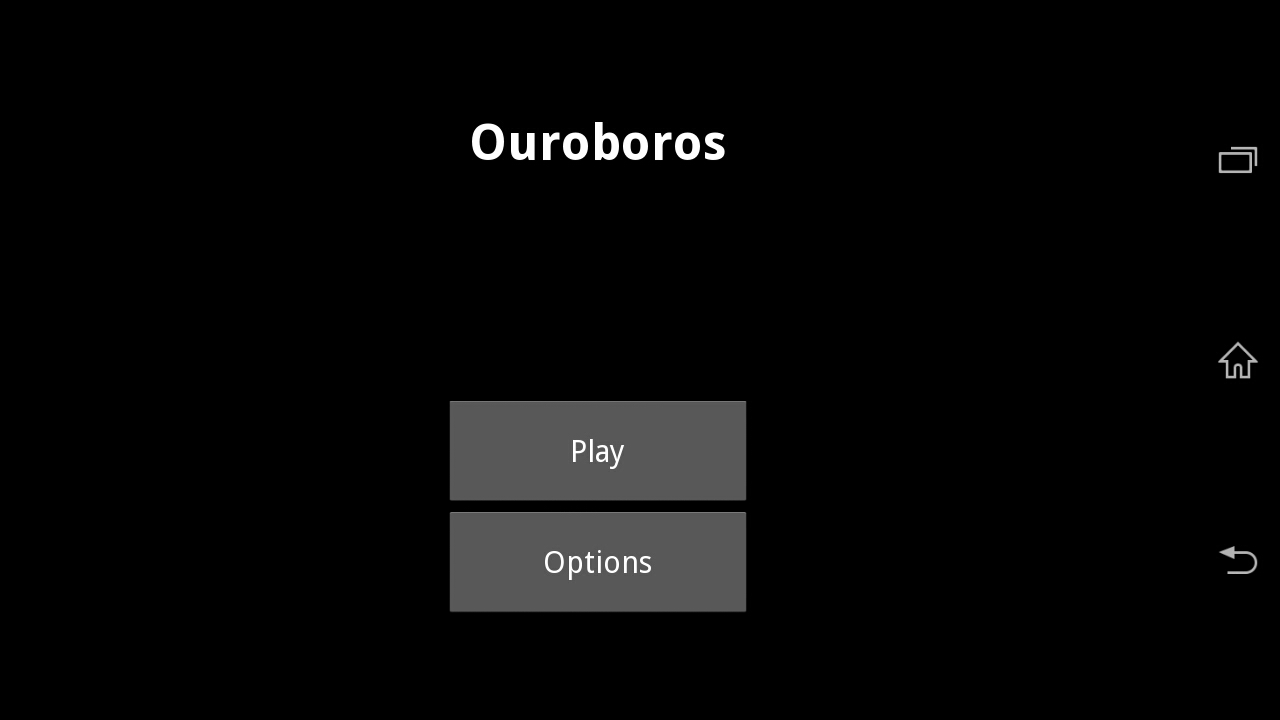
Основной экран будет состоять из трех встроенных виджетов: название приложения, кнопки запуска игры и кнопки вызывающая меню настроек:
<WelcomeScreen>
    AnchorLayout:
        anchor_x: "center"

        BoxLayout:
            orientation: "vertical"
            size_hint: (0.5, 1)
            spacing: 10

            Label:
                size_hint_y: .4
                text: "Ouroboros"
                valign: "bottom"
                bold: True
                font_size: 50
                padding: 0, 0

            AnchorLayout:
                anchor_x: "center"
                size_hint_y: .6

                BoxLayout:
                    size_hint: .5, .5
                    orientation: "vertical"
                    spacing: 10

                    Button:
                        halign: "center"
                        valign: "middle"
                        text: "Play"

                    Button:
                        halign: "center"
                        valign: "middle"
                        text: "Options"
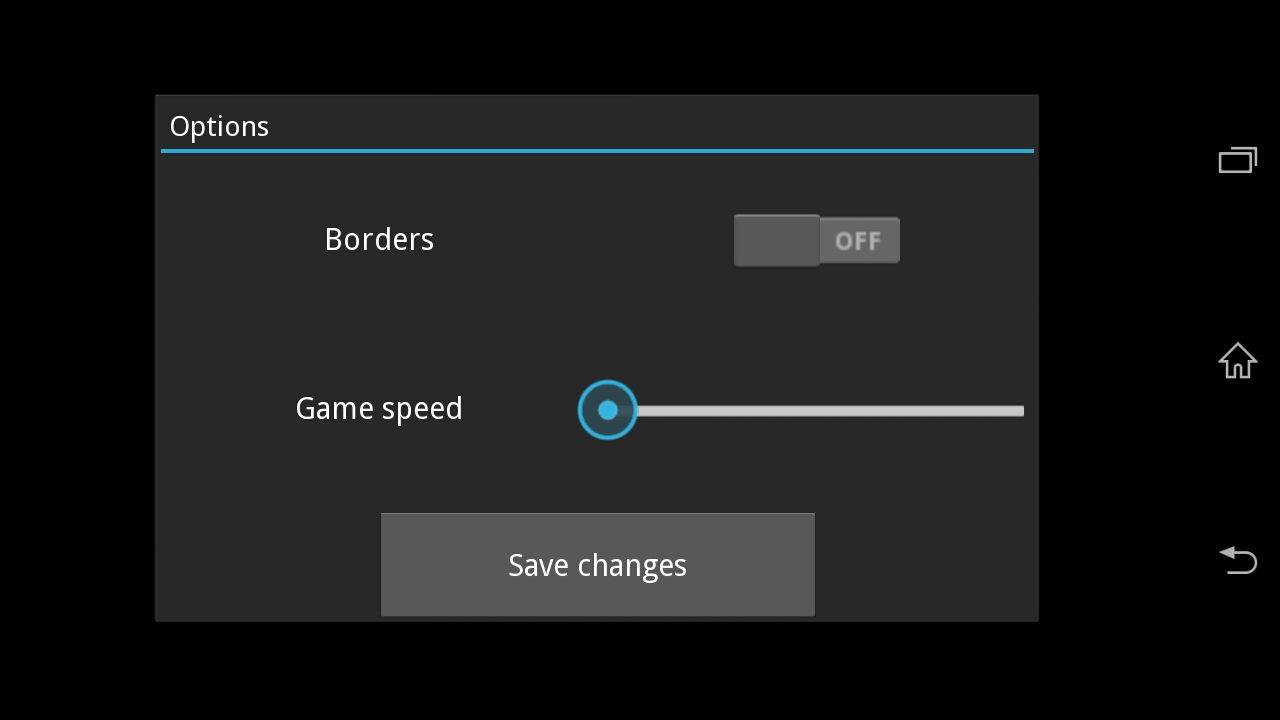
Всплывающее окно будет занимать ¾ экрана приветствия. Оно будет содержать виджеты, необходимые для установки параметров, и кнопку «Сохранить».
Подготовим макет:
<OptionsPopup>
    title: "Options"
    size_hint: .75, .75

    BoxLayout:
        orientation: "vertical"
        spacing: 20

        GridLayout:
            size_hint_y: .8
            cols: 2

        AnchorLayout:
            anchor_x: "center"
            size_hint: 1, .25

            Button:
                size_hint_x: 0.5
                text: "Save changes"
                on_press: root.dismiss()
Классы
На экране приветствия требуется только метод show_popup(), который будет вызываться при нажатии кнопки настроек на главном экране. Нам не нужно определять что-либо еще для кнопки включения игры, потому что она будет использовать способность своего родителя обращаться к диспетчеру экрана:
class WelcomeScreen(Screen):
    options_popup = ObjectProperty(None)

    def show_popup(self):
        # Создаем экземпляр всплывающего окна и отображаем на экране
        self.options_popup = OptionsPopup()
        self.options_popup.open()
Теперь нужно сделать так, чтоб экран приветствия показывался при запуске игры, а игра начиналась только тогда, когда будет показано игровое поле:
class PlaygroundScreen(Screen):
    game_engine = ObjectProperty(None)

    def on_enter(self):
        # Показываем экран и начинаем игру
        self.game_engine.start()
Также нам нужно подготовить класс окна настроек, иначе привязка будет работать не правильно:
class OptionsPopup(Popup):
    pass
Теперь добавим ScreenManager в приложение и зарегистрируем два экрана:
class SnakeApp(App):
    screen_manager = ObjectProperty(None)

    def build(self):
        # Объявление SkreenManager как свойства класса
        SnakeApp.screen_manager = ScreenManager()

        # Создание экземплров экранов
        ws = WelcomeScreen(name="welcome_screen")
        ps = PlaygroundScreen(name="playground_screen")

        # Регистрация экранов в SkreenManager
        self.screen_manager.add_widget(ws)
        self.screen_manager.add_widget(ps)

        return self.screen_manager
Теперь нужно сказать кнопкам, что делать, когда на них нажимают:
<WelcomeScreen>
...
                    Button:
...
                        on_press: root.manager.current = "playground_screen"

                    Button:
...
                        on_press: root.show_popup()

<OptionsPopup>
...
            Button:
...
                on_press: root.dismiss()
После проигрыша нужно возвращаться обратно на экран приветствия:
class Playground(Widget):
...
    def update(self, *args):
...
        # Проверяем проигрыш
        # Если это произошло,
        # показываем экран приветствия
        if self.is_defeated():
            self.reset()
            SnakeApp.screen_manager.current = "welcome_screen"
            return
…
Добавляем настройки
У нас будет всего два параметра:
- Включение/отключение границ. Если границы включены, при выхождении змеи за пределы экрана засчитывается проигрыш. Если границы выключены, змея будет появляться на другой стороне, если выходит за пределы.
- Скорость змеи.
Добавляем необходимые виджеты во всплывающее окно:
<OptionsPopup>
    border_option_widget: border_option_widget_id
    speed_option_widget: speed_option_widget_id

    title: "Options"
    size_hint: .75, .75

    BoxLayout:
        orientation: "vertical"
        spacing: 20

        GridLayout:
            size_hint_y: .8
            cols: 2

            Label:
                text: "Borders"
                halign: "center"

            Switch:
                id: border_option_widget_id

            Label:
                text: "Game speed"
                halign: "center"

            Slider:
                id: speed_option_widget_id
                max: 10
                min: 1
                step: 1
                value: 1
Теперь подготовим классы, чтобы они могли изменяться вместе с настройками. Если границы включены, будем рисовать очертание игрового поля. Также добавим возможность изменения частоты обновления:
class Playground(Widget):
...
    # Пользовательские настройки
    start_speed = NumericProperty(1)
    border_option = BooleanProperty(False)
...
    #Игровые переменные
...
    start_time_coeff = NumericProperty(1)
    running_time_coeff = NumericProperty(1)
...
    def start(self):
        # Если границы включены, рисуем прямоугольник вокруг поля
        if self.border_option:
            with self.canvas.before:
                Line(width=3.,
                     rectangle=(self.x, self.y, self.width, self.height))

        # Вычисляем коэффициент изменения частоты обновления игры
        # (по умолчанию 1.1, максимальный 2)
        self.start_time_coeff += (self.start_speed / 10)
        self.running_time_coeff = self.start_time_coeff
...
    def reset(self):
        # Сбрасываем игровые переменные
...
        self.running_time_coeff = self.start_time_coeff
...
    def is_defeated(self):
...
        # Если змея вышла за границы, которые были включены -- поражение
        if self.border_option:
            if snake_position[0] > self.col_number
                    or snake_position[0] < 1
                    or snake_position[1] > self.row_number
                    or snake_position[1] < 1:
                return True

        return False

    def handle_outbound(self):
        """
        Используется для перемещения змеи на противоположную сторону
        (только если границы выключены)
        """
        position = self.snake.get_position()
        direction = self.snake.get_direction()

        if position[0] == 1 and direction == "Left":
            self.snake.tail.add_block(list(position))
            self.snake.set_position([self.col_number + 1, position[1]])
        elif position[0] == self.col_number and direction == "Right":
            self.snake.tail.add_block(list(position))
            self.snake.set_position([0, position[1]])
        elif position[1] == 1 and direction == "Down":
            self.snake.tail.add_block(list(position))
            self.snake.set_position([position[0], self.row_number + 1])
        elif position[1] == self.row_number and direction == "Up":
            self.snake.tail.add_block(list(position))
            self.snake.set_position([position[0], 0])

    def update(self, *args):
...
        # Изменяем частоту появления фрукта
        if self.turn_counter == 0:
...
            Clock.schedule_interval(
                self.fruit.remove, self.fruit_rythme / self.running_time_coeff)
        elif self.turn_counter == self.fruit.interval:
...
            Clock.schedule_interval(
                self.pop_fruit, self.fruit_rythme / self.running_time_coeff)

        # Проверяем, пересечение змеей границ
        # если пересекает -- переносим на противоположную сторону
        if not self.border_option:
            self.handle_outbound()
...
        # Проверяем готовность фрукта
        if self.fruit.is_on_board():
            if self.snake.get_position() == self.fruit.pos:
...
                self.running_time_coeff *= 1.05
...
        Clock.schedule_once(self.update, 1 / self.running_time_coeff)
Изменим всплывающее окно так, чтобы оно могло передавать значения:
class OptionsPopup(Popup):
    border_option_widget = ObjectProperty(None)
    speed_option_widget = ObjectProperty(None)

    def on_dismiss(self):
        Playground.start_speed = self.speed_option_widget.value
        Playground.border_option = self.border_option_widget.active
Готово. Теперь можно упаковать проект и играть:
buildozer android debug # Создает apk-файл в папке ./bin

buildozer android debug deploy # Установка на Android-устройство
Перевод статьи «Make a Snake game for Android written in Python»
Привет!
Много людей хотели бы начать программировать на андроид, но Android Studio и Java их отпугивают. Почему? Потому, что это в некотором смысле из пушки по воробьям. «Я лишь хочу сделать змейку, и все!»
Начнем! (бонус в конце)
Зачем создавать еще один туториал по змейке на Kivy? (необязательно для прочтения)
Если вы — питонист, и хотите начать разработу простых игр под андроид, вы должно быть уже загуглили «змейка на андроиде» и нашли это (Eng) или ее перевод (Рус). И я тоже так сделал. К сожалению, я нашел статью бесполезной по нескольким причинам:
Плохой код
Мелкие недостатки:
- Использование «хвоста» и «головы» по отдельности. В этом нет необходимости, так как в змее голова — первая часть хвоста. Не стоит для этого всю змею делить на две части, для которых код пишется отдельно.
- Clock.schedule от self.update вызван из… self.update.
- Класс второго уровня (условно точка входа из первого класса) Playground объявлен в начале, но класс первого уровня SnakeApp объявлен в конце файла.
- Названия для направлений («up», «down», …) вместо векторов ( (0, 1), (1, 0)… ).
Серьезные недостатки:
- Динамичные объекты (к примеру, фрукт) прикреплены к файлу kv, так что вы не можете создать более одного яблока не переписав половину кода
- Чудная логика перемещения змеи вместо клетка-за-клеткой.
- 350 строк — слишком длинный код.
Статья неочевидна для новичков
Это мое ЛИЧНОЕ мнение. Более того, я не гарантирую, что моя статья будет более интересной и понятной. Но постараюсь, а еще гарантирую:
- Код будет коротким
- Змейка красивой (относительно)
- Туториал будет иметь поэтапное развитие
Результат не комильфо

Нет расстояния между клетками, чудной треугольник, дергающаяся змейка.
Знакомство
Первое приложение
Пожалуйста, удостовертесь в том, что уже установили Kivy (если нет, следуйте инструкциям) и запустите
buildozer init в папке проекта.
Запустим первую программу:
main.py
from kivy.app import App
from kivy.uix.widget import Widget

class WormApp(App):
    def build(self):
        return Widget()

if __name__ == '__main__':
    WormApp().run()

Мы создали виджет. Аналогично, мы можем создать кнопку или любой другой элемент графического интерфейса:
from kivy.app import App
from kivy.uix.widget import Widget
from kivy.uix.button import Button

class WormApp(App):
    def build(self):
        self.but = Button()
        self.but.pos = (100, 100)
        self.but.size = (200, 200)
        self.but.text = "Hello, cruel world"

        self.form = Widget()
        self.form.add_widget(self.but)
        return self.form

if __name__ == '__main__':
    WormApp().run()

Ура! Поздравляю! Вы создали кнопку!
Файлы .kv
Однако, есть другой способ создавать такие элементы. Сначала объявим нашу форму:
from kivy.app import App
from kivy.uix.widget import Widget
from kivy.uix.button import Button


class Form(Widget):
    def __init__(self):
        super().__init__()
        self.but1 = Button()
        self.but1.pos = (100, 100)
        self.add_widget(self.but1)


class WormApp(App):
    def build(self):
        self.form = Form()
        return self.form


if __name__ == '__main__':
    WormApp().run()
Затем создаем «worm.kv» файл.
worm.kv
<Form>:
    but2: but_id

    Button:
        id: but_id
        pos: (200, 200)
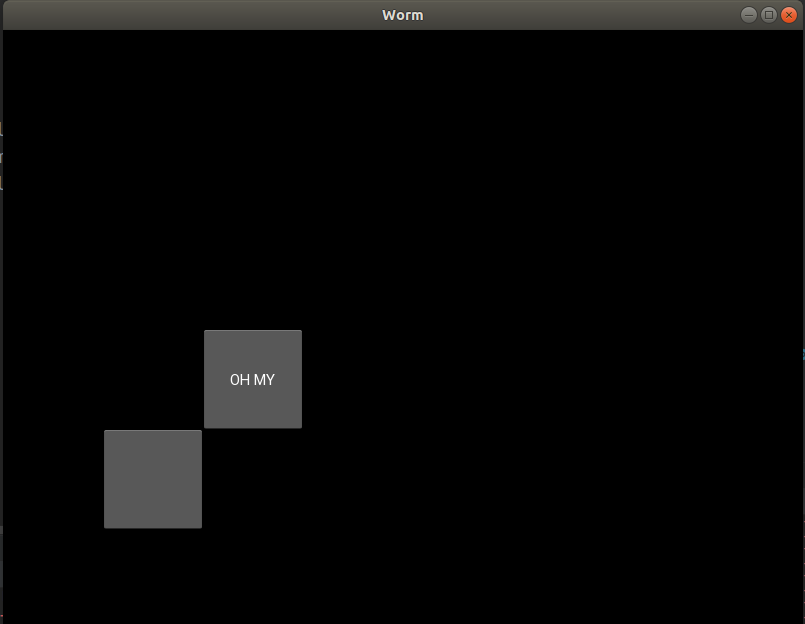
Что произошло? Мы создали еще одну кнопку и присвоим id but_id. Теперь but_id ассоциировано с but2 формы. Это означает, что мы можем обратиться к button с помощью but2:
class Form(Widget):
    def __init__(self):
        super().__init__()
        self.but1 = Button()
        self.but1.pos = (100, 100)
        self.add_widget(self.but1)   #
        self.but2.text = "OH MY"
Графика
Далее создадим графический элемент. Сначала объявим его в worm.kv:
<Form>:

<Cell>:
    canvas:
        Rectangle:
            size: self.size
            pos: self.pos
Мы связали позицию прямоугольника с self.pos и его размер с self.size. Так что теперь эти свойства доступны из Cell, например, как только мы создаем клетку, мы можем менять ее размер и позицию:
class Cell(Widget):
    def __init__(self, x, y, size):
        super().__init__()
        self.size = (size, size)   # Как можно заметить, мы можем поменять self.size который есть свойство "size" прямоугольника
        self.pos = (x, y)

class Form(Widget):
    def __init__(self):
        super().__init__()
        self.cell = Cell(100, 100, 30)
        self.add_widget(self.cell)
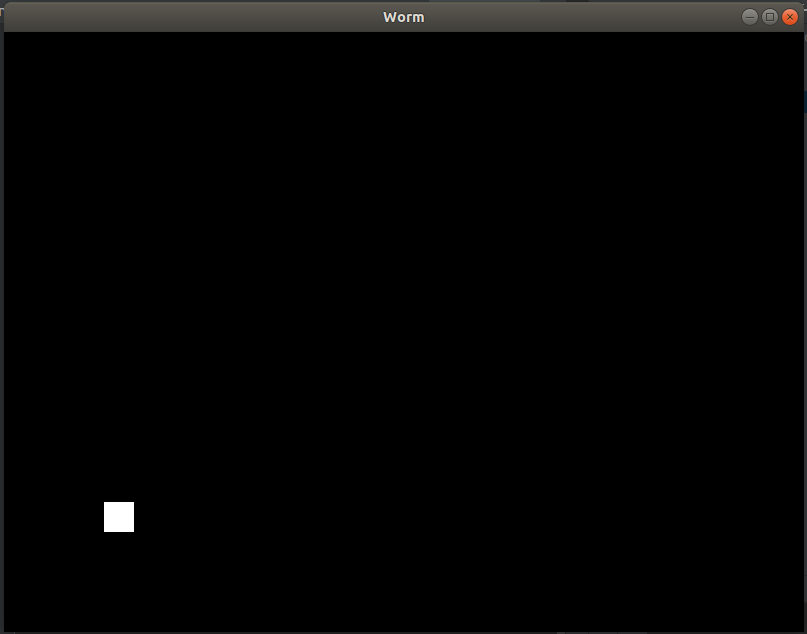
Окей, мы создали клетку.
Необходимые методы
Давайте попробуем двигать змею. Чтобы это сделать, мы можем добавить функцию Form.update и привязать к расписанию с помощью Clock.schedule.
from kivy.app import App
from kivy.uix.widget import Widget
from kivy.clock import Clock

class Cell(Widget):
    def __init__(self, x, y, size):
        super().__init__()
        self.size = (size, size)
        self.pos = (x, y)


class Form(Widget):
    def __init__(self):
        super().__init__()
        self.cell = Cell(100, 100, 30)
        self.add_widget(self.cell)

    def start(self):
        Clock.schedule_interval(self.update, 0.01)

    def update(self, _):
        self.cell.pos = (self.cell.pos[0] + 2, self.cell.pos[1] + 3)


class WormApp(App):
    def build(self):
        self.form = Form()
        self.form.start()
        return self.form


if __name__ == '__main__':
    WormApp().run()
Клетка будет двигаться по форме. Как вы можете видеть, мы можем поставить таймер на любую функцию с помощью Clock.
Далее, создадим событие нажатия (touch event). Перепишем Form:
class Form(Widget):
def __init__(self):
super().__init__()
self.cells = []
def start(self):
Clock.schedule_interval(self.update, 0.01)
def update(self, _):
for cell in self.cells:
cell.pos = (cell.pos[0] + 2, cell.pos[1] + 3)
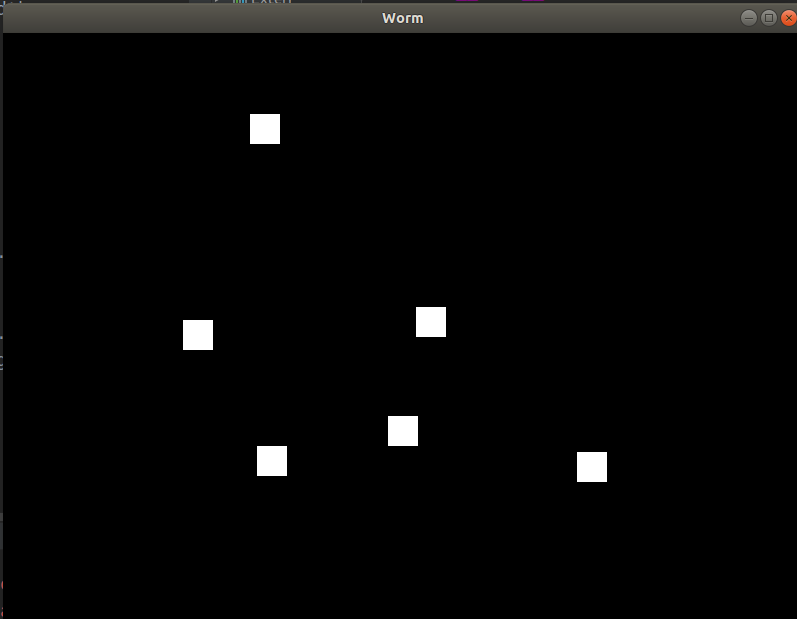
def on_touch_down(self, touch):
cell = Cell(touch.x, touch.y, 30)
self.add_widget(cell)
self.cells.append(cell)
Каждый touch_down создает клетку с координатами = (touch.x, touch.y) и размером = 30. Затем, мы добавим ее как виджет формы И в наш собственный массив (чтобы позднее обращаться к нему).
Теперь каждое нажатие на форму генерирует клетку.
Няшные настройки
Так как мы хотим сделать красивую змейку, мы должны логически разделить графическую и настоящую позиции.
Зачем?
Много причин делать это. Вся логика должна быть соединена с так называемой настоящей позицией, а вот графическая — есть результат настоящей. Например, если мы хотим сделать отступы, настоящая позиция будет (100, 100) пока графическая — (102, 102).
P. S. Мы бы этим не парились если бы имели дело с on_draw. Но теперь мы не обязаны перерисовать форму лапками.
Давайте изменим файл worm.kv:
<Form>:

<Cell>:
    canvas:
        Rectangle:
            size: self.graphical_size
            pos: self.graphical_pos
и main.py:
...
from kivy.properties import *
...
class Cell(Widget):
    graphical_size = ListProperty([1, 1])
    graphical_pos = ListProperty([1, 1])

    def __init__(self, x, y, size, margin=4):
        super().__init__()
        self.actual_size = (size, size)
        self.graphical_size = (size - margin, size - margin)
        self.margin = margin
        self.actual_pos = (x, y)
        self.graphical_pos_attach()

    def graphical_pos_attach(self):
        self.graphical_pos = (self.actual_pos[0] - self.graphical_size[0] / 2, self.actual_pos[1] - self.graphical_size[1] / 2)
...
class Form(Widget):
    def __init__(self):
        super().__init__()
        self.cell1 = Cell(100, 100, 30)
        self.cell2 = Cell(130, 100, 30)
        self.add_widget(self.cell1)
        self.add_widget(self.cell2)
...
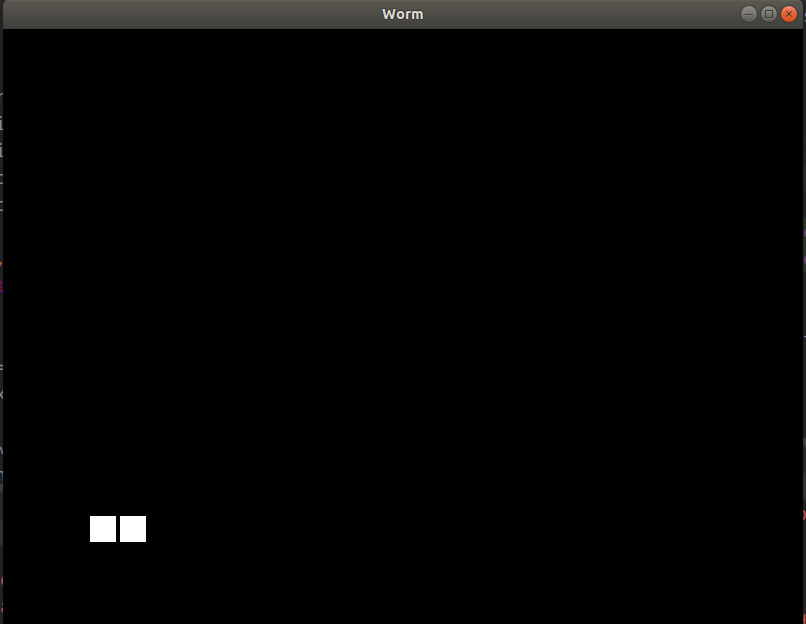
Появился отступ, так что это выглядит лучше не смотря на то, что мы создали вторую клетку с X = 130 вместо 132. Позже мы будем делать мягкое передвижение, основанное на расстоянии между actual_pos и graphical_pos.
Программирование червяка
Объявление
Инициализируем config в main.py
class Config:
    DEFAULT_LENGTH = 20
    CELL_SIZE = 25
    APPLE_SIZE = 35
    MARGIN = 4
    INTERVAL = 0.2
    DEAD_CELL = (1, 0, 0, 1)
    APPLE_COLOR = (1, 1, 0, 1)
(Поверьте, вы это полюбите!)
Затем присвойте config приложению:
class WormApp(App):
    def __init__(self):
        super().__init__()
        self.config = Config()
        self.form = Form(self.config)

    def build(self):
        self.form.start()
        return self.form
Перепишите init и start:
class Form(Widget):
    def __init__(self, config):
        super().__init__()
        self.config = config
        self.worm = None

    def start(self):
        self.worm = Worm(self.config)
        self.add_widget(self.worm)
        Clock.schedule_interval(self.update, self.config.INTERVAL)
Затем, Cell:
class Cell(Widget):
    graphical_size = ListProperty([1, 1])
    graphical_pos = ListProperty([1, 1])

    def __init__(self, x, y, size, margin=4):
        super().__init__()
        self.actual_size = (size, size)
        self.graphical_size = (size - margin, size - margin)
        self.margin = margin
        self.actual_pos = (x, y)
        self.graphical_pos_attach()

    def graphical_pos_attach(self):
        self.graphical_pos = (self.actual_pos[0] - self.graphical_size[0] / 2, self.actual_pos[1] - self.graphical_size[1] / 2)

    def move_to(self, x, y):
        self.actual_pos = (x, y)
        self.graphical_pos_attach()

    def move_by(self, x, y, **kwargs):
        self.move_to(self.actual_pos[0] + x, self.actual_pos[1] + y, **kwargs)

    def get_pos(self):
        return self.actual_pos

    def step_by(self, direction, **kwargs):
        self.move_by(self.actual_size[0] * direction[0], self.actual_size[1] * direction[1], **kwargs)
Надеюсь, это было более менее понятно.
И наконец Worm:
class Worm(Widget):
    def __init__(self, config):
        super().__init__()
        self.cells = []
        self.config = config
        self.cell_size = config.CELL_SIZE
        self.head_init((100, 100))
        for i in range(config.DEFAULT_LENGTH):
            self.lengthen()

    def destroy(self):
        for i in range(len(self.cells)):
            self.remove_widget(self.cells[i])
        self.cells = []

    def lengthen(self, pos=None, direction=(0, 1)):
        # Если позиция установлена, мы перемещаем клетку туда, иначе - в соответствии с данным направлением
        if pos is None:
            px = self.cells[-1].get_pos()[0] + direction[0] * self.cell_size
            py = self.cells[-1].get_pos()[1] + direction[1] * self.cell_size
            pos = (px, py)
        self.cells.append(Cell(*pos, self.cell_size, margin=self.config.MARGIN))
        self.add_widget(self.cells[-1])

    def head_init(self, pos):
        self.lengthen(pos=pos)
Давайте создадим нашего червячка.

Движение
Теперь подвигаем ЭТО.
Тут просто:
class Worm(Widget):
...
    def move(self, direction):
        for i in range(len(self.cells) - 1, 0, -1):
            self.cells[i].move_to(*self.cells[i - 1].get_pos())
        self.cells[0].step_by(direction)
class Form(Widget):
    def __init__(self, config):
        super().__init__()
        self.config = config
        self.worm = None
        self.cur_dir = (0, 0)

    def start(self):
        self.worm = Worm(self.config)
        self.add_widget(self.worm)
        self.cur_dir = (1, 0)
        Clock.schedule_interval(self.update, self.config.INTERVAL)

    def update(self, _):
        self.worm.move(self.cur_dir)

Оно живое! Оно живое!
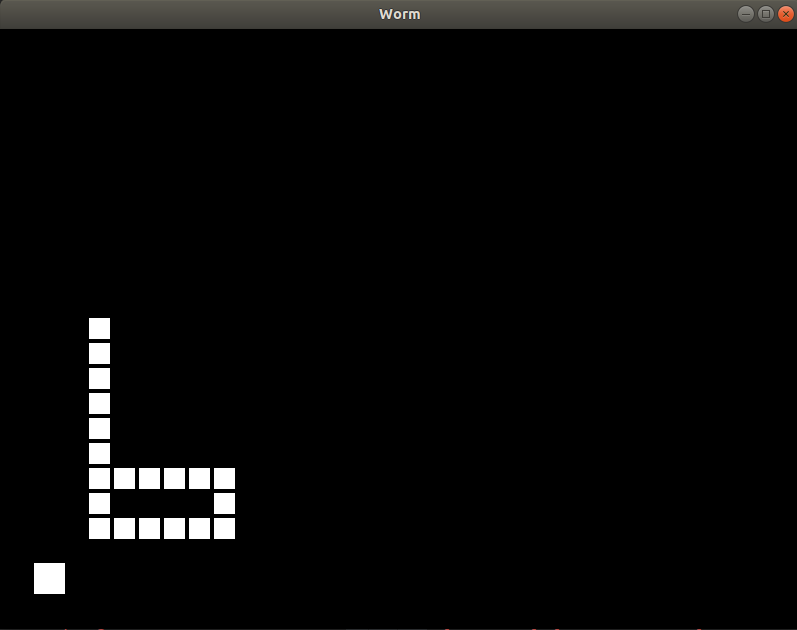
Управление
Как вы могли судить по первой картинке, управление змеи будет таким:

class Form(Widget):
...
    def on_touch_down(self, touch):
        ws = touch.x / self.size[0]
        hs = touch.y / self.size[1]
        aws = 1 - ws
        if ws > hs and aws > hs:
            cur_dir = (0, -1)         # Вниз
        elif ws > hs >= aws:
            cur_dir = (1, 0)          # Вправо
        elif ws <= hs < aws:
            cur_dir = (-1, 0)         # Влево
        else:
            cur_dir = (0, 1)           # Вверх
        self.cur_dir = cur_dir

Здорово.
Создание фрукта
Сначала объявим.
class Form(Widget):
...
    def __init__(self, config):
        super().__init__()
        self.config = config
        self.worm = None
        self.cur_dir = (0, 0)
        self.fruit = None
...
    def random_cell_location(self, offset):
        x_row = self.size[0] // self.config.CELL_SIZE
        x_col = self.size[1] // self.config.CELL_SIZE
        return random.randint(offset, x_row - offset), random.randint(offset, x_col - offset)

    def random_location(self, offset):
        x_row, x_col = self.random_cell_location(offset)
        return self.config.CELL_SIZE * x_row, self.config.CELL_SIZE * x_col

    def fruit_dislocate(self):
        x, y = self.random_location(2)
        self.fruit.move_to(x, y)
...
    def start(self):
        self.fruit = Cell(0, 0, self.config.APPLE_SIZE, self.config.MARGIN)
        self.worm = Worm(self.config)
        self.fruit_dislocate()
        self.add_widget(self.worm)
        self.add_widget(self.fruit)
        self.cur_dir = (1, 0)
        Clock.schedule_interval(self.update, self.config.INTERVAL)
Текущий результат:

Теперь мы должны объявить несколько методов Worm:
class Worm(Widget):
...
    # Тут соберем позиции всех клеток
    def gather_positions(self):
        return [cell.get_pos() for cell in self.cells]
    # Проверка пересекается ли голова с другим объектом
    def head_intersect(self, cell):
        return self.cells[0].get_pos() == cell.get_pos()
Другие бонусы функции gather_positions
Кстати, после того, как мы объявили gather_positions, мы можем улучшить fruit_dislocate:
class Form(Widget):
    def fruit_dislocate(self):
        x, y = self.random_location(2)
        while (x, y) in self.worm.gather_positions():
            x, y = self.random_location(2)
        self.fruit.move_to(x, y)
На этот моменте позиция яблока не сможет совпадать с позиции хвоста
… и добавим проверку в update()
class Form(Widget):
...
    def update(self, _):
        self.worm.move(self.cur_dir)
        if self.worm.head_intersect(self.fruit):
            directions = [(0, 1), (0, -1), (1, 0), (-1, 0)]
            self.worm.lengthen(direction=random.choice(directions))
            self.fruit_dislocate()
Определение пересечения головы и хвоста
Мы хотим узнать та же ли позиция у головы, что у какой-то клетки хвоста.
class Form(Widget):
...
    def __init__(self, config):
        super().__init__()
        self.config = config
        self.worm = None
        self.cur_dir = (0, 0)
        self.fruit = None
        self.game_on = True

    def update(self, _):
        if not self.game_on:
            return
        self.worm.move(self.cur_dir)
        if self.worm.head_intersect(self.fruit):
            directions = [(0, 1), (0, -1), (1, 0), (-1, 0)]
            self.worm.lengthen(direction=random.choice(directions))
            self.fruit_dislocate()
       if self.worm_bite_self():
            self.game_on = False

    def worm_bite_self(self):
        for cell in self.worm.cells[1:]:
            if self.worm.head_intersect(cell):
                return cell
        return False
Раскрашивание, декорирование, рефакторинг кода
Начнем с рефакторинга.
Перепишем и добавим
class Form(Widget):
...
    def start(self):
        self.worm = Worm(self.config)
        self.add_widget(self.worm)
        if self.fruit is not None:
            self.remove_widget(self.fruit)
        self.fruit = Cell(0, 0, self.config.APPLE_SIZE)
        self.fruit_dislocate()
        self.add_widget(self.fruit)
        Clock.schedule_interval(self.update, self.config.INTERVAL)
        self.game_on = True
        self.cur_dir = (0, -1)

    def stop(self):
        self.game_on = False
        Clock.unschedule(self.update)

    def game_over(self):
        self.stop()
...
    def on_touch_down(self, touch):
        if not self.game_on:
            self.worm.destroy()
            self.start()
            return
        ...
Теперь если червяк мертв (заморожен), если вы нажмете на экран, игра будет начата заново.
Теперь перейдим к декорированию и раскрашиванию.
worm.kv
<Form>:
    popup_label: popup_label
    score_label: score_label

    canvas:
        Color:
            rgba: (.5, .5, .5, 1.0)

        Line:
            width: 1.5
            points: (0, 0), self.size

        Line:
            width: 1.5
            points: (self.size[0], 0), (0, self.size[1])


    Label:
        id: score_label
        text: "Score: " + str(self.parent.worm_len)
        width: self.width

    Label:
        id: popup_label
        width: self.width


<Worm>:


<Cell>:
    canvas:
        Color:
            rgba: self.color
        Rectangle:
            size: self.graphical_size
            pos: self.graphical_pos
Перепишем WormApp:
class WormApp(App):
    def build(self):
        self.config = Config()
        self.form = Form(self.config)
        return self.form

    def on_start(self):
        self.form.start()

Раскрасим. Перепишем Cell in .kv:
<Cell>:
    canvas:
        Color:
            rgba: self.color

        Rectangle:
            size: self.graphical_size
            pos: self.graphical_pos
Добавим это к Cell.__init__:
self.color = (0.2, 1.0, 0.2, 1.0) #
и это к Form.start
self.fruit.color = (1.0, 0.2, 0.2, 1.0)
Превосходно, наслаждайтесь змейкой

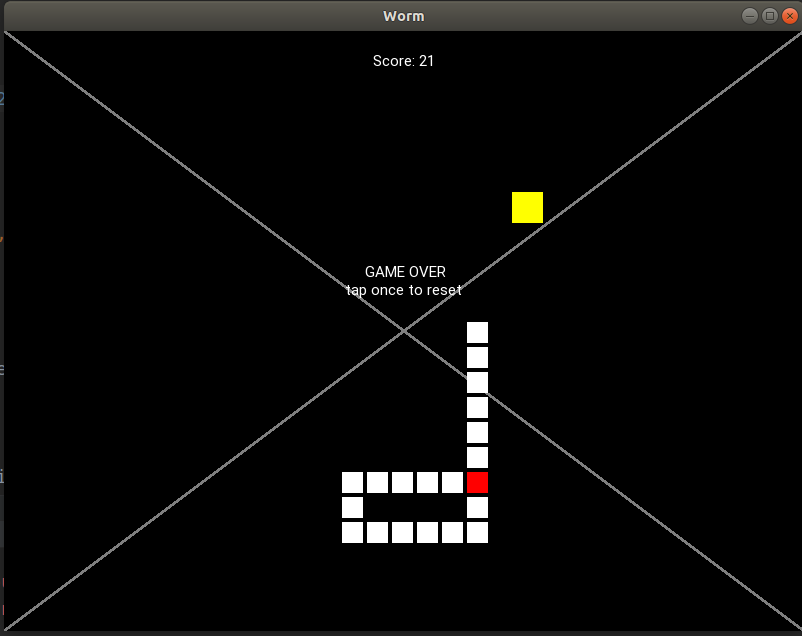
Наконец, мы создадим надпись «game over»
class Form(Widget):
...
    def __init__(self, config):
    ...
        self.popup_label.text = ""
...
    def stop(self, text=""):
        self.game_on = False
        self.popup_label.text = text
        Clock.unschedule(self.update)

    def game_over(self):
        self.stop("GAME OVER" + " " * 5 + "ntap to reset")
И зададим «раненой» клетке красный цвет:
вместо
    def update(self, _):
    ...
        if self.worm_bite_self():
            self.game_over()
    ...
напишите
    def update(self, _):
        cell = self.worm_bite_self()
        if cell:
            cell.color = (1.0, 0.2, 0.2, 1.0)
            self.game_over()

Вы еще тут? Самая интересная часть впереди!
Бонус — плавное движение
Так как шаг червячка равен cell_size, выглядит не очень плавно. Но мы бы хотели шагать как можно чаще без полного переписывания логики игры. Таким образом, нам нужен механизм, который двигал бы наши графические позиции (graphical_pos) но не влиял бы на настоящие (actual_pos). Я написал следующий код:
smooth.py
from kivy.clock import Clock
import time


class Timing:
    @staticmethod
    def linear(x):
        return x

class Smooth:
    def __init__(self, interval=1.0/60.0):
        self.objs = []
        self.running = False
        self.interval = interval

    def run(self):
        if self.running:
            return
        self.running = True
        Clock.schedule_interval(self.update, self.interval)

    def stop(self):
        if not self.running:
            return
        self.running = False
        Clock.unschedule(self.update)

    def setattr(self, obj, attr, value):
        exec("obj." + attr + " = " + str(value))

    def getattr(self, obj, attr):
        return float(eval("obj." + attr))

    def update(self, _):
        cur_time = time.time()
        for line in self.objs:
            obj, prop_name_x, prop_name_y, from_x, from_y, to_x, to_y, start_time, period, timing = line
            time_gone = cur_time - start_time
            if time_gone >= period:
                self.setattr(obj, prop_name_x, to_x)
                self.setattr(obj, prop_name_y, to_y)
                self.objs.remove(line)
            else:
                share = time_gone / period
                acs = timing(share)
                self.setattr(obj, prop_name_x, from_x * (1 - acs) + to_x * acs)
                self.setattr(obj, prop_name_y, from_y * (1 - acs) + to_y * acs)
        if len(self.objs) == 0:
            self.stop()

    def move_to(self, obj, prop_name_x, prop_name_y, to_x, to_y, t, timing=Timing.linear):
        self.objs.append((obj, prop_name_x, prop_name_y, self.getattr(obj, prop_name_x), self.getattr(obj, prop_name_y), to_x,
                          to_y, time.time(), t, timing))
        self.run()


class XSmooth(Smooth):
    def __init__(self, props, timing=Timing.linear, *args, **kwargs):
        super().__init__(*args, **kwargs)
        self.props = props
        self.timing = timing

    def move_to(self, obj, to_x, to_y, t):
        super().move_to(obj, *self.props, to_x, to_y, t, timing=self.timing)
Тем, кому не понравился сей код
Этот модуль не есть верх элегантности. Я признаю это решение плохим. Но это только hello-world решение.
Так, вы лишь создаете smooth.py and и копируете код в файл.
Наконец, заставим ЭТО работать!
class Form(Widget):
...
    def __init__(self, config):
    ...
        self.smooth = smooth.XSmooth(["graphical_pos[0]", "graphical_pos[1]"])
Заменим self.worm.move() с
class Form(Widget):
...
    def update(self, _):
    ...
        self.worm.move(self.cur_dir, smooth_motion=(self.smooth, self.config.INTERVAL))
А это как методы Cell должны выглядить
class Cell(Widget):
...
    def graphical_pos_attach(self, smooth_motion=None):
        to_x, to_y = self.actual_pos[0] - self.graphical_size[0] / 2, self.actual_pos[1] - self.graphical_size[1] / 2
        if smooth_motion is None:
            self.graphical_pos = to_x, to_y
        else:
            smoother, t = smooth_motion
            smoother.move_to(self, to_x, to_y, t)

    def move_to(self, x, y, **kwargs):
        self.actual_pos = (x, y)
        self.graphical_pos_attach(**kwargs)

    def move_by(self, x, y, **kwargs):
        self.move_to(self.actual_pos[0] + x, self.actual_pos[1] + y, **kwargs)
Ну вот и все, спасибо за ваше внимание! Код снизу.
Демонстрационное видео как работает результат:
Финальный код
main.py
from kivy.app import App
from kivy.uix.widget import Widget
from kivy.clock import Clock
from kivy.properties import *
import random
import smooth


class Cell(Widget):
    graphical_size = ListProperty([1, 1])
    graphical_pos = ListProperty([1, 1])
    color = ListProperty([1, 1, 1, 1])

    def __init__(self, x, y, size, margin=4):
        super().__init__()
        self.actual_size = (size, size)
        self.graphical_size = (size - margin, size - margin)
        self.margin = margin
        self.actual_pos = (x, y)
        self.graphical_pos_attach()
        self.color = (0.2, 1.0, 0.2, 1.0)

    def graphical_pos_attach(self, smooth_motion=None):
        to_x, to_y = self.actual_pos[0] - self.graphical_size[0] / 2, self.actual_pos[1] - self.graphical_size[1] / 2
        if smooth_motion is None:
            self.graphical_pos = to_x, to_y
        else:
            smoother, t = smooth_motion
            smoother.move_to(self, to_x, to_y, t)

    def move_to(self, x, y, **kwargs):
        self.actual_pos = (x, y)
        self.graphical_pos_attach(**kwargs)

    def move_by(self, x, y, **kwargs):
        self.move_to(self.actual_pos[0] + x, self.actual_pos[1] + y, **kwargs)

    def get_pos(self):
        return self.actual_pos

    def step_by(self, direction, **kwargs):
        self.move_by(self.actual_size[0] * direction[0], self.actual_size[1] * direction[1], **kwargs)


class Worm(Widget):
    def __init__(self, config):
        super().__init__()
        self.cells = []
        self.config = config
        self.cell_size = config.CELL_SIZE
        self.head_init((100, 100))
        for i in range(config.DEFAULT_LENGTH):
            self.lengthen()

    def destroy(self):
        for i in range(len(self.cells)):
            self.remove_widget(self.cells[i])
        self.cells = []

    def lengthen(self, pos=None, direction=(0, 1)):
        if pos is None:
            px = self.cells[-1].get_pos()[0] + direction[0] * self.cell_size
            py = self.cells[-1].get_pos()[1] + direction[1] * self.cell_size
            pos = (px, py)
        self.cells.append(Cell(*pos, self.cell_size, margin=self.config.MARGIN))
        self.add_widget(self.cells[-1])

    def head_init(self, pos):
        self.lengthen(pos=pos)

    def move(self, direction, **kwargs):
        for i in range(len(self.cells) - 1, 0, -1):
            self.cells[i].move_to(*self.cells[i - 1].get_pos(), **kwargs)
        self.cells[0].step_by(direction, **kwargs)

    def gather_positions(self):
        return [cell.get_pos() for cell in self.cells]

    def head_intersect(self, cell):
        return self.cells[0].get_pos() == cell.get_pos()


class Form(Widget):
    worm_len = NumericProperty(0)

    def __init__(self, config):
        super().__init__()
        self.config = config
        self.worm = None
        self.cur_dir = (0, 0)
        self.fruit = None
        self.game_on = True
        self.smooth = smooth.XSmooth(["graphical_pos[0]", "graphical_pos[1]"])

    def random_cell_location(self, offset):
        x_row = self.size[0] // self.config.CELL_SIZE
        x_col = self.size[1] // self.config.CELL_SIZE
        return random.randint(offset, x_row - offset), random.randint(offset, x_col - offset)

    def random_location(self, offset):
        x_row, x_col = self.random_cell_location(offset)
        return self.config.CELL_SIZE * x_row, self.config.CELL_SIZE * x_col

    def fruit_dislocate(self):
        x, y = self.random_location(2)
        while (x, y) in self.worm.gather_positions():
            x, y = self.random_location(2)
        self.fruit.move_to(x, y)

    def start(self):
        self.worm = Worm(self.config)
        self.add_widget(self.worm)
        if self.fruit is not None:
            self.remove_widget(self.fruit)
        self.fruit = Cell(0, 0, self.config.APPLE_SIZE)
        self.fruit.color = (1.0, 0.2, 0.2, 1.0)
        self.fruit_dislocate()
        self.add_widget(self.fruit)
        self.game_on = True
        self.cur_dir = (0, -1)
        Clock.schedule_interval(self.update, self.config.INTERVAL)
        self.popup_label.text = ""

    def stop(self, text=""):
        self.game_on = False
        self.popup_label.text = text
        Clock.unschedule(self.update)

    def game_over(self):
        self.stop("GAME OVER" + " " * 5 + "ntap to reset")

    def align_labels(self):
        try:
            self.popup_label.pos = ((self.size[0] - self.popup_label.width) / 2, self.size[1] / 2)
            self.score_label.pos = ((self.size[0] - self.score_label.width) / 2, self.size[1] - 80)
        except:
            print(self.__dict__)
            assert False

    def update(self, _):
        if not self.game_on:
            return
        self.worm.move(self.cur_dir, smooth_motion=(self.smooth, self.config.INTERVAL))
        if self.worm.head_intersect(self.fruit):
            directions = [(0, 1), (0, -1), (1, 0), (-1, 0)]
            self.worm.lengthen(direction=random.choice(directions))
            self.fruit_dislocate()
        cell = self.worm_bite_self()
        if cell:
            cell.color = (1.0, 0.2, 0.2, 1.0)
            self.game_over()
        self.worm_len = len(self.worm.cells)
        self.align_labels()

    def on_touch_down(self, touch):
        if not self.game_on:
            self.worm.destroy()
            self.start()
            return
        ws = touch.x / self.size[0]
        hs = touch.y / self.size[1]
        aws = 1 - ws
        if ws > hs and aws > hs:
            cur_dir = (0, -1)
        elif ws > hs >= aws:
            cur_dir = (1, 0)
        elif ws <= hs < aws:
            cur_dir = (-1, 0)
        else:
            cur_dir = (0, 1)
        self.cur_dir = cur_dir

    def worm_bite_self(self):
        for cell in self.worm.cells[1:]:
            if self.worm.head_intersect(cell):
                return cell
        return False


class Config:
    DEFAULT_LENGTH = 20
    CELL_SIZE = 25
    APPLE_SIZE = 35
    MARGIN = 4
    INTERVAL = 0.3
    DEAD_CELL = (1, 0, 0, 1)
    APPLE_COLOR = (1, 1, 0, 1)


class WormApp(App):
    def build(self):
        self.config = Config()
        self.form = Form(self.config)
        return self.form

    def on_start(self):
        self.form.start()


if __name__ == '__main__':
    WormApp().run()
smooth.py
from kivy.clock import Clock
import time


class Timing:
    @staticmethod
    def linear(x):
        return x


class Smooth:
    def __init__(self, interval=1.0/60.0):
        self.objs = []
        self.running = False
        self.interval = interval

    def run(self):
        if self.running:
            return
        self.running = True
        Clock.schedule_interval(self.update, self.interval)

    def stop(self):
        if not self.running:
            return
        self.running = False
        Clock.unschedule(self.update)

    def setattr(self, obj, attr, value):
        exec("obj." + attr + " = " + str(value))

    def getattr(self, obj, attr):
        return float(eval("obj." + attr))

    def update(self, _):
        cur_time = time.time()
        for line in self.objs:
            obj, prop_name_x, prop_name_y, from_x, from_y, to_x, to_y, start_time, period, timing = line
            time_gone = cur_time - start_time
            if time_gone >= period:
                self.setattr(obj, prop_name_x, to_x)
                self.setattr(obj, prop_name_y, to_y)
                self.objs.remove(line)
            else:
                share = time_gone / period
                acs = timing(share)
                self.setattr(obj, prop_name_x, from_x * (1 - acs) + to_x * acs)
                self.setattr(obj, prop_name_y, from_y * (1 - acs) + to_y * acs)
        if len(self.objs) == 0:
            self.stop()

    def move_to(self, obj, prop_name_x, prop_name_y, to_x, to_y, t, timing=Timing.linear):
        self.objs.append((obj, prop_name_x, prop_name_y, self.getattr(obj, prop_name_x), self.getattr(obj, prop_name_y), to_x,
                          to_y, time.time(), t, timing))
        self.run()


class XSmooth(Smooth):
    def __init__(self, props, timing=Timing.linear, *args, **kwargs):
        super().__init__(*args, **kwargs)
        self.props = props
        self.timing = timing

    def move_to(self, obj, to_x, to_y, t):
        super().move_to(obj, *self.props, to_x, to_y, t, timing=self.timing)
worm.kv
<Form>:
    popup_label: popup_label
    score_label: score_label

    canvas:
        Color:
            rgba: (.5, .5, .5, 1.0)

        Line:
            width: 1.5
            points: (0, 0), self.size

        Line:
            width: 1.5
            points: (self.size[0], 0), (0, self.size[1])
    Label:
        id: score_label
        text: "Score: " + str(self.parent.worm_len)
        width: self.width

    Label:
        id: popup_label
        width: self.width

<Worm>:


<Cell>:
    canvas:
        Color:
            rgba: self.color

        Rectangle:
            size: self.graphical_size
            pos: self.graphical_pos
Код, немного измененный @tshirtman
Мой код был проверен tshirtman, одним из участников Kivy, который предложил мне использовать инструкцию Point вместо создания виджета на каждую клетку. Однако мне не кажется сей код более простым для понимания чем мой, хотя он точно лучше в понимании разработки UI и gamedev. В общем, вот код:
main.py
from kivy.app import App
from kivy.uix.widget import Widget
from kivy.clock import Clock
from kivy.properties import *
import random
import smooth


class Cell:
    def __init__(self, x, y):
        self.actual_pos = (x, y)

    def move_to(self, x, y):
        self.actual_pos = (x, y)

    def move_by(self, x, y):
        self.move_to(self.actual_pos[0] + x, self.actual_pos[1] + y)

    def get_pos(self):
        return self.actual_pos


class Fruit(Cell):
    def __init__(self, x, y):
        super().__init__(x, y)


class Worm(Widget):
    margin = NumericProperty(4)
    graphical_poses = ListProperty()
    inj_pos = ListProperty([-1000, -1000])
    graphical_size = NumericProperty(0)

    def __init__(self, config, **kwargs):
        super().__init__(**kwargs)
        self.cells = []
        self.config = config
        self.cell_size = config.CELL_SIZE
        self.head_init((self.config.CELL_SIZE * random.randint(3, 5), self.config.CELL_SIZE * random.randint(3, 5)))
        self.margin = config.MARGIN
        self.graphical_size = self.cell_size - self.margin
        for i in range(config.DEFAULT_LENGTH):
            self.lengthen()

    def destroy(self):
        self.cells = []
        self.graphical_poses = []
        self.inj_pos = [-1000, -1000]

    def cell_append(self, pos):
        self.cells.append(Cell(*pos))
        self.graphical_poses.extend([0, 0])
        self.cell_move_to(len(self.cells) - 1, pos)

    def lengthen(self, pos=None, direction=(0, 1)):
        if pos is None:
            px = self.cells[-1].get_pos()[0] + direction[0] * self.cell_size
            py = self.cells[-1].get_pos()[1] + direction[1] * self.cell_size
            pos = (px, py)
        self.cell_append(pos)

    def head_init(self, pos):
        self.lengthen(pos=pos)

    def cell_move_to(self, i, pos, smooth_motion=None):
        self.cells[i].move_to(*pos)
        to_x, to_y = pos[0], pos[1]
        if smooth_motion is None:
            self.graphical_poses[i * 2], self.graphical_poses[i * 2 + 1] = to_x, to_y
        else:
            smoother, t = smooth_motion
            smoother.move_to(self, "graphical_poses[" + str(i * 2) + "]", "graphical_poses[" + str(i * 2 + 1) + "]",
                             to_x, to_y, t)

    def move(self, direction, **kwargs):
        for i in range(len(self.cells) - 1, 0, -1):
            self.cell_move_to(i, self.cells[i - 1].get_pos(), **kwargs)
        self.cell_move_to(0, (self.cells[0].get_pos()[0] + self.cell_size * direction[0], self.cells[0].get_pos()[1] +
                              self.cell_size * direction[1]), **kwargs)

    def gather_positions(self):
        return [cell.get_pos() for cell in self.cells]

    def head_intersect(self, cell):
        return self.cells[0].get_pos() == cell.get_pos()


class Form(Widget):
    worm_len = NumericProperty(0)
    fruit_pos = ListProperty([0, 0])
    fruit_size = NumericProperty(0)

    def __init__(self, config, **kwargs):
        super().__init__(**kwargs)
        self.config = config
        self.worm = None
        self.cur_dir = (0, 0)
        self.fruit = None
        self.game_on = True
        self.smooth = smooth.Smooth()

    def random_cell_location(self, offset):
        x_row = self.size[0] // self.config.CELL_SIZE
        x_col = self.size[1] // self.config.CELL_SIZE
        return random.randint(offset, x_row - offset), random.randint(offset, x_col - offset)

    def random_location(self, offset):
        x_row, x_col = self.random_cell_location(offset)
        return self.config.CELL_SIZE * x_row, self.config.CELL_SIZE * x_col

    def fruit_dislocate(self, xy=None):
        if xy is not None:
            x, y = xy
        else:
            x, y = self.random_location(2)
            while (x, y) in self.worm.gather_positions():
                x, y = self.random_location(2)
        self.fruit.move_to(x, y)
        self.fruit_pos = (x, y)

    def start(self):
        self.worm = Worm(self.config)
        self.add_widget(self.worm)
        self.fruit = Fruit(0, 0)
        self.fruit_size = self.config.APPLE_SIZE
        self.fruit_dislocate()
        self.game_on = True
        self.cur_dir = (0, -1)
        Clock.schedule_interval(self.update, self.config.INTERVAL)
        self.popup_label.text = ""

    def stop(self, text=""):
        self.game_on = False
        self.popup_label.text = text
        Clock.unschedule(self.update)

    def game_over(self):
        self.stop("GAME OVER" + " " * 5 + "ntap to reset")

    def align_labels(self):
        self.popup_label.pos = ((self.size[0] - self.popup_label.width) / 2, self.size[1] / 2)
        self.score_label.pos = ((self.size[0] - self.score_label.width) / 2, self.size[1] - 80)

    def update(self, _):
        if not self.game_on:
            return
        self.worm.move(self.cur_dir, smooth_motion=(self.smooth, self.config.INTERVAL))
        if self.worm.head_intersect(self.fruit):
            directions = [(0, 1), (0, -1), (1, 0), (-1, 0)]
            self.worm.lengthen(direction=random.choice(directions))
            self.fruit_dislocate()
        cell = self.worm_bite_self()
        if cell is not None:
            self.worm.inj_pos = cell.get_pos()
            self.game_over()
        self.worm_len = len(self.worm.cells)
        self.align_labels()

    def on_touch_down(self, touch):
        if not self.game_on:
            self.worm.destroy()
            self.start()
            return
        ws = touch.x / self.size[0]
        hs = touch.y / self.size[1]
        aws = 1 - ws
        if ws > hs and aws > hs:
            cur_dir = (0, -1)
        elif ws > hs >= aws:
            cur_dir = (1, 0)
        elif ws <= hs < aws:
            cur_dir = (-1, 0)
        else:
            cur_dir = (0, 1)
        self.cur_dir = cur_dir

    def worm_bite_self(self):
        for cell in self.worm.cells[1:]:
            if self.worm.head_intersect(cell):
                return cell
        return None


class Config:
    DEFAULT_LENGTH = 20
    CELL_SIZE = 26  # НЕ ЗАБУДЬТЕ, ЧТО CELL_SIZE - MARGIN ДОЛЖНО ДЕЛИТЬСЯ НА 4
    APPLE_SIZE = 36
    MARGIN = 2
    INTERVAL = 0.3
    DEAD_CELL = (1, 0, 0, 1)
    APPLE_COLOR = (1, 1, 0, 1)


class WormApp(App):
    def __init__(self, **kwargs):
        super().__init__(**kwargs)
        self.form = None

    def build(self, **kwargs):
        self.config = Config()
        self.form = Form(self.config, **kwargs)
        return self.form

    def on_start(self):
        self.form.start()


if __name__ == '__main__':
    WormApp().run()
smooth.py
from kivy.clock import Clock
import time


class Timing:
    @staticmethod
    def linear(x):
        return x


class Smooth:
    def __init__(self, interval=1.0/60.0):
        self.objs = []
        self.running = False
        self.interval = interval

    def run(self):
        if self.running:
            return
        self.running = True
        Clock.schedule_interval(self.update, self.interval)

    def stop(self):
        if not self.running:
            return
        self.running = False
        Clock.unschedule(self.update)

    def set_attr(self, obj, attr, value):
        exec("obj." + attr + " = " + str(value))

    def get_attr(self, obj, attr):
        return float(eval("obj." + attr))

    def update(self, _):
        cur_time = time.time()
        for line in self.objs:
            obj, prop_name_x, prop_name_y, from_x, from_y, to_x, to_y, start_time, period, timing = line
            time_gone = cur_time - start_time
            if time_gone >= period:
                self.set_attr(obj, prop_name_x, to_x)
                self.set_attr(obj, prop_name_y, to_y)
                self.objs.remove(line)
            else:
                share = time_gone / period
                acs = timing(share)
                self.set_attr(obj, prop_name_x, from_x * (1 - acs) + to_x * acs)
                self.set_attr(obj, prop_name_y, from_y * (1 - acs) + to_y * acs)
        if len(self.objs) == 0:
            self.stop()

    def move_to(self, obj, prop_name_x, prop_name_y, to_x, to_y, t, timing=Timing.linear):
        self.objs.append((obj, prop_name_x, prop_name_y, self.get_attr(obj, prop_name_x), self.get_attr(obj, prop_name_y), to_x,
                          to_y, time.time(), t, timing))
        self.run()


class XSmooth(Smooth):
    def __init__(self, props, timing=Timing.linear, *args, **kwargs):
        super().__init__(*args, **kwargs)
        self.props = props
        self.timing = timing

    def move_to(self, obj, to_x, to_y, t):
        super().move_to(obj, *self.props, to_x, to_y, t, timing=self.timing)
worm.kv
<Form>:
    popup_label: popup_label
    score_label: score_label

    canvas:
        Color:
            rgba: (.5, .5, .5, 1.0)

        Line:
            width: 1.5
            points: (0, 0), self.size

        Line:
            width: 1.5
            points: (self.size[0], 0), (0, self.size[1])

        Color:
            rgba: (1.0, 0.2, 0.2, 1.0)

        Point:
            points: self.fruit_pos
            pointsize: self.fruit_size / 2

    Label:
        id: score_label
        text: "Score: " + str(self.parent.worm_len)
        width: self.width

    Label:
        id: popup_label
        width: self.width

<Worm>:
    canvas:
        Color:
            rgba: (0.2, 1.0, 0.2, 1.0)
        Point:
            points: self.graphical_poses
            pointsize: self.graphical_size / 2
        Color:
            rgba: (1.0, 0.2, 0.2, 1.0)
        Point:
            points: self.inj_pos
            pointsize: self.graphical_size / 2
Задавайте любые вопросы.
Table Of Contents
- Pong Game Tutorial
- Introduction
- Getting Started
- Add Simple Graphics
- Explaining the Kv File Syntax
- Add the Ball
- PongBall Class
- Adding Ball Animation
- Scheduling Functions on the Clock
- Object Properties/References
- Connect Input Events
- Where To Go Now?
Introduction
Welcome to the Pong tutorial
This tutorial will teach you how to write pong using Kivy. We’ll start with
a basic application like the one described in the Create an application and turn
it into a playable pong game, describing each step along the way.

Here is a check list before starting this tutorial:
-
You have a working Kivy installation. See the Installing Kivy
section for detailed descriptions -
You know how to run a basic Kivy application. See Create an application
if you don’t.
If you have read the programming guide, and understand both basic Widget
concepts (A Simple Paint App) and basic concepts of the kv language
(Kv language), you can probably skip the first 2
steps and go straight to step 3.
Note
You can find the entire source code, and source code files for each step in
the Kivy examples directory under tutorials/pong/
Ready? Sweet, let’s get started!
Getting Started
Getting Started
Let’s start by getting a really simple Kivy app up and running. Create a
directory for the game and a file named main.py
 1from kivy.app import App
 2from kivy.uix.widget import Widget
 3
 4
 5class PongGame(Widget):
 6    pass
 7
 8
 9class PongApp(App):
10    def build(self):
11        return PongGame()
12
13
14if __name__ == '__main__':
15    PongApp().run()
Go ahead and run the application. It should just show a black window at this
point. What we’ve done is create a very simple Kivy App,
which creates an instance of our PongGame Widget class and returns it as
the root element for the applications UI, which you should imagine at this
point as a hierarchical tree of Widgets. Kivy places this widget-tree in the
default Window. In the next step, we will draw the
Pong background and scores by defining how the PongGame widget looks.
Add Simple Graphics
Creation of pong.kv
We will use a .kv file to define the look and feel of the PongGame class.
Since our App class is called PongApp, we can simply create a file
called pong.kv in the same directory that will be automatically loaded
when the application is run. So create a new file called «pong.kv« and add
the following contents.
 1#:kivy 1.0.9
 2
 3<PongGame>:
 4    canvas:
 5        Rectangle:
 6            pos: self.center_x - 5, 0
 7            size: 10, self.height
 8
 9    Label:
10        font_size: 70
11        center_x: root.width / 4
12        top: root.top - 50
13        text: "0"
14
15    Label:
16        font_size: 70
17        center_x: root.width * 3 / 4
18        top: root.top - 50
19        text: "0"
Note
COMMON ERROR: The name of the kv file, e.g. pong.kv, must match the name of the app,
e.g. PongApp (the part before the App ending).
If you run the app now, you should see a vertical bar in the middle, and two
zeros where the player scores will be displayed.
Explaining the Kv File Syntax
Before going on to the next step, you might want to take a closer look at
the contents of the kv file we just created and figure out what is going on.
If you understand what’s happening, you can probably skip ahead to the next
step.
On the very first line we have:
This first line is required in every kv file. It should start with #:kivy
followed by a space and the Kivy version it is intended for (so Kivy can make
sure you have at least the required version, or handle backwards compatibility
later on).
After that, we begin defining rules that are applied to all PongGame
instances:
Like Python, kv files use indentation to define nested blocks. A block defined
with a class name inside the < and > characters is a
Widget rule. It will be applied to any instance of
the named class. If you replaced PongGame with Widget in our example, all
Widget instances would have the vertical line and the two Label widgets inside
them because it would define these rules for all Widget instances.
Inside a rule section, you can add various blocks to define the style and
contents of the widgets they will be applied to. You can:
-
set property values
-
add child widgets
-
define a canvas section in which you can add Graphics instructions that
define how the widget is rendered.
The first block inside the <PongGame> rule we have is a canvas block:
1<PongGame>:
2    canvas:
3        Rectangle:
4            pos: self.center_x - 5, 0
5            size: 10, self.height
So this canvas block says that the PongGame widget should draw some
graphics primitives. In this case, we add a rectangle to the canvas. We set
the pos of the rectangle to be 5 pixels left of the horizontal center of
the widget, and 0 for y. The size of the rectangle is set to 10 pixels
in width, and the widget’s height in height. The nice thing about defining the
graphics like this, is that the rendered rectangle will be automatically
updated when the properties of any widgets used in the value expression change.
Note
Try to resize the application window and notice what happens. That’s
right, the entire UI resizes automatically. The standard behaviour of the
Window is to resize an element based on its property size_hint. The
default widget size_hint is (1,1), meaning it will be stretched 100% in both
x-direction and y-direction and hence fill the available space.
Since the pos and size of the rectangle and center_x and top of the score
labels were defined within
the context of the PongGame class, these properties will automatically
update when the corresponding widget properties change. Using the Kv
language gives you automatic property binding. 
The last two sections we add look pretty similar. Each of them adds a Label
widget as a child widget to the PongGame widget. For now, the text on
both of them is just set to “0”. We’ll hook that up to the actual
score once we have the logic implemented, but the labels already
look good since we set a bigger font_size, and positioned them relatively
to the root widget. The root keyword can be used inside the child block to
refer back to the parent/root widget the rule applies to (PongGame in this
case):
 1<PongGame>:
 2    # ...
 3
 4    Label:
 5        font_size: 70
 6        center_x: root.width / 4
 7        top: root.top - 50
 8        text: "0"
 9
10    Label:
11        font_size: 70
12        center_x: root.width * 3 / 4
13        top: root.top - 50
14        text: "0"
Add the Ball
Add the Ball
Ok, so we have a basic pong arena to play in, but we still need the players and
a ball to hit around. Let’s start with the ball. We’ll add a new PongBall
class to create a widget that will be our ball and make it bounce around.
PongBall Class
Here is the Python code for the PongBall class:
 1class PongBall(Widget):
 2
 3    # velocity of the ball on x and y axis
 4    velocity_x = NumericProperty(0)
 5    velocity_y = NumericProperty(0)
 6
 7    # referencelist property so we can use ball.velocity as
 8    # a shorthand, just like e.g. w.pos for w.x and w.y
 9    velocity = ReferenceListProperty(velocity_x, velocity_y)
10
11    # ``move`` function will move the ball one step. This
12    #  will be called in equal intervals to animate the ball
13    def move(self):
14        self.pos = Vector(*self.velocity) + self.pos
And here is the kv rule used to draw the ball as a white circle:
1<PongBall>:
2    size: 50, 50
3    canvas:
4        Ellipse:
5            pos: self.pos
6            size: self.size
To make it all work, you also have to add the imports for the
Properties Property classes used and the
Vector.
Here is the entire updated python code and kv file for this step:
- main.py:
-
 1from kivy.app import App
 2from kivy.uix.widget import Widget
 3from kivy.properties import NumericProperty, ReferenceListProperty
 4from kivy.vector import Vector
 5
 6
 7class PongBall(Widget):
 8    velocity_x = NumericProperty(0)
 9    velocity_y = NumericProperty(0)
10    velocity = ReferenceListProperty(velocity_x, velocity_y)
11
12    def move(self):
13        self.pos = Vector(*self.velocity) + self.pos
14
15
16class PongGame(Widget):
17    pass
18
19
20class PongApp(App):
21    def build(self):
22        return PongGame()
23
24
25if __name__ == '__main__':
26    PongApp().run()
- pong.kv:
-
 1#:kivy 1.0.9
 2
 3<PongBall>:
 4    size: 50, 50
 5    canvas:
 6        Ellipse:
 7            pos: self.pos
 8            size: self.size
 9
10<PongGame>:
11    canvas:
12        Rectangle:
13            pos: self.center_x - 5, 0
14            size: 10, self.height
15
16    Label:
17        font_size: 70
18        center_x: root.width / 4
19        top: root.top - 50
20        text: "0"
21
22    Label:
23        font_size: 70
24        center_x: root.width * 3 / 4
25        top: root.top - 50
26        text: "0"
27
28    PongBall:
29        center: self.parent.center
30
Note that not only a <PongBall> widget rule has been added, but also a
child widget PongBall in the <PongGame> widget rule.
Adding Ball Animation
Making the ball move
Cool, so now we have a ball, and it even has a move function… but it’s not
moving yet. Let’s fix that.
Scheduling Functions on the Clock
We need the move method of our ball to be called regularly. Luckily, Kivy
makes this pretty easy by letting us schedule any function we want using the
Clock and specifying the interval:
Clock.schedule_interval(game.update, 1.0/60.0)
This line for example, would cause the update function of the game object to
be called once every 60th of a second (60 times per second).
Object Properties/References
We have another problem though. We’d like to make sure the PongBall has its
move function called regularly, but in our code we don’t have any references
to the ball object since we just added it via the kv file
inside the kv rule for the PongGame class. The only reference to our
game is the one we return in the applications build method.
Since we’re going to have to do more than just move the ball (e.g.
bounce it off the walls and later the players racket), we’ll probably need
an update method for our PongGame class anyway. Furthermore, given that
we have a reference to the game object already, we can easily schedule its new
update method when the application gets built:
 1class PongGame(Widget):
 2
 3    def update(self, dt):
 4        # call ball.move and other stuff
 5        pass
 6
 7class PongApp(App):
 8
 9    def build(self):
10        game = PongGame()
11        Clock.schedule_interval(game.update, 1.0/60.0)
12        return game
However, that still doesn’t change the fact that we don’t have a reference to the
PongBall child widget created by the kv rule. To fix this, we can add an
ObjectProperty
to the PongGame class, and hook it up to the widget created in
the kv rule. Once that’s done, we can easily reference the ball property
inside the update method and even make it bounce off the edges:
 1class PongGame(Widget):
 2    ball = ObjectProperty(None)
 3
 4    def update(self, dt):
 5        self.ball.move()
 6
 7        # bounce off top and bottom
 8        if (self.ball.y < 0) or (self.ball.top > self.height):
 9            self.ball.velocity_y *= -1
10
11        # bounce off left and right
12        if (self.ball.x < 0) or (self.ball.right > self.width):
13            self.ball.velocity_x *= -1
Don’t forget to hook it up in the kv file, by giving the child widget an id
and setting the PongGame’s ball ObjectProperty to that id:
1<PongGame>:
2    ball: pong_ball
3
4    # ... (canvas and Labels)
5
6    PongBall:
7        id: pong_ball
8        center: self.parent.center
Note
At this point everything is hooked up for the ball to bounce around. If
you’re coding along as we go, you might be wondering why the ball isn’t
moving anywhere. The ball’s velocity is set to 0 on both x and y.
In the code listing below, a serve_ball method is
added to the PongGame class and called in the app’s build method. It sets a
random x and y velocity for the ball, and also resets the position, so we
can use it later to reset the ball when a player has scored a point.
Here is the entire code for this step:
- main.py:
-
 1from kivy.app import App
 2from kivy.uix.widget import Widget
 3from kivy.properties import (
 4    NumericProperty, ReferenceListProperty, ObjectProperty
 5)
 6from kivy.vector import Vector
 7from kivy.clock import Clock
 8from random import randint
 9
10
11class PongBall(Widget):
12    velocity_x = NumericProperty(0)
13    velocity_y = NumericProperty(0)
14    velocity = ReferenceListProperty(velocity_x, velocity_y)
15
16    def move(self):
17        self.pos = Vector(*self.velocity) + self.pos
18
19
20class PongGame(Widget):
21    ball = ObjectProperty(None)
22
23    def serve_ball(self):
24        self.ball.center = self.center
25        self.ball.velocity = Vector(4, 0).rotate(randint(0, 360))
26
27    def update(self, dt):
28        self.ball.move()
29
30        # bounce off top and bottom
31        if (self.ball.y < 0) or (self.ball.top > self.height):
32            self.ball.velocity_y *= -1
33
34        # bounce off left and right
35        if (self.ball.x < 0) or (self.ball.right > self.width):
36            self.ball.velocity_x *= -1
37
38
39class PongApp(App):
40    def build(self):
41        game = PongGame()
42        game.serve_ball()
43        Clock.schedule_interval(game.update, 1.0 / 60.0)
44        return game
45
46
47if __name__ == '__main__':
48    PongApp().run()
- pong.kv:
-
 1#:kivy 1.0.9
 2
 3<PongBall>:
 4    size: 50, 50
 5    canvas:
 6        Ellipse:
 7            pos: self.pos
 8            size: self.size
 9
10<PongGame>:
11    ball: pong_ball
12
13    canvas:
14        Rectangle:
15            pos: self.center_x - 5, 0
16            size: 10, self.height
17
18    Label:
19        font_size: 70
20        center_x: root.width / 4
21        top: root.top - 50
22        text: "0"
23
24    Label:
25        font_size: 70
26        center_x: root.width * 3 / 4
27        top: root.top - 50
28        text: "0"
29
30    PongBall:
31        id: pong_ball
32        center: self.parent.center
33
Connect Input Events
Adding Players and reacting to touch input
Sweet, our ball is bouncing around. The only things missing now are the movable
player rackets and keeping track of the score. We won’t go over all the
details of creating the class and kv rules again, since those concepts were
already covered in the previous steps. Instead, let’s focus on how to move the
Player widgets in response to user input. You can get the whole code and kv
rules for the PongPaddle class at the end of this section.
In Kivy, a widget can react to input by implementing the
on_touch_down, the
on_touch_move and the
on_touch_up
methods. By default, the Widget class
implements these methods by just calling the corresponding method on all its
child widgets to pass on the event until one of the children returns True.
Pong is pretty simple. The rackets just need to move up and down. In fact it’s
so simple, we don’t even really need to have the player widgets handle the
events themselves. We’ll just implement the on_touch_move function for the
PongGame class and have it set the position of the left or right player based
on whether the touch occurred on the left or right side of the screen.
Check the on_touch_move handler:
1def on_touch_move(self, touch):
2    if touch.x < self.width/3:
3        self.player1.center_y = touch.y
4    if touch.x > self.width - self.width/3:
5        self.player2.center_y = touch.y
We’ll keep the score for each player in a
NumericProperty. The score labels of the PongGame
are kept updated by changing the NumericProperty score, which in turn
updates the PongGame child labels text property. This binding
occurs because Kivy properties automatically bind to any references
in their corresponding kv files. When the ball
escapes out of the sides, we’ll update the score and serve the ball
again by changing the update method in the PongGame class. The PongPaddle
class also implements a bounce_ball method, so that the ball bounces
differently based on where it hits the racket. Here is the code for the
PongPaddle class:
1class PongPaddle(Widget):
2
3    score = NumericProperty(0)
4
5    def bounce_ball(self, ball):
6        if self.collide_widget(ball):
7            speedup  = 1.1
8            offset = 0.02 * Vector(0, ball.center_y-self.center_y)
9            ball.velocity =  speedup * (offset - ball.velocity)
Note
This algorithm for ball bouncing is very simple, but will have strange behavior
if the ball hits the paddle from the side or bottom…this is something you could
try to fix yourself if you like.
And here it is in context. Pretty much done:
- main.py:
-
 1from kivy.app import App
 2from kivy.uix.widget import Widget
 3from kivy.properties import (
 4    NumericProperty, ReferenceListProperty, ObjectProperty
 5)
 6from kivy.vector import Vector
 7from kivy.clock import Clock
 8
 9
10class PongPaddle(Widget):
11    score = NumericProperty(0)
12
13    def bounce_ball(self, ball):
14        if self.collide_widget(ball):
15            vx, vy = ball.velocity
16            offset = (ball.center_y - self.center_y) / (self.height / 2)
17            bounced = Vector(-1 * vx, vy)
18            vel = bounced * 1.1
19            ball.velocity = vel.x, vel.y + offset
20
21
22class PongBall(Widget):
23    velocity_x = NumericProperty(0)
24    velocity_y = NumericProperty(0)
25    velocity = ReferenceListProperty(velocity_x, velocity_y)
26
27    def move(self):
28        self.pos = Vector(*self.velocity) + self.pos
29
30
31class PongGame(Widget):
32    ball = ObjectProperty(None)
33    player1 = ObjectProperty(None)
34    player2 = ObjectProperty(None)
35
36    def serve_ball(self, vel=(4, 0)):
37        self.ball.center = self.center
38        self.ball.velocity = vel
39
40    def update(self, dt):
41        self.ball.move()
42
43        # bounce of paddles
44        self.player1.bounce_ball(self.ball)
45        self.player2.bounce_ball(self.ball)
46
47        # bounce ball off bottom or top
48        if (self.ball.y < self.y) or (self.ball.top > self.top):
49            self.ball.velocity_y *= -1
50
51        # went of to a side to score point?
52        if self.ball.x < self.x:
53            self.player2.score += 1
54            self.serve_ball(vel=(4, 0))
55        if self.ball.right > self.width:
56            self.player1.score += 1
57            self.serve_ball(vel=(-4, 0))
58
59    def on_touch_move(self, touch):
60        if touch.x < self.width / 3:
61            self.player1.center_y = touch.y
62        if touch.x > self.width - self.width / 3:
63            self.player2.center_y = touch.y
64
65
66class PongApp(App):
67    def build(self):
68        game = PongGame()
69        game.serve_ball()
70        Clock.schedule_interval(game.update, 1.0 / 60.0)
71        return game
72
73
74if __name__ == '__main__':
75    PongApp().run()
pong.kv:
 1#:kivy 1.0.9
 2
 3<PongBall>:
 4    size: 50, 50
 5    canvas:
 6        Ellipse:
 7            pos: self.pos
 8            size: self.size
 9
10<PongPaddle>:
11    size: 25, 200
12    canvas:
13        Rectangle:
14            pos: self.pos
15            size: self.size
16
17<PongGame>:
18    ball: pong_ball
19    player1: player_left
20    player2: player_right
21
22    canvas:
23        Rectangle:
24            pos: self.center_x - 5, 0
25            size: 10, self.height
26
27    Label:
28        font_size: 70
29        center_x: root.width / 4
30        top: root.top - 50
31        text: str(root.player1.score)
32
33    Label:
34        font_size: 70
35        center_x: root.width * 3 / 4
36        top: root.top - 50
37        text: str(root.player2.score)
38
39    PongBall:
40        id: pong_ball
41        center: self.parent.center
42
43    PongPaddle:
44        id: player_left
45        x: root.x
46        center_y: root.center_y
47
48    PongPaddle:
49        id: player_right
50        x: root.width - self.width
51        center_y: root.center_y
52
Where To Go Now?
Have some fun
Well, the pong game is pretty much complete. If you understood all of the
things that are covered in this tutorial, give yourself a pat on the back and
think about how you could improve the game. Here are a few ideas of things
you could do:
-
Add some nicer graphics / images. (Hint: check out the
sourceproperty on
the graphics instructions likecircleor
Rectangle, to set an image as the
texture.) -
Make the game end after a certain score. Maybe once a player has 10
points, you can display a large “PLAYER 1 WINS” label and/or add a main menu
to start, pause and reset the game. (Hint: check out the
Buttonand
Label
classes, and figure out how to use their add_widget and remove_widget
functions to add or remove widgets dynamically. -
Make it a 4 player Pong Game. Most tablets have Multi-Touch support, so
wouldn’t it be cool to have a player on each side and have four
people play at the same time? -
Fix the simplistic collision check so hitting the ball with an end of
the paddle results in a more realistic bounce.
Note
You can find the entire source code and source code files for each step in
the Kivy examples directory under tutorials/pong/
В наши дни каждый разработчик может столкнуться с необходимостью работы над мобильным или веб-приложением на Python. В Python нет встроенных инструментов для мобильных устройств, тем не менее существуют пакеты, которые можно использовать для создания мобильных приложений. Это Kivy, PyQt и даже библиотека Toga от Beeware.
Содержание
- Принципы работы фреймворка Kivy Python
- Установка Kivy
- Работа с виджетами в Kivy
- Запуск программы «Hello, Kivy!»
- Отображение виджета Image в Kivy Python
- Разметка (Layout) в UI Kivy
- Добавление событий в Kivy
- Использование языка дизайна KV
- Создание приложения Kivy Python
- Создаем apk приложения для Android на Python
- Создание приложений для iPhone (iOS) на Python
- Создание exe приложений для Windows на Python используя Kivy
- Создание приложений для macOS на Python используя Kivy
Библиотеки являются основными элементами мобильного мира Python. Однако, говоря о Kivy, нельзя игнорировать преимущества данного фреймворка при работе с мобильными приложениями. Внешний вид приложения автоматически подстраивается под все платформы, разработчику при этом не нужно компилировать код после каждой поправки. Кроме того, здесь для создания приложений можно использовать чистый синтаксис Python.
В руководстве будут разобраны следующие темы:
- Работа с виджетами Kivy;
- Планировка UI и лейауты;
- Добавление событий;
- Использование языка KV;
- Создание приложения-калькулятора;
- Упаковка приложения для iOS, Android, Windows и macOS.
Разбор данного руководства предполагает, что читатель знаком с объектно-ориентированным программированием. Для введения в курс дела можете просмотреть статью об Объектно-ориентированном программировании (ООП) в Python 3.
Приступим!
Принципы работы фреймворка Kivy Python
Kivy был создан в 2011 году. Данный кросс-платформенный фреймворк Python работает на Windows, Mac, Linux и Raspberry Pi. В дополнение к стандартному вводу через клавиатуру и мышь он поддерживает мультитач. Kivy даже поддерживает ускорение GPU своей графики, что во многом является следствием использования OpenGL ES2. У проекта есть лицензия MIT, поэтому библиотеку можно использовать бесплатно и вкупе с коммерческим программным обеспечением.
Во время разработки приложения через Kivy создается интуитивно понятный интерфейс (Natural user Interface), или NUI. Его главная идея в том, чтобы пользователь мог легко и быстро приспособиться к программному обеспечению без чтения инструкций.
Kivy не задействует нативные элементы управления, или виджеты. Все его виджеты настраиваются. Это значит, что приложения Kivy будут выглядеть одинаково на всех платформах. Тем не менее, это также предполагает, что внешний вид вашего приложения будет отличаться от нативных приложений пользователя. Это может стать как преимуществом, так и недостатком, все зависит от аудитории.
Установка Kivy
У Kivy есть множество зависимостей, поэтому лучше устанавливать его в виртуальную среду Python. Можно использовать встроенную библиотеку Python venv или же пакет virtualenv.
Виртуальная среда Python создается следующим образом:
|
$ python3 —m venv my_kivy_project |
По ходу данного действия исполняемый файл Python 3 будет скопирован в папку под названием my_kivy_project, куда также будут добавлено несколько других папок.
Есть вопросы по Python?
На нашем форуме вы можете задать любой вопрос и получить ответ от всего нашего сообщества!
Telegram Чат & Канал
Вступите в наш дружный чат по Python и начните общение с единомышленниками! Станьте частью большого сообщества!
Паблик VK
Одно из самых больших сообществ по Python в социальной сети ВК. Видео уроки и книги для вас!
Для использования виртуальной среды ее нужно активировать. На Mac или Linux это можно сделать, выполнив следующую команду, будучи внутри папки my_kivy_project:
Команда для Windows точно такая же, но активировать скрипт нужно в другом месте — через папку Scripts, а не bin.
После активации виртуальной среды Python можно запустить pip для установки Kivy. На Linux и Mac нужно выполнить следующую команду:
|
$ python —m pip install kivy |
Инсталляция на Windows несколько сложнее. В официальной документации фреймворка изучите пункт, касающийся установки Kivy на Windows. Пользователи Mac также могут скачать файл dmg и установить Kivy данным образом.
В случае возникновения проблем во время установки Kivy на вашу платформу изучите дополнительные инструкции, с которыми можно ознакомиться через страницу загрузки.
Работа с виджетами в Kivy
Виджеты — это отображаемые на экране элементы управления, которыми пользователь может оперировать. Любой инструментарий графического интерфейса пользователя поставляется с набором виджетов. Типичными представителями виджетов, что вы не раз использовали, являются кнопки, выпадающие списки и вкладки. Внутри фреймворка Kivy встроено много виджетов.
Запуск программы «Hello, Kivy!»
Принцип работы Kivy можно уловить, взглянув на следующее приложение «Hello, World!»:
|
from kivy.app import App from kivy.uix.label import Label class MainApp(App): def build(self): label = Label(text=‘Hello from Kivy’, size_hint=(.5, .5), pos_hint={‘center_x’: .5, ‘center_y’: .5}) return label if __name__ == ‘__main__’: app = MainApp() app.run() |
Каждому приложению Kivy требуется создать подкласс App и переопределить метод build(). Сюда вы помещаете код UI или вызываете другие функции, которые определяют код UI. В данном случае создается виджет Label и передается text, size_hint и pos_hint. Последние два аргумента не обязательны.
size_hint говорит Kivy о размерах что нужно использовать при создании виджета. Используются два числа:
- Первое число
xуказывает на размер ширины элемента управления. - Второе число
yуказывает на размер высоты элемента управления.
Значение обоих чисел должно быть в промежутке между 0 и 1. Значение по обоих показателей по умолчанию равно 1. Также можно задействовать pos_hint, что используется для позиционирования виджета. В коде, размещенном выше, указывается, что виджет должен быть размещен в центре осей x и y.
Для запуска приложения нужно инициализировать класс MainApp и вызвать метод run(). После этих действий на экране появится следующее:
Kivy также выводит в stdout довольно много текста:
|
1 2 3 4 5 6 7 8 9 10 11 12 13 14 15 16 17 18 19 20 21 22 23 |
[INFO ] [Logger ] Record log in /home/mdriscoll/.kivy/logs/kivy_19—06—07_2.txt [INFO ] [Kivy ] v1.11.0 [INFO ] [Kivy ] Installed at «/home/mdriscoll/code/test/lib/python3.6/site-packages/kivy/__init__.py» [INFO ] [Python ] v3.6.7 (default, Oct 22 2018, 11:32:17) [GCC 8.2.0] [INFO ] [Python ] Interpreter at «/home/mdriscoll/code/test/bin/python» [INFO ] [Factory ] 184 symbols loaded [INFO ] [Image ] Providers: img_tex, img_dds, img_sdl2, img_gif (img_pil, img_ffpyplayer ignored) [INFO ] [Text ] Provider: sdl2([‘text_pango’] ignored) [INFO ] [Window ] Provider: sdl2([‘window_egl_rpi’] ignored) [INFO ] [GL ] Using the «OpenGL» graphics system [INFO ] [GL ] Backend used <sdl2> [INFO ] [GL ] OpenGL version <b‘4.6.0 NVIDIA 390.116’> [INFO ] [GL ] OpenGL vendor <b‘NVIDIA Corporation’> [INFO ] [GL ] OpenGL renderer <b‘NVS 310/PCIe/SSE2’> [INFO ] [GL ] OpenGL parsed version: 4, 6 [INFO ] [GL ] Shading version <b‘4.60 NVIDIA’> [INFO ] [GL ] Texture max size <16384> [INFO ] [GL ] Texture max units <32> [INFO ] [Window ] auto add sdl2 input provider [INFO ] [Window ] virtual keyboard not allowed, single mode, not docked [INFO ] [Base ] Start application main loop [INFO ] [GL ] NPOT texture support is available |
Это может быть полезно для отладки приложения.
Далее добавим виджет Image и посмотрим, чем он отличается от Label.
Отображение виджета Image в Kivy Python
В Kivy есть несколько видов виджетов, связанных с изображениями. Для загрузки картинок с жесткого диска можно задействовать Image, а при использовании адреса URL подойдет AsyncImage. К следующем примере берется стандартный класс Image:
|
from kivy.app import App from kivy.uix.image import Image class MainApp(App): def build(self): img = Image(source=‘/path/to/real_python.png’, size_hint=(1, .5), pos_hint={‘center_x’:.5, ‘center_y’:.5}) return img if __name__ == ‘__main__’: app = MainApp() app.run() |
В данном коде импортируется Image из подпакета kivy.uix.image. Класс Image принимает много разных параметров, однако единственным для нас нужным является source, что указывает Kivy, какое изображение должно быть загружено. Здесь передается полный путь к выбранному изображению. Оставшаяся часть кода такая же, как и в прошлом примере.
После запуска кода должно выводиться нечто подобное:
Текст из предыдущего примера был заменен картинкой.
Теперь рассмотрим, как добавить и оптимально расположить несколько виджетов в приложении.
Разметка (Layout) в UI Kivy
У каждого фреймворка есть свой собственный метод для размещения виджетов. К примеру, в wxPython используются классификаторы, а в Tkinter будет задействован лейаут, или менеджер геометрии. В Kivy за это отвечают Лейауты (Layouts). Доступно несколько различных типов Лейаутов. Чаще всего используются следующие виды:
- BoxLayout;
- FloatLayout;
- GridLayout.
Найти полный список доступных Лейаутов можно в документации Kivy. Рабочий исходный код можно найти в kivy.uix.
Рассмотрим BoxLayout на примере следующего кода:
|
1 2 3 4 5 6 7 8 9 10 11 12 13 14 15 16 17 18 19 20 21 22 23 24 25 26 27 28 |
import kivy import random from kivy.app import App from kivy.uix.button import Button from kivy.uix.boxlayout import BoxLayout red = [1,0,0,1] green = [0,1,0,1] blue = [0,0,1,1] purple = [1,0,1,1] class HBoxLayoutExample(App): def build(self): layout = BoxLayout(padding=10) colors = [red, green, blue, purple] for i in range(5): btn = Button(text=«Button #%s» % (i+1), background_color=random.choice(colors) ) layout.add_widget(btn) return layout if __name__ == «__main__»: app = HBoxLayoutExample() app.run() |
Здесь из kivy.uix.boxlayout импортируется модуль BoxLayout и затем устанавливается. После этого создается список цветов, которые представляют собой цвета RGB (Red-Blue-Green).
В конечном итоге формируется цикл для range из 5, результатом чего является кнопка btn для каждой итерации. Сделаем вещи немного интереснее и поставим в качестве фона кнопки background_color случайный цвет. Теперь можно добавить кнопку в лейаут при помощи layout.add_widget(btn).
После запуска кода выведется нечто подобное:
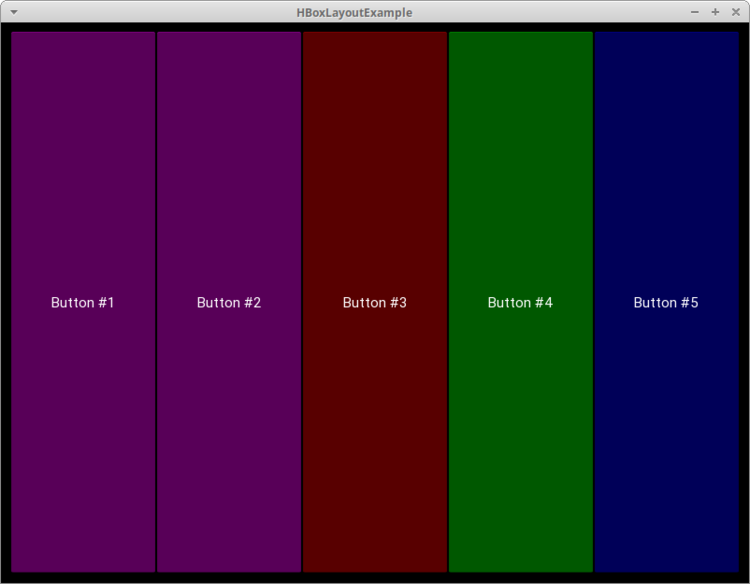
Здесь представлены 5 кнопок, окрашенных случайным образом, по одной для каждой итерации цикла for.
Во время создания лейаута следует учитывать следующие аргументы:
- padding: Отступ
paddingмежду лейаутом и его дочерними элементами уточняется в пикселях. Для этого можно выбрать один из трех способов:- Список из четырех аргументов:
[padding_left, padding_top, padding_right, padding_bottom] - Список из двух аргументов:
[padding_horizontal, padding_vertical] - Один аргумент:
padding=10
- Список из четырех аргументов:
- spacing: При помощи данного аргумента добавляется расстояние между дочерними виджетами.
- orientation: Позволяет изменить значение
orientationдляBoxLayoutпо умолчанию — с горизонтального на вертикальное.
Добавление событий в Kivy
Как и многие другие инструментарии GUI, по большей части Kivy полагается на события. Фреймворк отзывается на нажатие клавиш, кнопки мышки или прикосновение к сенсорному экрану. В Kivy задействован концепт Часов (Clock), что дает возможность создать своего рода график для вызова определенных функций в будущем.
В Kivy также используется концепт Свойств (Properties), что работает с EventDispatcher. Свойства помогают осуществить проверку достоверности. Они также запускают события, когда виджет меняет размер или позицию.
Добавим событие для кнопки из предыдущего кода:
|
1 2 3 4 5 6 7 8 9 10 11 12 13 14 15 16 17 18 |
from kivy.app import App from kivy.uix.button import Button class MainApp(App): def build(self): button = Button(text=‘Hello from Kivy’, size_hint=(.5, .5), pos_hint={‘center_x’: .5, ‘center_y’: .5}) button.bind(on_press=self.on_press_button) return button def on_press_button(self, instance): print(‘Вы нажали на кнопку!’) if __name__ == ‘__main__’: app = MainApp() app.run() |
В данном коде вызывается button.bind(), а событие on_press ссылается на MainApp.on_press_button().
Этот метод неявно принимает экземпляр виджета, который является самим объектом кнопки. Сообщение будет выводиться на stdout всякий раз при нажатии пользователем на кнопку.
Использование языка дизайна KV
Kivy предоставляет язык дизайна KV, что можно использовать в приложениях Kivy. Язык KV позволяет отделить дизайн интерфейса от логики приложения. Он придерживается принципа разделения ответственности и является частью архитектурного паттерна Модель-Представление-Контроллер (Model-View-Controller). Предыдущий пример можно обновить, используя язык KV:
|
from kivy.app import App from kivy.uix.button import Button class ButtonApp(App): def build(self): return Button() def on_press_button(self): print(‘Вы нажали на кнопку!’) if __name__ == ‘__main__’: app = ButtonApp() app.run() |
С первого взгляда данный код может показаться несколько странным, так как кнопка Button создается без указания атрибутов или привязывания к ним событий. Здесь Kivy автоматически ищет файл с таким же названием, что и у класса, только строчными буквами и без части App в названии класса.
В данном случае названием класса является ButtonApp, поэтому Kivy будет искать файл button.kv. Если такой файл существует, и он также форматирован должным образом, тогда Kivy использует его при загрузке UI. Попробуйте создать такой файл и добавить следующий код:
|
<Button>: text: ‘Press me’ size_hint: (.5, .5) pos_hint: {‘center_x’: .5, ‘center_y’: .5} on_press: app.on_press_button() |
Действия каждой строки:
- Строка 1 соответствует вызову
Buttonв коде Python. Kivy должен осмотреть инициализированный объект для определения кнопки; - Строка 2 устанавливает
textкнопки; - Строка 3 устанавливает ширину и высоту при помощи
size_hint; - Строка 4 устанавливает позицию кнопки через
pos_hint; - Строка 5 устанавливает обработчик событий
on_press. Для указания Kivy места обработчика событий используетсяapp.on_press_button(). Здесь Kivy будет искать метод.on_press_button()в классеApplication.
Вы можете установить все ваши виджеты и лейауты внутри одного или нескольких файлов языка KV. Язык KV также поддерживает импорт модулей Python в KV, создавая динамичные классы, и это далеко не предел. Ознакомиться с полным перечнем его возможностей можно в гиде Kivy по языку KV.
Теперь мы можем приступить к созданию настоящего рабочего приложения.
Создание приложения Kivy Python
Создание чего-то полезное несомненно является отличным способом выучить новый навык. Учитывая данное утверждение, давайте используем Kivy при создании калькулятора, который будет поддерживать следующие операции:
- Сложение;
- Вычитание;
- Умножение;
- Деление.
В данном приложении будет использован набор кнопок в своего рода лейауте. В верхней части также будет специальный блок для вывода операций и их результатов. В итоге калькулятор будет выглядеть следующим образом:

Теперь, когда у нас есть в наличии целевой UI, может составить код:
|
1 2 3 4 5 6 7 8 9 10 11 12 13 14 15 16 17 18 19 20 21 22 23 24 25 26 27 28 29 30 31 32 33 34 35 36 37 38 39 |
from kivy.app import App from kivy.uix.boxlayout import BoxLayout from kivy.uix.button import Button from kivy.uix.textinput import TextInput class MainApp(App): def build(self): self.operators = [«/», «*», «+», «-«] self.last_was_operator = None self.last_button = None main_layout = BoxLayout(orientation=«vertical») self.solution = TextInput( multiline=False, readonly=True, halign=«right», font_size=55 ) main_layout.add_widget(self.solution) buttons = [ [«7», «8», «9», «/»], [«4», «5», «6», «*»], [«1», «2», «3», «-«], [«.», «0», «C», «+»], ] for row in buttons: h_layout = BoxLayout() for label in row: button = Button( text=label, pos_hint={«center_x»: 0.5, «center_y»: 0.5}, ) button.bind(on_press=self.on_button_press) h_layout.add_widget(button) main_layout.add_widget(h_layout) equals_button = Button( text=«=», pos_hint={«center_x»: 0.5, «center_y»: 0.5} ) equals_button.bind(on_press=self.on_solution) main_layout.add_widget(equals_button) return main_layout |
Калькулятор работает следующим образом:
- В строках с 8 по 10 создается список
operatorsи несколько полезных значений,last_was_operatorиlast_button, которые будут использованы чуть позже. - В строках с 11 по 15 создается лейаут верхнего уровня
main_layout, к нему также добавляется виджет только для чтенияTextInput. - В строках с 16 по 21 создается вложенный список из списков, где есть большая часть кнопок для калькулятора.
- В строке 22 начинается цикл for для кнопок. Для каждого вложенного списка делается следующее:
- В строке 23 создается
BoxLayoutс горизонтальной ориентацией. - В строке 24 начинается еще один цикл
forдля элементов вложенного списка. - В строках с 25 по 39 создаются кнопки для ряда и связываются обработчиком событий, после чего кнопки добавляются к горизонтальному
BoxLayoutиз строки 23. - В строке 31 этот лейаут добавляется к
main_layout.
- В строке 23 создается
- В строках с 33 по 37 создается кнопка равно (=) и привязывается к обработчику событий, после чего она добавляется к
main_layout.
Далее создается обработчик событий .on_button_press(). Код будет выглядеть следующим образом:
|
1 2 3 4 5 6 7 8 9 10 11 12 13 14 15 16 17 18 19 20 |
def on_button_press(self, instance): current = self.solution.text button_text = instance.text if button_text == «C»: # Очистка виджета с решением self.solution.text = «» else: if current and ( self.last_was_operator and button_text in self.operators): # Не добавляйте два оператора подряд, рядом друг с другом return elif current == «» and button_text in self.operators: # Первый символ не может быть оператором return else: new_text = current + button_text self.solution.text = new_text self.last_button = button_text self.last_was_operator = self.last_button in self.operators |
Почти все виджеты приложения вызывают .on_button_press(). Это работает следующим образом:
- Строка 41 принимает аргумент
instance, в результате чего можно узнать, какой виджет вызвал функцию. - Строки между 42 и 43 извлекают и хранят значения
solutionиtextкнопки. - Строки c 45 по 47 проверяют, на какую кнопку нажали. Если пользователь нажимает с, тогда очищается
solution. В противном случае используется утверждениеelse. - Строка 49 проверяет, было ли у решения предыдущее значение.
- Строки с 50 по 52 проверяют, была ли последняя нажатая кнопка оператором. Если да, тогда
solutionобновляться не будет. Это необходимо для предотвращения создания двух операций в одном ряду. К примеру,1 * /будет недействительным утверждением. - Строки с 53 по 55 проверяют, является ли первый символ оператором. Если да, тогда solution обновляться не будет, так как первое значение не может быть значением оператора.
- Строки с 56 по 58 переходят к условию
else. Если никакое из предыдущих значений не найдено, тогда обновляетсяsolution. - Строка 59 устанавливает
last_buttonк метке последней нажатой кнопки. - Строка 60 устанавливает
last_was_operatorк значениюTrueилиFalseв зависимости от того, был символ оператором или нет.
Последней частью кода будет .on_solution():
|
def on_solution(self, instance): text = self.solution.text if text: solution = str(eval(self.solution.text)) self.solution.text = solution |
Здесь берется текущий текст из solution и используется встроенный в Python eval() для исполнения. Если пользователь создал формулу вроде 1+2, тогда eval() запустит код и вернет результат. В конце результат устанавливается как новое значение виджета solution.
На заметку: порой
eval()бывает опасным, так как он может запустить произвольный код. Многие разработчики избегают его использование именно по этой причине. Тем не менее, ввиду задействования только целых чисел, операторов и точки в качестве вводных данных дляeval(), в данном контексте его можно использовать безопасно.
При запуске данного кода на рабочем столе компьютера приложение будет выглядеть следующим образом:
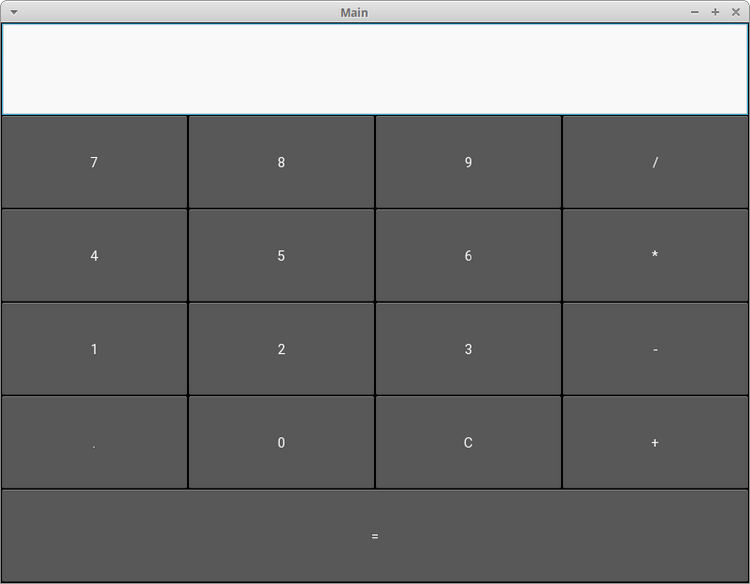
Полный текст кода примера калькулятора представлен ниже:
|
1 2 3 4 5 6 7 8 9 10 11 12 13 14 15 16 17 18 19 20 21 22 23 24 25 26 27 28 29 30 31 32 33 34 35 36 37 38 39 40 41 42 43 44 45 46 47 48 49 50 51 52 53 54 55 56 57 58 59 60 61 62 63 64 65 66 67 68 69 70 71 |
from kivy.app import App from kivy.uix.boxlayout import BoxLayout from kivy.uix.button import Button from kivy.uix.textinput import TextInput class MainApp(App): def build(self): self.operators = [«/», «*», «+», «-«] self.last_was_operator = None self.last_button = None main_layout = BoxLayout(orientation=«vertical») self.solution = TextInput( multiline=False, readonly=True, halign=«right», font_size=55 ) main_layout.add_widget(self.solution) buttons = [ [«7», «8», «9», «/»], [«4», «5», «6», «*»], [«1», «2», «3», «-«], [«.», «0», «C», «+»], ] for row in buttons: h_layout = BoxLayout() for label in row: button = Button( text=label, pos_hint={«center_x»: 0.5, «center_y»: 0.5}, ) button.bind(on_press=self.on_button_press) h_layout.add_widget(button) main_layout.add_widget(h_layout) equals_button = Button( text=«=», pos_hint={«center_x»: 0.5, «center_y»: 0.5} ) equals_button.bind(on_press=self.on_solution) main_layout.add_widget(equals_button) return main_layout def on_button_press(self, instance): current = self.solution.text button_text = instance.text if button_text == «C»: # Очистка виджета с решением self.solution.text = «» else: if current and ( self.last_was_operator and button_text in self.operators): # Не добавляйте два оператора подряд, рядом друг с другом return elif current == «» and button_text in self.operators: # Первый символ не может быть оператором return else: new_text = current + button_text self.solution.text = new_text self.last_button = button_text self.last_was_operator = self.last_button in self.operators def on_solution(self, instance): text = self.solution.text if text: solution = str(eval(self.solution.text)) self.solution.text = solution if __name__ == «__main__»: app = MainApp() app.run() |
Пришло время разместить приложение в Google Play или в AppStore!
По завершении составления кода вы можете поделиться своим приложением с другими. Хорошим способом сделать это может стать превращение вашего кода в приложения для смартфона на Android. Для этого вначале нужно установить пакет buildozer через pip:
Затем создается новая папка, после чего нужно перейти в нее через терминал. Затем выполняется следующая команда:
После этого создается файл buildozer.spec, который будет использован для конфигурации сборки. К примеру, первые две строчки файла спецификации можно редактировать следующим образом:
|
[app] # (str) Название вашего приложения title = KvCalc # (str) Название упаковки package.name = kvcalc # (str) Домен упаковки (нужен для упаковки android/ios) package.domain = org.kvcalc |
Не бойтесь посмотреть оставшуюся часть файла для выяснения того, что еще можно поменять.
На данный момент приложение почти готово к сборке, однако для начала нужно установить зависимости для buildozer. После их установки скопируйте ваше приложение калькулятора в новую папку и переименуйте его в main.py. Этого требует buildozer. Если файл будет назван неверно, тогда процесс сборки завершится неудачей.
Теперь можно запустить следующую команду:
|
$ buildozer —v android debug |
Этап сборки займет время! На моем компьютере на это ушло около 15-20 минут. Здесь все зависит от вашего железа, так что времени может потребоваться еще больше. Расслабьтесь, налейте чашечку кофе или прогуляйтесь. Buildozer скачает те элементы Android SDK, которые нужны для процесса сборки. Если все идет по плану, тогда в папке bin появится файл под названием, напоминающим что-то вроде kvcalc-0.1-debug.apk.
Далее требуется связать телефон Android с компьютером и перенести туда файл apk. Затем откройте менеджер файлов телефона и кликните на файл apk. Android должен спросить, хотите ли вы установить приложение. Есть вероятность появления предупреждения, ведь приложение было скачано не из Google Play. Тем не менее, вы по-прежнему сможете установить его.
Вот как выглядит калькулятор, запущенный на Samsung S9:
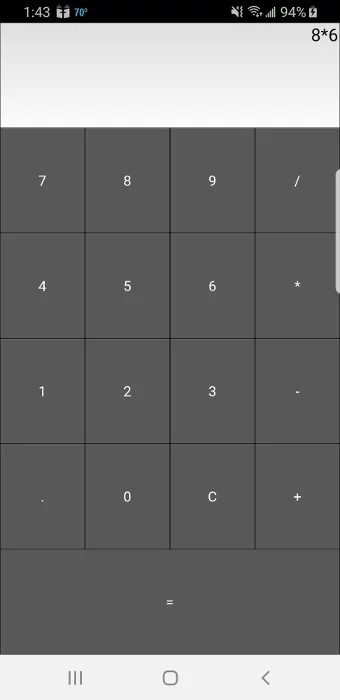
У buildozer также есть несколько других команд, которые вы можете использовать. Изучите документацию, чтобы подробнее узнать об этом.
При необходимости добиться более детального управления упаковку можно осуществить через python-for-android. Здесь это обсуждаться не будет, но если интересно, ознакомьтесь, как еще можно быстро начать проект.
Создание приложений для iPhone (iOS) на Python
Инструкция для сборки приложения для iOS будет немного сложнее, нежели для Android. Для получения последней информации всегда проверяйте обновления официальной документации Kivy.
Вам нужен будет компьютер с операционной системой OS X: MacBook или iMac. На Linux или Windows вы не сможете создать приложения для Apple.
Перед упаковкой приложения для iOS на Mac необходимо выполнить следующие команды:
|
$ brew install autoconf automake libtool pkg—config $ brew link libtool $ sudo easy_install pip $ sudo pip install Cython==0.29.10 |
После успешной установки нужно скомпилировать при использования следующих команд:
|
$ git clone git://github.com/kivy/kivy—ios $ cd kivy—ios $ ./toolchain.py build python3 kivy |
Если вы получаете ошибку, где говорится, что iphonesimulator не найден, тогда поищите способ решение проблемы на StackOverflow, после чего попробуйте запустить команды вновь.
Если вы получаете ошибки SSL, тогда скорее всего у вас не установлен OpenSSL от Python. Следующая команда должна это исправить:
|
$ cd /Applications/Python 3.7/ $ ./Install Certificates.command |
Теперь вернитесь назад и запустите команду toolchain опять.
После успешного выполнения всех указанных выше команд можете создать проект Xcode при помощи использования скрипта toolchain. Перед созданием проекта Xcode переименуйте ваше главное приложение в main.py, это важно. Выполните следующую команду.
|
./toolchain.py create <title> <app_directory> |
Здесь должна быть папка под названием title, внутри которой будет проект Xcode. Теперь можно открыть проект Xcode и работать над ним отсюда. Обратите внимание, что если вы хотите разместить свое приложение на AppStore, вам понадобится создать аккаунт разработчика на developer.apple.com и заплатить годовой взнос.
Создание exe приложений для Windows на Python используя Kivy
Упаковать приложение Kivy для Windows можно при помощи PyInstaller. Если ранее вы никогда не работали с ним, тогда изучите тему использования PyInstaller для упаковки кода Python в исполняемый файл.
Для установки PyInstaller можно использовать pip:
|
$ pip install pyinstaller |
Следующая команда упакует ваше приложение:
Команда создаст исполняемый файл Windows, а вместе с ним еще несколько других файлов. Аргумент -w говорит PyInstaller, что приложение открывается в оконном режиме и не является приложение для командной строки. Если вы хотите, чтобы PyInstaller создал только один исполняемый файл, тогда можете передать в дополнение к -w аргумент --onefile.
Создание приложений для macOS на Python используя Kivy
Как и в случае с Windows, для создания исполняемого файла Mac можно также использовать PyInstaller. Единственным условием является запуск следующей команды на Mac:
|
$ pyinstaller main.py —w —onefile |
Результатом станет один исполняемый файл в папке dist. Название исполняемого файла будет таким же, как и название файла Python, что был передан PyInstaller.
Если вы хотите уменьшить размер исполняемого файла или использовать в приложении GStreamer, тогда для получения дополнительной информации изучите тему упаковки для macOS.
Заключение
Kivy является действительно интересным фреймворком GUI, что можно использовать для создания пользовательских интерфейсов и мобильных приложений для Android и iOS. Внешне приложения Kivy будут отличаться от нативных приложений выбранной платформы. В том случае, если вы хотите выделяться на фоне конкурентов, это может быть выгодным преимуществом.
В данном руководстве были рассмотрены основы Kivy, среди которых стоит выделить добавление виджетов, привязку событий, планировку виджетов и лейауты, а также использование языка KV. В результате мы получили рабочее приложение Kivy и рассмотрели способы его переноса на другие платформы, в том числе мобильные.
В Kivy есть множество виджетов и концептов, которые не были рассмотрены в статьи. Для дальнейшего изучения темы можете изучить официальный сайт Kivy, где размещены разнообразные руководства, примеры приложений и многое другое.
Рекомендации
Для дальнейшего изучения Kivy ознакомьтесь со следующими ресурсами:
- Гид программирования на Kivy
- Документация по упаковке приложений Kivy
- Сборка приложений GUI через Python
Чтобы посмотреть, как создать приложение с графическим интерфейсом при использовании другого GUI фреймфорка Python, можете ознакомиться со статьями о wxPython.

Являюсь администратором нескольких порталов по обучению языков программирования Python, Golang и Kotlin. В составе небольшой команды единомышленников, мы занимаемся популяризацией языков программирования на русскоязычную аудиторию. Большая часть статей была адаптирована нами на русский язык и распространяется бесплатно.
E-mail: vasile.buldumac@ati.utm.md
Образование
Universitatea Tehnică a Moldovei (utm.md)
- 2014 — 2018 Технический Университет Молдовы, ИТ-Инженер. Тема дипломной работы «Автоматизация покупки и продажи криптовалюты используя технический анализ»
- 2018 — 2020 Технический Университет Молдовы, Магистр, Магистерская диссертация «Идентификация человека в киберпространстве по фотографии лица»

Welcome, citizens of Checkiopolis
The purpose of this article is not just to show that it’s possible to write applications for android, but to show that there’s already stable and popular tools to write Android games and applications using your favorite language — Python.
Android is currently one if not the most popular mobile operating systems. It powers hundreds of millions of mobile devices in more than 190 countries from all around the world. It has the largest install base of any mobile platform and is growing fast. Every day another million users power up their new Android devices for the first time and start looking for apps, games, and other digital content. Android gives you a globalized platform for publishing apps and games for users everywhere, with a widely used open marketplace for instantaneous distribution.
Because you happened to find yourself reading this article, I assume that you’re interested in Python and you already know why it is awesome, so I won’t waste your time convincing you to try it, so let’s just jump straight into our first and one of the most popular frameworks to work with Android — PGS4A.
Pygame Subset for Android
Pygame applications can run on Android phones and tablets with the use of the Pygame Subset for Android. Sound, vibration, keyboard, accelerometer are supported on Android. There is currently no way to run Pygame applications on iOS. Another major limitation of PGS4A is the lack of multi-touch support, which prevents the use of things like pinch to zoom and two-finger rotation. An alternative to running Pygame Subset for Android is to use Kivy, which includes multi-touch and iOS support.
And now the star of our tools roundup — Kivy!
Kivy
Kivy is an Open source Python library for rapid development of applications that make use of innovative user interfaces, such as multi-touch apps. Kivy runs on Linux, Windows, OS X, Android and iOS. You can run the same code on all supported platforms. It can use natively most inputs, protocols and devices including WM_Touch, WM_Pen, Mac OS X Trackpad and Magic Mouse, Mtdev, Linux Kernel HID, TUIO. A multi-touch mouse simulator is included. Kivy is 100% free to use under an MIT license (starting from 1.7.2) and LGPL 3 for the previous versions. The toolkit is professionally developed, backed and used. You can even use it in a commercial product.
The framework is stable and has a well documented API, plus a programming guide to help you get started. GPU Accelerated The graphics engine is built over OpenGL ES 2, using a modern and fast graphics pipeline.
The toolkit also comes with more than 20 widgets, all highly extensible.
Kivy is an example of a well written and well documented piece of software which can be extremely helpful for novice programmers, so it’s very easy to begin writing feature complete apps.
Here’s some examples of games and applications built using Kivy:
•There’s an official tutorial on how to build simple Pong game with Kivy
•Deflectouch is a multitouch game for, with and because of Kivy. This game won Kivy’s First Programming Contest and taken the 1st place (video)
•Python+Kivy is based version of world’s famous 2048 game
You can find Kivy and lots of other examples by googling or you can check out official list of Kivy written apps and games
IGNIFUGA
Ignifuga is a multi platform (Windows/Linux/OS X/iOS/Android) 2D hardware accelerated engine based on Python and Cython, inspired by similar offerings like Cocos2D, Cocos2D for iPhone, and AndEngine. All your game logic code, the engine and supporting tools are converted to C during the build process, then compiled into one big standalone binary for each of the supported platforms (you can refer to the FAQ for more information)
QPython
QPython — with Python on Android in most cases, scripts can get the job done as well as a native application. Now you can make it even easier with QPython’s help. QPython is a script engine which runs Python programs on android devices. It also can help developers develop android applications. QPython includes a complete development kit which helps you to develop programs for mobile. QPython is powerful, and you can extend it as you see fit.
The getting started and programming guide will help you to easily get to developing your apps and scripts
Pyglet
Pyglet is a library for Python which provides an object-oriented application programming interface. This provides the right tools to make the creation of games and other multimedia applications even easier. Pyglet runs on Microsoft Windows, Mac OS X, and Linux. It was released under a BSD Licence. It supports windowed and full-screen operation, and multiple monitors. Images, video, and sound files in a range of formats can be done natively, with more additional capabilities supplied by the optional AVbin plugin, which uses theLibav package to provide support for audio formats including MP3, Ogg/Vorbis, and Windows Media Audio, and video formats such as DivX, MPEG-2, H.264, WMV, and XviD.
This is just the quick glance on the first part of the a multi-part Android+Python development series. There’s still lot’s of cool and useful stuff to cover and discuss. Where it goes from here will depend on your feedback and interests. Heck, if people would like, we could write up a set of Kivy programming tutorials for complete beginners.
See you guys next Wednesday, happy coding and good luck!
Introduction
Kivy can build applications for desktop and mobile including Android and iOS.
The same code base can be used for both desktop and mobile, depending
on what hardware devices you are trying to access.
This guide will walk through the basics of installing Kivy,
building simple applications, building and packaging them for
desktop and Android.
For an example of a complete project, check out my
Bitcoin Price Checker example
with the Live Stream on YouTube.
Alternatives for desktop application programming with Python are
PyQt5, Tkinter, and wxPython.
Those packages have a more traditional desktop UI but lack the Android and iOS
build capabilities the same way Kivy has. Qt technically supports Android
but it is not easy to build with PyQt5.
Important concepts
There are a few concepts to understand in mind when building a Kivy application:
- Layouts — Screen layouts are defined in a
.kvtemplate file using a special Kivy language - Widgets — The UI elements that get packed in to layout elements. Buttons, for example.
- A layout is just another type of widget
To create a Kivy application in Python, there are a few easy steps:
- Create a class that inherits the Kivy main app class
kivy.app.App - Define a
build()method in the class that returns a root widget; anything from a single Button (kivy.uix.button.Button) to a complex GridLayout (kivy.uix.gridlayout.GridLayout)). - Create an instance of your class and call the
.run()method.
That is all there is to a Kivy app at a high level.
Installation
You will need to install the Python package kivy at a minimum.
There is also an optional package called plyer that contains a number
of cross-platform APIs for accessing device features like notifications
and GPS. Another package used for building Android and iOS is named buildozer.
You have a few options for installing Kivy:
- From source: https://github.com/kivy/kivy
- Download it from the Kivy website
- Use
pipto install the packages
To use pip to install Kivy:
# The core package
python -m pip install kivy

# For additional cross-platform APIs like notifications, GPS, and vibrator
python -m pip install plyer
# For Android/iOS building (Linux only)
python -m pip install buildozer

# You probablyalso need cython for the Android builds
python -m pip install cython
# Or use your system package like this for Fedora:
sudo dnf install python3-Cython
On Fedora, I needed to install ncurses-compat-libs to resolve the error:
$HOME/.buildozer/android/platform/android-ndk-r17c/toolchains/llvm/prebuilt/linux-x86_64/bin/clang: error while loading shared libraries: libtinfo.so.5: cannot open shared object file: No such file or directory.
# For Fedora might be needed
dnf install ncurses-compat-libs
In Ubuntu, others report similar: https://github.com/kivy/buildozer/issues/841
# Ubuntu fixes
sudo apt-get install libncurses5-dev libncursesw5-dev
sudo apt-get install libtinfo5
In Windows, you may need to install other dependencies.
Official instrucations: Installation in Windows
# Other pip packages to install
python -m pip install pypiwin32
python -m pip install kivy_deps.glew
# One of the backends:
python -m pip install kivy_deps.sdl2
python -m pip install kivy.deps.angle
# If needed for video
python -m pip install kivy.deps.gstreamer
Check installed version
Once Kivy is installed, you can verify it is installed
properly and check what version you have installed.
To check what version of Kivy you have, you run pip list to check
the Kivy package version, or just open your Python interpreter and
import kivy and inspect kivy.__version__.
>>> import kivy
[INFO   ] [Kivy        ] v1.11.1
[INFO   ] [Kivy        ] Installed at "/usr/local/lib64/python3.7/site-packages/kivy/__init__.py"
[INFO   ] [Python      ] v3.7.4 (default, Jul  9 2019, 16:32:37)
[GCC 9.1.1 20190503 (Red Hat 9.1.1-1)]
[INFO   ] [Python      ] Interpreter at "/usr/bin/python3"
>>> kivy.__version__
'1.11.1'
Start a new project
A Kivy application can be as simple as a single .py file.
This is an example of a minimal application that loads a window with one widget, a button:
# main.py
# Modified from https://kivy.org/doc/stable/guide/basic.html
import kivy
kivy.require('1.11.1')  # Set to your Kivy version
from kivy.app import App
from kivy.uix.button import Button


class MyApp(App):
    def build(self):
        return Button(text='This is a button.')


MyApp().run()
Run the application by executing the Python file:
python main.py
Use the Kv language
In the first example we just returned a single root widget, the button.
You can use methods like .add_widget() to pack in nested widgets,
but it can be tedious to do all the layout building programmatically.
This is why Kivy created the Kv language for defining widget trees.
It is similar to YAML but defines the heirarchy of widgets.
It is easier to work with visually and creates separation between the
view layer and the controller code.
While the Kv language is optional, and you don’t have to use it,
it is the preferred way to build layouts and worth
getting familiar with.
Read more about the KV language in the official Kv language guide
You can provide KV templates as separate .kv files or as hard-coded
strings inside your Python code.
When building a user interface, you first need to understand the layouts.
The layouts will allow you to organize the screen.
For example, do you want to stack up
a list of buttons vertically, or do you want to have a main
frame with a top and bottom bar, or do you want a 3×3 grid of buttons?
Read more about layouts.
These are some of the common layout types:
- kivy.uix.boxlayout.BoxLayout
- kivy.uix.gridlayout.GridLayout
- kivy.uix.stacklayout.StackLayout
- kivy.uix.pagelayout.PageLayout
Once you have a layout (which you can nest inside other layouts),
you can start putting widgets in it.
Widgets are things like buttons, text fields, and checkboxes.
Read more about widgets in the official Widget Guide.
Here is an example .kv file that uses a box layout to hold
two buttons. This creates two buttons side-by-side with no text.
While it is valid and demonstrates the simplest case, it’s
not very useful.
# example.kv
BoxLayout:
    Button:
    Button:
Once you have a .kv file ready, you need to load it in your application.
By default, it tries to map your app class to a .kv based off of the name.
For example, if your app is named PracticeApp it will look for a file named
practice.kv. I prefer to be more explicit and use kivy.lang.builder.Builder.load_file()
to load a specific file. Alternatively, if you don’t want to use a file at all, you can use
kivy.lang.builder.Builder.load_string() to load a string with the Kv contents.
Here is an example of how to load the simple example.kv file we created a few lines above.
# main.py
import kivy
kivy.require('1.11.1')  # Set to your Kivy version
from kivy.app import App
from kivy.lang.builder import Builder


class MyApp(App):
    def build(self):
        return Builder.load_file('example.kv')


MyApp().run()
A button generally needs some text and and a callback function to be useful though.
We can modify the .kv file to look more like this:
# example.kv
BoxLayout:
    Button:
        id: btn1
        text: "Button 1"
        on_press: print("%s was pressed" % btn1.text)
    Button:
        text: "Button 2"
        on_press: print(8 * 8)
You can reference other methods from the on_press and other events.
For example in the Button object, referencing self would reference
the Button object, and referencing root would reference the root
widget in the heirarchy (BoxLayout in this case).
A more powerful way to do this would be to create a custom class
that inherits the BoxLayout so we can extend its behavior.
We can swap out the BoxLayout in the .kv file and replace it with our
CustomBoxLayout widget.
# example.kv
MyCustomBoxLayout:
    Button:
        text: "Press me"
        on_press: root.custom_callback()
    Button:
We haven’t actually created the CustomBoxLayout class though.
We need to add one in our .py file like this:
# main.py
import kivy
kivy.require('1.11.1')  # Set to your Kivy version
from kivy.app import App
from kivy.lang.builder import Builder
from kivy.uix.boxlayout import BoxLayout


class MyCustomBoxLayout(BoxLayout):
    def custom_callback(self):
        print('Custom callback called.')


class MyApp(App):
    def build(self):
        return Builder.load_file('example.kv')


MyApp().run()
Running the above example would load the .kv file and hook up the callback specified
in the .kv file with the method defined in the .py file.
Use Plyer to access mobile device hardware
Plyer is a Kivy package that provides an API to hardware devices
like accelerometer, screen brightness, camera, compass, and GPS.
It also provides access to some utilities like notifications,
which work across desktop and mobile. It’s a very ambitious
library that has some cool features. Refer to
the Plyer documentation
for the latest information.
You can also find code examples at:
https://github.com/kivy/plyer/tree/master/examples
As of September 2019, I found several of the examples did not work
on my Android device. The compatibility still seems to be a
bit questionable. Be sure to test out of a module works on device.
python -m pip install plyer
Then you can try building some of the Plyer examples.
See the section further down about how to use buildozer to build an .apk file for Android.
Build and package
Now that we have looked at installing Kivy and building a simple application,
let’s look at how to run and package a Kivy application for distribution.
We’ll look at desktop applications and then Android. I don’t cover
iOS because I don’t have any experience with it, but Kivy does support it.
Build for desktop
You can share your app in a few ways, starting from simplest to most complex packaging:
- As source code — let people download your source, install Python and Kivy, and run your script themselves.
- As a Python package — Package it with distutils and a
setup.pythat users can install withpython setup.py install - Push the Python package to pypi.org so others can install it with
pip install - Use PyInstaller to package a .exe or Mac/Linux equivalent. This can create a directory with the .exe and supporting
files or a standalone .exe (slower to startup). Distribute this as a .zip for others to download and run.
Check out my PyInstaller Tutorial to learn more about how to use it. - Create an system-specific installer package (e.g. MSI installer with InnoSetup for Window, or a
.debpackage for Ubuntu/Debian)
that install the package created with PyInstaller. Check out my Debian Package Tutorial to learn how to make a .deb.
For more details on packaging, refer to the official documentation for Windows packaging and OSX packaging.
PyInstaller notes
If using PyInstaller to package the application,
there is a special step needed in order to ensure the SDL and glew DLLs are included in the final package.
These notes are taken from the official instructions at:
https://kivy.org/doc/stable/guide/packaging-windows.html#pyinstaller-default-hook.
To use PyInstaller to get a properly built package with the right DLLs,
modify the PyInstaller .spec file to have at the top:
from kivy_deps import sdl2, glew
And in the coll object, after the last positional argument, add:
*[Tree(p) for p in (sdl2.dep_bins + glew.dep_bins)],
This will allow it to find and include the right dependencies since they are included in the code.
This helps with errors like unable to get window.
If you want to create an installer, you need to build an installer for each platform.
For example, you can use Inno Setup to build
Windows installer wizards.
Build for Android
Let’s look at the basic steps for building an Android .apk with a Python Kivy application.
For more in-depth details on building for Android, check out the official documentation pages:
- Packaging for Android
- Android guide
Test adb
The adb tool is crucial to Android tooling. Buildozer has a way
to use adb. The one special thing to remember when calling adb
through the buildozer command is that you need to add two dashes (--)
before passing the actual command for adb.
To verify everything is working, check the adb version.
Running the version command will also output the full path
to the adb executable that it is using if you want to run it directly yourself.
python -m buildozer -v android adb -- version
# adb path will be something like:
# $HOME/.buildozer/android/platform/android-sdk/platform-tools/adb
You can also use adb to list devices like this:
python -m buildozer -v android adb -- devices
Configure the buildozer.spec file
The buildozer.spec file has all the configuration for
the Android and iOS build parameters.
Generate a template buildozer spec file using init command:
# Generates a `buildozer.spec` file
python -m buildozer init
With the generated buildozer.spec file, edit it to specify things like:
- Project name
- Version
- Source directory
- Files to include and exclude
- Required Python packages
- Icon image —
icon.filenamea 512×512 PNG - Splash loading image —
presplash.filenamea 512×512 PNG - Change allowed orientations —
orientation = all - Log level (
log_level = 2) - Android Permissions
- Android API level
Build the APK file
Once you have your Python Kivy application
and a buildozer.spec file for your project.
You can build a debug APK that does not require signing
or a release app that is signed and ready for the Google Play Store.
Build the debug APK
To build the debug APK which doesn’t require any app signing,
runthe android debug command for buildozer.
python3 -m buildozer -v android debug
This will generate an APK file in the bin/ directory with a name like:
myapp-0.1-debug.apk.
Build the release APK
To build the release APK there is more involved than the debug one.
You need to first have a keystore with a key ready to sign the app.
See my Java Keytool Tutorial to
learn how to generate and manage keystores. Once you have a keystore,
come back and the rest will make sense here.
Also refer to the Kivy Wiki: Creating a Release APK.
The main thing Buildozer needs to have is your keystore information.
You can set these values as environment variables.
You need to provide the keystore path, keystore password,
key alias, and key password.
export P4A_RELEASE_KEYSTORE=$HOME/.keystore
export P4A_RELEASE_KEYSTORE_PASSWD=s3cr3t
export P4A_RELEASE_KEYALIAS_PASSWD=s3cr3t
export P4A_RELEASE_KEYALIAS=mykey
Once your keystore environment variables are set, you can run the release build command:
# Requires the buildozer.spec file
python3 -m buildozer -v android release
Release app on the Google Play Store
Once you have a signed release APK from the previous step, you can publish it to the Google Play Store.
I have a dedicated tutorial about this topic.
Check out How to Publish Android Apps to Google Play Store.
Install the app
Install the application to a device (physical or virtual)
by running android debug deploy. This will install it
to all connected devices.
python -m buildozer -v android debug deploy
You can also use buildozer to serve the current directory with
an HTTP server. This is useful so any Android device on the network
can open the HTTP URL in a web browser and download the .apk and install
it on the device without the need to be connected via USB.
# Serve the current HTTP directory on port 8000
python -m buildozer serve
# Essentially the same as Python 3's http.server
python -m http.server
You’d then visit http://<your-hostname-or-ip>/ and navigate to the .apk file.
Run the app
You can build, install, and run the app all in one step with:
python -m buildozer -v android debug deploy run
- The built .apk file is about 13MB.
- The RAM consumption of simple example in debug is about 60MB.
The stats did not change much between release and debug mode.
View debug log
Use logcat to view the device logs
python -m buildozer -v android logcat
If you run with multiple devices attached it won’t tail the logs.
If you have one device then you will get the stream of log messages.
You can build, install, run, and dump logs in a single step.
You will get a ton of log messages so it’s best to output it to a file like this:
python -m buildozer -v android debug deploy run logcat 2>log.txt
Other common tasks
Now that we have looked at installing Kivy,
creating simple applications,
and how to package them for distribution,
we have all the knowledge needed to create
an app.
At this point you should understand how to
get everything installed, create an application from scratch,
creating custom widgets and callbacks with the Kv language,
and how to build the app in to a .exe for desktop and a .apk for Android.
All that information should be enough to continue exploring Kivy
and building your own applications.
Kivy also includes packages for many things, including:
- animation
- async
- audio
- canvas drawing
- shaders
- 3D rendering
Refer to the official Kivy documentation
for the latest and most accurate information.
For code references, check out the collection of official
Kivy examples.
To learn more, follow the official Pong game tutorial.
It shows you how to build a Pong game using Rectangle and Ellipse widgets
on a canvas widget, and use the built-it collide_widget() method
available on widgets to detect collisions like the ball hitting the paddle.
Also check out the Paint app tutorial which shows you how to detect touches and respond by
drawing an Ellipse (circle) at the touch location.
Conclusion
After reading this, you should have a good understanding of what Kivy is
and how you can use it. You should understand how to create desktop apps
and mobile apps by building layouts using the .kv language. Additionally,
you should know how to use the plyer package to access cross-platform
features and hardware devices.
References
- Official Kivy documentation
- Kivy Source
- Kv language guide
- Kivy examples
- Paint app tutorial
- Pong game tutorial
- Widget Guide
- Plyer documentation
- Plyer examples
- PyInstaller Tutorial
- InnoSetup
- Windows packaging
- OSX packaging
- Android packaging
- Android Kivy guide
- Buildozer source
- Inno Setup Installer
- PyQt5 Tutorial
- Python Tkinter Tutorial
- wxPython
- Bitcoin Price Checker
- Live Stream making Bitcoin Price Checker
- Java Keytool Tutorial
- Kivy Wiki: Creating a Release APK
- How to Publish Android Apps to Google Play Store