This guide will walk you through everything you need to know to build your first Telegram Bot.
If you already know your way around some of the basic steps, you can jump directly to the part you’re missing. Equivalent examples are available in C#, Python, Go and TypeScript .
- Introduction
- Basic Tutorial
- Environment
- First Run
- Echo Bot
- Advanced Tutorial
- Commands
- Navigation
- Database
- Hosting
- Further Reading
Introduction
At its core, you can think of the Telegram Bot API as software that provides JSON-encoded responses to your queries.
A bot, on the other hand, is essentially a routine, software or script that queries the API by means of an HTTPS request and waits for a response. There are several types of requests you can make, as well as many different objects that you can use and receive as responses.
Since your browser is capable of sending HTTPS requests, you can use it to quickly try out the API. After obtaining your token, try pasting this string into your browser:
https://api.telegram.org/bot<YOUR_BOT_TOKEN>/getMeIn theory, you could interact with the API with basic requests like this, either via your browser or other tailor-made tools like cURL. While this can work for simple requests like the example above, it’s not practical for larger applications and doesn’t scale well.
For that reason, this guide will show you how to use libraries and frameworks, along with some basic programming skills, to build a more robust and scalable project.
If you know how to code, you’ll fly right through each step in no time – and if you’re just starting out, this guide will show you everything you need to learn.
We will use Java throughout this guide as it’s one of the most popular programming languages, however, you can follow along with any language as all the steps are fundamentally the same.
Since Java is fully cross-platform, each code example will work with any operating system.
If you pick another language, equivalent examples are available in C#, Python, Go and TypeScript .
Getting Ready
First, we will briefly cover how to create your first project, obtain your API token and download all necessary dependencies and libraries.
For the purposes of this guide, a copy of the bot you will be creating is also live at @TutorialBot – feel free to check it out along the way to see how your own implementation should look after each step.
Obtain Your Bot Token
In this context, a token is a string that authenticates your bot (not your account) on the bot API. Each bot has a unique token which can also be revoked at any time via @BotFather.
Obtaining a token is as simple as contacting @BotFather, issuing the /newbot command and following the steps until you’re given a new token. You can find a step-by-step guide here.
Your token will look something like this:
4839574812:AAFD39kkdpWt3ywyRZergyOLMaJhac60qcMake sure to save your token in a secure place, treat it like a password and don’t share it with anyone.
Download an IDE
To program in Java you’ll need an IDE – a special text editor that will let you write, compile and run your code.
In this tutorial, we’ll use IntelliJ – there are several free, open source alternatives like Eclipse or NetBeans which work in the exact same way.
You will also need a JDK, a software kit that allows your Java code to run.
Most IDEs don’t include a JDK, so you should download a version compatible with your operating system separately. You can find a free, open source version here.
If you use another language, the steps are identical. You will just have to download a different IDE and software development kit.
Pick a Framework or Library
You can think of a framework as software that handles all the low-level logic for you, including the API calls, and lets you focus on your bot-specific logic.
In this tutorial, we’ll use TelegramBots, but you can follow along with any equivalent implementation, since all the underlying methods are either similar or exactly the same.
You can find many frameworks, along with code examples, in our dedicated list.
Create Your Project
In IntelliJ, go to File > New > Project.
Fill in the fields accordingly:
- Name — The name of your project. For example, BotTutorial.
- Location — Where to store your project. You can use the default value.
- Language — Java
- Build System — The framework that will handle your dependencies. Pick Maven.
- JDK — Pick whichever version you downloaded. We’ll be using version 17.
- Add Sample Code — Leave this selected, it will generate some needed files for you.
- Advanced Settings > GroupId — We suggest tutorial.
- Advanced Settings > ArtifactId — You can use the default value.
After hitting Create, if you did everything correctly, your Project view in the top left should show a project structure along these lines:
BotTutorial
├─ .idea
├─ src
│  └─ main
│     └─ java
│        └─ tutorial
│           └─ Main
└─ pom.xml
Other IDEs will follow a similar pattern. Your dependency management system will have a different name (or no name at all if it’s built-in) depending on the language you chose.
If this looks scary, don’t worry. We will only be using the Main file and the pom.xml file.
In fact, to check that everything is working so far, double click on Main and click on the small green arrow on the left of public class Main, then select the first option.
If you followed the steps correctly, Hello world! should appear in the console below.
Add Framework Dependency
We will now instruct the IDE to download and configure everything needed to work with the API.
This is very easy and happens automatically behind the scenes.
First, locate your pom.xml file on the left side of the screen.
Open it by double-clicking and simply add:
<dependencies>
    <dependency>
        <groupId>org.telegram</groupId>
        <artifactId>telegrambots</artifactId>
        <version>6.0.1</version>
    </dependency>
</dependencies>
right after the </properties> tag.
When you’re done, your pom.xml should look something like this.
Start Coding
We are ready to start coding. If you’re a beginner, consider that being familiar with your language of choice will greatly help. With this tutorial, you’ll be able to teach your bot basic behaviors, though more advanced features will require some coding experience.
Creating a Bot Class
If you’re familiar with object-oriented programming, you’ll know what a class is.
If you’ve never heard of it before, consider a class as a file where you write some logic.
To create the class that will contain the bot logic, right click on tutorial from the project tree on the left and select New > Java Class. Name it Bot and hit enter.
Now we have to connect this class to the bot framework. In other words, we must make sure it extends TelegramLongPollingBot. To do that, just add extends TelegramLongPollingBot right after Bot.
A red line will appear – it simply means we’re missing some important methods.
To fix this, hover over the red line, click on implement methods, then hit OK.
Depending on the IDE, this option may be called implement missing methods or something similar.
You should end up with this – if something went wrong, feel free to copy it from here and paste it in your class:
package tutorial;
import org.telegram.telegrambots.bots.TelegramLongPollingBot;
import org.telegram.telegrambots.meta.api.objects.Update;

public class Bot extends TelegramLongPollingBot {

  @Override
  public String getBotUsername() {
      return null;
  }

  @Override
  public String getBotToken() {
      return null;
  }

  @Override
  public void onUpdateReceived(Update update) {}

}
If you get a red line under TelegramLongPollingBot, it means you didn’t set up your pom.xml correctly. If this is the case, restart from here.
Available Methods
Let’s look into these 3 methods one by one.
- getBotUsername — This method must be edited to always return your bot’s username. You should replace the null return value with it.
- getBotToken — This method will be used by the framework to retrieve your bot token. You should replace the null return value with the token.
- onUpdateReceived — This is the most important method. It will be called automatically whenever a new Update is available. Let’s add a
System.out.println(update);call in there to quickly show what we are getting.
After you’ve replaced all the strings, you should end up with this:
@Override
public String getBotUsername() {
    return "TutorialBot";
}

@Override
public String getBotToken() {
    return "4839574812:AAFD39kkdpWt3ywyRZergyOLMaJhac60qc";
}

@Override
public void onUpdateReceived(Update update) {
    System.out.println(update);
}
At this point, the bot is configured and ready to go – time to register it on the API and start processing updates.
In the future, you should consider storing your token in a dedicated settings file or in environment variables. Keeping it in the code is fine for the scope of this tutorial, however, it’s not very versatile and is generally considered bad practice.
Registering the Bot
To register the bot on the API, simply add a couple of lines in the main method that will launch the application. If you named your class Bot, this is what your main method should look like:
public static void main(String[] args) throws TelegramApiException {
  TelegramBotsApi botsApi = new TelegramBotsApi(DefaultBotSession.class);
  botsApi.registerBot(new Bot());
}
You can place this method in any class. Since we have an auto-generated
mainmethod in the Main class, we’ll be using that one for this tutorial.
First Run
It’s time to run your bot for the first time.
Hit the green arrow to the left of public static void main and select the first option.
And then there was nothing. Yes, a bit anticlimactic.
This is because your bot has nothing to print – there are no new updates because nobody messaged it yet.
If you try messaging the bot on Telegram, you’ll then see new updates pop up in the console. At this point, you have your very own Telegram Bot – quite the achievement. Now, on to making it a bit more intelligent.
If nothing pops up, make sure you messaged the right bot and that the token you pasted in the code is correct.
Receiving Messages
Every time someone sends a private message to your bot, your onUpdateReceived method will be called automatically and you’ll be able to handle the update parameter, which contains the message, along with a great deal of other info which you can see detailed here.
Let’s focus on two values for now:
- The user — Who sent the message. Access it via
update.getMessage().getFrom(). - The message — What was sent. Access it via
update.getMessage().
Knowing this, we can make it a bit more clear in the console output.
@Override
public void onUpdateReceived(Update update) {
    var msg = update.getMessage();
    var user = msg.getFrom();

    System.out.println(user.getFirstName() + " wrote " + msg.getText());
}
This is just a basic example – you can now play around with all the methods to see everything you can pull out of these objects. You can try getUsername, getLanguageCode, and dozens more.
Knowing how to receive, process and print incoming messages, now it’s time to learn how to answer them.
Remember to stop and re-launch your bot after each change to the code.
Sending Messages
To send a private text message, you generally need three things:
- The user must have contacted your bot first. (Unless the user sent a join request to a group where your bot is an admin, but that’s a more advanced scenario).
- You must have previously saved the User ID (
user.getId()) - A
Stringobject containing the message text, 1-4096 characters.
With that out of the way, let’s create a new method to send the first message:
public void sendText(Long who, String what){
   SendMessage sm = SendMessage.builder()
                    .chatId(who.toString()) //Who are we sending a message to
                    .text(what).build();    //Message content
   try {
        execute(sm);                        //Actually sending the message
   } catch (TelegramApiException e) {
        throw new RuntimeException(e);      //Any error will be printed here
   }
}
And proceed to run this in the main method, right after registering the bot.
For this example, we’ll assume your User ID is 1234.
public static void main(String[] args) throws TelegramApiException {
   TelegramBotsApi botsApi = new TelegramBotsApi(DefaultBotSession.class);
   Bot bot = new Bot();                  //We moved this line out of the register method, to access it later
   botsApi.registerBot(bot);
   bot.sendText(1234L, "Hello World!");  //The L just turns the Integer into a Long
}
If you did everything correctly, your bot should text you Hello World! every time you launch your code. Sending messages to groups or channels – assuming you have the relevant permissions – is as simple as replacing 1234 with the ID of the respective chat.
Try experimenting with other types of messages, like SendPhoto, SendSticker, SendDice…
A full list is available starting here.
Echo Bot
Let’s practice everything we tried so far by coding an Echo Bot.
Its functionality will be rather simple: every text message it receives will be sent right back to the user.
Copying Text
The most intuitive way of coding this is saving the User ID and calling sendText right after each update.
In other words:
@Override
public void onUpdateReceived(Update update) {
    var msg = update.getMessage();
    var user = msg.getFrom();
    var id = user.getId();

    sendText(id, msg.getText());
}
This works for text but can be extended to stickers, media and files.
Copying Everything
There are more specific functions that can be used to copy messages and send them back.
Let’s build a method to do just that:
public void copyMessage(Long who, Integer msgId){
   CopyMessage cm = CopyMessage.builder()
              .fromChatId(who.toString())  //We copy from the user
           .chatId(who.toString())      //And send it back to him
           .messageId(msgId)            //Specifying what message
           .build();
    try {
        execute(cm);
    } catch (TelegramApiException e) {
        throw new RuntimeException(e);
    }
}
After replacing the method call inonUpdateReceived, running the code will result in a fully functional Echo Bot.
This tutorial assumes that updates always contain messages for the sake of simplicity. This may not always be true – be sure to implement all the proper checks in your code to handle every type of update with the appropriate methods.
Executing Commands
To learn what a command is and how it works, we recommend reading this dedicated summary.
In this guide, we’ll focus on the technical side of things.
Creating Your Command
Begin by opening @BotFather.
Type /mybots > Your_Bot_Name > Edit Bot > Edit Commands.
Now send a new command, followed by a brief description.
For the purpose of this tutorial, we’ll implement two simple commands:
scream - Speak, I'll scream right back
whisper - Shhhhhhh
Command Logic
We want the Echo Bot to reply in uppercase when it’s in scream mode and normally otherwise.
First, let’s create a variable to store the current mode.
public class Bot extends TelegramLongPollingBot {

   private boolean screaming = false;

   [...]
}
Then, let’s change some logic to account for this mode.
public void onUpdateReceived(Update update) {
    [...]                                   //Same variables as the previous versions
   if(screaming)                            //If we are screaming
       scream(id, update.getMessage());     //Call a custom method
   else
       copyMessage(id, msg.getMessageId()); //Else proceed normally
}

private void scream(Long id, Message msg) {
   if(msg.hasText())
       sendText(id, msg.getText().toUpperCase());
   else
       copyMessage(id, msg.getMessageId());  //We can't really scream a sticker
}
Finally, let’s add a couple more lines to the onUpdateReceived method to process each command before replying.
if(msg.isCommand()){
   if(msg.getText().equals("/scream"))         //If the command was /scream, we switch gears
      screaming = true;
   else if (msg.getText().equals("/whisper"))  //Otherwise, we return to normal
      screaming = false;

   return;                                     //We don't want to echo commands, so we exit
}
As you can see, it checks if the message is a command. If it is, the bot enters scream mode.
In the update method, we check which mode we are in and either copy the message or convert it to upper case before sending it back.
And that’s it. Now the bot can execute commands and change its behavior accordingly.
Naturally, this simplified logic will change the bot’s behavior for everyone – not just the person who sent the command. This can be fun for this tutorial but won’t work in a production environment – consider using a Map, dictionary or equivalent data structure to assign settings for individual users.
Remember to always implement a few basic global commands.
You can practice by implementing a simple feedback to the/startcommand, which we intentionally left out.
Buttons and Keyboards
To streamline and simplify user interaction with your bot, you can replace many text-based exchanges with handy buttons. These buttons can perform a wide variety of actions and can be customized for each user.
Button Types
There are two main types of buttons:
- Reply Buttons — used to provide a list of predefined text reply options.
- Inline Buttons — used to offer quick navigation, shortcuts, URLs, games and so much more.
Using these buttons is as easy as attaching a ReplyKeyboardMarkup or an InlineKeyboardMarkup to your SendMessage object.
This guide will focus on inline buttons since they only require a few extra lines of code.
Creating Buttons
First of all, let’s create some buttons.
 var next = InlineKeyboardButton.builder()
            .text("Next").callbackData("next")
            .build();

 var back = InlineKeyboardButton.builder()
            .text("Back").callbackData("back")
            .build();

 var url = InlineKeyboardButton.builder()
            .text("Tutorial")
            .url("https://core.telegram.org/bots/api")
            .build();
Let’s go back through the fields we specified:
- Text — This is what the user will see, the text that appears on the button
- Callback Data — This will be sent back to the code instance as part of a new
Update, so we can quickly identify what button was clicked. - Url — A button that specifies a URL doesn’t specify callbackdata since its behavior is predefined – it will open the given link when tapped.
Creating Keyboards
The buttons we created can be assembled into two keyboards, which will then be used to navigate back and forth between two sample menus.
First, add two fields to store the necessary keyboards.
private boolean screaming = false;

private InlineKeyboardMarkup keyboardM1;
private InlineKeyboardMarkup keyboardM2;
Then, build and assign them.
keyboardM1 = InlineKeyboardMarkup.builder()
          .keyboardRow(List.of(next)).build();

//Buttons are wrapped in lists since each keyboard is a set of button rows
keyboardM2 = InlineKeyboardMarkup.builder()
          .keyboardRow(List.of(back))
          .keyboardRow(List.of(url))
          .build();
You can place this code wherever you prefer, the important thing is making sure that keyboard variables are accessible from the method call that will send the new menu. If you’re confused by this concept and don’t know where to put them, just paste them above the command processing flow.
Sending Keyboards
Sending a keyboard only requires specifying a reply markup for the message.
public void sendMenu(Long who, String txt, InlineKeyboardMarkup kb){
    SendMessage sm = SendMessage.builder().chatId(who.toString())
            .parseMode("HTML").text(txt)
            .replyMarkup(kb).build();

    try {
        execute(sm);
    } catch (TelegramApiException e) {
        throw new RuntimeException(e);
    }
}
You may have noticed that we also added a new parameter,
HTML.
This is called a formatting option and will allow us to use HTML tags and add formatting to the text later on.
Menu Trigger
We could send a new menu for each new user, but for simplicity let’s add a new command that will spawn a menu. We can achieve this by adding a new else clause to the previous command flow.
 var txt = msg.getText();
 if(msg.isCommand()) {
        if (txt.equals("/scream"))
            screaming = true;
        else if (txt.equals("/whisper"))
            screaming = false;
        else if (txt.equals("/menu"))
            sendMenu(id, "<b>Menu 1</b>", keyboard1);
        return;
 }
Try sending /menu to your bot now. If you did everything correctly, you should see a brand new menu pop up.
In a production environment, commands should be handled with an appropriate design pattern that isolates them into different executor classes – modular and separated from the main logic.
Navigation
When building complex bots, navigation is essential. Your users must be able to move seamlessly from one menu to the next.
In this example, we want the Next button to lead the user to the second menu.
The Back button will send us back.
To do that, we will start processing incoming CallbackQueries, which are the results we get after the user taps on a button.
A CallbackQuery is essentially composed of three main parameters:
- queryId — Needed to close the query. You must always close new queries after processing them – if you don’t, a loading symbol will keep showing on the user’s side on top of each button.
- data — This identifies which button was pressed.
- from — The user who pressed the button.
Processing in this context just means executing the action uniquely identified by the button, then closing the query.
A very basic button handler could look something like:
private void buttonTap(Long id, String queryId, String data, int msgId) {

    EditMessageText newTxt = EditMessageText.builder()
            .chatId(id.toString())
            .messageId(msgId).text("").build();

    EditMessageReplyMarkup newKb = EditMessageReplyMarkup.builder()
            .chatId(id.toString()).messageId(msgId).build();

    if(data.equals("next")) {
        newTxt.setText("MENU 2");
        newKb.setReplyMarkup(keyboardM2);
    } else if(data.equals("back")) {
        newTxt.setText("MENU 1");
        newKb.setReplyMarkup(keyboardM1);
    }

    AnswerCallbackQuery close = AnswerCallbackQuery.builder()
            .callbackQueryId(queryId).build();

    execute(close);
    execute(newTxt);
    execute(newKb);
}
With this handler, whenever a button is tapped, your bot will automatically navigate between inline menus.
Expanding on this concept allows for endless combinations of navigable submenus, settings and dynamic pages.
Database
Telegram does not host an update database for you – once you process and consume an update, it will no longer be available. This means that features like user lists, message lists, current user inline menu, settings, etc. have to be implemented and maintained by bot developers.
If your bot needs one of these features and you want to get started on data persistence, we recommend that you look into serialization practices and libraries for your language of choice, as well as available databases.
Implementing a database is out of scope for this guide, however, several guides are available online for simple embedded open source software solutions like SQLite, HyperSQL, Derby and many more.
Your language of choice will also influence which databases are available and supported – the list above assumes you followed this Java tutorial.
Hosting
So far, your bot has been running on your local machine – your PC. While this may be good for developing, testing and debugging, it is not ideal for a production environment.
You’ll want your bot to be available and responsive at all times, but your computer might not always be online.
This can be done in four steps:
-
Package your code
Making your bot easy to move and runnable outside of an IDE is essential to host it elsewhere.
If you followed this tutorial, this standard guide will work for you. If you didn’t, look into export or packaging guides for your IDE and language of choice – procedures may vary but the end result is the same. -
Purchase a VPS or equivalent service
A server is essentially a machine that is always online and running, without you having to worry about anything. To host your bot, you can opt for a VPS which serves this purpose and can be rented from several different providers.
Another option would be to purchase a network-capable microcontroller, which come in all different specs and sizes depending on your needs.
You should ensure that all user data remains heavily encrypted at all times in your database to guarantee the privacy of your users. The same concept applies to your local instance, however, this becomes especially important once you transfer your database to a remote server.
- Upload your executable/package
Once you have a working ssh connection between your machine and your new server, you should upload your executable and all associated files.
We will assume the runnable jar TutorialBot.jar and its database dbase.db are currently in the /TBot folder.
$ scp -r /TBot/ username@server_ip:/bots/TBotRemote/- Run your application
Depending on which language you chose, you might have to configure your server environment differently. If you chose Java, you just need to install a compatible JDK.
$ apt install openjdk-17-jre
$ java -version
If you did everything correctly, you should see a Java version as the output, along with a few other values. This means you’re ready to run your application.
Now, to run the executable:
$ cd /bots/TBotRemote/
$ java -jar TutorialBot.jar
Your bot is now online and users can interact with it at any time.
To streamline and modularize this process, you could employ a specialized docker container or equivalent service.
If you followed along in one of the equivalent examples (C#, Python, Go and TypeScript) you can find a detailed set of instructions to export and run your code here.
Further Reading
If you got this far, you might be interested in these additional guides and docs:
- General Bot Platform Overview
- Detailed List of Bot Features
- Full API Reference
If you encounter any issues while following this guide, you can contact us on Telegram at @BotSupport.
Как сделать бота для telegram на java?
Как вы выбираете кандидата, кому доверить задание? Я задался этим вопросом, после того, как отклонили мое предложение о разработке бота для «вконтакте». Это задело мое самолюбие. На работе я делаю куда более сложные вещи, чем разработка ботов. Как доказать тому человеку, который находится по ту сторону экрана, который незнает меня и не доверяет, что я могу сделать простейшего бота информатора? Ответ есть — сделать этого бота и задокументировать процесс его создания. Статья расчитана на новичков, желающих познакомится с новым стандартом java 15 и простейшим ботостроением. Итак, нам понадобятся:
- IntelliJ IDEA CE
- Java JDK_15_PREVIEW
- Библиотека для взаимодействия с телеграмом
С какими трудностями мы столкнемся? Для меня, самым сложным было настроить среду разработки для работы с джавой 15 превью версии. Нужно отдельно настроить gradle и выставить в настройках запуска проекта аргумент «—enable-preview».
Начнем по порядку с создания проекта:

Рис. 1 Создание нового проекта
Нажимаем на кнопку «New Project». Следом увидим вот такое меню:

Рис. 2 Выбор типа проекта
За основу я взял сборщик проектов Gradle. Выбираем Java и затем кнопку Next

Рис. 3 Задаем имя проекта
Теперь нужно дать имя проекту. В моем случае это «telegram-bot-example-java»

Рис.4 Ждем, пока проект проиндексируется
Какое-то время идея и gradle будут загружаться. Кстати, я уже допустил одну ошибку в конфигурации проекта, заметили, какую? Вернемся к этому позже.

Рис.5 Создание структуры java packages
Кликаем правой кнопкой по папке «src/main/java» -> New -> Package -> «org.example.tgbot»

Рис. 6 Создаем точку входа в программу
Теперь самое главное, без чего программа не запустится — точка входа и метод «main». Выбираем «org.example.tgbot» -> New -> Java Class. Называем новый класс Main.

Рис. 7 Файл Main.java
Вот такой код должен быть в файле «Main.java». Обратите внимание на две зеленые стрелки рядом с определением класса и метода «main». Если вы их видите, значит сделали все правильно и IDEA может запустить ваш проект.

Рис. 8 Тестовый запуск
Проверим, что все ок, запустив проект.

Рис. 9 Успешный запуск
Если все хорошо, вы должны увидеть «done». У меня он есть, значит, можно продолжать.

Рис. 10 Проверяем новую фичу java 15
Итак, вот мы дошли до ошибки, о которой я упоминал выше. В чем тут дело? Тип «record» был добавлен в java 15 и в превью версии должен присутствовать. Но я при запуске указал джаву восьмой версии. Что теперь делать? Можно сделать новый проект и указать правильную версию. Или можно исправить текущий проект. Сделать новый слишком просто, поэтому я исправлю этот (на самом деле нет, я попробовал, это не решило проблему).

Рис. 11 Настройки проекта
Исправляем проблему. Нужно поменять версию джавы.Открываем настройки проекта.

Рис. 12 Настройки версии java
Выбираем «Project SDK» -> 15. Если у вас ее нет, можно скачать ниже, в выпадающем списке.
В «Project language level» выбираем «15 (Preview) — Sealed types, records, patterns, local enums and interfaces». Сохраняем настройки.

Рис. 13 Record тип работает
Теперь все ок, можно наконец-то взяться за программирование? Увы, нет. IDEA распознает новые фичи, но кроме нее есть еще gradle, который не сможет скомпилировать этот код. Чтобы это проверить, создаим рядом с «Main.java «еще один файл — «Bot.java» в котором будет происходить обработка сообщений.

Рис. 14 Bot.java
У gradle будут проблемы со сборкой этого файла, а именно — из за 11 строки. Модификатор «sealed», как и «record», является экспериментальным. Проверим, соберем проект.

Рис. 15 Gradle error
Еще немного борьбы и мы запустим этот код. Нужно настроить сборку gradle и добавить аргумент «—enable-preview» при запуске.

Рис. 16 Gradle java 15 settings
Нужно добавить новую секцию, в которой будут задаваться флаги сборки «—enable-preview» и «-Xlint:Preview». Второй флаг не обязательный, нужен для отображения новых warnings. В комментарии пример, как можно задать все флаги одной строкой. Кроме этого, нужно добавить строку «jvmArgs([‘—enable-preview’])» в секцию «test». На этом с gradle закончили.

Рис. 17 Настройки сборки
Далее, нужно добавить аргумент для виртуальной машины java. Отрываем настройки.

Рис. 18 Открыть меню «Add VM options»
После чего у вас появится поле редактирование опций виртуальной машины.

Рис. 19 Редактор опций виртуальной машины
В пустое поле вписываем «—enable-preview». Также проверьте, что у вас стоит «java 15». Сохраняем настройки и собираем проект. У меня сборка и запуск прошли успешно. Теперь настроим прием сообщений и ответы.

Рис. 20 Bot.java
Добавляем следующий код в файл «Bot.java». В нем два метода, хотя можно было обойтись и одним, выбранная мною библиотека присилает обновления в виде массива, а не по одному. Ах да, я забыл показать, как добавить эту библиотеку.

Рис. 21 Добавляем зависимость в «build.gradle»
В секцию «dependencies» добавьте строку «implementation ‘com.github.pengrad:java-telegram-bot-api:5.0.1′» как показано на рисунке (13 строка). И финальный штрих, обновляем Main класс, чтобы запустить бота.

Рис. 22 Новый Main класс
Здесь я читаю BOT_TOKEN из переменных среды, это значит, ее нужно как то добавить. Это можно сделать глобально в системе или задать в IDEA. Я выбираю второй вариант.
Рис. 23 Снова открываем «Edit configurations»

Рис. 24 Редактирование переменных среды
В поле «Environment variables» вставьте строку «BOT_TOKEN=123», где 123 — ваш токен. А я вставлю свой  Сохраняем настройки и запускаем проект.

Рис. 25 Бот успешно запущен
Бот работает! Пруф:

Рис. 25 Телеграм чат
Скорее всего, если вы захотите проверить моего бота, он вам не ответит. Потому что программа, которую мы написали, запущена локально, у меня на компьютере. Чтобы бот работал 24/7, программу нужно разметить на удаленном сервере (или просто держать компьютер всегда включенным всесте с запущенной программой). Это материал для другой статьи. Я также могу рассказать, как сделать ответы на команды в чате, отображать динамическую информацию, информировать клиентов. Или как написать бота на scala >_<. Пишите в комментариях, что у вас не получилось. До встречи в других статьях!
Из песочницы, Программирование, Open source, Java, Системы обмена сообщениями, Из песочницы
Рекомендация: подборка платных и бесплатных курсов Smm — https://katalog-kursov.ru/
Каждый разработчик (и не только), который использует Telegram в повседневной жизни, хотя бы раз задумывался о том, каково это — создать своего бота, на сколько это сложно и какой язык программирования лучше использовать.
На все эти вопросы могу дать самый простой (и, наверно, самый правильный) ответ: все зависит от вас самих, ваших знаний и намерений.
… Но в этой небольшой статье, я покажу, как можно создать своего бота на языке Java и что это довольно интересно и несложно.
Мы будем использовать библиотеку для работы с Telegram Bots API и ее расширение, позволяющее создавать свои команды (‘/custom_cmd‘) и обрабатывать их простым способом.
Задачей бота будет являться регистрация пользователя и отправка сообщения от указанного им имени другим пользователям бота.
Создание нового проекта и подготовка
1. Добавление зависимостей в проект
Создадим новый maven-проект и отредактируем pom.xml, добавив в него необходимые зависимости:
pom.xml
    <?xml version="1.0" encoding="UTF-8"?>
    <project xmlns="http://maven.apache.org/POM/4.0.0"
             xmlns:xsi="http://www.w3.org/2001/XMLSchema-instance"
             xsi:schemaLocation="http://maven.apache.org/POM/4.0.0 http://maven.apache.org/xsd/maven-4.0.0.xsd">
        <modelVersion>4.0.0</modelVersion>

        <groupId>io.example</groupId>
        <artifactId>anonymizerbot</artifactId>
        <version>1.0-SNAPSHOT</version>

        <build>
            <plugins>
                <plugin>
                    <groupId>org.apache.maven.plugins</groupId>
                    <artifactId>maven-compiler-plugin</artifactId>
                    <configuration>
```8</source>
                        <target>8</target>
                    </configuration>
                </plugin>
            </plugins>
        </build>

        <dependencies>

            <!-- Telegram API -->
            <dependency>
                <groupId>org.telegram</groupId>
                <artifactId>telegrambots</artifactId>
                <version>LATEST</version>
            </dependency>
            <dependency>
                <groupId>org.telegram</groupId>
                <artifactId>telegrambotsextensions</artifactId>
                <version>LATEST</version>
            </dependency>

            ...

        </dependencies>

    </project>
Telegram API — библиотека для работы с Telegram Bots API, содержит в себе классы и методы для взаимодействия с сервисами Telegram и некоторые расширения этих классов.
2. Создание аккаунта для бота
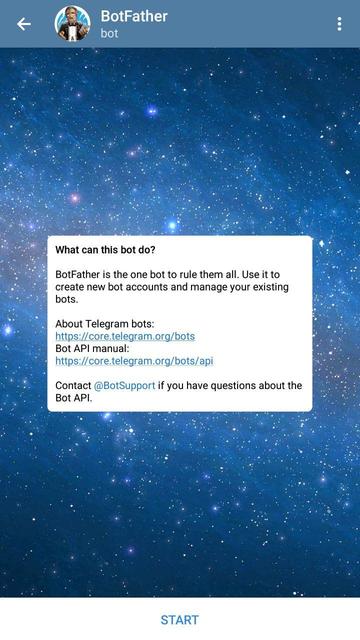
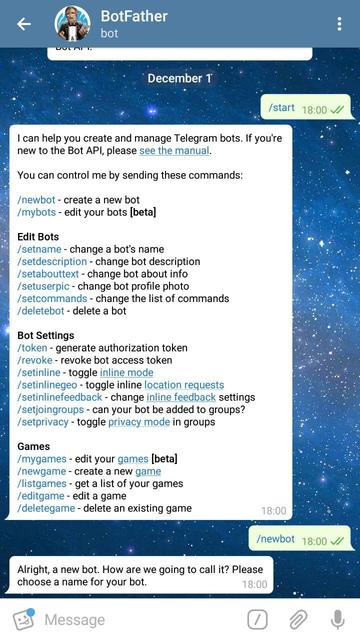
Для этого нам необходимо обратиться за помощью к боту BotFather:
- найдем бота в поиске;
- выполним команду «/start»;
- выполним команду «/newbot»;
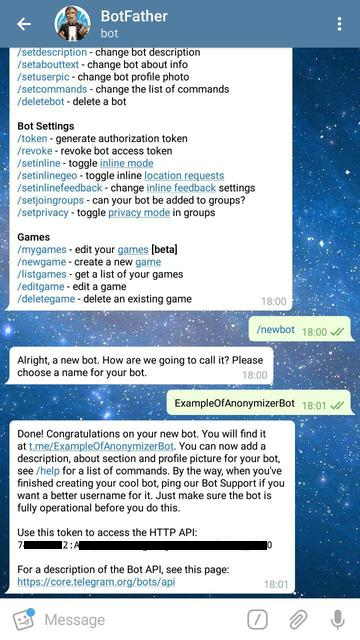
- зададим какое-нибудь имя нашему боту (должно заканчиваться на «Bot»). Я назвал его «ExampleOfAnonymizerBot».
После выполнения этих команд мы получим токен, который нам понадобится для использования Bot API. (7xxxxxxx2:Axxxxxxxxxxxxxxxxxxxxxxxxxxxxxxxxx0)
Реализация
1. Модель анонимного отправителя сообщений
Данные, необходимые нам от каждого пользователя:
- User mUser — информация о пользователе Telegram;
- Chat mChat — информация о чате пользователя и бота;
- String mDisplayedName — имя, от которого пользователь будет посылать сообщения другим пользователям бота.
Anonymous.java
package io.example.anonymizerbot.model;

import org.telegram.telegrambots.meta.api.objects.Chat;
import org.telegram.telegrambots.meta.api.objects.User;

public final class Anonymous {

    private final User mUser;
    private final Chat mChat;
    private String mDisplayedName;

    public Anonymous(User user, Chat chat) {
        mUser = user;
        mChat = chat;
    }

    @Override
    public int hashCode() {
        return mUser.hashCode();
    }

    @Override
    public boolean equals(Object obj) {
        return obj instanceof Anonymous && ((Anonymous) obj).getUser().equals(mUser);
    }

    public User getUser() {
        return mUser;
    }

    public Chat getChat() {
        return mChat;
    }

    public String getDisplayedName() {
        return mDisplayedName;
    }

    public void setDisplayedName(String displayedName) {
        mDisplayedName = displayedName;
    }
}
Добавим сервис, содержащий часто используемые методы для манипулирования множеством анонимных пользователей.
AnonymousService.java
package io.example.anonymizerbot.service;

import io.example.anonymizerbot.model.Anonymous;
import org.telegram.telegrambots.meta.api.objects.User;

import java.util.HashSet;
import java.util.Objects;
import java.util.Set;
import java.util.stream.Stream;

public final class AnonymousService {

    private final Set<Anonymous> mAnonymouses;

    public AnonymousService() {
        mAnonymouses = new HashSet<>();
    }

    public boolean setUserDisplayedName(User user, String name) {

        if (!isDisplayedNameTaken(name)) {
            mAnonymouses.stream().filter(a -> a.getUser().equals(user)).forEach(a -> a.setDisplayedName(name));
            return true;
        }

        return false;
    }

    public boolean removeAnonymous(User user) {
        return mAnonymouses.removeIf(a -> a.getUser().equals(user));
    }

    public boolean addAnonymous(Anonymous anonymous) {
        return mAnonymouses.add(anonymous);
    }

    public boolean hasAnonymous(User user) {
        return mAnonymouses.stream().anyMatch(a -> a.getUser().equals(user));
    }

    public String getDisplayedName(User user) {

        Anonymous anonymous = mAnonymouses.stream().filter(a -> a.getUser().equals(user)).findFirst().orElse(null);

        if (anonymous == null) {
            return null;
        }
        return anonymous.getDisplayedName();
    }

    public Stream<Anonymous> anonymouses() {
        return mAnonymouses.stream();
    }

    private boolean isDisplayedNameTaken(String name) {
        return mAnonymouses.stream().anyMatch(a -> Objects.equals(a.getDisplayedName(), name));
    }
}
2. Интерфейс бота
Любая кастомная команда должна наследоваться от BotCommand и реализовывать метод
execute(AbsSender sender, User user, Chat chat, String[] strings), который используется для обработки команд пользователей.
После того как мы обработаем команду пользователя, мы можем послать ему ответ, используя метод execute класса AbsSender, который принимает на вход вышеупомянутый execute(AbsSender sender, User user, Chat chat, String[] strings).
Здесь и далее чтобы не оборачивать каждый раз метод AbsSender.execute, который может выбросить исключение TelegramApiException, в try-catch, и для того чтобы не прописывать в каждой команде вывод однообразных логов, создадим класс AnonymizerCommand, а наши кастомные команды будем уже наследовать от него (обработку исключений в этом примере оставим):
AnonymizerCommand.java
package io.example.anonymizerbot.command;

import io.example.anonymizerbot.logger.LogLevel;
import io.example.anonymizerbot.logger.LogTemplate;
import org.apache.logging.log4j.Level;
import org.apache.logging.log4j.Logger;
import org.apache.logging.log4j.LogManager;
import org.telegram.telegrambots.extensions.bots.commandbot.commands.BotCommand;
import org.telegram.telegrambots.meta.api.methods.send.SendMessage;
import org.telegram.telegrambots.meta.api.objects.User;
import org.telegram.telegrambots.meta.bots.AbsSender;
import org.telegram.telegrambots.meta.exceptions.TelegramApiException;

abstract class AnonymizerCommand extends BotCommand {

    final Logger log = LogManager.getLogger(getClass());

    AnonymizerCommand(String commandIdentifier, String description) {
        super(commandIdentifier, description);
    }

    void execute(AbsSender sender, SendMessage message, User user) {
        try {
            sender.execute(message);
            log.log(Level.getLevel(LogLevel.SUCCESS.getValue()), LogTemplate.COMMAND_SUCCESS.getTemplate(), user.getId(), getCommandIdentifier());
        } catch (TelegramApiException e) {
            log.error(LogTemplate.COMMAND_EXCEPTION.getTemplate(), user.getId(), getCommandIdentifier(), e);
        }
    }
}
Определим команды, на которые наш бот будет реагировать:
/start— создаст новогоAnonymousбез имени и добавит его в коллекциюAnonymouses;
StartCommand.java
package io.example.anonymizerbot.command;
import io.example.anonymizerbot.logger.LogLevel;
import io.example.anonymizerbot.logger.LogTemplate;
import io.example.anonymizerbot.model.Anonymous;
import io.example.anonymizerbot.service.AnonymousService;
import org.apache.logging.log4j.Level;
import org.telegram.telegrambots.meta.api.methods.send.SendMessage;
import org.telegram.telegrambots.meta.api.objects.Chat;
import org.telegram.telegrambots.meta.api.objects.User;
import org.telegram.telegrambots.meta.bots.AbsSender;
public final class StartCommand extends AnonymizerCommand {
private final AnonymousService mAnonymouses;
// обязательно нужно вызвать конструктор суперкласса,
// передав в него имя и описание команды
public StartCommand(AnonymousService anonymouses) {
super("start", "start using botn");
mAnonymouses = anonymouses;
}
/**
* реализованный метод класса BotCommand, в котором обрабатывается команда, введенная пользователем
* @param absSender - отправляет ответ пользователю
* @param user - пользователь, который выполнил команду
* @param chat - чат бота и пользователя
* @param strings - аргументы, переданные с командой
*/
@Override
public void execute(AbsSender absSender, User user, Chat chat, String[] strings) {
log.info(LogTemplate.COMMAND_PROCESSING.getTemplate(), user.getId(), getCommandIdentifier());
StringBuilder sb = new StringBuilder();
SendMessage message = new SendMessage();
message.setChatId(chat.getId().toString());
if (mAnonymouses.addAnonymous(new Anonymous(user, chat))) {
log.info("User {} is trying to execute '{}' the first time. Added to users' list.", user.getId(), getCommandIdentifier());
sb.append("Hi, ").append(user.getUserName()).append("! You've been added to bot users' list!n")
.append("Please execute command:n'/set_name <displayed_name>'nwhere <displayed_name> is the name you want to use to hide your real name.");
} else {
log.log(Level.getLevel(LogLevel.STRANGE.getValue()), "User {} has already executed '{}'. Is he trying to do it one more time?", user.getId(), getCommandIdentifier());
sb.append("You've already started bot! You can send messages if you set your name (/set_name).");
}
message.setText(sb.toString());
execute(absSender, message, user);
}
}/help— выведет пользователю информацию обо всех доступных командах (конструктор отличается от других тем, что в него необходимо передатьICommandRegistry, который содержит все кастомные команды);
HelpCommand.java
package io.example.anonymizerbot.command;

import io.example.anonymizerbot.logger.LogTemplate;
import org.telegram.telegrambots.extensions.bots.commandbot.commands.ICommandRegistry;
import org.telegram.telegrambots.meta.api.methods.send.SendMessage;
import org.telegram.telegrambots.meta.api.objects.Chat;
import org.telegram.telegrambots.meta.api.objects.User;
import org.telegram.telegrambots.meta.bots.AbsSender;

public final class HelpCommand extends AnonymizerCommand {

    private final ICommandRegistry mCommandRegistry;

    public HelpCommand(ICommandRegistry commandRegistry) {
        super("help", "list all known commandsn");
        mCommandRegistry = commandRegistry;
    }

    @Override
    public void execute(AbsSender absSender, User user, Chat chat, String[] strings) {

        log.info(LogTemplate.COMMAND_PROCESSING.getTemplate(), user.getId(), getCommandIdentifier());

        StringBuilder helpMessageBuilder = new StringBuilder("<b>Available commands:</b>nn");

        mCommandRegistry.getRegisteredCommands().forEach(cmd -> helpMessageBuilder.append(cmd.toString()).append("n"));

        SendMessage helpMessage = new SendMessage();
        helpMessage.setChatId(chat.getId().toString());
        helpMessage.enableHtml(true);
        helpMessage.setText(helpMessageBuilder.toString());

        execute(absSender, helpMessage, user);
    }
}/set_name— задаст пользователю имя, от которого будут отправляться анонимные сообщения;
SetNameCommand.java
package io.example.anonymizerbot.command;

import io.example.anonymizerbot.logger.LogLevel;
import io.example.anonymizerbot.logger.LogTemplate;
import io.example.anonymizerbot.service.AnonymousService;
import org.apache.logging.log4j.Level;
import org.telegram.telegrambots.meta.api.methods.send.SendMessage;
import org.telegram.telegrambots.meta.api.objects.Chat;
import org.telegram.telegrambots.meta.api.objects.User;
import org.telegram.telegrambots.meta.bots.AbsSender;

public final class SetNameCommand extends AnonymizerCommand {

    private final AnonymousService mAnonymouses;

    public SetNameCommand(AnonymousService anonymouses) {
        super("set_name", "set or change name that will be displayed with your messagesn");
        mAnonymouses = anonymouses;
    }

    @Override
    public void execute(AbsSender absSender, User user, Chat chat, String[] strings) {

        log.info(LogTemplate.COMMAND_PROCESSING.getTemplate(), user.getId(), getCommandIdentifier());

        SendMessage message = new SendMessage();
        message.setChatId(chat.getId().toString());

        if (!mAnonymouses.hasAnonymous(user)) {
            log.log(Level.getLevel(LogLevel.STRANGE.getValue()), "User {} is trying to execute '{}' without starting the bot!", user.getId(), getCommandIdentifier());
            message.setText("Firstly you should start the bot! Execute '/start' command!");
            execute(absSender, message, user);
            return;
        }

        String displayedName = getName(strings);

        if (displayedName == null) {
            log.log(Level.getLevel(LogLevel.STRANGE.getValue()), "User {} is trying to set empty name.", user.getId());
            message.setText("You should use non-empty name!");
            execute(absSender, message, user);
            return;
        }

        StringBuilder sb = new StringBuilder();

        if (mAnonymouses.setUserDisplayedName(user, displayedName)) {

            if (mAnonymouses.getDisplayedName(user) == null) {
                log.info("User {} set a name '{}'", user.getId(), displayedName);
                sb.append("Your displayed name: '").append(displayedName)
                .append("'. Now you can send messages to bot!");
            } else {
                log.info("User {} has changed name to '{}'", user.getId(), displayedName);
                sb.append("Your new displayed name: '").append(displayedName).append("'.");
            }
        } else {
            log.log(Level.getLevel(LogLevel.STRANGE.getValue()), "User {} is trying to set taken name '{}'", user.getId(), displayedName);
            sb.append("Name ").append(displayedName).append(" is already in use! Choose another name!");
        }

        message.setText(sb.toString());
        execute(absSender, message, user);
    }

    private String getName(String[] strings) {

        if (strings == null || strings.length == 0) {
            return null;
        }

        String name = String.join(" ", strings);
        return name.replaceAll(" ", "").isEmpty() ? null : name;
    }
}/my_name— отобразит текущее имя пользователя;
MyNameCommand.java
package io.example.anonymizerbot.command;

import io.example.anonymizerbot.logger.LogLevel;
import io.example.anonymizerbot.logger.LogTemplate;
import io.example.anonymizerbot.service.AnonymousService;
import org.apache.logging.log4j.Level;
import org.telegram.telegrambots.meta.api.methods.send.SendMessage;
import org.telegram.telegrambots.meta.api.objects.Chat;
import org.telegram.telegrambots.meta.api.objects.User;
import org.telegram.telegrambots.meta.bots.AbsSender;

public final class MyNameCommand extends AnonymizerCommand {

    private final AnonymousService mAnonymouses;

    public MyNameCommand(AnonymousService anonymouses) {
        super("my_name", "show your current name that will be displayed with your messagesn");
        mAnonymouses = anonymouses;
    }

    @Override
    public void execute(AbsSender absSender, User user, Chat chat, String[] strings) {

        log.info(LogTemplate.COMMAND_PROCESSING.getTemplate(), user.getId(), getCommandIdentifier());

        StringBuilder sb = new StringBuilder();

        SendMessage message = new SendMessage();
        message.setChatId(chat.getId().toString());

        if (!mAnonymouses.hasAnonymous(user)) {

            sb.append("You are not in bot users' list! Send /start command!");
            log.log(Level.getLevel(LogLevel.STRANGE.getValue()), "User {} is trying to execute '{}' without starting the bot.", user.getId(), getCommandIdentifier());

        } else if(mAnonymouses.getDisplayedName(user) == null) {

            sb.append("Currently you don't have a name.nSet it using command:n'/set_name <displayed_name>'");
            log.log(Level.getLevel(LogLevel.STRANGE.getValue()), "User {} is trying to execute '{}' without having a name.", user.getId(), getCommandIdentifier());

        } else {

            log.info("User {} is executing '{}'. Name is '{}'.", user.getId(), getCommandIdentifier(), mAnonymouses.getDisplayedName(user));
            sb.append("Your current name: ").append(mAnonymouses.getDisplayedName(user));
        }

        message.setText(sb.toString());
        execute(absSender, message, user);
    }
}/stop— удалит пользователя из коллекции анонимусов.
StopCommand.java
package io.example.anonymizerbot.command;

import io.example.anonymizerbot.logger.LogLevel;
import io.example.anonymizerbot.logger.LogTemplate;
import io.example.anonymizerbot.service.AnonymousService;
import org.apache.logging.log4j.Level;
import org.telegram.telegrambots.meta.api.methods.send.SendMessage;
import org.telegram.telegrambots.meta.api.objects.Chat;
import org.telegram.telegrambots.meta.api.objects.User;
import org.telegram.telegrambots.meta.bots.AbsSender;

public final class StopCommand extends AnonymizerCommand {

    private final AnonymousService mAnonymouses;

    public StopCommand(AnonymousService anonymouses) {
        super("stop", "remove yourself from bot users' listn");
        mAnonymouses = anonymouses;
    }

    @Override
    public void execute(AbsSender absSender, User user, Chat chat, String[] strings) {

        log.info(LogTemplate.COMMAND_PROCESSING.getTemplate(), user.getId(), getCommandIdentifier());

        StringBuilder sb = new StringBuilder();

        SendMessage message = new SendMessage();
        message.setChatId(chat.getId().toString());

        if (mAnonymouses.removeAnonymous(user)) {
            log.info("User {} has been removed from users list!", user.getId());
            sb.append("You've been removed from bot's users list! Bye!");
        } else {
            log.log(Level.getLevel(LogLevel.STRANGE.getValue()), "User {} is trying to execute '{}' without having executed 'start' before!", user.getId(), getCommandIdentifier());
            sb.append("You were not in bot users' list. Bye!");
        }

        message.setText(sb.toString());
        execute(absSender, message, user);
    }
}
3. Инициализация и запуск бота
Класс бота, в котором производится регистрация всех кастомных команд, обработчика сообщений-не команд и неизвестных команд.
AnonymizerBot.java
package io.example.anonymizerbot.bot;
import io.example.anonymizerbot.command.*;
import io.example.anonymizerbot.logger.LogLevel;
import io.example.anonymizerbot.logger.LogTemplate;
import io.example.anonymizerbot.model.Anonymous;
import io.example.anonymizerbot.service.AnonymousService;
import org.apache.logging.log4j.Level;
import org.apache.logging.log4j.LogManager;
import org.apache.logging.log4j.Logger;
import org.telegram.telegrambots.bots.DefaultBotOptions;
import org.telegram.telegrambots.extensions.bots.commandbot.TelegramLongPollingCommandBot;
import org.telegram.telegrambots.meta.api.methods.send.SendMessage;
import org.telegram.telegrambots.meta.api.objects.Message;
import org.telegram.telegrambots.meta.api.objects.Update;
import org.telegram.telegrambots.meta.api.objects.User;
import org.telegram.telegrambots.meta.exceptions.TelegramApiException;
import java.util.stream.Stream;
public final class AnonymizerBot extends TelegramLongPollingCommandBot {
private static final Logger LOG = LogManager.getLogger(AnonymizerBot.class);
// имя бота, которое мы указали при создании аккаунта у BotFather
// и токен, который получили в результате
private static final String BOT_NAME = "AnonymizerBotExample";
private static final String BOT_TOKEN = "7xxxxxxx2:Axxxxxxxxxxxxxxxxxxxxxxxxxxxxxxxxx0";
private final AnonymousService mAnonymouses;
public AnonymizerBot(DefaultBotOptions botOptions) {
super(botOptions, BOT_NAME);
LOG.info("Initializing Anonymizer Bot...");
LOG.info("Initializing anonymouses list...");
mAnonymouses = new AnonymousService();
// регистрация всех кастомных команд
LOG.info("Registering commands...");
LOG.info("Registering '/start'...");
register(new StartCommand( mAnonymouses));
LOG.info("Registering '/set_name'...");
register(new SetNameCommand(mAnonymouses));
LOG.info("Registering '/stop'...");
register(new StopCommand(mAnonymouses));
LOG.info("Registering '/my_name'...");
register(new MyNameCommand(mAnonymouses));
HelpCommand helpCommand = new HelpCommand(this);
LOG.info("Registering '/help'...");
register(helpCommand);
// обработка неизвестной команды
LOG.info("Registering default action'...");
registerDefaultAction(((absSender, message) -> {
LOG.log(Level.getLevel(LogLevel.STRANGE.getValue()), "User {} is trying to execute unknown command '{}'.", message.getFrom().getId(), message.getText());
SendMessage text = new SendMessage();
text.setChatId(message.getChatId());
text.setText(message.getText() + " command not found!");
try {
absSender.execute(text);
} catch (TelegramApiException e) {
LOG.error("Error while replying unknown command to user {}.", message.getFrom(), e);
}
helpCommand.execute(absSender, message.getFrom(), message.getChat(), new String[] {});
}));
}
@Override
public String getBotToken() {
return BOT_TOKEN;
}
// обработка сообщения не начинающегося с '/'
@Override
public void processNonCommandUpdate(Update update) {
LOG.info("Processing non-command update...");
if (!update.hasMessage()) {
LOG.error("Update doesn't have a body!");
throw new IllegalStateException("Update doesn't have a body!");
}
Message msg = update.getMessage();
User user = msg.getFrom();
LOG.info(LogTemplate.MESSAGE_PROCESSING.getTemplate(), user.getId());
if (!canSendMessage(user, msg)) {
return;
}
String clearMessage = msg.getText();
String messageForUsers = String.format("%s:n%s", mAnonymouses.getDisplayedName(user), msg.getText());
SendMessage answer = new SendMessage();
// отправка ответа отправителю о том, что его сообщение получено
answer.setText(clearMessage);
answer.setChatId(msg.getChatId());
replyToUser(answer, user, clearMessage);
// отправка сообщения всем остальным пользователям бота
answer.setText(messageForUsers);
Stream<Anonymous> anonymouses = mAnonymouses.anonymouses();
anonymouses.filter(a -> !a.getUser().equals(user))
.forEach(a -> {
answer.setChatId(a.getChat().getId());
sendMessageToUser(answer, a.getUser(), user);
});
}
// несколько проверок, чтобы можно было отправлять сообщения другим пользователям
private boolean canSendMessage(User user, Message msg) {
SendMessage answer = new SendMessage();
answer.setChatId(msg.getChatId());
if (!msg.hasText() || msg.getText().trim().length() == 0) {
LOG.log(Level.getLevel(LogLevel.STRANGE.getValue()), "User {} is trying to send empty message!", user.getId());
answer.setText("You shouldn't send empty messages!");
replyToUser(answer, user, msg.getText());
return false;
}
if(!mAnonymouses.hasAnonymous(user)) {
LOG.log(Level.getLevel(LogLevel.STRANGE.getValue()), "User {} is trying to send message without starting the bot!", user.getId());
answer.setText("Firstly you should start bot! Use /start command!");
replyToUser(answer, user, msg.getText());
return false;
}
if (mAnonymouses.getDisplayedName(user) == null) {
LOG.log(Level.getLevel(LogLevel.STRANGE.getValue()), "User {} is trying to send message without setting a name!", user.getId());
answer.setText("You must set a name before sending messages.nUse '/set_name <displayed_name>' command.");
replyToUser(answer, user, msg.getText());
return false;
}
return true;
}
private void sendMessageToUser(SendMessage message, User receiver, User sender) {
try {
execute(message);
LOG.log(Level.getLevel(LogLevel.SUCCESS.getValue()), LogTemplate.MESSAGE_RECEIVED.getTemplate(), receiver.getId(), sender.getId());
} catch (TelegramApiException e) {
LOG.error(LogTemplate.MESSAGE_LOST.getTemplate(), receiver.getId(), sender.getId(), e);
}
}
private void replyToUser(SendMessage message, User user, String messageText) {
try {
execute(message);
LOG.log(Level.getLevel(LogLevel.SUCCESS.getValue()), LogTemplate.MESSAGE_SENT.getTemplate(), user.getId(), messageText);
} catch (TelegramApiException e) {
LOG.error(LogTemplate.MESSAGE_EXCEPTION.getTemplate(), user.getId(), e);
}
}
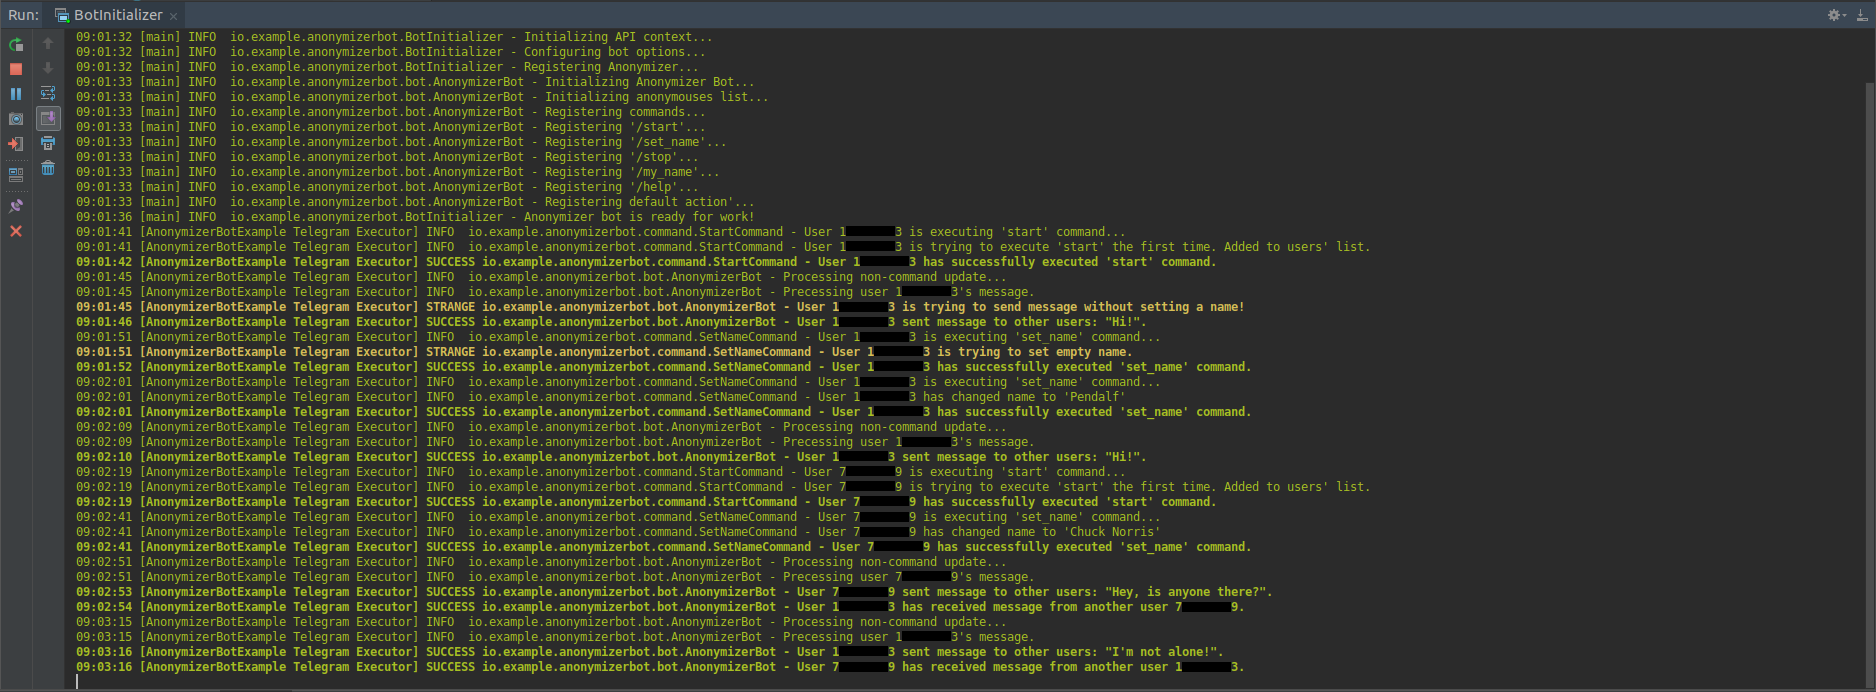
}Наконец, запуск бота:
BotInitializer.java
package io.example.anonymizerbot;

import io.example.anonymizerbot.bot.AnonymizerBot;
import org.apache.logging.log4j.LogManager;
import org.apache.logging.log4j.Logger;
import org.telegram.telegrambots.ApiContextInitializer;
import org.telegram.telegrambots.bots.DefaultBotOptions;
import org.telegram.telegrambots.meta.ApiContext;
import org.telegram.telegrambots.meta.TelegramBotsApi;
import org.telegram.telegrambots.meta.exceptions.TelegramApiRequestException;

public final class BotInitializer {

    private static final Logger LOG = LogManager.getLogger(BotInitializer.class);

    private static final String PROXY_HOST = "xx.xx.xxx.xxx";
    private static final int PROXY_PORT = 9999;

    public static void main(String[] args) {

        try {

            LOG.info("Initializing API context...");
            ApiContextInitializer.init();

            TelegramBotsApi botsApi = new TelegramBotsApi();

            LOG.info("Configuring bot options...");
            DefaultBotOptions botOptions = ApiContext.getInstance(DefaultBotOptions.class);

            botOptions.setProxyHost(PROXY_HOST);
            botOptions.setProxyPort(PROXY_PORT);
            botOptions.setProxyType(DefaultBotOptions.ProxyType.SOCKS4);

            LOG.info("Registering Anonymizer...");
            botsApi.registerBot(new AnonymizerBot(botOptions));

            LOG.info("Anonymizer bot is ready for work!");

        } catch (TelegramApiRequestException e) {
            LOG.error("Error while initializing bot!", e);
        }
    }
}
Вот и все! Бот готов к первым тестам.
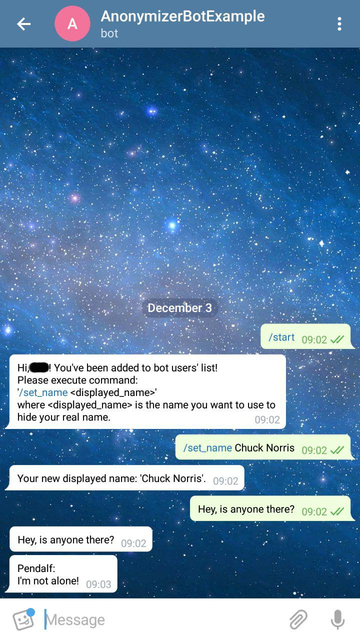
Пример использования
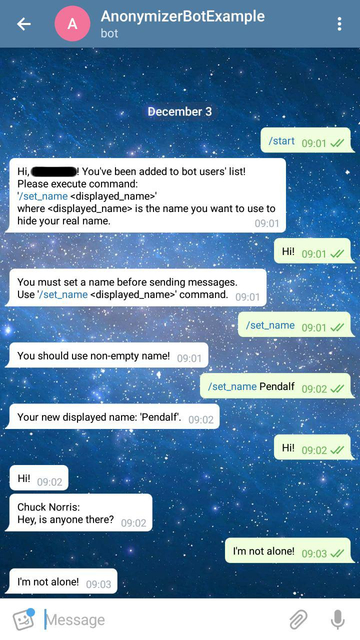
В качестве примера рассмотрим следующий сценарий:
- ‘A’ начинает работу с ботом (
/start); - ‘A’ пытается отправить сообщение;
- ‘A’ пытается задать имя (
/set_name); - ‘A’ задает имя (
/set_name Pendalf); - ‘A’ посылает сообщение другим пользователям (которых нет);
- ‘B’ начинает работу с ботом (
/start); - ‘B’ задает имя (
/set_name Chuck Norris); - ‘B’ посылает сообщение другим пользователям;
- ‘A’ видит сообщение от ‘B’ и посылает сообщение в ответ;
- ‘B’ видит ответ от ‘A’ и больше ему не пишет…
Привет, читатель.
Важно для прочтения!
Если ты не против, то изучи ООП и Jav’y прежде, чем учить другие библиотеки. Ибо ты не будешь браться за физику, не выучив математику. Тут то же самое.
Сегодня мы будем писать простейшего бота Telegram, который будет отвечать на команды. Такая статья была, но писали бота на Питоне.
Почему я выбрал именно Jav’y
Java в плане ботов, серверов, плагинов да и вообще программ будет удобнее для меня.
1. Виртуальная машина хоть и долгая, но если обрабатывать события в несколько потоков, то будет работать быстро.(Вообще для многих серверов/мультиплеерных игр в одном потоке не всегда получится обрабатывать события, в Jav’e сделать это гораздо проще)
2. Наличие хорошей документации и Javadoc’ов, которые можно сделать для всех библиотек(не только для системных)
0. А что такое «бот»?
Бот — это профиль в соцсети/мессенджере(в данном случае Telegram) который отвечает на команды.( В любом случае все действия буду происходить после выполнения команды)
Тип чата с ботом — это переписка 1 на 1.
1.С чего же начинать?
Здесь качать библиотеку Telegram(обязательно with-dependiciens)
IDE можно выбрать любую, я бы порекомендовал eclipse.
Импотрируем библиотеку Телеграма и приступаем.
2.Наследование бота
Для того чтобы отвечать на команды, класс должен наследовать TelegramLongPillingBot
Создаём класс:

И пишем в него:
package ru.thematdev.bot;

import org.telegram.telegrambots.api.objects.Update;
import org.telegram.telegrambots.bots.TelegramLongPollingBot;

public class Example extends TelegramLongPollingBot{
        public static void main(String[] args) {
	ApiContextInitializer.init(); // Инициализируем апи
	TelegramBotsApi botapi = new TelegramBotsApi();
	try {
		botapi.registerBot(new Bot());
	} catch (TelegramApiException e) {
		e.printStackTrace();
	}
	}
	@Override
	public String getBotUsername() {
		return "USER";
                //возвращаем юзера
	}

	@Override
	public void onUpdateReceived(Update e) {
		// Тут будет то, что выполняется при получении сообщения
	}

	@Override
	public String getBotToken() {
		return "YOUR_BOT_TOKEN";
                //Токен бота
	}

}
Получить токен и username можно вбив в поиск @BotFather и написать ему /newbot
3.Как же нам добавить в него что-нибудь?
В телеграме нет «приветствующего сообщения», но когда мы нажимаем кнопку «Start» чтобы начать общение с ботом, то автоматом прописывается команда «/start», поэтому для начала добавим именно её. В telegramapi нету метода отправить сообщение по типу send(строка), но мы его создадим, после всех войдов пишем:
	@SuppressWarnings("deprecation") // Означает то, что в новых версиях метод уберут или заменят
	private void sendMsg(Message msg, String text) {
		SendMessage s = new SendMessage();
		s.setChatId(msg.getChatId()); // Боту может писать не один человек, и поэтому чтобы отправить сообщение, грубо говоря нужно узнать куда его отправлять
		s.setText(text);
		try { //Чтобы не крашнулась программа при вылете Exception
			sendMessage(s);
		} catch (TelegramApiException e){
			e.printStackTrace();
		}
	}
А в UpdateReceived дописываем это:
		Message msg = e.getMessage(); // Это нам понадобится
		String txt = msg.getText();
		if (txt.equals("/start")) {
			sendMsg(msg, "Hello, world! This is simple bot!");
		}
4.Ура, всё получилось, как запустить?
Можно в Runnable JAR File так как у нас есть метод main, но лучше запускать прямо из IDE:

Когда мы запустили бота, зарегистрировали и получили токен у BotFather, то мы можем написать ему /start и увидеть что всё работает. Но бот будет работать только когда он запущен.(Много ему не нужно, за 50-100 рублей/месяц на хостинге можно держать). Также с помощью Telegram API можно отправлять картинки, создавать inline-ботов с кнопками и многое другое, но о этом уже в продолжении…
Спасибо всем за просмотр!
Автор: весёлый усач
Источник