Contents | Previous (1.1 Python) | Next (1.3 Numbers)
1.2 A First Program
This section discusses the creation of your first program, running the
interpreter, and some basic debugging.
Running Python
Python programs always run inside an interpreter.
The interpreter is a «console-based» application that normally runs
from a command shell.
python3
Python 3.6.1 (v3.6.1:69c0db5050, Mar 21 2017, 01:21:04)
[GCC 4.2.1 (Apple Inc. build 5666) (dot 3)] on darwin
Type "help", "copyright", "credits" or "license" for more information.
>>>
Expert programmers usually have no problem using the interpreter in
this way, but it’s not so user-friendly for beginners. You may be using
an environment that provides a different interface to Python. That’s fine,
but learning how to run Python terminal is still a useful skill to know.
Interactive Mode
When you start Python, you get an interactive mode where you can experiment.
If you start typing statements, they will run immediately. There is no
edit/compile/run/debug cycle.
>>> print('hello world')
hello world
>>> 37*42
1554
>>> for i in range(5):
...     print(i)
...
0
1
2
3
4
>>>
This so-called read-eval-print-loop (or REPL) is very useful for debugging and exploration.
STOP: If you can’t figure out how to interact with Python, stop what you’re doing
and figure out how to do it. If you’re using an IDE, it might be hidden behind a
menu option or other window. Many parts of this course assume that you can
interact with the interpreter.
Let’s take a closer look at the elements of the REPL:
>>>is the interpreter prompt for starting a new statement....is the interpreter prompt for continuing a statement. Enter a blank line to finish typing and run what you’ve entered.
The ... prompt may or may not be shown depending on your environment. For this course,
it is shown as blanks to make it easier to cut/paste code samples.
The underscore _ holds the last result.
>>> 37 * 42
1554
>>> _ * 2
3108
>>> _ + 50
3158
>>>
This is only true in the interactive mode. You never use _ in a program.
Creating programs
Programs are put in .py files.
# hello.py
print('hello world')
You can create these files with your favorite text editor.
Running Programs
To execute a program, run it in the terminal with the python command.
For example, in command-line Unix:
bash % python hello.py
hello world
bash %
Or from the Windows shell:
C:SomeFolder>hello.py
hello world

C:SomeFolder>c:python36python hello.py
hello world
Note: On Windows, you may need to specify a full path to the Python interpreter such as c:python36python.
However, if Python is installed in its usual way, you might be able to just type the name of the program
such as hello.py.
A Sample Program
Let’s solve the following problem:
One morning, you go out and place a dollar bill on the sidewalk by the Sears tower in Chicago.
Each day thereafter, you go out double the number of bills.
How long does it take for the stack of bills to exceed the height of the tower?
Here’s a solution:
# sears.py
bill_thickness = 0.11 * 0.001 # Meters (0.11 mm)
sears_height = 442 # Height (meters)
num_bills = 1
day = 1

while num_bills * bill_thickness < sears_height:
    print(day, num_bills, num_bills * bill_thickness)
    day = day + 1
    num_bills = num_bills * 2

print('Number of days', day)
print('Number of bills', num_bills)
print('Final height', num_bills * bill_thickness)
When you run it, you get the following output:
bash % python3 sears.py
1 1 0.00011
2 2 0.00022
3 4 0.00044
4 8 0.00088
5 16 0.00176
6 32 0.00352
...
21 1048576 115.34336
22 2097152 230.68672
Number of days 23
Number of bills 4194304
Final height 461.37344
Using this program as a guide, you can learn a number of important core concepts about Python.
Statements
A python program is a sequence of statements:
a = 3 + 4
b = a * 2
print(b)
Each statement is terminated by a newline. Statements are executed one after the other until control reaches the end of the file.
Comments
Comments are text that will not be executed.
a = 3 + 4
# This is a comment
b = a * 2
print(b)
Comments are denoted by # and extend to the end of the line.
Variables
A variable is a name for a value. You can use letters (lower and
upper-case) from a to z. As well as the character underscore _.
Numbers can also be part of the name of a variable, except as the
first character.
height = 442 # valid
_height = 442 # valid
height2 = 442 # valid
2height = 442 # invalid
Types
Variables do not need to be declared with the type of the value. The type
is associated with the value on the right hand side, not name of the variable.
height = 442           # An integer
height = 442.0         # Floating point
height = 'Really tall' # A string
Python is dynamically typed. The perceived «type» of a variable might change
as a program executes depending on the current value assigned to it.
Case Sensitivity
Python is case sensitive. Upper and lower-case letters are considered different letters.
These are all different variables:
name = 'Jake'
Name = 'Elwood'
NAME = 'Guido'
Language statements are always lower-case.
while x < 0:   # OK
WHILE x < 0:   # ERROR
Looping
The while statement executes a loop.
while num_bills * bill_thickness < sears_height:
    print(day, num_bills, num_bills * bill_thickness)
    day = day + 1
    num_bills = num_bills * 2

print('Number of days', day)
The statements indented below the while will execute as long as the expression after the while is true.
Indentation
Indentation is used to denote groups of statements that go together.
Consider the previous example:
while num_bills * bill_thickness < sears_height:
    print(day, num_bills, num_bills * bill_thickness)
    day = day + 1
    num_bills = num_bills * 2

print('Number of days', day)
Indentation groups the following statements together as the operations that repeat:
    print(day, num_bills, num_bills * bill_thickness)
    day = day + 1
    num_bills = num_bills * 2
Because the print() statement at the end is not indented, it
does not belong to the loop. The empty line is just for
readability. It does not affect the execution.
Indentation best practices
- Use spaces instead of tabs.
- Use 4 spaces per level.
- Use a Python-aware editor.
Python’s only requirement is that indentation within the same block
be consistent. For example, this is an error:
while num_bills * bill_thickness < sears_height:
    print(day, num_bills, num_bills * bill_thickness)
        day = day + 1 # ERROR
    num_bills = num_bills * 2
Conditionals
The if statement is used to execute a conditional:
if a > b:
    print('Computer says no')
else:
    print('Computer says yes')
You can check for multiple conditions by adding extra checks using elif.
if a > b:
    print('Computer says no')
elif a == b:
    print('Computer says yes')
else:
    print('Computer says maybe')
Printing
The print function produces a single line of text with the values passed.
print('Hello world!') # Prints the text 'Hello world!'
You can use variables. The text printed will be the value of the variable, not the name.
x = 100
print(x) # Prints the text '100'
If you pass more than one value to print they are separated by spaces.
name = 'Jake'
print('My name is', name) # Print the text 'My name is Jake'
print() always puts a newline at the end.
print('Hello')
print('My name is', 'Jake')
This prints:
The extra newline can be suppressed:
print('Hello', end=' ')
print('My name is', 'Jake')
This code will now print:
User input
To read a line of typed user input, use the input() function:
name = input('Enter your name:')
print('Your name is', name)
input prints a prompt to the user and returns their response.
This is useful for small programs, learning exercises or simple debugging.
It is not widely used for real programs.
pass statement
Sometimes you need to specify an empty code block. The keyword pass is used for it.
if a > b:
    pass
else:
    print('Computer says false')
This is also called a «no-op» statement. It does nothing. It serves as a placeholder for statements, possibly to be added later.
Exercises
This is the first set of exercises where you need to create Python
files and run them. From this point forward, it is assumed that you
are editing files in the practical-python/Work/ directory. To help
you locate the proper place, a number of empty starter files have
been created with the appropriate filenames. Look for the file
Work/bounce.py that’s used in the first exercise.
Exercise 1.5: The Bouncing Ball
A rubber ball is dropped from a height of 100 meters and each time it
hits the ground, it bounces back up to 3/5 the height it fell. Write
a program bounce.py that prints a table showing the height of the
first 10 bounces.
Your program should make a table that looks something like this:
1 60.0
2 36.0
3 21.599999999999998
4 12.959999999999999
5 7.775999999999999
6 4.6655999999999995
7 2.7993599999999996
8 1.6796159999999998
9 1.0077695999999998
10 0.6046617599999998
Note: You can clean up the output a bit if you use the round() function. Try using it to round the output to 4 digits.
1 60.0
2 36.0
3 21.6
4 12.96
5 7.776
6 4.6656
7 2.7994
8 1.6796
9 1.0078
10 0.6047
Exercise 1.6: Debugging
The following code fragment contains code from the Sears tower problem. It also has a bug in it.
# sears.py

bill_thickness = 0.11 * 0.001    # Meters (0.11 mm)
sears_height   = 442             # Height (meters)
num_bills      = 1
day            = 1

while num_bills * bill_thickness < sears_height:
    print(day, num_bills, num_bills * bill_thickness)
    day = days + 1
    num_bills = num_bills * 2

print('Number of days', day)
print('Number of bills', num_bills)
print('Final height', num_bills * bill_thickness)
Copy and paste the code that appears above in a new program called sears.py.
When you run the code you will get an error message that causes the
program to crash like this:
Traceback (most recent call last):
  File "sears.py", line 10, in <module>
    day = days + 1
NameError: name 'days' is not defined
Reading error messages is an important part of Python code. If your program
crashes, the very last line of the traceback message is the actual reason why the
the program crashed. Above that, you should see a fragment of source code and then
an identifying filename and line number.
- Which line is the error?
- What is the error?
- Fix the error
- Run the program successfully
Contents | Previous (1.1 Python) | Next (1.3 Numbers)
В настоящее время используются только версия Python 3. Разработка и поддержка Python 2 прекращены, так что мы работаем с третей версией во всех статьях.
В какой-то момент ваших приключений в программировании вы, в конце концов, столкнетесь с Python 2. Не беспокойтесь. Есть несколько важных отличий, о которых вы можете почитать здесь.
Если вы используете Apple или Linux, у вас уже установлен Python 2.7 и 3.6+ (в зависимости от версии OS). Некоторые версии Windows идут в комплекте с Python, но вам также потребуется установить Python 3.
Он очень прост в установке на Linux. В терминале запустите:
$ sudo apt-get install python3 idle3Это установит Python и IDLE для написания кода.
Для Windows и Apple я предлагаю вам обратиться к официальной документации, где вы найдете подробные инструкции: https://www.python.org/download
Запуск IDLE
IDLE означает «Интегрированная среда разработки». В вашей карьере программирования вы столкнетесь с многочисленными интегрированными средами разработки, хотя за пределами Python они называются IDE.
- Если у вас Windows, выберите IDLE из меню «Пуск».
- Для Mac OS, вы можете найти IDLE в приложениях > Python 3.
- Если у вас Linux, выберите IDLE из меню > Программирование > IDLE (используя Python 3.*).
Для Mac OS и Linux, в терминале, воспользуйтесь:
$ idle3Когда вы впервые запускаете IDLE, вы видите примерно следующее на экране:
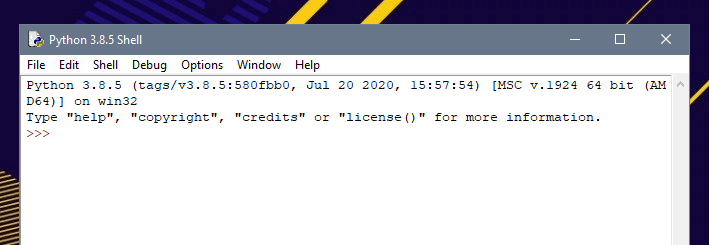
Это оболочка Python. А три стрелки называются шевронами.
>>>Они означают приглашение интерпретатора, в который вы вводите команды.
Как написать “Hello, World!”
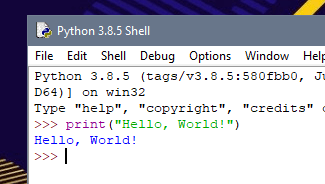
Классическая первая программа — "Hello, World!". Давайте придерживаться традиции. Введите следующую команду и нажмите Enter:
Это может показаться не очень сложным и удивительным. Заскриньте вывод, будет приятно возвращаться и вспоминать как это было. Затем присоединитесь к нам в следующих уроках с темой: Уроки Python для начинающих.
Обучение с трудоустройством
| Введение | |
| Hello World! — первый скрипт на Python | |
| Как запускать скрипты | |
| Отступы (indentation) | |
| Арифметика | |
| if __name__ == ‘__main__’ | |
| !#: Shebang | |
| Scopes: области видимости | |
| Полезные ссылки | |
| Похожие статьи |
Введение
Python, произностися как Пайтон, в русском языке распространено название Питон
— высокоуровневый язык программирования общего назначения, ориентированный на
повышение производительности разработчика и читаемости кода.
Синтаксис ядра Python минималистичен. В то же время стандартная библиотека
включает большой объём полезных функций.
Python поддерживает структурное, объектно-ориентированное, функциональное,
императивное и аспектно-ориентированное программирование.
Основные архитектурные черты — динамическая типизация, автоматическое управление
памятью, полная интроспекция, механизм обработки исключений, поддержка многопоточных
вычислений, высокоуровневые структуры данных.
Поддерживается разбиение программ на модули, которые, в свою очередь, могут объединяться в пакеты.
Эталонной реализацией Python является интерпретатор CPython, поддерживающий
большинство активно используемых платформ.
Он распространяется под свободной лицензией Python Software Foundation License,
позволяющей использовать его без ограничений в любых приложениях, включая проприетарные.
Есть реализация интерпретатора для JVM с возможностью компиляции, CLR, LLVM,
другие независимые реализации. Проект PyPy использует JIT-компиляцию, которая
значительно увеличивает скорость выполнения Python-программ.
Python — активно развивающийся язык программирования, новые версии с
добавлением/изменением языковых свойств выходят примерно раз в два
с половиной года.
Язык не подвергался официальной стандартизации, роль
стандарта де-факто выполняет CPython, разрабатываемый под контролем автора языка.
В настоящий момент (апрель 2021)
Python занимает третье место в рейтинге TIOBE с показателем 11,03%.
Аналитики отмечают, что это самый высокий балл Python за все время его присутствия в
рейтинге.
Посмотреть текущий рейтинг можно
здесь
Hello World!
Инструкция по запуску первой программы в Python
Убедитесь, что Python установлен и команда
python -V
Показывает версию Python, например
Python 3.9.1
Если вы работаете в
Linux,
UNIX
или
Bash в Windows
перейдите в свою домашнюю директорию
В Linux
cd ~
В Windows
cd /mnt/c/Users/username
Создайте директорию python
mkdir python
Перейдите в неё, создайте файл hello_world.py
и откройте его любым тестовым редактором
cd python
touch hello_world.py
vi hello_world.py
Вставьте туда следующий код
print("Hello World!")
Выполните
python hello_world.py
В терминале должно появиться сообщение
Hello World!
Больше деталей о запуске скриптов вы можете найти в следующем параграфе —
«Запуск Python скрипта»
и затем в
if __name__ == «__main__»:
Запуск скрипта
Чтобы запустить .py скрипт введите
python имя_файла.py
Результат такого запуска зависит от того, что указано после
if __name__ == «__main__»:
если это условие вообще есть
print(«Hello!»)
python sample.py
Hello!
Теперь то же самое но в функции
def say_hello():
print(«Hello!»)
python sample.py
Ничего не произошло потому что функцию никто не вызвал
Можно добавить вызов функции следующим образом
def say_hello():
print(«Hello!»)
say_hello()
python sample.py
Hello!
В этом случае функция будет вызываться всегда — как при запуске скрипта из терминала так и при импорте в другой модуль
настроить это поведение можно с помощью переменной __name__ а точнее — с помощью условия
if __name__ == «__main__»:
Отступы (indentation)
Python не является языком поддерживающим свободный формат. Блоки кода не
разделяются с помощью { }
Вместо этого блоки разделяются отступами по так называемому правилу оффсайда (Off-side rule)
Демонстрация
Рассмотрим файл for_loop.py
for i in range(1,4):print(i)
python for_loop.py
1
2
3
Всё работает прекрасно. Обратите внимание, что выведены были только i от 1 до 3. 4 python не вывел.
Если написать код не в одну строку, а следующим образом
for i in range(1,4):
print(i)
то работать код не будет. Получится ошибка
File «/home/andrei/python/for_loop.py», line 2
print(i)
^
IndentationError: expected an indented block
Поэтому нужно поставить перед print пробел
for i in range(1,3):
print(i)
python for_loop.py
1
2
3
Вместо одного пробела можно поставить табуляцию, но лучше поставить два или четыре пробела подряд.
PEP8
— документ, в котором собраны рекомендации по написанию Python кода говорит:
Use 4 spaces per indentation level
САМОЕ ВАЖНОЕ: Нельзя смешивать в одном файле отступы в виде табуляций и в виде
пробелов. Выберите один стиль и придерживайтесь его.
Про то как правильно переносить слишком длинные строки можете прочитать
здесь
Арифметика
/ — деление. Результат — число с плавающей точкой
>>> 5 / 2
2.5
// — целочисленное деление. Результат — округлённое до целого числа частное.
>>> 5 // 2
2
% — остаток от деления. Результат — остаток от //
>>> 5 % 2
1
Печать спецсимволов HTML
for i in range(100001,125000):
print "<tr><td>&#",i,";</td><td>&#",i,";</td></tr>"
Ссылки
Psyco
Shedskin
PyPy
Cython
Jython
IronPython
IDLE
Синтаксис
Set в фигурных скобках. Элемент добавляется с помощью .add()
if __name__ == ‘__main__’
Чтобы разобраться в смысле этой строки создадим два файла.
first_module.py
и
second_module.py
В первом напишем
print(f"Имя первого модуля: {__name__}")
# Если не любите f-string напишите:
print("Имя первого модуля: {}".format(__name__))
Запустим его
python3 first_module.py
Имя первого модуля: __main__
Во втором запишем
import first_module
Запустим его
python3 second_module.py
Имя первого модуля: __first_module__
Вывод: когда модуль запущен непосредственно, его __name__ это __main__
Когда модуль импортирован в другой модуль, его __name__ это __название_py_файла__
Теперь когда все ясно, можно добавить в наш код условие if __name__ == «__main__»
def say_hello():
print(«Hello!»)
def display_name():
print(f«Имя первого модуля: {__name__}»)
if __name__ == «__main__»:
say_hello()
Hello!
Или
def say_hello():
print(«Hello!»)
def display_name():
print(f«Имя первого модуля: {__name__}»)
if __name__ == «__main__»:
display_name()
Имя первого модуля: __main__
Суть в том, что теперь мы определяем что будет выполняться при вызове этого скрипта а что нет.
Пакеты Python в Linux
Узнать сколько всего python3 пакетов в репозитории
Ubuntu
apt-cache search python3 | wc -l
3472
Изучить их названия можно с помощью less
apt-cache search python3 | less
alembic — lightweight database migration tool for SQLAlchemy
brltty — Access software for a blind person using a braille display
debian-goodies — Small toolbox-style utilities for Debian systems
devscripts — scripts to make the life of a Debian Package maintainer easier
libcrack2-dev — pro-active password checker library — development files
…
Проверить, существует ли файл
hosts
#!/usr/bin/python3
import os.path
if os.path.exists("/etc/hosts"):
print("hosts file exists")
else:
print("no hosts file")
или
#!/usr/bin/python3
try:
f = open('/etc/hosts')
print("hosts file exists")
except FileNotFoundError:
print("no hosts file")
python3 check_hosts.py
hosts file exists
Shebang
Указывает на нужный интерпретатор. Примеры:
#!/usr/bin/env python
#!/home/andrei/.pyenv/shims/python
После написаний шебанга нужно сделать скрипт выполняемым файлом
chmod + x имя_скрипта.py
И теперь его можно запускать прямо из терминала
./имя_скрипта.py
Или
.имя_скрипта.py
Scopes
Local — внутри функции
Enclosing — внутри фукнции, которая вызвала функцию
Global — во всем модуле
Built-in — встроено в Python
LEGB
Ссылки на Local уничтожаются после выполнения функции
Рассмотрим функцию fetch_words()
из статьи про
docstring
url, story, story_words, line, line_words, word — это локальные переменные
def fetch_words(url):
«»»Fetch a list of words from a URL.
Args:
url: The URL of a UTF-8 text document.
Returns:
A list of strings containing the words from
the document
«»»
# PEP 257
# story = urlopen(«http://sixty-north.com/c/t.txt»)
story = urlopen(url)
story_words = []
for line in story:
line_words = line.decode(«utf8»).split()
for word in line_words:
story_words.append(word)
story.close()
return story_words
def print_items(story_words):
«»»Print items one per line.
Args:
An iterable series of printable items.
«»»
for word in story_words:
print(word)
def main(url):
words = fetch_words(url)
print_items(words)
if __name__ == «__main__»:
main(sys.argv[1])
Разберем поведение глобальных переменных
count = 0
def show_count():
print(count)
def set_count(c):
count = c
show_count() # 0
set_count(5)
show_count() # 0
0
0
Изменить поведение функции можно с помощью global
count = 0
def show_count():
print(count)
def set_count(c):
global count
count = c
show_count() # 0
set_count(5) # Now affects global variable
show_count() # 5
0
5
Полезные ссылки
| Основы Python | |
| Python | |
| Установка Python | |
| ООП в Python | |
| Функции | |
| docstring | |
| #!: Shebang | |
| Объекты | |
| Сложности при работе с Python |
Первые шаги
Давайте посмотрим, как создать традиционную программу «Hello World» на Python.
Это научит вас писать, сохранять и выполнять программы на Python.
Существует два способа запуска программ на Python: использование интерактивного
приглашения интерпретатора и использование файла с текстом программы. Сейчас мы
увидим, как пользоваться обоими методами.
Использование командной строки интерпретатора
Откройте окно терминала (как было описано в главе
Установка) и запустите интерпретатор Python, введя
команду python3 и нажав Enter.
Пользователи Windows могут запустить интерпретатор в командной строке, если
установили переменную PATH надлежащим образом. Чтобы открыть командную
строку в Windows, зайдите в меню «Пуск» и нажмите «Выполнить…». В появившемся
диалоговом окне введите «cmd» и нажмите Enter; теперь у вас будет всё
необходимое для начала работы с python в командной строке DOS.
Если вы используете IDLE, нажмите «Пуск» —> «Программы» —> «Python 3.0» —>
«IDLE (Python GUI)».
Как только вы запустили python3, вы должны увидеть >>> в начале строки,
где вы можете что-то набирать. Это и называется командной строкой
интерпретатора Python.
Теперь введите print('Hello World') и нажмите клавишу Enter.
В результате должны появиться слова «Hello World».
Вот пример того, что вы можете увидеть на экране, если будете использовать
компьютер с Mac OS X. Информация о версии Python может отличаться в зависимости
от компьютера, но часть, начинающаяся с приглашения (т. е. от >>> и далее)
должна быть одинаковой на всех операционных системах.
$ python3
Python 3.3.0 (default, Oct 22 2012, 12:20:36)
[GCC 4.2.1 Compatible Apple Clang 4.0 ((tags/Apple/clang-421.0.60))] on darwin
Type "help", "copyright", "credits" or "license" for more information.
>>> print('hello world')
hello world
>>>
Обратите внимание, что Python выдаёт результат работы строки немедленно! Вы
только что ввели одиночный «оператор» Python. print используется для
того, чтобы (что неудивительно1) напечатать любое переданное в него
значение. В данном случае мы передали в него текст «Hello World», который и был
напечатан на экране.
Как выйти из командной строки интерпретатора
Если вы используете IDLE или оболочку GNU/Linux или BSD, вы можете выйти из
командной строки интерпретатора нажатием Ctrl-D или введя команду
exit() (примечание: не забудьте написать скобки, «()»), а затем
нажав клавишу Enter. Если вы используете командную строку Windows,
нажмите Ctrl-Z, а затем нажмите клавишу Enter.
Выбор редактора
Поскольку мы не можем набирать программу в командной строке интерпретатора
каждый раз, когда нам нужно что-то запустить, нам понадобится сохранять
программы в файлах, чтобы потом иметь возможность запускать их сколько угодно
раз.
Прежде чем приступить к написанию программ на Python в файлах, нам нужен
редактор для работы с файлами программ. Выбор редактора крайне важен.
Подходить к выбору редактора следует так же, как и к выбору личного
автомобиля. Хороший редактор поможет вам легко писать программы на Python,
делая ваше путешествие более комфортным, а также позволяя быстрее и безопаснее
достичь вашей цели.
Одно из самых основных требований — это подсветка синтаксиса, когда
разные элементы программы на Python раскрашены так, чтобы вы могли легко
видеть вашу программу и ход её выполнения.
Если вы не знаете, с чего начать, я бы порекомендовал воспользоваться программой
Komodo Edit, которая
доступна для Windows, Mac OS X и GNU/Linux.
Если вы пользуетесь Windows, Не используйте Блокнот — это плохой выбор,
поскольку он не обладает функцией подсветки синтаксиса, а также не позволяет
автоматически вставлять отступы, что очень важно в нашем случае, как мы увидим
позже. Хорошие редакторы, как Komodo Edit, позволяют делать это автоматически.
Опытные программисты, должно быть, уже используют Vim
или Emacs. Не стоит даже и говорить,
что это два наиболее мощных редактора, и вы только выиграете от их
использования для написания программ на Python. Лично я пользуюсь ими обоими
для большинства своих программ, и даже написал книгу о Vim.
Я настоятельно рекомендую вам решиться и потратить время на изучение Vim или
Emacs, поскольку это будет приносить вам пользу долгие годы. Однако, как я уже
писал выше, новички могут пока просто остановиться на Komodo Edit и
сосредоточиться на изучении Python, а не текстового редактора.
Я повторюсь ещё раз: обязательно выберите подходящий редактор — это сделает
написание программ на Python более простым и занимательным.
Для пользователей Vim
Существует хорошее введение в использование Vim как мощного IDE для Python,
автор — John M Anderson.
Также я рекомендую плагин jedi-vim
и мой собственный конфигурационный файл.
Для пользователей Emacs
Существует хорошее введение в использование Emacs как мощного IDE для Python, автор — Ryan McGuire.
Также я рекомендую Конфигурацию dotemacs от BG.
Использование программных файлов
А теперь давайте вернёмся к программированию. Существует такая традиция, что
какой бы язык программирования вы ни начинали учить, первой вашей программой
должна быть программа «Привет, Мир!». Это программа, которая просто выводит
надпись «Привет, Мир!». Как сказал Simon Cozens2, это «традиционное
заклинание богов программирования, которое поможет вам лучше изучить язык».
Запустите выбранный вами редактор, введите следующую программу и сохраните её
под именем helloworld.py .
Если вы пользуетесь Komodo Edit, нажмите «Файл» —> «Новый» —> «Новый файл»,
введите строку:
В Komodo Edit нажмите «Файл» —> «Сохранить» для сохранения файла.
Куда сохранить файл? В любую папку, расположение которой вы знаете. Если вы
не понимаете, что это значит, то создайте новую папку и используйте её для
всех ваших программ на Python:
C:pyв Windows/tmp/pyв GNU/Linux/tmp/pyв Mac OS X
Чтобы создать папку, воспользуйтесь командой mkdir в терминале. Например,
mkdir /tmp/py.
Не забывайте указывать расширение файла .py. Например, «file.py«.
В Komodo Edit нажмите «Инструменты» —> «Запуск команды», наберите
python3 helloworld.py и нажмите «Выполнить». Вы должны увидеть вывод,
показанный на скриншоте ниже.
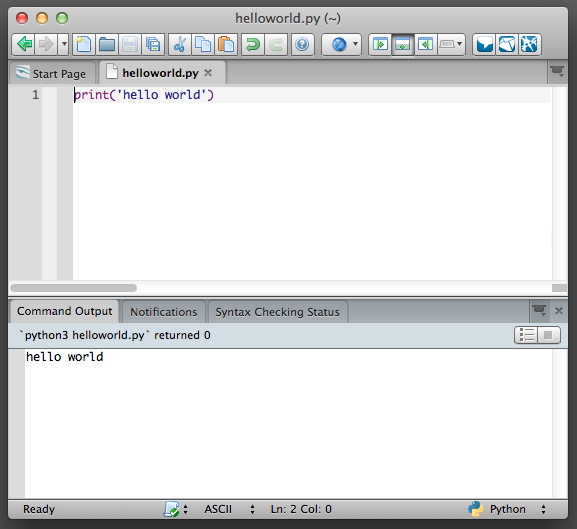
Но всё-таки лучше редактировать программу в Komodo Edit, а запускать в
терминале:
- Откройте терминал, как описано в главе Установка.
- Перейдите в каталог, в котором вы сохранили файл. Например,
cd /tmp/py. - Запустите программу, введя команду
python3 helloworld.py.
Вывод программы показан ниже.
$ python3 helloworld.py
Привет, Мир!
Если у вас получился такой же вывод, поздравляю! — вы успешно выполнили вашу
первую программу на Python. Вы только что совершили самый сложный шаг в
обучении программированию, заключающийся в написании своей первой программы!
Если вы получите сообщение об ошибке, введите вышеуказанную программу в
точности так, как показано здесь, и запустите снова. Обратите внимание, что
Python различает регистр букв, то есть print — это не то же самое, что
Print (обратите внимание на букву p в нижнем регистре в первом случае и
на букву P в верхнем регистре во втором). Также убедитесь, что перед первым
символом в строке нет пробелов или символов табуляции — позже мы увидим,
почему это важно.
Как это работает
Программа на Python состоит из выражений. В нашей первой программе имеется
всего лишь одно выражение. В этом выражении мы вызываем функцию print,
которая просто выводит текст 'Привет, Мир!'. О функциях мы узнаем в
одной из последующих глав, а пока вам достаточно понять,
что всё, что вы укажете в скобках, будет выведено на экран. В данном примере
мы указали 'Привет, Мир!'.
Python никак не обрабатывает комментарии, кроме специального случая в первой
строке. Она называется »строка shebang»; когда первые два символа файла с
программой — #!, за которыми следует путь к некоторой программе, это
указывает вашей Unix-подобной системе, что вашу программу нужно запускать
именно в этом интерпретаторе, когда вы »исполняете» её. Это объясняется
подробно в следующем параграфе. Помните, что вы всегда можете запустить свою
программу на любой платформе, указав интерпретатор напрямую в командной
строке, как например, команда python helloworld.py .
Важно! Вставляйте разумные комментарии в ваши программы, чтобы объяснить некоторые
важные детали вашей программы — это будет полезно для тех, кто будет читать
вашу программу, так как им легче будет понять, что программа делает.
Помните, что таким человеком можете оказаться вы сами через полгода!
Исполнимые программы на Python
Это касается только пользователей GNU/Linux и Unix, но пользователям Windows
тоже будет полезно об этом знать.
Каждый раз, когда нам нужно запустить программу на Python, нам приходится в
явном виде запускать python3 foo.py. Но почему бы нам не запускать её точно
так же, как и все другие программы? Этого можно достичь при помощи так
называемого hashbang.
Добавьте строку, указанную ниже, в самое начало вашей программы:
Теперь ваша программа должна выглядеть так:
#!/usr/bin/env python3
print('Привет, Мир!')
Теперь необходимо установить программе атрибут исполнимости, используя команду
chmod, а затем выполнить программу.
Команда chmod здесь используется для изменения режима файла3
добавлением атрибута исполнимости для всех пользователей в системе4.
$ chmod a+x helloworld.py
После этого мы можем запускать программу напрямую, потому что наша операционная
система запустит /usr/bin/env, который, в свою очередь, найдёт Python 3, а
значит, сможет запустить наш файл.
$ ./helloworld.py
Привет, Мир!
Здесь «./» обозначает, что программа находится в текущем каталоге.
Ради интереса можете даже переименовать файл в просто «helloworld» и
запустить его как ./helloworld, и это также сработает, поскольку система
знает, что запускать программу нужно интерпретатором, положение которого
указано в первой строке файла программы.
Но до сих пор мы могли выполнять свою программу только если знали полный путь
к ней. А что, если нам нужно запускать эту программу из любого каталога? Это
можно организовать, расположив свою программу в одном из каталогов,
перечисленных в переменной окружения PATH.
При попытке запуска какой-либо программы система ищет её в каталогах,
перечисленных в переменной окружения PATH, и запускает. Таким образом, мы
можем сделать программу доступной из любого места, скопировав её в один из
каталогов, перечисленных в PATH.
$ echo $PATH
/usr/local/bin:/usr/bin:/bin:/usr/X11R6/bin:/home/swaroop/bin
$ cp helloworld.py /home/swaroop/bin/helloworld
$ helloworld
Привет, Мир!
Мы можем вывести на экран значение переменной PATH при помощи команды
echo, добавив перед именем переменной символ $, чтобы указать оболочке,
что мы хотим получить значение этой переменной. Мы видим, что
/home/swaroop/bin — один из каталогов в переменной PATH, где swaroop —
это имя пользователя, которое я использую в своей системе. В вашей системе,
скорее всего, будет аналогичный каталог для вашего пользователя.
Вы также можете добавить какой-либо каталог к переменной PATH — это можно
сделать, выполнив PATH=$PATH:/home/swaroop/mydir, где
'/home/swaroop/mydir' — это каталог, который я хочу добавить к переменной
PATH.
Этот метод полезен для написания сценариев, которые будут доступны для запуска
в любой момент из любого места. По сути, это равносильно созданию собственных
команд, как cd или любой другой, которые часто используются в терминале
GNU/Linux или приглашении DOS.
Когда речь идёт о Python, слова «программа» или «сценарий (скрипт)» обозначают одно и то же.
Получение помощи
Для быстрого получения информации о любой функции или операторе Python служит
встроенная функция help. Это особенно удобно при использовании командной
строки интерпретатора. К примеру, выполните help(print) — это покажет
справку по функции print, которая используется для вывода на экран.
Для выхода из справки нажмите q.
Аналогичным образом можно получить информацию почти о чём угодно в Python.
При помощи функции help() можно даже получить описание самой функции
help!
Если вас интересует информация об операторах, как например, return, их
необходимо указывать в кавычках (например, help('return')), чтобы
Python понял, чего мы хотим.
Резюме
Теперь вы умеете с лёгкостью писать, сохранять и запускать программы на Python.
И поскольку сейчас вы уже используете Python, давайте узнаем больше о его
основных принципах.
Summary: in this tutorial, you’ll learn how to develop the first program in Python called “Hello, World!”.
If you can write “hello world” you can change the world.
Raghu Venkatesh
Creating a new Python project
First, create a new folder called helloworld.
Second, launch the VS code and open the helloworld folder.
Third, create a new app.py file and enter the following code and save the file:
Code language: Python (python)
print('Hello, World!')
The print() is a built-in function that displays a message on the screen. In this example, it’ll show the message 'Hello, Word!'.
What is a function
When you sum two numbers, that’s a function. And when you multiply two numbers, that’s also a function.
Each function takes your inputs, applies some rules, and returns a result.
In the above example, the print() is a function. It accepts a string and shows it on the screen.
Python has many built-in functions like the print() function to use them out of the box in your program.
In addition, Python allows you to define your functions, which you’ll learn how to do it later.
Executing the Python Hello World program
To execute the app.py file, you first launch the Command Prompt on Windows or Terminal on macOS or Linux.
Then, navigate to the helloworld folder.
After that, type the following command to execute the app.py file:
Code language: Python (python)
python app.py
If you use macOS or Linux, you use python3 command instead:
Code language: CSS (css)
python3 app.py
If everything is fine, you’ll see the following message on the screen:
Code language: Python (python)
Hello, World!
If you use VS Code, you can also launch the Terminal within the VS code by:
- Accessing the menu Terminal > New Terminal
- Or using the keyboard shortcut
Ctrl+Shift+`.
Typically, the backtick key (`) locates under the Esc key on the keyboard.
Python IDLE
Python IDLE is the Python Integration Development Environment (IDE) that comes with the Python distribution by default.
The Python IDLE is also known as an interactive interpreter. It has many features such as:
- Code editing with syntax highlighting
- Smart indenting
- And auto-completion
In short, the Python IDLE helps you experiment with Python quickly in a trial-and-error manner.
The following shows you step by step how to launch the Python IDLE and use it to execute the Python code:
First, launch the Python IDLE program:
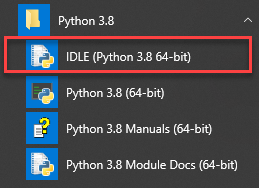
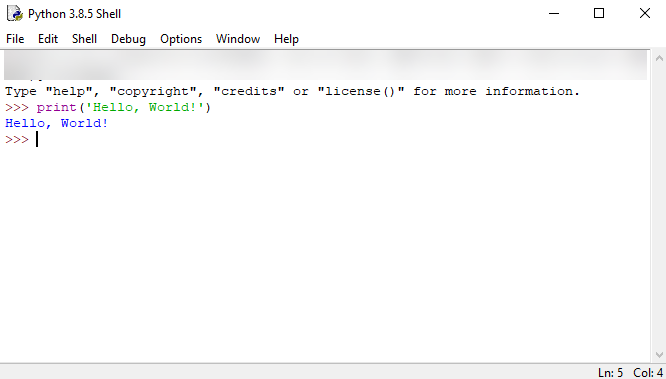
A new Python Shell window will display as follows:

Now, you can enter the Python code after the cursor >>> and press Enter to execute it.
For example, you can type the code print('Hello, World!') and press Enter, you’ll see the message Hello, World! immediately on the screen:
Summary
- Use the
python app.pycommand from the Command Prompt on Windows or Terminal on macOS or Linux to execute theapp.pyfile. - Use the
print()function to show a message on the screen. - Use the Python IDLE to type Python code and execute it immediately.
Did you find this tutorial helpful ?
«Hello World» на языке Python.
«Hello World» на языке программирования Python выглядит следующим образом:
print ('Привет, Python!')
Вы можете попробовать запустить ее, набрав текст в интерпретаторе Python3.
Более сложная программа «Hello World», с интерактивным вводом выглядит так:
name = input("Как тебя зовут? ")
print('Привет,' ,name)
Во время исполнения программы появляется сообщение:
> Как тебя зовут?
пишем имя, например Тёма и жмем клавишу Enter
После этого получаем вывод:
> Привет, Тёма
Printing “Hello World” is usually the first thing a developer does when starting with a new programming language.
In this article, we will see how to print “Hello World” in Python.
The simplest way to print Hello World in Python is to pass a string to the print() function. The next step is to assign the string “Hello World” to a variable and then pass the variable to the print() function. This message can also be printed by using the + operator to concatenate two variables where the value of the first variable is “Hello” and the value of the second variable is “World”.
And these are just some ways to do that…
Let’s get creative and explore other possible ways!
1. How Do You Print Hello World in Python?
To print a message in Python you use the print() function. This is a function that receives a string as input and prints its value on the screen.
Let me explain…
Create a file called hello_world.py and add the following line of code to the file:
print("Hello World")Note: you can create this file in a text editor or even better in an IDE like Visual Studio Code.
To run your program you can use the following command:
python hello_world.py

[output]
Hello World
We have specified the python command followed by the name of our Python program.
The extension .py identifies a file that contains Python code.
Important: in this tutorial, we are using Python 3.8. Also, in the following examples, we will always update the file hello_world.py with new code and we will execute our program using the Python command above.
2. Printing Hello World Using a Variable
In the previous section, we printed “Hello World” directly using the print() function.
This time I want to show you that it’s possible to assign the string “Hello World” to a variable first. Then after doing that you can print the value of the variable using the print() function.
Note: a variable allows storing data to be used in your program (in this case the string “Hello World”).
message = "Hello World using a variable"
print(message)

[output]
Hello World using a variable
Using the assignment operator ( = ) we have assigned the value on the right side of the operator to the variable message on its left side.
3. Concatenate two Python Strings to Print Hello World
We can also print our message by doing the following:
- Store the word “Hello” in a variable called word1
- Store the word “World” in a variable called word2
- Concatenate the two variables using the + operator
word1 = "Hello"
word2 = "World"
print(word1 + " " + word2)
Confirm that the output is “Hello World”.
Notice that we have concatenated one space character ” ” after word1 and before word2 to have a space between the words “Hello” and “World”.
Let’s see what happens if we remove that space character:
print(word1 + word2)

[output]
HelloWorld
We have removed the space between the two words.
4. Use the String format() Method to Print Hello World
Using the + operator to concatenate strings can get confusing when you try to create very long strings that contain several variables.
A cleaner option is to use the string format() method.
word1 = "Hello"
word2 = "World"
print("{} {}".format(word1, word2))
The first and second sets of curly brackets {} are replaced respectively by the values of the variables word1 and word2.
Let’s confirm the output is correct:
Hello WorldIt is correct!
5. Using Python f-strings to Print Hello World
With Python 3.6 and later you can use an alternative approach to the string format() method: Python f-strings.
Here is how it works…
word1 = "Hello"
word2 = "World"
print(f"{word1} {word2} using f-strings")

[output]
Hello World using f-strings
Notice the f letter just before the double quote.
This format is easier to read compared to the previous one considering that the variables word1 and word2 are embedded directly in the string.
Remember f-strings as they will definitely be useful in other Python programs.
6. Using a List and the String join() Method
So far we have used only strings…
In this section, we will introduce another data type: the list.
A list is used to store multiple values in a single variable. Lists are delimited by square brackets.
Firstly let’s assign the strings “Hello” and “World” to two items in our list called words.
words = ["Hello", "World"]Then generate the message you want to print using the string join() method.
message = " ".join(words)The join() method concatenates elements in a list (in this case our two words) using as a separator the string the join() method is applied to (in this case a single space ” “).
The result is that the worlds “Hello” and “World” are concatenated and an empty character is added between them.
print(message)

[output]
Hello World
Makes sense?
7. Using a List of Characters and the String join() Method
Let’s use a similar approach to the one in the previous section with the only difference being that in our list we don’t have words.
In our Python list, we have the individual characters of the string “Hello World”.
This example shows you that a Python string is made of individual characters.
characters = ['H','e','l','l','o',' ','W','o','r','l','d']Notice that I have also included one space character between the characters of the two words.
Using the string join() method and the print() function we will print our message.
message = "".join(characters)
print(message)

[output]
Hello World
Nice!
8. Using Dictionary Values to Print Hello World in Python
But wait, there’s more!
In this section and in the next one we will use a different Python data type: the dictionary.
Every item in a dictionary has a key and a value associated with that key. A dictionary is delimited by curly brackets.
Let’s create a dictionary called words…
words = {1: "Hello", 2: "World"}Here is how you can read this dictionary:
- First item: key = 1 and value = “Hello”
- Second item: key = 2 and value = “World”
We can generate the string “Hello World” by passing the values of the dictionary to the string join() method.
To understand how this works let’s print first the value of words.values().
print(words.values())

[output]
dict_values(['Hello', 'World'])
The values of the dictionary are returned in a list that we can then pass to the string join() method.
message = " ".join(words.values())
print(message)

[output]
Hello World
Test it on your computer to make sure you understand this syntax.
9. Using Python Dictionary Keys to Print Hello World
Once again in this section, we will use a dictionary…
The difference compared to the previous example is that we will store the strings “Hello” and “World” in the keys of the dictionary instead of using the values.
Our dictionary becomes…
words = {"Hello": 1, "World": 2}Let’s go through this dictionary:
- First item: key = “Hello” and value = 1
- Second item: key = “World” and value = 2
This time let’s see what we get back when we print the keys of the dictionary using words.keys().
print(words.keys())

[output]
dict_keys(['Hello', 'World'])
Once again we get back a list.
At this point, we can concatenate the strings in the list of keys using the string join() method.
message = " ".join(words.keys())
print(message)
Verify that your Python program prints the correct message.
How Do You Print Hello World 10 Times in Python?
One last thing before completing this tutorial…
In your program, you might need to print a specific string multiple times.
Let’s see how we can do that with the message “Hello World”.
print("Hello World"*10)Very simple…
I have used the * operator followed by the number of repetitions next to the string I want to repeat.
And here is the output:
Hello WorldHello WorldHello WorldHello WorldHello WorldHello WorldHello WorldHello WorldHello WorldHello WorldConclusion
Well done for completing this tutorial!
And if this is one of your first Python tutorials congratulations!!
To recap, we have covered a few Python basics here:
- Variables
- Data types (strings, lists, and dictionaries)
- print() function
- + operator to concatenate strings
- string methods .format() and .join()
- f-strings
It can be quite a lot if you are just getting started with Python so you might have to go through this tutorial a few times to make all these concepts yours.
Bonus read: we have used lists a few times in this tutorial. Go through another tutorial that will show you how to work with Python lists.
Related posts:
![]()
I’m a Tech Lead, Software Engineer and Programming Coach. I want to help you in your journey to become a Super Developer!