Содержание:
-
1.
Герерация Helm чарта -
2.
Шаблоны (templates) -
3.
Значения (values) -
4.
Метаданные (metadata) -
5.
Деплой вашего Helm чарта -
6.
Изменение Helm чарта для деплоя произвольного сервиса -
7.
Упаковка чарта и подготовка к распространению -
8.
Репозитории -
9.
Зависимости
Итак, вы установили собственный Kubernetes кластер, а также установили Helm. Но как теперь запускать при помощи этой связки свои приложения?

Это руководство проведет вас через процесс создания вашего первого чарта, объяснит, что входит в архивы и инструменты, которые вы будете использовать для их разработки. В конце этого вы будете понимать преимущества использования Helm для доставки ваших собственных приложений в ваш кластер.
Для типичного облачного приложения с трехуровневой архитектурой приведенная ниже диаграмма иллюстрирует, как его можно описать в терминах объектов Kubernetes. В этом примере каждый уровень состоит из объекта развертывания (Deployment и (Service), а также может дополнительно определять объекты ConfigMap или Secret. Каждый из этих объектов обычно определяется в отдельном конфигурационном YAML файле, который передается для развертывания или обновления в Kubernetes при помощи kubectl.

Helm чарт содержит в себе каждое YAML определение каждого объекта вашего приложения, обеспечивает единый механизм конфигурации во время развертывания и позволяет вам определять метаданные иили документацию, которые могут быть полезны при совместной работе над архивами. Helm может быть полезен в различных сценариях:
- Поиск и использование популярного программного обеспечения, упакованного как Helm чарт
- Распространение своего приложения через репозиторий Helm
- Создание воспроизводимых сборок ваших приложений для Kubernetes
- Интеллектуальное управление объектами в Kubernetes
- Управление выпуском архивов Helm
Давайте рассмотрим второй и третий сценарии, создав небольшой Helm чарт.
Герерация Helm чарта
Лучший способ начать работу с новым чартом – это использовать команду helm create, чтобы получить пример-заглушку, на базе которого можно будет построить свое приложение. Используйте эту команду для создания нового чарта с именем my—awsome—chart в новой директории:
$ helm create my—awsome—chart
Helm создаст новую директорию с именем названием my—awsome—chart со структурой, показанной ниже. Давайте рассмотрим наш новый чарт, чтобы разобраться в том, как он работает.
$ tree my-awsome-chart
my-awsome-chart
├── charts
├── Chart.yaml
├── templates
│ ├── deployment.yaml
│ ├── _helpers.tpl
│ ├── ingress.yaml
│ ├── NOTES.txt
│ └── service.yaml
└── values.yaml
Шаблоны (templates)
Самой важной частью созданного чарта является директория templates. В ней Helm
ищет YAML описания для ваших сервисов (Services), развертываний (Deployment) и других объектов Kubernetes. Если у вас уже есть определения для ваших приложений, все, что вам нужно сделать, это заменить созданные файлы YAML на ваши собственные. В результате вы получите рабочий чарт, который может быть развернут с помощью команды helm install.
Стоит отметить, что Helm обрабатывает каждый файл в директории templates с помощью механизма рендеринга шаблонов Go. Helm
расширяет язык шаблонов, добавляя в него ряд полезных функций для написания чартов. Откройте файл service.yaml, чтобы посмотреть, как это выглядит.
$ cd my—awsome—chart/
$ cat templates/service.yaml
apiVersion: v1
kind: Service
metadata:
name: {{ template «fullname» . }}
labels:
app: {{ template «name» . }}
chart: {{ .Chart.Name }}-{{ .Chart.Version | replace «+» «_» }}
release: {{ .Release.Name }}
heritage: {{ .Release.Service }}
spec:
type: {{ .Values.service.type }}
ports:
— port: {{ .Values.service.externalPort }}
targetPort: {{ .Values.service.internalPort }}
protocol: TCP
name: {{ .Values.service.name }}
selector:
app: {{ template «name» . }}
release: {{ .Release.Name }}
Это базовое определение Сервиса (Service) при помощи шаблона. При деплое этого чарта Helm на основании этого файла сгенерирует описание сервиса, которое будет больше похоже на правильно определенный Сервис. Давайте выполним запуск команды helm install (ключ —dry—run) с включенным режимом отладки (ключ —debug):
$ helm install —dry-run —debug .
…
# Source: my-awsome-chart/templates/service.yaml
apiVersion: v1
kind: Service
metadata:
name: doltish-mink-my-awsome-chart
labels:
app: my-awsome-chart
chart: my-awsome-chart-0.1.0
release: doltish-mink
heritage: Tiller
spec:
type: ClusterIP
ports:
— port: 80
targetPort: 80
protocol: TCP
name: nginx
selector:
app: my-awsome-chart
release: doltish-mink
Значения (values)
Шаблон service.yaml использует специфичные для Helm объекты: .Chart и .Values. Первый предоставляет собой метаданные о чарте для ваших определений, т.к. имя или версия чарта. Последний объект .Values является ключевым элементом любого чарта Helm
и используется для отображения конфигурации, которая должна быть установлена в процессе развертывания чарта. Значения по умолчанию для этого объекта определены в файле values.yaml. Попробуйте изменить значение по умолчанию, например, для service.internalPort и выполните еще один запуск команды Helm с ключами —dry—run и —debug. Вы увидите, что targetPort в Сервисе и containerPort в информации о развертывании изменяется. Значение service.internalPort используется для обеспечения правильной работы объектов Serviceand Deployment. Использование шаблонов таким образом может значительно уменьшить ваши изначальные шаблоны и упростить определения ваших Kubernetes объектов.
Более того, если вы захотите изменить конфигурацию по умолчанию в процессе запуска без редактирования файла определений, вы можете переопределить эти переменные непосредственно в командной строке:
$ helm install —dry-run —debug . —set service.internalPort=8080
Метаданные (metadata)
Как уже упоминалось ранее, Helm чарт состоит из метаданных, которые используются для описания того, что из себя представляет ваше приложение, определения ограничений на минимальную требуемую версию Kubernetes иили версию Helm, а также управления версией вашего чарта. Все эти метаданные находятся в файле Chart.yaml. Документация Helm подробно описывает различные опции внутри этого файла.
Деплой вашего Helm чарта
Чарт, сгенерированный на предыдущем шаге, предназначен для запуска сервера nginx, который предоставляется при помощи Cервиса (Service) Kubernetes. По умолчанию чарт создаст сервис типа ClusterIP, поэтому nginx будет доступен только внутри кластера. Чтобы получить доступ к нему извне, нам необходимо будет использовать тип публикации NodePort. Мы также можем установить имя релиза Helm, чтобы было легче к нему обращаться. Давайте развернем наш nginx чарт, используя команду helm install:
$ helm install —name example . —set service.type=NodePort
NAME: example
LAST DEPLOYED: Mon Aug 14 10:28:48 2017
NAMESPACE: default
STATUS: DEPLOYED
RESOURCES:
==> v1/Service
NAME CLUSTER-IP EXTERNAL-IP PORT(S) AGE
example-my-awsome-chart 10.102.172.137 80:32664/TCP 0s
==> v1beta1/Deployment
NAME DESIRED CURRENT UP-TO-DATE AVAILABLE AGE
example-my-awsome-chart 1 1 1 0 0s
NOTES:
1. Get the application URL by running these commands:
export
NODE_PORT=$(kubectl get —namespace default -o jsonpath=«{.spec.ports[0].nodePort}» services example-my-awsome-chart)
export
NODE_IP=$(kubectl get nodes —namespace default -o jsonpath=«{.items[0].status.addresses[0].address}»)
echo http://$NODE_IP:$NODE_PORT
Результат установки Helm чарта показывает полезную сводку состояния релиза, какие объекты были созданы, а также файл NOTES.txt, чтобы подсказать, что делать дальше. Запустите предлагаемые выводом команды, чтобы получить URL-адрес для доступа к службе nginx и проверить установку в своем браузере.

Если все пошло хорошо, вы увидите страницу приветствия nginx, как показано выше. Поздравляю! Вы только что развернули свой первый Helm сервис, упакованный в виде Helm чарта!
Изменение Helm чарта для деплоя произвольного сервиса
Сгенерированный чарт создает объект Deployment, предназначенный для запуска образа, предоставленного значениями по умолчанию. Это означает, что все, что нам нужно сделать для запуска другой службы – это изменить образ по-умолчанию в values.yaml.
Далее мы обновим Helm чарт и запустим приложение списка дел, доступное на Docker Hub. В values.yaml обновите образ так, чтобы ссылаться на образ списка дел:
image:
repository: prydonius/todo
tag: 1.0.0
pullPolicy: IfNotPresent
Когда вы разрабатываете собственный Helm чарт, рекомендуется предварительно запускать его через линтер (linter), чтобы следить за тем, что он соответствует лучшим практиками. Запустите команду helm lint, чтобы увидеть, как работает linter:
$ helm lint .
==> Linting .
[INFO] Chart.yaml: icon is recommended
1 chart(s) linted, no failures
Линтер не зафиксировал каких-либо серьезных проблемы с нашим чартом, поэтому мы готовы двигаться дальше. Однако, в качестве примера, вот что может сделать линтер, если вы сделали что-то неправильно (Не повторяйте этот шаг):
$ echo «malformed» > mychart/values.yaml
helm lint ./mychart
==> Linting mychart
[INFO] Chart.yaml: icon is recommended
[ERROR] values.yaml: unable to parse YAML
error converting YAML to JSON: yaml: line 34: could not find expected ‘:’
Error: 1 chart(s) linted, 1 chart(s) failed
На этот раз линтер сообщает нам, что он не смог правильно проанализировать файл values.yaml, а также подсказывает номер строки, чтобы легко найти и исправить допущенную ошибку.
Когда чарт снова станет валидным, мы можем запустить команду helm install, чтобы развернуть приложение списка дел:
$ helm install —name example2 . —set service.type=NodePort
NAME: example2
LAST DEPLOYED: Mon Aug 14 11:36:58 2017
NAMESPACE: default
STATUS: DEPLOYED
RESOURCES:
==> v1/Service
NAME CLUSTER-IP EXTERNAL-IP PORT(S) AGE
example2-my-awsome-chart 10.97.10.113 80:31336/TCP 1s
==> v1beta1/Deployment
NAME DESIRED CURRENT UP-TO-DATE AVAILABLE AGE
example2-my-awsome-chart 1 1 1 0 1s
NOTES:
1. Get the application URL by running these commands:
export
NODE_PORT=$(kubectl get —namespace default -o jsonpath=«{.spec.ports[0].nodePort}» services example2-my-awsome-chart)
export
NODE_IP=$(kubectl get nodes —namespace default -o jsonpath=«{.items[0].status.addresses[0].address}»)
echo http://$NODE_IP:$NODE_PORT
Как и в прошлый раз вы можете проверить деплой вашего приложения, выполнив подсказываемые вам команды, и открыв полученную ссылку в браузере:

Если вы уже упаковывали в контейнеры ваши приложения, вы можете легко запустить их с помощью чарта, обновив значения по умолчанию или шаблон развертывания.
Упаковка чарта и подготовка к распространению
До сих пор в этой статье мы использовали команду helm install для деплоя локального распакованного чарта. Однако, если вы хотите поделиться своими чртами с вашей командой или сообществом, имейте в виду, что все остальные устанавливают чарты tar архива. Мы можем использовать команду helm package для создания такого архива:
$ cd ..
$ helm package ./my-awsome-chart
Helm создаст архив с именем my—awsome—chart-0.1.0.tgz в нашей рабочей директории, используя имя и версию из метаданных, определенных в файле Chart.yaml. Пользователь может установить ваше приложение из этого архива, передав имя архива в качестве параметра для установки:
$ helm install —name example3 my-awsome-chart-0.1.0.tgz —set service.type=NodePort
Репозитории
Для облегчения обмена архивами Helm имеет встроенную поддержку их установки с HTTP-сервера. Helm читает размещенный на сервере индекс хранилища, который описывает, какие архивы чартов доступны, и где они расположены. Так работает стабильный репозиторий по умолчанию.
Мы можем использовать команду helm serve для запуска локального репозитория для распространения нашего чарта.
$ helm serve
Regenerating index. This may take a moment.
Now serving you on 127.0.0.1:8879
Теперь в другой вкладке консоли можно посмотреть на содержимое нашего локального репозитория и попробовать установить только что созданный нами сервис:
$ helm search local
NAME VERSION DESCRIPTION
local/my-awsome-chart 0.1.0 A Helm chart for Kubernetes
$ helm install —name example4 local/my-awsome-chart —set
service.type=NodePort
Если вам интересно, как установить общедоступный Helm репозиторий, воспользуйтесь официальной документацией.
- Документация на Kubernetes
- Официальный сайт проекта Kubernetes
Зависимости
С развитием вашего приложения или сервиса ваш чарт также будет становиться сложнее. В какой-то момент вы обнаружите, что вам нужна дополнительная зависимость, например база данных. Helm позволяет указать суб-чарты (sub—charts), которые будут созданы как часть одной и той же версии. Чтобы определить зависимость, создайте файл requirements.yaml в корневой директории вашего чарта:
$ cat > ./my-awsome-chart/requirements.yaml <<EOF
dependencies:
— name: mariadb
version: 0.6.0
repository: https://kubernetes-charts.storage.googleapis.com
EOF
Так же, как файл с зависимостями python приложения (requirements.txt), файл requirements.yaml позволяет вам управлять зависимостями чарта и их версиями. При обновлении зависимостей создается файл блокировки, так чтобы последующая выборка зависитмостей использовала уже известную версию. Выполните следующую команду, чтобы скачать зависимость MariaDB, которую мы определили:
$ helm dep update ./my-awsome-chart
Hang tight while we grab the latest from your chart repositories…
…Unable to get an update from the «local» chart repository (http://127.0.0.1:8879/charts):
Get http://127.0.0.1:8879/charts/index.yaml: dial tcp 127.0.0.1:8879: getsockopt: connection refused
…Successfully got an update from the «stable»
chart repository
Update Complete. ⎈Happy Helming!⎈
Deleting outdated charts
Saving 1 charts
Downloading mariadb from repo https://kubernetes-charts.storage.googleapis.com
$ ls ./my-awsome-chart/charts/
mariadb—0.6.0.tgz
Helm нашел подходящую версию в стабильном репозитории и скачал ее в директорию chartsнашего чарта. Теперь давайте установим наш чарт и увидим, что объекты MariaDB также создаются:
$ helm install —name example5 ./my-awsome-chart —set
service.type=NodePort
NAME: example5
LAST DEPLOYED: Mon Aug 14 12:09:05 2017
NAMESPACE: default
STATUS: DEPLOYED
RESOURCES:
==> v1beta1/Deployment
NAME DESIRED CURRENT UP-TO-DATE AVAILABLE AGE
example5-my-awsome-chart 1 1 1 0 1s
example5-mariadb 1 1 1 0 1s
==> v1/Secret
NAME TYPE DATA AGE
example5-mariadb Opaque 2 2s
==> v1/ConfigMap
NAME DATA AGE
example5-mariadb 1 2s
==> v1/PersistentVolumeClaim
NAME STATUS VOLUME CAPACITY ACCESSMODES STORAGECLASS AGE
example5-mariadb Pending 2s
==> v1/Service
NAME CLUSTER-IP EXTERNAL-IP PORT(S) AGE
example5-mariadb 10.100.87.94 3306/TCP 2s
example5-my-awsome-chart 10.106.213.6 80:32379/TCP 1s
NOTES:
1. Get the application URL by running these commands:
export
NODE_PORT=$(kubectl get —namespace default -o jsonpath=«{.spec.ports[0].nodePort}» services example5-my-awsome-chart)
export
NODE_IP=$(kubectl get nodes —namespace default -o jsonpath=«{.items[0].status.addresses[0].address}»)
echo http://$NODE_IP:$NODE_PORT
Одним из преимуществ Helm является его огромный набор чартов, которые вы можете установить с помощью одной команды. В роли автора такого чарта вы можете помочь создать стабильный репозиторий, улучшив существующие чарты или предоставив новые для общего пользования. Посмотрите на текущий репозиторий приложений на https://kubeapps.com.
Перевели статью, автор которой описывает быстрый способ создания базового чарта, показывает полезные команды и делится лучшими практиками. Он не останавливается на аспектах языка шаблонов Go, поскольку большинство из них описаны в документации по Helm. В этом руководстве — более абстрактные аспекты и идеи по улучшению рабочего процесса.
Helm — мощный инструмент для применения, обновления и управления приложениями в Kubernetes. Сообщество Helm создает множество чартов с открытым исходным кодом. Вы можете развернуть Redis, Nginx или Prometheus Operator с помощью одной команды. И они поставляются со всем, что нужно, например, с Ingress.
Создание базовой структуры чарта
Начните с простой команды, которая создаст пример структуры чарта:
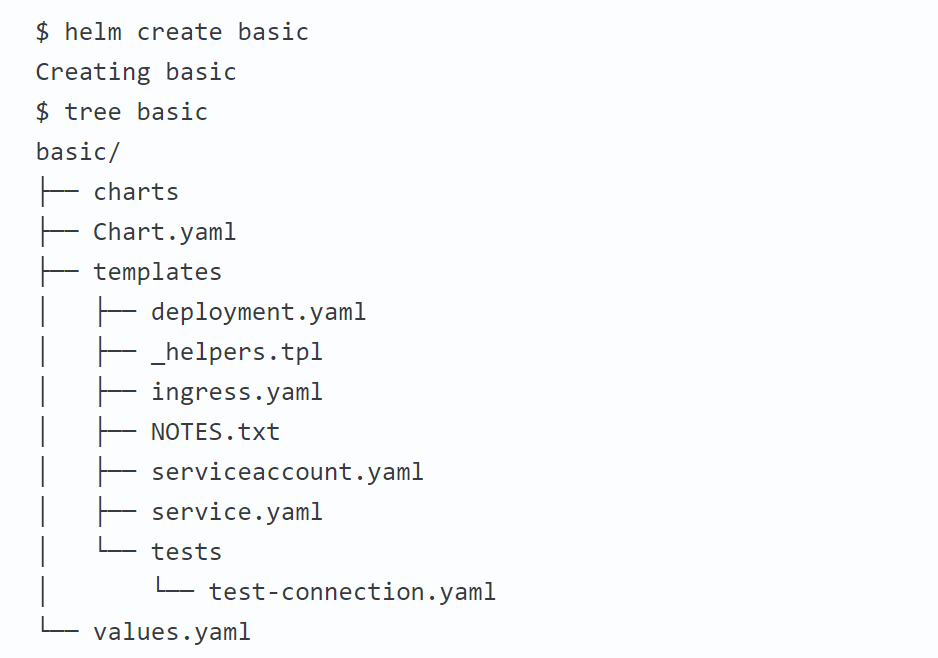
Вот и всё, что нужно для создания готового к развертыванию чарта. Такой чарт позволяет развернуть приложение со всеми необходимыми компонентами. Если вы заглянете в values.yaml, то увидите, что это приложение развернет Nginx.
Развернуть чарт так же просто, как и создать:
Команда template — ваш лучший друг
Непосредственно перед установкой и после изменений в чарте следует проверять, всё ли обрабатывается в шаблонах должным образом.
Чтобы проверить, что именно будет развернуто в кластере, используйте команду:
Команда выведет каждый YAML, созданный всеми шаблонами. Если хотите увидеть результат только одного шаблона, используйте:
$ helm template basic -x templates/service.yamlРезультат будет примерно таким:
---
# Source: basic/templates/service.yaml
apiVersion: v1
kind: Service
metadata:
  name: release-name-basic
  labels:
    app.kubernetes.io/name: basic
    helm.sh/chart: basic-0.1.0
    app.kubernetes.io/instance: release-name
    app.kubernetes.io/version: "1.0"
    app.kubernetes.io/managed-by: Tiller
spec:
  type: ClusterIP
  ports:
    - port: 80
      targetPort: http
      protocol: TCP
      name: http
  selector:
    app.kubernetes.io/name: basic
    app.kubernetes.io/instance: release-name
Для тестирования шаблона с настраиваемыми значениями используйте:
$ helm template basic -x templates/service.yaml -f mypath/tocustomvalues.yamlСгенерированный шаблон можно протестировать на кластере при помощи команды:
$ helm install basic --dry-run --debugLINT!
Перед отправкой в репозиторий вы можете добавить еще один шаг для четкой проверки кода — linting (статистический анализ):
$ helm lint basic/
==> Linting basic/
[INFO] Chart.yaml: icon is recommended
1 chart(s) linted, no failures
Helm работает с функциями
Если заглянуть в каталог шаблонов чарта, то можно увидеть _helpers.tpl. Сюда вы можете добавить свои функции, они будут доступны по всему чарту. Пример функции может выглядеть так:
{{/*
Expand the name of the chart.
*/}}
{{- define "basic.name" -}}
{{- default .Chart.Name .Values.nameOverride | trunc 63 | trimSuffix "-" -}}
{{- end -}}
Использование функции в шаблоне указывают при помощи функции include:
app.kubernetes.io/name: {{ include "basic.name" . }}Мета-метки
Важная часть Kubernetes — правильное использование меток. Это очень важно, если вы используете Helm для развертывания множества манифестов. Чтобы легко добавлять метки для поиска ресурсов, управляемых Helm, можно использовать собственные функции:
{{/*
Common labels
*/}}
{{- define "basic.labels" -}}
app.kubernetes.io/name: {{ include "basic.name" . }}
helm.sh/chart: {{ include "basic.chart" . }}
app.kubernetes.io/instance: {{ .Release.Name }}
{{- if .Chart.AppVersion }}
app.kubernetes.io/version: {{ .Chart.AppVersion | quote }}
{{- end }}
app.kubernetes.io/managed-by: {{ .Release.Service }}
{{- end -}}
И теперь несложно добавить несколько меток в чарт:
apiVersion: v1
kind: Service
metadata:
  name: {{ include "basic.fullname" . }}
  labels:
{{ include "basic.labels" . | indent 4 }}
...
Если хотите отыскать сервисы, созданные с помощью этого чарта, то используйте команду:
$ kubectl get svc -l helm.sh/chart=basic-0.1.0Комментарии вас спасут
Возможны два типа комментариев:
- # — простой комментарий, который остается в результирующем YML после обработки.
- {{- /* … */ -}} — комментарий, который отбрасывается обработчиком шаблонов.
# app files volume
        {{- /*
          App files are configmaps created by cloud-app-play-files chart.
          App files contains files specific for app and environment.
          App name should be same as in deployment of cloud-app-play-files chart.
        */ -}}
        {{- if .Values.include.appDir }}
        - name: {{ $appName }}-files
          configMap:
            name: {{ $appName }}-files
Вывод шаблона будет таким:
       # app files volume
       - name: app-notification-files
         configMap:
           name: app-notification-files
Как вы видите, сгенерированный манифест содержит только комментарий простого типа. Какой тип использовать — решать вам. Но комментарии к шаблонам полезны, если вы описываете в YAML функции более сложных конвейеров или зависимостей.
Еще важно помнить, что комментарии, начинающиеся с #, тоже парсятся. Если вы поместите шаблон Go в комментарий, то он будет вычислен. Так что комментарии тоже могут быть шаблонами.
Обязательно ведите документацию
Документация для чартов незаменима, особенно если вы хотите опубликовать чарт. Самый простой способ создавать и поддерживать документы — использовать пакет Golang с именем helm-docs. С его помощью вы можете сгенерировать README.md, содержащий таблицы значений, версий и описания из values.yaml и chart.yaml или использовать другие пользовательские файлы.
Как видите, добавление в комментарии имени с “- -” приводит к одной строке в таблице. Кроме того, в таблице содержится дополнительная информация, например, описание чарта, имя и версия. Helm-docs можно интегрировать в прекоммит вместе с линтингом. Сделать это просто:
$ helm-docs
INFO[2020-07-23T15:30:38+02:00] Found Chart directories [.]
INFO[2020-07-23T15:30:38+02:00] Generating README Documentation for chart .
Магия субчартов
Когда ваш чарт становится монстром, создающим всю архитектуру, лучше всего разделить некоторые компоненты чарта на более мелкие. Их называют субчартами или дочерними чартами.
Субчарты развертываются одновременно с основным чартом. Значения для субчартов можно предоставить в том же файле values.yaml, что и для основного чарта. Еще их можно подключать из GitHub, но для статьи я создам субчарт локально.
Чтобы начать работу с новым субчартом, от которого зависит основной чарт, создайте каталог charts внутри папки основного чарта. Затем создайте базовый чарт:
$ mkdir charts
$ cd charts
$ helm create subbasic
Чтобы подключить субчарт, измените определение основного чарта:
apiVersion: v1
appVersion: "1.0"
description: A Helm chart for Kubernetes
name: basic
version: 0.1.0
dependencies:
  - name: subbasic
Теперь каждый раз при запуске команды helm install разворачивается не только основной чарт, но и субчарт. Чтобы переопределить референсное имя субчарта при развертывании в сервисе, добавьте в values.yaml основного чарта следующие команды:
subbasic:
 service:
   type: NodePort
 nameOverride: "jojo"
Теперь запустите команду template и посмотрите измененный вывод сервиса субчарта. Тип сервиса изменится вместе с названием:
---
# Source: basic/charts/subbasic/templates/service.yaml
apiVersion: v1
kind: Service
metadata:
  name: release-name-jojo
  labels:
    app.kubernetes.io/name: jojo
    helm.sh/chart: subbasic-0.1.0
    app.kubernetes.io/instance: release-name
    app.kubernetes.io/version: "1.0"
    app.kubernetes.io/managed-by: Tiller
spec:
  type: NodePort
  ports:
    - port: 80
      targetPort: http
      protocol: TCP
      name: http
  selector:
    app.kubernetes.io/name: jojo
    app.kubernetes.io/instance: release-name
Важное примечание: субчарты не могут принимать значения из родительских чартов.
Моменты, о которых часто забывают
Еще несколько моментов:
- Имена ресурсов — максимум 63 символа.
- Имена ресурсов могут состоять только из цифр, строчных букв, “-” или “.”
- Размер чарта — не более 1 МБ. Это особенно важно, если вы используете прикрепление файлов.
- В чарте есть функция для парсинга .tpl.
- Вы можете указать ресурсы, которые останутся после удаления деплоя чарта командой helm delete.
Kubernetes как сервис с сертификацией CNCF
Беспроблемная доставка ваших приложений
Перейти
Ну вот и всё!
Теперь вы можете написать свой первый чарт. Стоит упомянуть о прикреплении файлов — чарты не подходят для добавления файлов и сохранения их структуры в каталогах. Но на странице с рекомендациями вы не найдете информации о том, что следует держать в чарте, а что — нет.
Helm — довольно молодой инструмент, но с большим потенциалом. Не забывайте, что линтинг, генерация документации и даже dry-run шаблоны в кластере могут быть частью CI. Для GitHub уже доступны Helm Workflow.
Удачи!
Оригинал статьи на Habr.com.
Что еще почитать:
- Автогенерация секретов в Helm.
- 90+ полезных инструментов для Kubernetes: развертывание, управление, мониторинг, безопасность и не только.
- Разворачиваем кластер Kubernetes на платформе Mail.ru Cloud Solutions.
В этом руководстве мы кратко обсудим, как Helm может помочь упростить управление приложениями Kubernetes, и узнаем, как использовать Helm для создания базового чарта.
Управление приложениями — сложный аспект Kubernetes. Helm значительно упрощает его, предоставляя единый метод упаковки программного обеспечения, поддерживающий контроль версий. Helm устанавливает пакеты (называются Чартами в Helm) для Kubernetes и управляет ими, как это делают yum и apt.
В этом руководстве мы позволим Helm создать для нас базовый чарт. В этом руководстве предполагается, что у вас есть хотя бы базовое понимание того, что такое Helm. Если вы не знакомы с ним, я предлагаю вам ознакомиться с этим руководством, прежде чем приступить к статье: https://www.alibabacloud.com/help/doc-detail/86511.htm
Затем мы будем постепенно вносить изменения, чтобы узнать, как файл значений и части шаблона работают вместе.
С таким базовым рабочим чартом легче работать, чем начинать с нуля.
Чарт — это пакет Helm. Он содержит все определения ресурсов, необходимые для запуска приложения, инструмента или службы внутри кластера Kubernetes.
Думайте об этом как о Kubernetes-эквиваленте формулы Homebrew, Apt dpkg или Yum RPM-файле.
Создание полной структуры каталогов рабочего чарта
helm create myhelm1
Creating myhelm1
Это создает полный рабочий чарт со всеми необходимыми файлами в каталоге myhelm.
myhelm1/
  |
  |- .helmignore     # Contains patterns for files to ignore when packaging Helm charts.
  |
  |- Chart.yaml      # Meta Information about your chart
  |
  |- values.yaml     # The default values for your templates
  |
  |- charts/         # Charts that this chart depends on: dependencies
  |
  |- templates/      # The template files
Вам будут представлены некоторые из этих файлов на протяжении всего этого руководства — только тогда, когда нам нужно узнать об этих конкретных файлах.
Цель — как можно скорее использовать чарт для создания работающего экземпляра. Затем мы исследуем, что создал чарт и как он это сделал.
Сначала идет файл values.yaml. Он содержит наши значения по умолчанию для объектов Kubernetes, которые мы хотим создать.
Вверху мы видим, что он использует nginx. Это загрузка весом 55 МБ. Я предпочитаю быстрые действия во время обучения с помощью busybox — загрузка 650 КБ.
Исходные values.yaml
nano ./myhelm1/values.yaml

# Default values for myhelm1.
# This is a YAML-formatted file.
# Declare variables to be passed into your templates.

replicaCount: 1

image:
  repository: nginx
  tag: stable
  pullPolicy: IfNotPresent
Измените values.yaml вверху, чтобы использовать busybox, как показано ниже. Обратите внимание на изменения тегов.
nano ./myhelm1/values.yaml

# Default values for myhelm1.
# This is a YAML-formatted file.
# Declare variables to be passed into your templates.

replicaCount: 1

image:
  repository: radial/busyboxplus
  tag: base
  pullPolicy: IfNotPresent
Далее идет файл deployment.yaml.
Это развертывание (deployment), как и любое другое, которое вы используете в Kubernetes. Основное отличие состоит в том, что большинство значений полей он получает из только что отредактированного файла значений.
Отредактируйте файл deployment.yaml около строки 27 — добавьте команду. Мы используем образ busybox. Если мы создадим наши поды, они сразу же выйдут, так как ни одна команда или программа не запущены. Команда позволила нашему поду busybox спать 60 секунд.
(Вы можете увидеть в отрывке из шаблона ниже, как будут извлечены значения из values.yaml. Мы перейдем к синтаксису позже — пока мы сосредотачиваемся на общей картине.)
nano ./myhelm1/templates/deployment.yaml

    spec:
      containers:
        - name: {{ .Chart.Name }}
          image: "{{ .Values.image.repository }}:{{ .Values.image.tag }}"
          imagePullPolicy: {{ .Values.image.pullPolicy }}

          command: ['sh', '-c', 'sleep 60']
Теперь мы готовы позволить Helm установить наш отредактированный чарт.
Запустите helm install ./myhelm1/ и исследуйте вывод.
helm install ./myhelm1/

NAME:   loopy-otter
LAST DEPLOYED: Thu Feb 14 08:48:42 2019
NAMESPACE: default
STATUS: DEPLOYED

RESOURCES:
==> v1/Service
NAME                 TYPE       CLUSTER-IP     EXTERNAL-IP  PORT(S)  AGE
loopy-otter-myhelm1  ClusterIP  10.109.163.87  <none>       80/TCP   0s

==> v1/Deployment
NAME                 DESIRED  CURRENT  UP-TO-DATE  AVAILABLE  AGE
loopy-otter-myhelm1  1        0        0           0          0s

==> v1/Pod(related)
NAME                                  READY  STATUS   RESTARTS  AGE
loopy-otter-myhelm1-67b67bf4c8-tsdcq  0/1    Pending  0         0s

NOTES:
1. Get the application URL by running these commands:
  export POD_NAME=$(kubectl get pods --namespace default -l "app.kubernetes.io/name=myhelm1,app.kubernetes.io/instance=loopy-otter" -o jsonpath="{.items[0].metadata.name}")
  echo "Visit http://127.0.0.1:8080 to use your application"
  kubectl port-forward $POD_NAME 8080:80
Helm автоматически генерирует название выпуска для вашего: NAME: loopy-otter
Ваш будет другим. Ненавижу эти глупые имена. Позже мы будем использовать наши собственные имена.
Мы видим сервис, развертывание и создание пода.
Грубо говоря, Helm прочитал все шаблоны .yaml в каталоге шаблонов, а затем интерпретировал эти шаблоны, извлекая значения из файла values.yaml.
Примечания относятся к исходному приложению nginx. Это совершенно неправильно для нашего приложения busybox.
Эти примечания взяты из NOTES.txt, другого файла шаблона.
Через несколько секунд мы увидим, что наш Pod работает.
kubectl get pods
NAME                                   READY   STATUS    RESTARTS   AGE
loopy-otter-myhelm1-67b67bf4c8-tsdcq   0/1     Running   0          13s
Демонстрация общего обзора демо готова. Используйте helm delete, чтобы удалить наш первый выпуск.
Релиз — это экземпляр чарта, работающей в кластере Kubernetes.
helm delete loopy-otter
release "loopy-otter" deleted
helmignore NOTES.txt
Теперь отредактируйте файл .helmignore и добавьте NOTES.txt внизу.
.helmignore содержит список имен файлов и шаблонов имен файлов, которые Helm должен игнорировать.
nano ./myhelm1/.helmignore

NOTES.txt
Если вы снова запустите установку, вы увидите, что эти примечания больше не отображаются.
helm install .myhelm1 --name test1
NAME:   test1
LAST DEPLOYED: Thu Feb 14 08:56:10 2019
NAMESPACE: default
STATUS: DEPLOYED

RESOURCES:
==> v1/Service
NAME           TYPE       CLUSTER-IP     EXTERNAL-IP  PORT(S)  AGE
test1-myhelm1  ClusterIP  10.96.102.116  <none>       80/TCP   0s

==> v1/Deployment
NAME           DESIRED  CURRENT  UP-TO-DATE  AVAILABLE  AGE
test1-myhelm1  1        0        0           0          0s

==> v1/Pod(related)
NAME                            READY  STATUS             RESTARTS  AGE
test1-myhelm1-6f77bf4459-9nxpz  0/1    ContainerCreating  0         0s
(Позже мы будем использовать такие заметки, но здесь и сейчас этот файл нам не нужен.)
Удалите наш тестовый релиз test1.
helm delete test1
release "test1" deleted
—dry-run —debug
Мы используем --dry-run и --debug, чтобы исследовать, как Helm интерпретирует наш шаблон и файлы YAML в наших чартах.
Таким образом мы не засоряем наш узел Kubernetes несколькими ненужными объектами.
Давайте попробуем.
helm install .myhelm1 --name test1 --dry-run --debug
[debug] Created tunnel using local port: '49958'

[debug] SERVER: "127.0.0.1:49958"

[debug] Original chart version: ""
[debug] CHART PATH: C:k8myhelm1

Error: a release named test1 already exists.
Run: helm ls --all test1; to check the status of the release
Or run: helm del --purge test1; to delete it
Как видите, релиз может существовать только один раз.
Проверим статус release
helm ls --all test1
NAME    REVISION        UPDATED                         STATUS  CHART           APP VERSION     NAMESPACE
test1   1               Thu Feb 14 08:56:10 2019        DELETED myhelm1-0.1.0   1.0             default
Мы просто удалили его.
Для тестирования отладки (debug) нам понадобится другое название релиза: мы используем test2:
helm install .myhelm1 --name test2 --dry-run --debug

[debug] Created tunnel using local port: '49970'

[debug] SERVER: "127.0.0.1:49970"

[debug] Original chart version: ""
[debug] CHART PATH: C:k8myhelm1

NAME:   test2
REVISION: 1
RELEASED: Thu Feb 14 08:59:22 2019
CHART: myhelm1-0.1.0
USER-SUPPLIED VALUES:
{}

COMPUTED VALUES:
affinity: {}
fullnameOverride: ""
image:
  pullPolicy: IfNotPresent
  repository: radial/busyboxplus
  tag: base
ingress:
  annotations: {}
  enabled: false
  hosts:
  - chart-example.local
  paths: []
  tls: []
nameOverride: ""
nodeSelector: {}
replicaCount: 1
resources: {}
service:
  port: 80
  type: ClusterIP
tolerations: []

HOOKS:
---
# test2-myhelm1-test-connection
apiVersion: v1
kind: Pod
metadata:
  name: "test2-myhelm1-test-connection"
  labels:
    app.kubernetes.io/name: myhelm1
    helm.sh/chart: myhelm1-0.1.0
    app.kubernetes.io/instance: test2
    app.kubernetes.io/managed-by: Tiller
  annotations:
    "helm.sh/hook": test-success
spec:
  containers:
    - name: wget
      image: busybox
      command: ['wget']
      args:  ['test2-myhelm1:80']
  restartPolicy: Never

MANIFEST:
---
# Source: myhelm1/templates/service.yaml
apiVersion: v1
kind: Service
metadata:
  name: test2-myhelm1
  labels:
    app.kubernetes.io/name: myhelm1
    helm.sh/chart: myhelm1-0.1.0
    app.kubernetes.io/instance: test2
    app.kubernetes.io/managed-by: Tiller
spec:
  type: ClusterIP
  ports:
    - port: 80
      targetPort: http
      protocol: TCP
      name: http
  selector:
    app.kubernetes.io/name: myhelm1
    app.kubernetes.io/instance: test2

---
# Source: myhelm1/templates/deployment.yaml
apiVersion: apps/v1
kind: Deployment
metadata:
  name: test2-myhelm1
  labels:
    app.kubernetes.io/name: myhelm1
    helm.sh/chart: myhelm1-0.1.0
    app.kubernetes.io/instance: test2
    app.kubernetes.io/managed-by: Tiller
spec:
  replicas: 1
  selector:
    matchLabels:
      app.kubernetes.io/name: myhelm1
      app.kubernetes.io/instance: test2
  template:
    metadata:
      labels:
        app.kubernetes.io/name: myhelm1
        app.kubernetes.io/instance: test2
    spec:
      containers:
        - name: myhelm1
          image: "radial/busyboxplus:base"
          imagePullPolicy: IfNotPresent

          command: ['sh', '-c', 'sleep 60']

          ports:
            - name: http
              containerPort: 80
              protocol: TCP
          livenessProbe:
            httpGet:
              path: /
              port: http
          readinessProbe:
            httpGet:
              path: /
              port: http
          resources:
            {}
Очень полезно, но слишком много информации, если мы хотим постоянно редактировать и устанавливать наш чарт.
Прямо сейчас я не буду пытаться все это разобрать, давайте сначала уменьшим вывод.
Под Хуками есть тестовое соединение. Это было полезно для тестирования исходного nginx. Нам это не нужно.
Примерно через 20 строк мы находим # Source: myhelm1/templates/service.yaml ... kind: Service — нам это не нужно — нам нужен только работающий Pod.
Его легко исправить, просто отредактируйте .helmignore и добавьте эти два имени файла внизу.
nano ./myhelm1/.helmignore

test-connection.yaml
service.yaml
Нашему поду busybox не нужны порты или livenessProbes.
Удалите строки с 29 по 42 из deployment.yaml
nano ./myhelm1/templates/deployment.yaml

          ports:
            - name: http
              containerPort: 80
              protocol: TCP
          livenessProbe:
            httpGet:
              path: /
              port: http
          readinessProbe:
            httpGet:
              path: /
              port: http
          resources:
            {}
Эти ярлыки ниже не добавляют ценности этому руководству, поэтому они удаляются из вывода всех приведенных ниже команд helm install.
  labels:
    app.kubernetes.io/name: myhelm1
    helm.sh/chart: myhelm1-0.1.0
    app.kubernetes.io/instance: test4
    app.kubernetes.io/managed-by: Tiller

  selector:
    matchLabels:
      app.kubernetes.io/name: myhelm1
      app.kubernetes.io/instance: test4

    metadata:
      labels:
        app.kubernetes.io/name: myhelm1
        app.kubernetes.io/instance: test4
Давайте запустим снова нашу установку.
helm install .myhelm1 --name test2 --dry-run --debug
[debug] Created tunnel using local port: '49976'

[debug] SERVER: "127.0.0.1:49976"

[debug] Original chart version: ""
[debug] CHART PATH: C:k8myhelm1

NAME:   test2
REVISION: 1
RELEASED: Thu Feb 14 09:09:55 2019
CHART: myhelm1-0.1.0
USER-SUPPLIED VALUES:
{}

COMPUTED VALUES:
affinity: {}
fullnameOverride: ""
image:
  pullPolicy: IfNotPresent
  repository: radial/busyboxplus
  tag: base
ingress:
  annotations: {}
  enabled: false
  hosts:
  - chart-example.local
  paths: []
  tls: []
nameOverride: ""
nodeSelector: {}
replicaCount: 1
resources: {}
service:
  port: 80
  type: ClusterIP
tolerations: []

HOOKS:
MANIFEST:

---
# Source: myhelm1/templates/deployment.yaml
apiVersion: apps/v1
kind: Deployment
metadata:
  name: test2-myhelm1
spec:
  replicas: 1
  template:
    spec:
      containers:
        - name: myhelm1
          image: "radial/busyboxplus:base"
          imagePullPolicy: IfNotPresent

          command: ['sh', '-c', 'sleep 60']
Давайте разберемся данных командах:
- USER-SUPPLIED VALUES: мы их не предоставляли, поэтому здесь ничего не указано. Мы воспользуемся этим через минуту.
- COMPUTED VALUES: показывает рассчитанные значения из
values.yaml. Он отображается в алфавитном порядке, в то время как наш файл находится в случайном порядке. - HOOKS: не используются в этом руководстве для начинающих.
- Внизу мы видим наш
deployment.yaml. Он показывает шаблон со значениями, взятыми из файлаvalues.yaml.
Вы можете неоднократно вносить изменения в свои значения и шаблоны и тестировать их с помощью --dry-run --debug. Он только показывает, что произойдет, не делая этого. Очень полезно: отладить установку Helm ДО того, как это будет сделано.
Мы довольны результатами отладки, давайте запустим установку.
helm install .myhelm1 --name test2
NAME:   test2
LAST DEPLOYED: Thu Feb 14 09:12:01 2019
NAMESPACE: default
STATUS: DEPLOYED

RESOURCES:
==> v1/Deployment
NAME           DESIRED  CURRENT  UP-TO-DATE  AVAILABLE  AGE
test2-myhelm1  1        0        0           0          0s

==> v1/Pod(related)
NAME                            READY  STATUS             RESTARTS  AGE
test2-myhelm1-5bd9bb65c7-6pr4q  0/1    ContainerCreating  0         0s
Как и ожидалось — происходит развертывание и его Pod. Через несколько секунд Pod запускается.
kubectl get pods
NAME                             READY   STATUS    RESTARTS   AGE
test2-myhelm1-5bd9bb65c7-6pr4q   1/1     Running   0          10s
helm delete test2
release "test2" deletedimagePullPolicy = Never
Значения в values.yaml заменяют свои заполнители (placeholders) в файлах шаблонов.
Файлы шаблонов также могут получать свои значения от пользователя. Пользователи передают значения программному обеспечению, которое они устанавливают, с помощью флага --setв команде установки.
В этой части руководства демонстрируется передача imagePullPolicy в командной строке.
Редактирование не требуется, просто обратите внимание на последнюю строку извлечения файла значений ниже.
Файл значений по умолчанию должен называться values.yaml.
nano ./myhelm1/values.yaml

# Default values for myhelm1.
# This is a YAML-formatted file.
# Declare variables to be passed into your templates.

replicaCount: 1

image:
  repository: radial/busyboxplus
  tag: base
  pullPolicy: IfNotPresent
Теперь посмотрите, где он используется в шаблоне. (в диапазоне 22-25)
nano ./myhelm1/templates/deployment.yaml
      containers:
        - name: {{ .Chart.Name }}
          image: "{{ .Values.image.repository }}:{{ .Values.image.tag }}"
          imagePullPolicy: {{ .Values.image.pullPolicy }}
.Values.image.pullPolicy получает значение из
- файла
values.yaml - содержимого
.image.pullPolicy
image:
  pullPolicy: IfNotPresent
До сих пор в этом руководстве мы использовали pullPolicy: IfNotPresent. (Возможно, вы захотите пролистать страницу и увидеть, что это так везде.)
Предположим, что для этого тестового прогона мы НЕ хотим, чтобы образ было извлечен из репозитория. (imagePullPolicy: Never)
Из документации Kubernetes:
imagePullPolicy: Never: предполагается, что образ существует локально. Попытки вытащить образ не предпринимаются.
Смотрите приведенную ниже команду пробного запуска, как мы указываем политику с помощью --set.
helm install .myhelm1 --set imagePullPolicy=Never --name test3 --dry-run --debug
[debug] Created tunnel using local port: '50101'

[debug] SERVER: "127.0.0.1:50101"

[debug] Original chart version: ""
[debug] CHART PATH: C:k8myhelm1

NAME:   test3
REVISION: 1
RELEASED: Thu Feb 14 10:10:37 2019
CHART: myhelm1-0.1.0
USER-SUPPLIED VALUES:
imagePullPolicy: Never

COMPUTED VALUES:
affinity: {}
fullnameOverride: ""
image:
  pullPolicy: IfNotPresent
  repository: radial/busyboxplus
  tag: base
imagePullPolicy: Never
ingress:
  annotations: {}
  enabled: false
  hosts:
  - chart-example.local
  paths: []
  tls: []
nameOverride: ""
nodeSelector: {}
replicaCount: 1
resources: {}
service:
  port: 80
  type: ClusterIP
tolerations: []

HOOKS:
MANIFEST:

---
# Source: myhelm1/templates/deployment.yaml
apiVersion: apps/v1
kind: Deployment
metadata:
  name: test3-myhelm1

spec:
  replicas: 1

  template:
    spec:
      containers:
        - name: myhelm1
          image: "radial/busyboxplus:base"
          imagePullPolicy: IfNotPresent

          command: ['sh', '-c', 'sleep 60']
USER-SUPPLIED VALUES кажутся правильными: imagePullPolicy: Never
COMPUTED VALUES: указывают на наличие проблемы:
image:
  pullPolicy: IfNotPresent
  tag: base
imagePullPolicy: Never
Наша политика --set не заменяет политику скачивания образов.
Они имеют разные имена и находятся на разных уровнях yaml.
В развертывании мы видим: imagePullPolicy: IfNotPresent: переопределение не выполнено.
Давайте исправим это: смотрите на вторую попытку:
helm install .myhelm1 --set image.PullPolicy=Never --name test3 --dry-run --debug
[debug] Created tunnel using local port: '50107'

[debug] SERVER: "127.0.0.1:50107"

[debug] Original chart version: ""
[debug] CHART PATH: C:k8myhelm1

NAME:   test3
REVISION: 1
RELEASED: Thu Feb 14 10:14:11 2019
CHART: myhelm1-0.1.0
USER-SUPPLIED VALUES:
image:
  PullPolicy: Never            < - - - - - -

COMPUTED VALUES:
affinity: {}
fullnameOverride: ""
image:
  PullPolicy: Never            < - - - - - -
  pullPolicy: IfNotPresent     < - - - - - -
  repository: radial/busyboxplus
Почти готово, но все равно неверно. Теперь у нас есть две политики, написанные по-разному. (Первая буква в нижнем регистре — это правильная буква, которая появляется в файле значений).
Соглашение гласит, что мы должны называть наши значения, начиная со строчной буквы. Наши values.yaml верны. Наше переопределение командной строки неверно.
Третья попытка, смотрите команду ниже.
helm install .myhelm1 --set image.pullPolicy=Never --name test3 --dry-run --debug

[debug] Created tunnel using local port: '50113'

[debug] SERVER: "127.0.0.1:50113"

[debug] Original chart version: ""
[debug] CHART PATH: C:k8myhelm1

NAME:   test3
REVISION: 1
RELEASED: Thu Feb 14 10:15:10 2019
CHART: myhelm1-0.1.0
USER-SUPPLIED VALUES:
image:
  pullPolicy: Never     < - - - - - - - - - - - - -

COMPUTED VALUES:
affinity: {}
fullnameOverride: ""
image:
  pullPolicy: Never
  repository: radial/busyboxplus
  tag: base
ingress:
  annotations: {}
  enabled: false
  hosts:
  - chart-example.local
  paths: []
  tls: []
nameOverride: ""
nodeSelector: {}
replicaCount: 1
resources: {}
service:
  port: 80
  type: ClusterIP
tolerations: []

HOOKS:
MANIFEST:

---
# Source: myhelm1/templates/deployment.yaml
apiVersion: apps/v1
kind: Deployment
metadata:
  name: test3-myhelm1

spec:
  replicas: 1
  template:
    spec:
      containers:
        - name: myhelm1
          image: "radial/busyboxplus:base"
          imagePullPolicy: Never     < - - - - - - - - - - -

          command: ['sh', '-c', 'sleep 60']
В приведенном выше развертывании показано, как imagePullPolicy: Never… прошло успешно.
COMPUTED VALUES показывают, что переопределение выполнено правильно.
COMPUTED VALUES:
image:
  pullPolicy: Never
Вывод отладки выглядит хорошо. Мы готовы установить этот выпуск вживую.
Я хочу скрыть все остальные значения, которые нам не нужны. Отредактируйте файл значений так, чтобы только первые 5 значений не закомментировались.
nano ./myhelm1/values.yaml

# Default values for myhelm1.
# This is a YAML-formatted file.
# Declare variables to be passed into your templates.

replicaCount: 1

image:
  repository: radial/busyboxplus
  tag: base
  pullPolicy: IfNotPresent

#nameOverride: ""
#fullnameOverride: ""

#service:
#  type: ClusterIP
#  port: 80

#ingress:
#  enabled: false
#  annotations: {}
    # kubernetes.io/ingress.class: nginx
    # kubernetes.io/tls-acme: "true"
#  paths: []
#  hosts:
#    - chart-example.local
#  tls: []
  #  - secretName: chart-example-tls
  #    hosts:
  #      - chart-example.local

#resources: {}
  # We usually recommend not to specify default resources and to leave this as a conscious
  # choice for the user. This also increases chances charts run on environments with little
  # resources, such as Minikube. If you do want to specify resources, uncomment the following
  # lines, adjust them as necessary, and remove the curly braces after 'resources:'.
  # limits:
  #  cpu: 100m
  #  memory: 128Mi
  # requests:
  #  cpu: 100m
  #  memory: 128Mi

#nodeSelector: {}

#tolerations: []

#affinity: {}
Установим наш чарт
helm install .myhelm1 --set image.pullPolicy=Never --name test3 --dry-run --debug
[debug] Created tunnel using local port: '50125'

[debug] SERVER: "127.0.0.1:50125"

[debug] Original chart version: ""
[debug] CHART PATH: C:k8myhelm1

Error: render error in "myhelm1/templates/ingress.yaml": template: myhelm1/templates/ingress.yaml:1:14: executing "myhelm1/templates/ingress.yaml" at <.Values.ingress.enab...>: can't evaluate field enabled in type interface {}
Values.ingress.enabled используется в myhelm1/templates/ingress.yaml
Нам не нужен ingress — это часть чарта nginx, с которого мы начали.
Добавьте ingress.yaml в конец нашего файла игнорирования.
nano ./myhelm1/.helmignore
ingress.yaml
Вторая попытка: установить чарт myhelm1 с помощью image.pullPolicy = Never
плюс мы добавили --set replicaCount=3
helm install .myhelm1 --set image.pullPolicy=Never --set replicaCount=3 --name test3 --dry-run --debug
[debug] Created tunnel using local port: '50140'

[debug] SERVER: "127.0.0.1:50140"

[debug] Original chart version: ""
[debug] CHART PATH: C:k8myhelm1

NAME:   test3
REVISION: 1
RELEASED: Thu Feb 14 10:23:43 2019
CHART: myhelm1-0.1.0

USER-SUPPLIED VALUES:
image:
  pullPolicy: Never        < * * * = = = = = = = = = = = = =
replicaCount: 3    < - - - - - - - - - - - - - - - -

COMPUTED VALUES:
image:
  pullPolicy: Never        < * * * = = = = = = = = = = = = =
  repository: radial/busyboxplus
  tag: base
replicaCount: 3    < - - - - - - - - - - - - - - - -

HOOKS:
MANIFEST:

---
# Source: myhelm1/templates/deployment.yaml
apiVersion: apps/v1
kind: Deployment
metadata:
  name: test3-myhelm1
spec:
  replicas: 3   < - - - - - - - - - - - - - - - - - -
  template:
    spec:
      containers:
        - name: myhelm1
          image: "radial/busyboxplus:base"
          imagePullPolicy: Never        < * * * = = = = = = = = = = = = =

          command: ['sh', '-c', 'sleep 60']
--set replicaCount правильно переопределяет значение в deployment.yaml
Сделаем живую установку.
helm install .myhelm1 --set image.pullPolicy=Never --set replicaCount=3 --name test3
NAME:   test3
LAST DEPLOYED: Thu Feb 14 10:34:45 2019
NAMESPACE: default
STATUS: DEPLOYED

RESOURCES:
==> v1/Deployment
NAME           DESIRED  CURRENT  UP-TO-DATE  AVAILABLE  AGE
test3-myhelm1  3        0        0           0          0s

==> v1/Pod(related)
NAME                          READY  STATUS             RESTARTS  AGE
test3-myhelm1-878d8d7c-7xshs  0/1    Pending            0         0s
test3-myhelm1-878d8d7c-fnjqn  0/1    ContainerCreating  0         0s
test3-myhelm1-878d8d7c-gjw4m  0/1    Pending            0         0s
Успешно. ЖЕЛАТЕЛЬНОЕ развертывание — 3, и мы видим, что создаются 3 модуля.
Через несколько секунд у нас есть 3 работающих пода. Обратите внимание на использование команды helm status.
helm status test3
LAST DEPLOYED: Thu Feb 14 10:34:45 2019
NAMESPACE: default
STATUS: DEPLOYED

RESOURCES:
==> v1/Deployment
NAME           DESIRED  CURRENT  UP-TO-DATE  AVAILABLE  AGE
test3-myhelm1  3        3        3           3          20s

==> v1/Pod(related)
NAME                          READY  STATUS   RESTARTS  AGE
test3-myhelm1-878d8d7c-7xshs  1/1    Running  0         20s
test3-myhelm1-878d8d7c-fnjqn  1/1    Running  0         20s
test3-myhelm1-878d8d7c-gjw4m  1/1    Running  0         20s
Демо завершено. Удалите наш релиз test3.
helm delete test3
release "test3" deleted
Определение нового value
Пока что мы удалили значения из values.yaml.
Мы также передали значения переопределения в командной строке.
Теперь мы создаем собственное новое значение: terminationGracePeriodSeconds
terminationGracePeriodSeconds — Необязательная продолжительность в секундах, необходимая для корректного завершения работы модуля. grace period — это продолжительность в секундах после того, как процессы, запущенные в модуле, отправляют сигнал завершения, и время, когда процессы принудительно останавливаются с сигналом уничтожения. Установите это значение больше, чем ожидаемое время очистки для вашего процесса. По умолчанию 30 секунд.
Добавьте terminationGracePeriodSeconds: 30 в свой файл values.yaml, чтобы ваши строки 5–12 выглядели так, как показано ниже:
nano ./myhelm1/values.yaml

replicaCount: 1

terminationGracePeriodSeconds: 30

image:
  repository: radial/busyboxplus
  tag: base
  pullPolicy: IfNotPresent
Отредактируйте файл развертывания, чтобы он использовал это новое значение (строки с 22 по 29 должны быть такими, как показано ниже)
nano ./myhelm1/templates/deployment.yaml

      containers:
        - name: {{ .Chart.Name }}
          image: "{{ .Values.image.repository }}:{{ .Values.image.tag }}"
          imagePullPolicy: {{ .Values.image.pullPolicy }}

          terminationGracePeriodSeconds: {{ .Values.terminationGracePeriodSeconds }}

          command: ['sh', '-c', 'sleep 60']
Сделайте пробный запуск.
helm install .myhelm1 --name test4 --dry-run --debug
[debug] Created tunnel using local port: '50239'

[debug] SERVER: "127.0.0.1:50239"

[debug] Original chart version: ""
[debug] CHART PATH: C:k8myhelm1

NAME:   test4
REVISION: 1
RELEASED: Thu Feb 14 10:54:58 2019
CHART: myhelm1-0.1.0
USER-SUPPLIED VALUES:
{}

COMPUTED VALUES:
image:
  pullPolicy: IfNotPresent
  repository: radial/busyboxplus
  tag: base
replicaCount: 1
terminationGracePeriodSeconds: 30     < - - - - - - -

HOOKS:
MANIFEST:

---
# Source: myhelm1/templates/deployment.yaml
apiVersion: apps/v1
kind: Deployment
metadata:
  name: test4-myhelm1
spec:
  replicas: 1
  template:
    spec:
      containers:
        - name: myhelm1
          image: "radial/busyboxplus:base"
          imagePullPolicy: IfNotPresent

          terminationGracePeriodSeconds: 30     < - - - - - -

          command: ['sh', '-c', 'sleep 60']
Успешно. COMPUTED VALUES: показывает их правильно и развертывание внизу использует их правильно.
Еще один тест: давайте отладим тест, переопределив значение terminationGracePeriodSeconds на 10.
helm install .myhelm1 --set terminationGracePeriodSeconds=10 --name test4 --dry-run --debug
[debug] Created tunnel using local port: '50245'

[debug] SERVER: "127.0.0.1:50245"

[debug] Original chart version: ""
[debug] CHART PATH: C:k8myhelm1

NAME:   test4
REVISION: 1
RELEASED: Thu Feb 14 10:56:33 2019
CHART: myhelm1-0.1.0

USER-SUPPLIED VALUES:
terminationGracePeriodSeconds: 10     < - - - - - -

COMPUTED VALUES:
image:
  pullPolicy: IfNotPresent
  repository: radial/busyboxplus
  tag: base
replicaCount: 1
terminationGracePeriodSeconds: 10     < - - - - - -

HOOKS:
MANIFEST:

---
# Source: myhelm1/templates/deployment.yaml
apiVersion: apps/v1
kind: Deployment
metadata:
  name: test4-myhelm1
spec:
  replicas: 1
  template:
    spec:
      containers:
        - name: myhelm1
          image: "radial/busyboxplus:base"
          imagePullPolicy: IfNotPresent

          terminationGracePeriodSeconds: 10     < - - - - - -

          command: ['sh', '-c', 'sleep 60']
Успешно. COMPUTED VALUES: правильно показывает 10 и при развертывании внизу правильно используется 10.
Мы даже не посмотрели на _helpers.tpl или каталог чартов. (Это касается зависимостей. Это тема для другого руководства из этого набора.)
Мы внесли несколько изменений в наш файл значений, а также в файл развертывания и увидели его результаты с помощью отладки и команд живой установки.
Вы также можете скрыть ненужные файлы с чарта. (.helmignore)
На работе вы создадите свои собственные скелетные базовые чарты, из которых будете копировать.
Мы изучили базовые концепции Helm в первый же день, изменив чарт nginx в соответствии с нашими требованиями. --dry-run --debug — лучшая функция Helm: пробный запуск и отладка перед установкой.
Introduction
Helm charts are one of the best practices for building efficient clusters in Kubernetes. It is a form of packaging that uses a collection of Kubernetes resources. Helm charts use those resources to define an application.
Helm charts use a template approach to deploy applications. Templates give structure to projects and are suitable for any type of application.
This article provides step-by-step instructions to create and deploy a Helm chart.
Prerequisites
- Access to a CLI
- Minikube cluster installed and configured. (For assistance, follow our guides How to Install Minikube on Ubuntu and How to Install Minikube on CentOS.)
- Helm installed and configured.
Note: To confirm Helm installed properly, run which helm in the terminal. The output should return a path to Helm.
Creating a Helm chart involves creating the chart itself, configuring the image pull policy, and specifying additional details in the values.yaml file.
Step 1: Create a New Helm Chart
1. To create a new Helm chart, use:
helm create <chart name>For example:
helm create phoenixnap
2. Using the ls command, list the chart structure:
ls <chart name>
The Helm chart directory contains:
- Directory charts – Used for adding dependent charts. Empty by default.
- Directory templates – Configuration files that deploy in the cluster.
- YAML file – Outline of the Helm chart structure.
- YAML file – Formatting information for configuring the chart.
Step 2: Configure Helm Chart Image Pull Policy
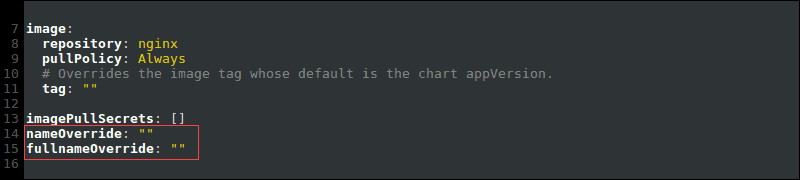
1. Open the values.yaml file in a text editor. Locate the image values:
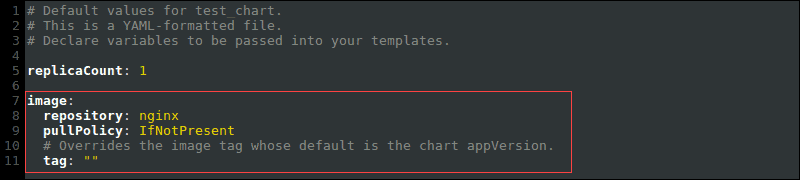
There are three possible values for the pullPolicy:
IfNotPresent– Downloads a new version of the image if one does not exist in the cluster.Always– Pulls the image on every restart or deployment.Latest– Pulls the most up-to-date version available.
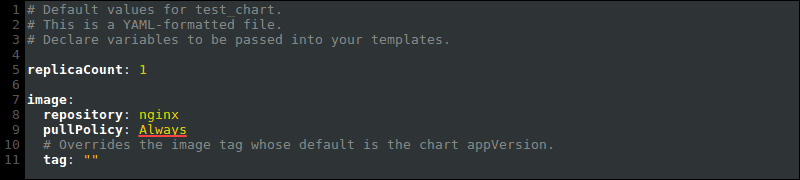
2. Change the image pullPolicy from IfNotPresent to Always:
Step 3: Helm Chart Name Override
To override the chart name in the values.yaml file, add values to the nameOverride and fullnameOverride:
For example:
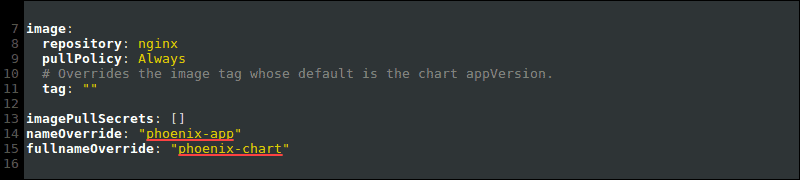
Overriding the Helm chart name ensures configuration files also change.
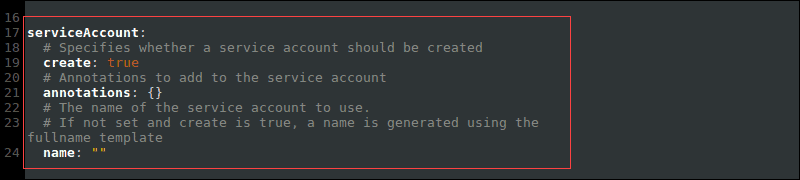
Step 4: Specify Service Account Name
The service account name for the Helm chart generates when you run the cluster. However, it is good practice to set it manually.
The service account name makes sure the application is directly associated with a controlled user in the chart.
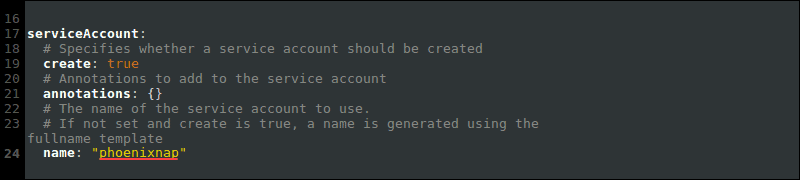
1. Locate the serviceAccount value in the values.yaml file:
2. Specify the name of the service account:
Step 5: Change Networking Service Type
The recommended networking service type for Minikube is NodePort.
1. To change the networking service type, locate the service value:

2. Change the type from ClusterIP to NodePort:

Deploy Helm Chart
After configuring the values.yaml file, check the status of your Minikube cluster and deploy the application using Helm commands.
Step 1: Check minikube Status
If Minikube isn’t running, the install Helm chart step returns an error.
1. Check Minikube status with:
minikube statusThe status shows up as Running.

2. If the status shows Stopped, run:
minikube start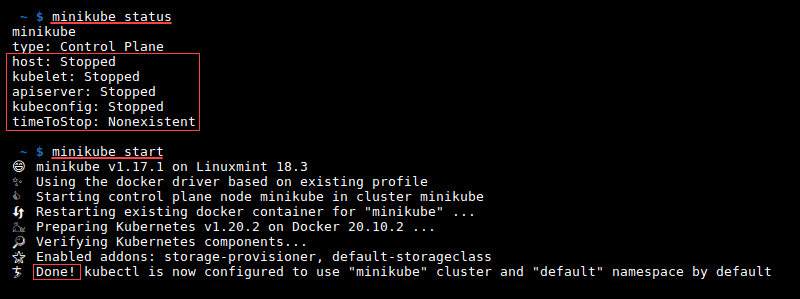
The output shows Done and the status changes to Running.
Step 2: Install the Helm Chart
Install the Helm chart using the helm install command:
helm install <full name override> <chart name>/ --values <chart name>/values.yamlFor example:
helm install phoenix-chart phoenixnap/ --values phoenixnap/values.yaml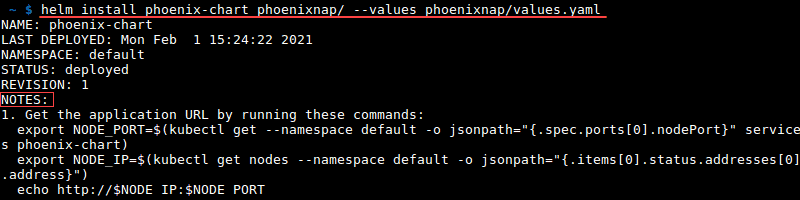
The helm install command deploys the app. The next steps are printed in the NOTES section of the output.
Step 3: Export the Pod Node Port and IP Address
1. Copy the two export commands from the helm install output.
2. Run the commands to get the Pod node port and IP address:

Step 4: View the Deployed Application
1. Copy and paste the echo command and run it in the terminal to print the IP address and port:

2. Copy the link and paste it into your browser, or press CTRL+click to view the deployed application:

Conclusion
After following the outlined step-by-step instructions, you have a Helm chart created, set up, and deployed on a web server. Helm charts simplify application deployment on a Kubernetes cluster.
Now that you have created a Helm chart, learn How to Pull And Push Helm Charts.
Add Helm chart repositories to create more complex applications, learn how to use environment variables with Helm, or learn about other Kubernetes tools next.
Introduction
So, you’ve got your Kubernetes cluster up and running and set up Helm v3.x, but how do you run your applications on it? This guide walks you through the process of creating your first ever chart, explaining what goes inside these packages and the tools you use to develop them. By the end of it you should have an understanding of the advantages of using Helm to deliver your own applications to your cluster.
For a typical cloud-native application with a 3-tier architecture, the diagram below illustrates how it might be described in terms of Kubernetes objects. In this example, each tier consists of a Deployment and Service object, and may additionally define ConfigMap or Secret objects. Each of these objects are typically defined in separate YAML files, and are fed into the kubectl command line tool.

A Helm chart encapsulates each of these YAML definitions, provides a mechanism for configuration at deploy-time and allows you to define metadata and documentation that might be useful when sharing the package. Helm can be useful in different scenarios:
- Find and use popular software packaged as Kubernetes charts
- Share your own applications as Kubernetes charts
- Create reproducible builds of your Kubernetes applications
- Intelligently manage your Kubernetes object definitions
- Manage releases of Helm packages
Let’s explore the second and third scenarios by creating our first chart.
Step 1: Generate your first chart
The best way to get started with a new chart is to use the helm create command to scaffold out an example we can build on. Use this command to create a new chart named mychart in a new directory:
helm create mychart
Helm will create a new directory in your project called mychart with the structure shown below. Let’s navigate our new chart (pun intended) to find out how it works.
mychart
|-- Chart.yaml
|-- charts
|-- templates
|   |-- NOTES.txt
|   |-- _helpers.tpl
|   |-- deployment.yaml
|   |-- ingress.yaml
|   `-- service.yaml
`-- values.yaml
Templates
The most important piece of the puzzle is the templates/ directory. This is where Helm finds the YAML definitions for your Services, Deployments and other Kubernetes objects. If you already have definitions for your application, all you need to do is replace the generated YAML files for your own. What you end up with is a working chart that can be deployed using the helm install command.
It’s worth noting however, that the directory is named templates, and Helm runs each file in this directory through a Go template rendering engine. Helm extends the template language, adding a number of utility functions for writing charts. Open the service.yaml file to see what this looks like:
apiVersion: v1
kind: Service
metadata:
name: {{ template "fullname" . }}
labels:
    chart: "{{ .Chart.Name }}-{{ .Chart.Version | replace "+" "_" }}"
spec:
type: {{ .Values.service.type }}
ports:
- port: {{ .Values.service.externalPort }}
    targetPort: {{ .Values.service.internalPort }}
    protocol: TCP
    name: {{ .Values.service.name }}
selector:
    app: {{ template "fullname" . }}
This is a basic Service definition using templating. When deploying the chart, Helm will generate a definition that will look a lot more like a valid Service. We can do a dry-run of a helm install and enable debug to inspect the generated definitions:
helm install mychart --dry-run --debug ./mychart
...
## Source: mychart/templates/service.yaml
apiVersion: v1
kind: Service
metadata:
name: pouring-puma-mychart
labels:
    chart: "mychart-0.1.0"
spec:
type: ClusterIP
ports:
- port: 80
    targetPort: 80
    protocol: TCP
    name: nginx
selector:
    app: pouring-puma-mychart
...
Values
The template in service.yaml makes use of the Helm-specific objects .Chart and .Values.. The former provides metadata about the chart to your definitions such as the name, or version. The latter .Values object is a key element of Helm charts, used to expose configuration that can be set at the time of deployment. The defaults for this object are defined in the values.yaml file. Try changing the default value for service.internalPort and execute another dry-run, you should find that the targetPort in the Service and the containerPort in the Deployment changes. The service.internalPort value is used here to ensure that the Service and Deployment objects work together correctly. The use of templating can greatly reduce boilerplate and simplify your definitions.
If a user of your chart wanted to change the default configuration, they could provide overrides directly on the command-line:
helm install mychart --dry-run --debug ./mychart --set service.internalPort=8080
For more advanced configuration, a user can specify a YAML file containing overrides with the --values option.
Helpers and other functions
The service.yaml template also makes use of partials defined in _helpers.tpl, as well as functions like replace. The Helm documentation has a deeper walkthrough of the templating language, explaining how functions, partials and flow control can be used when developing your chart.
Documentation
Another useful file in the templates/ directory is the NOTES.txt file. This is a templated, plaintext file that gets printed out after the chart is successfully deployed. As we’ll see when we deploy our first chart, this is a useful place to briefly describe the next steps for using a chart. Since NOTES.txt is run through the template engine, you can use templating to print out working commands for obtaining an IP address, or getting a password from a Secret object.
Metadata
As mentioned earlier, a Helm chart consists of metadata that is used to help describe what the application is, define constraints on the minimum required Kubernetes and/or Helm version and manage the version of your chart. All of this metadata lives in the Chart.yaml file. The Helm documentation describes the different fields for this file.
Step 2: Deploy your first chart
The chart you generated in the previous step is set up to run an NGINX server exposed via a Kubernetes Service. By default, the chart will create a ClusterIP type Service, so NGINX will only be exposed internally in the cluster. To access it externally, we’ll use the NodePort type instead. We can also set the name of the Helm release so we can easily refer back to it. Let’s go ahead and deploy our NGINX chart using the helm install command:
helm install example ./mychart --set service.type=NodePort
NAME:   example
LAST DEPLOYED: Tue May  2 20:03:27 2017
NAMESPACE: default
STATUS: DEPLOYED

RESOURCES:
==> v1/Service
NAME             CLUSTER-IP  EXTERNAL-IP  PORT(S)       AGE
example-mychart  10.0.0.24   <nodes>      80:30630/TCP  0s

==> v1beta1/Deployment
NAME             DESIRED  CURRENT  UP-TO-DATE  AVAILABLE  AGE
example-mychart  1        1        1           0          0s


NOTES:
1. Get the application URL by running these commands:
export NODE_PORT=$(kubectl get --namespace default -o jsonpath="{.spec.ports[0].nodePort}" services example-mychart)
export NODE_IP=$(kubectl get nodes --namespace default -o jsonpath="{.items[0].status.addresses[0].address}")
echo http://$NODE_IP:$NODE_PORT/
The output of helm install displays a handy summary of the state of the release, what objects were created, and the rendered NOTES.txt file to explain what to do next. Run the commands in the output to get a URL to access the NGINX service and pull it up in your browser.
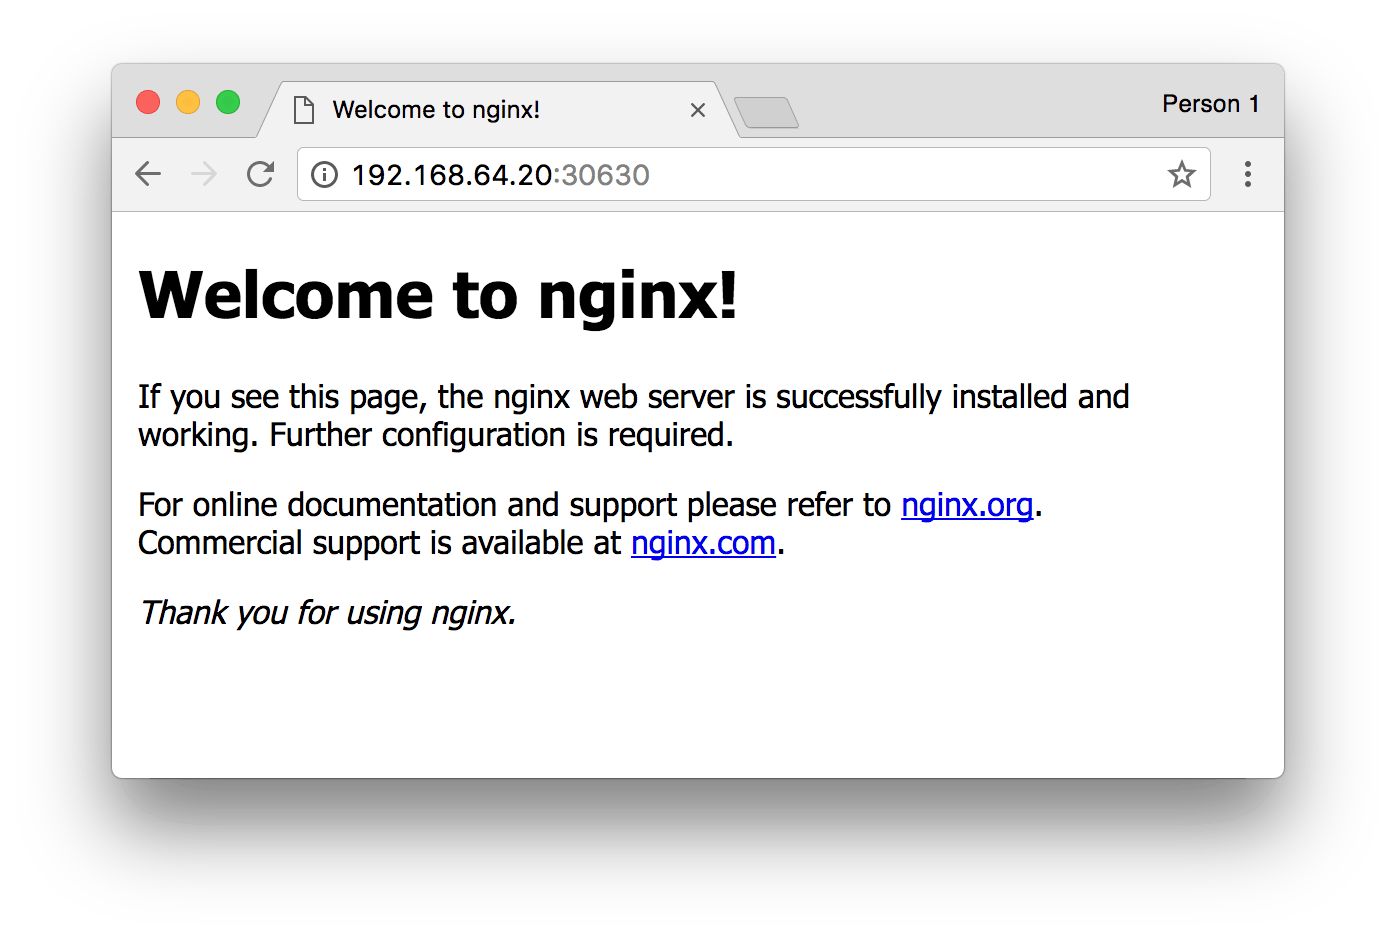
If all went well, you should see the NGINX welcome page as shown above. Congratulations! You’ve just deployed your very first service packaged as a Helm chart!
Step 3: Modify chart to deploy a custom service
The generated chart creates a Deployment object designed to run an image provided by the default values. This means all we need to do to run a different service is to change the referenced image in values.yaml.
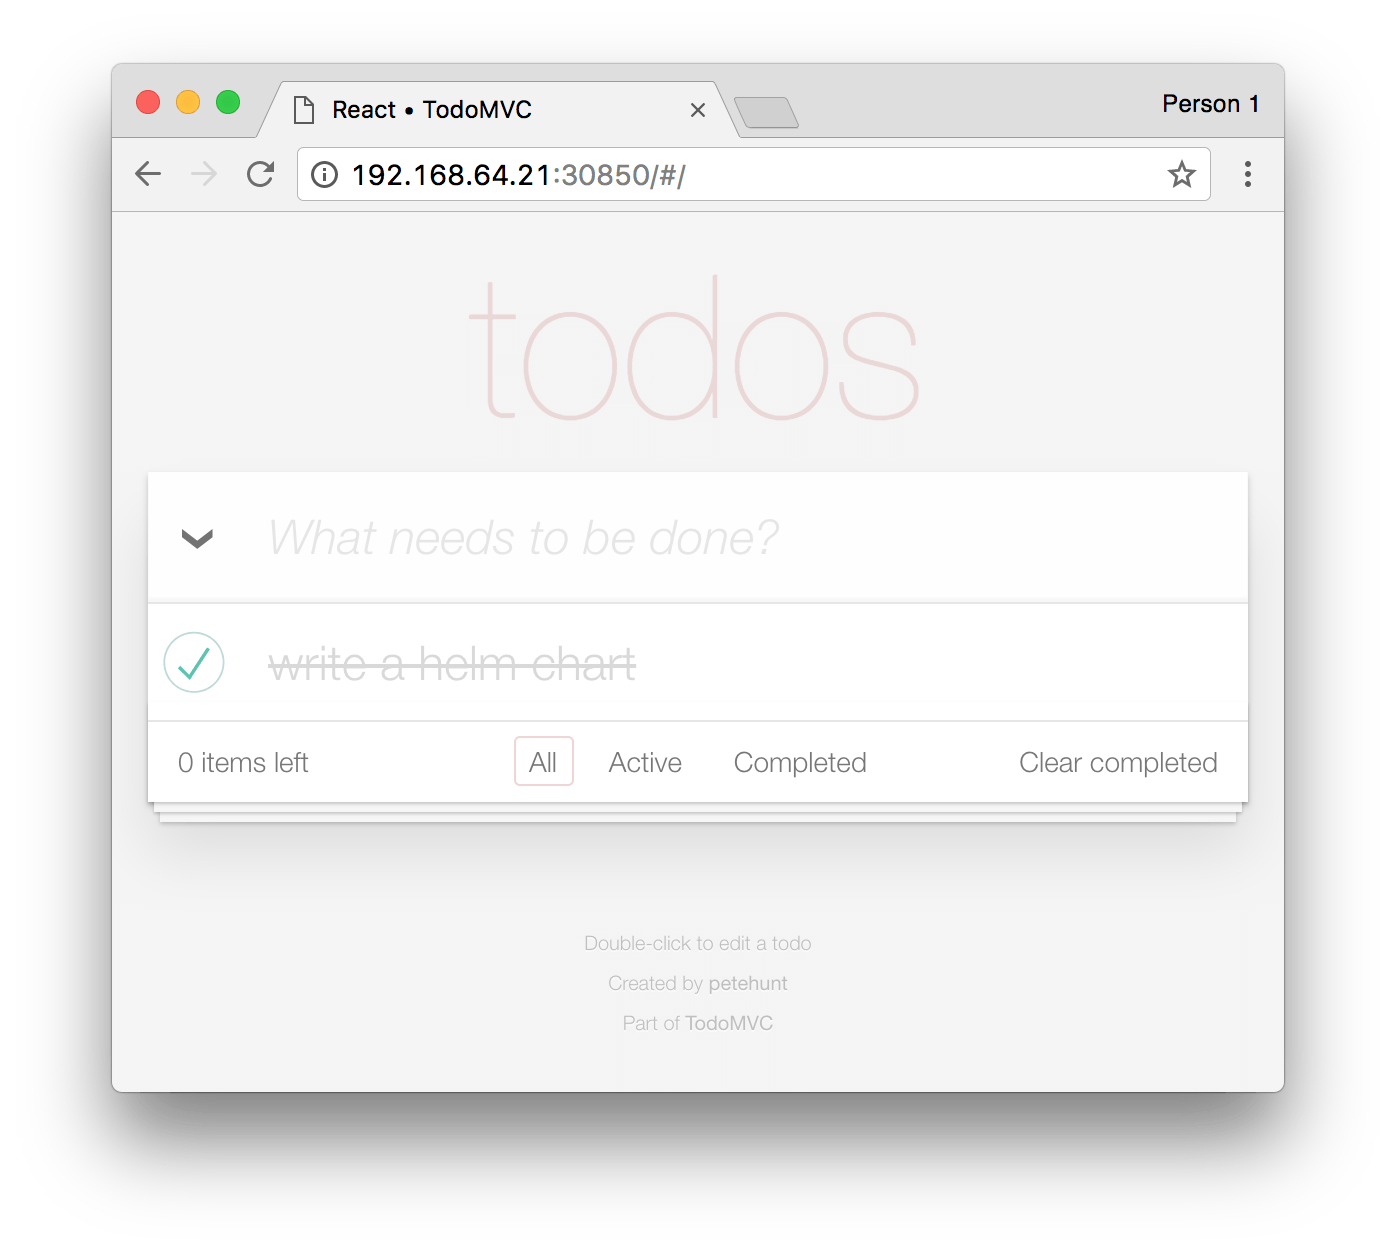
We are going to update the chart to run a todo list application available on Docker Hub. In values.yaml, update the image keys to reference the todo list image:
image:
repository: prydonius/todo
tag: 1.0.0
pullPolicy: IfNotPresent
As you develop your chart, it’s a good idea to run it through the linter to ensure you’re following best practices and that your templates are well-formed. Run the helm lint command to see the linter in action:
helm lint ./mychart
==> Linting ./mychart
[INFO] Chart.yaml: icon is recommended

1 chart(s) linted, no failures
The linter didn’t complain about any major issues with the chart, so we’re good to go. However, as an example, here is what the linter might output if you managed to get something wrong:
echo "malformed" > mychart/values.yaml
helm lint ./mychart
==> Linting mychart
[INFO] Chart.yaml: icon is recommended
[ERROR] values.yaml: unable to parse YAML
    error converting YAML to JSON: yaml: line 34: could not find expected ':'

Error: 1 chart(s) linted, 1 chart(s) failed
This time, the linter tells us that it was unable to parse the values.yaml file correctly. With the line number hint, we can easily find and fix the bug we introduced.
Now that the chart is once again valid, run helm install again to deploy the todo list application:
helm install example2 ./mychart --set service.type=NodePort
NAME:   example2
LAST DEPLOYED: Wed May  3 12:10:03 2017
NAMESPACE: default
STATUS: DEPLOYED

RESOURCES:
==> v1/Service
NAME              CLUSTER-IP  EXTERNAL-IP  PORT(S)       AGE
example2-mychart  10.0.0.78   <nodes>      80:31381/TCP  0s

==> apps/v1/Deployment
NAME              DESIRED  CURRENT  UP-TO-DATE  AVAILABLE  AGE
example2-mychart  1        1        1           0          0s


NOTES:
1. Get the application URL by running these commands:
export NODE_PORT=$(kubectl get --namespace default -o jsonpath="{.spec.ports[0].nodePort}" services example2-mychart)
export NODE_IP=$(kubectl get nodes --namespace default -o jsonpath="{.items[0].status.addresses[0].address}")
echo http://$NODE_IP:$NODE_PORT/
Once again, we can run the commands in the NOTES to get a URL to access our application.
If you have already built containers for your applications, you can run them with your chart by updating the default values or the Deployment template.
So far in this tutorial, we’ve been using the helm install command to install a local, unpacked chart. However, if you are looking to share your charts with your team or the community, your consumers will typically install the charts from a tar package. We can use helm package to create the tar package:
helm package ./mychart
Helm will create a mychart-0.1.0.tgz package in our working directory, using the name and version from the metadata defined in the Chart.yaml file. A user can install from this package instead of a local directory by passing the package as the parameter to helm install.
helm install example3 mychart-0.1.0.tgz --set service.type=NodePort
Repositories
In order to make it much easier to share packages, Helm has built-in support for installing packages from an HTTP server. Helm reads a repository index hosted on the server which describes what chart packages are available and where they are located.
We can use the helm serve command to run a local repository to serve our chart.
helm serve
Regenerating index. This may take a moment.
Now serving you on 127.0.0.1:8879
Now, in a separate terminal window, you should be able to see your chart in the local repository and install it from there:
helm search local
NAME         	VERSION	DESCRIPTION
local/mychart	0.1.0  	A Helm chart for Kubernetes

helm install example4 local/mychart --set service.type=NodePort
To set up a remote repository you can follow the guide in the Helm documentation.
Dependencies
As the applications your packaging as charts increase in complexity, you might find you need to pull in a dependency such as a database. Helm allows you to specify sub-charts that will be created as part of the same release. To define a dependency, create a requirements.yaml file in the chart root directory:
cat > ./mychart/requirements.yaml <<EOF
dependencies:
- name: mariadb
version: 0.6.0
repository: https://charts.helm.sh/stable
EOF
Much like a runtime language dependency file (such as Python’s requirements.txt), the requirements.yaml file allows you to manage your chart’s dependencies and their versions. When updating dependencies, a lockfile is generated so that subsequent fetching of dependencies use a known, working version. Run the following command to pull in the MariaDB dependency we defined:
helm dep update ./mychart
Hang tight while we grab the latest from your chart repositories...
...Unable to get an update from the "local" chart repository (http://127.0.0.1:8879/charts):
    Get http://127.0.0.1:8879/charts/index.yaml: dial tcp 127.0.0.1:8879: getsockopt: connection refused
...Successfully got an update from the "bitnami" chart repository
...Successfully got an update from the "incubator" chart repository
Update Complete. `Happy Helming!`
Saving 1 charts
Downloading mariadb from repo
$ ls ./mychart/charts
mariadb-0.6.0.tgz
Helm has found a matching version in the bitnami repository and has fetched it into the chart’s sub-chart directory. Now when we go and install the chart, we’ll see that MariaDB’s objects are created too:
helm install example5 ./mychart --set service.type=NodePort
NAME:   example5
LAST DEPLOYED: Wed May  3 16:28:18 2017
NAMESPACE: default
STATUS: DEPLOYED

RESOURCES:
==> v1/Secret
NAME              TYPE    DATA  AGE
example5-mariadb  Opaque  2     1s

==> v1/ConfigMap
NAME              DATA  AGE
example5-mariadb  1     1s

==> v1/PersistentVolumeClaim
NAME              STATUS  VOLUME                                    CAPACITY  ACCESSMODES  AGE
example5-mariadb  Bound   pvc-229f9ed6-3015-11e7-945a-66fc987ccf32  8Gi       RWO          1s

==> v1/Service
NAME              CLUSTER-IP  EXTERNAL-IP  PORT(S)       AGE
example5-mychart  10.0.0.144  <nodes>      80:30896/TCP  1s
example5-mariadb  10.0.0.108  <none>       3306/TCP      1s

==> apps/v1/Deployment
NAME              DESIRED  CURRENT  UP-TO-DATE  AVAILABLE  AGE
example5-mariadb  1        1        1           0          1s
example5-mychart  1        1        1           0          1s


NOTES:
1. Get the application URL by running these commands:
export NODE_PORT=$(kubectl get --namespace default -o jsonpath="{.spec.ports[0].nodePort}" services example5-mychart)
export NODE_IP=$(kubectl get nodes --namespace default -o jsonpath="{.items[0].status.addresses[0].address}")
echo http://$NODE_IP:$NODE_PORT/
Useful links
We’ve walked through some of the ways Helm supercharges the delivery of applications on Kubernetes. From an empty directory, you were able to get a working Helm chart out of a single command, deploy it to your cluster and access an NGINX server. Then, by simply changing a few lines and re-deploying, you had a much more useful todo list application running on your cluster! Beyond templating, linting, sharing and managing dependencies, here are some other useful tools available to chart authors:
- Define hooks to run Jobs before or after installing and upgrading releases
- Sign chart packages to help users verify its integrity
- Write integration/validation tests for your charts
- Employ a handful of tricks in your chart templates
A good amount of my day-to-day involves creating, modifying, and deploying Helm charts to manage the deployment of applications. Helm is an application package manager for Kubernetes, which coordinates the download, installation, and deployment of apps. Helm charts are the way we can define an application as a collection of related Kubernetes resources.
So why would anyone use Helm? Helm makes managing the deployment of applications easier inside Kubernetes through a templated approach. All Helm charts follow the same structure while still having a structure flexible enough to represent any type of application you could run on Kubernetes. Helm also supports versioning since deployment needs are guaranteed to change with time. The alternative is to use multiple configuration files that you manually apply to your Kubernetes cluster to bring an application up. If we’ve learned anything from seeing infrastructure as code, it’s that manual processes inevitably lead to errors. Helm charts give us a chance to apply that same lesson to the world of Kubernetes.
In this example, we’ll be walking through using Helm with minikube, a single-node testing environment for Kubernetes. We will make a small Nginx web server application. For this example, I have minikube version 1.9.2 and Helm version 3.0.0 installed on my Linux laptop. To get set up, do the following.
- Download and configure minikube by following the excellent documentation here.
- Download and configure Helm using your favorite package manager listed here or manually from the releases.
Create a Helm chart
Start by confirming we have the prerequisites installed:
$ which helm ## this can be in any folder as long as it returns in the path
/usr/local/bin/helm
$ minikube status ## if it shows Stopped, run `minikube start`
host: Running
kubelet: Running
apiserver: Running
kubeconfig: Configured
Starting a new Helm chart requires one simple command:
$ helm create mychartnameFor the purposes of this tutorial, name the chart buildachart:
$ helm create buildachart
Creating buildachart
$ ls buildachart/
Chart.yaml   charts/      templates/   values.yaml
Examine the chart’s structure
Now that you have created the chart, take a look at its structure to see what’s inside. The first two files you see—Chart.yaml and values.yaml—define what the chart is and what values will be in it at deployment.
Look at Chart.yaml, and you can see the outline of a Helm chart’s structure:
apiVersion: v2
name: buildachart
description: A Helm chart for Kubernetes

# A chart can be either an 'application' or a 'library' chart.
#
# Application charts are a collection of templates that can be packaged into versioned archives
# to be deployed.
#
# Library charts provide useful utilities or functions for the chart developer. They're included as
# a dependency of application charts to inject those utilities and functions into the rendering
# pipeline. Library charts do not define any templates and therefore cannot be deployed.
type: application

# This is the chart version. This version number should be incremented each time you make changes
# to the chart and its templates, including the app version.
version: 0.1.0

# This is the version number of the application being deployed. This version number should be
# incremented each time you make changes to the application.
appVersion: 1.16.0
The first part includes the API version that the chart is using (this is required), the name of the chart, and a description of the chart. The next section describes the type of chart (an application by default), the version of the chart you will deploy, and the application version (which should be incremented as you make changes).
The most important part of the chart is the template directory. It holds all the configurations for your application that will be deployed into the cluster. As you can see below, this application has a basic deployment, ingress, service account, and service. This directory also includes a test directory, which includes a test for a connection into the app. Each of these application features has its own template files under templates/:
$ ls templates/
NOTES.txt            _helpers.tpl         deployment.yaml      ingress.yaml         service.yaml         serviceaccount.yaml  tests/
There is another directory, called charts, which is empty. It allows you to add dependent charts that are needed to deploy your application. Some Helm charts for applications have up to four extra charts that need to be deployed with the main application. When this happens, the values file is updated with the values for each chart so that the applications will be configured and deployed at the same time. This is a far more advanced configuration (which I will not cover in this introductory article), so leave the charts/ folder empty.
Understand and edit values
Template files are set up with formatting that collects deployment information from the values.yaml file. Therefore, to customize your Helm chart, you need to edit the values file. By default, the values.yaml file looks like:
# Default values for buildachart.
# This is a YAML-formatted file.
# Declare variables to be passed into your templates.

replicaCount: 1

image:
  repository: nginx
  pullPolicy: IfNotPresent

imagePullSecrets: []
nameOverride: ""
fullnameOverride: ""

serviceAccount:
  # Specifies whether a service account should be created
  create: true
  # Annotations to add to the service account
  annotations: {}
  # The name of the service account to use.
  # If not set and create is true, a name is generated using the fullname template
  name:

podSecurityContext: {}
  # fsGroup: 2000

securityContext: {}
  # capabilities:
  #   drop:
  #   - ALL
  # readOnlyRootFilesystem: true
  # runAsNonRoot: true
  # runAsUser: 1000

service:
  type: ClusterIP
  port: 80

ingress:
  enabled: false
  annotations: {}
    # kubernetes.io/ingress.class: nginx
    # kubernetes.io/tls-acme: "true"
  hosts:
    - host: chart-example.local
      paths: []
  tls: []
  #  - secretName: chart-example-tls
  #    hosts:
  #      - chart-example.local

resources: {}
  # We usually recommend not to specify default resources and to leave this as a conscious
  # choice for the user. This also increases chances charts run on environments with little
  # resources, such as Minikube. If you do want to specify resources, uncomment the following
  # lines, adjust them as necessary, and remove the curly braces after 'resources:'.
  # limits:
  #   cpu: 100m
  #   memory: 128Mi
  # requests:
  #   cpu: 100m
  #   memory: 128Mi

nodeSelector: {}

tolerations: []

affinity: {}
Basic configurations
Beginning at the top, you can see that the replicaCount is automatically set to 1, which means that only one pod will come up. You only need one pod for this example, but you can see how easy it is to tell Kubernetes to run multiple pods for redundancy.
The image section has two things you need to look at: the repository where you are pulling your image and the pullPolicy. The pullPolicy is set to IfNotPresent; which means that the image will download a new version of the image if one does not already exist in the cluster. There are two other options for this: Always, which means it will pull the image on every deployment or restart (I always suggest this in case of image failure), and Latest, which will always pull the most up-to-date version of the image available. Latest can be useful if you trust your image repository to be compatible with your deployment environment, but that’s not always the case.
Change the value to Always.
Before:
image:
  repository: nginx
  pullPolicy: IfNotPresent
After:
image:
  repository: nginx
  pullPolicy: Always
Naming and secrets
Next, take a look at the overrides in the chart. The first override is imagePullSecrets, which is a setting to pull a secret, such as a password or an API key you’ve generated as credentials for a private registry. Next are nameOverride and fullnameOverride. From the moment you ran helm create, its name (buildachart) was added to a number of configuration files—from the YAML ones above to the templates/helper.tpl file. If you need to rename a chart after you create it, this section is the best place to do it, so you don’t miss any configuration files.
Change the chart’s name using overrides.
Before:
imagePullSecrets: []
nameOverride: ""
fullnameOverride: ""
After:
imagePullSecrets: []
nameOverride: "cherry-awesome-app"
fullnameOverride: "cherry-chart"
Accounts
Service accounts provide a user identity to run in the pod inside the cluster. If it’s left blank, the name will be generated based on the full name using the helpers.tpl file. I recommend always having a service account set up so that the application will be directly associated with a user that is controlled in the chart.
As an administrator, if you use the default service accounts, you will have either too few permissions or too many permissions, so change this.
Before:
serviceAccount:
  # Specifies whether a service account should be created
  create: true
  # Annotations to add to the service account
  annotations: {}
  # The name of the service account to use.
  # If not set and create is true, a name is generated using the fullname template
  Name:
After:
serviceAccount:
  # Specifies whether a service account should be created
  create: true
  # Annotations to add to the service account
  annotations: {}
  # The name of the service account to use.
  # If not set and create is true, a name is generated using the fullname template
  Name: cherrybomb
Security
You can configure pod security to set limits on what type of filesystem group to use or which user can and cannot be used. Understanding these options is important to securing a Kubernetes pod, but for this example, I will leave this alone.
podSecurityContext: {}
  # fsGroup: 2000

securityContext: {}
  # capabilities:
  #   drop:
  #   - ALL
  # readOnlyRootFilesystem: true
  # runAsNonRoot: true
  # runAsUser: 1000
Networking
There are two different types of networking options in this chart. One uses a local service network with a ClusterIP address, which exposes the service on a cluster-internal IP. Choosing this value makes the service associated with your application reachable only from within the cluster (and through ingress, which is set to false by default). The other networking option is NodePort, which exposes the service on each Kubernetes node’s IP address on a statically assigned port. This option is recommended for running minikube, so use it for this how-to.
Before:
service:
  type: ClusterIP
  port: 80

ingress:
  enabled: false
After:
service:
  type: NodePort
  port: 80

ingress:
  enabled: false
Resources
Helm allows you to explicitly allocate hardware resources. You can configure the maximum amount of resources a Helm chart can request and the highest limits it can receive. Since I’m using Minikube on a laptop, I’ll set a few limits by removing the curly braces and the hashes to convert the comments into commands.
Before:
resources: {}
  # We usually recommend not to specify default resources and to leave this as a conscious
  # choice for the user. This also increases chances charts run on environments with little
  # resources, such as Minikube. If you do want to specify resources, uncomment the following
  # lines, adjust them as necessary, and remove the curly braces after 'resources:'.
  # limits:
  #   cpu: 100m
  #   memory: 128Mi
  # requests:
  #   cpu: 100m
  #   memory: 128Mi
After:
resources:
  # We usually recommend not to specify default resources and to leave this as a conscious
  # choice for the user. This also increases chances charts run on environments with little
  # resources, such as Minikube. If you do want to specify resources, uncomment the following
  # lines, adjust them as necessary, and remove the curly braces after 'resources:'.
   limits:
     cpu: 100m
     memory: 128Mi
   requests:
     cpu: 100m
     memory: 128Mi
Tolerations, node selectors, and affinities
These last three values are based on node configurations. Although I cannot use any of them in my local configuration, I’ll still explain their purpose.
nodeSelector comes in handy when you want to assign part of your application to specific nodes in your Kubernetes cluster. If you have infrastructure-specific applications, you set the node selector name and match that name in the Helm chart. Then, when the application is deployed, it will be associated with the node that matches the selector.
Tolerations, tainting, and affinities work together to ensure that pods run on separate nodes. Node affinity is a property of pods that attracts them to a set of nodes (either as a preference or a hard requirement). Taints are the opposite—they allow a node to repel a set of pods.
In practice, if a node is tainted, it means that it is not working properly or may not have enough resources to hold the application deployment. Tolerations are set up as a key/value pair watched by the scheduler to confirm a node will work with a deployment.
Node affinity is conceptually similar to nodeSelector: it allows you to constrain which nodes your pod is eligible to be scheduled based on labels on the node. However, the labels differ because they match rules that apply to scheduling.
nodeSelector: {}

tolerations: []

affinity: {}
Deploy ahoy!
Now that you’ve made the necessary modifications to create a Helm chart, you can deploy it using a Helm command, add a name point to the chart, add a values file, and send it to a namespace:
$ helm install my-cherry-chart buildachart/ --values buildachart/values.yaml
Release “my-cherry-chart” has been upgraded. Happy Helming!
The command’s output will give you the next steps to connect to the application, including setting up port forwarding so you can reach the application from your localhost. To follow those instructions and connect to an Nginx load balancer:
$ export POD_NAME=$(kubectl get pods -l "app.kubernetes.io/name=buildachart,app.kubernetes.io/instance=my-cherry-chart" -o jsonpath="{.items[0].metadata.name}")
$ echo "Visit http://127.0.0.1:8080 to use your application"
Visit http://127.0.0.1:8080 to use your application
$ kubectl port-forward $POD_NAME 8080:80
Forwarding from 127.0.0.1:8080 -> 80
Forwarding from [::1]:8080 -> 80
View the deployed application
To view your application, open your web browser:

Congratulations! You’ve deployed an Nginx web server by using a Helm chart!
There is a lot to learn as you explore what Helm charts can do. If you want to double-check your work, visit my example repository on GitHub.
In this Kubernetes tutorial we will explore all about helm charts. These days there is tremendous pressure on developers to make their application lightweight and scalable. Most importantly the applications must be highly available. With Kubernetes we can almost achieve this but then it comes with it’s own sets of challenges. To manage large applications with multiple deployment pods, services, ingress, storage etc can be overwhelming. This is where Helm steps in to manage the life cycle of Kubernetes applications.
1. Overview on Helm
- Helm is an open source tool also referred as «Kubernetes Package Manager«
- You may be some other package managers such as YUM, DNF, APT etc which are used to simplify the process of managing rpms in bulk such as install, remove, revert, update etc.
- Now these package managers operates on RPM package while Helm works with charts.
- A Helm chart can be thought of as a Kubernetes package. Charts contain the declarative Kubernetes resource files required to deploy an application. Similar to an RPM, it can also declare one or more dependencies that the application needs in order to run.
- Similar to DNF/YUM which rely on repository to download the RPM packages, Helm relies on repositories to provide widespread access to charts
- Helm v3 is based on a client-only architecture. It connects to the Kubernetes API the same way as
kubectldoes, by using akubeconfigfile containing the Kubernetes cluster connection settings.
ALSO READ: How to add or remove label from node in Kubernetes
2. Download and Install Helm
Helm provides a single command-line client that is capable of performing all of the main Helm tasks. The helm client is written in a programming language called Go. Unlike Python, JavaScript, or Ruby, Go is a compiled language. Once a Go program is compiled, you do not need any of the Go tools to run or otherwise work with the binary.
You can download the helm binary package from Helm release page based on your distribution. Since we are using Linux, so we will download Linux amd64 package.
On Linux, the download will be in a gzipped tar archive (.tar.gz) that can be extracted with the tar -zxf command.
[root@controller ~]# tar -xzvf helm-v3.5.2-linux-amd64.tar.gz
linux-amd64/
linux-amd64/helm
linux-amd64/LICENSE
linux-amd64/README.md
We will place the linux-amd64/helm binary inside /usr/local/bin so that we don’t have to provide the path of the binary every time we use helm command. Alternatively we could have also added linux-amd64/helm to our PATH variable but the previous option is easier without modifying system variables.
[root@controller ~]# cp linux-amd64/helm /usr/local/bin/
Check the helm version
[root@controller ~]# helm version
version.BuildInfo{Version:"v3.5.2", GitCommit:"167aac70832d3a384f65f9745335e9fb40169dc2", GitTreeState:"dirty", GoVersion:"go1.15.7"}
To get the short version we can use --short flag in the above command:

3. Helm commands cheatsheet
You can get all available Helm CLI commands with helm –h. Let’s list the most used ones, along with their descriptions:
| Command | Description |
|---|---|
helm repo add |
Adds a Helm chart repository to the local cache list, after which we can reference it to pull charts from the repository |
helm repo update |
Gets the latest information about chart repositories; the information is stored locally. |
helm search repo |
Searches for charts in the given repositories. |
helm pull |
Downloads a given chart from the chart repository. |
helm upgrade -i |
If there is no release then install it, otherwise upgrade the release. |
helm ls |
Lists releases in the current namespace. If the -A flag is provided, it will list all the namespaces. |
helm history |
Prints historical revisions for a given release. |
helm rollback |
Rolls back a release to a previous revision. |
helm template |
Renders chart templates locally and displays the output. |
helm create |
Creates a chart |
helm lint |
Validates a chart |
helm plugin |
Installs, lists, updates, and uninstalls Helm plugins. |
ALSO READ: Easy steps to install Calico CNI on Kubernetes Cluster
4. Adding a chart repository
A Helm chart repository is simply a set of files, reachable over the network, that conforms to the Helm specification for indexing packages. There are thousands of helm chart repositories on the internet. The easiest way to find the popular repositories is to use your web browser to navigate to the Artifact Hub. There you will find thousands of Helm charts, each hosted on an appropriate repository.
For demonstration we will install the popular Drupal CMS. This makes a good example chart because it creates different types of Kubernetes resources such as Deployments, Services, Ingress and ConfigMaps.
4.1 Adding a repo
Adding a Helm chart is done with the helm repo add command:
[root@controller ~]# helm repo add bitnami https://charts.bitnami.com/bitnami
"bitnami" has been added to your repositories
The helm repo add command will add a repository named bitnami that points to the URL https://charts.bitnami.com/bitnami. Once we have added a repository, its index will be locally cached until we next update it.
4.2 Searching a Chart repository
We can run a query inside the repo to look out for any specific chart.
[root@controller ~]# helm search repo drupal
NAME            CHART VERSION   APP VERSION     DESCRIPTION
bitnami/drupal  10.2.6          9.1.5           One of the most versatile open source content m...
We did a simple search for the term drupal. Helm will search not just the package names, but also other fields like labels and descriptions.
ALSO READ: How to troubleshoot OpenStack ironic introspection

While Drupal is the first result, note that there are a variety of other charts that contain the word content somewhere in the descriptive text.
By default, Helm tries to install the latest stable release of a chart, but you can override this behavior and install a specific verison of a chart. Thus it is often useful to see not just the summary info for a chart, but exactly which versions exist for a chart:

4.3 Installing a Package (Chart)
At very minimum, installing a chart in Helm requires just two pieces of information: the name of the installation and the chart you want to install. The general syntax to install a chart is:
helm install <RELEASE NAME> <CHART NAME>
To install the drupal chart we will use:
[root@controller ~]# helm install mysite bitnami/drupal
NAME: mysite
LAST DEPLOYED: Wed Mar 10 03:36:29 2021
NAMESPACE: default
STATUS: deployed
REVISION: 1
TEST SUITE: None
NOTES:
*******************************************************************
*** PLEASE BE PATIENT: Drupal may take a few minutes to install ***
*******************************************************************

1. Get the Drupal URL:

  NOTE: It may take a few minutes for the LoadBalancer IP to be available.
        Watch the status with: 'kubectl get svc --namespace default -w mysite-drupal'

  export SERVICE_IP=$(kubectl get svc --namespace default mysite-drupal --template "{{ range (index .status.loadBalancer.ingress 0) }}{{.}}{{ end }}")
  echo "Drupal URL: http://$SERVICE_IP/"

2. Get your Drupal login credentials by running:

  echo Username: user
  echo Password: $(kubectl get secret --namespace default mysite-drupal -o jsonpath="{.data.drupal-password}" | base64 --decode)
ALSO READ: #1-ELK Stack: Configure elasticsearch cluster setup CentOS/RHEL 7/8
4.4 Listing installed charts
The helm list command is a simple tool to help you see installations and learn about those installations:
[root@controller ~]# helm list
NAME    NAMESPACE       REVISION        UPDATED                                 STATUS          CHART           APP VERSION
mysite  default         1               2021-03-10 03:36:29.001757599 +0530 IST deployed        drupal-10.2.6   9.1.5
To list all the resources deployed by this chart we can use kubectl get all -l "app.kubernetes.io/name=drupal":

5. Create your first helm chart
A Helm chart is an individual package that can be installed into your Kubernetes cluster. It is a collection of template files that describe Kubernetes resources. During chart development, you will often just work with a chart that is stored on your local filesystem. It uses templating to create Kubernetes manifests.
5.1 Create a new chart
I will create all my charts under
[root@controller ~]# mkdir -p /k8s/helm-examples
Create a chart called mychart:
[root@controller helm-examples]# helm create mychart
Creating mychart
This command will create the entire directory structure with all the files required to deploy nginx.
NOTE:
Nginx is a good starting point to showcase the parts of a chart and for basic stateless services. However, if you regularly create charts that do not follow the Nginx model, a different starting point would be more helpful. For this purpose, Helm has a feature called starter packs, which helm create can utilize to provide a different starting point to generate a chart from.
[root@controller helm-examples]# tree  mychart/
mychart/
├── charts
├── Chart.yaml
├── templates
│   ├── deployment.yaml
│   ├── _helpers.tpl
│   ├── hpa.yaml
│   ├── ingress.yaml
│   ├── NOTES.txt
│   ├── serviceaccount.yaml
│   ├── service.yaml
│   └── tests
│       └── test-connection.yaml
└── values.yaml
ALSO READ: Helm hooks examples in Kubernetes for beginners
5.2 Understanding helm chart’s structure
As you can see in the above snippet, the deployment.yaml file, Horizontal Pod Autoscaler (HPA), ingress, service, and service account resource templates have been created, all of which provide a good base to start from.
The preceding command also created the test-connection.yaml file so we can run a test with helm test against the installed nginx chart.
Here,
- Chart.yaml: The
Chart.yamlfile contains metadata and some functionality controls for the chart. - charts: The folder where dependent sub-charts get stored.
- templates: Templates used to generate Kubernetes manifests are stored in the templates directory.
- NOTES.txt: This file is a special template. When a chart is installed, the
NOTES.txttemplate is rendered and displayed rather than being installed into a cluster. - tests: Templates can include tests that are not installed as part of the install or upgrade commands. This chart includes a test that is used by the helm test command.
- values.yaml: Default values passed to the templates when Helm is rendering the manifests are in the
values.yamlfile. When you instantiate a chart, these values can be overridden.
5.3 Modifying the chart’s values
We will make some minor modifications to the default chart templates and values.
Under mychart/values.yaml we will modify pullPolicy to Always. The default value i.e. IfNotPresent means the pod will avoid pulling an image if it already exists. This we change to Always to pull the image every time a pod is deployed.
ALSO READ: How to perform kubernetes health check using probes
FROM:
image:
  repository: nginx
  pullPolicy: IfNotPresent
  # Overrides the image tag whose default is the chart appVersion.
  tag: ""
TO:
image:
  repository: nginx
  pullPolicy: Always
  # Overrides the image tag whose default is the chart appVersion.
  tag: ""
Under mychart/values.yaml we will use NodePort service to access the nginx server instead of ClusterIP from external network.
FROM:
service:
  type: ClusterIP
  port: 80
TO:
service:
  type: NodePort
  port: 80
5.4 Modifying the chart’s deployment file
Under mychart/templates/deployment.yaml we will use the latest available nginx image instead of the default app version i.e. 1.16 collected from Charts.yaml
FROM:
      containers:
        - name: {{ .Chart.Name }}
          securityContext:
            {{- toYaml .Values.securityContext | nindent 12 }}
          image: "{{ .Values.image.repository }}:{{ .Values.image.tag | default .Chart.AppVersion }}"
          imagePullPolicy: {{ .Values.image.pullPolicy }}
TO:
      containers:
        - name: {{ .Chart.Name }}
          securityContext:
            {{- toYaml .Values.securityContext | nindent 12 }}
          image: "{{ .Values.image.repository }}"
          imagePullPolicy: {{ .Values.image.pullPolicy }}
5.5 Linting the helm chart
We can utilise helm’s linting feature to check the chart for possible issues and errors. For that, we can use the helm lint <CHART NAME> command, which will check the Helm chart content by running a series of tests to verify the chart integrity.
Let’s lint the mychart we have created:
[root@controller helm-examples]# helm lint mychart
==> Linting mychart
[INFO] Chart.yaml: icon is recommended

1 chart(s) linted, 0 chart(s) failed
As you can see in the preceding screenshot, our chart has no issues and can be installed safely. The [INFO] message is just the warning that the chart’s icon is missing, which can be safely ignored.
ALSO READ: Ansible playbook tutorial | How to write a playbook with example
5.6 Installing the helm chart
It is always recommended to test your application before install and upgrade using --dry-run with helm command. With this, Helm will validate the templates against the Kubernetes cluster. The general syntax to install a chart is:
helm install <RELEASE NAME> <CHART NAME>
Here, <CHART NAME> is the local folder, so note that you can install the chart from remote Helm repositories and also from local folders, both with the same command. Bust we will first execute this command with --dry-run argument:
[root@controller helm-examples]# helm install --dry-run nginx mychart/
NAME: nginx
LAST DEPLOYED: Wed Mar 10 00:50:04 2021
NAMESPACE: default
STATUS: pending-install
REVISION: 1
HOOKS:
---
# Source: mychart/templates/tests/test-connection.yaml
apiVersion: v1
kind: Pod
metadata:
  name: "nginx-mychart-test-connection"
  labels:
    helm.sh/chart: mychart-0.1.0
    app.kubernetes.io/name: mychart
    app.kubernetes.io/instance: nginx
    app.kubernetes.io/version: "1.16.0"
    app.kubernetes.io/managed-by: Helm
  annotations:
    "helm.sh/hook": test
spec:
  containers:
    - name: wget
      image: busybox
      command: ['wget']
      args: ['nginx-mychart:80']
  restartPolicy: Never
MANIFEST:
---
# Source: mychart/templates/serviceaccount.yaml
apiVersion: v1
kind: ServiceAccount
metadata:
  name: nginx-mychart
  labels:
    helm.sh/chart: mychart-0.1.0
    app.kubernetes.io/name: mychart
    app.kubernetes.io/instance: nginx
    app.kubernetes.io/version: "1.16.0"
    app.kubernetes.io/managed-by: Helm
---
# Source: mychart/templates/service.yaml
apiVersion: v1
kind: Service
metadata:
  name: nginx-mychart
  labels:
    helm.sh/chart: mychart-0.1.0
    app.kubernetes.io/name: mychart
    app.kubernetes.io/instance: nginx
    app.kubernetes.io/version: "1.16.0"
    app.kubernetes.io/managed-by: Helm
spec:
  type: NodePort
  ports:
    - port: 80
      targetPort: http
      protocol: TCP
      name: http
  selector:
    app.kubernetes.io/name: mychart
    app.kubernetes.io/instance: nginx
---
# Source: mychart/templates/deployment.yaml
apiVersion: apps/v1
kind: Deployment
metadata:
  name: nginx-mychart
  labels:
    helm.sh/chart: mychart-0.1.0
    app.kubernetes.io/name: mychart
    app.kubernetes.io/instance: nginx
    app.kubernetes.io/version: "1.16.0"
    app.kubernetes.io/managed-by: Helm
spec:
  replicas: 1
  selector:
    matchLabels:
      app.kubernetes.io/name: mychart
      app.kubernetes.io/instance: nginx
  template:
    metadata:
      labels:
        app.kubernetes.io/name: mychart
        app.kubernetes.io/instance: nginx
    spec:
      serviceAccountName: nginx-mychart
      securityContext:
        {}
      containers:
        - name: mychart
          securityContext:
            {}
          image: "nginx"
          imagePullPolicy: Always
          ports:
            - name: http
              containerPort: 80
              protocol: TCP
          livenessProbe:
            httpGet:
              path: /
              port: http
          readinessProbe:
            httpGet:
              path: /
              port: http
          resources:
            {}

NOTES:
1. Get the application URL by running these commands:
  export NODE_PORT=$(kubectl get --namespace default -o jsonpath="{.spec.ports[0].nodePort}" services nginx-mychart)
  export NODE_IP=$(kubectl get nodes --namespace default -o jsonpath="{.items[0].status.addresses[0].address}")
  echo http://$NODE_IP:$NODE_PORT
So the --dry-run was successfully able to trigger the deploy hence it is safe to install the chart. Next we will actually install the chart without using --dry-run. We will name our chart as nginx:

ALSO READ: How to add label to running pod in Kubernetes
5.7 List all the resources deployed by chart
Now we can check the --dry-run output to get the list of resources which will be deployed by our chart, but we can also use the following command. It expects the Release Name of the chart. This command helped us to show the resources deployed by the chart.

5.8 Accessing the nginx server
Since we had defined a Service with NodePort so we can use the same to access the nginx server using external network. You can read Kubernetes Services for more details on different types of services and examples.
List the available services:
[root@controller helm-examples]# kubectl get svc
NAME            TYPE        CLUSTER-IP       EXTERNAL-IP   PORT(S)        AGE
kubernetes      ClusterIP   10.96.0.1        <none>        443/TCP        37h
nginx-mychart   NodePort    10.104.222.203   <none>        80:31204/TCP   4m11s
Check the worker node on which our deployment pod is running on:
[root@controller helm-examples]# kubectl get pods -o wide
NAME                            READY   STATUS    RESTARTS   AGE     IP          NODE                   NOMINATED NODE   READINESS GATES
nginx-mychart-7fd98b7fd-mmx62   1/1     Running   0          5m31s   10.44.0.1   worker-1.example.com   <none>           <none>
So we can use the worker-1.example IP with 31204 port from PORT(S) section of kubernetes service output to access the nginx server from nginx-mychart-7fd98b7fd-mmx62:

6. Debugging Helm Chart Templates
It can be really tricky to debug a helm chart template to identify the cause of failure. Following are some of the commands which can come handy in debugging helm chart templates:
helm lintis your go-to tool for verifying that your chart follows best practiceshelm install --dry-run --debugorhelm template --debug: We’ve seen this trick already. It’s a great way to have the server render your templates, then return the resulting manifest file.helm get manifest: This is a good way to see what templates are installed on the server.
ALSO READ: 12 steps to setup Kubernetes Cluster on AWS EC2
Here is a sample output for helm get manifest which populates all the variables used in the templates and you can make sure that all the values are properly populated for each resource.
[root@controller ~]# helm get manifest nginx
---
# Source: mychart/templates/serviceaccount.yaml
apiVersion: v1
kind: ServiceAccount
metadata:
  name: nginx-mychart
  labels:
    helm.sh/chart: mychart-0.1.0
    app.kubernetes.io/name: mychart
    app.kubernetes.io/instance: nginx
    app.kubernetes.io/version: "1.16.0"
    app.kubernetes.io/managed-by: Helm
---
# Source: mychart/templates/service.yaml
apiVersion: v1
kind: Service
metadata:
  name: nginx-mychart
  labels:
    helm.sh/chart: mychart-0.1.0
    app.kubernetes.io/name: mychart
    app.kubernetes.io/instance: nginx
    app.kubernetes.io/version: "1.16.0"
    app.kubernetes.io/managed-by: Helm
spec:
  type: NodePort
  ports:
    - port: 80
      targetPort: http
      protocol: TCP
      name: http
  selector:
    app.kubernetes.io/name: mychart
    app.kubernetes.io/instance: nginx
---
# Source: mychart/templates/deployment.yaml
apiVersion: apps/v1
kind: Deployment
metadata:
  name: nginx-mychart
  labels:
    helm.sh/chart: mychart-0.1.0
    app.kubernetes.io/name: mychart
    app.kubernetes.io/instance: nginx
    app.kubernetes.io/version: "1.16.0"
    app.kubernetes.io/managed-by: Helm
spec:
  replicas: 1
  selector:
    matchLabels:
      app.kubernetes.io/name: mychart
      app.kubernetes.io/instance: nginx
  template:
    metadata:
      labels:
        app.kubernetes.io/name: mychart
        app.kubernetes.io/instance: nginx
    spec:
      serviceAccountName: nginx-mychart
      securityContext:
        {}
      containers:
        - name: mychart
          securityContext:
            {}
          image: "nginx"
          imagePullPolicy: Always
          ports:
            - name: http
              containerPort: 80
              protocol: TCP
          livenessProbe:
            httpGet:
              path: /
              port: http
          readinessProbe:
            httpGet:
              path: /
              port: http
          resources:
            {}
7. Deleting/Un-installing a chart
To remove a Helm installation, use the helm uninstall command. This command does not need a chart name or any configuration files. It simply needs the name of the installation
[root@controller ~]# helm uninstall mysite
release "mysite" uninstalled
Summary
Creating a simple chart for your application is straightforward when you use the helm create command. Even when your applications are more complicated, the structure of charts is able to accommodate them, and the helm create command can help you. We already performed some minor modifications in this article, but you can further modify it and see the custom application running in your cluster. You can use this same flow to create your own charts.
ALSO READ: Tutorial: How to manage docker container with examples ?