Время на прочтение
6 мин
Количество просмотров 6.5K
Всем привет! Сегодня вас ждет легкая статья, которая расскажет как написать простую мобильную игру-викторину на Kotlin. Здесь я наглядно покажу как выглядит Kotlin для мобильной разработки и предложу свои идеи о том, как можно структурировать подобный проект. Что же, не буду томить вас графоманией, вперед!
Сейчас вы увидите остов идеи, которая ярко воспылала, но быстро прогорела. Мы с моим другом-дизайнером придумали сделать простую мобильную игру в текстовом формате. Жанр планировался приключенческий, а скупой текст должен был быть подогрет уникальным картинками в определенном стиле. К сожалению, дальше скелета приложения дело не продвинулось, поэтому я решил вынести его на публику. Вдруг кто-то найдет новые мысли. Сразу оговорюсь, вряд ли проект можно назвать серьезным решением, и для действительно больших приложений, возможно, стоит рассмотреть более сложные абстракции. Приложение стоит воспринимать как некий MVP.
Структура папок
Для начала поговорим о структуре папок. Вряд ли здесь будет что-то инновационное, но я считаю структуру папок в проекте одной из самых важных и интересных вещей в программировании.

В корне проекта лежит 2 Activity, которые у нас будут использоваться в приложении.
StartActivity отвечает за стартовый экран приложения, где можно начать игру и потенциально разместить какие-то глобальные элементы управления (настройки, кнопочки “поделиться” и т.п.).
MainActivity, которую корректнее было бы назвать как-то вроде GameActivity, будет отвечать за рендер вопросов викторины, вариантов ответов и соответствующих картинок.
Папка Entity содержит некоторые доменные сущности. Файл json с самим сюжетом игры, о котором я расскажу чуть позже, будет превращаться как раз в набор моделей из папки Entity.
Папка dao (от сокращения data access object) в проекте нужна для содержания сущностей, которые предоставляют доступ к данным. Именно здесь будут лежать классы, которые будут отвечать за хранение данных в Runtime, и классы, которые смогут превратить набор структурированных данных в объекты.
Папка core будет содержать объекты, которые относятся непосредственно к ходу игры. По итогу таких объектов вышло достаточно мало, однако здесь кроется потенциал для расширения.
Папка UI отвечает, как многие уже догадались, за какие-то интерфейсные сущности. В частности, сюда стоит помещать presenter-ы для наших activity.
Модель данных
В нашем MVP сами данные представляют собой json-файл, который содержит массив объектов. Вот пример одного из таких объектов:
{
 "id": 2,
 "type": "Q",
 "question": "После получаса ходьбы вы наткнулись на затушенное кострище. Здесь были люди!",
 "answers": [
   {
     "next_question_id":  5,
     "answer": "Попытаться обнаружить следы"
   },
   {
     "next_question_id":  3,
     "answer": "Потрогать, вдруг кострище еще теплое"
   }
 ]
}
Давайте разберем, что здесь для чего:
-
Id — это некоторый уникальный идентификатор. Не буду вновь повторяться и рассказывать для чего вообще существуют уникальные идентификаторы. Лишь скажу, что в приложении он будет использоваться для поиска следующего вопроса
-
type — строка состоящая из одного символа. Литера Q означает, что это шаг типа «question» и он имеет возможность перехода к следующему вопросу. Существуют еще типы F (Fail) и S (Success). Это особые типы вопросов, которые говорят нам о том, что игра закончена поражением или победой
-
question — просто текст вопроса, который будет выведен на экране
-
answers — массив ответов на текущий вопрос. Он может содержать от 0 до 4 ответов. Массив пуст, когда текущий вопрос имеет тип F или S. В объектах ответов мы имеем поля, указывающие на следующий вопрос, и текст ответа, который будет отображаться на экране
JSON файл с игрой содержится в папочке assests. Подразумевалось, что изначально данные игры будут храниться непосредственно в приложении. Однако, теоретически, мы можем получать этот JSON по сети, сохраняя его локально или в sqllite. Либо же мы можем организовать общение приложения по сети с некоторым сервером, сохраняя этот же протокол.
Тут же, в модели данных, можно прикрепить ссылки на картинки, если мы их хотели бы менять. Пока это логика не реализована, она лишь планировалась. Однако ассоциацию между картинкой и вопросом хранить лучше именно здесь.
Управление игрой и ее состоянием
Для начала, давайте разберемся как мы будем хранить модель данных в runtime. Для этого был придуман интерфейс Store.
public interface Store {
    fun getAllQuestions(): List<Question>

    fun getQuestionById(id: Int): Question

    fun init(context: Context): Store
}
Этот интерфейс расширяем и содержит набор методов, которые позволяют нам работать с нашими данными. Используя фабричный метод, мы можем получить какую-то определенную реализацию хранилища. В нашем MVP реализована версия хранилища с локальным JSON-ом, который превратится в коллекцию объектов, содержащихся в оперативной памяти. Теоретически, мы можем создать еще несколько реализаций, в которых, например, класс будет обращаться в sqllite или же на сервер за следующим вопросом. Все, что нам потребуется изменить в приложении — лишь написать новую реализацию хранилища.
class StoreFactory {
    companion object {
        fun getStore(ctx: Context): Store {
            return LocalStore().init(ctx)
        }
    }
}
Выше я немного слукавил. Если мы хотим работать с сервером по сети или же доставать объекты из локальной базы данных, то нам определенно потребуются асинхронные операции. В противном случае, наш интерфейс будет блокироваться, и мы будем получать ошибки ANR. Для обхода этой проблемы нам нужно выполнять все IO — операции не в главном потоке. Поскольку я не очень много занимался production разработкой под андроид, то для решения этой проблемы я посоветую популярный RX. Надеюсь, более опытные разработчики под мобильные устройства предложат альтернативы.
Дальше мы создаем класс игры:
class Game {
    private lateinit var store: Store
    private lateinit var question: Question

    fun init(context: Context) {
        this.store = StoreFactory.getStore(context)

        question = store.getQuestionById(1)
    }

    fun isGameEnd(): Boolean {
        return isSuccess() || isFail()
    }

    fun isSuccess(): Boolean {
        return question.isSuccess()
    }

    fun isFail(): Boolean {
        return question.isFail()
    }

    fun chooseAnswer(numberOfAnswer: Int) {
        val answer: Answer = question.getAnswers()[numberOfAnswer - 1]
        question = store.getQuestionById(answer.getNextQuestionId())
    }

    fun getQuestion(): Question {
        return question
    }
}
Класс содержит в себе 2 поля: экземпляр класса Store, о котором мы уже успели поговорить, и экземпляр текущего вопроса, на котором находится пользователь. Помимо этого, игра может закончится (когда type текущего вопрос F или S). Также в данном классе существует метод, который получит выбранный ответ и поменяет текущий вопрос на следующий.
Достаточно много логики уже содержится в модели данных. Например информация о том, закончилась ли игра, как она закончилась. При таком подходе нам остается просто отобразить информацию на экране.
Слегка неочевидный пункт содержится в модели вопроса (Question.kt). Давайте обратим внимание на реализацию геттера ответов:
fun getAnswers(): List<Answer> {
        val list: MutableList<Answer> = ArrayList(this.answers)
        val shouldAdd: Int = 4 - list.size

        for (i in 1..shouldAdd) {
            list.add(Answer("", -1))
        }

        return list
    }
Из этого метода мы всегда возвращаем List с 4 вариантами ответа, даже если вопрос предполагает, что их 2. Мы просто добиваем нашу коллекцию пустыми объектами с невалидными id. На слое представления они просто не будут отображены, это не изменит логику поведения экрана. Это небольшой костыль для того, чтобы нам было проще рендерить объекты.
Рендер игры
Тут все достаточно прозаично, мы просто отображаем вопрос и 4 варианта ответа, вешаем обработчики кликов на них и даем пользователю играть. При каждом выборе ответа мы обновляем страницу с текущим вопросом, отвечает у нас за это presenter:
private fun updateView() {
        if (game.isGameEnd()) {
            showEndGame()
            return
        }

        activity.setQuestion(game.getQuestion().getText())

        val answers: List<Answer> = game.getQuestion().getAnswers()
        answers.forEachIndexed {idx, answer -> activity.setAnswer(idx + 1, answer.getText())}
    }

    fun chooseAnswer(number: Int) {
        game.chooseAnswer(number)
        updateView()
    }
Ну и когда игра закончена, мы возвращаем пользователя на StartActivity, передавая результат игры (текст текущего вопроса) в Intent:
private fun showEndGame() {
        val intent = Intent(activity, StartActivity::class.java).apply {
            putExtra(StartActivity.RESULT_MESSAGE, game.getQuestion().getText())
        }
        activity.startActivity(intent)
    }
Вместо заключения
Как я уже говорил, вряд ли это приложение можно назвать максимально production-ready. Здесь много допущений и мест, где срезаются углы. Это скорее MVP, скелет, который можно развить. Ниже я напишу то, что можно было бы улучшить или добавить:
-
Дизайн. Его тут вообще нет, есть пространство для маневра
-
Текущие UI-элементы неплохо отображаются на моем эмуляторе, однако на реальном смартфоне есть проблемы и конфликты с темой. Над этим можно поработать
-
Добавить различные картинки в модель данных, заменять картинки на экране
-
Стоило бы перенести тяжелые операции парсинга json — файла в фон, добавить loader на время этого процесса
-
Добавить возможность сохранять данные из json в sqllite и работать с этим
Ну и ссылка на полные исходники для тех, кто хочет посмотреть на проект комплексно.
Learn the basic concepts of game development and create your own Snake clone by following this step-by-step tutorial.

Table of Contents
Preface
Would you like to be able to create an immersive world from scratch and let other people explore it? It’s truly a magical power and I wanted to acquire this power since my early childhood. In fact, that’s why I chose to study computer science.
Game development is one of the most fulfilling things I experienced in my life. Games have no pre-existing rules or limits, the only limit is your own imagination. You’re free to create whole worlds from scratch and they’ll look and behave exactly as you want them to. It gives you a powerful way to express your ideas and share them with other people.
I’m not a professional game developer. Why? It turned out there are many other useful things computers can do and, unfortunately, making video games isn’t a dream job. I’ve made a lot of games during my student years and it helped me to land my first programming job but making games is just one of my hobbies now. This means I’m not the best person to give anyone advice on how to become a professional game developer. This guide is aimed at hobbyists, like myself, who just want to learn the basic concepts of game development using Kotlin.
Art Form or Entertainment?
In my opinion, game development is a form of art. Games can tell you an interesting story, just like a good book does, but you can actually see this story exactly as the author wanted you to see it. Movies are better at visuals but they’re linear so you can only be an observer who have no influence on what’s happening. It can be a good thing, but it’s limiting. Also, the movies have a fixed pace and it’s one of the reasons why some books are much better than movies despite the lack of visuals: movies are often artificially shortened to fit the movie theater standards or artificially extended to show you more ads.
Common Issues
The most common issue that an indie game developer might face is the lack of motivation to finish a game. Here are several tips on how to stay motivated:
It’s Not About Tools
It’s impossible to master everything, learning every aspect of game development can take years but it’s not necessary to start writing games as a hobby. Many beginners try to use low-level libraries such as OpenGL, DirectX or Vulkan in their first games. That’s what a professional game developer should know how to use but in most of the cases the Canvas API would be a better choice since it’s much simpler to use. You can save a lot of time and nerves if you select the right tools.
Time is an Important Factor
A lot of people try to write their own MMORPG or think they can match the top games in the industry in terms of the features. Let’s make it clear: even if you have the required skills and motivation, no one can make such a game in reasonable time. It takes hundreds of people and a few years, sometimes more than a decade to produce a typical AAA game. As an indie game developer or a small team, you don’t have a lot of time and resources but there are advantages in being small that you can utilize. Although it’s nearly impossible for you to create a giant game world and tons of beautiful graphics, you are able to experiment more with a gameplay. Big companies are too worried for their sales and it limits their ability to experiment with a gameplay. If you have no investors to please, that actually gives you a big advantage.
Make it Look Good Enough
Graphics is an important part of modern games. It’s cool if you can write a clean and beautiful code but players won’t see it. If your game looks bad it can discourage the players and even the authors themselves. It’s much more fun to work on something that looks nice and clean. A typical indie game doesn’t require a lot of graphics but graphics is very important to keep you motivated and make your game more enjoyable.
Engine
We won’t use any specific game engine, it’s more fun to create a game engine from scratch and it will also help us to better understand how video games work under the hood. We’re going to create a Snake game clone because it’s relatively easy to implement which makes it a good game to start with.
Source Code
You can check the full source code here. It may help you to understand project confuguration and see the end result that you should expect if you’ll follow this tutorial.
Creating a Scene
Every game is different but, luckily for us, many video games share a common set of components and patterns. There are things that may be specific to a certain genre but on a high enough level all games are more or less the same and they all made of the same components.
Some of those components are:
-
Screen— player has to be able to see what’s going on in the game and using a screen is a convenient way to provide visual feedback. It can be a TV screen, computer screen, mobile screen or even a VR headset. Technically, there are two screens in a VR headset but we don’t have to worry about that, most of the required adjustments are handled automatically by the headset hardware. -
Controller— it’s the device that can be used to interact with video games. Many devices can be used as controllers: keyboards, computer mice, joysticks and a variety of more exotic devices such as steering wheels or fighter jet controllers. -
Game Objects— anything that exists in a game is a game object. Some objects are static, such as the walls, and some are more dynamic, such as the player’s game character or his friends and enemies.
Scene Class
Let’s start with implementing a screen component. A typical desktop app consists of several windows and every window has its own purpose and separating concerns is usually beneficial for the app users and the developers alike. App users may have a better focus and feel less overwhelmed since there is a separate window for each specific task and the developers can split the application logic between those screens which makes it easier to maintain the code base.
Video games don’t have a window system by default, but it doesn’t mean we can’t implement it. I think we shouldn’t use the name ‘window’ when we’re making a game. “Level” seems to be a good name, many games do look like a series of levels but, in my opinion, this name is not abstract enough. For instance, a main menu or a settings screen are visually separated from the rest of the game and it’s confusing to treat them as “levels” but they also have a lot in common with the rest of the screens: they usually display something and process the input events from the game controllers. So let’s call it a scene, it will be easier to understand that any kind of action can happen here as long as it has something to show to the player. Obviously, we don’t want the player to stare at an empty scene, it’s no fun at all.
Here is our Scene class:
import java.awt.Graphics2D
import java.util.concurrent.TimeUnit

abstract class Scene(val game: Game) {

    abstract fun update(
        timePassed: Long,
        timeUnits: TimeUnit = TimeUnit.NANOSECONDS
    )

    abstract fun draw(graphics: Graphics2D)
}
How Does It Work?
The update method is supposed to be called each time we want the scene to update it’s state but, in order to perform the update, the scene needs to know how much time has passed since the last call. That’s why we require the caller to provide us with the timePassed value. For instance if we have a moving car on the scene there is no way to tell how far it should move unless we know both its speed and the amount of time that has passed since the last update. The update and draw methods should be called at least 30 times per second to make sure that all the game objects will move smoothly. That’s why if you try to launch a resource intensive game on the old hardware it would look like a slide show. Some computers might be unable to update and draw the game scenes fast enough to make the game look “realtime”.
The only purpose of the update method is to sync “game time” with “real time”. We don’t care what a particular game does with this information, we just need to tell the game how much time has passed since the last call.
Updating game state is important, but we still need a way to display it in order to make it visible to a player. That’s why we have introduced the draw method, and it supposed to be called immediately after update.
Conclusion
Now we have our way to separate our games into a set of scenes, but it’s only one of the core game components we need. Next, we’re going to make a component which will handle the data from the input devices. It’s fun to see the objects move but it’s even more fun to be able to control them.
Handling Input Events
Controllers are devices that can register players’ actions, and we want our players to be able to alter the course of a game. In more technical terms it means that every game has a state and the game controllers are devices that can be used to change that state.
There are lots of different input devices: typical console games tend to rely on game-pads, flight or racing simulators can support their own unique controllers, but we’re writing a PC game, so we’ll stick with the keyboard: the most popular input device used to interact with personal computers.
It makes sense to also support the computer mouse and trackpad, but we don’t really need those devices to control a snake, so we can do it later. It will also make the code a bit more simple, and it’s always better not to add any unnecessary complexity.
Input Class
Let’s add a new class and call it Input
import java.awt.event.KeyEvent
import java.awt.event.KeyListener

class Input : KeyListener {
    private val events = mutableListOf<Event>()

    override fun keyTyped(event: KeyEvent) {
        // We're not interested in this kind of events
    }

    override fun keyPressed(event: KeyEvent) {
        synchronized(this) {
            events += Event.KeyPressed(event)
        }
    }

    override fun keyReleased(event: KeyEvent) {
        synchronized(this) {
            events += Event.KeyReleased(event)
        }
    }

    fun consumeEvents(): List<Event> {
        synchronized(this) {
            val consumedEvents = events.toList()
            events.clear()
            return consumedEvents
        }
    }

    sealed class Event {
        data class KeyPressed(val data: KeyEvent) : Event()
        data class KeyReleased(val data: KeyEvent) : Event()
    }
}
How Does It Work?
Let’s take a closer look at our Input class. It implements the KeyListener interface which allows it to be notified of any keyboard events that happen inside the game window.
There are 3 methods we have to listen to in order to implement the KeyListener interface:
keyTyped— we don’t need those events, so we will ignore themkeyPressed— this method is being called each time our player presses a button on a keyboard. We want to know about that because we need to save this event for later processingkeyReleased— the player released a button, it can be valuable, so we need to save it too. Sometimes we want to do something while a certain button is pressed, so we need to know when to start as well as when to stop such actions (think of a gas pedal or something like that)
Note that we just store those events for later use, so we expect some other component to actually react to them. I’ve called it event consumption because once the external component reads the available events — they are gone. It’s more straightforward because it helps us to avoid processing the same event twice because it will never return twice, but it also assumes that we have a single consumer, otherwise such a model wouldn’t work in a predictable way.
Why Synchronize?
Probably you’ve noticed that all the code that touches the event collection is placed inside the synchronized blocks. The reason is that our game loop is using its own thread but our game window is a part of the Swing library which uses a different thread so we have to be extra cautious about that. Concurrent modification of a collection is a thing we would like to avoid since it will crash our game from time to time or introduce a lot of weird and hard to trace side effects.
So what exactly are the synchronized blocks used for? They guarantee that the code inside them will never be used by more than one thread at the same time. We can also use this keyword for several methods inside a class and that would guarantee that only one thread can access any of those methods at any given moment. This of course leads to some performance drawbacks, but it will guarantee that our class will work properly in a concurrent environment, and we can actually use more advanced synchronization techniques, but we won’t be using them in this tutorial to keep the code as simple as possible.
Conclusion
Now we have the Scene and the Input classes done. In the next piece we’ll create the key element of our mini engine — the Game class. It will utilize and tie together the code we had created earlier.
Game Loop
Every game has a game loop. It is a simple loop that should be familiar to every programmer. We can think of a game as a sequence of static images changing fast enough to create an illusion of motion. The purpose of the game loop is to keep generating new frames as long as the loop lasts and, as with any loop, it shouldn’t last forever, so we must have some way of breaking that loop, usually when a player decides to quit the game.
Implementation
We’re going to create a class called Game which will wrap the game loop, and it will also contain all the crucial game components such as an input handling module and the current scene.
This class will have two methods:
play— this method will activate the game loop, so it can start producing new frames.pause— this method will move the game to the inactive state. The game loop should be stopped which means the game should stop producing new frames.
Here is the code:
import kotlinx.coroutines.*
import kotlinx.coroutines.swing.Swing
import java.awt.Canvas
import java.awt.Dimension
import java.awt.Graphics2D

class Game(val screenSize: Dimension) : Canvas() {
    var scene: Scene? = null

    val input = Input()

    private var gameLoop: Job? = null

    init {
        size = screenSize
        addKeyListener(input)
    }

    fun play() {
        if (gameLoop != null) return

        gameLoop = GlobalScope.launch {
            var lastIterationTime = System.nanoTime()

            while (isActive) {
                val scene = scene ?: continue
                val now = System.nanoTime()
                val timePassed = now - lastIterationTime
                lastIterationTime = now

                scene.update(timePassed)

                withContext(Dispatchers.Swing) {
                    scene.draw(bufferStrategy.drawGraphics as Graphics2D)
                    bufferStrategy.show()
                }
            }
        }
    }

    fun pause() = runBlocking {
        gameLoop?.cancel()
        gameLoop?.join()
        gameLoop = null
    }
}
How Does It Work?
As you can see, the Game class extends the Canvas which is the part of the AWT (Abstract Window Toolkit) library. We can think of the Canvas as the empty drawing space that we’ll be using to draw our game scenes on and because our Game class is also a Canvas we can easily place it inside any AWT window.
The Game constructor takes a single parameter: screenSize, it should state how much space (in pixels) our game wants to occupy. The Game class also has references to the current scene, the input module and the game loop. The play and pause methods are used to control the game lifecycle.
The most interesting part of this class is the content of the game loop, so let’s examine it in more detail:
gameLoop = GlobalScope.launch {
    var lastIterationTime = System.nanoTime()

    while (isActive) {
        val scene = scene ?: continue
        val now = System.nanoTime()
        val timePassed = now - lastIterationTime
        lastIterationTime = now

        scene.update(timePassed)

        withContext(Dispatchers.Swing) {
            scene.draw(bufferStrategy.drawGraphics as Graphics2D)
            bufferStrategy.show()
        }
    }
}
Before we go into the while loop, we have to initialize the variable called lastIterationTime. This variable holds the time of the previous iteration, and we need to know it in order to find out how much time has passed since the last frame was rendered.
The loop itself will run until the enclosing coroutine is active. Calling the pause method will make this coroutine inactive, so it will stop the loop so the code inside it will stop repeating.
In The Loop
The first thing that the loop does is calculating how much time has passed since the last iteration, and it can vary from computer to computer. The timePassed value will be larger on slower PCs and lower on the fastest ones. Obviously, the lower, the better but players would hardly notice any difference if the game loop can do at least 30 iterations per second. It would even make sense to cap the maximum amount of frames at 60 per second to make sure we’re not wasting more processing power than we actually need to make sure the game runs smoothly.
Now that we know how much time has passed since the previous iteration, we can call the update and draw methods to update the game state and draw that state on the screen. We can also obtain a Graphics2D object from our Canvas which can be used by our scenes to perform various drawing operations.
And the last step our loop is supposed to do is to call the BufferStrategy.show method to notify other UI components that the frame is ready to be displayed.
Conclusion
Now we have the game loop, the input module and the Scene class to display our frames. It’s all tied together and managed by the Game class. The only thing our little framework is missing is an actual window. The game needs to live inside a window and that’s what we’re going to implement next.
Game Factory
We already have a set of components for controlling the game loop, drawing on a screen and processing the input events so why do we need something else? There are two key things that are still missing:
- We need a place to instantiate our game
- Our game needs a window so we have to provide it
Let’s add the GameFactory class which will do those tasks for us:
import java.awt.Dimension
import javax.swing.WindowConstants
import java.awt.BorderLayout
import javax.swing.JFrame

object GameFactory {

    fun create(
        screenSize: Dimension,
        windowTitle: String
    ): Game {
        val game = Game(screenSize)

        JFrame().apply {
            title = windowTitle
            isVisible = true

            layout = BorderLayout()
            add(game)
            pack()

            defaultCloseOperation = WindowConstants.EXIT_ON_CLOSE
            setLocationRelativeTo(null)
        }

        game.createBufferStrategy(2)
        game.requestFocus()
        return game
    }
}
How Does It Work?
This class takes the screen size and window title as arguments. Both of them can vary from game to game, so we shouldn’t hard-code it in order to make this factory reusable.
Our game can’t appear on the screen if there is no window to host it. The code above uses a JFrame to create the game window. We should also make sure that the game is visible and that the window is not resizable by default. The only line that seems a bit odd is setLocationRelativeTo(null) and it simply means that we want our game window to be placed right in the center of a computer screen.
The last step is to create a buffer strategy and request the input focus so our game can receive the input events from a keyboard.
Launching a Game
Let’s create a new file and call it Main.kt which will serve as an entry point to our game. Here is the code:
import java.awt.Dimension

fun main() {
    val game = GameFactory.create(
        screenSize = Dimension(660, 660),
        windowTitle = "Snake"
    )

    game.play()
}
Now we can launch our game engine and see if it works so feel free to do it. You should see the empty white window in the center of your screen.
Conclusion
Our “game engine” is up and running and that means we can start using it. Our next goal is to create a simple scene to demonstrate how to draw on the screen and handle user input.
Main Menu
Most of the games have a main menu because we might not always know what the player want to do when he or she launches a game. The player might want to start a new game, load the saved game data or modify the game settings but we will have a very simple menu in the Snake game which will have only one option: start a new game.
The main menu is just a Scene so it already has the ability to draw on the screen and it can also handle user input. Let’s see the whole code first:
import java.awt.Color
import java.awt.Font
import java.awt.Graphics2D
import java.awt.event.KeyEvent
import java.util.concurrent.TimeUnit

class MainMenuScene(game: Game) : Scene(game) {
    private val primaryFont = Font("Default", Font.BOLD, 30)
    private val secondaryFont = Font("Default", Font.PLAIN, 20)

    override fun update(timePassed: Long, timeUnits: TimeUnit) {
        game.input.consumeEvents().forEach {
            if (it is Input.Event.KeyPressed && it.data.keyCode == KeyEvent.VK_ENTER) {
                game.scene = GameScene(game)
            }
        }
    }

    override fun draw(graphics: Graphics2D) {
        graphics.apply {
            color = Color.black
            fillRect(0, 0, game.screenSize.width, game.screenSize.height)

            font = primaryFont
            color = Color.white
            val name = "Snake"

            drawString(
                name,
                game.screenSize.width / 2 - fontMetrics.stringWidth(name) / 2,
                game.screenSize.height / 2 - 50
            )

            font = secondaryFont
            color = Color.gray
            val message = "Press Enter to continue"

            drawString(
                message,
                game.screenSize.width / 2 - fontMetrics.stringWidth(message) / 2,
                game.screenSize.height / 2 + 50
            )
        }
    }
}
Properties
Let’s examine all the properties that are declared in this class:
private val primaryFont = Font("Default", Font.BOLD, 30)
private val secondaryFont = Font("Default", Font.PLAIN, 20)
Both of those properties have the same type: Font. We could have declared them in the draw method because it’s the only method that uses them, but we have to keep in mind that the draw method is usually called multiple times per second, so it’s extremely wasteful to initialize complex objects each time this method is called.
Update
override fun update(timePassed: Long, timeUnits: TimeUnit) {
    game.input.consumeEvents().forEach {
        if (it is Input.Event.KeyPressed && it.data.keyCode == KeyEvent.VK_ENTER) {
            game.scene = GameScene(game)
        }
    }
}
This method is quite straightforward because the only thing we have to do is to scan through all the keys that were pressed and check if any of them is the enter key. In case the enter key was pressed we should switch to the next screen. You can create an empty scene and call it GameScene to avoid compilation errors.
Draw
Let’s take a look at the draw method:
override fun draw(graphics: Graphics2D) {
    graphics.apply {
        color = Color.black
        fillRect(0, 0, game.screenSize.width, game.screenSize.height)

        font = primaryFont
        color = Color.white
        val name = "Snake"

        drawString(
            name,
            game.screenSize.width / 2 - fontMetrics.stringWidth(name) / 2,
            game.screenSize.height / 2 - 50
        )

        font = secondaryFont
        color = Color.gray
        val message = "Press Enter to continue"

        drawString(
            message,
            game.screenSize.width / 2 - fontMetrics.stringWidth(message) / 2,
            game.screenSize.height / 2 + 50
        )
    }
}
The first line sets the color to Color.black which means whatever we’re going to draw next, it will have the black color. It does not apply to the images of course, but it will affect the color of the geometrical primitives as well as fonts.
The second line just fills the screen with the previously specified color.
The next two blocks are more involved, but they just repeat the same pattern twice:
- Set font
- Set color
- Draw text
We use different fonts for the game title and for the hint message, but we just repeat the same steps, the only difference is in the values.
Testing
Let’s check this scene to see if it works. Now we can assign it to our Game instance in the Main.kt:
package com.bubelov.snake

import com.bubelov.snake.engine.GameFactory
import com.bubelov.snake.scene.MainMenuScene
import java.awt.Dimension

fun main(args: Array<String>) {
    val screenSize = Dimension(660, 660)
    val game = GameFactory.create(screenSize)
    game.scene = MainMenuScene(game)
    game.play()
}
Now let’s launch our game. You should see the following screen:
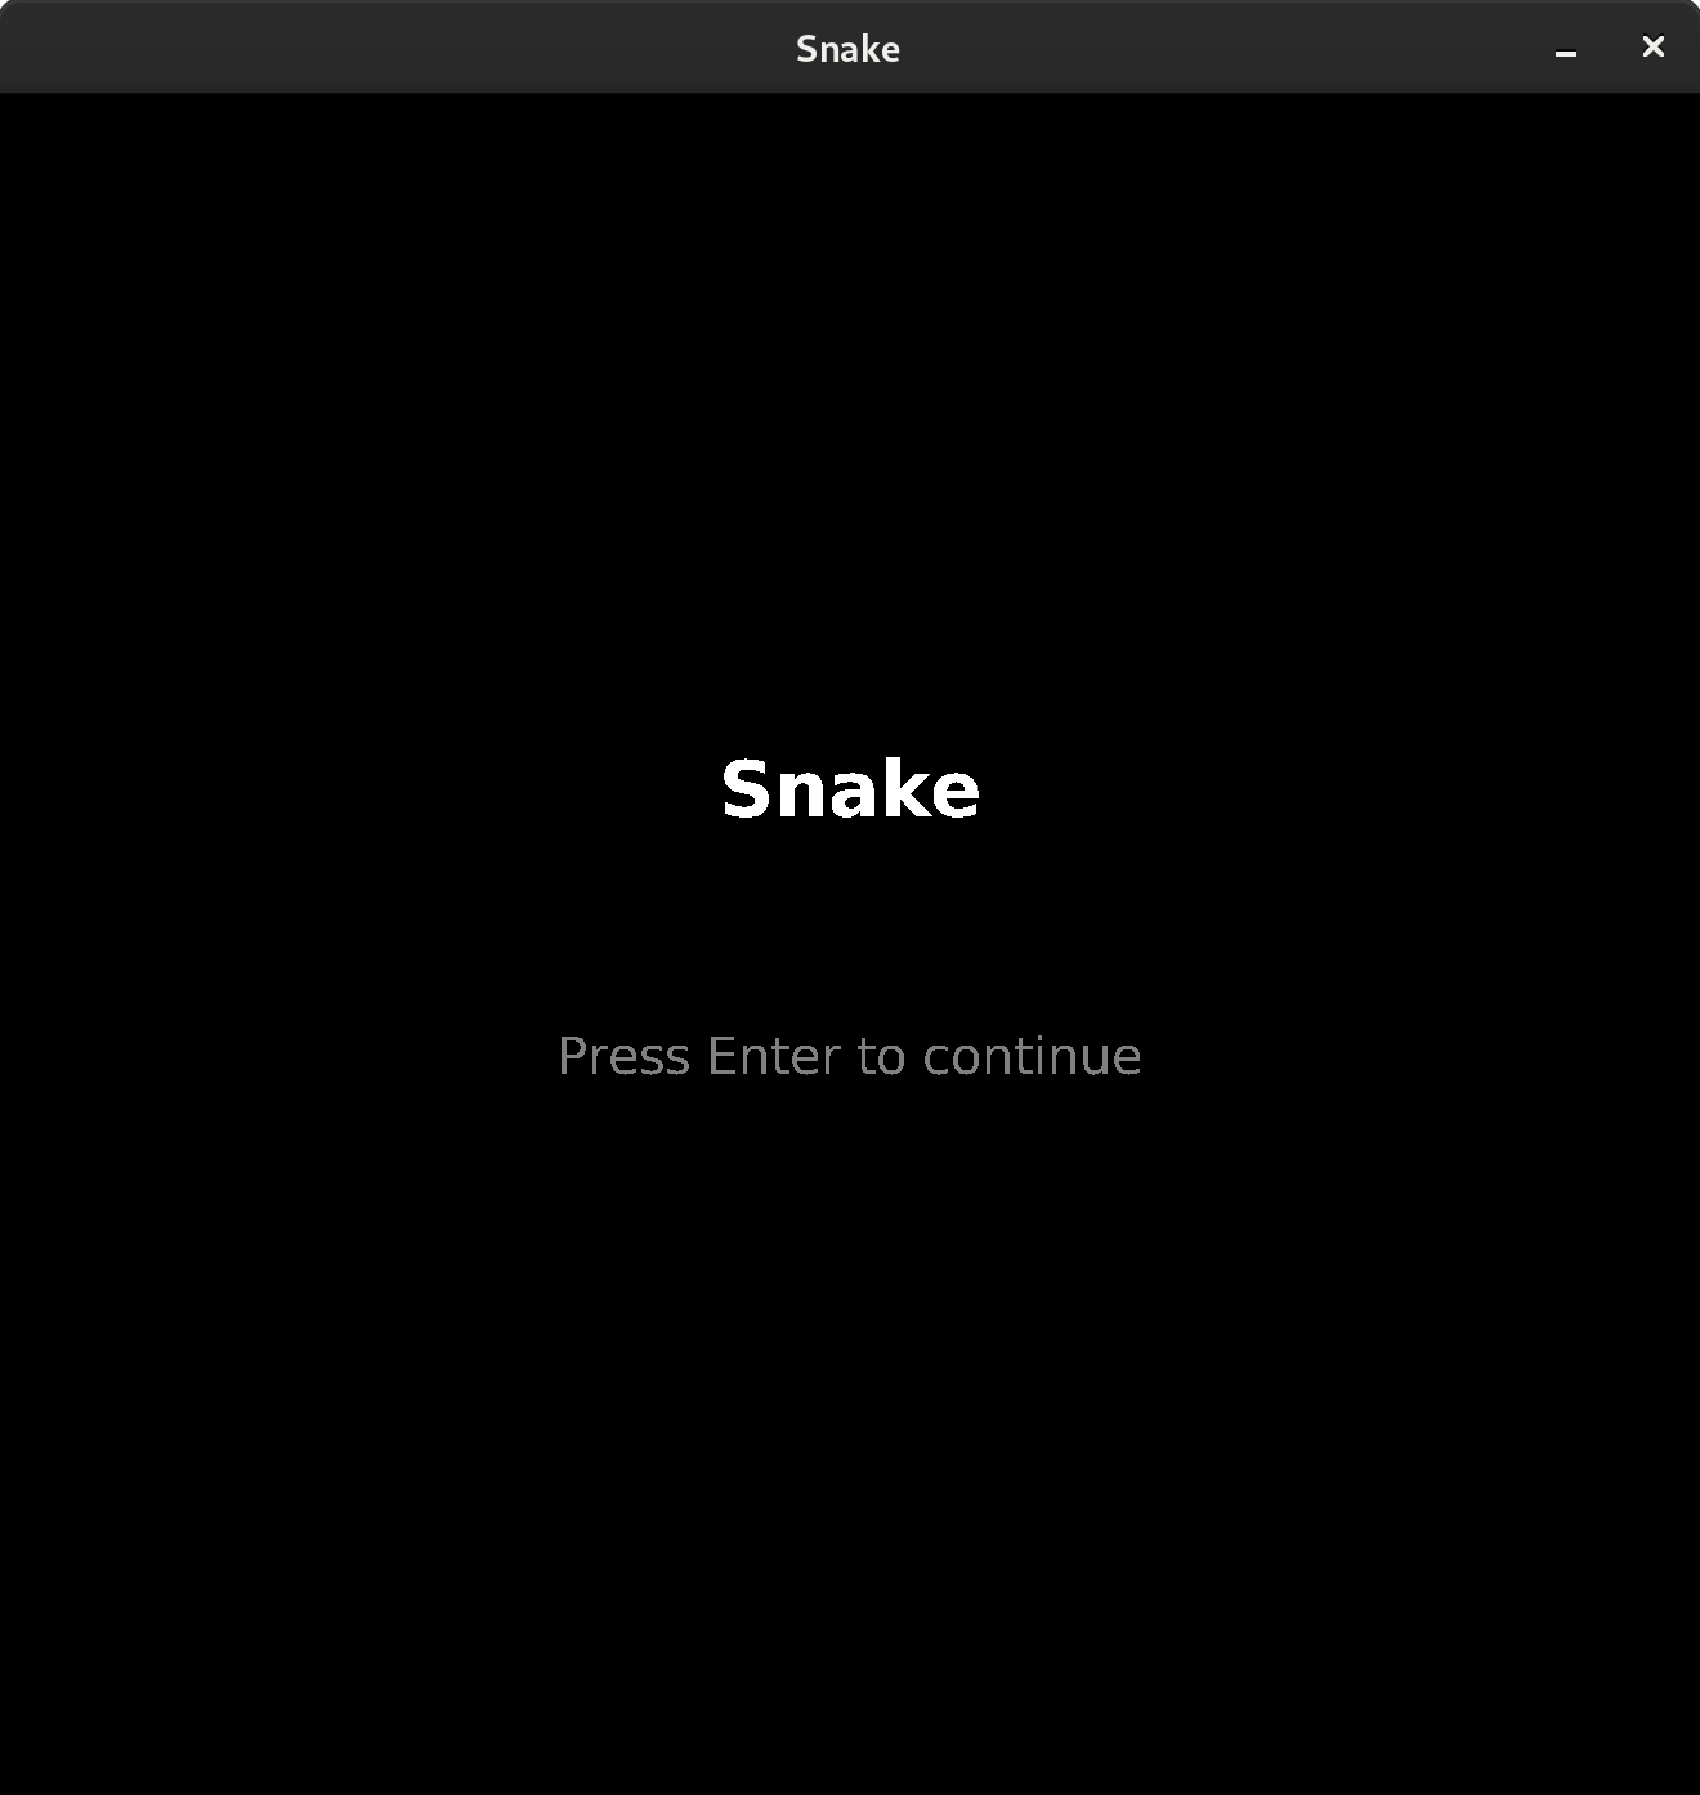
Conclusion
Now we know the basics of creating the scenes, and we also have the game menu. Next, we’re going to define the game model.
Model
We need a model layer to define what objects will exist within our game. We can define any object but since we’re working on the snake game, it makes sense to start with the essentials: snake and apple. Feel free to add more objects such as bonuses if you think it would make the game more interesting.
Snake Model
How can we represent a snake? As you may already know the traditional snake looked like a chain of blocks that constantly moves in a specific direction. Each part of the snake has its own position and this position changes when the snake moves.
Let’s create a new class and call it SnakeBodyPart:
data class SnakeBodyPart (
    var x: Int,
    var y: Int
)
This class represents one piece of the snake. Usually the snake is quite short when the game starts, but it grows longer as it eats apples. Each apple consumed by our snake adds one more part to it’s body. The only thing we want to know about each body part is it’s position.
Do we need something else except the list of body parts to describe the snake? It turns out the snake is a bit smarter than the sum of it’s parts. At least, it should have a direction, and it should be able to move according to the selected direction.
Let’s create a Snake class that will coordinate the movement of all the body parts:
class Snake(
    startX: Int,
    startY: Int,
    var direction: Direction = Direction.RIGHT
) {
    val body = mutableListOf<SnakeBodyPart>()
    val head by lazy { body[0] }

    init {
        body += SnakeBodyPart(startX, startY)

        body += SnakeBodyPart(
            x = startX - direction.deltaX(),
            y = startY - direction.deltaY()
        )

        body += SnakeBodyPart(
            x = startX - direction.deltaX() * 2,
            y = startY - direction.deltaY() * 2
        )
    }

    fun move() {
        for (i in body.size - 1 downTo 1) {
            val current = body[i]
            val (x, y) = body[i - 1]
            current.x = x
            current.y = y
        }

        head.x = head.x + direction.deltaX()
        head.y = head.y + direction.deltaY()
    }
}
This class handles the creation of the snake at the specific location as well as moving it in any specific direction. The only missing part is the Direction enum:
enum class Direction {
    UP,
    RIGHT,
    DOWN,
    LEFT;

    fun deltaX(): Int {
        return when (this) {
            LEFT -> -1
            RIGHT -> 1
            else -> 0
        }
    }

    fun deltaY(): Int {
        return when (this) {
            UP -> 1;
            DOWN -> -1;
            else -> 0;
        }
    }
}
Note that we have 2 helper methods to calculate how a particular direction affects x and y coordinates of the snake. For instance, the UP direction will produce deltaY = -1 and deltaX = 0.
Apple Model
The apple model is very simple. The only thing we need to know is the position of an apple which can be described as a pair of integers (x and y):
data class Apple (
    val x: Int,
    val y: Int
)
Conclusion
Now we have a model which describes all objects that can exist in our game’s world. Next, we will place those objects on the game screen and make them interact with the player and with each other.
Game Scene
Now that we have all the required components we can start working on the actual game mechanics. In this post we’re going to create the GameScene class, the main scene where most of the action happens.
Movement
Let’s think about snake movement. When should it move? We need some real numbers. The easiest way to move the snake is to call it’s move method on every scene update. It might seem like a good idea but let’s think about how many times that method is supposed to be called? The answer is: we don’t know, and we can’t know, most likely it will be called too often. Not only does it depend on a particular machine, it also can be called hundreds of times per second which will move the snake too fast making our game unplayable.
Our game world is just a grid of squares, so a square seems to be a great distance unit. How can we describe the speed? Distance units per second sounds reasonable so let’s specify our requirements:
The snake needs to move at a fixed pace of 1 square per 300 milliseconds, roughly 3 squares per second. The speed can be increased as the game progresses, feel free to play with this parameter.
How can we achieve such a behavior? I suggest we make an assumption that the scene will be updated faster than 3 times per second, so we need to move the snake on some updates but keep it still during other invocations of that same method.
Basically, we need a timer. Let’s add a new class and name it Timer:
class Timer(private val duration: Long) {
    private var remainingTime = duration

    fun update(timePassed: Long) {
        remainingTime -= timePassed
    }

    fun timeIsUp() = remainingTime <= 0

    fun reset() {
        remainingTime = duration
    }
}
This class also has an update method, just like our scene, but it only holds the remaining time until it should be fired so we can keep updating it, but it will not be fired until the time comes. In case the time is up we should perform our delayed event and reset the timer (if we want it to be repeating).
Game Scene
It looks like now we have everything to implement the game scene, let’s add a new class and call it GameScene:
import java.awt.Color
import java.awt.Graphics2D
import java.awt.event.KeyEvent
import java.util.concurrent.TimeUnit

class GameScene(game: Game) : Scene(game) {

    private val snake = Snake(
        startX = WORLD_WIDTH / 2,
        startY = WORLD_HEIGHT / 2
    )

    private lateinit var apple: Apple

    private val snakeMoveTimer = Timer(TimeUnit.MILLISECONDS.toNanos(300))

    init {
        placeApple()
    }

    override fun update(timePassed: Long, timeUnits: TimeUnit) {
        if (gameIsOver()) {
            // game.scene = GameOverScene(game) TODO Implement later
            return
        }

        processInput()

        snakeMoveTimer.update(timePassed)

        if (snakeMoveTimer.timeIsUp()) {
            snake.move()
            val head = snake.head

            if (head.x < 1) {
                head.x = WORLD_WIDTH
            }

            if (head.x > WORLD_WIDTH) {
                head.x = 1
            }

            if (head.y < 1) {
                head.y = WORLD_HEIGHT
            }

            if (head.y > WORLD_HEIGHT) {
                head.y = 1
            }

            if (head.x == apple.x && head.y == apple.y) {
                val body = snake.body
                val lastPart = body[body.size - 1]
                body.add(SnakeBodyPart(lastPart.x, lastPart.y))
                placeApple()
            }

            snakeMoveTimer.reset()
        }
    }

    override fun draw(graphics: Graphics2D) {
        graphics.apply {
            color = Color.black
            fillRect(0, 0, game.width, game.height)
            drawSnake(this)
            drawApple(this)
        }
    }

    private fun processInput() {
        for (event in game.input.consumeEvents()) {
            when (event) {
                is Input.Event.KeyPressed -> {
                    when (event.data.keyCode) {
                        KeyEvent.VK_UP -> snake.direction = Direction.UP
                        KeyEvent.VK_RIGHT -> snake.direction = Direction.RIGHT
                        KeyEvent.VK_DOWN -> snake.direction = Direction.DOWN
                        KeyEvent.VK_LEFT -> snake.direction = Direction.LEFT
                    }
                }
            }
        }
    }

    private fun drawSnake(graphics: Graphics2D) {
        graphics.apply {
            color = Color.green

            snake.body.forEach { part ->
                fillRect(
                    part.x * CELL_SIZE - CELL_SIZE,
                    game.screenSize.height - part.y * CELL_SIZE,
                    CELL_SIZE,
                    CELL_SIZE
                )
            }
        }
    }

    private fun drawApple(graphics: Graphics2D) {
        graphics.apply {
            color = Color.red

            fillRect(
                apple.x * CELL_SIZE - CELL_SIZE,
                game.screenSize.height - apple.y * CELL_SIZE,
                CELL_SIZE,
                CELL_SIZE
            )
        }
    }

    private fun placeApple() {
        var x = (1 + (Math.random() * WORLD_WIDTH)).toInt()
        var y = (1 + (Math.random() * WORLD_HEIGHT)).toInt()

        while (!isCellEmpty(x, y)) {
            if (x < WORLD_WIDTH) {
                x++
            } else {
                if (y < WORLD_HEIGHT) {
                    x = 1
                    y++
                } else {
                    x = 1
                    y = 1
                }
            }
        }

        apple = Apple(x, y)
    }

    private fun isCellEmpty(x: Int, y: Int) = snake.body.none { it.x == x && it.y == y }

    private fun gameIsOver(): Boolean {
        if (snake.body.size == WORLD_WIDTH * WORLD_HEIGHT) {
            return true
        }

        snake.body.forEachIndexed { index, part ->
            if (index > 0 && part.x == snake.head.x && part.y == snake.head.y) {
                return true
            }
        }

        return false
    }

    companion object {
        const val WORLD_WIDTH = 12
        const val WORLD_HEIGHT = 12
        const val CELL_SIZE = 55
    }
}
Let’s go through this code line by line to better understand what’s happening:
private val snake = Snake(
    startX = WORLD_WIDTH / 2,
    startY = WORLD_HEIGHT / 2
)

private lateinit var apple: Apple

private val snakeMoveTimer = Timer(TimeUnit.MILLISECONDS.toNanos(300))

init {
    placeApple()
}
Here we are just instantiating our snake and apple and setting up snake move timer to make sure it won’t run too fast.
override fun update(timePassed: Long, timeUnits: TimeUnit) {
    if (gameIsOver()) {
        // game.scene = GameOverScene(game) TODO Implement later
        return
    }

    processInput()

    snakeMoveTimer.update(timePassed)

    if (snakeMoveTimer.timeIsUp()) {
        snake.move()
        val head = snake.head

        if (head.x < 1) {
            head.x = WORLD_WIDTH
        }

        if (head.x > WORLD_WIDTH) {
            head.x = 1
        }

        if (head.y < 1) {
            head.y = WORLD_HEIGHT
        }

        if (head.y > WORLD_HEIGHT) {
            head.y = 1
        }

        if (head.x == apple.x && head.y == apple.y) {
            val body = snake.body
            val lastPart = body[body.size - 1]
            body.add(SnakeBodyPart(lastPart.x, lastPart.y))
            placeApple()
        }

        snakeMoveTimer.reset()
    }
}
This part is more interesting. The first thing we need to do on each update is to make sure the game is still playable. If the game is over (snake ate itself), we need to transition to the GameOver scene which will be implemented in the next post.
The next step is to process the user input. After that, we need to update the snake move timer and check if it’s time to move the snake. In case we need to move the snake, we should also check that it stays inside the screen bounds. That’s why we need those 4 head position checks.
We should also check if the snake has reached an apple. In that case we need to place another apple somewhere on the game screen and we should also elongate the snake length.
Let’s move to the next method:
override fun draw(graphics: Graphics2D) {
    graphics.apply {
        color = Color.black
        fillRect(0, 0, game.width, game.height)
        drawSnake(this)
        drawApple(this)
    }
}
Nothing interesting here, we’re just filling the screen with black color and then drawing the snake and apple. Let’s move forward:
private fun processInput() {
    for (event in game.input.consumeEvents()) {
        when (event) {
            is Input.Event.KeyPressed -> {
                when (event.data.keyCode) {
                    KeyEvent.VK_UP -> snake.direction = Direction.UP
                    KeyEvent.VK_RIGHT -> snake.direction = Direction.RIGHT
                    KeyEvent.VK_DOWN -> snake.direction = Direction.DOWN
                    KeyEvent.VK_LEFT -> snake.direction = Direction.LEFT
                }
            }
        }
    }
}
Here we are analyzing the pressed keys and setting the snake direction according to user input.
private fun drawSnake(graphics: Graphics2D) {
    graphics.apply {
        color = Color.red

        snake.body.forEach { part ->
            fillRect(
                part.x * CELL_SIZE - CELL_SIZE,
                game.screenSize.height - part.y * CELL_SIZE,
                CELL_SIZE,
                CELL_SIZE
            )
        }
    }
}

private fun drawApple(graphics: Graphics2D) {
    graphics.apply {
        color = Color.green

        fillRect(
            apple.x * CELL_SIZE - CELL_SIZE,
            game.screenSize.height - apple.y * CELL_SIZE,
            CELL_SIZE,
            CELL_SIZE
        )
    }
}
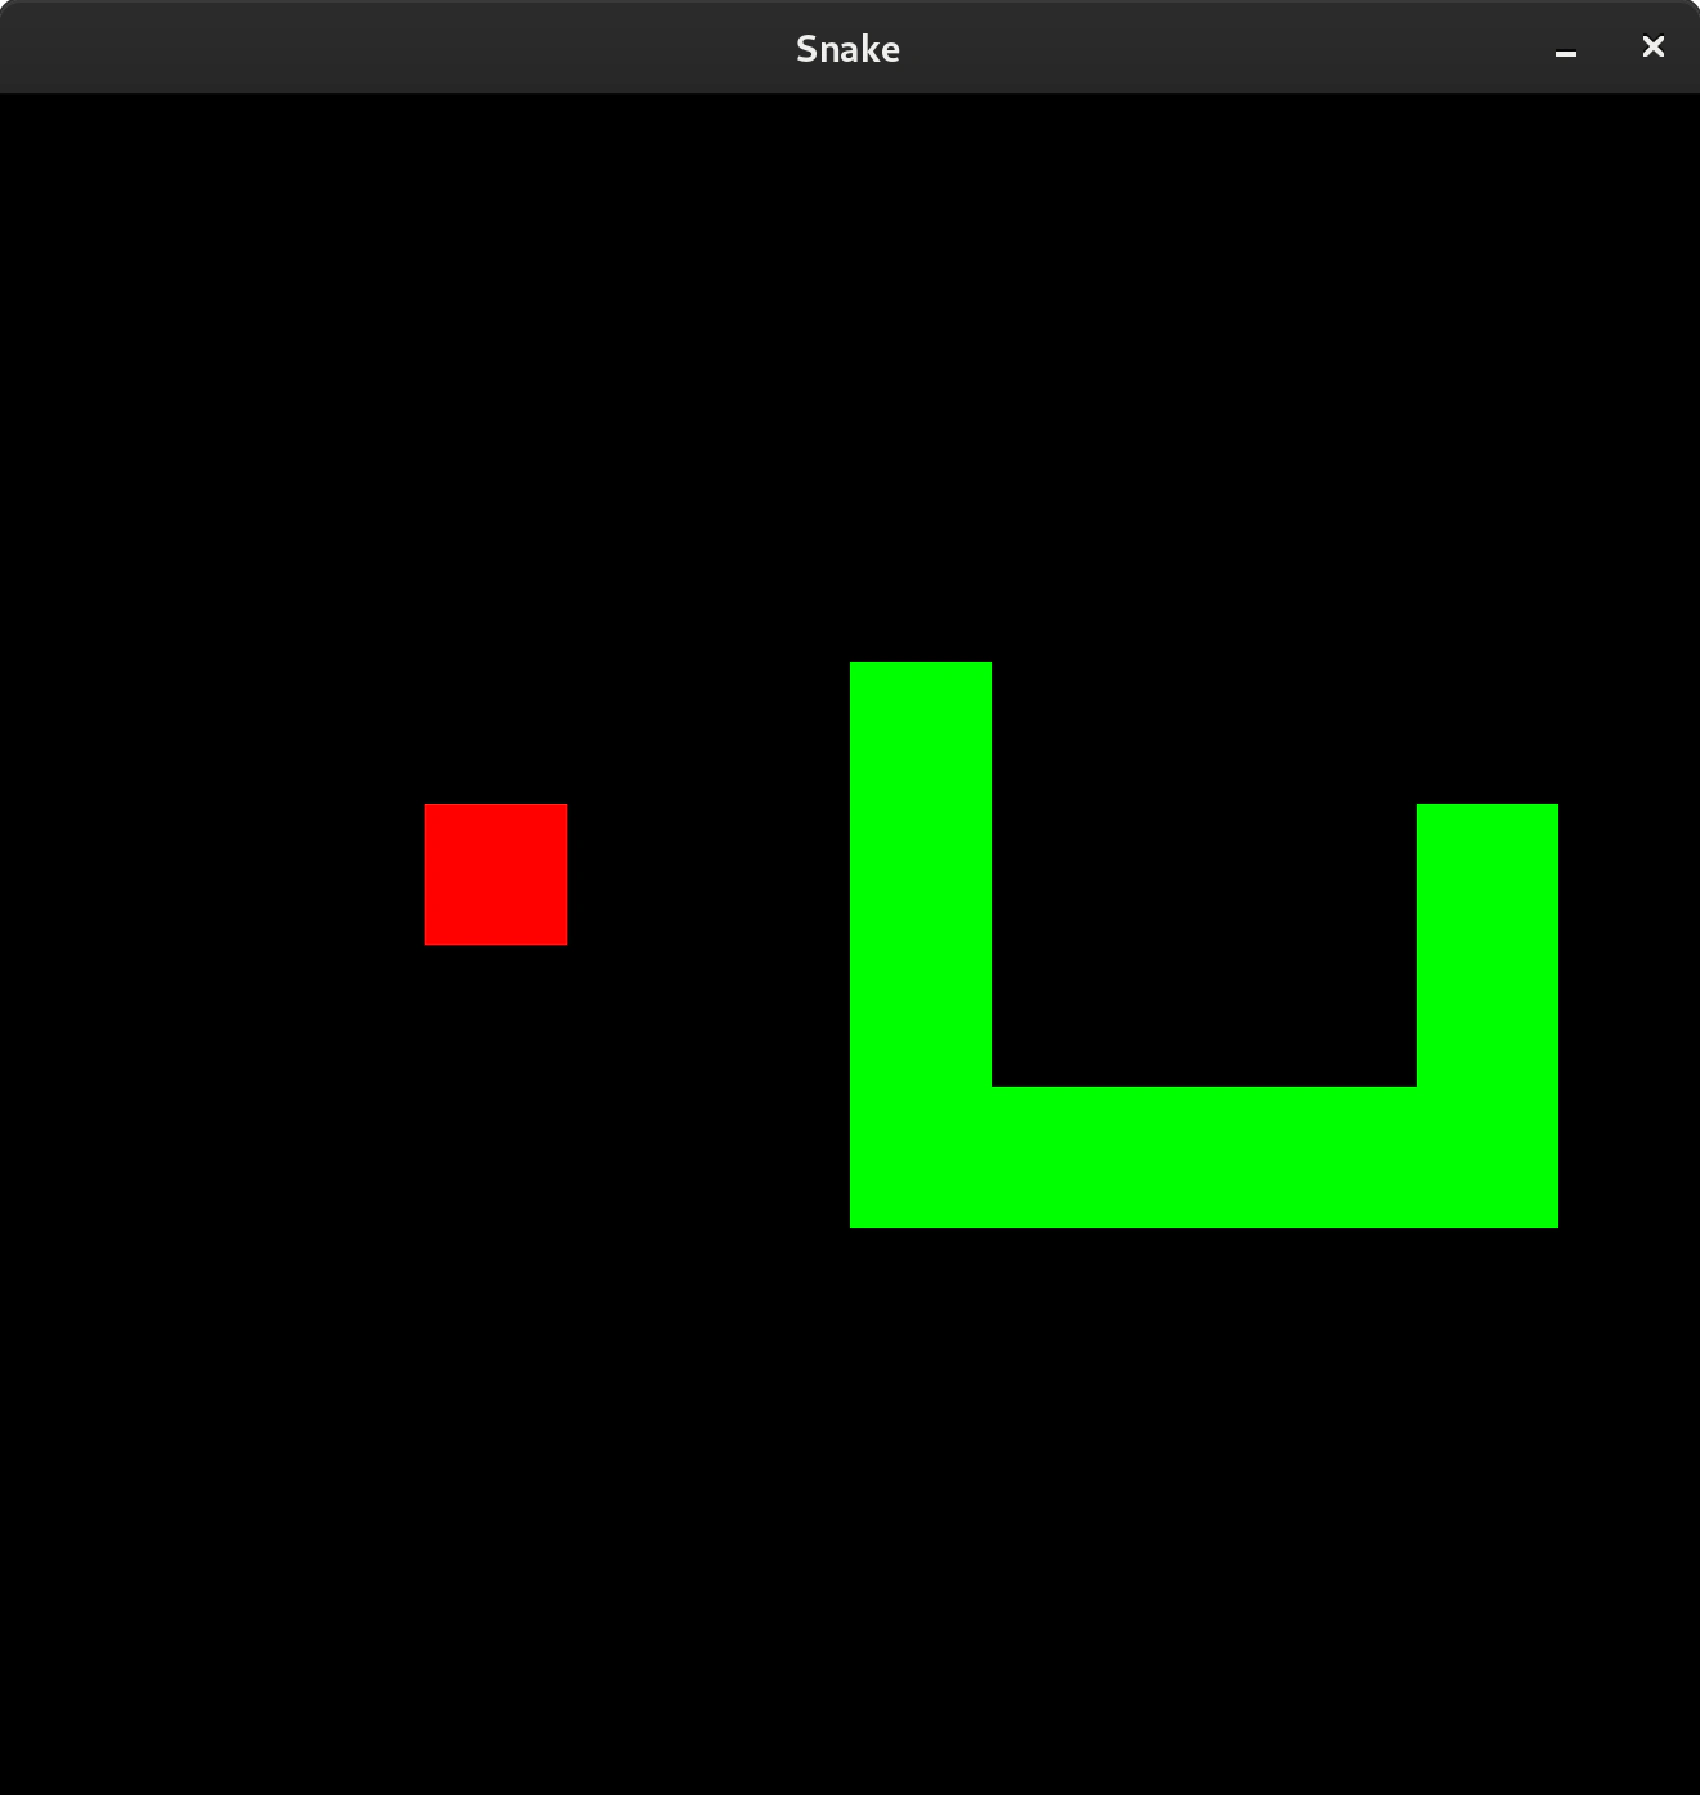
Those methods are used to draw the game objects. As you can see we can just fill the rectangles with different colors to make a distinction between snake body and apples: snake body is green but apples are red.
private fun placeApple() {
    var x = (1 + (Math.random() * WORLD_WIDTH)).toInt()
    var y = (1 + (Math.random() * WORLD_HEIGHT)).toInt()

    while (!isCellEmpty(x, y)) {
        if (x < WORLD_WIDTH) {
            x++
        } else {
            if (y < WORLD_HEIGHT) {
                x = 1
                y++
            } else {
                x = 1
                y = 1
            }
        }
    }

    apple = Apple(x, y)
}

private fun isCellEmpty(x: Int, y: Int) = snake.body.none { it.x == x && it.y == y }
This block can be a bit harder to understand. Basically, we need to find an empty cell to place a new apple here but the location cannot be predictable, so we should start with a random point. If that point is empty — that’s it, but if it’s not we need to scan our game grid line by line in order to find an empty cell. In that case we should use the first empty cell we find while scanning.
private fun gameIsOver(): Boolean {
    if (snake.body.size == WORLD_WIDTH * WORLD_HEIGHT) {
        return true
    }

    snake.body.forEachIndexed { index, part ->
        if (index > 0 && part.x == snake.head.x && part.y == snake.head.y) {
            return true
        }
    }

    return false
}
What is a game over state? There are 2 possible outcomes:
- winning (snake took all the space)
- losing (snake tried to eat itself)
That’s exactly what we are checking for.
Running The Game
Let’s run our game and try to play it. You should see the following picture:
Don’t forget to uncomment screen transition on the MainMenuScene.
Conclusion
Our game is almost ready, we just need to add the “game over” scene and reflect on the things that we’ve implemented so far.
Finalizing The Game
Game Over Scene
Our game needs one more scene in order to be completed: GameOverScene, let’s add it to our project:
import java.awt.Color
import java.awt.Font
import java.awt.Font.BOLD
import java.awt.Graphics2D
import java.awt.event.KeyEvent
import java.util.concurrent.TimeUnit

class GameOverScene(game: Game) : Scene(game) {

    override fun update(timePassed: Long, timeUnits: TimeUnit) {
        game.input.consumeEvents().forEach {
            when (it) {
                is Input.Event.KeyPressed -> {
                    when (it.data.keyCode) {
                        KeyEvent.VK_ENTER -> game.scene = GameScene(game)
                    }
                }
            }
        }
    }

    override fun draw(graphics: Graphics2D) {
        graphics.apply {
            color = Color.black
            fillRect(0, 0, game.screenSize.width, game.screenSize.height)

            font = Font("Default", BOLD, 16)
            color = Color.white

            val message = "Press <Enter> to start new game"
            val messageBounds = fontMetrics.getStringBounds(message, this)
            val messageWidth = messageBounds.width.toInt()
            val messageHeight = messageBounds.height.toInt()

            drawString(
                message,
                game.screenSize.width / 2 - messageWidth / 2,
                game.screenSize.height / 2 - messageHeight / 2
            )
        }
    }
}
There are 2 major steps happening here:
- Scanning the user input
- Drawing hint text in the center of our new scene
Let’s go through those steps one by one:
override fun update(nanosecondsPassed: Long) {
    game.input.consumeEvents().forEach {
        when (it) {
            is Input.Event.KeyPressed -> {
                when (it.data.keyCode) {
                    KeyEvent.VK_ENTER -> game.scene = GameScene(game)
                }
            }
        }
    }
}
This step is pretty straightforward, we need to scan through all of the input events in order to find out if the ENTER key was pressed. Pressing the ENTER key means we should navigate to the GameScene and restart our game.
Let’s move to the next step:
override fun draw(graphics: Graphics2D) {
    graphics.apply {
        color = Color.black
        fillRect(0, 0, game.screenSize.width, game.screenSize.height)

        font = Font("Default", BOLD, 16)
        color = Color.white

        val message = "Press <Enter> to start new game"
        val messageBounds = fontMetrics.getStringBounds(message, this)
        val messageWidth = messageBounds.width.toInt()
        val messageHeight = messageBounds.height.toInt()

        drawString(
            message,
            game.screenSize.width / 2 - messageWidth / 2,
            game.screenSize.height / 2 - messageHeight / 2
        )
    }
}
The first 2 lines are responsible for filling the screen in black. The next two lines are just initializing the font that we want to use for drawing the text and the rest of the code is responsible for actually drawing it. Luckily for us, the Java SDK provides us with the getStringBounds method which can predict the size of the text that we’re going to draw. Using those metrics, we can place our text at the center of the screen:
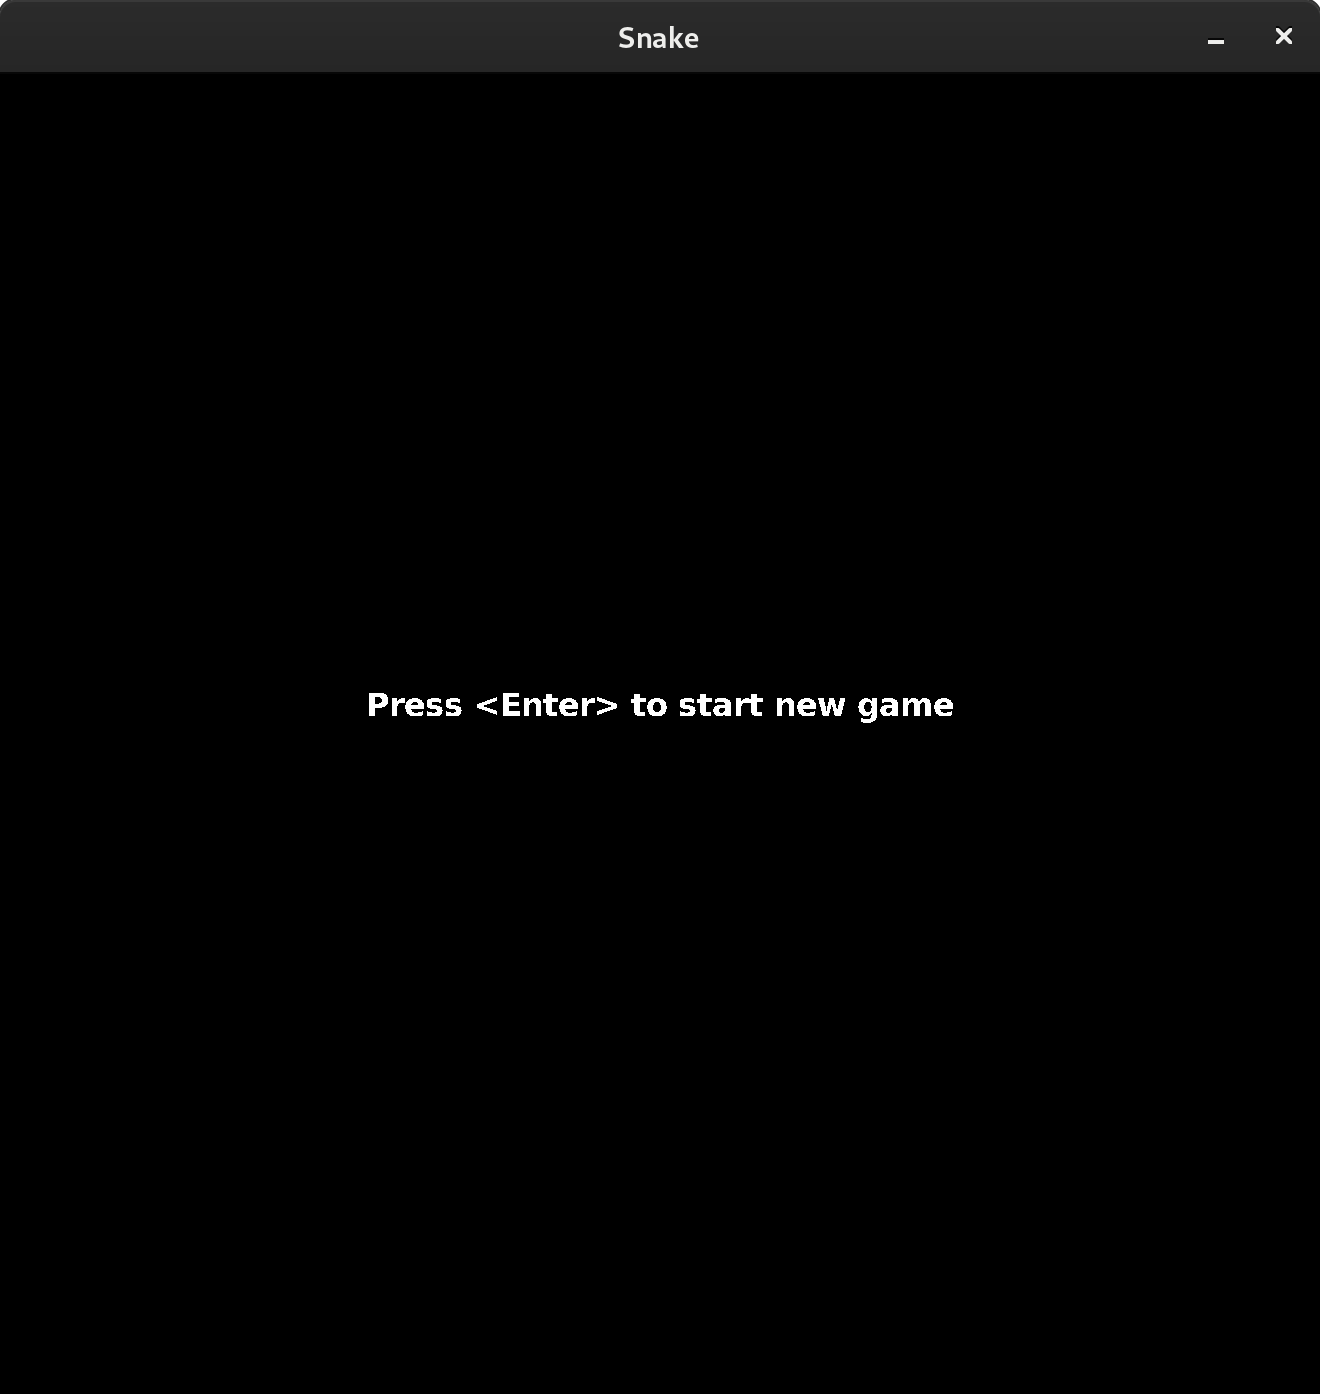
Conclusion
In this series we’ve covered the basics of game development in Kotlin, and we’ve also created a fully playable snake game.
There are far more in the game development than just that. Here is the steps that I recommend if you want to go further (the order is irrelevant):
-
Learn how to create graphics (raster, vector, 3D objects rendered to 2D images, doesn’t matter).
-
Learn how to create and add sound effects and music to your game.
-
Learn a game engine, the best choice depends on your experience in programming. I’d recommend Game Maker for total noobs, LibGDX for people who have solid programming skills and something like Unity if you want to sell your game or pursue a career in game development.
-
Copy a few successful games with simple mechanics. It can teach you a lot about the art of making games.
-
Don’t be too hard on yourself. There are tons of things to learn, but it is worth it only if you enjoy the process!
Kotlin — один из двух официальных языков, используемых при разработке под Android, и язык, который стоит выбрать, говоря о платформе Google. Для тех, кто начинает изучать Kotlin это хорошая новость, ведь это простой и приятный для изучения язык. Пройти туториал по Kotlin проще, чем вы думаете, а это значит, что теперь любой может начать создавать приложения под Android!
Kotlin стал участником этого праздника позже, чем его брат Java — ведь официальный статус получил только с 2017 года. Кроме того, он реже используется за пределами Android, поэтому многие авторитетные разработчики до сих пор сторонятся его.
В этом туториале по Kotlin мы рассмотрим процесс создания простого приложения на Kotlin — квиза, что послужит отправной точкой для изучения Kotlin в целом. Приступим!
Создаем ваш первый Android-проект на Kotlin

Чтобы изучить Kotlin для разработки под Android, вам сначала нужно скачать Android Studio и все настроить.
Как только это будет сделано, создайте новый проект и убедитесь, что вы выбрали Kotlin в качестве языка в раскрывающемся меню. Теперь выберите Empty Activity в качестве начального шаблона.
Вас встретит код, выглядящий следующим образом:
class MainActivity : AppCompatActivity() {
    override fun onCreate(savedInstanceState: Bundle?) {
        super.onCreate(savedInstanceState)
        setContentView(R.layout.activity_main)
    }
}
Этот шаблонный код находится в вашем файле MainActivity.kt и является первым, запускающемся при создании приложения. Этот код сообщает Android, что нужно отобразить файл макета: activity_main.xml. Android Studio легко делает это для нас в другой вкладке в верхней части основного окна. Вы можете перейти в эту вкладку в любое время, чтобы увидеть визуальный дизайнер, в котором вы можете перетаскивать элементы, такие как кнопки и текст вью. Если при открытии этого файла вы видите только код, вам нужно переключиться в «Design», нажав кнопку в правом верхнем углу.
В разработке под Android вам нужно будет работать не только с Kotlin/Java, но и с XML. XML означает «Extensible Markup Language» (расширяемый язык разметки) и является «markup language» (языком разметки). Это означает, что он не диктует логику или динамические действия, а просто определяет, где происходит что-то на странице.
При создании приложений под Android вам нужно будет создать макеты с помощью XML и визуального дизайнера, а затем определить, как эти элементы отрабатывают в соответствующем коде на Kotlin или Java.
А пока просто следуйте инструкциям, и, надеюсь, все станет ясно!
Kotlin: начало работы и создание макета
Прежде чем мы начнем изучать программирование на Kotlin, мы сначала внесем некоторые изменения в XML-файл, чтобы создать дизайн, который хотим.
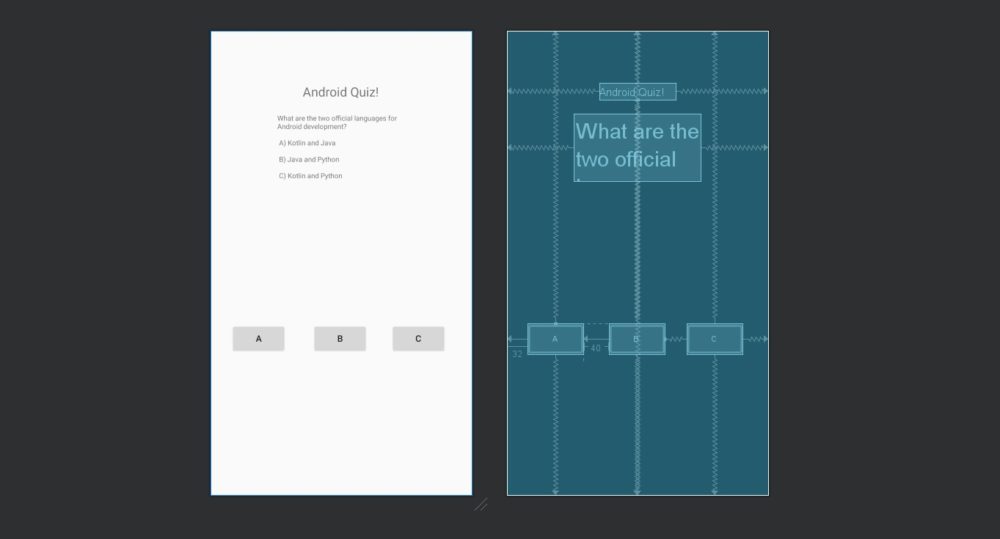
Упростить все можно, просто нажав на Code, а затем вставив следующее, чтобы перезаписать то, что уже есть:
<?xml version="1.0" encoding="utf-8"?>
<androidx.constraintlayout.widget.ConstraintLayout xmlns:android="http://schemas.android.com/apk/res/android"
    xmlns:app="http://schemas.android.com/apk/res-auto"
    xmlns:tools="http://schemas.android.com/tools"
    android:layout_width="match_parent"
    android:layout_height="match_parent"
    tools:context=".MainActivity">

    <TextView
        android:id="@+id/textView2"
        android:layout_width="wrap_content"
        android:layout_height="wrap_content"
        android:text="Android Quiz!"
        android:textSize="20sp"
        app:layout_constraintBottom_toBottomOf="parent"
        app:layout_constraintHorizontal_bias="0.498"
        app:layout_constraintLeft_toLeftOf="parent"
        app:layout_constraintRight_toRightOf="parent"
        app:layout_constraintTop_toTopOf="parent"
        app:layout_constraintVertical_bias="0.117" />

    <TextView
        android:id="@+id/textView"
        android:layout_width="200dp"
        android:layout_height="wrap_content"
        android:text="What are the two official languages for Android development? nn A) Kotlin and Java nn B) Java and Python nn C) Kotlin and Python"
        android:textSize="11sp"
        app:layout_constraintBottom_toTopOf="@+id/button"
        app:layout_constraintEnd_toEndOf="parent"
        app:layout_constraintHorizontal_bias="0.498"
        app:layout_constraintStart_toStartOf="parent"
        app:layout_constraintTop_toBottomOf="@+id/textView2"
        app:layout_constraintVertical_bias="0.083" />

    <Button
        android:id="@+id/button"
        android:layout_width="wrap_content"
        android:layout_height="wrap_content"
        android:layout_marginStart="32dp"
        android:text="A"
        app:layout_constraintBottom_toBottomOf="parent"
        app:layout_constraintStart_toStartOf="parent"
        app:layout_constraintTop_toTopOf="parent"
        app:layout_constraintVertical_bias="0.674" />

    <Button
        android:id="@+id/button2"
        android:layout_width="wrap_content"
        android:layout_height="wrap_content"
        android:layout_marginStart="40dp"
        android:text="B"
        app:layout_constraintBottom_toBottomOf="parent"
        app:layout_constraintStart_toEndOf="@+id/button"
        app:layout_constraintTop_toTopOf="parent"
        app:layout_constraintVertical_bias="0.674" />

    <Button
        android:id="@+id/button3"
        android:layout_width="wrap_content"
        android:layout_height="wrap_content"
        android:text="C"
        app:layout_constraintBottom_toBottomOf="parent"
        app:layout_constraintEnd_toEndOf="parent"
        app:layout_constraintHorizontal_bias="0.472"
        app:layout_constraintStart_toEndOf="@+id/button2"
        app:layout_constraintTop_toTopOf="parent"
        app:layout_constraintVertical_bias="0.674" />

</androidx.constraintlayout.widget.ConstraintLayout>
Это, в свою очередь, означает, что мы можем сосредоточиться на программировании на Kotlin и не беспокоиться о том, как выглядит наше приложение. По крайней мере сильно.
Заставляем кнопки хоть что-то делать!
Теперь у нас есть макет, и хорошая новость заключается в том, что ссылаться на эти элементы и изменять их в программе Kotlin очень легко.
Для этого нам нужно обратиться к «ID» (идентификатору), которые мы предоставили нашим вьюшкам. View — это техническое название виджетов, составляющих наш макет, таких как кнопки и текстовые метки.
Вы увидите, что мы уже сделали это в XML:
android:id="@+id/button"В данном случае «ID» кнопки — «button». Обратите внимание, что написание чувствительно к регистру. Слово Button с заглавной буквы B на самом деле относится к более широкой концепции всех кнопок в Kotlin.
Следовательно, мы можем ссылаться на кнопку в нашем коде. Если бы мы написали button.setText («Right Answer!»), тогда текст на первой кнопке изменился бы на Right Answer!.
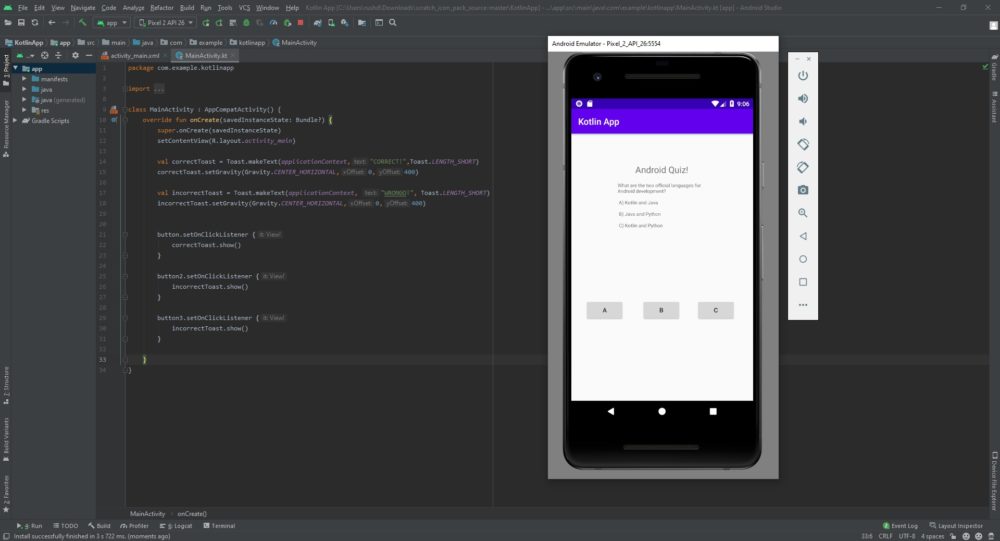
Но мы не хотим этого делать. Вместо этого мы сделаем так, чтобы при нажатии первой кнопки появлялось CORRECT (ПРАВИЛЬНО!) и этим мы сообщаем нашему игроку, что он выбрал правильное решение.
Для этого мы собираемся вывести на экран сообщение, известное как «toast message» (всплывающее сообщение-подсказка). Это небольшой плавающий пузырь с текстом, который исчезает через пару секунд.
Не беспокойтесь о строке с текстом, создающей и отображающей это всплывающее сообщение, вы будете ей редко пользоваться, и это часть Android, а не Kotlin.
Мы собираемся сделать так, чтобы эти сообщения отображались, когда мы нажимаем на одну из этих кнопок:
button.setOnClickListener {
        Toast.makeText(applicationContext,"CORRECT!",Toast.LENGTH_SHORT).show()
    }

    button2.setOnClickListener {
        Toast.makeText(applicationContext, "WRONGO!", Toast.LENGTH_SHORT).show()
    }

    button3.setOnClickListener {
        Toast.makeText(applicationContext, "WRONGO!", Toast.LENGTH_SHORT).show()
    }

}
Поместите этот код в функцию onCreate (это весь код в фигурных скобках после слова onCreate). В Kotlin, как и в Java, код можно «заблокировать», поместив его в фигурные скобки. Такое группирование полезно, если мы хотим, чтобы определенный набор кода выполнялся, например, за пределами прямолинейной траектории. И совсем скоро мы узнаем, что же такое «function» (функция).
Нажмите зеленую кнопку воспроизведения в Android Studio IDE, убедившись, что виртуальное устройство настроено или устройство Android подключено. Вы увидите, что игра появится на экране, и вы сможете выбрать вариант ответа. Вот так да! Клик на «A» отобразит правильное сообщение, а два других должны отобразить неправильное сообщение.
Kotlin туториал — Использование функций в Kotlin
Вы можете подумать, что уже создали свое первое приложение на Kotlin под Android, но на самом деле программирования на Kotlin здесь мало. Скорее, мы полагаемся в основном на XML для внешнего вида и на Android SDK для производительности. Например, setText не является примером Kotlin, а скорее является частью класса Android (TextView). То есть сам Kotlin не поддерживает эти типы кнопок и текстовых лейблов, а просто используется в данном случае для структуры.
Наш квиз еще совсем мал. В нем только один вопрос, и ответ привязан к единственной кнопке. Если мы хотим превратить все это в динамическую программу, которая может отображать несколько вопросов и ответов, нам нужно добавить некоторую логику. Здесь на помощь приходит код на Kotlin.
Во-первых, давайте создадим структуру получше. В программировании мы стараемся не вводить что-то чаще, чем это необходимо, поэтому собираемся поместить все наши всплывающие сообщения в функцию. Функция — это фрагмент кода, на который можно ссылаться в любой точке остальной части программы.
Чтобы определить функцию, нам нужно дать ей имя, которое будет описывать то, что она делает. Затем мы добавляем к этому префиксу слово «fun» (развлечение) и ставим за ним фигурные скобки. Убедитесь, что вы делаете это вне функции onCreate, но внутри класса MainActivity (хотя это очень упрощенное решение, но фактически это имя файла).
Здесь мы собираемся показать всплывающее сообщение ( «toast»). Чтобы увидеть, как это работает, поместим только одно всплывающее сообщение в нашу функцию, а затем вызовем его с помощью первой кнопки:
class MainActivity : AppCompatActivity() {
    override fun onCreate(savedInstanceState: Bundle?) {
        super.onCreate(savedInstanceState)
        setContentView(R.layout.activity_main)

        button.setOnClickListener {
            showToast()
        }


    }

    fun showToast() {
        Toast.makeText(applicationContext,"CORRECT!",Toast.LENGTH_SHORT).show()
    }

}
Запускаем. Код будет вести себя точно так же, как и раньше. Единственная разница в том, что он стал лучше организован.
Видите, только теперь нам нужно записать имя функции в двух скобках, чтобы выполнить нашу строку кода в любой момент. Если бы showToast() сделал что-то более сложное, это могло бы сэкономить нам бесчисленное количество часов; особенно, если нам когда-нибудь понадобится изменить способ отображения всплывающего сообщения!
Что мы действительно хотим сделать, так это изменить ответ, который отображается в зависимости от кнопки, которую нажимают. Мы могли бы сделать это с помощью второй функции, но еще лучше было бы поместить оба сообщения внутри одной функции.
Для этого мы собираемся использовать две новые концепции программирования на Kotlin.
Аргументы, переменные и условные операторы Kotlin
Теперь вы знаете, как использовать функции для группировки разделов кода в Android, и в следующей части этого руководства по Kotlin произойдет настоящее волшебство. Вы овладеете тремя бесценными навыками программирования на Kotlin и любом другом языке!
Во-первых, переменная — это «контейнер» для данных. Другими словами, переменная позволяет использовать слово для обозначения другого слова, числа или даже списка элементов. Скорее всего, вы помните переменные из уроков алгебры:
a + 2 = 3, найдите a!
Здесь, очевидно, используется для обозначения «1». Мы аналогичным образом используем переменные в программировании, чтобы у нас была возможность изменять поведение нашего кода в зависимости от взаимодействия с пользователем или других входных данных.
Что мы также можем делать с переменными, так это передавать их между функциями. Когда мы это делаем, мы называем это «аргументом». По сути, это позволяет нам передавать входные данные в нашу функцию для изменения выходных данных.
Чтобы определить аргументы, которые будет принимать функция, нам просто нужно поместить их в фигурные скобки.
Мы используем тип переменной, называемый интеджером (или целым числом), который в Kotlin называется Int. Интеджеры, как вы также можете помнить из математики, — это целые числа без десятичных знаков.
Поэтому нам нужно обновить нашу функцию, чтобы она выглядела так:
fun showToast(answer: Int) { }Здесь имя функции — answer (ответ), и она имеет целочисленный тип. Теперь, когда мы впоследствии вызываем нашу функцию, нам нужно добавить целое число в фигурные скобки:
showToast(1)Вы можете передать в функцию столько аргументов, сколько захотите, при условии, что вы определите их каждый и разделите запятыми.
В этом случае мы собираемся присвоить каждой кнопке номер. A = 1, B = 2 и C = 3. Теперь функция showToast знает, какую кнопку нажал пользователь!
button.setOnClickListener {
    showToast(1)
}

button2.setOnClickListener {
    showToast(2)
}

button3.setOnClickListener {
    showToast(3)
}
Теперь нам просто нужно изменить всплывающее сообщение, которое отображается в зависимости от того, какой ответ мы читаем!
Для этого мы используем так называемый «условный оператор». Это означает, что строка кода будет работать только при определенных условиях. В этом случае мы покажем правильное сообщение, только если пользователь выбрал правильный ответ. Мы достигаем этого с помощью следующего кода:
if (answer==1) {
         Toast.makeText(applicationContext, "CORRECT!", Toast.LENGTH_SHORT).show()
}
Это инструкция if, и она покажет код внутри фигурных скобок только в том случае, если инструкция в обычных скобках имеет значение true. В этом случае, если переменная answer содержит значение 1, мы можем запустить код!
Что делать, если ответ — 2 или 3? Что ж, мы всегда можем использовать еще две условные инструкции! Но более быстрым решением было бы использовать инструкцию else. Она делает именно то, что вы ожидаете, когда следует за инструкцией if:
fun showToast(answer: Int) {
    if (answer==1) {
        Toast.makeText(applicationContext, "CORRECT!", Toast.LENGTH_SHORT).show()
    } else {
        Toast.makeText(applicationContext, "WRONGO!", Toast.LENGTH_SHORT).show()
    }
}
Делаем игру увлекательной
Если вы не усвоили информацию с первого раза, рекомендую перечитать несколько раз. Это самая важная часть туториала по Kotlin, и с помощью всего лишь нескольких навыков вы сможете обрабатывать очень много кода!
Затем мы изменим наши новые приемы программирования, чтобы превратить это в настоящую игру.
Сначала мы создадим еще три переменные. Это будут глобальные переменные, созданные вне каких-либо функций и, следовательно, доступные для всех функций.
Обратите внимание, что в Kotlin вам не нужно назначать тип переменной. В таких языках, как Java, вам нужно сразу указать, является ли ваша переменная Int (целым числом), String (строкой), Float (числом с плавающей точкой) и т. д. В Kotlin мы можем просто написать var и позволить Kotlin разбираться самостоятельно!
Перед функцией onCreate() добавьте эти три строки:
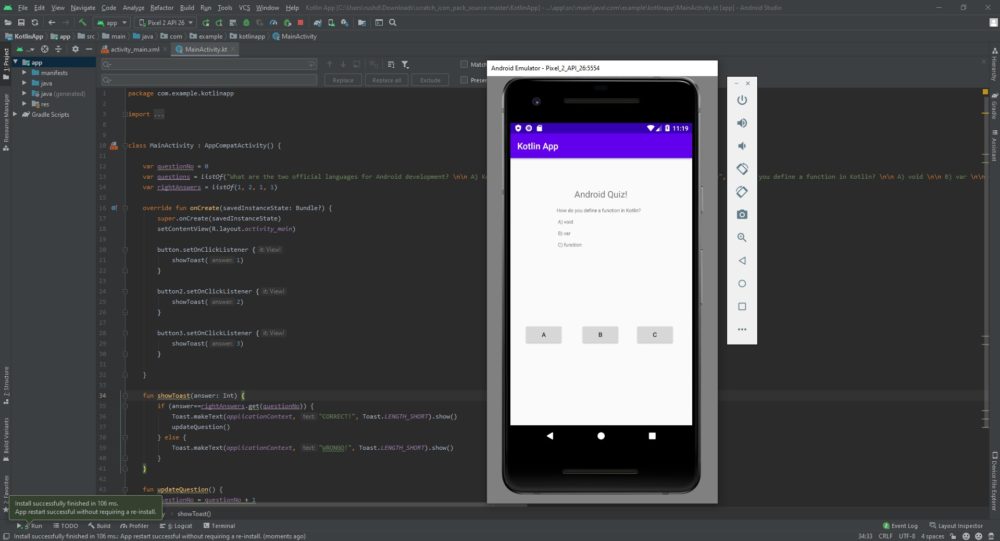
var questionNo = 0

var questions = listOf("What are the two official languages for Android development? nn A) Kotlin and Java nn B) Java and Python nn C) Kotlin and Python", "How do you define a function in Kotlin? nn A) void nn B) var nn C) function", "What is a variable used for? nn A) To contain data nn B) To insert a random value nn C) Don't know", "What does SDK stand for in Android SDK? nn A) Software Development Kit nn B) Software Development Kotlin nn C) Something Don't Know")

var rightAnswers = listOf(1, 2, 1, 1)
Переменная questionNo — это целое число и будет использоваться для отслеживания номера вопроса, который мы задаем. Переменная questions представляет из себя список, означающий, что это переменная, которая может содержать несколько значений — в данном случае несколько строк. Каждая из наших строк разделена запятой, и ей будет присвоен индекс, на который можно будет ссылаться позже (обратите внимание, что первому элементу в списке присваивается индекс: 0). Важно, что символ n распознается Kotlin (и большинством языков) как символ «новой строки» и фактически не отображается в нашем выводе.
(Это выглядит некрасиво, и если вы создаете реальное приложение, то лучше хранить эти значения в отдельном XML-файле.)
Последняя строка создает еще один список, на этот раз заполненный целыми числами. Это правильные ответы на каждый наш вопрос!
Затем мы создаем новую функцию с названием updateQuestion. Все, что мы собираемся здесь сделать, это изменить наш вопрос в зависимости от номера вопроса. Делаем это так:
fun updateQuestion() {
            questionNo = questionNo + 1
            textView.setText(questions.get(questionNo))
}
Поскольку мы вызываем эту функцию только тогда, когда кто-то получает правильный ответ, мы можем безопасно увеличить значение нашей переменной questionNo в начале функции. Затем мы собираемся задать вопрос, который отображается, обновив textView.
Когда мы используем get со списком как в коде выше, нам нужно только вставить индекс в скобки, чтобы получить значение, которое там помещено. Таким образом, мы можем перейти к следующему вопросу, постепенно увеличивая это значение.
Наконец, мы меняем наше условие «right answer» (правильный ответ) на любую правильную запись в нашем списке правильных ответов. Полученный код должен выглядеть так:
class MainActivity : AppCompatActivity() {

    var questionNo = 0
    var questions = listOf("What are the two official languages for Android development? nn A) Kotlin and Java nn B) Java and Python nn C) Kotlin and Python", "How do you define a function in Kotlin? nn A) void nn B) var nn C) function", "What is a variable used for? nn A) To contain data nn B) To insert a random value nn C) Don't know", "What does SDK stand for in Android SDK? nn A) Software Development Kit nn B) Software Development Kotlin nn C) Something Don't Know")
    var rightAnswers = listOf(1, 2, 1, 1)

    override fun onCreate(savedInstanceState: Bundle?) {
        super.onCreate(savedInstanceState)
        setContentView(R.layout.activity_main)

        button.setOnClickListener {
            showToast(1)
        }

        button2.setOnClickListener {
            showToast(2)
        }

        button3.setOnClickListener {
            showToast(3)
        }

    }

    fun showToast(answer: Int) {
        if (answer==rightAnswers.get(questionNo)) {
            Toast.makeText(applicationContext, "CORRECT!", Toast.LENGTH_SHORT).show()
            updateQuestion()
        } else {
            Toast.makeText(applicationContext, "WRONGO!", Toast.LENGTH_SHORT).show()
        }
    }

    fun updateQuestion() {
        questionNo = questionNo + 1
        textView.setText(questions.get(questionNo))
    }

}
Продолжаем
Запустите этот код, и теперь вы должны обнаружить, что вопрос обновляется каждый раз, когда вы получаете правильный ответ! Это полноценная игра, и вы могли бы создать гораздо больше подобных проектов, используя приобретенные навыки.
Единственная небольшая проблема со всем этим заключается в том, что прямо сейчас игра вылетает, как только у вас закончатся вопросы!
Но вместо того, чтобы принести вам решение на блюдечке с золотой каемочкой, я призываю вас найти ответ самостоятельно. В конце концов, именно так вы по-настоящему изучите Kotlin: создавая свои собственные проекты и узнавая, как реализовывать каждую новую задачу по мере необходимости.
Оригинал статьи
Всем привет! Сегодня вас ждет легкая статья, которая расскажет как написать простую мобильную игру-викторину на Kotlin. Здесь я наглядно покажу как выглядит Kotlin для мобильной разработки и предложу свои идеи о том, как можно структурировать подобный проект. Что же, не буду томить вас графоманией, вперед!
Сейчас вы увидите остов идеи, которая ярко воспылала, но быстро прогорела. Мы с моим другом-дизайнером придумали сделать простую мобильную игру в текстовом формате. Жанр планировался приключенческий, а скупой текст должен был быть подогрет уникальным картинками в определенном стиле. К сожалению, дальше скелета приложения дело не продвинулось, поэтому я решил вынести его на публику. Вдруг кто-то найдет новые мысли. Сразу оговорюсь, вряд ли проект можно назвать серьезным решением, и для действительно больших приложений, возможно, стоит рассмотреть более сложные абстракции. Приложение стоит воспринимать как некий MVP.
Структура папок
Для начала поговорим о структуре папок. Вряд ли здесь будет что-то инновационное, но я считаю структуру папок в проекте одной из самых важных и интересных вещей в программировании.

В корне проекта лежит 2 Activity, которые у нас будут использоваться в приложении.
StartActivity отвечает за стартовый экран приложения, где можно начать игру и потенциально разместить какие-то глобальные элементы управления (настройки, кнопочки “поделиться” и т.п.).
MainActivity, которую корректнее было бы назвать как-то вроде GameActivity, будет отвечать за рендер вопросов викторины, вариантов ответов и соответствующих картинок.
Папка Entity содержит некоторые доменные сущности. Файл json с самим сюжетом игры, о котором я расскажу чуть позже, будет превращаться как раз в набор моделей из папки Entity.
Папка dao (от сокращения data access object) в проекте нужна для содержания сущностей, которые предоставляют доступ к данным. Именно здесь будут лежать классы, которые будут отвечать за хранение данных в Runtime, и классы, которые смогут превратить набор структурированных данных в объекты.
Папка core будет содержать объекты, которые относятся непосредственно к ходу игры. По итогу таких объектов вышло достаточно мало, однако здесь кроется потенциал для расширения.
Папка UI отвечает, как многие уже догадались, за какие-то интерфейсные сущности. В частности, сюда стоит помещать presenter-ы для наших activity.
Модель данных
В нашем MVP сами данные представляют собой json-файл, который содержит массив объектов. Вот пример одного из таких объектов:
{
 "id": 2,
 "type": "Q",
 "question": "После получаса ходьбы вы наткнулись на затушенное кострище. Здесь были люди!",
 "answers": [
   {
     "next_question_id":  5,
     "answer": "Попытаться обнаружить следы"
   },
   {
     "next_question_id":  3,
     "answer": "Потрогать, вдруг кострище еще теплое"
   }
 ]
}
Давайте разберем, что здесь для чего:
-
Id — это некоторый уникальный идентификатор. Не буду вновь повторяться и рассказывать для чего вообще существуют уникальные идентификаторы. Лишь скажу, что в приложении он будет использоваться для поиска следующего вопроса
-
type — строка состоящая из одного символа. Литера Q означает, что это шаг типа «question» и он имеет возможность перехода к следующему вопросу. Существуют еще типы F (Fail) и S (Success). Это особые типы вопросов, которые говорят нам о том, что игра закончена поражением или победой
-
question — просто текст вопроса, который будет выведен на экране
-
answers — массив ответов на текущий вопрос. Он может содержать от 0 до 4 ответов. Массив пуст, когда текущий вопрос имеет тип F или S. В объектах ответов мы имеем поля, указывающие на следующий вопрос, и текст ответа, который будет отображаться на экране
JSON файл с игрой содержится в папочке assests. Подразумевалось, что изначально данные игры будут храниться непосредственно в приложении. Однако, теоретически, мы можем получать этот JSON по сети, сохраняя его локально или в sqllite. Либо же мы можем организовать общение приложения по сети с некоторым сервером, сохраняя этот же протокол.
Тут же, в модели данных, можно прикрепить ссылки на картинки, если мы их хотели бы менять. Пока это логика не реализована, она лишь планировалась. Однако ассоциацию между картинкой и вопросом хранить лучше именно здесь.
Управление игрой и ее состоянием
Для начала, давайте разберемся как мы будем хранить модель данных в runtime. Для этого был придуман интерфейс Store.
public interface Store {
    fun getAllQuestions(): List<Question>

    fun getQuestionById(id: Int): Question

    fun init(context: Context): Store
}
Этот интерфейс расширяем и содержит набор методов, которые позволяют нам работать с нашими данными. Используя фабричный метод, мы можем получить какую-то определенную реализацию хранилища. В нашем MVP реализована версия хранилища с локальным JSON-ом, который превратится в коллекцию объектов, содержащихся в оперативной памяти. Теоретически, мы можем создать еще несколько реализаций, в которых, например, класс будет обращаться в sqllite или же на сервер за следующим вопросом. Все, что нам потребуется изменить в приложении — лишь написать новую реализацию хранилища.
class StoreFactory {
    companion object {
        fun getStore(ctx: Context): Store {
            return LocalStore().init(ctx)
        }
    }
}
Выше я немного слукавил. Если мы хотим работать с сервером по сети или же доставать объекты из локальной базы данных, то нам определенно потребуются асинхронные операции. В противном случае, наш интерфейс будет блокироваться, и мы будем получать ошибки ANR. Для обхода этой проблемы нам нужно выполнять все IO — операции не в главном потоке. Поскольку я не очень много занимался production разработкой под андроид, то для решения этой проблемы я посоветую популярный RX. Надеюсь, более опытные разработчики под мобильные устройства предложат альтернативы.
Дальше мы создаем класс игры:
class Game {
    private lateinit var store: Store
    private lateinit var question: Question

    fun init(context: Context) {
        this.store = StoreFactory.getStore(context)

        question = store.getQuestionById(1)
    }

    fun isGameEnd(): Boolean {
        return isSuccess() || isFail()
    }

    fun isSuccess(): Boolean {
        return question.isSuccess()
    }

    fun isFail(): Boolean {
        return question.isFail()
    }

    fun chooseAnswer(numberOfAnswer: Int) {
        val answer: Answer = question.getAnswers()[numberOfAnswer - 1]
        question = store.getQuestionById(answer.getNextQuestionId())
    }

    fun getQuestion(): Question {
        return question
    }
}
Класс содержит в себе 2 поля: экземпляр класса Store, о котором мы уже успели поговорить, и экземпляр текущего вопроса, на котором находится пользователь. Помимо этого, игра может закончится (когда type текущего вопрос F или S). Также в данном классе существует метод, который получит выбранный ответ и поменяет текущий вопрос на следующий.
Достаточно много логики уже содержится в модели данных. Например информация о том, закончилась ли игра, как она закончилась. При таком подходе нам остается просто отобразить информацию на экране.
Слегка неочевидный пункт содержится в модели вопроса (Question.kt). Давайте обратим внимание на реализацию геттера ответов:
fun getAnswers(): List<Answer> {
        val list: MutableList<Answer> = ArrayList(this.answers)
        val shouldAdd: Int = 4 - list.size

        for (i in 1..shouldAdd) {
            list.add(Answer("", -1))
        }

        return list
    }
Из этого метода мы всегда возвращаем List с 4 вариантами ответа, даже если вопрос предполагает, что их 2. Мы просто добиваем нашу коллекцию пустыми объектами с невалидными id. На слое представления они просто не будут отображены, это не изменит логику поведения экрана. Это небольшой костыль для того, чтобы нам было проще рендерить объекты.
Рендер игры
Тут все достаточно прозаично, мы просто отображаем вопрос и 4 варианта ответа, вешаем обработчики кликов на них и даем пользователю играть. При каждом выборе ответа мы обновляем страницу с текущим вопросом, отвечает у нас за это presenter:
private fun updateView() {
        if (game.isGameEnd()) {
            showEndGame()
            return
        }

        activity.setQuestion(game.getQuestion().getText())

        val answers: List<Answer> = game.getQuestion().getAnswers()
        answers.forEachIndexed {idx, answer -> activity.setAnswer(idx + 1, answer.getText())}
    }

    fun chooseAnswer(number: Int) {
        game.chooseAnswer(number)
        updateView()
    }
Ну и когда игра закончена, мы возвращаем пользователя на StartActivity, передавая результат игры (текст текущего вопроса) в Intent:
private fun showEndGame() {
        val intent = Intent(activity, StartActivity::class.java).apply {
            putExtra(StartActivity.RESULT_MESSAGE, game.getQuestion().getText())
        }
        activity.startActivity(intent)
    }
Вместо заключения
Как я уже говорил, вряд ли это приложение можно назвать максимально production-ready. Здесь много допущений и мест, где срезаются углы. Это скорее MVP, скелет, который можно развить. Ниже я напишу то, что можно было бы улучшить или добавить:
-
Дизайн. Его тут вообще нет, есть пространство для маневра
-
Текущие UI-элементы неплохо отображаются на моем эмуляторе, однако на реальном смартфоне есть проблемы и конфликты с темой. Над этим можно поработать
-
Добавить различные картинки в модель данных, заменять картинки на экране
-
Стоило бы перенести тяжелые операции парсинга json — файла в фон, добавить loader на время этого процесса
-
Добавить возможность сохранять данные из json в sqllite и работать с этим
Ну и ссылка на полные исходники для тех, кто хочет посмотреть на проект комплексно.
Battleship is a game of two players which is played on grids on which each players fleet of ships are marked. Players take turns to take shots at the other player’s ships. The objective of the game is destroy the opponent’s fleet. Read more on Wikipedia. Building this game is also a very famous design interview question.
We are going to build the game in Kotlin using Redux architecture. We will implement the logic and not worry much about the UI since it’s secondary.

Rules of Battleship
Before we begin writing some code, it’s imperative that we familiarize ourselves with the rules.
- There are 2 players in the game. Each player has a board to place their fleet and a board to mark their shots.
- Each player is allotted identical fleet of ships. Based on the game, the type and number of the ships may vary.
- Each player take turns calling the shot alternatively until a player’s fleet is completely destroyed.
- When a player takes a shot at a grid on the board, the other player has to honestly acknowledge the shot and let the offense know if they hit a ship or not. The offense marks the grid based on the defense’s response.
Models
Let’s analyze what type of models and data structures we will require to build the game.
User: The player.Board: The board of size(w, h)that belongs to the player.Ship: A ship of sizes, located at gridgwith directiond.Point: A point(x, y)denoting the grid on the board.Direction: Direction of the ship —verticalorhorizontal.
Let’s start from the smallest model required.
Point
data class Point(val col, val row)The point denotes a grid on the 2D-board. The point and grid representation is from index 0.
Ship
A ship may have a name, but it’s not that important right now. A ship has a size — how many grids long it is. We also need to put the ship on the board, so we need start point and end point of the ship to correctly determine where the ship is.
If we take board as a 2D space, a ship can be termed as a vector which has a magnitude and a direction (vertical or horizontal). We need a fix point to place the ship on the board.
Direction
enum class Direction {
  HORIZONTAL, VERTICAL;
}
Let’s write a class for Ship.
data class Ship(
  val start: Point,
  val size: Int,
  val direction: Direction)
This definition is not complete yet and we shall revisit this later.
Board
A board has a size and contains the fleet.
data class Board(
  val width: Int,
  val height: Int,
  val ships: List<Ship> = listOf())
These models just represent the setup of the game. It doesn’t support any gameplay, eg. what happens when a player takes a shot?
Gameplay
The logic of the gameplay is complex and would involve some changes to our models.
When a player takes a shot at a grid, they mark it down on their board if they hit a ship or missed. It means that we need to store if each shot was hit or missed. To keep track of hits and misses, we will add hits: Set<Point> and misses: Set<Point> to the board.
When a player takes a shot, the defense also marks down on their board if the shot hit or missed. We will add opponentHits: Set<Point> and opponentMisses: Set<Point> to the board model to keep track.
It’s also helpful if we mark the hits to the ship so that we can easily track if the ship is completely destroyed or not. We will add hits: Set<Point> to the ship model.
We also need to keep track which ship are still active and which are completely destroyed so that we can know if the game is over once all the ships are destroyed. We can add active: List<Ship> and destroyed: List<Ship> to the board. The data structure is immutable and we should try to keep it lean as much as possible. We can use active: List<Int> and destroyed: List<Int> and unique id: Int to each ship.
Ship
data class Ship(val id: Int,
  val start: Point,
  val size: Int,
  val direction: Direction,
  val hits: Set<Point> = setOf()) {

  val destroyed = hits.size == size
}
We added hits and destroyed to the ship model.
Board
data class Board(
  val id: Int,
  val user: User,
  val width: Int, val height: Int,
  val ships: List<Ship> = listOf(),
  val hits: Set<Point> = setOf(),
  val misses: Set<Point> = setOf(),
  val opponentHits: Set<Point> = setOf(),
  val opponentMisses: Set<Point> = setOf()) {

  val activeShips = ships.filter { !it.destroyed }.map { it.id }
  val destroyedShips: ships.filter { it.destroyed }.map { it.id }
  val lost = ships.isNotEmpty() && activeShips.isEmpty()
}
We added id — unique identifier for the board and user. We also added hits, misses, opponentHits and opponentMisses to keep track of the moves and where the user can play. We added activeShips, destroyedShips and lost to have better representation of the gameplay.
Kotlin operator overloading
Kotlin allows us to provide implementations for a predefined set of operators on our types. We can use +, * or in and other operators to make our code concise and readable.
The board has a predefined fixed size and if we want to add a ship on the board, it should fit the board.
data class Board(...) {

  operator fun contains(p: Point): Boolean {
    return p.col >= 0 && p.row >= 0
      && p.col < width && p.row < height
  }

}
Now, we can check if a point is on the board or not by just calling p in board which would return a boolean.
When a shot is taken, we need to check if it hit the ship or not.
data class Ship(...) {

  operator fun contains(p: Point): Boolean {
    return when(direction) {
      HORIZONTAL -> start.row == p.row && start.col <= p.col && end.col >= p.col
      VERTICAL -> start.col == p.col && start.row <= p.row && end.row >= p.row
    }
  }
}
We have not defined Ship.end yet. So let’s do that now with the help of operators. We will define WeighedDirection which is an actual representation of a vector.
data class WeighedDirection(val d: Direction, val len: Int)

enum class Direction {
  HORIZONTAL, VERTICAL;

  operator fun times(n: Int): WeighedDirection {
    return WeighedDirection(this, n)
  }

}

data class Point(val col: Int, val row: Int) {
  operator fun plus(wd: WeighedDirection): Point {
    return when(wd.d) {
      HORIZONTAL -> Point(col + wd.len, row)
      VERTICAL -> Point(col, row + wd.len)
    }
  }
}

data class Ship(...) {
  val end = start + direction * (size-1)
}
direction * sizecallsDirectio.times()method and returnsWeighedDirection. And,start + WeighedDirectioncallsPoint.plus()which gives us the end point of the ship.
And now we can check if a point exists on the ship by calling p in ship.
In the game, no two ships can overlap. So let’s overload another operator which would help us check if two ships overlap.
data class Ship(...) {

  operator fun contains(other: Ship): Boolean {
    if (other.direction == this.direction) {
      return other.start in this || other.end in this
    }

    val vertical = if (other.direction == VERTICAL) other else this
    val horizontal = if (other.direction == HORIZONTAL) other else this

    return horizontal.start.row in vertical.start.row..vertical.end.row &&
      vertical.start.col in horizontal.start.row..horizontal.end.row
  }
}
This is a complex logic and if you’re not in habit of solving such equations, I’d recommend that you try once. It took me some time to come up with the solution. We can use this operator to check if two ships overlap by simply calling ship1 in ship2.
Explanation: If both the ships have same direction, we need to check if start or end point one ship lies on the other or not.
The logic becomes complex when the ships have different directions. We don’t care what direction the ships have since there are only two directions so we create instances for vertical and horizontal ship.
A horizontal ship has the same row for all the points and similarly, the vertical ship has the same column for all the points. So we check if the vertical ship passes through the row of the horizontal ship and the horizontal ship passes through the column of the vertical ship. This would get us the intersection point.
horizontal.start.row in vertical.start.row...vertical.end.row — 2 operators are used here. in which we have overloaded in Point.contains() and .. which is the range operator.
Summary
We require Point, Direction, Ship, and Board models to build our battleship game. Here’s how the final version looks.
UI
We have created our models and data classes. It’s time to work on the UI so that we can see the game in action.
Disclaimer: I’m not going to spend a lot of time in making amazing UI as it’s not the focus of the series. The UI is going to be super ugly!
We are going to use RecyclerView with GridLayoutManager to create the board. Each grid of the board will be a ViewHolder. We shall use a custom view to draw some paint and dots which would represent ships and shots on the board.
This is how it’s going to turn out.

Let’s look at the components that are being used here.
Components
- Cell: UI model which maps
Boardto an individualGrid. After every update, we create new cells which represent grids of the board. For a board of size of 10 columns and 10 rows, we will have10*10 => 100cells. - SquareCell: UI representation of the
Grid. It extendsViewand binds withCellto draw and display the data. It’s a square view which draws the ship, hit and missed points on the canvas. - UiCellAdapter: RecyclerView Adapter that we use to draw the board on the screen.
Without going much in the details, here’s the code which will render the game UI. You can find the layout for ViewHolder here — square_cell_itemview.xml.
Converter
We have the components for the UI ready, but we still need to convert Board to List<Cell>. We create a list with capacity of width*height and iterate over each point and create Cell.
private fun convert(board: Board): List<Cell> {
    val cells = ArrayList<Cell>(board.width * board.height)
      for (i in 0 until board.height) {
        for (j in 0 until board.width) {
          val point = Point(j, i)
            cells.add(Cell(
                  point = point,
                  hasShip = board.ships.contains(point),
                  direction = board.ships.getShipDirection(point),
                  userHit = board.hits.contains(point),
                  userMissed = board.misses.contains(point),
                  opponentMissed = board.opponentMisses.contains(point),
                  opponentHit = board.opponentHits.contains(point)
            ))
          }
      }
    return cells
}
Battleship in Action
Let’s write an Activity and configure some code so that we can play with it. We’ll use a layout which has a RecyclerView. After creating the adapter, we would set up the boards. For this, we will randomly place the ships on each boats. We will add a click listener on the grid so that you can take a shot on the board.
I have quickly gone through the UI composing part as the article already has too much content. If you have any questions, feel free to leave a comment or get in touch with me.
We are ready with our models and data structure. In the next article, we will use Redux architecture to implement the gameplay logic.
Redux architecture series
- Introduction: Redux architecture for android apps
- Middleware: Introduction and implementation
- Write your own Redux implementation in Kotlin
- Add Middleware to your Redux implementation
- Build Battleship Game with Redux — Groundwork
- Implement the Battleship gameplay with Redux
In this article, we are going to make a tic-tac-toe game that has both online and offline modes. So for this project, we are going to use Kotlin and XML. Tic-Tac-Toe is a two-player game. Each player has X or O. Both the player plays one by one simultaneously. In one move, players need to select one position in the 3×3 grid and put their mark at that place. The game runs continuously until one may wins. In the previous article, we have built a simple Tic Tac Toe Game in Android but in this article, we have the following additional features inside the app:
- Single Player
- Multi-Player
- Online Game
- Create and Join by Entering the Game Code
- Offline Game
- Online Game
A sample video is given below to get an idea about what we are going to do in this article.
Basic Terminologies
- XML: Its full form is an extensible markup language and it is a set of codes and tags.
- Kotlin: It is a free and open-source programming language that is developed by JetBrains.
- Android Studio: Android Studio is the official Integrated Development Environment for Android app development.
- Firebase: It is a backend service provided by Google.
Step by Step Implementation
Step 1: Create a New Project
To create a new project in Android Studio please refer to How to Create/Start a New Project in Android Studio. Note that select Kotlin as the programming language.
Step 2: Working with the activity_main.xml file
Navigate to the app > res > layout > activity_main.xml and add the below code to that file. Below is the code for the activity_main.xml file.
XML
<?xml version="1.0" encoding="utf-8"?>
<TableLayout
android:layout_width="match_parent"
android:layout_height="match_parent"
android:background="#FFEB3B"
android:gravity="center"
tools:context=".MainActivity">
<LinearLayout
android:layout_width="wrap_content"
android:layout_height="20dp"
android:layout_margin="10dp"
android:gravity="center">
<TextView
android:id="@+id/textView"
android:layout_width="110dp"
android:layout_height="30dp"
android:layout_marginLeft="40dp"
android:text="Player1 : 0"
android:textColor="#000000"
android:textSize="18dp" />
<TextView
android:id="@+id/textView2"
android:layout_width="110dp"
android:layout_height="30dp"
android:layout_marginLeft="30dp"
android:text="Player2 : 0"
android:textColor="#000000"
android:textSize="18dp" />
</LinearLayout>
<TableRow
android:layout_width="match_parent"
android:layout_height="match_parent"
android:layout_marginTop="10dp"
android:gravity="center">
<Button
android:id="@+id/button"
android:layout_width="100dp"
android:layout_height="100dp"
android:layout_marginLeft="5dp"
android:background="#FFFFFF"
android:onClick="clickfun"
android:textSize="60dp" />
<Button
android:id="@+id/button2"
android:layout_width="100dp"
android:layout_height="100dp"
android:layout_marginLeft="5dp"
android:background="#FFFFFF"
android:onClick="clickfun"
android:textSize="60dp" />
<Button
android:id="@+id/button3"
android:layout_width="100dp"
android:layout_height="100dp"
android:layout_marginLeft="5dp"
android:background="#FFFFFF"
android:onClick="clickfun"
android:textColor="#000000"
android:textSize="60dp" />
</TableRow>
<TableRow
android:layout_width="match_parent"
android:layout_height="match_parent"
android:gravity="center">
<Button
android:id="@+id/button4"
android:layout_width="100dp"
android:layout_height="100dp"
android:layout_marginLeft="5dp"
android:layout_marginTop="5dp"
android:background="#FFFFFF"
android:onClick="clickfun"
android:textColor="#000000"
android:textSize="60dp" />
<Button
android:id="@+id/button5"
android:layout_width="100dp"
android:layout_height="100dp"
android:layout_marginLeft="5dp"
android:layout_marginTop="5dp"
android:background="#FFFFFF"
android:onClick="clickfun"
android:textColor="#000000"
android:textSize="60dp" />
<Button
android:id="@+id/button6"
android:layout_width="100dp"
android:layout_height="100dp"
android:layout_marginLeft="5dp"
android:layout_marginTop="5dp"
android:background="#FFFFFF"
android:onClick="clickfun"
android:textColor="#000000"
android:textSize="60dp" />
</TableRow>
<TableRow
android:layout_width="match_parent"
android:layout_height="match_parent"
android:gravity="center">
<Button
android:id="@+id/button7"
android:layout_width="100dp"
android:layout_height="100dp"
android:layout_marginLeft="5dp"
android:layout_marginTop="5dp"
android:background="#FFFFFF"
android:onClick="clickfun"
android:textColor="#000000"
android:textSize="60dp" />
<Button
android:id="@+id/button8"
android:layout_width="100dp"
android:layout_height="100dp"
android:layout_marginLeft="5dp"
android:layout_marginTop="5dp"
android:background="#FFFFFF"
android:onClick="clickfun"
android:textColor="#000000"
android:textSize="60dp" />
<Button
android:id="@+id/button9"
android:layout_width="100dp"
android:layout_height="100dp"
android:layout_marginLeft="5dp"
android:layout_marginTop="5dp"
android:background="#FFFFFF"
android:onClick="clickfun"
android:textColor="#000000"
android:textSize="60dp" />
</TableRow>
<LinearLayout
android:layout_marginTop="15dp"
android:gravity="center">
<Button
android:id="@+id/button10"
android:layout_width="wrap_content"
android:layout_height="wrap_content"
android:text="Reset" />
</LinearLayout>
</TableLayout>
After writing this much code the UI look likes this:

Step 3: Working with the MainActivity.kt file
Go to the MainActivity.kt file and refer to the following code. Below is the code for the MainActivity.kt file. Comments are added inside the code to understand the code in more detail. Here we are going to add functionality to our app.
Kotlin
class MainActivity : AppCompatActivity() {
override fun onCreate(savedInstanceState: Bundle?) {
super.onCreate(savedInstanceState)
setContentView(R.layout.activity_main)
button10.setOnClickListener {
reset()
}
}
var player1Count = 0
var player2Count = 0
fun clickfun(view:View)
{
if(playerTurn) {
val but = view as Button
var cellID = 0
when (but.id) {
R.id.button -> cellID = 1
R.id.button2 -> cellID = 2
R.id.button3 -> cellID = 3
R.id.button4 -> cellID = 4
R.id.button5 -> cellID = 5
R.id.button6 -> cellID = 6
R.id.button7 -> cellID = 7
R.id.button8 -> cellID = 8
R.id.button9 -> cellID = 9
}
playerTurn = false;
Handler().postDelayed(Runnable { playerTurn = true } , 600)
playnow(but, cellID)
}
}
var player1 = ArrayList<Int>()
var player2 = ArrayList<Int>()
var emptyCells = ArrayList<Int>()
var activeUser = 1
fun playnow(buttonSelected:Button , currCell:Int)
{ val audio = MediaPlayer.create(this , R.raw.poutch)
if(activeUser == 1)
{
buttonSelected.text = "X"
buttonSelected.setTextColor(Color.parseColor("#EC0C0C"))
player1.add(currCell)
emptyCells.add(currCell)
audio.start()
buttonSelected.isEnabled = false
Handler().postDelayed(Runnable { audio.release() } , 200)
val checkWinner = checkwinner()
if(checkWinner == 1){
Handler().postDelayed(Runnable { reset() } , 2000)
}
else if(singleUser){
Handler().postDelayed(Runnable { robot() } , 500)
}
else
activeUser = 2
}
else
{
buttonSelected.text = "O"
audio.start()
buttonSelected.setTextColor(Color.parseColor("#D22BB804"))
activeUser = 1
player2.add(currCell)
emptyCells.add(currCell)
Handler().postDelayed(Runnable { audio.release() } , 200)
buttonSelected.isEnabled = false
val checkWinner = checkwinner()
if(checkWinner == 1)
Handler().postDelayed(Runnable { reset() } , 4000)
}
}
fun reset()
{
player1.clear()
player2.clear()
emptyCells.clear()
activeUser = 1;
for(i in 1..9)
{
var buttonselected : Button?
buttonselected = when(i){
1 -> button
2 -> button2
3 -> button3
4 -> button4
5 -> button5
6 -> button6
7 -> button7
8 -> button8
9 -> button9
else -> {button}
}
buttonselected.isEnabled = true
buttonselected.text = ""
textView.text = "Player1 : $player1Count"
textView2.text = "Player2 : $player2Count"
}
}
fun disableReset()
{
button10.isEnabled = false
Handler().postDelayed(Runnable { button10.isEnabled = true } , 2200)
}
}
After writing that much code our app is ready with basic functionality. Now let’s add robot functionality for single-player mode:
Kotlin
fun robot()
{
val rnd = (1..9).random()
if(emptyCells.contains(rnd))
robot()
else {
val buttonselected : Button?
buttonselected = when(rnd) {
1 -> button
2 -> button2
3 -> button3
4 -> button4
5 -> button5
6 -> button6
7 -> button7
8 -> button8
9 -> button9
else -> {button}
}
emptyCells.add(rnd);
val audio = MediaPlayer.create(this , R.raw.poutch)
audio.start()
Handler().postDelayed(Runnable { audio.release() } , 500)
buttonselected.text = "O"
buttonselected.setTextColor(Color.parseColor("#D22BB804"))
player2.add(rnd)
buttonselected.isEnabled = false
var checkWinner = checkwinner()
if(checkWinner == 1)
Handler().postDelayed(Runnable { reset() } , 2000)
}
}
Let’s try to play in single-mode:
Step 4: Now let’s implement the main feature of our app i.e. online mode
Here we are going to use firebase for our backend functionality. So what we are doing here is listening on a particular codes database and if got any change in the database, then running an event on the client-side to update the move made by the opponent.
Kotlin
FirebaseDatabase.getInstance().reference.child("data").child(code).addChildEventListener(object : ChildEventListener{
override fun onCancelled(error: DatabaseError) {
TODO("Not yet implemented")
}
override fun onChildMoved(snapshot: DataSnapshot, previousChildName: String?) {
TODO("Not yet implemented")
}
override fun onChildChanged(snapshot: DataSnapshot, previousChildName: String?) {
TODO("Not yet implemented")
}
override fun onChildAdded(snapshot: DataSnapshot, previousChildName: String?) {
var data = snapshot.value
if(isMyMove==true){
isMyMove = false
moveonline(data.toString() , isMyMove)
}
else{
isMyMove = true
moveonline(data.toString() , isMyMove)
}
}
override fun onChildRemoved(snapshot: DataSnapshot) {
reset()
errorMsg("Game Reset")
}
})
}
Step 5: Create 4 new empty activities
Refer to this article How to Create New Activity in Android Studio using Shortcuts and create 4 new empty activities and name the activity as the Firstpage, SecondPage, ThirdPage, and CodeActivity. Below is the code for this activity file for both the XML and Kotlin files respectively.
XML
<?xml version="1.0" encoding="utf-8"?>
<LinearLayout
android:layout_width="match_parent"
android:layout_height="match_parent"
android:gravity="center"
android:orientation="vertical"
tools:context=".Firstpage">
<TextView
android:id="@+id/textView3"
android:layout_width="match_parent"
android:layout_height="wrap_content"
android:gravity="center"
android:text="Tic Tac Toe"
android:textColor="@color/colorPrimaryDark"
android:textSize="25dp" />
<Button
android:id="@+id/button11"
android:layout_width="250dp"
android:layout_height="wrap_content"
android:layout_marginTop="90dp"
android:background="#B2BCF8"
android:gravity="center"
android:text="Single Player" />
<Button
android:id="@+id/button12"
android:layout_width="250dp"
android:layout_height="wrap_content"
android:layout_marginTop="30dp"
android:background="#B2BCF8"
android:gravity="center"
android:text="Multi Player" />
</LinearLayout>
Kotlin
package com.example.tictactoeapp
import android.content.Intent
import android.os.Bundle
import androidx.appcompat.app.AppCompatActivity
import androidx.core.app.ActivityCompat
import kotlinx.android.synthetic.main.activity_firstpage.*
var singleUser = false
class Firstpage : AppCompatActivity() {
override fun onCreate(savedInstanceState: Bundle?) {
super.onCreate(savedInstanceState)
setContentView(R.layout.activity_firstpage)
button11.setOnClickListener {
startActivity(Intent(this, MainActivity::class.java))
singleUser = true;
}
button12.setOnClickListener {
startActivity(Intent(this, SecondPage::class.java))
singleUser = false;
}
}
override fun onBackPressed() {
ActivityCompat.finishAffinity(this)
}
}
XML
<?xml version="1.0" encoding="utf-8"?>
<LinearLayout
android:layout_width="match_parent"
android:layout_height="match_parent"
android:gravity="center"
android:orientation="vertical"
tools:context=".Firstpage">
<TextView
android:id="@+id/textView3"
android:layout_width="match_parent"
android:layout_height="wrap_content"
android:gravity="center"
android:text="Tic Tac Toe"
android:textColor="@color/colorPrimaryDark"
android:textSize="25dp" />
<Button
android:id="@+id/buttonOnline"
android:layout_width="250dp"
android:layout_height="wrap_content"
android:layout_marginTop="90dp"
android:background="#B2BCF8"
android:gravity="center"
android:text="Online Game" />
<Button
android:id="@+id/buttonOffline"
android:layout_width="250dp"
android:layout_height="wrap_content"
android:layout_marginTop="30dp"
android:background="#B2BCF8"
android:gravity="center"
android:text="Offline Game" />
</LinearLayout>
Kotlin
package com.example.tictactoeapp
import android.content.Intent
import android.os.Bundle
import androidx.appcompat.app.AppCompatActivity
import kotlinx.android.synthetic.main.activity_second_page.*
var Online = true;
class SecondPage : AppCompatActivity() {
override fun onCreate(savedInstanceState: Bundle?) {
super.onCreate(savedInstanceState)
setContentView(R.layout.activity_second_page)
buttonOnline.setOnClickListener {
startActivity(Intent(this, CodeActivity::class.java))
singleUser = true;
Online = true;
}
buttonOffline.setOnClickListener {
startActivity(Intent(this, MainActivity::class.java))
singleUser = false;
Online = false;
}
}
}
XML
<?xml version="1.0" encoding="utf-8"?>
<TableLayout
android:layout_width="match_parent"
android:layout_height="match_parent"
android:background="#FFEB3B"
android:gravity="center"
tools:context=".MainActivity">
<LinearLayout
android:layout_width="wrap_content"
android:layout_height="20dp"
android:layout_margin="10dp"
android:gravity="center">
<TextView
android:id="@+id/textView3"
android:layout_width="132dp"
android:layout_height="30dp"
android:layout_marginLeft="40dp"
android:text="Turn : Player 1"
android:textColor="#000000"
android:textSize="18dp" />
<TextView
android:id="@+id/textView"
android:layout_width="wrap_content"
android:layout_height="30dp"
android:layout_marginLeft="40dp"
android:text="Player1 : 0"
android:textColor="#000000"
android:textSize="18dp" />
<TextView
android:id="@+id/textView2"
android:layout_width="110dp"
android:layout_height="30dp"
android:layout_marginLeft="30dp"
android:text="Player2 : 0"
android:textColor="#000000"
android:textSize="18dp" />
</LinearLayout>
<TableRow
android:layout_width="match_parent"
android:layout_height="match_parent"
android:layout_marginTop="10dp"
android:gravity="center">
<Button
android:id="@+id/button11"
android:layout_width="100dp"
android:layout_height="100dp"
android:layout_marginLeft="5dp"
android:background="#FFFFFF"
android:onClick="clickfun"
android:textSize="60dp" />
<Button
android:id="@+id/button12"
android:layout_width="100dp"
android:layout_height="100dp"
android:layout_marginLeft="5dp"
android:background="#FFFFFF"
android:onClick="clickfun"
android:textSize="60dp" />
<Button
android:id="@+id/button13"
android:layout_width="100dp"
android:layout_height="100dp"
android:layout_marginLeft="5dp"
android:background="#FFFFFF"
android:onClick="clickfun"
android:textColor="#000000"
android:textSize="60dp" />
</TableRow>
<TableRow
android:layout_width="match_parent"
android:layout_height="match_parent"
android:gravity="center">
<Button
android:id="@+id/button14"
android:layout_width="100dp"
android:layout_height="100dp"
android:layout_marginLeft="5dp"
android:layout_marginTop="5dp"
android:background="#FFFFFF"
android:onClick="clickfun"
android:textColor="#000000"
android:textSize="60dp" />
<Button
android:id="@+id/button15"
android:layout_width="100dp"
android:layout_height="100dp"
android:layout_marginLeft="5dp"
android:layout_marginTop="5dp"
android:background="#FFFFFF"
android:onClick="clickfun"
android:textColor="#000000"
android:textSize="60dp" />
<Button
android:id="@+id/button16"
android:layout_width="100dp"
android:layout_height="100dp"
android:layout_marginLeft="5dp"
android:layout_marginTop="5dp"
android:background="#FFFFFF"
android:onClick="clickfun"
android:textColor="#000000"
android:textSize="60dp" />
</TableRow>
<TableRow
android:layout_width="match_parent"
android:layout_height="match_parent"
android:gravity="center">
<Button
android:id="@+id/button17"
android:layout_width="100dp"
android:layout_height="100dp"
android:layout_marginLeft="5dp"
android:layout_marginTop="5dp"
android:background="#FFFFFF"
android:onClick="clickfun"
android:textColor="#000000"
android:textSize="60dp" />
<Button
android:id="@+id/button18"
android:layout_width="100dp"
android:layout_height="100dp"
android:layout_marginLeft="5dp"
android:layout_marginTop="5dp"
android:background="#FFFFFF"
android:onClick="clickfun"
android:textColor="#000000"
android:textSize="60dp" />
<Button
android:id="@+id/button19"
android:layout_width="100dp"
android:layout_height="100dp"
android:layout_marginLeft="5dp"
android:layout_marginTop="5dp"
android:background="#FFFFFF"
android:onClick="clickfun"
android:textColor="#000000"
android:textSize="60dp" />
</TableRow>
<LinearLayout
android:layout_marginTop="15dp"
android:gravity="center">
<Button
android:id="@+id/button110"
android:layout_width="wrap_content"
android:layout_height="wrap_content"
android:text="Reset" />
</LinearLayout>
</TableLayout>
Kotlin
package com.example.tictactoeapp
import android.graphics.Color
import android.media.MediaPlayer
import android.os.Bundle
import android.os.Handler
import android.view.View
import android.widget.Button
import android.widget.Toast
import androidx.appcompat.app.AlertDialog
import androidx.appcompat.app.AppCompatActivity
import com.google.firebase.database.ChildEventListener
import com.google.firebase.database.DataSnapshot
import com.google.firebase.database.DatabaseError
import com.google.firebase.database.FirebaseDatabase
import kotlinx.android.synthetic.main.activity_third_page.*
import kotlin.system.exitProcess
var isMyMove = isCodeMaker;
class ThirdPage : AppCompatActivity() {
override fun onCreate(savedInstanceState: Bundle?) {
super.onCreate(savedInstanceState)
setContentView(R.layout.activity_third_page)
button110.setOnClickListener {
reset()
}
FirebaseDatabase.getInstance().reference.child("data").child(code)
.addChildEventListener(object : ChildEventListener {
override fun onCancelled(error: DatabaseError) {
TODO("Not yet implemented")
}
override fun onChildMoved(snapshot: DataSnapshot, previousChildName: String?) {
TODO("Not yet implemented")
}
override fun onChildChanged(snapshot: DataSnapshot, previousChildName: String?) {
TODO("Not yet implemented")
}
override fun onChildAdded(snapshot: DataSnapshot, previousChildName: String?) {
var data = snapshot.value
if (isMyMove == true) {
isMyMove = false
moveonline(data.toString(), isMyMove)
} else {
isMyMove = true
moveonline(data.toString(), isMyMove)
}
}
override fun onChildRemoved(snapshot: DataSnapshot) {
reset()
errorMsg("Game Reset")
}
})
}
var player1Count = 0
var player2Count = 0
fun clickfun(view: View) {
if (isMyMove) {
val but = view as Button
var cellOnline = 0
when (but.id) {
R.id.button11 -> cellOnline = 1
R.id.button12 -> cellOnline = 2
R.id.button13 -> cellOnline = 3
R.id.button14 -> cellOnline = 4
R.id.button15 -> cellOnline = 5
R.id.button16 -> cellOnline = 6
R.id.button17 -> cellOnline = 7
R.id.button18 -> cellOnline = 8
R.id.button19 -> cellOnline = 9
else -> {
cellOnline = 0
}
}
playerTurn = false;
Handler().postDelayed(Runnable { playerTurn = true }, 600)
playnow(but, cellOnline)
updateDatabase(cellOnline);
} else {
Toast.makeText(this, "Wait for your turn", Toast.LENGTH_LONG).show()
}
}
var player1 = ArrayList<Int>()
var player2 = ArrayList<Int>()
var emptyCells = ArrayList<Int>()
var activeUser = 1
fun playnow(buttonSelected: Button, currCell: Int) {
val audio = MediaPlayer.create(this, R.raw.poutch)
buttonSelected.text = "X"
emptyCells.remove(currCell)
textView3.text = "Turn : Player 2"
buttonSelected.setTextColor(Color.parseColor("#EC0C0C"))
player1.add(currCell)
emptyCells.add(currCell)
audio.start()
buttonSelected.isEnabled = false
Handler().postDelayed(Runnable { audio.release() }, 200)
checkwinner()
}
fun moveonline(data: String, move: Boolean) {
val audio = MediaPlayer.create(this, R.raw.poutch)
if (move) {
var buttonselected: Button?
buttonselected = when (data.toInt()) {
1 -> button11
2 -> button12
3 -> button13
4 -> button14
5 -> button15
6 -> button16
7 -> button17
8 -> button18
9 -> button19
else -> {
button11
}
}
buttonselected.text = "O"
textView3.text = "Turn : Player 1"
buttonselected.setTextColor(Color.parseColor("#D22BB804"))
player2.add(data.toInt())
emptyCells.add(data.toInt())
audio.start()
Handler().postDelayed(Runnable { audio.release() }, 200)
buttonselected.isEnabled = false
checkwinner()
}
}
fun updateDatabase(cellId: Int) {
FirebaseDatabase.getInstance().reference.child("data").child(code).push().setValue(cellId);
}
fun checkwinner(): Int {
val audio = MediaPlayer.create(this, R.raw.success)
if ((player1.contains(1) && player1.contains(2) && player1.contains(3)) || (player1.contains(
1
) && player1.contains(4) && player1.contains(7)) ||
(player1.contains(3) && player1.contains(6) && player1.contains(9)) || (player1.contains(
7
) && player1.contains(8) && player1.contains(9)) ||
(player1.contains(4) && player1.contains(5) && player1.contains(6)) || (player1.contains(
1
) && player1.contains(5) && player1.contains(9)) ||
player1.contains(3) && player1.contains(5) && player1.contains(7) || (player1.contains(2) && player1.contains(
5
) && player1.contains(8))
) {
player1Count += 1
buttonDisable()
audio.start()
disableReset()
Handler().postDelayed(Runnable { audio.release() }, 4000)
val build = AlertDialog.Builder(this)
build.setTitle("Game Over")
build.setMessage("Player 1 Wins!!" + "nn" + "Do you want to play again")
build.setPositiveButton("Ok") { dialog, which ->
reset()
audio.release()
}
build.setNegativeButton("Exit") { dialog, which ->
audio.release()
removeCode()
exitProcess(1)
}
Handler().postDelayed(Runnable { build.show() }, 2000)
return 1
} else if ((player2.contains(1) && player2.contains(2) && player2.contains(3)) || (player2.contains(
1
) && player2.contains(4) && player2.contains(7)) ||
(player2.contains(3) && player2.contains(6) && player2.contains(9)) || (player2.contains(
7
) && player2.contains(8) && player2.contains(9)) ||
(player2.contains(4) && player2.contains(5) && player2.contains(6)) || (player2.contains(
1
) && player2.contains(5) && player2.contains(9)) ||
player2.contains(3) && player2.contains(5) && player2.contains(7) || (player2.contains(2) && player2.contains(
5
) && player2.contains(8))
) {
player2Count += 1
audio.start()
buttonDisable()
disableReset()
Handler().postDelayed(Runnable { audio.release() }, 4000)
val build = AlertDialog.Builder(this)
build.setTitle("Game Over")
build.setMessage("Player 2 Wins!!" + "nn" + "Do you want to play again")
build.setPositiveButton("Ok") { dialog, which ->
reset()
audio.release()
}
build.setNegativeButton("Exit") { dialog, which ->
audio.release()
removeCode()
exitProcess(1)
}
Handler().postDelayed(Runnable { build.show() }, 2000)
return 1
} else if (emptyCells.contains(1) && emptyCells.contains(2) && emptyCells.contains(3) && emptyCells.contains(
4
) && emptyCells.contains(5) && emptyCells.contains(6) && emptyCells.contains(7) &&
emptyCells.contains(8) && emptyCells.contains(9)
) {
val build = AlertDialog.Builder(this)
build.setTitle("Game Draw")
build.setMessage("Nobody Wins" + "nn" + "Do you want to play again")
build.setPositiveButton("Ok") { dialog, which ->
audio.release()
reset()
}
build.setNegativeButton("Exit") { dialog, which ->
audio.release()
exitProcess(1)
removeCode()
}
build.show()
return 1
}
return 0
}
fun reset() {
player1.clear()
player2.clear()
emptyCells.clear()
activeUser = 1;
for (i in 1..9) {
var buttonselected: Button?
buttonselected = when (i) {
1 -> button11
2 -> button12
3 -> button13
4 -> button14
5 -> button15
6 -> button16
7 -> button17
8 -> button18
9 -> button19
else -> {
button11
}
}
buttonselected.isEnabled = true
buttonselected.text = ""
textView.text = "Player1 : $player1Count"
textView2.text = "Player2 : $player2Count"
isMyMove = isCodeMaker
if (isCodeMaker) {
FirebaseDatabase.getInstance().reference.child("data").child(code).removeValue()
}
}
}
fun buttonDisable() {
for (i in 1..9) {
val buttonSelected = when (i) {
1 -> button11
2 -> button12
3 -> button13
4 -> button14
5 -> button15
6 -> button16
7 -> button17
8 -> button18
9 -> button19
else -> {
button11
}
}
if (buttonSelected.isEnabled == true)
buttonSelected.isEnabled = false
}
}
fun buttoncelldisable() {
emptyCells.forEach {
val buttonSelected = when (it) {
1 -> button11
2 -> button12
3 -> button13
4 -> button14
5 -> button15
6 -> button16
7 -> button17
8 -> button18
9 -> button19
else -> {
button11
}
}
if (buttonSelected.isEnabled == true)
buttonSelected.isEnabled = false;
}
}
fun removeCode() {
if (isCodeMaker) {
FirebaseDatabase.getInstance().reference.child("codes").child(keyValue).removeValue()
}
}
fun errorMsg(value: String) {
Toast.makeText(this, value, Toast.LENGTH_SHORT).show()
}
fun disableReset() {
button110.isEnabled = false
Handler().postDelayed(Runnable { button110.isEnabled = true }, 2200)
}
override fun onBackPressed() {
removeCode()
if (isCodeMaker) {
FirebaseDatabase.getInstance().reference.child("data").child(code).removeValue()
}
exitProcess(0)
}
}
XML
<?xml version="1.0" encoding="utf-8"?>
<LinearLayout
android:layout_width="match_parent"
android:layout_height="match_parent"
android:gravity="center"
android:orientation="vertical"
tools:context=".CodeActivity">
<TextView
android:id="@+id/textView4"
android:layout_width="match_parent"
android:layout_height="wrap_content"
android:layout_marginBottom="130dp"
android:gravity="center"
android:text="Tic Tac Toe"
android:textColor="@color/colorPrimaryDark"
android:textSize="25dp" />
<EditText
android:id="@+id/GameCode"
android:layout_width="200dp"
android:layout_height="wrap_content"
android:layout_marginBottom="25dp"
android:gravity="center"
android:hint="Enter Game Code"
android:inputType="textPersonName" />
<Button
android:id="@+id/Create"
android:layout_width="150dp"
android:layout_height="wrap_content"
android:layout_marginBottom="30dp"
android:background="#B2BCF8"
android:text="Create" />
<Button
android:id="@+id/Join"
android:layout_width="150dp"
android:layout_height="wrap_content"
android:background="#B2BCF8"
android:text="Join" />
<ProgressBar
android:id="@+id/progressBar"
style="?android:attr/progressBarStyle"
android:layout_width="match_parent"
android:layout_height="wrap_content"
android:visibility="gone" />
</LinearLayout>
Kotlin
package com.example.tictactoeapp
import android.content.Intent
import android.os.Bundle
import android.os.Handler
import android.view.View
import android.widget.Toast
import androidx.appcompat.app.AppCompatActivity
import com.google.firebase.database.DataSnapshot
import com.google.firebase.database.DatabaseError
import com.google.firebase.database.FirebaseDatabase
import com.google.firebase.database.ValueEventListener
import kotlinx.android.synthetic.main.activity_code.*
var isCodeMaker = true;
var code = "null";
var codeFound = false
var checkTemp = true
var keyValue: String = "null"
class CodeActivity : AppCompatActivity() {
override fun onCreate(savedInstanceState: Bundle?) {
super.onCreate(savedInstanceState)
setContentView(R.layout.activity_code)
Create.setOnClickListener {
code = "null";
codeFound = false
checkTemp = true
keyValue = "null"
code = GameCode.text.toString()
Create.visibility = View.GONE
Join.visibility = View.GONE
GameCode.visibility = View.GONE
textView4.visibility = View.GONE
progressBar.visibility = View.VISIBLE
if (code != "null" && code != null && code != "") {
isCodeMaker = true;
FirebaseDatabase.getInstance().reference.child("codes")
.addValueEventListener(object : ValueEventListener {
override fun onCancelled(error: DatabaseError) {
TODO("Not yet implemented")
}
override fun onDataChange(snapshot: DataSnapshot) {
var check = isValueAvailable(snapshot, code)
Handler().postDelayed({
if (check == true) {
Create.visibility = View.VISIBLE
Join.visibility = View.VISIBLE
GameCode.visibility = View.VISIBLE
textView4.visibility = View.VISIBLE
progressBar.visibility = View.GONE
} else {
FirebaseDatabase.getInstance().reference.child("codes").push()
.setValue(code)
isValueAvailable(snapshot, code)
checkTemp = false
Handler().postDelayed({
accepted()
errorMsg("Please don't go back")
}, 300)
}
}, 2000)
}
})
} else {
Create.visibility = View.VISIBLE
Join.visibility = View.VISIBLE
GameCode.visibility = View.VISIBLE
textView4.visibility = View.VISIBLE
progressBar.visibility = View.GONE
errorMsg("Enter Code Properly")
}
}
Join.setOnClickListener {
code = "null";
codeFound = false
checkTemp = true
keyValue = "null"
code = GameCode.text.toString()
if (code != "null" && code != null && code != "") {
Create.visibility = View.GONE
Join.visibility = View.GONE
GameCode.visibility = View.GONE
textView4.visibility = View.GONE
progressBar.visibility = View.VISIBLE
isCodeMaker = false;
FirebaseDatabase.getInstance().reference.child("codes")
.addValueEventListener(object : ValueEventListener {
override fun onCancelled(error: DatabaseError) {
TODO("Not yet implemented")
}
override fun onDataChange(snapshot: DataSnapshot) {
var data: Boolean = isValueAvailable(snapshot, code)
Handler().postDelayed({
if (data == true) {
codeFound = true
accepted()
Create.visibility = View.VISIBLE
Join.visibility = View.VISIBLE
GameCode.visibility = View.VISIBLE
textView4.visibility = View.VISIBLE
progressBar.visibility = View.GONE
} else {
Create.visibility = View.VISIBLE
Join.visibility = View.VISIBLE
GameCode.visibility = View.VISIBLE
textView4.visibility = View.VISIBLE
progressBar.visibility = View.GONE
errorMsg("Invalid Code")
}
}, 2000)
}
})
} else {
errorMsg("Enter Code Properly")
}
}
}
fun accepted() {
startActivity(Intent(this, ThirdPage::class.java));
Create.visibility = View.VISIBLE
Join.visibility = View.VISIBLE
GameCode.visibility = View.VISIBLE
textView4.visibility = View.VISIBLE
progressBar.visibility = View.GONE
}
fun errorMsg(value: String) {
Toast.makeText(this, value, Toast.LENGTH_SHORT).show()
}
fun isValueAvailable(snapshot: DataSnapshot, code: String): Boolean {
var data = snapshot.children
data.forEach {
var value = it.getValue().toString()
if (value == code) {
keyValue = it.key.toString()
return true;
}
}
return false
}
}
Below is the complete code for the MainActivity.kt file.
Kotlin
package com.example.tictactoeapp
import android.graphics.Color
import android.media.MediaPlayer
import android.os.Bundle
import android.os.Handler
import android.view.View
import android.widget.Button
import androidx.appcompat.app.AlertDialog
import androidx.appcompat.app.AppCompatActivity
import kotlinx.android.synthetic.main.activity_main.*
import kotlin.system.exitProcess
var playerTurn = true
class MainActivity : AppCompatActivity() {
override fun onCreate(savedInstanceState: Bundle?) {
super.onCreate(savedInstanceState)
setContentView(R.layout.activity_main)
button10.setOnClickListener {
reset()
}
}
var player1Count = 0
var player2Count = 0
fun clickfun(view: View) {
if (playerTurn) {
val but = view as Button
var cellID = 0
when (but.id) {
R.id.button -> cellID = 1
R.id.button2 -> cellID = 2
R.id.button3 -> cellID = 3
R.id.button4 -> cellID = 4
R.id.button5 -> cellID = 5
R.id.button6 -> cellID = 6
R.id.button7 -> cellID = 7
R.id.button8 -> cellID = 8
R.id.button9 -> cellID = 9
}
playerTurn = false;
Handler().postDelayed(Runnable { playerTurn = true }, 600)
playnow(but, cellID)
}
}
var player1 = ArrayList<Int>()
var player2 = ArrayList<Int>()
var emptyCells = ArrayList<Int>()
var activeUser = 1
fun playnow(buttonSelected: Button, currCell: Int) {
val audio = MediaPlayer.create(this, R.raw.poutch)
if (activeUser == 1) {
buttonSelected.text = "X"
buttonSelected.setTextColor(Color.parseColor("#EC0C0C"))
player1.add(currCell)
emptyCells.add(currCell)
audio.start()
buttonSelected.isEnabled = false
Handler().postDelayed(Runnable { audio.release() }, 200)
val checkWinner = checkwinner()
if (checkWinner == 1) {
Handler().postDelayed(Runnable { reset() }, 2000)
} else if (singleUser) {
Handler().postDelayed(Runnable { robot() }, 500)
} else
activeUser = 2
} else {
buttonSelected.text = "O"
audio.start()
buttonSelected.setTextColor(Color.parseColor("#D22BB804"))
activeUser = 1
player2.add(currCell)
emptyCells.add(currCell)
Handler().postDelayed(Runnable { audio.release() }, 200)
buttonSelected.isEnabled = false
val checkWinner = checkwinner()
if (checkWinner == 1)
Handler().postDelayed(Runnable { reset() }, 4000)
}
}
fun checkwinner(): Int {
val audio = MediaPlayer.create(this, R.raw.success)
if ((player1.contains(1) && player1.contains(2) && player1.contains(3)) || (player1.contains(
1
) && player1.contains(4) && player1.contains(7)) ||
(player1.contains(3) && player1.contains(6) && player1.contains(9)) || (player1.contains(
7
) && player1.contains(8) && player1.contains(9)) ||
(player1.contains(4) && player1.contains(5) && player1.contains(6)) || (player1.contains(
1
) && player1.contains(5) && player1.contains(9)) ||
player1.contains(3) && player1.contains(5) && player1.contains(7) || (player1.contains(2) && player1.contains(
5
) && player1.contains(8))
) {
player1Count += 1
buttonDisable()
audio.start()
disableReset()
Handler().postDelayed(Runnable { audio.release() }, 4000)
val build = AlertDialog.Builder(this)
build.setTitle("Game Over")
build.setMessage("You have won the game.."+"nn"+"Do you want to play again")
build.setPositiveButton("Ok") { dialog, which ->
reset()
audio.release()
}
build.setNegativeButton("Exit") { dialog, which ->
audio.release()
exitProcess(1)
}
Handler().postDelayed(Runnable { build.show() }, 2000)
return 1
} else if ((player2.contains(1) && player2.contains(2) && player2.contains(3)) || (player2.contains(
1
) && player2.contains(4) && player2.contains(7)) ||
(player2.contains(3) && player2.contains(6) && player2.contains(9)) || (player2.contains(
7
) && player2.contains(8) && player2.contains(9)) ||
(player2.contains(4) && player2.contains(5) && player2.contains(6)) || (player2.contains(
1
) && player2.contains(5) && player2.contains(9)) ||
player2.contains(3) && player2.contains(5) && player2.contains(7) || (player2.contains(2) && player2.contains(
5
) && player2.contains(8))
) {
player2Count += 1
audio.start()
buttonDisable()
disableReset()
Handler().postDelayed(Runnable { audio.release() }, 4000)
val build = AlertDialog.Builder(this)
build.setTitle("Game Over")
build.setMessage("Opponent have won the game"+"nn"+"Do you want to play again")
build.setPositiveButton("Ok") { dialog, which ->
reset()
audio.release()
}
build.setNegativeButton("Exit") { dialog, which ->
audio.release()
exitProcess(1)
}
Handler().postDelayed(Runnable { build.show() }, 2000)
return 1
} else if (emptyCells.contains(1) && emptyCells.contains(2) && emptyCells.contains(3) && emptyCells.contains(
4
) && emptyCells.contains(5) && emptyCells.contains(6) && emptyCells.contains(7) &&
emptyCells.contains(8) && emptyCells.contains(9)
) {
val build = AlertDialog.Builder(this)
build.setTitle("Game Draw")
build.setMessage("Nobody Wins" + "nn" + "Do you want to play again")
build.setPositiveButton("Ok") { dialog, which ->
reset()
}
build.setNegativeButton("Exit") { dialog, which ->
exitProcess(1)
}
build.show()
return 1
}
return 0
}
fun reset() {
player1.clear()
player2.clear()
emptyCells.clear()
activeUser = 1;
for (i in 1..9) {
var buttonselected: Button?
buttonselected = when (i) {
1 -> button
2 -> button2
3 -> button3
4 -> button4
5 -> button5
6 -> button6
7 -> button7
8 -> button8
9 -> button9
else -> {
button
}
}
buttonselected.isEnabled = true
buttonselected.text = ""
textView.text = "Player1 : $player1Count"
textView2.text = "Player2 : $player2Count"
}
}
fun robot() {
val rnd = (1..9).random()
if (emptyCells.contains(rnd))
robot()
else {
val buttonselected: Button?
buttonselected = when (rnd) {
1 -> button
2 -> button2
3 -> button3
4 -> button4
5 -> button5
6 -> button6
7 -> button7
8 -> button8
9 -> button9
else -> {
button
}
}
emptyCells.add(rnd);
val audio = MediaPlayer.create(this, R.raw.poutch)
audio.start()
Handler().postDelayed(Runnable { audio.release() }, 500)
buttonselected.text = "O"
buttonselected.setTextColor(Color.parseColor("#D22BB804"))
player2.add(rnd)
buttonselected.isEnabled = false
var checkWinner = checkwinner()
if (checkWinner == 1)
Handler().postDelayed(Runnable { reset() }, 2000)
}
}
fun buttonDisable() {
for (i in 1..9) {
val buttonSelected = when (i) {
1 -> button
2 -> button2
3 -> button3
4 -> button4
5 -> button5
6 -> button6
7 -> button7
8 -> button8
9 -> button9
else -> {
button
}
}
if (buttonSelected.isEnabled == true)
buttonSelected.isEnabled = false
}
}
fun disableReset() {
button10.isEnabled = false
Handler().postDelayed(Runnable { button10.isEnabled = true }, 2200)
}
}
Now after implementing online mode functionality we are done with our Tic tac toe projects.
Output:
For full source code just click here.
In this article, we are going to make a tic-tac-toe game that has both online and offline modes. So for this project, we are going to use Kotlin and XML. Tic-Tac-Toe is a two-player game. Each player has X or O. Both the player plays one by one simultaneously. In one move, players need to select one position in the 3×3 grid and put their mark at that place. The game runs continuously until one may wins. In the previous article, we have built a simple Tic Tac Toe Game in Android but in this article, we have the following additional features inside the app:
- Single Player
- Multi-Player
- Online Game
- Create and Join by Entering the Game Code
- Offline Game
- Online Game
A sample video is given below to get an idea about what we are going to do in this article.
Basic Terminologies
- XML: Its full form is an extensible markup language and it is a set of codes and tags.
- Kotlin: It is a free and open-source programming language that is developed by JetBrains.
- Android Studio: Android Studio is the official Integrated Development Environment for Android app development.
- Firebase: It is a backend service provided by Google.
Step by Step Implementation
Step 1: Create a New Project
To create a new project in Android Studio please refer to How to Create/Start a New Project in Android Studio. Note that select Kotlin as the programming language.
Step 2: Working with the activity_main.xml file
Navigate to the app > res > layout > activity_main.xml and add the below code to that file. Below is the code for the activity_main.xml file.
XML
<?xml version="1.0" encoding="utf-8"?>
<TableLayout
android:layout_width="match_parent"
android:layout_height="match_parent"
android:background="#FFEB3B"
android:gravity="center"
tools:context=".MainActivity">
<LinearLayout
android:layout_width="wrap_content"
android:layout_height="20dp"
android:layout_margin="10dp"
android:gravity="center">
<TextView
android:id="@+id/textView"
android:layout_width="110dp"
android:layout_height="30dp"
android:layout_marginLeft="40dp"
android:text="Player1 : 0"
android:textColor="#000000"
android:textSize="18dp" />
<TextView
android:id="@+id/textView2"
android:layout_width="110dp"
android:layout_height="30dp"
android:layout_marginLeft="30dp"
android:text="Player2 : 0"
android:textColor="#000000"
android:textSize="18dp" />
</LinearLayout>
<TableRow
android:layout_width="match_parent"
android:layout_height="match_parent"
android:layout_marginTop="10dp"
android:gravity="center">
<Button
android:id="@+id/button"
android:layout_width="100dp"
android:layout_height="100dp"
android:layout_marginLeft="5dp"
android:background="#FFFFFF"
android:onClick="clickfun"
android:textSize="60dp" />
<Button
android:id="@+id/button2"
android:layout_width="100dp"
android:layout_height="100dp"
android:layout_marginLeft="5dp"
android:background="#FFFFFF"
android:onClick="clickfun"
android:textSize="60dp" />
<Button
android:id="@+id/button3"
android:layout_width="100dp"
android:layout_height="100dp"
android:layout_marginLeft="5dp"
android:background="#FFFFFF"
android:onClick="clickfun"
android:textColor="#000000"
android:textSize="60dp" />
</TableRow>
<TableRow
android:layout_width="match_parent"
android:layout_height="match_parent"
android:gravity="center">
<Button
android:id="@+id/button4"
android:layout_width="100dp"
android:layout_height="100dp"
android:layout_marginLeft="5dp"
android:layout_marginTop="5dp"
android:background="#FFFFFF"
android:onClick="clickfun"
android:textColor="#000000"
android:textSize="60dp" />
<Button
android:id="@+id/button5"
android:layout_width="100dp"
android:layout_height="100dp"
android:layout_marginLeft="5dp"
android:layout_marginTop="5dp"
android:background="#FFFFFF"
android:onClick="clickfun"
android:textColor="#000000"
android:textSize="60dp" />
<Button
android:id="@+id/button6"
android:layout_width="100dp"
android:layout_height="100dp"
android:layout_marginLeft="5dp"
android:layout_marginTop="5dp"
android:background="#FFFFFF"
android:onClick="clickfun"
android:textColor="#000000"
android:textSize="60dp" />
</TableRow>
<TableRow
android:layout_width="match_parent"
android:layout_height="match_parent"
android:gravity="center">
<Button
android:id="@+id/button7"
android:layout_width="100dp"
android:layout_height="100dp"
android:layout_marginLeft="5dp"
android:layout_marginTop="5dp"
android:background="#FFFFFF"
android:onClick="clickfun"
android:textColor="#000000"
android:textSize="60dp" />
<Button
android:id="@+id/button8"
android:layout_width="100dp"
android:layout_height="100dp"
android:layout_marginLeft="5dp"
android:layout_marginTop="5dp"
android:background="#FFFFFF"
android:onClick="clickfun"
android:textColor="#000000"
android:textSize="60dp" />
<Button
android:id="@+id/button9"
android:layout_width="100dp"
android:layout_height="100dp"
android:layout_marginLeft="5dp"
android:layout_marginTop="5dp"
android:background="#FFFFFF"
android:onClick="clickfun"
android:textColor="#000000"
android:textSize="60dp" />
</TableRow>
<LinearLayout
android:layout_marginTop="15dp"
android:gravity="center">
<Button
android:id="@+id/button10"
android:layout_width="wrap_content"
android:layout_height="wrap_content"
android:text="Reset" />
</LinearLayout>
</TableLayout>
After writing this much code the UI look likes this:
Step 3: Working with the MainActivity.kt file
Go to the MainActivity.kt file and refer to the following code. Below is the code for the MainActivity.kt file. Comments are added inside the code to understand the code in more detail. Here we are going to add functionality to our app.
Kotlin
class MainActivity : AppCompatActivity() {
override fun onCreate(savedInstanceState: Bundle?) {
super.onCreate(savedInstanceState)
setContentView(R.layout.activity_main)
button10.setOnClickListener {
reset()
}
}
var player1Count = 0
var player2Count = 0
fun clickfun(view:View)
{
if(playerTurn) {
val but = view as Button
var cellID = 0
when (but.id) {
R.id.button -> cellID = 1
R.id.button2 -> cellID = 2
R.id.button3 -> cellID = 3
R.id.button4 -> cellID = 4
R.id.button5 -> cellID = 5
R.id.button6 -> cellID = 6
R.id.button7 -> cellID = 7
R.id.button8 -> cellID = 8
R.id.button9 -> cellID = 9
}
playerTurn = false;
Handler().postDelayed(Runnable { playerTurn = true } , 600)
playnow(but, cellID)
}
}
var player1 = ArrayList<Int>()
var player2 = ArrayList<Int>()
var emptyCells = ArrayList<Int>()
var activeUser = 1
fun playnow(buttonSelected:Button , currCell:Int)
{ val audio = MediaPlayer.create(this , R.raw.poutch)
if(activeUser == 1)
{
buttonSelected.text = "X"
buttonSelected.setTextColor(Color.parseColor("#EC0C0C"))
player1.add(currCell)
emptyCells.add(currCell)
audio.start()
buttonSelected.isEnabled = false
Handler().postDelayed(Runnable { audio.release() } , 200)
val checkWinner = checkwinner()
if(checkWinner == 1){
Handler().postDelayed(Runnable { reset() } , 2000)
}
else if(singleUser){
Handler().postDelayed(Runnable { robot() } , 500)
}
else
activeUser = 2
}
else
{
buttonSelected.text = "O"
audio.start()
buttonSelected.setTextColor(Color.parseColor("#D22BB804"))
activeUser = 1
player2.add(currCell)
emptyCells.add(currCell)
Handler().postDelayed(Runnable { audio.release() } , 200)
buttonSelected.isEnabled = false
val checkWinner = checkwinner()
if(checkWinner == 1)
Handler().postDelayed(Runnable { reset() } , 4000)
}
}
fun reset()
{
player1.clear()
player2.clear()
emptyCells.clear()
activeUser = 1;
for(i in 1..9)
{
var buttonselected : Button?
buttonselected = when(i){
1 -> button
2 -> button2
3 -> button3
4 -> button4
5 -> button5
6 -> button6
7 -> button7
8 -> button8
9 -> button9
else -> {button}
}
buttonselected.isEnabled = true
buttonselected.text = ""
textView.text = "Player1 : $player1Count"
textView2.text = "Player2 : $player2Count"
}
}
fun disableReset()
{
button10.isEnabled = false
Handler().postDelayed(Runnable { button10.isEnabled = true } , 2200)
}
}
After writing that much code our app is ready with basic functionality. Now let’s add robot functionality for single-player mode:
Kotlin
fun robot()
{
val rnd = (1..9).random()
if(emptyCells.contains(rnd))
robot()
else {
val buttonselected : Button?
buttonselected = when(rnd) {
1 -> button
2 -> button2
3 -> button3
4 -> button4
5 -> button5
6 -> button6
7 -> button7
8 -> button8
9 -> button9
else -> {button}
}
emptyCells.add(rnd);
val audio = MediaPlayer.create(this , R.raw.poutch)
audio.start()
Handler().postDelayed(Runnable { audio.release() } , 500)
buttonselected.text = "O"
buttonselected.setTextColor(Color.parseColor("#D22BB804"))
player2.add(rnd)
buttonselected.isEnabled = false
var checkWinner = checkwinner()
if(checkWinner == 1)
Handler().postDelayed(Runnable { reset() } , 2000)
}
}
Let’s try to play in single-mode:
Step 4: Now let’s implement the main feature of our app i.e. online mode
Here we are going to use firebase for our backend functionality. So what we are doing here is listening on a particular codes database and if got any change in the database, then running an event on the client-side to update the move made by the opponent.
Kotlin
FirebaseDatabase.getInstance().reference.child("data").child(code).addChildEventListener(object : ChildEventListener{
override fun onCancelled(error: DatabaseError) {
TODO("Not yet implemented")
}
override fun onChildMoved(snapshot: DataSnapshot, previousChildName: String?) {
TODO("Not yet implemented")
}
override fun onChildChanged(snapshot: DataSnapshot, previousChildName: String?) {
TODO("Not yet implemented")
}
override fun onChildAdded(snapshot: DataSnapshot, previousChildName: String?) {
var data = snapshot.value
if(isMyMove==true){
isMyMove = false
moveonline(data.toString() , isMyMove)
}
else{
isMyMove = true
moveonline(data.toString() , isMyMove)
}
}
override fun onChildRemoved(snapshot: DataSnapshot) {
reset()
errorMsg("Game Reset")
}
})
}
Step 5: Create 4 new empty activities
Refer to this article How to Create New Activity in Android Studio using Shortcuts and create 4 new empty activities and name the activity as the Firstpage, SecondPage, ThirdPage, and CodeActivity. Below is the code for this activity file for both the XML and Kotlin files respectively.
XML
<?xml version="1.0" encoding="utf-8"?>
<LinearLayout
android:layout_width="match_parent"
android:layout_height="match_parent"
android:gravity="center"
android:orientation="vertical"
tools:context=".Firstpage">
<TextView
android:id="@+id/textView3"
android:layout_width="match_parent"
android:layout_height="wrap_content"
android:gravity="center"
android:text="Tic Tac Toe"
android:textColor="@color/colorPrimaryDark"
android:textSize="25dp" />
<Button
android:id="@+id/button11"
android:layout_width="250dp"
android:layout_height="wrap_content"
android:layout_marginTop="90dp"
android:background="#B2BCF8"
android:gravity="center"
android:text="Single Player" />
<Button
android:id="@+id/button12"
android:layout_width="250dp"
android:layout_height="wrap_content"
android:layout_marginTop="30dp"
android:background="#B2BCF8"
android:gravity="center"
android:text="Multi Player" />
</LinearLayout>
Kotlin
package com.example.tictactoeapp
import android.content.Intent
import android.os.Bundle
import androidx.appcompat.app.AppCompatActivity
import androidx.core.app.ActivityCompat
import kotlinx.android.synthetic.main.activity_firstpage.*
var singleUser = false
class Firstpage : AppCompatActivity() {
override fun onCreate(savedInstanceState: Bundle?) {
super.onCreate(savedInstanceState)
setContentView(R.layout.activity_firstpage)
button11.setOnClickListener {
startActivity(Intent(this, MainActivity::class.java))
singleUser = true;
}
button12.setOnClickListener {
startActivity(Intent(this, SecondPage::class.java))
singleUser = false;
}
}
override fun onBackPressed() {
ActivityCompat.finishAffinity(this)
}
}
XML
<?xml version="1.0" encoding="utf-8"?>
<LinearLayout
android:layout_width="match_parent"
android:layout_height="match_parent"
android:gravity="center"
android:orientation="vertical"
tools:context=".Firstpage">
<TextView
android:id="@+id/textView3"
android:layout_width="match_parent"
android:layout_height="wrap_content"
android:gravity="center"
android:text="Tic Tac Toe"
android:textColor="@color/colorPrimaryDark"
android:textSize="25dp" />
<Button
android:id="@+id/buttonOnline"
android:layout_width="250dp"
android:layout_height="wrap_content"
android:layout_marginTop="90dp"
android:background="#B2BCF8"
android:gravity="center"
android:text="Online Game" />
<Button
android:id="@+id/buttonOffline"
android:layout_width="250dp"
android:layout_height="wrap_content"
android:layout_marginTop="30dp"
android:background="#B2BCF8"
android:gravity="center"
android:text="Offline Game" />
</LinearLayout>
Kotlin
package com.example.tictactoeapp
import android.content.Intent
import android.os.Bundle
import androidx.appcompat.app.AppCompatActivity
import kotlinx.android.synthetic.main.activity_second_page.*
var Online = true;
class SecondPage : AppCompatActivity() {
override fun onCreate(savedInstanceState: Bundle?) {
super.onCreate(savedInstanceState)
setContentView(R.layout.activity_second_page)
buttonOnline.setOnClickListener {
startActivity(Intent(this, CodeActivity::class.java))
singleUser = true;
Online = true;
}
buttonOffline.setOnClickListener {
startActivity(Intent(this, MainActivity::class.java))
singleUser = false;
Online = false;
}
}
}
XML
<?xml version="1.0" encoding="utf-8"?>
<TableLayout
android:layout_width="match_parent"
android:layout_height="match_parent"
android:background="#FFEB3B"
android:gravity="center"
tools:context=".MainActivity">
<LinearLayout
android:layout_width="wrap_content"
android:layout_height="20dp"
android:layout_margin="10dp"
android:gravity="center">
<TextView
android:id="@+id/textView3"
android:layout_width="132dp"
android:layout_height="30dp"
android:layout_marginLeft="40dp"
android:text="Turn : Player 1"
android:textColor="#000000"
android:textSize="18dp" />
<TextView
android:id="@+id/textView"
android:layout_width="wrap_content"
android:layout_height="30dp"
android:layout_marginLeft="40dp"
android:text="Player1 : 0"
android:textColor="#000000"
android:textSize="18dp" />
<TextView
android:id="@+id/textView2"
android:layout_width="110dp"
android:layout_height="30dp"
android:layout_marginLeft="30dp"
android:text="Player2 : 0"
android:textColor="#000000"
android:textSize="18dp" />
</LinearLayout>
<TableRow
android:layout_width="match_parent"
android:layout_height="match_parent"
android:layout_marginTop="10dp"
android:gravity="center">
<Button
android:id="@+id/button11"
android:layout_width="100dp"
android:layout_height="100dp"
android:layout_marginLeft="5dp"
android:background="#FFFFFF"
android:onClick="clickfun"
android:textSize="60dp" />
<Button
android:id="@+id/button12"
android:layout_width="100dp"
android:layout_height="100dp"
android:layout_marginLeft="5dp"
android:background="#FFFFFF"
android:onClick="clickfun"
android:textSize="60dp" />
<Button
android:id="@+id/button13"
android:layout_width="100dp"
android:layout_height="100dp"
android:layout_marginLeft="5dp"
android:background="#FFFFFF"
android:onClick="clickfun"
android:textColor="#000000"
android:textSize="60dp" />
</TableRow>
<TableRow
android:layout_width="match_parent"
android:layout_height="match_parent"
android:gravity="center">
<Button
android:id="@+id/button14"
android:layout_width="100dp"
android:layout_height="100dp"
android:layout_marginLeft="5dp"
android:layout_marginTop="5dp"
android:background="#FFFFFF"
android:onClick="clickfun"
android:textColor="#000000"
android:textSize="60dp" />
<Button
android:id="@+id/button15"
android:layout_width="100dp"
android:layout_height="100dp"
android:layout_marginLeft="5dp"
android:layout_marginTop="5dp"
android:background="#FFFFFF"
android:onClick="clickfun"
android:textColor="#000000"
android:textSize="60dp" />
<Button
android:id="@+id/button16"
android:layout_width="100dp"
android:layout_height="100dp"
android:layout_marginLeft="5dp"
android:layout_marginTop="5dp"
android:background="#FFFFFF"
android:onClick="clickfun"
android:textColor="#000000"
android:textSize="60dp" />
</TableRow>
<TableRow
android:layout_width="match_parent"
android:layout_height="match_parent"
android:gravity="center">
<Button
android:id="@+id/button17"
android:layout_width="100dp"
android:layout_height="100dp"
android:layout_marginLeft="5dp"
android:layout_marginTop="5dp"
android:background="#FFFFFF"
android:onClick="clickfun"
android:textColor="#000000"
android:textSize="60dp" />
<Button
android:id="@+id/button18"
android:layout_width="100dp"
android:layout_height="100dp"
android:layout_marginLeft="5dp"
android:layout_marginTop="5dp"
android:background="#FFFFFF"
android:onClick="clickfun"
android:textColor="#000000"
android:textSize="60dp" />
<Button
android:id="@+id/button19"
android:layout_width="100dp"
android:layout_height="100dp"
android:layout_marginLeft="5dp"
android:layout_marginTop="5dp"
android:background="#FFFFFF"
android:onClick="clickfun"
android:textColor="#000000"
android:textSize="60dp" />
</TableRow>
<LinearLayout
android:layout_marginTop="15dp"
android:gravity="center">
<Button
android:id="@+id/button110"
android:layout_width="wrap_content"
android:layout_height="wrap_content"
android:text="Reset" />
</LinearLayout>
</TableLayout>
Kotlin
package com.example.tictactoeapp
import android.graphics.Color
import android.media.MediaPlayer
import android.os.Bundle
import android.os.Handler
import android.view.View
import android.widget.Button
import android.widget.Toast
import androidx.appcompat.app.AlertDialog
import androidx.appcompat.app.AppCompatActivity
import com.google.firebase.database.ChildEventListener
import com.google.firebase.database.DataSnapshot
import com.google.firebase.database.DatabaseError
import com.google.firebase.database.FirebaseDatabase
import kotlinx.android.synthetic.main.activity_third_page.*
import kotlin.system.exitProcess
var isMyMove = isCodeMaker;
class ThirdPage : AppCompatActivity() {
override fun onCreate(savedInstanceState: Bundle?) {
super.onCreate(savedInstanceState)
setContentView(R.layout.activity_third_page)
button110.setOnClickListener {
reset()
}
FirebaseDatabase.getInstance().reference.child("data").child(code)
.addChildEventListener(object : ChildEventListener {
override fun onCancelled(error: DatabaseError) {
TODO("Not yet implemented")
}
override fun onChildMoved(snapshot: DataSnapshot, previousChildName: String?) {
TODO("Not yet implemented")
}
override fun onChildChanged(snapshot: DataSnapshot, previousChildName: String?) {
TODO("Not yet implemented")
}
override fun onChildAdded(snapshot: DataSnapshot, previousChildName: String?) {
var data = snapshot.value
if (isMyMove == true) {
isMyMove = false
moveonline(data.toString(), isMyMove)
} else {
isMyMove = true
moveonline(data.toString(), isMyMove)
}
}
override fun onChildRemoved(snapshot: DataSnapshot) {
reset()
errorMsg("Game Reset")
}
})
}
var player1Count = 0
var player2Count = 0
fun clickfun(view: View) {
if (isMyMove) {
val but = view as Button
var cellOnline = 0
when (but.id) {
R.id.button11 -> cellOnline = 1
R.id.button12 -> cellOnline = 2
R.id.button13 -> cellOnline = 3
R.id.button14 -> cellOnline = 4
R.id.button15 -> cellOnline = 5
R.id.button16 -> cellOnline = 6
R.id.button17 -> cellOnline = 7
R.id.button18 -> cellOnline = 8
R.id.button19 -> cellOnline = 9
else -> {
cellOnline = 0
}
}
playerTurn = false;
Handler().postDelayed(Runnable { playerTurn = true }, 600)
playnow(but, cellOnline)
updateDatabase(cellOnline);
} else {
Toast.makeText(this, "Wait for your turn", Toast.LENGTH_LONG).show()
}
}
var player1 = ArrayList<Int>()
var player2 = ArrayList<Int>()
var emptyCells = ArrayList<Int>()
var activeUser = 1
fun playnow(buttonSelected: Button, currCell: Int) {
val audio = MediaPlayer.create(this, R.raw.poutch)
buttonSelected.text = "X"
emptyCells.remove(currCell)
textView3.text = "Turn : Player 2"
buttonSelected.setTextColor(Color.parseColor("#EC0C0C"))
player1.add(currCell)
emptyCells.add(currCell)
audio.start()
buttonSelected.isEnabled = false
Handler().postDelayed(Runnable { audio.release() }, 200)
checkwinner()
}
fun moveonline(data: String, move: Boolean) {
val audio = MediaPlayer.create(this, R.raw.poutch)
if (move) {
var buttonselected: Button?
buttonselected = when (data.toInt()) {
1 -> button11
2 -> button12
3 -> button13
4 -> button14
5 -> button15
6 -> button16
7 -> button17
8 -> button18
9 -> button19
else -> {
button11
}
}
buttonselected.text = "O"
textView3.text = "Turn : Player 1"
buttonselected.setTextColor(Color.parseColor("#D22BB804"))
player2.add(data.toInt())
emptyCells.add(data.toInt())
audio.start()
Handler().postDelayed(Runnable { audio.release() }, 200)
buttonselected.isEnabled = false
checkwinner()
}
}
fun updateDatabase(cellId: Int) {
FirebaseDatabase.getInstance().reference.child("data").child(code).push().setValue(cellId);
}
fun checkwinner(): Int {
val audio = MediaPlayer.create(this, R.raw.success)
if ((player1.contains(1) && player1.contains(2) && player1.contains(3)) || (player1.contains(
1
) && player1.contains(4) && player1.contains(7)) ||
(player1.contains(3) && player1.contains(6) && player1.contains(9)) || (player1.contains(
7
) && player1.contains(8) && player1.contains(9)) ||
(player1.contains(4) && player1.contains(5) && player1.contains(6)) || (player1.contains(
1
) && player1.contains(5) && player1.contains(9)) ||
player1.contains(3) && player1.contains(5) && player1.contains(7) || (player1.contains(2) && player1.contains(
5
) && player1.contains(8))
) {
player1Count += 1
buttonDisable()
audio.start()
disableReset()
Handler().postDelayed(Runnable { audio.release() }, 4000)
val build = AlertDialog.Builder(this)
build.setTitle("Game Over")
build.setMessage("Player 1 Wins!!" + "nn" + "Do you want to play again")
build.setPositiveButton("Ok") { dialog, which ->
reset()
audio.release()
}
build.setNegativeButton("Exit") { dialog, which ->
audio.release()
removeCode()
exitProcess(1)
}
Handler().postDelayed(Runnable { build.show() }, 2000)
return 1
} else if ((player2.contains(1) && player2.contains(2) && player2.contains(3)) || (player2.contains(
1
) && player2.contains(4) && player2.contains(7)) ||
(player2.contains(3) && player2.contains(6) && player2.contains(9)) || (player2.contains(
7
) && player2.contains(8) && player2.contains(9)) ||
(player2.contains(4) && player2.contains(5) && player2.contains(6)) || (player2.contains(
1
) && player2.contains(5) && player2.contains(9)) ||
player2.contains(3) && player2.contains(5) && player2.contains(7) || (player2.contains(2) && player2.contains(
5
) && player2.contains(8))
) {
player2Count += 1
audio.start()
buttonDisable()
disableReset()
Handler().postDelayed(Runnable { audio.release() }, 4000)
val build = AlertDialog.Builder(this)
build.setTitle("Game Over")
build.setMessage("Player 2 Wins!!" + "nn" + "Do you want to play again")
build.setPositiveButton("Ok") { dialog, which ->
reset()
audio.release()
}
build.setNegativeButton("Exit") { dialog, which ->
audio.release()
removeCode()
exitProcess(1)
}
Handler().postDelayed(Runnable { build.show() }, 2000)
return 1
} else if (emptyCells.contains(1) && emptyCells.contains(2) && emptyCells.contains(3) && emptyCells.contains(
4
) && emptyCells.contains(5) && emptyCells.contains(6) && emptyCells.contains(7) &&
emptyCells.contains(8) && emptyCells.contains(9)
) {
val build = AlertDialog.Builder(this)
build.setTitle("Game Draw")
build.setMessage("Nobody Wins" + "nn" + "Do you want to play again")
build.setPositiveButton("Ok") { dialog, which ->
audio.release()
reset()
}
build.setNegativeButton("Exit") { dialog, which ->
audio.release()
exitProcess(1)
removeCode()
}
build.show()
return 1
}
return 0
}
fun reset() {
player1.clear()
player2.clear()
emptyCells.clear()
activeUser = 1;
for (i in 1..9) {
var buttonselected: Button?
buttonselected = when (i) {
1 -> button11
2 -> button12
3 -> button13
4 -> button14
5 -> button15
6 -> button16
7 -> button17
8 -> button18
9 -> button19
else -> {
button11
}
}
buttonselected.isEnabled = true
buttonselected.text = ""
textView.text = "Player1 : $player1Count"
textView2.text = "Player2 : $player2Count"
isMyMove = isCodeMaker
if (isCodeMaker) {
FirebaseDatabase.getInstance().reference.child("data").child(code).removeValue()
}
}
}
fun buttonDisable() {
for (i in 1..9) {
val buttonSelected = when (i) {
1 -> button11
2 -> button12
3 -> button13
4 -> button14
5 -> button15
6 -> button16
7 -> button17
8 -> button18
9 -> button19
else -> {
button11
}
}
if (buttonSelected.isEnabled == true)
buttonSelected.isEnabled = false
}
}
fun buttoncelldisable() {
emptyCells.forEach {
val buttonSelected = when (it) {
1 -> button11
2 -> button12
3 -> button13
4 -> button14
5 -> button15
6 -> button16
7 -> button17
8 -> button18
9 -> button19
else -> {
button11
}
}
if (buttonSelected.isEnabled == true)
buttonSelected.isEnabled = false;
}
}
fun removeCode() {
if (isCodeMaker) {
FirebaseDatabase.getInstance().reference.child("codes").child(keyValue).removeValue()
}
}
fun errorMsg(value: String) {
Toast.makeText(this, value, Toast.LENGTH_SHORT).show()
}
fun disableReset() {
button110.isEnabled = false
Handler().postDelayed(Runnable { button110.isEnabled = true }, 2200)
}
override fun onBackPressed() {
removeCode()
if (isCodeMaker) {
FirebaseDatabase.getInstance().reference.child("data").child(code).removeValue()
}
exitProcess(0)
}
}
XML
<?xml version="1.0" encoding="utf-8"?>
<LinearLayout
android:layout_width="match_parent"
android:layout_height="match_parent"
android:gravity="center"
android:orientation="vertical"
tools:context=".CodeActivity">
<TextView
android:id="@+id/textView4"
android:layout_width="match_parent"
android:layout_height="wrap_content"
android:layout_marginBottom="130dp"
android:gravity="center"
android:text="Tic Tac Toe"
android:textColor="@color/colorPrimaryDark"
android:textSize="25dp" />
<EditText
android:id="@+id/GameCode"
android:layout_width="200dp"
android:layout_height="wrap_content"
android:layout_marginBottom="25dp"
android:gravity="center"
android:hint="Enter Game Code"
android:inputType="textPersonName" />
<Button
android:id="@+id/Create"
android:layout_width="150dp"
android:layout_height="wrap_content"
android:layout_marginBottom="30dp"
android:background="#B2BCF8"
android:text="Create" />
<Button
android:id="@+id/Join"
android:layout_width="150dp"
android:layout_height="wrap_content"
android:background="#B2BCF8"
android:text="Join" />
<ProgressBar
android:id="@+id/progressBar"
style="?android:attr/progressBarStyle"
android:layout_width="match_parent"
android:layout_height="wrap_content"
android:visibility="gone" />
</LinearLayout>
Kotlin
package com.example.tictactoeapp
import android.content.Intent
import android.os.Bundle
import android.os.Handler
import android.view.View
import android.widget.Toast
import androidx.appcompat.app.AppCompatActivity
import com.google.firebase.database.DataSnapshot
import com.google.firebase.database.DatabaseError
import com.google.firebase.database.FirebaseDatabase
import com.google.firebase.database.ValueEventListener
import kotlinx.android.synthetic.main.activity_code.*
var isCodeMaker = true;
var code = "null";
var codeFound = false
var checkTemp = true
var keyValue: String = "null"
class CodeActivity : AppCompatActivity() {
override fun onCreate(savedInstanceState: Bundle?) {
super.onCreate(savedInstanceState)
setContentView(R.layout.activity_code)
Create.setOnClickListener {
code = "null";
codeFound = false
checkTemp = true
keyValue = "null"
code = GameCode.text.toString()
Create.visibility = View.GONE
Join.visibility = View.GONE
GameCode.visibility = View.GONE
textView4.visibility = View.GONE
progressBar.visibility = View.VISIBLE
if (code != "null" && code != null && code != "") {
isCodeMaker = true;
FirebaseDatabase.getInstance().reference.child("codes")
.addValueEventListener(object : ValueEventListener {
override fun onCancelled(error: DatabaseError) {
TODO("Not yet implemented")
}
override fun onDataChange(snapshot: DataSnapshot) {
var check = isValueAvailable(snapshot, code)
Handler().postDelayed({
if (check == true) {
Create.visibility = View.VISIBLE
Join.visibility = View.VISIBLE
GameCode.visibility = View.VISIBLE
textView4.visibility = View.VISIBLE
progressBar.visibility = View.GONE
} else {
FirebaseDatabase.getInstance().reference.child("codes").push()
.setValue(code)
isValueAvailable(snapshot, code)
checkTemp = false
Handler().postDelayed({
accepted()
errorMsg("Please don't go back")
}, 300)
}
}, 2000)
}
})
} else {
Create.visibility = View.VISIBLE
Join.visibility = View.VISIBLE
GameCode.visibility = View.VISIBLE
textView4.visibility = View.VISIBLE
progressBar.visibility = View.GONE
errorMsg("Enter Code Properly")
}
}
Join.setOnClickListener {
code = "null";
codeFound = false
checkTemp = true
keyValue = "null"
code = GameCode.text.toString()
if (code != "null" && code != null && code != "") {
Create.visibility = View.GONE
Join.visibility = View.GONE
GameCode.visibility = View.GONE
textView4.visibility = View.GONE
progressBar.visibility = View.VISIBLE
isCodeMaker = false;
FirebaseDatabase.getInstance().reference.child("codes")
.addValueEventListener(object : ValueEventListener {
override fun onCancelled(error: DatabaseError) {
TODO("Not yet implemented")
}
override fun onDataChange(snapshot: DataSnapshot) {
var data: Boolean = isValueAvailable(snapshot, code)
Handler().postDelayed({
if (data == true) {
codeFound = true
accepted()
Create.visibility = View.VISIBLE
Join.visibility = View.VISIBLE
GameCode.visibility = View.VISIBLE
textView4.visibility = View.VISIBLE
progressBar.visibility = View.GONE
} else {
Create.visibility = View.VISIBLE
Join.visibility = View.VISIBLE
GameCode.visibility = View.VISIBLE
textView4.visibility = View.VISIBLE
progressBar.visibility = View.GONE
errorMsg("Invalid Code")
}
}, 2000)
}
})
} else {
errorMsg("Enter Code Properly")
}
}
}
fun accepted() {
startActivity(Intent(this, ThirdPage::class.java));
Create.visibility = View.VISIBLE
Join.visibility = View.VISIBLE
GameCode.visibility = View.VISIBLE
textView4.visibility = View.VISIBLE
progressBar.visibility = View.GONE
}
fun errorMsg(value: String) {
Toast.makeText(this, value, Toast.LENGTH_SHORT).show()
}
fun isValueAvailable(snapshot: DataSnapshot, code: String): Boolean {
var data = snapshot.children
data.forEach {
var value = it.getValue().toString()
if (value == code) {
keyValue = it.key.toString()
return true;
}
}
return false
}
}
Below is the complete code for the MainActivity.kt file.
Kotlin
package com.example.tictactoeapp
import android.graphics.Color
import android.media.MediaPlayer
import android.os.Bundle
import android.os.Handler
import android.view.View
import android.widget.Button
import androidx.appcompat.app.AlertDialog
import androidx.appcompat.app.AppCompatActivity
import kotlinx.android.synthetic.main.activity_main.*
import kotlin.system.exitProcess
var playerTurn = true
class MainActivity : AppCompatActivity() {
override fun onCreate(savedInstanceState: Bundle?) {
super.onCreate(savedInstanceState)
setContentView(R.layout.activity_main)
button10.setOnClickListener {
reset()
}
}
var player1Count = 0
var player2Count = 0
fun clickfun(view: View) {
if (playerTurn) {
val but = view as Button
var cellID = 0
when (but.id) {
R.id.button -> cellID = 1
R.id.button2 -> cellID = 2
R.id.button3 -> cellID = 3
R.id.button4 -> cellID = 4
R.id.button5 -> cellID = 5
R.id.button6 -> cellID = 6
R.id.button7 -> cellID = 7
R.id.button8 -> cellID = 8
R.id.button9 -> cellID = 9
}
playerTurn = false;
Handler().postDelayed(Runnable { playerTurn = true }, 600)
playnow(but, cellID)
}
}
var player1 = ArrayList<Int>()
var player2 = ArrayList<Int>()
var emptyCells = ArrayList<Int>()
var activeUser = 1
fun playnow(buttonSelected: Button, currCell: Int) {
val audio = MediaPlayer.create(this, R.raw.poutch)
if (activeUser == 1) {
buttonSelected.text = "X"
buttonSelected.setTextColor(Color.parseColor("#EC0C0C"))
player1.add(currCell)
emptyCells.add(currCell)
audio.start()
buttonSelected.isEnabled = false
Handler().postDelayed(Runnable { audio.release() }, 200)
val checkWinner = checkwinner()
if (checkWinner == 1) {
Handler().postDelayed(Runnable { reset() }, 2000)
} else if (singleUser) {
Handler().postDelayed(Runnable { robot() }, 500)
} else
activeUser = 2
} else {
buttonSelected.text = "O"
audio.start()
buttonSelected.setTextColor(Color.parseColor("#D22BB804"))
activeUser = 1
player2.add(currCell)
emptyCells.add(currCell)
Handler().postDelayed(Runnable { audio.release() }, 200)
buttonSelected.isEnabled = false
val checkWinner = checkwinner()
if (checkWinner == 1)
Handler().postDelayed(Runnable { reset() }, 4000)
}
}
fun checkwinner(): Int {
val audio = MediaPlayer.create(this, R.raw.success)
if ((player1.contains(1) && player1.contains(2) && player1.contains(3)) || (player1.contains(
1
) && player1.contains(4) && player1.contains(7)) ||
(player1.contains(3) && player1.contains(6) && player1.contains(9)) || (player1.contains(
7
) && player1.contains(8) && player1.contains(9)) ||
(player1.contains(4) && player1.contains(5) && player1.contains(6)) || (player1.contains(
1
) && player1.contains(5) && player1.contains(9)) ||
player1.contains(3) && player1.contains(5) && player1.contains(7) || (player1.contains(2) && player1.contains(
5
) && player1.contains(8))
) {
player1Count += 1
buttonDisable()
audio.start()
disableReset()
Handler().postDelayed(Runnable { audio.release() }, 4000)
val build = AlertDialog.Builder(this)
build.setTitle("Game Over")
build.setMessage("You have won the game.."+"nn"+"Do you want to play again")
build.setPositiveButton("Ok") { dialog, which ->
reset()
audio.release()
}
build.setNegativeButton("Exit") { dialog, which ->
audio.release()
exitProcess(1)
}
Handler().postDelayed(Runnable { build.show() }, 2000)
return 1
} else if ((player2.contains(1) && player2.contains(2) && player2.contains(3)) || (player2.contains(
1
) && player2.contains(4) && player2.contains(7)) ||
(player2.contains(3) && player2.contains(6) && player2.contains(9)) || (player2.contains(
7
) && player2.contains(8) && player2.contains(9)) ||
(player2.contains(4) && player2.contains(5) && player2.contains(6)) || (player2.contains(
1
) && player2.contains(5) && player2.contains(9)) ||
player2.contains(3) && player2.contains(5) && player2.contains(7) || (player2.contains(2) && player2.contains(
5
) && player2.contains(8))
) {
player2Count += 1
audio.start()
buttonDisable()
disableReset()
Handler().postDelayed(Runnable { audio.release() }, 4000)
val build = AlertDialog.Builder(this)
build.setTitle("Game Over")
build.setMessage("Opponent have won the game"+"nn"+"Do you want to play again")
build.setPositiveButton("Ok") { dialog, which ->
reset()
audio.release()
}
build.setNegativeButton("Exit") { dialog, which ->
audio.release()
exitProcess(1)
}
Handler().postDelayed(Runnable { build.show() }, 2000)
return 1
} else if (emptyCells.contains(1) && emptyCells.contains(2) && emptyCells.contains(3) && emptyCells.contains(
4
) && emptyCells.contains(5) && emptyCells.contains(6) && emptyCells.contains(7) &&
emptyCells.contains(8) && emptyCells.contains(9)
) {
val build = AlertDialog.Builder(this)
build.setTitle("Game Draw")
build.setMessage("Nobody Wins" + "nn" + "Do you want to play again")
build.setPositiveButton("Ok") { dialog, which ->
reset()
}
build.setNegativeButton("Exit") { dialog, which ->
exitProcess(1)
}
build.show()
return 1
}
return 0
}
fun reset() {
player1.clear()
player2.clear()
emptyCells.clear()
activeUser = 1;
for (i in 1..9) {
var buttonselected: Button?
buttonselected = when (i) {
1 -> button
2 -> button2
3 -> button3
4 -> button4
5 -> button5
6 -> button6
7 -> button7
8 -> button8
9 -> button9
else -> {
button
}
}
buttonselected.isEnabled = true
buttonselected.text = ""
textView.text = "Player1 : $player1Count"
textView2.text = "Player2 : $player2Count"
}
}
fun robot() {
val rnd = (1..9).random()
if (emptyCells.contains(rnd))
robot()
else {
val buttonselected: Button?
buttonselected = when (rnd) {
1 -> button
2 -> button2
3 -> button3
4 -> button4
5 -> button5
6 -> button6
7 -> button7
8 -> button8
9 -> button9
else -> {
button
}
}
emptyCells.add(rnd);
val audio = MediaPlayer.create(this, R.raw.poutch)
audio.start()
Handler().postDelayed(Runnable { audio.release() }, 500)
buttonselected.text = "O"
buttonselected.setTextColor(Color.parseColor("#D22BB804"))
player2.add(rnd)
buttonselected.isEnabled = false
var checkWinner = checkwinner()
if (checkWinner == 1)
Handler().postDelayed(Runnable { reset() }, 2000)
}
}
fun buttonDisable() {
for (i in 1..9) {
val buttonSelected = when (i) {
1 -> button
2 -> button2
3 -> button3
4 -> button4
5 -> button5
6 -> button6
7 -> button7
8 -> button8
9 -> button9
else -> {
button
}
}
if (buttonSelected.isEnabled == true)
buttonSelected.isEnabled = false
}
}
fun disableReset() {
button10.isEnabled = false
Handler().postDelayed(Runnable { button10.isEnabled = true }, 2200)
}
}
Now after implementing online mode functionality we are done with our Tic tac toe projects.
Output:
For full source code just click here.