Project restarted
Contributors to this project will really be appreciated.
Update: 30/10/22. This launcher is being rewritten in rust at the moment, will make up for all that this launcher lacks.
However this launcher will still have support if anyone wants to keep using it.
New subreddit!
The project has now a dedicated subreddit! https://www.reddit.com/r/PyCraftLauncher
Project Info
A Minecraft launcher made in python.
This Launcher aims to be the best free minecraft launcher for Linux primarily. Porting to other platforms will be done later.
This launcher is not illegal as all files are downloaded from libraries.minecraft.net.
Piracy concerned rich people feel free to press the back button on the browser


Changelog


v1.04-beta-3
To use the latest version, it’s best to clone the project and then run it, since I fail to keep the releases updated in the release section in tandem with
the main code folders in the .gitAdded a modinstaller where users will have to enter the modname(in lowercase), modloader(in lowercase) and gameversion
This modinstaller only downloads «stable» version of the mods from modrinth. If the stable version doesn’t exist then the mod won’t be downloaded( non stable versions can be added manually in the mods folder)
Yes, minecraft 1.19 and all subsequent updates are supported.
Fixed issue of being unable to play downloaded versions offline without internet.
Fixed all bugs on Windows.
Rewritten the ram allocation alogrithm, jvm no longer assigns ram by rounding off to the nearest GB. What you select on the slider is what you get.
Fixed issue of cracked login in Fabric. Players using cracked mode will now have a permanent UUID generated by the launcher.
Changed GUI totally.
Ely_by login mode is now optional if customskinloader is used.
GUI changes(Merged all 3 files into one main launcher).
Added a new download mode named (fps clients). This mode will detect custom clients by placing them in the versions folder. I have chosen Ares client as the candidate for now. This is not fully implemented yet so work in progress
Fps boost is still(sadly) in beta testing mode.
Fixed the download window.
There is a font folder now containing all fonts the launcher uses. There is no copyright on these fonts, and can be used anywhere. Users are needed
to install these fonts or else the launcher will not look as it is intended to look.Added a «Bypass Ram limiter» option which will override Pycraft’s defualt settings to allocate only upto 50% of system ram to minecraft. With this
option enabled people can set ram more than 50% of the total ram, if needed.
Planned Updates
Deal with the GUI once and for all
Add a new news page on the launcher
Add a modinstaller
Make a few fps boosting modpacks(tested on my pc gives around 1200 fps without shaders)
Rename cracked mode to something better
Installation script changes
Added installation support for java 17 (windows and debian based linux). The launcher only supports this variant of java 17 now.
Added python installation support (windows and debian based linux. Use this only if you don’t
have python installed by defualt).
Privacy updates
Passwords are no longer stored in the launcher. Only player uuid, accessToken from auth servers
and clientToken is randomly generated on each run, for ely_by logins.
Players using cracked mode will now have a permanent UUID generated by the launcher on first run in cracked mode
Features
This launcher is based on the Tkinter and minecraft_launcher_lib. It offers mojang login and cracked login.
Includes a special FPS boost option(old releases).
Includes an in-built toggleable vpn, running through torsocks(Linux) (old releases)
To run Tor on windows as a service : https://deepdarkweb.github.io/how-to-install-tor-on-windows-without-the-tor-browser-running-tutorial/
Fps boost has been shifted to beta testing mode. That is , it has been tested with java 16.It is still being tested. Feedback would be most graciously appreciated.
Installation
Run python install.py or python3 install.py(if on linux)
Then run python pycraft_gui.py or python3 pycraft_gui.py
Before starting minecraft, do increase or decrease the ram in the settings, so as to update it in the settings file. Or else an error will pop concerning the JVM.
I will patch this in future releases.
IMPORTANT
After stopping a download, please press CTRL+C twice. (This will close the launcher as well.)
For people who have worked with python, it’s an issue where i am unable to close the download thread directly at once by raising the KeyboardInterrupt exception.
If download fails, you may need to use a vpn(windows) or enable tor in settings(linux)
Any changes in the settings (be it tor, fps boost, ram change, directory change) will require a launcher reboot(not to be confused with system reboot), to take effect.
Pycraft skins system
Pycraft has 3 accounts mode. The mojang account mode(microsoft accounts support coming soon),
cracked mode and ely_by login system. For the majority of the people who don’t know what that is,
it is an alternative minecraft service used by Tlauncher as well, only that their security is better. For this mode, you need to create an account at https://ely.by (2 factor authentication not yet supported), and then enter your username and password and start. Supported for all modes, vanilla, forge and fabric.
Ely_by skins are not viewable on all servers, only in singleplayer mode and those servers which
use it’s services. However to view your skin on all servers you can use a client side mod, https://www.curseforge.com/minecraft/mc-mods/customskinloader/ , usage instructions are given on the page. Officially supported till 1.16.5 but there are release versions for the mod for 1.17 in the files section. Just run this mod one time, close minecraft, go to .minecraft/CustomSkinLoader/CustomSkinLoader.json, open it with any text editor
from the webiste : «- Q: How can I modify configurations of CustomSkinLoader?
A: The config file is .minecraft/CustomSkinLoader/CustomSkinLoader.json . Unfortunately, there is no way to modify the CustomSkinLoader configuration file in
the game currently, so you need to manually modify it by using a code editor (e.g. VSCode). However, we have a website to modify the configuration file online,
you only need to import and modify your current configuration file.»
This mod supports: LittleSkin, BlessingSkin, Elyby, SkinMe, GlitchlessGames skins. Since ely_by is the most popular choice, you can go ahead with this mod.
And yea this mod has no impact on physical resources, like ram and cpu(I used it a lot of times).
Why the whole vpn thingy?
Sometimes mojang’s server, libraries.minecraft.net is not available on some systems (especially for those living in Egypt). To fix this a vpn is used. Now the
governement of Egypt has kinda cracked down on openvpn (thanks to one of my testers, i wouldn’t have known about it otherwise.), so Tor is the best solution to that.
Coming soon:
FunMc (my minecraft server’s website).
New microsoft account login system as per the latest changes according to mojang in Minecraft: Java Edition
Below is a video stating how to use PyCraft Launcher(rip my trash pc — i am still working on the fps boost)
Среди любителей Minecraft много энтузиастов: пока одни просто играют, другие запускают целые серверы и пишут модификации. А кто-то идет дальше и разрабатывает собственные песочницы. Последнее достаточно просто сделать на Python.
Под катом делюсь основами работы с библиотекой Ursina Engine и показываю, как с помощью нее создать мир из кубов.
Пояснения внутри кодовых вставок — неотъемлемая часть статьи. Обращайтесь к ним, если что-то непонятно. На более сложные вопросы по работе с библиотекой могу ответить в комментариях под текстом.
Первый чанк: основные элементы библиотеки
Ursina Engine — это полноценный движок под Windows, Linux и Mac, написанный на Panda3D, Pillow и Pyperclip. Его можно использовать для создания 2D- и 3D-игр. В комплекте библиотеки — готовые шейдеры, геометрические примитивы и анимации.
Движок будто консолидирует рутинную работу: разработчику нужно просто импортировать необходимые объекты и проработать логику игры.
from ursina import *

app = Ursina()

# здесь будет описана игровая логика

app.run()
Инициализация окна игры.
Игровая сцена и наблюдатель: объекты типов Entity, FirstPersonController
Дисклеймер: Все, что описано в этом подразделе, лучше использовать для сцен с небольшим количеством объектов. Для более сложных полигонов генерацию нужно оптимизировать — об этом подробнее в следующих разделах. Но пропускать этот блок не советую: здесь объясняю принцип работы с ключевыми элементами библиотеки.
Для наполнения карты нужно использовать объект Entity. По сути, на базе него построены все внутриигровые сущности. Это могут быть как объекты игровой сцены — геометрические примитивы вроде кубов, сфер, квадратов и другого, так и, например, модели мобов.
...

app = Ursina()

# создаем объекты модели cube, с текстурой white_cube и заданными координатами
for x in range(16):
   for z in range(16):
       Entity(model="cube", texture="white_cube", position=Vec3(x,0,z))

app.run()
Генерация платформы 16×16 из блоков типа Entity.
После запуска программы на экране появится двумерная картинка. Чтобы увидеть площадку из блоков в 3D, нужно добавить наблюдателя. Это можно сделать с помощью встроенного объекта FirstPersonController.
# импортируем объект
from ursina.prefabs.first_person_controller import FirstPersonController

...

# добавляем персонажа
player = FirstPersonController()

# активируем невесомость, чтобы персонаж не упал в пустоту
player.gravity = 0.0

app.run()

...
Активация FirstPersonController.
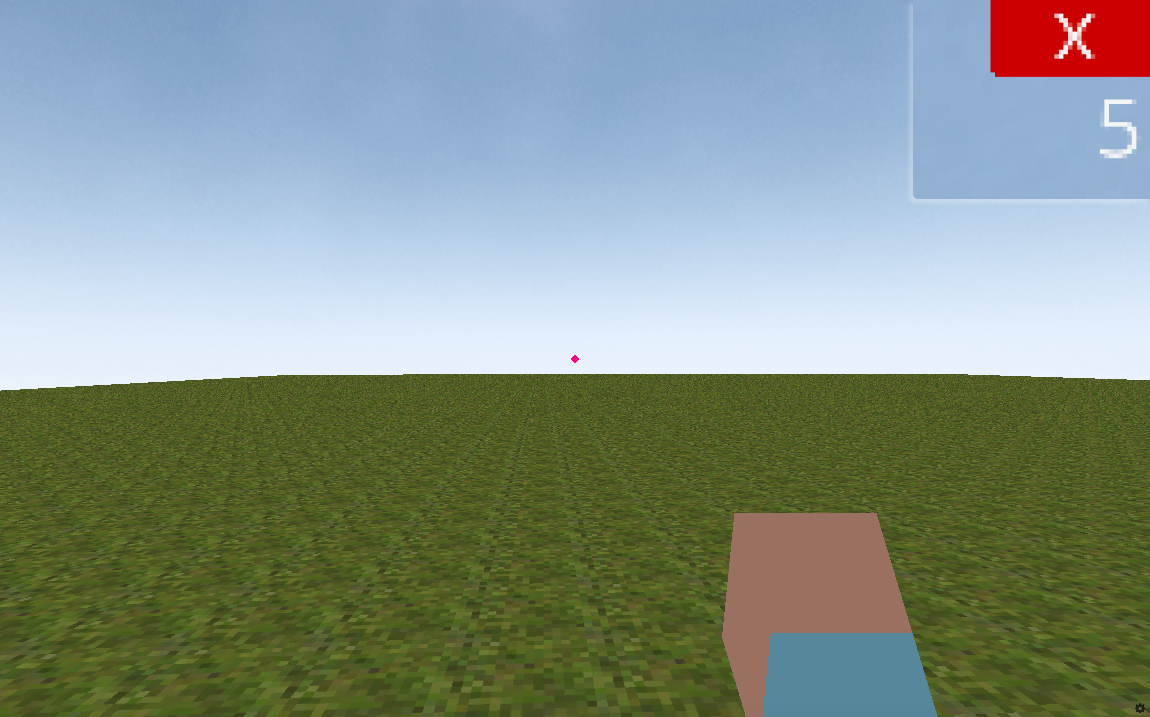
После запуска программы вы увидите простую площадку из блоков. И хоть пока что она выглядит скучно, по ней уже можно перемещаться.

Отображение площадки из блоков после запуска программы.
По умолчанию персонажем можно управлять с помощью мышки и кнопок W, A, S, D. Но есть «фича»: если переключиться на русскую раскладку, то при нажатии кнопки сработает исключение TypeError. Поэтому лучше добавить автоматическое переключение раскладки при запуске программы — например, с помощью win32api.
Текстурирование и кастомные объекты
Кроме встроенных текстур и моделей, Ursina Engine позволяет добавлять собственные. Примеры таких кастомных объектов ищите в репозитории на GitHub.
Текстурирование блоков. Первым делом, мне кажется, лучше добавить и текстурировать блоки. Для этого нужно сделать Blender-модель, заготовить текстуру и импортировать объект в программу.

Blender, модель блока земли.
...

# загружаем текстуру
grass_texture = load_texture('assets/grass.png')

for x_dynamic in range(16):
   for z_dynamic in range(16):
       # настраиваем объект Entity, загружаем модель block.obj
       Entity(model='assets/block', scale=0.5, texture=grass_texture, position=Vec3(x_dynamic,0,z_dynamic))

...
Загрузка кастомного объекта block.
После запуска программы вы увидите что-то похожее на оригинальную игру.

Результат: платформа из блоков земли.
Текстурирование персонажа. Аналогичным образом можно добавить ту же руку персонажа. Сначала — заготовить текстуру для Blender-модели, а после — импортировать ее в программу через объект Entity. Чтобы закрепить руку рядом с камерой персонажа, нужно «подогнать» параметры — позицию и наклон.

Blender, модель руки.
...
# загружаем текстуру руки
arm_texture = load_texture('assets/arm_texture.png')

# объявляем объект hand, привязываем к камере camera.ui, загружаем модель и размещаем ее в правом нижнем углу
hand = Entity(parent = camera.ui, model = 'assets/arm',
             texture = arm_texture, scale = 0.2,
             rotation = Vec3(150, -10,0), position = Vec2(0.5,-0.6))
...
Загрузка кастомного объекта hand.
Результат: в правом нижнем углу появилась рука.
Текстурирование неба. С помощью Entity также можно добавить небо — для этого нужно создать модель сферы и наложить на нее текстуру.
...

sky_texture = load_texture('assets/sky_texture.png')

sky = Entity(
           model = 'sphere', texture = sky_texture,
           scale = 1000, double_sided = True
       )

...
Добавление объекта sky.
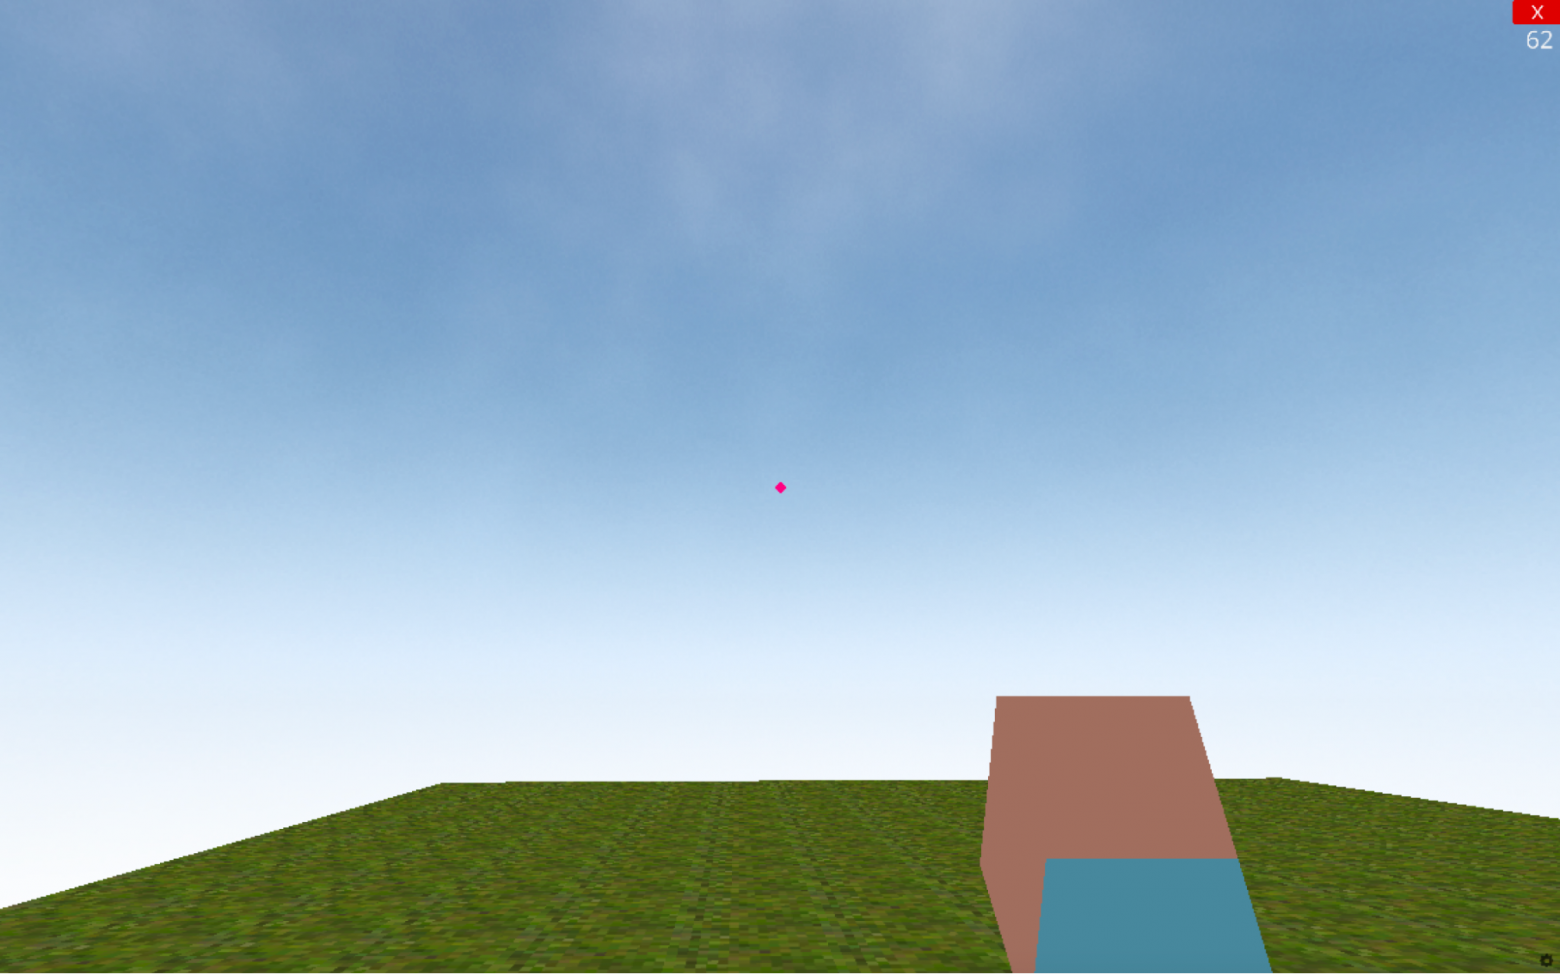
Результат: над игровой картой появилось небо.
Для создания перехода изо дня в ночь можно использовать функцию update. Она в параллельном потоке программы способна отслеживать время, координаты и другие параметры, а также — модифицировать объекты «на лету».
...

def update():
  print(player.x, player.y, player.z)

...
Пример: функция параллельного вывода координат.
Результат: программа отслеживает актуальные координаты.

Основы взаимодействия с объектами
До этого раздела мы генерировали сцену и наполняли ее основными объектами. Но как с ними взаимодействовать?
Мониторинг действий через функцию input
Сначала нужно научиться отслеживать нажатия клавиш — для этого подходит функция input. С помощью нее можно, например, добавить режим быстрого бега при клике на шифт.
...

def input(key):

  if key == 'o': # кнопка выхода из игры
    quit()

  if key == 'shift': # кнопка быстрого бега
    global shift_click
    if shift_click % 2 == 0:
      player.speed = normal_speed + 3 # увеличиваем скорость при нажатии
      shift_click += 1
    else:
      player.speed = normal_speed
      shift_click += 1

...
Программирование режима ускорения.
Также ее можно использовать для удаления и установки блоков при нажатии ЛКМ и ПКМ соответственно.
Включение блоков типа Button
Но не все блоки можно «разрушать». Для того, чтобы добавить в игру взаимодействие с миром, нужно использовать специальный объект Button. Он поддерживает функцию input и метод destroy, который нужен для уничтожения блоков.
...

# создаем новый класс на базе Button и задаем стартовые параметры
class Voxel(Button):
   def __init__(self, position=(0, 0, 0), texture=grass_texture):
       super().__init__(
           parent=scene, model='assets/block',
           scale=0.5, texture=texture, position=position,
           origin_y=0.5, color = color.color(0,0,random.uniform(0.9,1))
       )

   #  добавляем input — встроенную функцию взаимодействия с блоком Voxel:
   #     		если нажали на ПКМ — появится блок
   #     		если нажали на ЛКМ — удалится
   def input(self, key):
       if self.hovered:
           if key == 'right mouse down':
               Voxel(position=self.position + mouse.normal, texture=texture)

           if key == 'left mouse down':
               destroy(self)

# генерация платформы из блоков Voxel
for x_dynamic in range(16):
   for z_dynamic in range(16):
       Voxel(position=(x_dynamic,0,z_dynamic))

...
Генерация платформы 16×16 из блоков типа Button.

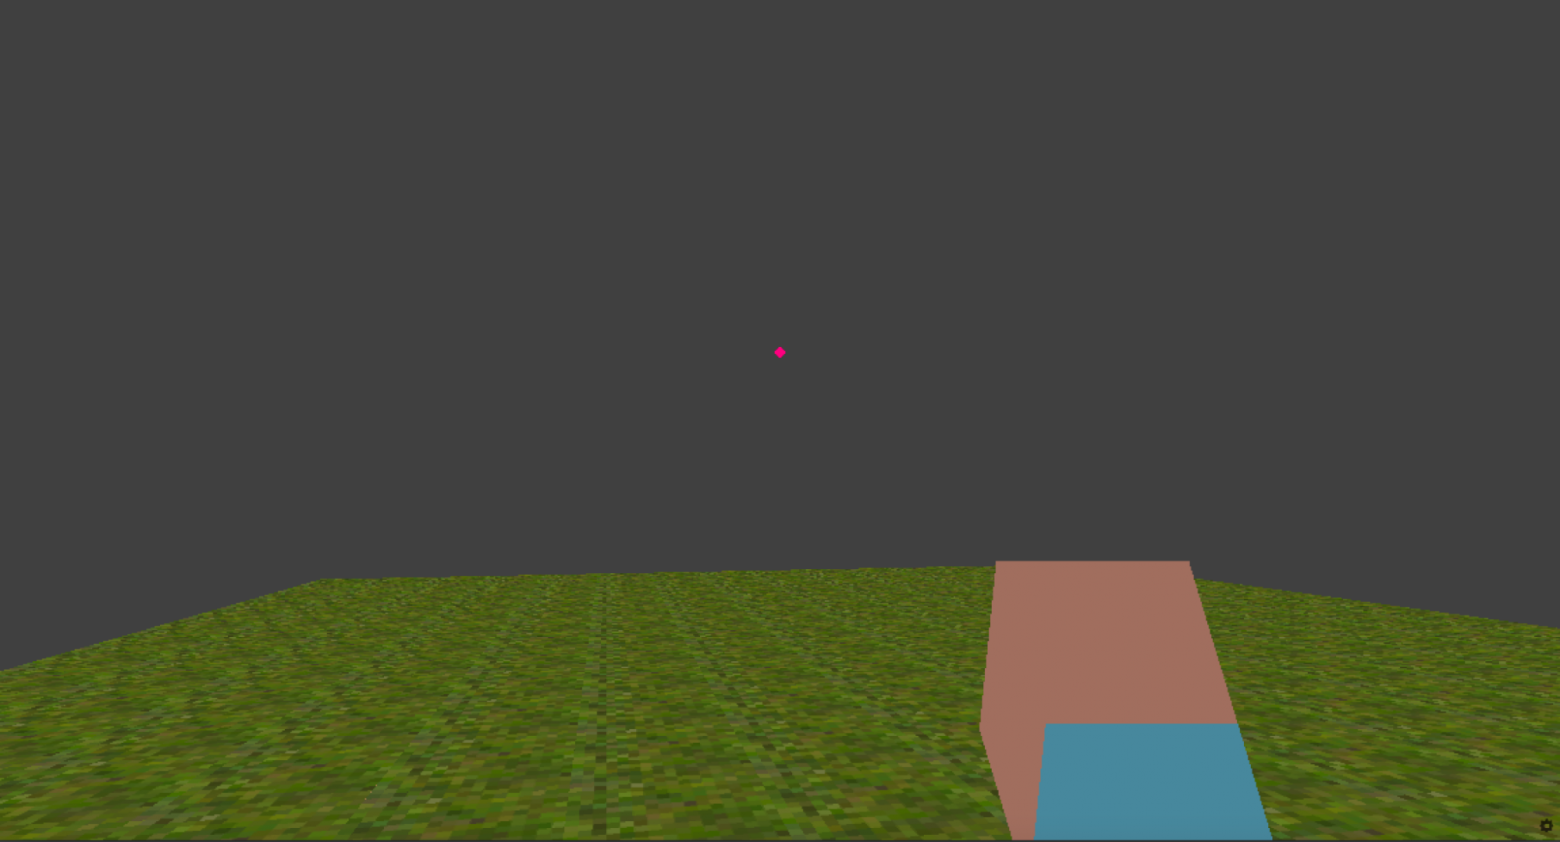
Результат: землянка, которая напоминает мне почему-то дом Шрека.
Супер — вы научились строить землянку. Попробуйте переплюнуть постройку с картинки.
Проблема оптимизации
Кажется, что статья подошла к концу: ландшафт из блоков готов, работу с объектами и обработку событий освоили. Но есть проблема с оптимизацией. Попробуйте сгенерировать полигон площадью в 1000 блоков — и вы заметите, как стремительно падает FPS.
Это связано с тем, что движок не умеет «безболезненно» загружать большое количество объектов Entity и Button. Конечно, можно последовательно генерировать чанки и удалять старые. Но у этого метода есть пара минусов.
- Не гарантирует стабильную работу. Внутри одного чанка с горной местностью может быть больше блоков, чем в нескольких с пологой.
- FPS все равно страдает. Чтобы подгружать дополнительные чанки незаметно, перед персонажем должно быть несколько сотен блоков. Это значит, что фреймрейт все равно просядет.
Поэтому рассмотренная механика хорошо подходит для создания именно небольших карт. А для генерации «бесконечных» миров лучше использовать объекты типа Mesh.
 Арендуйте выделенный сервер с запуском от 2 минут и бесплатной заменой комплектующих. И используйте его ресурсы для гейминга.
Погружение в Mesh
Я бы не написал этот раздел, если бы не канал Red Hen dev. К слову, на нем уже больше года выходят видео по Ursina Engine. Сегодня это лучшая неофициальная документация. Поэтому если вы хотите углубиться, например, в процедурную генерацию мира из Mesh-блоков, переходите по ссылке.
Модель Mesh позволяет генерировать один логический объект и отрисовывать его по заданным координатам, когда как Entity создает в каждой точке новые объекты. Так Mesh потребляет меньше памяти и производительности GPU.
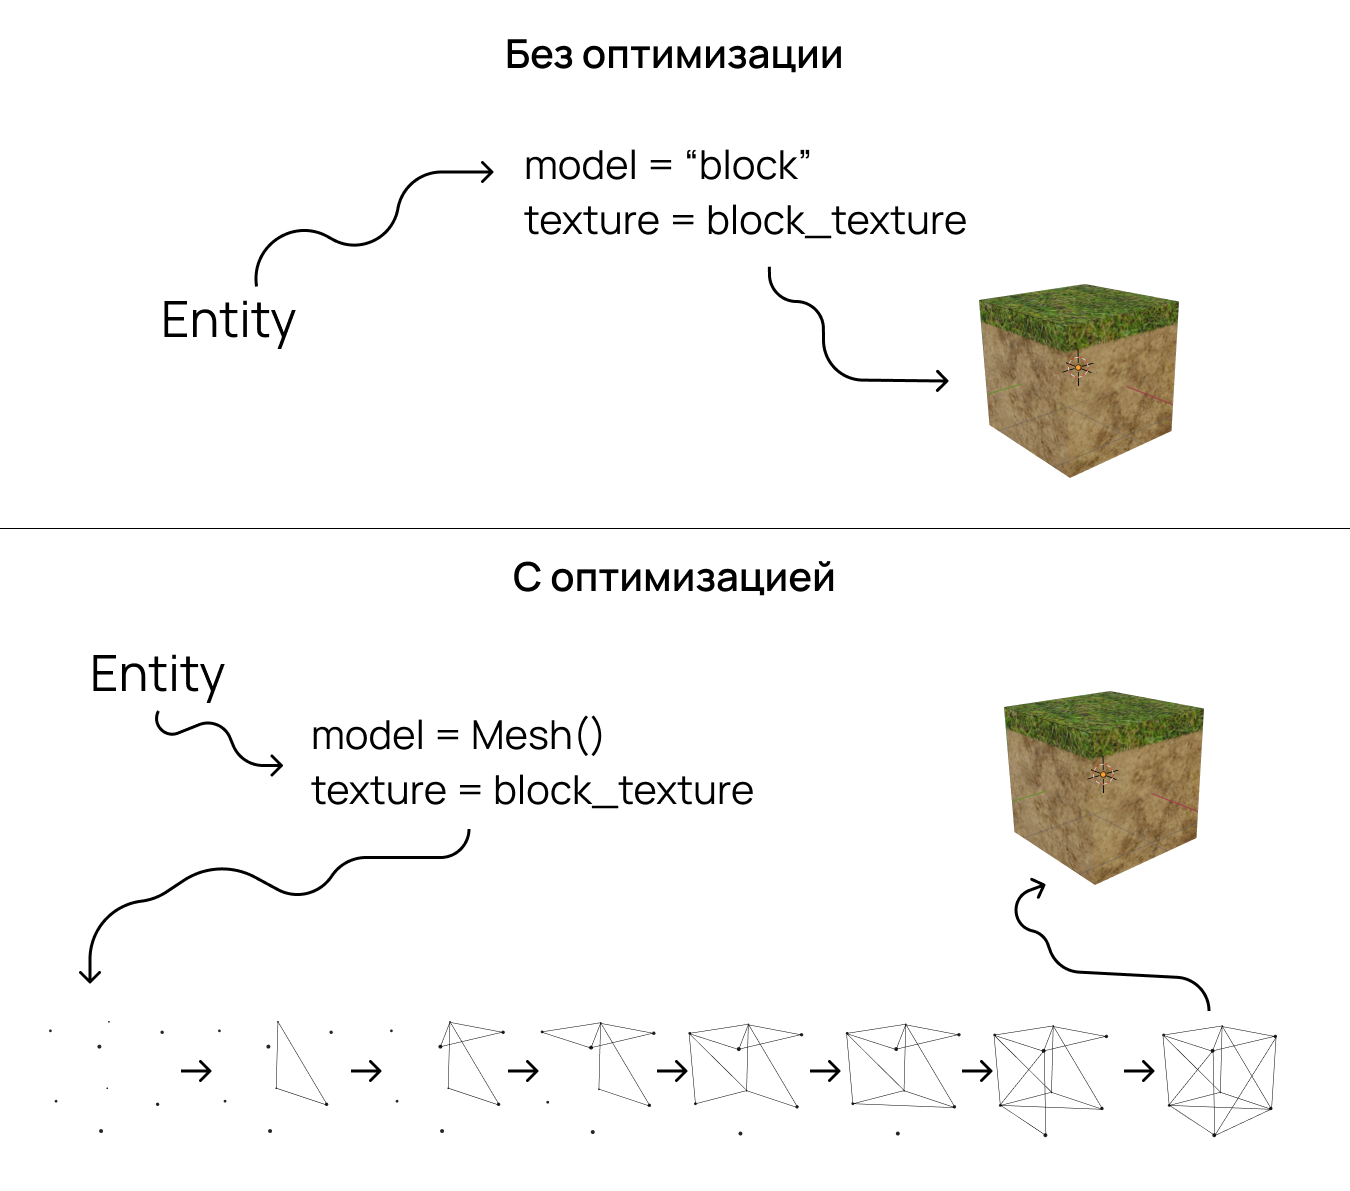
Схема генерации Entity- и Mesh-блоков.
Однако с блоками типа Mesh работать сложнее. Сначала нужно создать объект Entity, загрузить модель Mesh, а после — «слепить» из нее прообраз Blender-объекта (блока). Посмотрите сами.
...
# создаем объект Mesh
e = Entity(model=Mesh(), texture=this.textureAtlas)

# подгружаем конкретную ячейку из атласа текстур (с помощью масштабирования)
# атлас текстур — это обычное изображение, в котором собраны текстуры разных блоков
e.texture_scale *= 64/e.texture.width

def genBlock(this, x, y, z):
    model = this.subsets[0].model
    uu = 8
    uv = 7
    model.uvs.extend([Vec2(uu, uv) + u for u in this.block.uvs])

def genTerrain(this):
   x = 0
   z = 0
   y = 0

   o_width = int(this.subWidth*0.5)

   for x_dynamic in range(-o_width, o_width):
      for z_dynamic in range(-o_width, o_width):

# обращаемся к genBlock(), генерируем блоки типа Mesh
          this.genBlock(x+x_dynamic, y, z+z_dynamic)

    this.subsets[0].model.generate()

...
Пример генерации площадки из блоков Mesh.
Особенности Mesh

Генерация блоков Mesh — всего лишь одно из препятствий на пути к оптимизации. Есть и другие особенности, которые нужно учитывать.
- По умолчанию с Mesh-блоками нельзя взаимодействовать.
- Mesh-блоки не твердотельны.
Эти проблемы можно решить — например, написать собственные правила для удаления и установки блоков. Или управлять координатами персонажа таким образом, чтобы было ощущение перемещения по твердой поверхности.
Эти и другие решения уже есть — ищите их в GitHub-репозитории проекта Red Hen dev.
Генерация мира
Теперь, когда нет жестких ограничений на количество объектов внутри игровой сцены, можно сгенерировать Minecraft-подобный мир. Встроенные методы для этого не предусмотрены. Но есть простой способ — создать матрицу из шумов Перлина и последовательно «отрисовывать» ее внутри игры.
Матрица из шумов Перлина
Шум Перлина — это алгоритм процедурной генерации псевдослучайным методом. Механика такая: вы подаете на вход число seed, на базе которого генерируется текстура поверхности.
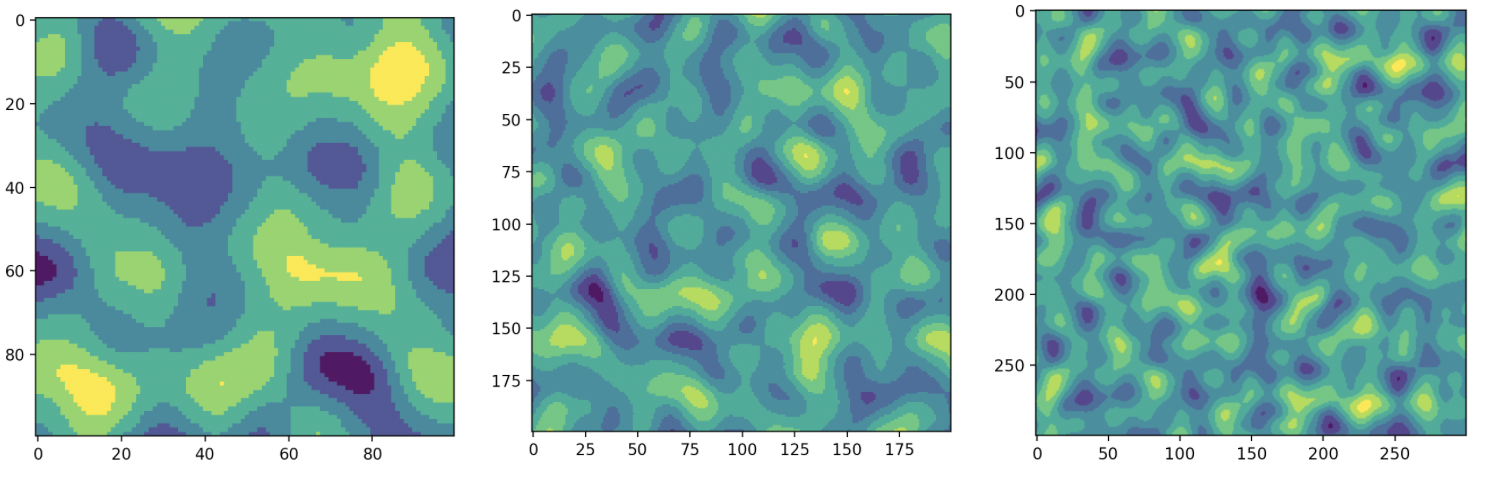
Шумы Перлина в разном масштабе.
Если не менять внутренние параметры алгоритма, то при загрузке одного и того же значения seed шум будет одинаковым.
from numpy import floor
from perlin_noise import PerlinNoise
import matplotlib.pyplot as plt

noise = PerlinNoise(octaves=2, seed=4522)
amp = 6
freq = 24
terrain_width = 300

landscale = [[0 for i in range(terrain_width)] for i in range(terrain_width)]

for position in range(terrain_width**2):
   x = floor(position / terrain_width)
   z = floor(position % terrain_width)
   y = floor(noise([x/freq, z/freq])*amp)

   landscale[int(x)][int(z)] = int(y)

plt.imshow(landscale)
plt.show()
Генерация «красивого» шума Перлина.
Генерация сложного ландшафта
По сути, шум Перлина формирует двумерный массив с плавными спадами и подъемами по координате y. Его достаточно просто перенести в игру.
...

for x_dynamic in range(-o_width, o_width):
 for z_dynamic in range(-o_width, o_width):
     # генерация Mesh-блока в заданной точке, координату y берем из алгоритма Перлина
     this.genBlock(x+x_dynamic, this.landscale[x+x_dynamic][z+z_dynamic], z+z_dynamic)

...
Генерация ландшафта.
Подобным образом возможно генерировать не только ландшафты, но и, например, шахты. Только в последнем случае используются черви Перлина. Подробнее о разных алгоритмах и принципах генерации мира можно узнать тут.

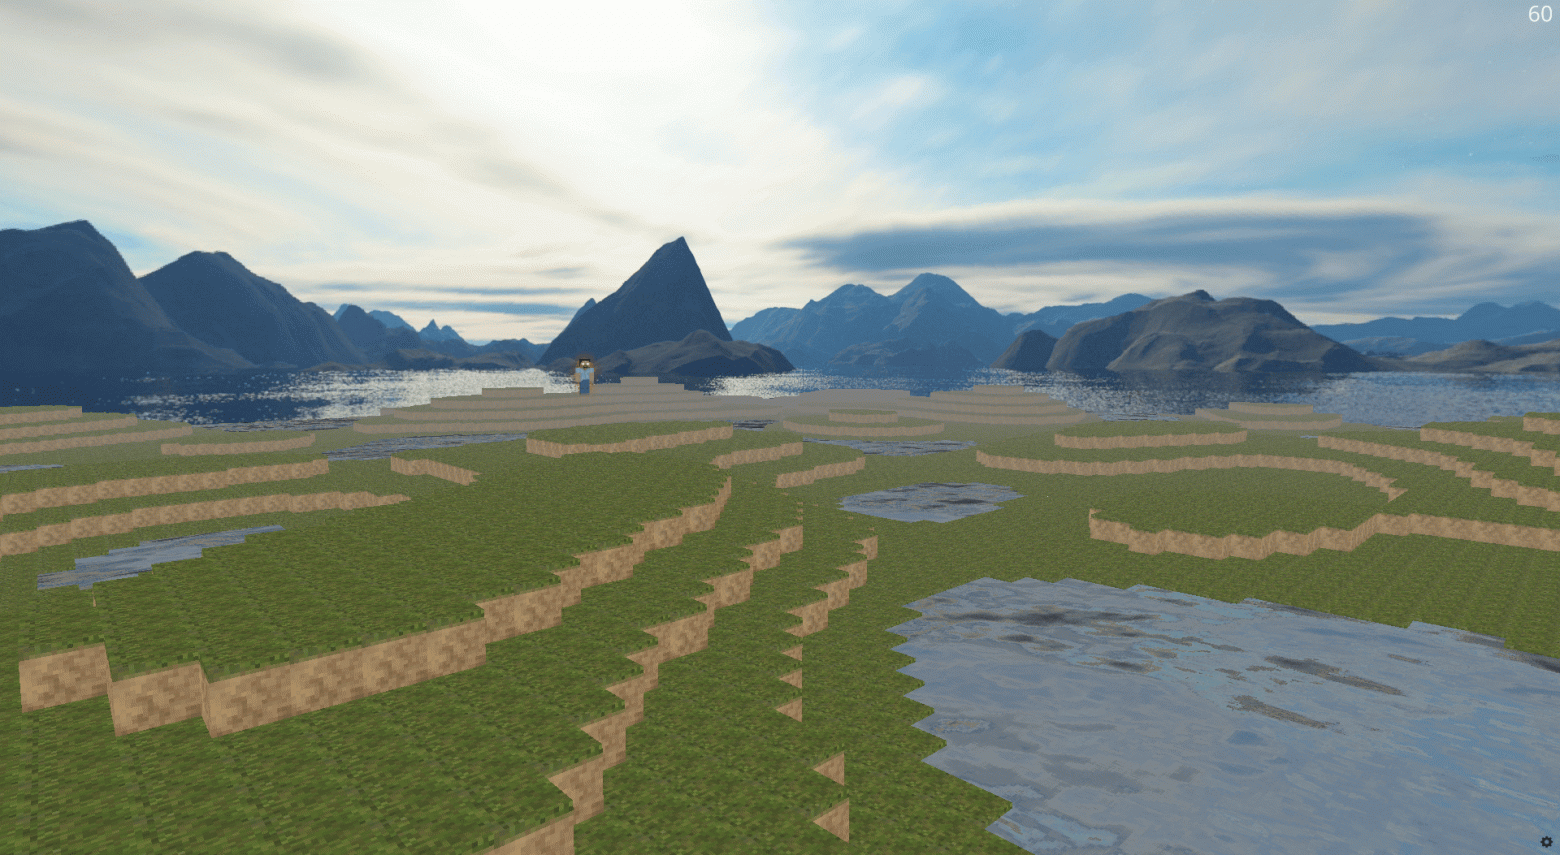
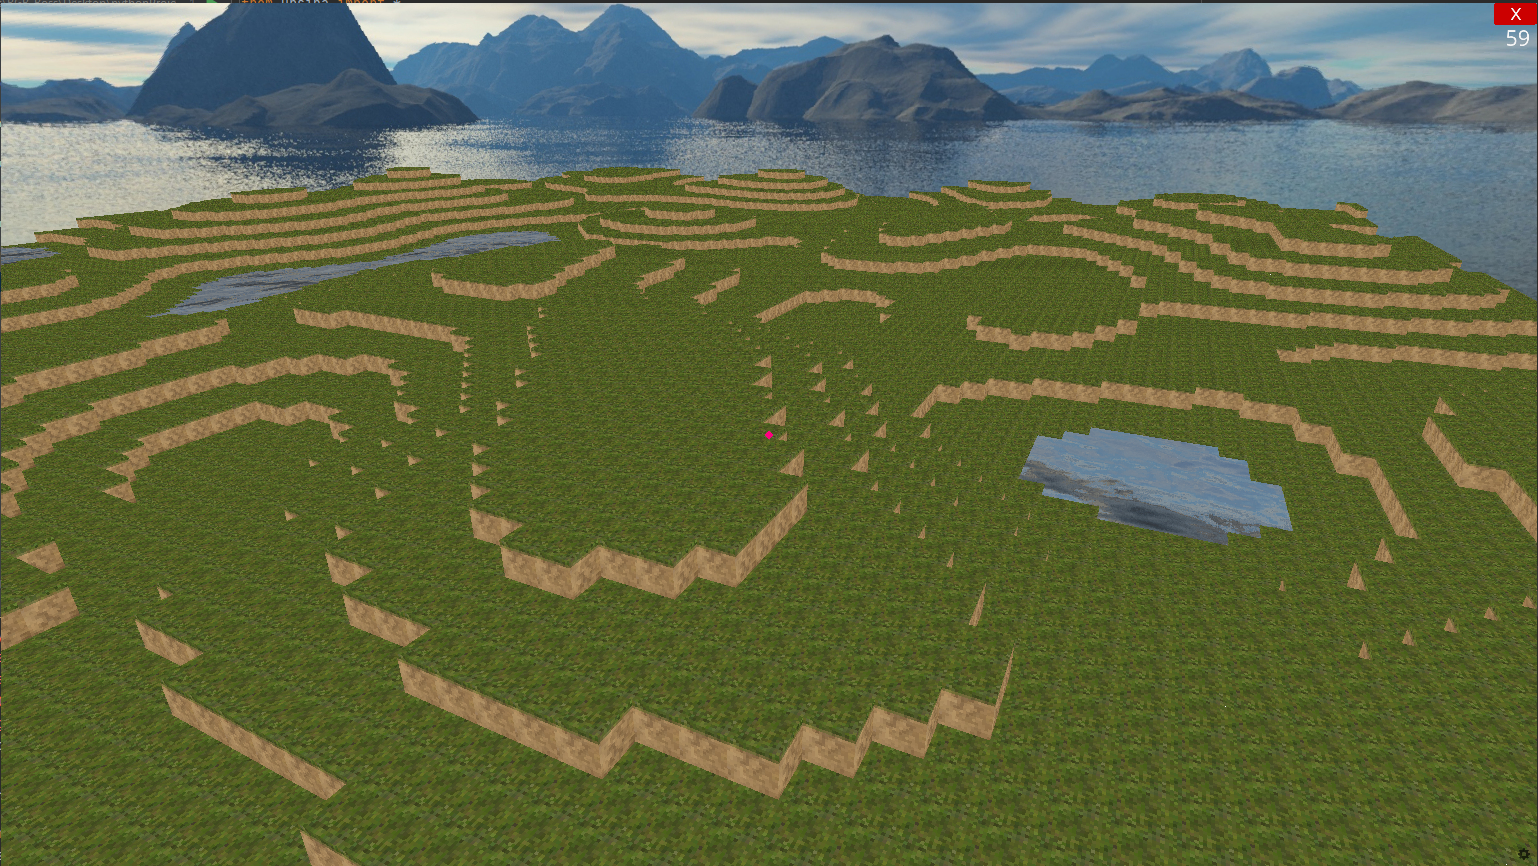
Результат: Minecraft-подобный ландшафт.
Элементы «атмосферы»: шейдеры и аудио
Игра до сих пор кажется плоской: ей не хватает музыки, звуков и чего-то «нового». Если другие блоки — песок, камень, дерево — добавить просто, то с анимированными объектами — например, водой — ситуация сложнее.
Добавление шейдеров
В Ursina Engine есть готовый набор шейдеров, которые можно импортировать из подмодуля ursina.shaders и подключить к нужным Entity-объектам. Это полезно, если нужно, например, показать объем объектов.
from ursina.shaders import basic_lighting_shader

...

e = Entity(..., shader = basic_lighting_shader)

...
Пример подключения шейдера.

Ursina Engine, встроенные шейдеры.
Также к шейдерам можно причислить туманность, которая есть и в оригинальной игре. Она нужна, чтобы «сбить» фокус с дальних объектов.
...

scene.fog_density=(0,95)

# scene, как и window, тоже один из основных элементов библиотеки. Иногда его можно встретить в параметре наследования parent. Хотя, по моему опыту, его использование скорее опционально, чем обязательно.

scene.fog_color=color.white

...
Добавление туманности.

Не всегда туманность смотрится хорошо. Возможно, стоит поэкспериментировать с параметром color.
Ursina Lighting. В целом, это все, что нужно знать о встроенных шейдерах. Но есть аналог ursina.shaders — открытая библиотека Ursina Lighting. С помощью нее можно добавить даже воду.
# импортируем основные объекты. Предварительно нужно развернуть репозиторий UrsinaLighting внутри своего проекта.
from UrsinaLighting import LitObject, LitInit

...

# важно! нужно инициализировать главный объект.
lit = LitInit()

...

# заполняем нижние уровни ландшафта водой (y = -1.1), создаем текстуру воды размером с ширину ландшафта. Проседать FPS не будет, тк water — это один объект, который просто «растянут» вдоль игровой сцены
water = LitObject(position = (floor(terrain.subWidth/2), -1.1, floor(terrain.subWidth/2)), scale = terrain.subWidth, water = True, cubemapIntensity = 0.75, collider='box', texture_scale=(terrain.subWidth, terrain.subWidth), ambientStrength = 0.5)

...
Подключение UrsinaLighting и добавление воды.

Обратите внимание: вода буквально отражает небо. Мне кажется, что она выглядит лучше, чем в оригинальной игре.
Добавление звуков и музыки
Ursina Engine умеет воспроизводить аудиофайлы формата mp3 и wav. Так, например, можно добавить музыку C418 и разные звуки.
...

punch_sound = Audio('assets/punch_sound',loop = False, autoplay = False)

...

class Voxel(Button):
    ...
    def input(key):
        if key == 'left mouse down':
        punch_sound.play()

...
Добавление музыки и звуков удара.
Возможно, эти тексты тоже вас заинтересуют:
→ Как запустить динозаврика Google на тачбаре? Обзор Python-библиотеки PyTouchBar
→ Каким должен быть Feature Store, чтобы оптимизировать работу с ML-моделями
→ 7 полезных книг по Python для старта и развития
Меню игры: основные элементы GUI
На базе Entity делают не только 3D, но и полноценные графические интерфейсы. Логично, ведь все элементы GUI — это двумерные объекты, с которыми Ursina Engine также работает хорошо.
Движок поддерживает элементы типа Text и ButtonList. Последний автоматически создает кнопки и привязывает к ним функции, которые срабатывают при нажатии.
Ниже — пример программирования простого меню игры.
# в отдельном файле menu.py

from ursina import *

app = Ursina(title='Minecraft-Menu')

# создаем объект на базе Entity, настраиваем камеру и бэкграунд
class MenuMenu(Entity):
   def __init__(self, **kwargs):
       super().__init__(parent=camera.ui, ignore_paused=True)

       self.main_menu = Entity(parent=self, enabled=True)
       self.background = Sky(model = "cube", double_sided = True, texture = Texture("textures/skybox.jpg"), rotation = (0, 90, 0))

# стартовая надпись Minecraft
       Text("Minecraft", parent = self.main_menu, y=0.4, x=0, origin=(0,0))

       def switch(menu1, menu2):
           menu1.enable()
           menu2.disable()

# вместо print_on_screen можно вписать lambda-функцию для запуска игры
       ButtonList(button_dict={
           "Start": Func(print_on_screen,"You clicked on Start button!", position=(0,.2), origin=(0,0)),
           "Exit": Func(lambda: application.quit())
       },y=0,parent=self.main_menu)

main_menu = MenuMenu()

app.run()
Примитивный GUI на базе Ursina Engine.

Результат: «100%-сходство» с оригинальным меню.
Смотрим, что получилось
Код из статьи доступен на GitHub. Делайте «форк» и используйте его в качестве референса, а также предлагайте свои улучшения.
Получившийся проект издалека напоминает ранние версии Minecraft. Хотя и превосходит их по качеству шейдеров и текстур.
На самом деле, это лишь небольшая доля того, что можно сделать на базе Ursina Engine. Энтузиасты со всего мира создают на этом движке шутеры, платформеры и другие игры. И это оправдано: время разработки на Ursina Engine меньше, чем на чистом OpenGL. А качество игры выше, чем на том же PyGame.
Но несмотря на позитивный результат, хочу отметить и негативные моменты в работе с библиотекой.
Проблемы Ursina Engine
Нет подробной документации. О назначении некоторых параметров остается только догадываться. Документация ограничивается небольшим лендингом и репозиторием с примерами. Последнего недостаточно, чтобы полностью понять механику работы с объектами.
«Сырая» кроссплатформенность. На MacOS трудно управлять камерой персонажа: курсор постоянно слетает, а иногда и вовсе не перемещается. Некоторые элементы из UrsinaLighting не поддерживаются. Это нужно учитывать, если вы разрабатываете полноценный проект.
Не хватает элементов. Например, взаимодействие с объектами типа Mesh нужно программировать самостоятельно.
Что думаете по поводу этой библиотеки вы? Поделитесь мнением в комментариях.
-
- GitLab: the DevOps platform
- Explore GitLab
- Install GitLab
- How GitLab compares
- Get started
- GitLab docs
- GitLab Learn
- Pricing
- Talk to an expert
-
/
-
Help
- Help
- Support
- Community forum
- Submit feedback
- Contribute to GitLab
- Switch to GitLab Next
-
Projects
Groups
Snippets -
Register - Sign in
minecraft-launcher-lib
Project ID: 15405583
Star
14
Topics:
minecraft
Python
A Python library for creating a custom minecraft launcher
Archived project! Repository and other project resources are read-only
Find file
Download source code
tar.gz
tar.bz2
tar
Clone
-
Clone with SSH
-
Clone with HTTPS
-
Open in your IDE
Visual Studio Code (SSH)Visual Studio Code (HTTPS)IntelliJ IDEA (SSH)IntelliJ IDEA (HTTPS)
- Copy SSH clone URLgit@gitlab.com:JakobDev/minecraft-launcher-lib.git
- Copy HTTPS clone URLhttps://gitlab.com/JakobDev/minecraft-launcher-lib.git
- README
- BSD 2-Clause «Simplified» License
- CONTRIBUTING
Project description
A Python library for creating a custom minecraft launcher. This library containts functions to install and execute minecraft and interacting with mojang accounts.
import minecraft_launcher_lib
import subprocess
import sys

# Set the data for your Azure Application here. For more information look at the documentation.
CLIENT_ID = "YOUR CLIENT ID"
REDIRECT_URL = "YOUR REDIRECT URL"

# Get latest version
latest_version = minecraft_launcher_lib.utils.get_latest_version()["release"]

# Get Minecraft directory
minecraft_directory = minecraft_launcher_lib.utils.get_minecraft_directory()

# Make sure, the latest version of Minecraft is installed
minecraft_launcher_lib.install.install_minecraft_version(latest_version, minecraft_directory)

# Login
login_url, state, code_verifier = minecraft_launcher_lib.microsoft_account.get_secure_login_data(CLIENT_ID, REDIRECT_URL)
print(f"Please open {login_url} in your browser and copy the url you are redirected into the prompt below.")
code_url = input()

# Get the code from the url
try:
    auth_code = minecraft_launcher_lib.microsoft_account.parse_auth_code_url(code_url, state)
except AssertionError:
    print("States do not match!")
    sys.exit(1)
except KeyError:
    print("Url not valid")
    sys.exit(1)

# Get the login data
login_data = minecraft_launcher_lib.microsoft_account.complete_login(CLIENT_ID, None, REDIRECT_URL, auth_code, code_verifier)

# Get Minecraft command
options = {
    "username": login_data["name"],
    "uuid": login_data["id"],
    "token": login_data["access_token"]
}
minecraft_command = minecraft_launcher_lib.command.get_minecraft_command(latest_version, minecraft_directory, options)

# Start Minecraft
subprocess.call(minecraft_command)
Features:
- Easy installing
- Get command to run Minecraft
- Login to Microsoft account
- Support Forge, Fabric and Liteloader
- Old versions like alpha or beta supported
- All functions have type annotations and docstrings
- Only depents on requests
- Supports PyPy
- Full Documention with tutorial online available
- All public APIs are static typed
- Examples available
- OpenSource
View more examples
Read the documentation
Thanks to tomsik68 who documented how a minecraft launcher works
Buy me a coffe
Download files
Download the file for your platform. If you’re not sure which to choose, learn more about installing packages.
Source Distribution
Built Distribution
Want to make Minecraft in python then you are at the right place today in this python tutorial. I will show you how to make a minecraft game in python with source code. It will be fun and interesting so read till the end.
Minecraft is one of the most popular video game and loved by many gamers. It is a 3D game made of blocks where players can interact and modify the environment. It also has story mode and it is an adventure game.
Minecraft is a great game. You must have played it. Therefore, if you want to recreate the game using python we will create a similar clone of minecraft using python where players can interact with blocks.
Making minecraft in python for beginners can be difficult but you don’t have to worry about anything because I will provide you with the python minecraft code you just have to copy and paste.
Making Minecraft Game In Python With Code
If you are not a game developer and do not have much experience with python just follow me carefully till the end. I will show you a step by step tutorial and you will have a python minecraft game running on your computer.
Before we proceed you need to have python installed and setuped on your computer and also a code editor if you don’t have python installed follow this guide: Install and setup python.
1. Create a new project folder
So the first step you need to do is create a new folder on your computer for this minecraft game and open the folder in a python code editor of your choice.
I use vs code as my editor. You can use pycharm or any editor where you can write and edit python code.
2. Install pyglet library
We will use a python library called pyglet to create this minecraft game in python. It is a cross platform game development library for python like pygame.
So we need to install this library to install an open terminal or command prompt at the project location and paste the below command.
pip install pyglet
The above command will install the pyglet library in your project now you can use this library in your project
3. Copy and paste Minecraft code
from __future__ import division
import sys
import math
import random
import time
from collections import deque
from pyglet import image
from pyglet.gl import *
from pyglet.graphics import TextureGroup
from pyglet.window import key, mouse
from noise_gen import NoiseGen
TICKS_PER_SEC = 60
# Size of sectors used to ease block loading.
SECTOR_SIZE = 16
# Movement variables
WALKING_SPEED = 5
FLYING_SPEED = 15
CROUCH_SPEED = 2
SPRINT_SPEED = 7
SPRINT_FOV = SPRINT_SPEED / 2
GRAVITY = 20.0
MAX_JUMP_HEIGHT = 1.0 # About the height of a block.
# To derive the formula for calculating jump speed, first solve
# v_t = v_0 + a * t
# for the time at which you achieve maximum height, where a is the acceleration
# due to gravity and v_t = 0. This gives:
# t = - v_0 / a
# Use t and the desired MAX_JUMP_HEIGHT to solve for v_0 (jump speed) in
# s = s_0 + v_0 * t + (a * t^2) / 2
JUMP_SPEED = math.sqrt(2 * GRAVITY * MAX_JUMP_HEIGHT)
TERMINAL_VELOCITY = 50
# Player variables
PLAYER_HEIGHT = 2
PLAYER_FOV = 80.0
if sys.version_info[0] >= 3:
xrange = range
def cube_vertices(x, y, z, n):
""" Return the vertices of the cube at position x, y, z with size 2*n.
"""
return [
x-n,y+n,z-n, x-n,y+n,z+n, x+n,y+n,z+n, x+n,y+n,z-n, # top
x-n,y-n,z-n, x+n,y-n,z-n, x+n,y-n,z+n, x-n,y-n,z+n, # bottom
x-n,y-n,z-n, x-n,y-n,z+n, x-n,y+n,z+n, x-n,y+n,z-n, # left
x+n,y-n,z+n, x+n,y-n,z-n, x+n,y+n,z-n, x+n,y+n,z+n, # right
x-n,y-n,z+n, x+n,y-n,z+n, x+n,y+n,z+n, x-n,y+n,z+n, # front
x+n,y-n,z-n, x-n,y-n,z-n, x-n,y+n,z-n, x+n,y+n,z-n, # back
]
def tex_coord(x, y, n=4):
""" Return the bounding vertices of the texture square.
"""
m = 1.0 / n
dx = x * m
dy = y * m
return dx, dy, dx + m, dy, dx + m, dy + m, dx, dy + m
def tex_coords(top, bottom, side):
""" Return a list of the texture squares for the top, bottom and side.
"""
top = tex_coord(*top)
bottom = tex_coord(*bottom)
side = tex_coord(*side)
result = []
result.extend(top)
result.extend(bottom)
result.extend(side * 4)
return result
TEXTURE_PATH = 'texture.png'
GRASS = tex_coords((1, 0), (0, 1), (0, 0))
SAND = tex_coords((1, 1), (1, 1), (1, 1))
BRICK = tex_coords((2, 0), (2, 0), (2, 0))
STONE = tex_coords((2, 1), (2, 1), (2, 1))
WOOD = tex_coords((3, 1), (3, 1), (3, 1))
LEAF = tex_coords((3, 0), (3, 0), (3, 0))
WATER = tex_coords((0, 2), (0, 2), (0, 2))
FACES = [
( 0, 1, 0),
( 0,-1, 0),
(-1, 0, 0),
( 1, 0, 0),
( 0, 0, 1),
( 0, 0,-1),
]
def normalize(position):
""" Accepts `position` of arbitrary precision and returns the block
containing that position.
Parameters
----------
position : tuple of len 3
Returns
-------
block_position : tuple of ints of len 3
"""
x, y, z = position
x, y, z = (int(round(x)), int(round(y)), int(round(z)))
return (x, y, z)
def sectorize(position):
""" Returns a tuple representing the sector for the given `position`.
Parameters
----------
position : tuple of len 3
Returns
-------
sector : tuple of len 3
"""
x, y, z = normalize(position)
x, y, z = x // SECTOR_SIZE, y // SECTOR_SIZE, z // SECTOR_SIZE
return (x, 0, z)
class Model(object):
def __init__(self):
# A Batch is a collection of vertex lists for batched rendering.
self.batch = pyglet.graphics.Batch()
# A TextureGroup manages an OpenGL texture.
self.group = TextureGroup(image.load(TEXTURE_PATH).get_texture())
# A mapping from position to the texture of the block at that position.
# This defines all the blocks that are currently in the world.
self.world = {}
# Same mapping as `world` but only contains blocks that are shown.
self.shown = {}
# Mapping from position to a pyglet `VertextList` for all shown blocks.
self._shown = {}
# Mapping from sector to a list of positions inside that sector.
self.sectors = {}
# Simple function queue implementation. The queue is populated with
# _show_block() and _hide_block() calls
self.queue = deque()
self._initialize()
def _initialize(self):
""" Initialize the world by placing all the blocks.
"""
gen = NoiseGen(452692)
n = 128 #size of the world
s = 1 # step size
y = 0 # initial y height
#too lazy to do this properly lol
heightMap = []
for x in xrange(0, n, s):
for z in xrange(0, n, s):
heightMap.append(0)
for x in xrange(0, n, s):
for z in xrange(0, n, s):
heightMap[z + x * n] = int(gen.getHeight(x, z))
#Generate the world
for x in xrange(0, n, s):
for z in xrange(0, n, s):
h = heightMap[z + x * n]
if (h < 15):
self.add_block((x, h, z), SAND, immediate=False)
for y in range (h, 15):
self.add_block((x, y, z), WATER, immediate=False)
continue
if (h < 18):
self.add_block((x, h, z), SAND, immediate=False)
self.add_block((x, h, z), GRASS, immediate=False)
for y in xrange(h - 1, 0, -1):
self.add_block((x, y, z), STONE, immediate=False)
#Maybe add tree at this (x, z)
if (h > 20):
if random.randrange(0, 1000) > 990:
treeHeight = random.randrange(5, 7)
#Tree trunk
for y in xrange(h + 1, h + treeHeight):
self.add_block((x, y, z), WOOD, immediate=False)
#Tree leaves
leafh = h + treeHeight
for lz in xrange(z + -2, z + 3):
for lx in xrange(x + -2, x + 3):
for ly in xrange(3):
self.add_block((lx, leafh + ly, lz), LEAF, immediate=False)
def hit_test(self, position, vector, max_distance=8):
""" Line of sight search from current position. If a block is
intersected it is returned, along with the block previously in the line
of sight. If no block is found, return None, None.
Parameters
----------
position : tuple of len 3
The (x, y, z) position to check visibility from.
vector : tuple of len 3
The line of sight vector.
max_distance : int
How many blocks away to search for a hit.
"""
m = 8
x, y, z = position
dx, dy, dz = vector
previous = None
for _ in xrange(max_distance * m):
key = normalize((x, y, z))
if key != previous and key in self.world:
return key, previous
previous = key
x, y, z = x + dx / m, y + dy / m, z + dz / m
return None, None
def exposed(self, position):
""" Returns False is given `position` is surrounded on all 6 sides by
blocks, True otherwise.
"""
x, y, z = position
for dx, dy, dz in FACES:
if (x + dx, y + dy, z + dz) not in self.world:
return True
return False
def add_block(self, position, texture, immediate=True):
""" Add a block with the given `texture` and `position` to the world.
Parameters
----------
position : tuple of len 3
The (x, y, z) position of the block to add.
texture : list of len 3
The coordinates of the texture squares. Use `tex_coords()` to
generate.
immediate : bool
Whether or not to draw the block immediately.
"""
if position in self.world:
self.remove_block(position, immediate)
self.world[position] = texture
self.sectors.setdefault(sectorize(position), []).append(position)
if immediate:
if self.exposed(position):
self.show_block(position)
self.check_neighbors(position)
def remove_block(self, position, immediate=True):
""" Remove the block at the given `position`.
Parameters
----------
position : tuple of len 3
The (x, y, z) position of the block to remove.
immediate : bool
Whether or not to immediately remove block from canvas.
"""
del self.world[position]
self.sectors[sectorize(position)].remove(position)
if immediate:
if position in self.shown:
self.hide_block(position)
self.check_neighbors(position)
def check_neighbors(self, position):
""" Check all blocks surrounding `position` and ensure their visual
state is current. This means hiding blocks that are not exposed and
ensuring that all exposed blocks are shown. Usually used after a block
is added or removed.
"""
x, y, z = position
for dx, dy, dz in FACES:
key = (x + dx, y + dy, z + dz)
if key not in self.world:
continue
if self.exposed(key):
if key not in self.shown:
self.show_block(key)
else:
if key in self.shown:
self.hide_block(key)
def show_block(self, position, immediate=True):
""" Show the block at the given `position`. This method assumes the
block has already been added with add_block()
Parameters
----------
position : tuple of len 3
The (x, y, z) position of the block to show.
immediate : bool
Whether or not to show the block immediately.
"""
texture = self.world[position]
self.shown[position] = texture
if immediate:
self._show_block(position, texture)
else:
self._enqueue(self._show_block, position, texture)
def _show_block(self, position, texture):
""" Private implementation of the `show_block()` method.
Parameters
----------
position : tuple of len 3
The (x, y, z) position of the block to show.
texture : list of len 3
The coordinates of the texture squares. Use `tex_coords()` to
generate.
"""
x, y, z = position
vertex_data = cube_vertices(x, y, z, 0.5)
texture_data = list(texture)
# create vertex list
# FIXME Maybe `add_indexed()` should be used instead
self._shown[position] = self.batch.add(24, GL_QUADS, self.group,
('v3f/static', vertex_data),
('t2f/static', texture_data))
def hide_block(self, position, immediate=True):
""" Hide the block at the given `position`. Hiding does not remove the
block from the world.
Parameters
----------
position : tuple of len 3
The (x, y, z) position of the block to hide.
immediate : bool
Whether or not to immediately remove the block from the canvas.
"""
self.shown.pop(position)
if immediate:
self._hide_block(position)
else:
self._enqueue(self._hide_block, position)
def _hide_block(self, position):
""" Private implementation of the 'hide_block()` method.
"""
self._shown.pop(position).delete()
def show_sector(self, sector):
""" Ensure all blocks in the given sector that should be shown are
drawn to the canvas.
"""
for position in self.sectors.get(sector, []):
if position not in self.shown and self.exposed(position):
self.show_block(position, False)
def hide_sector(self, sector):
""" Ensure all blocks in the given sector that should be hidden are
removed from the canvas.
"""
for position in self.sectors.get(sector, []):
if position in self.shown:
self.hide_block(position, False)
def change_sectors(self, before, after):
""" Move from sector `before` to sector `after`. A sector is a
contiguous x, y sub-region of world. Sectors are used to speed up
world rendering.
"""
before_set = set()
after_set = set()
pad = 4
for dx in xrange(-pad, pad + 1):
for dy in [0]: # xrange(-pad, pad + 1):
for dz in xrange(-pad, pad + 1):
if dx ** 2 + dy ** 2 + dz ** 2 > (pad + 1) ** 2:
continue
if before:
x, y, z = before
before_set.add((x + dx, y + dy, z + dz))
if after:
x, y, z = after
after_set.add((x + dx, y + dy, z + dz))
show = after_set - before_set
hide = before_set - after_set
for sector in show:
self.show_sector(sector)
for sector in hide:
self.hide_sector(sector)
def _enqueue(self, func, *args):
""" Add `func` to the internal queue.
"""
self.queue.append((func, args))
def _dequeue(self):
""" Pop the top function from the internal queue and call it.
"""
func, args = self.queue.popleft()
func(*args)
def process_queue(self):
""" Process the entire queue while taking periodic breaks. This allows
the game loop to run smoothly. The queue contains calls to
_show_block() and _hide_block() so this method should be called if
add_block() or remove_block() was called with immediate=False
"""
start = time.process_time()
while self.queue and time.process_time() - start < 1.0 / TICKS_PER_SEC:
self._dequeue()
def process_entire_queue(self):
""" Process the entire queue with no breaks.
"""
while self.queue:
self._dequeue()
class Window(pyglet.window.Window):
def __init__(self, *args, **kwargs):
super(Window, self).__init__(*args, **kwargs)
# Whether or not the window exclusively captures the mouse.
self.exclusive = False
# When flying gravity has no effect and speed is increased.
self.flying = False
# Used for constant jumping. If the space bar is held down,
# this is true, otherwise, it's false
self.jumping = False
# If the player actually jumped, this is true
self.jumped = False
# If this is true, a crouch offset is added to the final glTranslate
self.crouch = False
# Player sprint
self.sprinting = False
# This is an offset value so stuff like speed potions can also be easily added
self.fov_offset = 0
self.collision_types = {"top": False, "bottom": False, "right": False, "left": False}
# Strafing is moving lateral to the direction you are facing,
# e.g. moving to the left or right while continuing to face forward.
#
# First element is -1 when moving forward, 1 when moving back, and 0
# otherwise. The second element is -1 when moving left, 1 when moving
# right, and 0 otherwise.
self.strafe = [0, 0]
# Current (x, y, z) position in the world, specified with floats. Note
# that, perhaps unlike in math class, the y-axis is the vertical axis.
self.position = (30, 50, 80)
# First element is rotation of the player in the x-z plane (ground
# plane) measured from the z-axis down. The second is the rotation
# angle from the ground plane up. Rotation is in degrees.
#
# The vertical plane rotation ranges from -90 (looking straight down) to
# 90 (looking straight up). The horizontal rotation range is unbounded.
self.rotation = (0, 0)
# Which sector the player is currently in.
self.sector = None
# The crosshairs at the center of the screen.
self.reticle = None
# Velocity in the y (upward) direction.
self.dy = 0
# A list of blocks the player can place. Hit num keys to cycle.
self.inventory = [BRICK, GRASS, SAND, WOOD, LEAF]
# The current block the user can place. Hit num keys to cycle.
self.block = self.inventory[0]
# Convenience list of num keys.
self.num_keys = [
key._1, key._2, key._3, key._4, key._5,
key._6, key._7, key._8, key._9, key._0]
# Instance of the model that handles the world.
self.model = Model()
# The label that is displayed in the top left of the canvas.
self.label = pyglet.text.Label('', font_name='Arial', font_size=18,
x=10, y=self.height - 10, anchor_x='left', anchor_y='top',
color=(0, 0, 0, 255))
# This call schedules the `update()` method to be called
# TICKS_PER_SEC. This is the main game event loop.
pyglet.clock.schedule_interval(self.update, 1.0 / TICKS_PER_SEC)
def set_exclusive_mouse(self, exclusive):
""" If `exclusive` is True, the game will capture the mouse, if False
the game will ignore the mouse.
"""
super(Window, self).set_exclusive_mouse(exclusive)
self.exclusive = exclusive
def get_sight_vector(self):
""" Returns the current line of sight vector indicating the direction
the player is looking.
"""
x, y = self.rotation
# y ranges from -90 to 90, or -pi/2 to pi/2, so m ranges from 0 to 1 and
# is 1 when looking ahead parallel to the ground and 0 when looking
# straight up or down.
m = math.cos(math.radians(y))
# dy ranges from -1 to 1 and is -1 when looking straight down and 1 when
# looking straight up.
dy = math.sin(math.radians(y))
dx = math.cos(math.radians(x - 90)) * m
dz = math.sin(math.radians(x - 90)) * m
return (dx, dy, dz)
def get_motion_vector(self):
""" Returns the current motion vector indicating the velocity of the
player.
Returns
-------
vector : tuple of len 3
Tuple containing the velocity in x, y, and z respectively.
"""
if any(self.strafe):
x, y = self.rotation
strafe = math.degrees(math.atan2(*self.strafe))
y_angle = math.radians(y)
x_angle = math.radians(x + strafe)
if self.flying:
m = math.cos(y_angle)
dy = math.sin(y_angle)
if self.strafe[1]:
# Moving left or right.
dy = 0.0
m = 1
if self.strafe[0] > 0:
# Moving backwards.
dy *= -1
# When you are flying up or down, you have less left and right
# motion.
dx = math.cos(x_angle) * m
dz = math.sin(x_angle) * m
else:
dy = 0.0
dx = math.cos(x_angle)
dz = math.sin(x_angle)
else:
dy = 0.0
dx = 0.0
dz = 0.0
return (dx, dy, dz)
def update(self, dt):
""" This method is scheduled to be called repeatedly by the pyglet
clock.
Parameters
----------
dt : float
The change in time since the last call.
"""
self.model.process_queue()
sector = sectorize(self.position)
if sector != self.sector:
self.model.change_sectors(self.sector, sector)
if self.sector is None:
self.model.process_entire_queue()
self.sector = sector
m = 8
dt = min(dt, 0.2)
for _ in xrange(m):
self._update(dt / m)
def _update(self, dt):
""" Private implementation of the `update()` method. This is where most
of the motion logic lives, along with gravity and collision detection.
Parameters
----------
dt : float
The change in time since the last call.
"""
# walking
if self.flying:
speed = FLYING_SPEED
elif self.sprinting:
speed = SPRINT_SPEED
elif self.crouch:
speed = CROUCH_SPEED
else:
speed = WALKING_SPEED
if self.jumping:
if self.collision_types["top"]:
self.dy = JUMP_SPEED
self.jumped = True
else:
if self.collision_types["top"]:
self.jumped = False
if self.jumped:
speed += 0.7
d = dt * speed # distance covered this tick.
dx, dy, dz = self.get_motion_vector()
# New position in space, before accounting for gravity.
dx, dy, dz = dx * d, dy * d, dz * d
# gravity
if not self.flying:
# Update your vertical speed: if you are falling, speed up until you
# hit terminal velocity; if you are jumping, slow down until you
# start falling.
self.dy -= dt * GRAVITY
self.dy = max(self.dy, -TERMINAL_VELOCITY)
dy += self.dy * dt
# collisions
old_pos = self.position
x, y, z = old_pos
x, y, z = self.collide((x + dx, y + dy, z + dz), PLAYER_HEIGHT)
self.position = (x, y, z)
# Sptinting stuff. If the player stops moving in the x and z direction, the player stops sprinting
# and the sprint fov is subtracted from the fov offset
if old_pos[0]-self.position[0] == 0 and old_pos[2]-self.position[2] == 0:
disablefov = False
if self.sprinting:
disablefov = True
self.sprinting = False
if disablefov:
self.fov_offset -= SPRINT_FOV
def collide(self, position, height):
""" Checks to see if the player at the given `position` and `height`
is colliding with any blocks in the world.
Parameters
----------
position : tuple of len 3
The (x, y, z) position to check for collisions at.
height : int or float
The height of the player.
Returns
-------
position : tuple of len 3
The new position of the player taking into account collisions.
"""
# How much overlap with a dimension of a surrounding block you need to
# have to count as a collision. If 0, touching terrain at all counts as
# a collision. If .49, you sink into the ground, as if walking through
# tall grass. If >= .5, you'll fall through the ground.
pad = 0.25
p = list(position)
np = normalize(position)
self.collision_types = {"top":False,"bottom":False,"right":False,"left":False}
for face in FACES: # check all surrounding blocks
for i in xrange(3): # check each dimension independently
if not face[i]:
continue
# How much overlap you have with this dimension.
d = (p[i] - np[i]) * face[i]
if d < pad:
continue
for dy in xrange(height): # check each height
op = list(np)
op[1] -= dy
op[i] += face[i]
if tuple(op) not in self.model.world:
continue
p[i] -= (d - pad) * face[i]
# If you are colliding with the ground or ceiling, stop
# falling / rising.
if face == (0, -1, 0):
self.collision_types["top"] = True
self.dy = 0
if face == (0, 1, 0):
self.collision_types["bottom"] = True
self.dy = 0
break
return tuple(p)
def on_mouse_press(self, x, y, button, modifiers):
""" Called when a mouse button is pressed. See pyglet docs for button
amd modifier mappings.
Parameters
----------
x, y : int
The coordinates of the mouse click. Always center of the screen if
the mouse is captured.
button : int
Number representing mouse button that was clicked. 1 = left button,
4 = right button.
modifiers : int
Number representing any modifying keys that were pressed when the
mouse button was clicked.
"""
if self.exclusive:
vector = self.get_sight_vector()
block, previous = self.model.hit_test(self.position, vector)
if (button == mouse.RIGHT) or
((button == mouse.LEFT) and (modifiers & key.MOD_CTRL)):
# ON OSX, control + left click = right click.
if previous:
self.model.add_block(previous, self.block)
elif button == pyglet.window.mouse.LEFT and block:
texture = self.model.world[block]
if texture != STONE:
self.model.remove_block(block)
else:
self.set_exclusive_mouse(True)
def on_mouse_motion(self, x, y, dx, dy):
""" Called when the player moves the mouse.
Parameters
----------
x, y : int
The coordinates of the mouse click. Always center of the screen if
the mouse is captured.
dx, dy : float
The movement of the mouse.
"""
if self.exclusive:
m = 0.15
x, y = self.rotation
x, y = x + dx * m, y + dy * m
y = max(-90, min(90, y))
self.rotation = (x, y)
def on_key_press(self, symbol, modifiers):
""" Called when the player presses a key. See pyglet docs for key
mappings.
Parameters
----------
symbol : int
Number representing the key that was pressed.
modifiers : int
Number representing any modifying keys that were pressed.
"""
if symbol == key.W:
self.strafe[0] -= 1
elif symbol == key.S:
self.strafe[0] += 1
elif symbol == key.A:
self.strafe[1] -= 1
elif symbol == key.D:
self.strafe[1] += 1
elif symbol == key.C:
self.fov_offset -= 60.0
elif symbol == key.SPACE:
self.jumping = True
elif symbol == key.ESCAPE:
self.set_exclusive_mouse(False)
elif symbol == key.LSHIFT:
self.crouch = True
if self.sprinting:
self.fov_offset -= SPRINT_FOV
self.sprinting = False
elif symbol == key.R:
if not self.crouch:
if not self.sprinting:
self.fov_offset += SPRINT_FOV
self.sprinting = True
elif symbol == key.TAB:
self.flying = not self.flying
elif symbol in self.num_keys:
index = (symbol - self.num_keys[0]) % len(self.inventory)
self.block = self.inventory[index]
def on_key_release(self, symbol, modifiers):
""" Called when the player releases a key. See pyglet docs for key
mappings.
Parameters
----------
symbol : int
Number representing the key that was pressed.
modifiers : int
Number representing any modifying keys that were pressed.
"""
if symbol == key.W:
self.strafe[0] += 1
elif symbol == key.S:
self.strafe[0] -= 1
elif symbol == key.A:
self.strafe[1] += 1
elif symbol == key.D:
self.strafe[1] -= 1
elif symbol == key.SPACE:
self.jumping = False
elif symbol == key.LSHIFT:
self.crouch = False
elif symbol == key.C:
self.fov_offset += 60.0
def on_resize(self, width, height):
""" Called when the window is resized to a new `width` and `height`.
"""
# label
self.label.y = height - 10
# reticle
if self.reticle:
self.reticle.delete()
x, y = self.width // 2, self.height // 2
n = 10
self.reticle = pyglet.graphics.vertex_list(4,
('v2i', (x - n, y, x + n, y, x, y - n, x, y + n))
)
def set_2d(self):
""" Configure OpenGL to draw in 2d.
"""
width, height = self.get_size()
glDisable(GL_DEPTH_TEST)
viewport = self.get_viewport_size()
glViewport(0, 0, max(1, viewport[0]), max(1, viewport[1]))
glMatrixMode(GL_PROJECTION)
glLoadIdentity()
glOrtho(0, max(1, width), 0, max(1, height), -1, 1)
glMatrixMode(GL_MODELVIEW)
glLoadIdentity()
def set_3d(self):
""" Configure OpenGL to draw in 3d.
"""
width, height = self.get_size()
glEnable(GL_DEPTH_TEST)
viewport = self.get_viewport_size()
glViewport(0, 0, max(1, viewport[0]), max(1, viewport[1]))
glMatrixMode(GL_PROJECTION)
glLoadIdentity()
gluPerspective(PLAYER_FOV + self.fov_offset, width / float(height), 0.1, 60.0)
glMatrixMode(GL_MODELVIEW)
glLoadIdentity()
x, y = self.rotation
glRotatef(x, 0, 1, 0)
glRotatef(-y, math.cos(math.radians(x)), 0, math.sin(math.radians(x)))
x, y, z = self.position
if self.crouch:
glTranslatef(-x, -y+0.2, -z)
else:
glTranslatef(-x, -y, -z)
def on_draw(self):
""" Called by pyglet to draw the canvas.
"""
self.clear()
self.set_3d()
glColor3d(1, 1, 1)
self.model.batch.draw()
self.draw_focused_block()
self.set_2d()
self.draw_label()
self.draw_reticle()
def draw_focused_block(self):
""" Draw black edges around the block that is currently under the
crosshairs.
"""
vector = self.get_sight_vector()
block = self.model.hit_test(self.position, vector)[0]
if block:
x, y, z = block
vertex_data = cube_vertices(x, y, z, 0.51)
glColor3d(0, 0, 0)
glPolygonMode(GL_FRONT_AND_BACK, GL_LINE)
pyglet.graphics.draw(24, GL_QUADS, ('v3f/static', vertex_data))
glPolygonMode(GL_FRONT_AND_BACK, GL_FILL)
def draw_label(self):
""" Draw the label in the top left of the screen.
"""
x, y, z = self.position
self.label.text = '%02d (%.2f, %.2f, %.2f) %d / %d' % (
pyglet.clock.get_fps(), x, y, z,
len(self.model._shown), len(self.model.world))
self.label.draw()
def draw_reticle(self):
""" Draw the crosshairs in the center of the screen.
"""
glColor3d(0, 0, 0)
self.reticle.draw(GL_LINES)
def setup_fog():
""" Configure the OpenGL fog properties.
"""
# Enable fog. Fog "blends a fog color with each rasterized pixel fragment's
# post-texturing color."
glEnable(GL_FOG)
# Set the fog color.
glFogfv(GL_FOG_COLOR, (GLfloat * 4)(0.5, 0.69, 1.0, 1))
# Say we have no preference between rendering speed and quality.
glHint(GL_FOG_HINT, GL_DONT_CARE)
# Specify the equation used to compute the blending factor.
glFogi(GL_FOG_MODE, GL_LINEAR)
# How close and far away fog starts and ends. The closer the start and end,
# the denser the fog in the fog range.
glFogf(GL_FOG_START, 40.0)
glFogf(GL_FOG_END, 60.0)
def setup():
""" Basic OpenGL configuration.
"""
# Set the color of "clear", i.e. the sky, in rgba.
glClearColor(0.5, 0.69, 1.0, 1)
# Enable culling (not rendering) of back-facing facets -- facets that aren't
# visible to you.
glEnable(GL_CULL_FACE)
# Set the texture minification/magnification function to GL_NEAREST (nearest
# in Manhattan distance) to the specified texture coordinates. GL_NEAREST
# "is generally faster than GL_LINEAR, but it can produce textured images
# with sharper edges because the transition between texture elements is not
# as smooth."
glTexParameteri(GL_TEXTURE_2D, GL_TEXTURE_MIN_FILTER, GL_NEAREST)
glTexParameteri(GL_TEXTURE_2D, GL_TEXTURE_MAG_FILTER, GL_NEAREST)
setup_fog()
def main():
window = Window(width=1280, height=720, caption='Minecraft', resizable=True)
# Hide the mouse cursor and prevent the mouse from leaving the window.
window.set_exclusive_mouse(True)
setup()
pyglet.app.run()
main()
First create a python file with the name main.py and paste the above python minecraft code. This is the main python minecraft code. There is another python file you need to create.
import random as rand
import math

class NoiseParameters:
    def __init__(self, octaves, amplitude, smoothness, roughness, heightOffset):
        self.octaves = octaves
        self.amplitude = amplitude
        self.smoothness = smoothness
        self.roughness = roughness
        self.heightOffset = heightOffset

class NoiseGen:
    def __init__(self, seed):
        self.seed = seed
        self.noiseParams = NoiseParameters(
            7, 50, 450, 0.3, 20
        )

    def _getNoise2(self, n):
        n += self.seed
        n = (int(n) << 13) ^ int(n)
        newn = (n * (n * n * 60493 + 19990303) + 1376312589) & 0x7fffffff
        return 1.0 - (float(newn) / 1073741824.0)

    def _getNoise(self, x, z):
        return self._getNoise2(x + z * 57)

    def _lerp(self, a, b, z):
        mu2 = (1.0 - math.cos(z * 3.14)) / 2.0
        return (a * (1 - mu2) + b * mu2)

    def _noise(self, x, z):
        floorX = float(int(x))
        floorZ = float(int(z))

        s = 0.0,
        t = 0.0,
        u = 0.0,
        v = 0.0;#Integer declaration

        s = self._getNoise(floorX,      floorZ)
        t = self._getNoise(floorX + 1,  floorZ)
        u = self._getNoise(floorX,      floorZ + 1)
        v = self._getNoise(floorX + 1,  floorZ + 1)

        rec1 = self._lerp(s, t, x - floorX)
        rec2 = self._lerp(u, v, x - floorX)
        rec3 = self._lerp(rec1, rec2, z - floorZ)
        return rec3

    def getHeight(self, x, z):
        totalValue = 0.0

        for a in range(self.noiseParams.octaves - 1):
            freq = math.pow(2.0, a)
            amp  = math.pow(self.noiseParams.roughness, a)
            totalValue += self._noise(
                (float(x)) * freq / self.noiseParams.smoothness,
                (float(z)) * freq / self.noiseParams.smoothness
            ) * self.noiseParams.amplitude

        result = (((totalValue / 2.1) + 1.2) * self.noiseParams.amplitude) + self.noiseParams.heightOffset

        return (totalValue / 5) + self.noiseParams.heightOffset
Create another python file naming noise_gen.py or noise_generator.py and paste the above python code it is responsible for noise.
4. Download Texture images
A game has textures and images so our last file for our minecraft game is texture image file you can download it from below.
Download the above image it is a single png image and copy and paste it in the main project directory and it is responsible for all the textures shown in the game.

Above is the file structure you should have after creating all the files and pasting the images. Now we are ready to run the game.
So to run the game you need to open up the terminal or command prompt and paste the below command
python main.py
This will start the game in a new tab. It will be recommended to use the mouse to play the game. You can play it like a minecraft game. Below is the image output of how the game looks.

After you run it you can see it just looks like the real minecraft game you can create and edit blocks.
Here are the game controls of this game
- «W» to move forward
- «S» to move backward
- «A» to move left side
- «D» to move right side
- «Left click mouse» to remove a block
- «Right click mouse» to create a block
- «Space» to jump
- «Esc» to pause the game
Above are some of the game controls so I hope you ran the game successfully and did not get any errors.
Summary
This was the complete tutorial on making a minecraft game in python with source code. I hope you ran the game successfully.
This game does not have the features of the original game. You can add more features and functionalities to this game. Note that this game is just a clone and not trying to sell the game source code.
Here are more python guides you may find helpful:
- Python program to draw doraemon.
- Making a battleship game in python.
- Python program to draw shinchan.
I hope you found what you were looking for from this tutorial If you want more python guides like this do join our Telegram channel to receive updates and resources.
Thanks for reading, have a nice day 🙂
Introduction: Python Coding for Minecraft
This Instructable shows how to install and use a mod I wrote that lets you control Minecraft with python scripts. I’ll focus on Windows, though OS X and Linux should work just as well. (If you want something simpler than python, here is a Scratch version of this project.)
Python scripts can generate neat in-world things, and there are many examples on the web. With a few lines you can draw a giant glass sphere, and with a bit more work make a giant Sierpinski triangle in the sky and even import obj files like a space shuttle. I myself made fun scripts to draw a water-filled glass donut and a gigantic Klein bottle, to turn everything around into TNT and to control Minecraft with your brain using a MindFlex EEG toy. There is a whole book introducing programming using python scripts for Minecraft, and you can even make simple Minecraft-based games. I will also show how to do simple (and sometimes more elaborate) turtle-based drawings in Minecraft, while you can ride along with the drawing as the turtle.
For a while now you could write python scripts for Minecraft on the Raspberry Pi. I wanted my kids to be able to do that, but we don’t have a Pi, plus it would be nice to do this with the full desktop Minecraft. You could run your own server with the Raspberry Juice plugin which enables most of the python scripts to work. But not everyone wants to install and configure a server.
So I wrote the Raspberry Jam Mod for Minecraft 1.8 (now ported to 1.8.8, 1.8.9 and 1.9 as well) that emulates most of the Raspberry Pi Minecraft protocol (about the same as the Raspberry Juice plugin provides) and lets Raspberry Pi python scripts run with full desktop Minecraft. (I later found out that someone wrote the mcpiapi mod for Minecraft 1.7.10 a couple of weeks earlier.) I wrote this Instructable initially for Python 2.7, but I think most of my samples will work for 3.x.
I assume that you have basic facility with creating folders and downloading, unzipping, and copying files on Windows (or your operating system of choice).
You can create Python scripts for Minecraft with a text editor, the IDLE environment which comes with Python, or with Visual Studio Python Tools on Windows. The last is actually the nicest in some ways, so I’ll have some optional steps on how to do that.
This summer I plan to teach coding and basic 3D geometry to gifted middle- and high-schoolers using Minecraft, Raspberry Jam Mod, Python and Visual Studio.
If you want to do this with Minecraft Pocket Edition on Android instead, I have an Instructable for that, too.
Step 1: Install Forge for Minecraft
The Forge manages Minecraft mods, and is needed for the Raspberry Jam Mod.
I assume you have Minecraft installed.
- You need to run Minecraft 1.12.2 (the version is very important) once. To do that, start the Minecraft Launcher, and after logging in, click on Installations, and press the «New» button to create a profile. Choose «Release 1.12.2» from the dropdown, save the profile (you can give it a name like «1.12.2»), start a world and make sure it works.
- Exit Minecraft and Minecraft Launcher.
- Download Forge installer for 1.12.2.
- Run the Forge installer. Default settings should work.
- Start Minecraft. You will now have a new Forge 1.12.2 profile.
Step 2: Windows Installer [automatic Install]
If you have Windows, once you have Forge, you can install everything using a Windows installer. This will install RaspberryJamMod, a Python interpreter, IDLE for Python and sample scripts. If you don’t have Windows, or want more control, look at the next two steps (but you’ll have to adapt them if you don’t have Windows).
Step 3: Install Python [manual Installation]
You need to decide if you want Python 2.7 or Python 3.x. The Adventures in Minecraft book uses 2.7, and most of the scripts floating around the web are for 2.7, but I have converted a lot of scripts for 3.x.
1. Download your choice of Python installed from here.
2. Run the installer.
3. Click through to the Customize Python dialog, and make sure to scroll down to «Add python.exe to path», click on it and select «Will be installed on local hard drive.» If you don’t add Python to the path, you won’t be able to launch scripts with /python from within Minecraft.
Step 4: Install Mod and Scripts
1. Create a mods folder in your Minecraft folder. (To do that, press Windows-R, type %appdata%.minecraft, press enter. You will see everything in your Minecraft folder. If you already have a mods subfolder, you don’t need to do anything. Otherwise, make one. On Windows 8, click on New folder, and then type in the name mods and press enter.)
2. Download the mods.zipfile from the latest version of the Raspberry Jam Mod. Put the contents of the zip file (currently consisting of a number of folders with names like 1.8 and 1.10.2) inside the mods folder you had just made.
3. Download the latest zip file containing sample Python scripts and the mcpi library from my Raspberry Jam Mod github release. (The scripts are supposed to work on both Python 2.7 and 3.x.)
4. Open the downloaded zip file (in Chrome, by clicking on it at the bottom of the window). It has a mcpipy folder. Copy the mcpipy folder into your Minecraft folder. (To do that, click once on the mcpipy folder in the zip file, and press ctrl-c, then navigate to the %appdata%.minecraft folder as in step 1, and press ctrl-v).
Step 5: Testing Mod
Start Minecraft, making sure that you use the Forge profile.
Create a new world (it’s too easy to mess things up with the python scripts). My daughter suggested I use Creative and Superflat.
In Minecraft, type /py donut and press enter.
If all goes well, a giant glass donut will be drawn around you, and then it will be filled with water.
If you get something like a Script not found error, this probably means that you don’t have the sample scripts installed in the %appdata%.minecraftmcpipy folder.
If you get a ‘Cannot run program «python»‘ error, you don’t have your python directory in your system path. You may want to add it manually to the path, or just reinstall python, following the directions in Step 3 of my python install step.
Running a new script with /py stops any earlier scripts running (if you don’t like that, use /apy instead of /py). You can stop a script that’s running by just typing /py without any arguments.
Step 6: Getting Started Programming Minecraft in Python
The easiest way to get started programming Minecraft in python is to start with one of the simpler sample scripts. I recommend making a shortcut on your desktop to the scripts folder (%appdata%.minecraftmcpipy).
You can load the scripts into IDLE. A fun script to modify is my water-filled donut script (donut.py). For instance, change WATER to GRASS in the second last line to make a silly grass-filled donut. You can run this with /py donut from Minecraft, or just by pressing F5 in IDLE.
Or to make a simple new script, create a helloworld.py file with your favorite text editor (even Notepad) in the scripts directory. Put at the top:
from mine import *
This imports the needed library code. It also conveniently imports all the functions from the math library as well as names for all the blocks. Connect to Minecraft with:
mc = Minecraft()
You can then send a «Hello world!» message to the user with:
mc.postToChat("Hello world!")
If you want to create a diamond block right under the player, you can also do:
playerPos = mc.player.getPos()
mc.setBlock(playerPos.x,playerPos.y-1,playerPos.z,block.DIAMOND_ORE)
The coordinates for setBlock() and getPos() are measured from the player’s spawn point (which is thus (0,0,0)).
(For a list of all the block names other than DIAMOND_ORE, see mcpiblock.py in the scripts folder. You can also directly use Minecraft block numbers.)
To run your script, save it and type /py helloworld in your Minecraft world and press enter.
It’s sometimes useful to set a whole rectangular prism of blocks at one time: use mc.setBlocks(). For instance, this excerpt from my mengersponge.py script draws an 81×81 cube at the player position (the script then recursively deletes—i.e., replaces with AIR—subblocks to form the fractal image in the screenshot):
length = 3*3*3*3
mc.setBlocks(playerPos.x,playerPos.y,playerPos.z,
             playerPos.x+length-1,playerPos.y+length-1,playerPos.z+length-1,block.WOOL_PURPLE)
Technical note: Starting with from mine import * imports a lot of stuff (Minecraft, block definitions, entity definitions, math) into our namespace. This is handy for focusing on the essentials for beginners (remember that I am going to be using this to teach coding to beginners). More advanced users may prefer being more pythonic by keeping the namespaces separate and putting in the header:
import mcpi.minecraft as minecraft
import mcpi.block as block
import mcpi.entity as entity
import math
and then starting with mc = minecraft.Minecraft() or even mc = minecraft.Minecraft.create().
Step 7: Simple Turtle-based Drawing
A particularly simple way to draw in Minecraft is to use a turtle-based system. I made a very simple Turtle class (inspired by Martin O’Hanlon’s MinecraftTurtle class) that I use to introduce middle- and high-schoolers to Minecraft python scripting.
Start up a Minecraft world in creative mode, and make your player fly (double-tap spacebar). Initialize the script with:
from mineturtle import *
t = Turtle()
(I wrapped all the Minecraft connection code inside the Turtle class and it also brings math into the namespace for convenience.) You can now do things like t.go(15) to draw a line while moving 15 blocks forward, t.right(45) to rotate 45 degrees to the right, t.down(30) to rotate 30 degrees down, and thus draw simple pictures.
You move along with the turtle as it draws, which is fun, and the turtle starts off where the player is, pointing horizontally.
For instance you can draw a horizontal square with:
t.go(50)
t.right(90)
t.go(50)
t.right(90)
t.go(50)
t.right(90)
t.go(50)
You do a 7-sided star by doing:
t.go(50)
t.right(180.-180./7)
seven times. Or just once in a loop:
for i in range(7):
    t.go(50)
    t.right(180.-180./7)
You can change materials with penblock(). For instance, a golden vertical star:
t.penblock(block.GOLD_BLOCK)
for i in range(7):
    t.go(50)
    t.right(180.-180./7)
And you can change the pen width with penwidth(x). For instance, this draws a very simple glass donut (actually, a thickened 90-gon, but who can tell the difference?):
t.penblock(block.GLASS)
radius = 20
circumference = 2 * radius * pi
t.penwidth(10)
for i in range(90):
    t.go(circumference/90)
    t.left(360/90)
Here are all the methods available:
- go(x): move x blocks forward (drawing if pen is down)
- back(x): move x blocks backward (drawing if pen is down)
- penup(): pause drawing resume drawing
- left(angle): rotate left by angle (in degrees)
- right(angle): rotate right by angle (in degrees)
- up(angle): rotate up by angle (in degrees); beginners should not mix the left/right and up/down rotations or they may get unexpected results (technical note: the same as pitch(angle))
- down(angle): rotate down by angle (in degrees) (technical note: the same as pitch(-angle))
- pendelay(x): each movement or rotation of the turtle is delayed by x seconds; default is 0.05; set to zero for much faster drawing (the player will still move with each line drawn, but instantaneously from beginning to end)
- angle(x): set horizontal angle to x (clockwise in degrees; 0 = South, 90 = West, 180 = North, 270 = East); resets roll angle
- verticalangle(x): set vertical angle to x (in degrees; upward is positive; 90 = vertically up; -90 = vertically down); resets roll angle
- angles(compass,vertical,roll): set compass, vertical and roll angles; omitted arguments are taken to be zero
- penblock(x): set material for drawing to block x; for a list of the predefined blocks, see mcpi/block.py
- goto(x,y,z): set pen position to (x,y,z); you can also access the position as t.position.x, t.position.y and t.position.z
- follow(): the player follows the turtle
- nofollow(): the player doesn’t follow the turtle
- turtle(x): if x is PLAYER, this is the same as follow(), and if x is None, this is the same as nofollow(). If you are using Raspberry Jam Mod you can also use other entities than yourself as the turtle. For instance, turtle(HORSE) spawns a horse to use as a turtle (all the entities available are listed in mcpi/entity.py, but the living ones are best as others are unable to levitate; and the Ender Dragon cannot be controlled). The entity remains once the script is finished. To make it disappear, call turtle(None) or turtle(PLAYER).
- penwidth(x): set stroke width to x (default is 1; wider strokes slow down drawing, and if follow mode is on, you may end up trapped inside the stroke, so at the end you should call penup() and back out of the drawing)
- pitch(x), yaw(x) and roll(x): rotate turtle via pitch/yaw/roll angles (see next step of Instructable)
- startface() and endface(): start and finish drawing a filled convex polygon
- push() and pop(): save and restore drawing state (heading, material, face status, thickness; but not speed or turtle type); useful for L-systems
- gridalign(): align the current position and turtle direction to the grid (the best approximation to the turtle’s current direction is chosen)
The mcpiapi mod, unlike my Raspberry Jam Mod, doesn’t support setting the player’s direction. This means that the player won’t face the same direction as the turtle. (And there is some chance of other problems with turtle scripts.)
Technical note: If you already have a Minecraft object mc, initialize with t = Turtle(mc). If you omit the Minecraft object when initializing the turtle, it’s created for you, and in either case, you can access the Minecraft object via t.mc.
You can also play with python code for controlling the turtle right from the Minecraft chat window.
In Minecraft, run the turtleconsole.py script by typing: /py turtleconsole [enter].
Then every python line you enter into chat will get executed by the python interpreter. To enter a line into chat, press T, type the line and press [enter]. To exit turtleconsole, just type /py [enter] or enter quit() [enter] into chat.
The context includes a local variable t initialized to a Turtle() object, so you don’t need to run any initialization code, just things like:
t.penblock(block.GOLD_BLOCK)
t.back(10)
There is also a console for the full non-Turtle API: console.py (which includes a pre-initialized mc local variable). (Just don’t put in any postToChat() calls, or they will confuse the interpreter.)
Step 8: Advanced Turtle-based Drawing
Using the left(), right(), up() and down() methods for the turtle is easy. But for some drawings we need more sophisticated 3D control. For instance, you might want to draw a donut tilted 45 degrees up. It’s tempting to take the glass donut script from the previous step, and add before the loop:
t.up(45)
But that produces an unexpected result—see the picture. The reason for this is that the turtle will be climbing up all the time, while the d.left() method rotates it around the vertical axis, and so you get a spiral.
Instead, what we need to do is yaw/pitch/roll rotatins of the turtle. See the picture from NASA (US government works are public domain) explaining how the three angles go, and just imagine that the airplane is your turtle. (Unfortunately, because of Minecraft limitations, the roll angle doesn’t affect how the turtle looks or the point of view from which you’re viewing.) What we need to do to draw our sideways donut is first roll our turtle by 45 degrees with t.roll(45), and then when drawing the donut use t.yaw(-angle) instead of t.left(angle). The revised code is in the screenshot.
What’s nice about the yaw/pitch/roll rotations is that they are always relative to where the turtle is pointing, while left() and right() are relative to the Minecraft world.
Finally, here is a much more advanced example. Let’s draw a tree. This involves making a recursive function. Start with this to ensure that the drawing is done as fast as possible
from mineturtle import *
t = Turtle()
t.pendelay(0)
t.turtle(None)
Now we do our recursive tree function. The basic idea behind this is that a branch is just a smaller tree. So we make a function that takes a counter and a branch length. The counter specifies how many iterations the tree will go. For instance, counter=1 means just the trunk will be drawn, and counter=1 means the trunk and one set of branches will be drawn.
def tree(counter,branchLen):
  if counter == 0:
    return
  t.go(branchLen)
  for i in range(4):
    t.pitch(30)
    tree(counter-1,branchLen*0.75)
    t.pitch(-30)
    t.roll(90)
  t.back(branchLen)
First, the code checks if our counter has run down to zero. If so, we don’t have anything to draw. Then we draw a trunk. Then we draw four branches sticking out of it with a simple loop. To design this bit of code, I just imagine myself as the turtle, having just moved up along the trunk. To draw a branch, I tilt my self up by 30 degrees (i.e., t.pitch(30)) and draw a new tree of smaller size: its counter is less by one, and its trunk will be 3/4 of the length of my current trunk. I think tilt myself back down by 30 degrees. I rotate myself by 90 degrees and repeat the exercise. Finally, once I’m done with the branches, I go back down the trunk.
Finally, I just need to invoke this code. I will make a tree with a counter of 6 and an initial branch length of 20. And for good measure, I’l make it out of wood, and of course vertically upward:
t.penblock(block.WOOD)
t.verticalangle(90)
tree(6,20)
This fractal tree doesn’t look very realistic. We should make the trunk thick and the branches get thinner and thinner as they go outward (say, get half as thick, until they reach a single block), and we should switch from WOOD to LEAVES blocks as we go out. But most of all, real trees aren’t that regular. We need some randomness. The simplest form of randomness is just to give each branch a chance of failing to grow, say a 20% chance. I implemented all of these in my fancytree.py script. The resulting tree looks surprisingly realistic for something produced by such a relatively simple piece of code. A funny side-effect of how I implemented it is that there is a 20% chance that nothing will be drawn—i.e., the tree has a chance of failing to grow, which is also realistic. And each time you run the script, you get something different.
Another useful feature of the turtle drawing class is being able to draw not just lines but polygonal surfaces. To do this, just do t.startface(), draw your surface, and then do t.endface(). Once you’re in face mode, each time you draw a line, the code actually draws a triangle: one vertex is the point the turtle was when t.startface() was called and the line is the opposite edge. This draws a pentagon tilted on its side by 45 degrees:
t.roll(45)
t.startface()
for i in range(5):
  t.go(20)
  t.yaw(360/5)
t.endface()
Step 9: L-system Fractals With Turtle Graphics
Draw a triangle. Now take each line of the triangle and replace it by a line with a triangular bump on it. Repeat. Like on the animated image (public domain, based on Wikipedia), you get a Koch snowflake.
This can be modeled by a super-simple turtle-graphics program. Imagine that F means «draw forward», and «+» and «-» turn by 60 degrees, counterclockwise and clockwise, respectively. Then the initial triangle can be drawn by:
F++F++F
I.e., go forward, turn right by 120 degrees, then go forward, turn right by 120 degrees, go forward.
The triangular bump line can be drawn by:
F-F++F-F
So here’s how we can generate a snowflake. We take the initial turtle program F++F++F to draw a triangle. Each F in it represents a line. So replace each F by F-F++F-F. If we keep on going, we generate the Koch snowflake.
This is a simple example of an L-system. The idea behind an L-system is that we start with a string of characters (in this case F++F++F), and then a bunch of rules how to change the characters (in this case, the one rule to replace F with F-F++F-F) in each iteration. We apply this a bunch of times and we get a rather complicated string. For instance, after two iterations in the snowflake case, we get:
F-F++F-F-F-F++F-F++F-F++F-F-F-F++F-F++F-F++F-F-F-F++F-F++F-F++F-F-F-F++F-F++F-F++F-F-F-F++F-F++F-F++F-F-F-F++F-F
After four, we get the image above. (To really get a fractal, the lines should shrink with each iteration, but that won’t work in Minecraft.)
There is a lot of really good information in this free PDF book.
I wrote a very simple lsystem.py module. To implement the snowflake, start with boilerplate:
import lsystem
from turtle import *
t = Turtle()
t.pendelay(0)
t.penblock(block.GOLD_BLOCK)
Now we need to define the rules. I define the rules by a python dictionary:
rules = { 'F': 'F-F++F-F' }
Next we define the axiom, or starting point:
axiom = 'F++F++F'
Finally we need to tell the system what each of the symbols in the strings mean. For different L-systems, we will assign different meanings to them (rotations by different angles, for instance). So we need a second python dictionary specifying what is done for each symbol. If you don’t specify an action for a symbol, the symbol is ignored when it is time for the turtle to draw the output (but it might be important for the generation). The meanings are given by a dictionary that specifies a function to call for each symbol. One-line functions can be specified with the lambda operator. In this case, all the functions are one-liners:
dictionary = {
  'F': lambda: t.go(2),
  '+': lambda: t.yaw(60),
  '-': lambda: t.yaw(-60)
}
Finally we invoke the L-system, specifying how many iterations (in this case 4):
lsystem.lsystem(axiom, rules, dictionary, 4)
There is one special trick for some L-systems. These L-systems are grid-aligned, with all the rotations being 90 degrees. The square curve (squarecurve.py) and dragon curve (dragoncurve.py) are nice examples. The trick is to call, somewhere near the beginning of your code:
t.gridalign()
This moves your turtle to an integer grid location, and aligns its heading to a grid direction. After this, the turtle will remain exactly grid aligned provided that you move it only by integer amounts (e.g., 7, not 7.1, and not even 7. or 7.0 as these are floating point in Python), and you rotate only by integer amounts that are multiples of 90 degrees (e.g., -180, or 90, but not 90.0 or 45). The dragon curve code also gives an example of a forward function that is a bit more complicated—instead of just a line, it draws a wall with an opening in it.
Actually, calling gridalign() can sometimes be a good idea even if not all of your angles are right angles. You will probably get some round-off problems in a large image, but it can still look better. See the spacefilling curve example (rendered in purple stained glass!).
L-systems don’t have to be two-dimensional. You can include symbols that do yaw, pitch and roll rotations. For designing trees, a useful trick is to have stack commands: ‘[‘ to save the current drawing state to a stack and ‘]’ to restore it. This will use the turtle module’s push() and pop() methods. For instance, here’s a snippet of code for drawing a simple tree (ltree.py):
t.pitch(90)
rules = { 'L':'[^FL]>[^FL]>[^FL]' }
axiom = 'FL'
dictionary = {
  'F': lambda: t.go(10),
  '^': lambda: t.pitch(20),
  '>': lambda: t.roll(120),
  '[': lambda: t.push(),
  ']': lambda: t.pop()
}
lsystem.lsystem(axiom,rules,dictionary,5)
Think of the L as a leaf (though this simple code doesn’t actually draw the leaf—that would need to be added to the dictionary). We start with FL, which is a trunk plus a leaf. Then we replace each leaf by [^FL]>[^FL]>[^FL]. This is a set of three branches, each tilted by 20 degrees from the trunk, 120 degrees apart. The brackets ensure that after each new ^FL is drawn, we’re back where we were before it. This repeats, so that the leaves on the branches are replaced by triples of branches, and so on.
A more realistic tree could have more complex code for ‘[‘. It could make the succeeding branches shorter and thinner, and change their material as we get closer to the leaves (and then restore on ‘]’). I include such a tree as the demo code in lsystem.py, based on rules (with some tweaks) from the Geeky Blogger.
You can also do grid-aligned 3D things. For instance, hilbert.py has a 3D Hilbert curve.
Finally, you might want to introduce some randomization into the L-system rules. So far our rules were deterministic: a single string was given that replaces a symbol, e.g., ‘F’: ‘F-F++F-F’. But instead of a simple replacement string, one can give a Python list of pairs (p,string), where p is a probability (from 0 to 1) and string is the string to use with that probability. The probabilities for a given source symbol had better not add up to more than 1, but they can add up to less than one—in that case, there is a chance that there will be no replacement. For instance, here’s a slightly randomized version of geeky.blogger’s tree:
rules = {'A': [(0.55,'^f[^^f>>>>>>A]>>>[^^f>>>>>>A]>>>>>[^^f>>>>>>A]'),
               (0.25,'^f>>[^^f>>>>>>A]>>>[^^f>>>>>>A]')]}
This rule has a 55% chance of replacing an A with a three-branch structure, and a 25% chance of replacing it with a two-branch structure. This isn’t very random—more randomness would make things even more lifelike. I attach a screenshot of a fairly sparse forest randomly generated using this rule (and random placement of trees, subject to a minimum distance).
Step 10: Cartesian Drawing
I also made a simple class for drawing with Cartesian coordinates. You can initialize with:
from drawing import *
d = Drawing()
(This initializes the Minecraft connection and brings math and block names into the namespace.) Then you have several convenience methods:
- d.penwidth(x): sets thickness of points/lines/faces
- d.line(x1,x2,x3,y1,y2,y3,block): draws line from (x1,x2,x3) to (y1,y2,y3) made from the block material
- d.face(vertexlist,block): draws a face with the vertices in the vertexlist made from the block material
For instance, you can do a rectangle sloped at 45 degrees made of glass at level 0 at the spawn point with:
d.face([(0,0,0),(0,10,10),(10,10,10),(10,0,0)])
For fun, I adapted Simon Tatham’s really neat polyhedron generation code to use the Minecraft drawing class. His code starts with a number of random points on a sphere, and then simulates them repelling themselves until they stabilize into a configuration that is often regular. Then he has two neat methods of making a polyhedron out of these points, a face method and a vertex method. I put this in polyhedron.py. This script takes commandline arguments. For instance, to draw an icosahedron use 12 points and the vertex construction. Directly from Minecraft:
/py polyhedron 12 vertex
For an dodecahedron, change vertex to face. You can also add one more argument for size. The polyhedron will be made of glass with stone edges and will be centered around the player.
Technical note: If you already have a Minecraft object mc, initialize with d = Drawing(mc). In either case, you can access the Minecraft object via d.mc.
Step 11: Optional: Disable Pause on Loss of Focus
Minecraft normally pauses the game and goes to the Game menu when you alt-tab out of it or otherwise lose focus. This makes it harder to see what your python scripts are doing if you’re launching them from outside of Minecraft. To do that, you can edit the options.txt file in your Minecraft directory (%appdata%.minecraft on Windows), change the
pauseOnLostFocus:true
line to
pauseOnLostFocus:false
and then save, and restart Minecraft.
This is particularly nice for running python scripts interactively. In the screenshot, I am playing with Michael O’Hanlon’s 3D turtle drawing (and, yes, that’s Deep Space Nine in the background).
Step 12: Advanced Notes 1: Drawing Objects Defined by an Inequality
There are basically two different techniques for drawing mathematically defined objects with a python script in Minecraft.
One way is to define a solid object by an inequality. For instance, a sphere centered on (x0,y0,z0) with radius r can be defined by the inequality:
(x-x0)**2 + (y-y0)**2 + (z-z0)**2 <= r**2
(I.e., the distance to (x0,y0,z0) is at most r.) So to draw a sphere, just loop through all points (x,y,z) in a cube of side-length 2*r+1 surrounding (x0,y0,z0), and draw a block if the above inequality holds.
I learned this technique from the sample nt7s_sphere.py script. Start with the standard header and init Minecraft connection code:
from mine import *
mc = Minecraft()
Then just do:
radius = 8
playerPos = mc.player.getPos()
for x in range(radius*-1,radius):
  for y in range(radius*-1, radius):
    for z in range(radius*-1,radius):
      if x**2 + y**2 + z**2 < radius**2:
        mc.setBlock(playerPos.x + x, playerPos.y + y + radius, playerPos.z - z - 10, block.GLASS)
This draws a sphere of the specified radius above the player, and a little offset in the z-direction.
I use the same technique, but with a more complicated formula, in my donut.py script (yes, this is more complicated than the turtle-based method):
for x in range(-R-r,R+r):
     for y in range(-R-r,R+r):
        xy_dist = math.sqrt(x**2 + y**2)
        if (xy_dist > 0):
           ringx = x / xy_dist * R # nearest point on major ring
           ringy = y / xy_dist * R
           ring_dist_sq = (x-ringx)**2 + (y-ringy)**2
           for z in range(-R-r,R+r):
               if (ring_dist_sq + z**2 <= r**2):
                  mc.setBlock(mcx+x, mcy+z, mcz+y, mcblock, mcmeta)
While the inequality technique works best for solid shapes, you can use it for hollow shapes in two ways. One way is to use two inequalities, for instance in the case of the sphere one to make sure that we’re within the outer radius of the center and another to make sure we’re not closer than the inner radius. The other way is just to draw another object with smaller dimensions made out of air inside the larger solid object, much as in my donut.py script, I initially draw a glass donut, and then replace the inside of it with water.
Step 13: Advanced Notes 2: Drawing an Object Defined by a Parametric Surface
One can also draw a surface by parametrizing it with two parameters, say a and b, and then looping over a range of these parameters, setting blocks where needed. In my Klein bottle and Mobius strip scripts, I have a general draw_surface() method that lets one do this. For instance, the Mobius strip (see my mobius.py script) is defined by the three formulae:
x = (3 + a * cos(b/2)) * cos(b)
y = a * sin(b/2)
z = (3 + a * cos(b/2)) * sin(b)
with a ranging from -1 to 1 and b ranging from 0 to 2*pi (yet another reason why this can be in the pi/e contest?). You can think of b as defining the angle around the circuit, and a moving one from one edge to the other.
Using scripts like this, you need to ensure that in your loops over a and b, the steps are sufficiently small that there are no gaps in the surface. Unless that’s the effect you’re after.
For details and examples see mobius.py, klein.py and klein2.py.
Step 14: Advanced Notes 3: Knots
You can find parametric equation for knots on the net. This time, we’re going to do things slightly different from before. Before, we had loops driving calls to mc.setBlock() directly. But in our surface plots, such as the Klein bottle, often the same block would get drawn multiple times, which is slow and inefficient. A better way is to keep track of the set of exact blocks that were already drawn to avoid redoing the same thing.
Let me go through an example like that (in knot.py) to draw a knot. Start with a standard header like:
from mine import *
We now need to generate our knot. I used the cinquefoil formulas from here. This requires looping a parameter t from 0 to 2*pi, with small enough steps to ensure we don’t have gaps. I used 10000 steps. Since this is done in-memory, and computers are fast, and overlapping blocks are only sent once to Minecraft, it’s easier to easier to do more steps than to think how many is enough. It’s important for the coordinates that go in the dictionary to be integers so we can tell that the same block is being drawing (a block at (1.1,1.2,1.4) and a block at (1,1,1) are the same thing in Minecraft).
We first initialize and set the position of the knot relative to the player. Note that the player position need not be an integer (you might not be standing exactly aligned with a block) and should be turned into an integer.
mc = Minecraft()
playerPos = mc.player.getPos()
scale = 12
x0 = int(playerPos.x)
y0 = int(playerPos.y + 5*scale)
z0 = int(playerPos.z)
Now we make an empty set named done to store the coordinates we’ve already drawn:
done = set()
And we draw the set:
t = 0
while t < 2*pi:
  x = x0+int( scale * cos(2*t) * (3 + cos(5*t)) )
  y = y0+int( scale * sin(2*t) * (3 + cos(5*t)) )
  z = z0+int( scale * sin(5*t) )
  if (x,y,z) not in done:
     mc.setBlock(x,y,z,block.GOLD_BLOCK)
     done.add((x,y,z))
  t += 2*pi / 10000
This only draws data that isn’t already drawn. Note that we need to round off the x, y and z coordinates with the int() function. That’s the magic behind the overlap removal: when the rounded coordinates are the same, only one block is drawn. (Note: the double parenthesis in the done.add((x,y,z)) line are due to the fact that what we’re adding to the set is the coordinate triple (x,y,z).)
The above code is in knot.py.
The knot would look better if the rope were thicker. There are many ways one can do that. An inefficient way, but easy since computers are fast these days, is just to draw a little ball instead of a point at each pixel. To do that, first I make a little utility function to draw a ball while checking in the done set to ensure there are no duplicate blocks:
def ball(x0,y0,z0,r,block,done):
  for x in range(-r,r):
    for y in range(-r,r):
      for z in range(-r,r):
         if (x**2 + y**2 + z**2 <= r**2):
            if not (x0+x,y0+y,z0+z) in done:
               mc.setBlock(x0+x,y0+y,z0+z, block)
               done.add((x0+x,y0+y,z0+z))
This uses the inequality method to fill in a ball at (x0,y0,z0), of radius r.
Then just modify our knot-making while loop to make a ball instead of just a point:
scale = 10
x0 = int(playerPos.x)
y0 = int(playerPos.y + 5*scale)
z0 = int(playerPos.z)
done = set()
t = 0
while t < 2*pi:
  x = x0+int( scale * cos(2*t) * (3 + cos(5*t)) )
  y = y0+int( scale * sin(2*t) * (3 + cos(5*t)) )
  z = z0+int( scale * sin(5*t) )
  ball(x,y,z,4,block.GOLD_BLOCK,done)
  t += 2*pi / 10000
The result is in knot2.py in the sample scripts.
Other sample knots are in trefoil.py, trefoil2.py and borromean.py. If you draw with multiple materials, you can use a dictionary in place of a set, or just go sequentially through the different materials and clear the set before each (that’s what I do in trefoil2.py and borromean.py).
Step 15: Advanced Note 4: Flying With Your Brain
In another Instructable, I describe how to hack a Mindflex EEG toy to work over Bluetooth. Using python and a modified version of the NeuroPy package, you can now control Minecraft with your brain. Here’s how to do it, either with the Mindflex or with a full Mindwave Mobile set. In my example scripts, I do this in the neurosky.py script.
Start by importing relevant packages and initializing Minecraft:
from mine import *
from NeuroPy.NeuroPy import NeuroPy
mc = Minecraft()
Then connect to the EEG headset. My hacked Mindflex EEG toy connects to my Windows laptop as COM11 and works over 57600 baud. It also needs a special initialization string to be sent to it to switch it to 57600 baud (and raw mode). This was done with:
eeg = NeuroPy("COM11",57600,True)
If you have an official Mindwave Mobile (or are using Mindflex but left it at 9600 baud), then you can omit the «,True» part.
Now we set up a simple callback routine that will move you upward (this needs Creative mode) when the «meditation» value from the eeg (which ranges from 0 to 100) goes above 60, and to move downward when it goes below 40:
up = 60
down = 40
def callback(a):
    mc.postToChat(a)
    if a > up:
       pos = mc.player.getPos()
       pos.y = pos.y + 1
       if mc.getBlock(pos.x,pos.y,pos.z) == block.AIR.id:
          mc.player.setPos(pos)
    elif a < down:
       pos = mc.player.getPos()
       pos.y = pos.y - 1
       if mc.getBlock(pos.x,pos.y,pos.z) == block.AIR.id:
          mc.player.setPos(pos)
eeg.setCallBack("meditation", callback)
For good measure, I posted the meditation value to chat. Now, all we need to do is start up the EEG and inform the user:
mc.postToChat("Connecting to EEG")
eeg.start()
mc.postToChat("To fly up, be meditative")
Finally, we need to keep the script from exiting, by starting an endless loop of sleeping:
while True:
    time.sleep(10)
(My neurosky.py script is slightly fancier by letting you select whether to work with the «meditation» or the «attention» value from the headset. By default it does attention, but /py neurosky m will start it in meditation mode.)
Then turn on the headset, and start the script with /py scriptname. To stop the script, do /py again.
Step 16: Optional: Visual Studio With Python and Minecraft: Getting Started
If you’re running on Windows, Visual Studio (I recommend free Visual Studio Express for Desktop 2015) together with the Python Tools is a nice way to develop python code for Minecraft. (But if you used my Windows installer for the mod, you’ll need a full official Python installation instead of what I bundled, or else you’ll need to use PTVS to set up a custom environment pointed to %appdata%.minecraftpythonX.)
A really useful thing is that Visual Studio’s code completion will help you with the Minecraft python api. For instance, when you type «block.» it will pop up a list of all the block types (AIR, BED, etc.).
Make sure you have installed Python, the mod, and the sample scripts.
1. Download and install Visual Studio Community Edition 2013.
2. Download and install Python Tools for Visual Studio (PTVS 2.1 VS 2013.msi).
3. Start Visual Studio.
4. Click on «Open Project», search for your sample scripts folder (%appdata%.minecraftmcpipy with Raspberry Jam Mod) and load the mcpipy.sln solution.
5. In the Solution Explorer window on the right, you can choose an existing script to modify, for instance knot2.py (or you can create a new one by clicking on the bold mcpipy in the Solution Explorer and choosing from the main menu «Project», «Add new item», and then choosing «Python» and «Empty module»).
Now you can edit the script to your heart’s content.
Step 17: Optional: Visual Studio With Python and Minecraft: Running and Debugging
Because we set up all the scripts to be part of one project, to run or debug a script, you need to tell Visual Studio which script is the one you want to run. Right click on the script in the Solution Explorer window (if you lose the Solution Explorer, go to the «Windows» menu and choose «Reset Window Layout») and «Set as Startup File».
You will also want to have Minecraft running with a world opened, or otherwise your script won’t be able to connect to Minecraft.
After setting the startup file, you can run by pulling down «Debug», and choosing «Start debugging» (or just press F5) or «Start without debugging» (ctrl-F5). If you choose «Start debugging», the script will run much more slowly, but you will have useful debug features, like the ability to pause the script at any time, step through it step-by-step (there are useful buttons on the toolbar), and examine the variables while running (see the «Autos» and «Locals» boxes).
You can also run in debug mode up to a particular line in the script by right-clicking on the line and choosing «Run to cursor». This is handy if you know that something is wrong in your script around that line, and you want to have a look at the variables at that point. For instance, if you run the knot2.py script up to around the line that invokes draw_data(), you can see the contents of the knot dictionary that stores the list of blocks to be drawn.
Step 18: Additional Resources
The best resource for programming Minecraft in python is the Adventures in Minecraft book by Martin O’Hanlon.
O’Hanlon also has a lot of good information on the stuffaboutcode.com site. In particular, he has an API reference here. The Raspberry Jam Mod (and mcpiapi mod) supports just about everything that the Raspberry Juice server plugin does.
The real-time working analog clock in the picture above is from one of the stuffaboutcode scripts (sitting above one of my donuts): /py stuffaboutcode_clock
A rather cool thing that O’Hanlon did was to write a python script to convert Wavefront mesh.obj files to Minecraft. I’ve adapted this to convert 3DS, PLY and binary STL files as well. For instance, you can draw a space shuttle with /py render shuttle (there are .txt files describing the block choices in the mcpipy/models directory; the meshes will automatically be downloaded).
10 People Made This Project!
Recommendations
Hi!
This is my first time writing something like this, so please do bear with me (I’m a newbie in Python, so I’m not 100% correct, nor am I confident on this, but I raised it to verify if it is possible — I’ll be doing it a bit later). I posted this just in case there are others who would encounter the same error as I did.

As per the screenshot, it shows that the installation package cannot be opened. It says that either: (a) The package does not exist, or (b) it isn’t a valid Windows installer package. Instead, I snooped on install.py, and I found that you specifically used Liberica JDK 17.0.3 (via the download link given) for this project. However, checking the developer’s site, I found this which states that:
Some users running on Windows may encounter Windows Defender SmartScreen popup during installation of Liberica JDK: This is caused by a new certificate used by BellSoft to sign the binaries.
Their recommendation is to run it anyway (it gets flagged by Windows Defender Smartscreen Popup, so Situation B is likely the case). Knowing this, there are two possible options: (a) Install the specific JDK version manually (but I’m not sure how this would work, because the code doesn’t seem to check if that specific kit is already installed), or (b) as the developer’s link says, run a silent installation by adding /quiet to the installation configuration at line 54, as shown below:

I haven’t really tested any of the two yet, but I’m going to do the latter. I’m hoping it might work. Cheers!
Also to note: I ran this with Python 3.9.12. I tried running it first on 3.10, but it fails because of a problem with the wget() function. Seems like the function isn’t working properly on 3.10, based on what I saw after I tried installing a package (I don’t remember if it was PIP or not: I’m a newbie, so I didn’t completely understand what it statement was when I initially saw it — I only remembered when I tried running this).