Продолжая наш цикл аркадных игр на Python, напишем свою реализацю игры Пин-Понг на Python с использованием библиотеки tkinter.
- Создание игрового поля.
- Движение мячика.
- Управление ракетками.
- Реализация отскоков.
- Подсчет отчков и респаун мячика.
Создание игрового поля.
Начнем с установки игрового поля. Зададим родительское окно, область для отрисовки анимации и основные элементы игрового поля.
Обратите внимание на создание глобальных переменных в начале скрипта. Они нам пригодятся для того, чтобы нам было легче настраивать нашу игру. Если у нас ширина 900 пикселей, то проще создать переменную WIDTH, присвоить ей значение 900 и использовать ее имя в тексте программы, чем вручную каждый раз переписывать 900. Вы ощутите пользу от этого, когда захотите изменить ширину окна, и сможете сделать это просто изменив значение этой переменной:
from tkinter import *

# глобальные переменные
# настройки окна
WIDTH = 900
HEIGHT = 300

# настройки ракеток

# ширина ракетки
PAD_W = 10
# высота ракетки
PAD_H = 100

# настройки мяча

# радиус мяча
BALL_RADIUS = 30

# устанавливаем окно
root = Tk()
root.title("PythonicWay Pong")

# область анимации
c = Canvas(root, width=WIDTH, height=HEIGHT, background="#003300")
c.pack()

# элементы игрового поля

# левая линия
c.create_line(PAD_W, 0, PAD_W, HEIGHT, fill="white")
# правая линия
c.create_line(WIDTH-PAD_W, 0, WIDTH-PAD_W, HEIGHT, fill="white")
# центральная линия
c.create_line(WIDTH/2, 0, WIDTH/2, HEIGHT, fill="white")

# установка игровых объектов

# создаем мяч
BALL = c.create_oval(WIDTH/2-BALL_RADIUS/2,
                     HEIGHT/2-BALL_RADIUS/2,
                     WIDTH/2+BALL_RADIUS/2,
                     HEIGHT/2+BALL_RADIUS/2, fill="white")

# левая ракетка
LEFT_PAD = c.create_line(PAD_W/2, 0, PAD_W/2, PAD_H, width=PAD_W, fill="yellow")

# правая ракетка
RIGHT_PAD = c.create_line(WIDTH-PAD_W/2, 0, WIDTH-PAD_W/2,
                          PAD_H, width=PAD_W, fill="yellow")

# запускаем работу окна
root.mainloop()
Должно получиться примерно следующее:

Заставляем мячик двигаться.
Создадим функцию move_ball в которой пропишем код движения мяча. После этого создадим функцию main в которой будем вызывать move_ball и рекурсивно саму себя через root.after
# добавим глобальные переменные для скорости движения мяча
# по горизонтали
BALL_X_CHANGE = 20
# по вертикали
BALL_Y_CHANGE = 0

def move_ball():
    c.move(BALL, BALL_X_CHANGE, BALL_Y_CHANGE)

def main():
    move_ball()
    # вызываем саму себя каждые 30 миллисекунд
    root.after(30, main)

# запускаем движение
main()
Если вы все правильно добавили, то при запуске скрипта мяч летит в правую сторону. Вы можете изменить скорость и направление движения по горизонтали, изменяя значение BALL_X_CHANGE.
Задаем управление движением ракеток.
Логика движения ракеток будет следующая. Задается скорость ракетки — изначально она равна нулю, то есть ракетка стоит на месте. Как только пользователь нажимает клавишу — скорость изменяется, и ракетка едет вверх либо вниз. Когда игрок отпускает клавишу скорость ракетки опять становится равна нулю.
# зададим глобальные переменные скорости движения ракеток
# скорось с которой будут ездить ракетки
PAD_SPEED = 20
# скорость левой платформы
LEFT_PAD_SPEED = 0
# скорость правой ракетки
RIGHT_PAD_SPEED = 0

# функция движения обеих ракеток
def move_pads():
    # для удобства создадим словарь, где ракетке соответствует ее скорость
    PADS = {LEFT_PAD: LEFT_PAD_SPEED,
            RIGHT_PAD: RIGHT_PAD_SPEED}
    # перебираем ракетки
    for pad in PADS:
        # двигаем ракетку с заданной скоростью
        c.move(pad, 0, PADS[pad])
        # если ракетка вылезает за игровое поле возвращаем ее на место
        if c.coords(pad)[1] < 0:
            c.move(pad, 0, -c.coords(pad)[1])
        elif c.coords(pad)[3] > HEIGHT:
            c.move(pad, 0, HEIGHT - c.coords(pad)[3])

# Вставляем созданную функцию в main
def main():
     move_ball()
     move_pads()
     root.after(30, main)

# Установим фокус на Canvas чтобы он реагировал на нажатия клавиш
c.focus_set()

# Напишем функцию обработки нажатия клавиш
def movement_handler(event):
    global LEFT_PAD_SPEED, RIGHT_PAD_SPEED
    if event.keysym == "w":
        LEFT_PAD_SPEED = -PAD_SPEED
    elif event.keysym == "s":
        LEFT_PAD_SPEED = PAD_SPEED
    elif event.keysym == "Up":
        RIGHT_PAD_SPEED = -PAD_SPEED
    elif event.keysym == "Down":
        RIGHT_PAD_SPEED = PAD_SPEED

# Привяжем к Canvas эту функцию
c.bind("<KeyPress>", movement_handler)

# Создадим функцию реагирования на отпускание клавиши
def stop_pad(event):
    global LEFT_PAD_SPEED, RIGHT_PAD_SPEED
    if event.keysym in "ws":
        LEFT_PAD_SPEED = 0
    elif event.keysym in ("Up", "Down"):
        RIGHT_PAD_SPEED = 0

# Привяжем к Canvas эту функцию
c.bind("<KeyRelease>", stop_pad)
Теперь мы можем управлять обеими ракетками.
Отскок мячика от стенок и «ракеток».
Отскок реализуется достаточно просто: при соприкосновении со стенкой или «ракеткой» мы будем изменять значение переменных движения мяча на противоположные. Ради интереса при ударе о ракетку будет увеличиваться горизонтальная скорость мячика и случайным образом изменяться вертикальная.
# импортируем библиотеку random
import random

# Добавляем глобальные переменные
# Насколько будет увеличиваться скорость мяча с каждым ударом
BALL_SPEED_UP = 1.05
# Максимальная скорость мяча
BALL_MAX_SPEED = 40
# Начальная скорость по горизонтали
BALL_X_SPEED = 20
# Начальная скорость по вертикали
BALL_Y_SPEED = 20
# Добавим глобальную переменную отвечающую за расстояние
# до правого края игрового поля
right_line_distance = WIDTH - PAD_W

# функция отскока мяча
def bounce(action):
    global BALL_X_SPEED, BALL_Y_SPEED
    # ударили ракеткой
    if action == "strike":
        BALL_Y_SPEED = random.randrange(-10, 10)
        if abs(BALL_X_SPEED) < BALL_MAX_SPEED:
            BALL_X_SPEED *= -BALL_SPEED_UP
        else:
            BALL_X_SPEED = -BALL_X_SPEED
    else:
        BALL_Y_SPEED = -BALL_Y_SPEED

# Переписываем функцию движения мяча с учетом наших изменений
def move_ball():
    # определяем координаты сторон мяча и его центра
    ball_left, ball_top, ball_right, ball_bot = c.coords(BALL)
    ball_center = (ball_top + ball_bot) / 2

    # вертикальный отскок
    # Если мы далеко от вертикальных линий - просто двигаем мяч
    if ball_right + BALL_X_SPEED < right_line_distance and
            ball_left + BALL_X_SPEED > PAD_W:
        c.move(BALL, BALL_X_SPEED, BALL_Y_SPEED)
    # Если мяч касается своей правой или левой стороной границы поля
    elif ball_right == right_line_distance or ball_left == PAD_W:
        # Проверяем правой или левой стороны мы касаемся
        if ball_right > WIDTH / 2:
            # Если правой, то сравниваем позицию центра мяча
            # с позицией правой ракетки.
            # И если мяч в пределах ракетки делаем отскок
            if c.coords(RIGHT_PAD)[1] < ball_center < c.coords(RIGHT_PAD)[3]:
                bounce("strike")
            else:
                # Иначе игрок пропустил - тут оставим пока pass, его мы заменим на подсчет очков и респаун мячика
                pass
        else:
            # То же самое для левого игрока
            if c.coords(LEFT_PAD)[1] < ball_center < c.coords(LEFT_PAD)[3]:
                bounce("strike")
            else:
                pass
    # Проверка ситуации, в которой мячик может вылететь за границы игрового поля.
    # В таком случае просто двигаем его к границе поля.
    else:
        if ball_right > WIDTH / 2:
            c.move(BALL, right_line_distance-ball_right, BALL_Y_SPEED)
        else:
            c.move(BALL, -ball_left+PAD_W, BALL_Y_SPEED)
    # горизонтальный отскок
    if ball_top + BALL_Y_SPEED < 0 or ball_bot + BALL_Y_SPEED > HEIGHT:
        bounce("ricochet")
Теперь наш мячек отскакивает от стенок и ракеток и зависает если попадает в вертикальную границу поля, но не попадает в ракетку.
Подсчет очков и респаун мячика.
Создадим глобальные переменные очков для каждого игрока и обнулим их.
PLAYER_1_SCORE = 0
PLAYER_2_SCORE = 0
Теперь добавим текстовые объекты в которых будем отображать счет.
p_1_text = c.create_text(WIDTH-WIDTH/6, PAD_H/4,
                         text=PLAYER_1_SCORE,
                         font="Arial 20",
                         fill="white")

p_2_text = c.create_text(WIDTH/6, PAD_H/4,
                          text=PLAYER_2_SCORE,
                          font="Arial 20",
                          fill="white")
Создадим функции изменения счета и респауна мяча
# Добавьте глобальную переменную INITIAL_SPEED
INITIAL_SPEED = 20

def update_score(player):
    global PLAYER_1_SCORE, PLAYER_2_SCORE
    if player == "right":
        PLAYER_1_SCORE += 1
        c.itemconfig(p_1_text, text=PLAYER_1_SCORE)
    else:
        PLAYER_2_SCORE += 1
        c.itemconfig(p_2_text, text=PLAYER_2_SCORE)

def spawn_ball():
    global BALL_X_SPEED
    # Выставляем мяч по центру
    c.coords(BALL, WIDTH/2-BALL_RADIUS/2,
             HEIGHT/2-BALL_RADIUS/2,
             WIDTH/2+BALL_RADIUS/2,
             HEIGHT/2+BALL_RADIUS/2)
    # Задаем мячу направление в сторону проигравшего игрока,
    # но снижаем скорость до изначальной
    BALL_X_SPEED = -(BALL_X_SPEED * -INITIAL_SPEED) / abs(BALL_X_SPEED)
Осталось вставить вызов этих функций вместо pass в функцию move_ball. Замените
...
            if c.coords(RIGHT_PAD)[1] < ball_center < c.coords(RIGHT_PAD)[3]:
                bounce("strike")
            else:
                # Иначе игрок пропустил - тут оставим пока pass, его мы заменим на подсчет очков и респаун мячика
                pass
        else:
            # То же самое для левого игрока
            if c.coords(LEFT_PAD)[1] < ball_center < c.coords(LEFT_PAD)[3]:
                bounce("strike")
            else:
                pass
...
на
            if c.coords(RIGHT_PAD)[1] < ball_center < c.coords(RIGHT_PAD)[3]:
                bounce("strike")
            else:
                update_score("left")
                spawn_ball()
        else:
            if c.coords(LEFT_PAD)[1] < ball_center < c.coords(LEFT_PAD)[3]:
                bounce("strike")
            else:
                update_score("right")
                spawn_ball()
Теперь наш пин-понг можно считать завершенным.

Приятной игры!
Полный код игры пин-понг на Python на GitHub.
import turtle
sc = turtle.Screen()
sc.title("Pong game")
sc.bgcolor("white")
sc.setup(width=1000, height=600)
left_pad = turtle.Turtle()
left_pad.speed(0)
left_pad.shape("square")
left_pad.color("black")
left_pad.shapesize(stretch_wid=6, stretch_len=2)
left_pad.penup()
left_pad.goto(-400, 0)
right_pad = turtle.Turtle()
right_pad.speed(0)
right_pad.shape("square")
right_pad.color("black")
right_pad.shapesize(stretch_wid=6, stretch_len=2)
right_pad.penup()
right_pad.goto(400, 0)
hit_ball = turtle.Turtle()
hit_ball.speed(40)
hit_ball.shape("circle")
hit_ball.color("blue")
hit_ball.penup()
hit_ball.goto(0, 0)
hit_ball.dx = 5
hit_ball.dy = -5
left_player = 0
right_player = 0
sketch = turtle.Turtle()
sketch.speed(0)
sketch.color("blue")
sketch.penup()
sketch.hideturtle()
sketch.goto(0, 260)
sketch.write("Left_player : 0 Right_player: 0",
align="center", font=("Courier", 24, "normal"))
def paddleaup():
y = left_pad.ycor()
y += 20
left_pad.sety(y)
def paddleadown():
y = left_pad.ycor()
y -= 20
left_pad.sety(y)
def paddlebup():
y = right_pad.ycor()
y += 20
right_pad.sety(y)
def paddlebdown():
y = right_pad.ycor()
y -= 20
right_pad.sety(y)
sc.listen()
sc.onkeypress(paddleaup, "e")
sc.onkeypress(paddleadown, "x")
sc.onkeypress(paddlebup, "Up")
sc.onkeypress(paddlebdown, "Down")
while True:
sc.update()
hit_ball.setx(hit_ball.xcor()+hit_ball.dx)
hit_ball.sety(hit_ball.ycor()+hit_ball.dy)
if hit_ball.ycor() > 280:
hit_ball.sety(280)
hit_ball.dy *= -1
if hit_ball.ycor() < -280:
hit_ball.sety(-280)
hit_ball.dy *= -1
if hit_ball.xcor() > 500:
hit_ball.goto(0, 0)
hit_ball.dy *= -1
left_player += 1
sketch.clear()
sketch.write("Left_player : {} Right_player: {}".format(
left_player, right_player), align="center",
font=("Courier", 24, "normal"))
if hit_ball.xcor() < -500:
hit_ball.goto(0, 0)
hit_ball.dy *= -1
right_player += 1
sketch.clear()
sketch.write("Left_player : {} Right_player: {}".format(
left_player, right_player), align="center",
font=("Courier", 24, "normal"))
if (hit_ball.xcor() > 360 and
hit_ball.xcor() < 370) and
(hit_ball.ycor() < right_pad.ycor()+40 and
hit_ball.ycor() > right_pad.ycor()-40):
hit_ball.setx(360)
hit_ball.dx*=-1
if (hit_ball.xcor()<-360 and
hit_ball.xcor()>-370) and
(hit_ball.ycor()<left_pad.ycor()+40 and
hit_ball.ycor()>left_pad.ycor()-40):
hit_ball.setx(-360)
hit_ball.dx*=-1
В этой статье мы разберём как создать игру Пинг понг на библиотеки PyGame для языка программирования Python, думаю будет очень интересно.
Также перед прочтением этой статья настоятельно рекомендую почитать мой цикл про основы PyGame:
- Основы Python библиотеки PyGame, Часть 1;
- Pygame основы часть 2, Создание фигур;
- PyGame Основы часть 3. Анимация и события;
Знания из них пригодиться в этой статье.
Создание PyGame пинг понг:
Перед тем как сначинать создавать игру, нужно подключить нужные компоненты, вот что мы подключаем:
Как видите мы подключили сам PyGame и sys, последний нужен нам для того чтобы закрывать игру.
Дальше продолжаем подготовку, назначим несколько переменных которые нам пригодятся:
|
1 2 3 4 5 6 7 8 9 10 11 12 13 14 15 16 17 18 19 20 21 22 23 24 25 26 27 28 29 30 31 32 33 34 |
# Инициализация PyGame pygame.init() # Назначаем чёрный цвет BLACK = (0, 0, 0) # Назначаем зелёный цвет GREEN = (0, 200, 64) # Назначаем жёлтый цвет YELLOW = (225, 225, 0) # Позиция по Y для блока posY_block = 150 # Позиция по Y для шарика posX_circle = 80 # Позиция по X для шарика posY_circle = 150 # Направление шарика на право circle_right = True # Направление шарика вверх circle_top = True # Скорость speed = 3 # Ширина окна игры screenWidth = 800 # Высота окна игры screenHeight = 400 # Создаём окно screen = pygame.display.set_mode((screenWidth, screenHeight)) # Берём компонент часов clock = pygame.time.Clock() |
В начале мы инициализируем проект на PyGame, потом назначаем цвета которые будем использовать, после назначаем координаты объектов, сначала блока которым будем управлять, потом шарика, который надо отбивать.
Дальше, самое интересное, создаём переменные которые отвечают за направление шарика, первая это circle_right, если значение True, то направляться будет на право, если False налево, и circle_top, если True, то направление шарика на верх, если False то вниз.
Последние, мы закачаем переменные для скорости и параметров окна игры, создаём окно и берём компонент часы, он нам нужен будет, чтобы настроить FPS.
Теперь перейдём к основному, для этого мы сделаем цикл, в котором будет происходить вся логика:
То есть цикл у нас всегда True, так как он нам нужен для рендеринга, теперь пропишем всё логику:
|
1 2 3 4 5 6 7 8 9 10 11 12 13 14 15 16 17 18 19 |
# Назначаем FPS clock.tick(60) # Красим экран в чёрный цвет screen.fill(BLACK) # Отслеживаем зажатие клавиш pressed_keys = pygame.key.get_pressed() # Если зажата стрелка верх if pressed_keys[pygame.K_UP]: # Проверяем позицию блока по Y больше нуля if posY_block > 0: # То # Вычитаем из позиции скорость posY_block -= speed # Если нажата стрелка вниз то if pressed_keys[pygame.K_DOWN]: # Проверяем позиция по Y плюс 100 больше высоты окна if posY_block + 100 < screenHeight: # То # Увеличиваем позицию Y на скорость posY_block += speed |
Тут мы назначаем FPS, с помощью clock.tick(60), как и понятно, он будет 60, потом закрашиваем экран в чёрный цвет, это нужно будет для будущего рендеринга, дальше начинаем отслеживать зажатие клавиши, это нужно для управление блоком, зависимости какая кнопка нажата, мы меняем позицию, ещё можете заметить, что там есть условие, оно нужно для того, чтобы блок не вышел за границы экрана.
Теперь идут условия для позиции шарика, вот они:
|
1 2 3 4 5 6 7 8 9 10 11 12 13 14 15 16 17 18 19 20 21 22 23 24 25 26 27 28 29 |
# Проверяем что наш шарик достиг левого края окна if posX_circle — 50 <= 0: # Меняем направление на право circle_right = True # Проверяем что шарик достиг верхнего края if posY_circle — 50 <= 0: # Меняем направление вниз circle_top = False # Если шарик достиг нижнего края elif posY_circle + 50 >= screenHeight: # Меняем направление вверх circle_top = True # Проверяем направление на право if circle_right: # Увеличиваем позицию X на скорость posX_circle += speed else: # Иначе # Уменьшаем позицию X на скорость posX_circle -= speed # Проверяем направление на верх if circle_top: # Уменьшаем позицию Y на скорость posY_circle -= speed else: # Иначе # Увеличиваем позицию Y на скорость posY_circle += speed |
В начале мы проверяем дошёл ли шарик до левого края, если да, то меняем направление, потом проверяем дошёл ли шарик до нижнего или верхнего края, если одно из этого верно, то меняем направление.
Дальше зависимо от направление уменьшая или увеличиваем позицию по X или Y, ещё вы можете заметить, что для проверки мы в некоторых случаях уменьшаем или увеличиваем позицию на 50, это связано с тем, что диаметр шара будет 100, соответственно, чтобы он не проваливался, нужно проверять при столкновение его радиус.
Осталась последняя проверка, проверка что шарик оттолкнулся от блока или провалился в за правый край, вот что мы пишем:
|
# Проверка того, что шарик столкнулся с блоком if posY_block <= posY_circle <= posY_block + 100 and screenWidth — 20 <= posX_circle + 50 <= screenWidth: # Меняем направление circle_right = False # Если шарик прошёл за правый край, то elif posX_circle + 50 > screenWidth: # Выходим из программу pygame.quit() sys.exit() |
В целом тут всё достаточно просто, сначала проверяем что шарик столкнулся с блоком, для этого проверяем столкновение границ шарика и блока.
Также идёт проверка что шарик вышел за приделы окна, в этом случае программа закрывается.
Осталось последние, это проверка для закрытия окна, рендеринг и обновление окна.
|
for event in pygame.event.get(): if event.type == pygame.QUIT: pygame.quit() sys.exit() # Рисуем блок pygame.draw.rect(screen, GREEN, (780, posY_block, 20, 100)) # Рисуем шарик pygame.draw.circle(screen, YELLOW, (posX_circle, posY_circle), 50) # Обновляем экран pygame.display.update() |
В целом на этом все, теперь можете играть, вот что у нас получилось:

Вывод:
В этой статье вы прочитали как создать пинг понг на Pyhon PyGame, думаю было очень интересно, единственное надо ещё немного поработать над ним, например чтобы не выходило из программы а просто появлялось мину со счётом, но это думаю вы и сам сделаете.
Подписываетесь на соц-сети:
Оценка:
Загрузка…
Также рекомендую:

Пишем, классическая аркадная игра пинг-поннг на python, с помощью библиотеки
turtle и pygame.
упражнения
- Измените цвета.
- Какая частота кадров? Сделайте движение быстрее или медленнее.
- Измените скорость мяча.
- Измените размер ракеток.
- Измените способ отскока мяча от стен.
- Добавьте второй шар.
from random import choice, random
from turtle import *

from freegames import vector


def value():
    """Randomly generate value between (-5, -3) or (3, 5)."""
    return (3 + random() * 2) * choice([1, -1])


ball = vector(0, 0)
aim = vector(value(), value())
state = {1: 0, 2: 0}


def move(player, change):
    """Move player position by change."""
    state[player] += change


def rectangle(x, y, width, height):
    """Draw rectangle at (x, y) with given width and height."""
    up()
    goto(x, y)
    down()
    begin_fill()
    for count in range(2):
        forward(width)
        left(90)
        forward(height)
        left(90)
    end_fill()


def draw():
    """Draw game and move pong ball."""
    clear()
    rectangle(-200, state[1], 10, 50)
    rectangle(190, state[2], 10, 50)

    ball.move(aim)
    x = ball.x
    y = ball.y

    up()
    goto(x, y)
    dot(10)
    update()

    if y < -200 or y > 200:
        aim.y = -aim.y

    if x < -185:
        low = state[1]
        high = state[1] + 50

        if low <= y <= high:
            aim.x = -aim.x
        else:
            return

    if x > 185:
        low = state[2]
        high = state[2] + 50

        if low <= y <= high:
            aim.x = -aim.x
        else:
            return

    ontimer(draw, 50)


setup(420, 420, 370, 0)
hideturtle()
tracer(False)
listen()
onkey(lambda: move(1, 20), 'w')
onkey(lambda: move(1, -20), 's')
onkey(lambda: move(2, 20), 'i')
onkey(lambda: move(2, -20), 'k')
draw()
done()
https://t.me/pythonl
Просмотры: 1 841
The ping pong game is one of the most famous games of arcadia, which is quite similar to table tennis. The rules of this game are simple:
- There are two players.
- Both have control over the paddle of their side.
- They can move the paddle on vertical sides from up to down and down to up.
Players can strike back and forth on the ball by using the paddle.
Turtle: The turtle is a built-in module in Python which is used for graphical illustrations. The users can use it as a pen and panel to illustrate the graphics.
The following are the steps used for illustrating Ping Pong game:
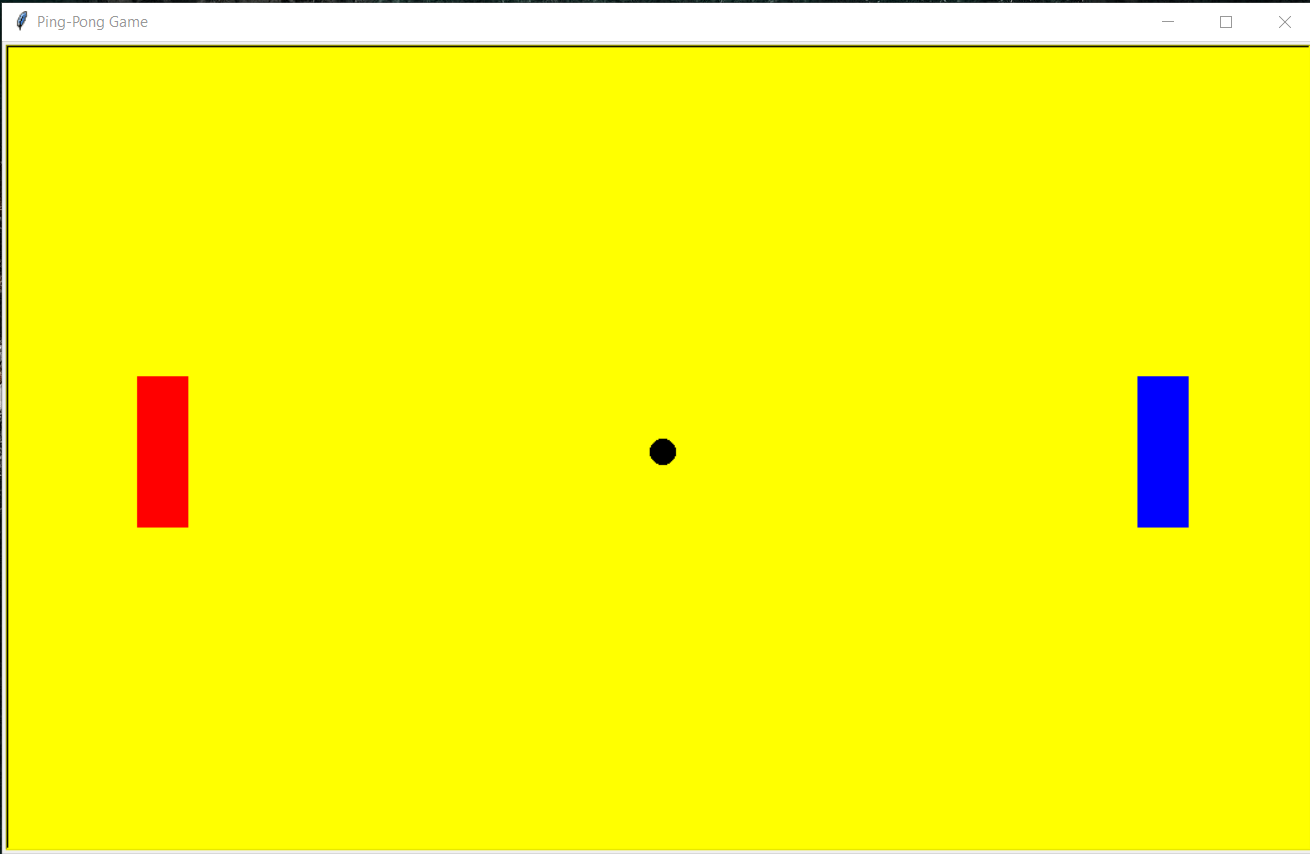
- Step 1: The user has to create two Paddles for the «Left Side» and «Right Side» of the screen.
- Step 2: The user then has to create the ball.
- Step 3: Then, create an event for moving the paddles vertically by pressing the particular keys, that is, for «Left Paddle«: «R» for «Up» and «C» for «Down«, for «Right Paddle«: «Up key ()» for «Up» and «Down key ()» for «Down«.
- Step 4: At last, create the function for updating the score after each player misses the strike on the ball.
Code 1: For Creating Illustrating the Ball and Paddle:
Output:
Explanation:
First, we imported the turtle library. Then we wrote the code for the background screen by using turtle.Screen() function. We created the Left and Right paddle by using the turtle.Turtle() function and positioned them by using goto() function. at last, we created the ball by using a turtle.Turtle() function and mentioned its moving speed on screen by using speed() function and other required parameters. The illustration of the ball and paddle on the screen is ready.
Code 2: The Complete Code for Illustrating the Ping Pong Game with Two Players.
Output:
Explanation:
In the above code, after illustrating the outlook of the screen with paddles and ball, we will first initialize the score of both the players, that is, Zero. Then, we will display the score on the screen, which will increase with the opposite player missing the strike. We will then implement the functions for moving the paddle vertically. We will bind the keys for each function, that is, for «Left Paddle»: «R» for «Up» and «C» for «Down», for «Right Paddle»: «Up key» for «Up» and «Down key» for «Down». Then, we will initiate how the ball and striking of the paddle will work, as if the ball hit the paddle, it will go for the opposite player, but if the paddle missed the ball, then the ball will hit the border, and the opposite player will get the score. If the code is correct and no error is found, the screen of Ping Pong Game will pop up after running the code, and the players can play. The ball will first go for the right player.
Conclusion
In this tutorial, we have created a simple illustration of a ping pong game on the screen by using the built-in library of Python, that is, Turtle. The user can create different moving illustrations by using the turtle library and its different functions.
This article explains how to develop a simple Pong game using Python. To create this, all we need is to know the basics of the Python programming language.
A Pong game has a ball that moves all the time within a rectangular space. Ball deflects from the top and the side walls.
But, if the ball hits the bottom wall, game is over.
To prevent the ball from hitting the bottom wall, a small base rectangle object is there at the bottom which can be moved horizontally using keyboard.
We have to place this object in the right position so that the ball hits this object each time and not the bottom wall.
To develop the game, we have to start with a rectangular GUI which holds the moving ball and the base object and displays the score as well.
Python has many such GUI libraries. For this sample, we are going to use TKinter, which is one of the simplest out there and has all the features that we need
to develop a pong game.
The most complex part of this pong game is the logic to make the ball move and deflect the ball to right direction after hitting the wall.
We also need to find a way to know, when the ball hits the base object. All these can be written using basic Python and is explained in detail in the below sections.
Doing this sample will help you to get a better understanding of Python and Tkinter.
Particularly, on how to use canvas, create, shapes in it, move the shapes and bind event to these shapes.
Below are the step by step process to develop this game. Also provided the complete code at the last section.
-
Install Python and Tkinter
Download and install the latest version of python from Python Website.
Set up virtual environment also to avoid any unexpected errors.
Open command prompt and navigate to the folder where you are going to place the code and activate virtual environment.
Install TKinter using command pip install tk.
If you get an error ‘No module named pip’, refer
virtual environment setup section.If you wish to get a quick tutorial of tkinter before starting with the sample,
please have a look at the Tkinter Quick Reference. -
Running the game
Create a file name game.py. Here we are going to place our code.
To run the game navigate to the folder in cmd and use commands
python game.py or py game.py depending on the os.If we get any error on using above commands, it is likely because we have set up our virtual environment using older version of Python.
Here we have to use commands like python3.9 -m game or py -3.9 -m game -
Define the main method
__main__ needs to be defined for any Tkinter application.
This section of code execute only once when the page loads for the first time.
First define a window of size 400 * 400. 2 variables to set the speed of ball and base rectangle. Also a global variable to see if
the ball hits the bottom window (not the base).
Then create a canvas with same size of window. Create a rectangle base and a ball shape and place these at the bottom.
An Entry to keep the score. A label which is initially hidden and displays when game fails.
Bind left and right arrow key press to move the base according to the speed set.
Bind enter key press to restart the game.
startBall() method is called to start the game.if __name__ == "__main__": root = Tk() root.minsize(400,400) basesp = 10 ballsp = 5 global isFailed isFailed = False c = Canvas(width=400, height=400, background='#a0aa00') c.pack() base = c.create_rectangle(150, 385, 250, 400, fill='blue', outline='blue') ball = c.create_oval(190, 365, 210, 385, fill='red', outline='red') txtS = tk.Entry(c, text='0') txtScore = c.create_window(350, 0, anchor='nw', window=txtS) lblM = tk.Label(c, text='Failed!!!Press Enter key to start again') lblID = c.create_window(100, 190, anchor='nw', window=lblM) c.itemconfigure(lblID, state='hidden') root.bind("<KeyPress-Left>", lambda event: moveBaseLR(base, 'l', 0-basesp)) root.bind("<KeyPress-Right>", lambda event: moveBaseLR(base, 'r', basesp)) root.bind("<Return>", lambda event: restart()) startBall(ball, ballsp) root.mainloop() -
Function to move the base rectangle
This function gets called on left or right arrow key press.
Get the current position of base using c.coords(base)
Then use canvas function c.move(base, x, y) to move the base by a particular value in x and y direction
and c.update() to reflect the changes in canvas.def moveBaseLR(base, dir, x, y = 0): x1, y1, x2, y2 = c.coords(base) if ((x1 > 0 and dir == 'l') or (x2 < 400 and dir == 'r')): c.move(base, x, y) c.update() -
Function to move the ball
This is the most challenging section of code for this game and is written completely using basic Python.
We are using a for loop to continuously move the ball.
When the ball hits the wall, we have to deflect it by changing the x and y values to positive or negative.
Eight scenarios are there which are explained in code itself as comments.
When ball reaches bottom, we have to check if it is hitting base or not. If it hits the base rectangle, ball should go up.
Otherwise game fails and fail message is displayed.
Also we are providing a small break between each loop statement using time.sleep(.025)
for smooth movement of ball.def startBall(ball, sp): s = random.randint(-sp, sp) x, y = s, 0-sp #Start. Ball to move in random direction. 0-sp is used to get negative value c.move(ball, x, y) for p in range(1, 500000): l, t, r, b = c.coords(ball) txtS.delete(0, END) txtS.insert(0, str(p)) #Need to change direction on hitting wall. Eight options are there. if(r >= 400 and x >= 0 and y < 0): #Ball moving ↗ and hit right wall x, y = 0-sp, 0-sp elif(r >= 400 and x >= 0 and y >= 0): #Ball moving ↘ and hit right wall x, y = 0-sp, sp elif(l <= 0 and x < 0 and y < 0): #Ball moving ↖ and hit left wall x, y = sp, 0-sp elif(l <= 0 and x < 0 and y >= 0): #Ball moving ↙ and hit left wall x, y = sp, sp elif(t <= 0 and x > 0 and y < 0): #Ball moving ↗ and hit top wall x, y = sp, sp elif(t <= 0 and x < 0 and y < 0): #Ball moving ↖ and hit top wall x, y = 0-sp, sp elif(b >= 385): #Ball reached base level. Check if base touches ball tchPt = l + 10 #Size is 20. Half of it. bsl, bst, bsr, bsb = c.coords(base) if(tchPt >= bsl and tchPt <= bsr): #Ball touch base n = random.randint(-sp, sp) x, y = n, 0-sp else: #Hit bottom. Failed c.itemconfigure(lblID, state='normal') global isFailed isFailed = True break time.sleep(.025) c.move(ball, x, y) c.update() -
Restarting the Game
Game is restarted on pressing the enter key.
When enter key is pressed, we will check if the game is still running or not. If not, fail message is hidden and shapes are
moved to the initial position and game starts.def restart(): global isFailed if(isFailed == True): isFailed = False c.itemconfigure(lblID, state='hidden') c.moveto(base, 150, 385) c.moveto(ball, 190, 365) startBall(ball, ballsp)
Complete Code
from tkinter import *
import tkinter as tk
import time
import random
global isFailed
def moveBaseLR(base, dir, x, y = 0):
x1, y1, x2, y2 = c.coords(base)
if ((x1 > 0 and dir == 'l') or (x2 < 400 and dir == 'r')):
c.move(base, x, y)
c.update()
def startBall(ball, sp):
s = random.randint(-sp, sp)
x, y = s, 0-sp #Start. Ball to move in random direction. 0-sp is used to get negative value
c.move(ball, x, y)
for p in range(1, 500000):
l, t, r, b = c.coords(ball)
txtS.delete(0, END)
txtS.insert(0, str(p))
#Need to change direction on hitting wall. Eight options are there.
if(r >= 400 and x >= 0 and y < 0): #Ball moving ↗ and hit right wall
x, y = 0-sp, 0-sp
elif(r >= 400 and x >= 0 and y >= 0): #Ball moving ↘ and hit right wall
x, y = 0-sp, sp
elif(l <= 0 and x < 0 and y < 0): #Ball moving ↖ and hit left wall
x, y = sp, 0-sp
elif(l <= 0 and x < 0 and y >= 0): #Ball moving ↙ and hit left wall
x, y = sp, sp
elif(t <= 0 and x >= 0 and y < 0): #Ball moving ↗ and hit top wall
x, y = sp, sp
elif(t <= 0 and x < 0 and y < 0): #Ball moving ↖ and hit top wall
x, y = 0-sp, sp
elif(b >= 385): #Ball reached base level. Check if base touches ball
tchPt = l + 10 #Size is 20. Half of it.
bsl, bst, bsr, bsb = c.coords(base)
if(tchPt >= bsl and tchPt <= bsr): #Ball touch base
n = random.randint(-sp, sp)
x, y = n, 0-sp
else: #Hit bottom. Failed
c.itemconfigure(lblID, state='normal')
global isFailed
isFailed = True
break
time.sleep(.025)
c.move(ball, x, y)
c.update()
def restart():
global isFailed
if(isFailed == True):
isFailed = False
c.itemconfigure(lblID, state='hidden')
c.moveto(base, 150, 385)
c.moveto(ball, 190, 365)
startBall(ball, ballsp)
if __name__ == "__main__":
    root = Tk()
    root.minsize(400,400)
    basesp = 10
    ballsp = 5
    global isFailed
    isFailed = False

    c = Canvas(width=400, height=400, background='#a0aa00')
    c.pack()
    base = c.create_rectangle(150, 385, 250, 400, fill='blue', outline='blue')
    ball = c.create_oval(190, 365, 210, 385, fill='red', outline='red')
    txtS = tk.Entry(c, text='0')
    txtScore = c.create_window(350, 0, anchor='nw', window=txtS)

    lblM = tk.Label(c, text='Failed!!!Press Enter key to start again')
    lblID = c.create_window(100, 190, anchor='nw', window=lblM)
    c.itemconfigure(lblID, state='hidden')

    root.bind("<KeyPress-Left>", lambda event: moveBaseLR(base, 'l', 0-basesp))
    root.bind("<KeyPress-Right>", lambda event: moveBaseLR(base, 'r', basesp))
    root.bind("<Return>", lambda event: restart())

    startBall(ball, ballsp)

    root.mainloop()