Я начал писать статьи задолго до сегодняшних событий, и не уверен, что статьи еще могут быть актуальны (так как не уверен уже, что будет завтра), но не охото чтобы усилия пропали совсем зря.
Дисклаймер: я не являюсь разработчиком из JetBrains, поэтому в статье и в коде могут быть и скорее всего есть неточности и ошибки.
Краткое оглавление
Часть 1
-
Введение
-
Предусловия
-
Создание основы языкового плагина
-
Создание PSI-дерева
-
— Лексер
-
— Парсер
-
Аннотаторы
-
Подсветка скобок
Часть 2
-
Форматирование
-
Structure view
-
Кэши, индексы, stub и goto
-
Ссылки (Reference)
-
Find Usages
-
Rename и другие рефакторинги
-
Маркеры (Markers)
-
Автодополнение
-
Тестирование
Введение
Я работаю бекэнд-разработчиком и иногда устаю от перекладывания json из одного формата в другой (к сожалению, эта часть работы, хоть и не самая любимая). Как и любому программисту мне нравится копаться в коде, смотреть что как устроено и, возможно, использовать некоторые приемы в своей работе, а также мне нравится автоматизировать свою работу — в этом мне часто помогает IDEA.
Большая часть кода IDEA и особенно платформенная ее часть — open-source. Программисты из JetBrains активно помогают с pull request в основную ветку (спасибо @tagir_valeev за помощь с парой инспекций). Один из главных плюсов IDEA (кроме богатого функционала): относительно легкое расширение плагинами. Примеры инспекции и плагина для транзакций Spring были рассмотрены в предыдущих статьях. Но для того чтобы понять, как работает основа IDEA, самое простое, как мне кажется, — это написать языковой плагин.
На habr уже была серия замечательных статей по создания своего плагина, есть также официальная документация. В этой серии статей я постарался не сильно повторять то, что уже было написано, а скорее углубленно расказать о интересных деталях и особенностях реализации.
Эти статьи могут быть интересны тем, кто хочет попробовать расширить IDEA под себя или добавить какой-нибудь интересный функционал, или просто тем, кому, как и мне, нравится копаться внутри.
В качестве «подопытного кролика», для которого будет написан плагин, взят максимально простой язык Monkey, создание интепретатора и компилятора для которого описано в книгах по Golang. Так как у меня не было целью охватить все, то сам плагин охватывает некоторое его ограниченное подмножество. Сам интерпретатор можно найти тут.
Пример рассчета числа Фибоначчи на Monkey:
let fibonacci = fn(x){
                    if (x == 0){
                        0;
                    }
                    else{
                        if (x == 1){
                            return 1;
                        }
                        else{
                            fibonacci(x - 1) + fibonacci(x - 2);
                        };
                    };
};
Сам плагин будет писаться на Java и Kotlin (JVM), так как они являются основными языками разработки для платформы IDEA.
Предусловия
Самый просто способ создать любой плагин из IDEA — из шаблона. Он активно развивается и включает в себя практически весь функционал, который нам нужен для разработки.
Для создания языкового плагина также понадобится DevKit. Он нужен для удобной настройки расширений (будут расмотрено ниже).

Для генерации лексера и парсера понадобится плагин Grammar-Kit.
Примеры языковых плагинов:
-
Java (в основном коде IDEA)
-
go-plugin (до того, как он стал платным и стал Golang. С ним есть некоторые сложности, так как многие зависимости устарели, но как пример хорош)
-
Haskell
-
Erlang
-
Frege (его создание здорово описано его авторами в статьях)
-
Monkey plugin (в рамках данной статьи)
Сразу отмечу, что Java plugin является самым развитым из всех, но при этом он сильно отличается от остальных, так как был первым. Например, go-plugin (здесь и далее для простоты он будет называться так, хотя репозиторий называется go-lang-idea-plugin, а пакет — goide) использует Grammar-Kit для создания парсера и лексера, парсер и лексер Java плагина же написаны полностью вручную.
Маленькая ремарка о IDEA
Изучая исходный код IDEA, понимаешь, сколько в него вложено труда и знаний. Например, в IDEA для того, чтобы вычислять данные в debug окне, написан небольшой интерпретатор (спасибо Тагиру Валееву за твит про это)

или еще один интерпретатор используется поточным анализом для выявления ошибок (его работа очень сильно напоминает работу самого Java интепретатора).
Создание основы языкового плагина
Первые этапы создания языкового плагина хорошо описаны в документации.
-
Требуется объявить новый язык (пример из go-plugin, frege, monkey)
Пример из Monkey
import com.intellij.lang.Language

class MonkeyLanguage : Language("Monkey") {
    companion object {
        @JvmStatic
        val INSTANCE = MonkeyLanguage()
    }
}
-
Объявить иконку (пример из go-plugin, frege, monkey)
-
Объявить новый тип файла и связать все вместе (пример из go-plugin, frege, monkey)
Пример из Monkey
import com.intellij.openapi.fileTypes.LanguageFileType
import javax.swing.Icon

class MonkeyFileType : LanguageFileType(MonkeyLanguage.INSTANCE) {
    override fun getName(): String {
        return "Monkey File"
    }

    override fun getDescription(): String {
        return "Monkey language file"
    }

    override fun getDefaultExtension(): String {
        return "monkey"
    }

    override fun getIcon(): Icon {
        return MonkeyIcons.FILE
    }

    companion object {
        @JvmStatic
        val INSTANCE = MonkeyFileType()
    }
}
После этого надо подключить новый тип файла через точку расширения (extension point). Все возможности, которые предоставляют плагины, подключаются через одну или несколько точек расширений. Они прописываются в файле plugin.xml (пример для go-plugin, frege). Другие примеры использования точек расширений будут приведены ниже или можно посмотреть в документации.
Пример подключения для Monkey (resources/META-INF/plugin.xml)
<extensions defaultExtensionNs="com.intellij">
  <fileType name="Monkey File"
            implementationClass="com.github.pyltsin.monkeyplugin.MonkeyFileType"
            fieldName="INSTANCE"
            language="Monkey"
            extensions="monkey"/>
</extensions>
Создание PSI-дерева
К сожалению, в рамках одной статьи невозможно описать всю теорию, которая требуется для разбора кода. Фундаментальные знания по этой теме можно получить в «книге с драконом»

Процесс работы компилятора с кодом состоит из следующих шагов:

Для успешной работы любой IDE требуется реализовать первые 3 анализатора:
-
Лексический анализатор (читает поток символов и группирует их в значащие последовательности, из которых строит токены)
-
Синтаксический анализатор (получает поток токенов и строит из них синтаксическое дерево — AST)
-
Семантический анализатор (использует дерево для проверки исходного кода программы на корректность языка).
Пример работы первых 3 анализаторов:

В IDEA вместо AST дерева используется аналог — PSI-дерево (Program structure Interface).
Процесс создания PSI-дерева хорошо показан на иллюстрации из документации:

Для того чтобы его увидеть, можно воспользоваться PSI Viewer (Tools->View PSI Structure)

В IDEA для имплементации PSI-дерева используется в основном абстрактный класс TreeElement
Часть кода TreeElement
public abstract class TreeElement extends ElementBase implements ASTNode, Cloneable {
  private TreeElement myNextSibling;
  private TreeElement myPrevSibling;
  private CompositeElement myParent;
...
}
В IDEA для создания лексера и парсера можно использовать плагин GrammarKit.
Лексер
Интересный кейс по созданию лексера описан в статье про Frege.
Самый простой способ создания лексера для IDEA — использование JFlex. Плагин GrammarKit содержит уже реализацию и позволяет генерить лексер или из .bnf файла (про него будет ниже) или из .flex файла (при этом больше возможностей для настройки). Пример для языка Monkey можно посмотреть здесь, более сложный для Frege — здесь.
Чтобы сгенерить сам Lexer, нужно или настроить Gradle плагин, или воспользоваться контестным меню в .flex файле — «Run JFlex Generator».
После этого нужно объявить класс, реализующий com.intellij.lexer.Lexer. Для сгенерированного JFlex лексера уже существует адаптер — com.intellij.lexer.FlexAdapter
Парсер
В IDEA для создания парсера в основном используется кодогенерация плагином GrammarKit. К сожалению, документации по генерации парсера не так много и в основном она представлена в Tutorial и HOWTO.
Грамматика языка описывается в виде BNF. Единственное отличие, что используется ::= как «является».
Пример грамматики для выражений
Взят отсюда
{
  generate=[psi="no"]
  classHeader="//header.txt"
  parserClass="org.intellij.grammar.expression.ExpressionParser"
  extends(".*expr")=expr
  elementTypeFactory="org.intellij.grammar.expression.ExpressionParserDefinition.createType"
  tokenTypeFactory="org.intellij.grammar.expression.ExpressionParserDefinition.createTokenType"
  elementTypeHolderClass="org.intellij.grammar.expression.ExpressionTypes"
  parserUtilClass="org.intellij.grammar.parser.GeneratedParserUtilBase"

  tokens=[
    space='regexp:s+'
    comment='regexp://.*'
    number='regexp:d+(.d*)?'
    id='regexp:p{Alpha}w*'
    string="regexp:('([^'\]|\.)*'|"([^"\]|\.)*")"

    syntax='regexp:;|.|+|-|**|*|==|=|/|,|(|)|^|!=|!|>=|<=|>|<'
  ]
}
root ::= element *
private element ::= expr ';'?  {recoverWhile=element_recover}
private element_recover ::= !('(' | '+' | '-' | '!' | 'multiply' | id | number)

// left recursion and empty PSI children define expression root
expr ::= assign_expr
  | conditional_group
  | add_group
  | boolean_group
  | mul_group
  | unary_group
  | exp_expr
  | factorial_expr
  | call_expr
  | qualification_expr
  | primary_group
  {extraRoot=true}
private boolean_group ::= xor_expr | between_expr | is_not_expr

private conditional_group ::= elvis_expr | conditional_expr
private unary_group ::= unary_plus_expr | unary_min_expr | unary_not_expr
private mul_group ::= mul_expr | div_expr
private add_group ::= plus_expr | minus_expr
private primary_group ::= special_expr | simple_ref_expr | literal_expr | paren_expr

// expressions: auto-operator detection or parens
fake ref_expr ::= expr? '.' identifier
simple_ref_expr ::= identifier {extends=ref_expr elementType=ref_expr}
qualification_expr ::= expr '.' identifier {extends=ref_expr elementType=ref_expr}
call_expr ::= ref_expr arg_list
arg_list ::= '(' [ !')' expr  (',' expr) * ] ')' {pin(".*")=1}
literal_expr ::= number
identifier ::= id
unary_min_expr ::= '-' expr
unary_plus_expr ::= '+' expr
unary_not_expr ::= '!' expr
xor_expr ::= expr '^' expr
assign_expr ::= expr '=' expr { rightAssociative=true }
conditional_expr ::= expr ('<' | '>' | '<=' | '>=' | '==' | '!=') expr
div_expr ::= expr '/' expr
mul_expr ::= expr '*' expr
minus_expr ::= expr '-' expr
plus_expr ::= expr '+' expr
exp_expr ::= expr ('**' expr) + // N-ary variant
factorial_expr ::= expr '!'
paren_expr ::= '(' expr ')'
elvis_expr ::= expr '?' expr ':' expr
is_not_expr ::= expr IS NOT expr
between_expr ::= expr BETWEEN add_group AND add_group {
  methods=[testExpr="expr[0]"]
}

// test specific expressions
external special_expr ::= meta_special_expr
meta_special_expr ::= 'multiply' '(' simple_ref_expr ',' mul_expr ')' {elementType="special_expr" pin=2}
Как видно, bnf файл состоит из 2 частей: первая часть описывает метаинформацию (и описание токенов, если не используется flex файлы), вторая часть описывает саму грамматику.
Рассмотрим некоторую часть метаинформации:
parserClass — название и расположение генерируемого класса парсера
parserUtilClass — ссылка на класс, содержащий набор вспомогательных методов для парсера (как правило, класс com.intellij.lang.parser.GeneratedParserUtilBase или его наследник)
extends = <какой-то класс> — ссылка на базовый класс, от которого будут наследоваться все PSI-элементы (узлы дерева). Обычно com.intellij.extapi.psi.ASTWrapperPsiElement или его наследники.
extends(<regexp для узлов дерева>) = <psi-element> (например: extends(".*expr")=expr) — все psi-элементы будут наследоваться от указанного psi-элемента.
psiClassPrefix, psiImplClassSuffix — соответственно префикс классов и интерфейсов (обычно по имени языка) и суффикс для реализации интерфейсов (как правило — Impl)
psiPackage и psiImplPackage — соответственно пакет для интерфейсов и их реализаций.
implements— аналогично extends, но для интерфейсов
elementTypeHolderClass — генерируемое хранилище всех типов элементов
elementTypeClass — класс типов элеметов (не генерируется, наследник com.intellij.psi.tree.IElementType)
elementTypeFactory — создание фабрики для генерации типов элементов (используется для работы со Stub — о них ниже)
psiImplUtilClass — класс с набором статических методов, которые используются как имплементация требуемых методов для psi-элементов. Предположим, у нас есть такие строчки (из go-plugin)
ImportSpec ::= [ '.' | identifier ] ImportString {
  stubClass="com.goide.stubs.GoImportSpecStub"
  methods=[getAlias getLocalPackageName shouldGoDeeper isForSideEffects isDot getPath getName isCImport]
}
Для ImportSpec должен быть сгенерирован метод getAlias. Для этого в psiImplUtilClass должен быть объявлен соответствующий метод
public static String getAlias(@NotNull GoImportSpec importSpec)а в самом классе будет просто вызов этого метода
  public String getAlias() {
    return GoPsiImplUtil.getAlias(this);
  }
Теперь перейдем к самим bnf правилам. Для каждого правила могут быть использованы модификаторы (например, private, fake и так далее). Их описание приведено здесь. Так например private в
private boolean_group ::= xor_expr | between_expr | is_not_exprговорит о том, что PSI-элемент для boolean_group сгенерирован не будет.
Если не получается правильно описать грамматику в bnf файле, то есть возможность описать это в коде, используя внешние правила.
Одна из важных частей грамматики — правила работы с ошибками. Для этого используется два ключевых слова: pin, recoverWhile.
pin — указывает номер токена, как только мы доходим до которого, парсер начинает ожидать только текущее объявление. Например, объявление структуры в Golang
StructType ::= struct '{' Fields? '}' {pin=1}recoverWhile — указывает, какие токены можно потреблять после завершения сопоставления со всеми правилами. Рекомендации по применению этого атрибута описаны здесь.
Также следует обратить внимание на рекомендации для парсинга выражений с учетом приоритета.
Как мне кажется, создание правильного и удобного описания грамматики для будущей работы — одна из самых сложных частей реализации плагина для языка. Чтобы начать, можно ориентироваться на примеры: go-plugin, Frege, Monkey (для Monkey с целью упрощения реализовано только подмножество этого языка).
После создания bnf файла и генерации из него парсера требуется определить класс файла (наследник от com.intellij.extapi.psi.PsiFileBase) (пример go-plugin, Frege, Monkey) и класс определения парсера (наследник от com.intellij.lang.ParserDefinition)(пример go-plugin, Frege, Monkey), и после этого подключить его через точку расширения.
<lang.parserDefinition language="Monkey"
implementationClass="com.github.pyltsin.monkeyplugin.parser.MonkeyParserDefinition"/>
Аннотаторы
В предыдущих частях мы посмотрели как создаются и работают лексер и парсер, которые отвечают, соответственно, за лексический и синтаксический анализ. Теперь перейдем к третьей части — семантический анализ. Изучая код IDEA и плагинов к ней, я нашел два способа его реализации (исключая инспекции).
Первый способ применен в плагине для языка Java. Рассмотрим следующий невалидный код:
![]()
IDEA, конечно, его подсветила и сказала «Operator ‘-‘ cannot be applied to ‘java.lang.String’, ‘java.lang.String’«. Это работает благодаря следующей точки расширения:
<highlightVisitor implementation=
"com.intellij.codeInsight.daemon.impl.analysis.HighlightVisitorImpl"/>
Сам класс должен реализовывать интерфейс com.intellij.codeInsight.daemon.impl.HighlightVisitor
public interface HighlightVisitor {

  boolean suitableForFile(@NotNull PsiFile file);

  void visit(@NotNull PsiElement element);

  boolean analyze(@NotNull PsiFile file,
                  boolean updateWholeFile,
                  @NotNull HighlightInfoHolder holder,
                  @NotNull Runnable action);
}
Метод analyze — используется для настройки, запуска подсветки (action.run()) и очистки ресурсов.
Метод visit выполняется при вызове action.run() и выполняет сам анализ.
//Реализация из HighlightVisitorImpl
	@Override
  public void visit(@NotNull PsiElement element) {
  // некоторый код
      element.accept(this);
  // некоторый код
  }

//Пример для класса ClsJavaModuleImpl, реализация accept
  @Override
  public void accept(@NotNull PsiElementVisitor visitor) {
    if (visitor instanceof JavaElementVisitor) {
      ((JavaElementVisitor)visitor).visitModule(this);
    }
    else {
      visitor.visitElement(this);
    }
  }
Как видно, здесь используется паттерн visitor. Сам класс HighlightVisitorImpl также расширяет JavaElementVisitor.
public abstract class JavaElementVisitor extends PsiElementVisitor {
  public void visitAnonymousClass(PsiAnonymousClass aClass) {
    visitClass(aClass);
  }

  public void visitArrayAccessExpression(PsiArrayAccessExpression expression) {
    visitExpression(expression);
  }

  public void visitArrayInitializerExpression(PsiArrayInitializerExpression expression) {
    visitExpression(expression);
  }
  //и еще много-много методов для каждого типа PSI-элемента
Второй способ применен в плагине go-plugin и Frege. В плагине Monkey я использовал тоже его. Он заключается в использовании точки расширения annotator
Подключение:
<annotator language="Monkey"
implementationClass="com.github.pyltsin.monkeyplugin.annotator.MonkeyWarningAnnotator"/>
Класс должен реализовывать интерфейс:
public interface Annotator {
  void annotate(@NotNull PsiElement element,
                @NotNull AnnotationHolder holder);
}
Само сообщение об ошибке регистрируется следующим образом:
holder.newAnnotation(HighlightSeverity.ERROR, errorMsg)
.range(element)
.create()
Примеры для Frege, go-plugin, Monkey.
Для языка Monkey на данный момент реализовал 2 проверки — невозможность разрешить ссылки (resolve references — о них ниже) и простая проверка типов элементов (через DSL).
Подсветка скобок
В этой части мы рассмотрим еще пару точек расширений.
Первая точка расширения: lang.braceMatcher. Пример подключения:
<lang.braceMatcher language="Monkey"
implementationClass="com.github.pyltsin.monkeyplugin.editor.MonkeyBraceMatcher"/>
Эта точка расширения включает подсветку пары скобок и добавление закрывающей скобки

Класс должен реализовывать интерфейс com.intellij.lang.PairedBraceMatcher
Код интерфейса com.intellij.lang.PairedBraceMatcher
public interface PairedBraceMatcher {
  /**
   * Returns the array of definitions for brace pairs that need to be matched when
   * editing code in the language.
   *
   * @return the array of brace pair definitions.
   */
  @NotNull
  BracePair[] getPairs();

  /**
   * Returns true if paired rbrace should be inserted after lbrace of given type when lbrace is encountered before contextType token.
   * It is safe to always return true, then paired brace will be inserted anyway.
   * @param lbraceType lbrace for which information is queried
   * @param contextType token type that follows lbrace
   * @return true / false as described
   */
  boolean isPairedBracesAllowedBeforeType(@NotNull IElementType lbraceType, @Nullable IElementType contextType);

  /**
   * Returns the start offset of the code construct which owns the opening structural brace at the specified offset. For example,
   * if the opening brace belongs to an 'if' statement, returns the start offset of the 'if' statement.
   *
   * @param file the file in which brace matching is performed.
   * @param openingBraceOffset the offset of an opening structural brace.
   * @return the offset of corresponding code construct, or the same offset if not defined.
   */
  int getCodeConstructStart(final PsiFile file, int openingBraceOffset);
}
Релизация, которая была сделана мной для языка Monkey, можно посмотреть тут, для плагина go-plugin тут, для Java — тут и тут.
Вторая точка расширения: highlightVisitor . Я ее уже упоминал для создания семантического анализатора. В своем плагине я ее не использовал, но она используется в популярном плагине Rainbow Brackets, который раскрашивает пары скобок в уникальные цвета.

Если посмотреть в его plugin.xml, то можно найти вот такую строчку
<highlightVisitor implementation="com.github.izhangzhihao.rainbow.brackets.visitor.DefaultRainbowVisitor"/>Класс реализует интерфейс — com.intellij.codeInsight.daemon.impl.HighlightVisitor. Реализацию можно посмотреть здесь. Само раскрашивание происходит в методе com.github.izhangzhihao.rainbow.brackets.visitor.RainbowHighlightVisitor#setHighlightInfo
holder.add(HighlightInfo
    .newHighlightInfo(rainbowElement)
    .textAttributes(attr)
    .range(element)
    .create())
Продолжение тут
Программирование, JAVA, API
Рекомендация: подборка платных и бесплатных курсов Python — https://katalog-kursov.ru/
Полгода назад или около того я загорелся-таки идей написать свой плагин для Intellij IDEA. Согласно задумке, он должен был считать, сколько времени разработчик потратил на проект (всего, за день, за сеанс) и отображать результат на диаграмме. Никакой магии, но такая функция здорово помогла бы мне рассчитывать время работы.

Пролистав каталог существующих плагинов, я все же нашел один подобный. Но никаких диаграмм он не рисовал, открывался через два выпадающих списка — что жуть, как неудобно, — да и на вид оказался довольно скудным.
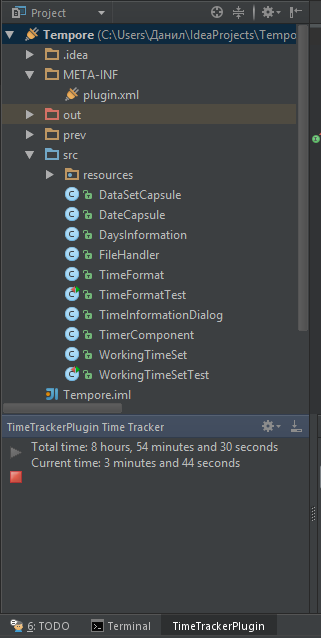
Короче, я еще больше укрепился в вере, что мой плагин был бы полезен, и приступил к работе. Сразу хочу сказать, что материалов по разработке плагинов Intellij IDEA не просто мало, а их почти что нет.
Но кое-что все же раскопать удалось.
Полезные ссылки
Небольшой гайд от JetBrains
Форум разработчиков плагинов для Intellij Platform
Коротко и понятно о том, где взять исходный код IDE
Пост одного польского разработчика
Очень подробный цикл статей на Хабре от Lucyfer
Java API Examples
Мелкие советы
Я решил не рассказывать о таких вещах, как настройка среды для разработки плагина, конфигурационном файле и др., так как все немногие статьи в рунете посвящены именно этому. За время создания плагина я много раз спотыкался о неочевидные (мне, во всяком случае) особенности Intellij IDEA. Знай я о них раньше, дело пошло бы намного быстрее. Поэтому поделюсь некоторыми моментами, которые могут сэкономить вам порядочно времени.
Добавляем свой CustomStatusBarWidget
Для удобства я решил дополнить Status Bar небольшим элементом, который отображал бы сколько времени было потрачено за текущий сеанс работы в среде, не отвлекая при этом разработчика от редактора. Интерфейс StatusBar содержит перегруженный метод addWidget(), принимающий CustomStatusBarWidget параметр:
public interface StatusBar extends StatusBarInfo, Disposable {
...
    void addWidget(@NotNull StatusBarWidget var1);

    void addWidget(@NotNull StatusBarWidget var1, @NotNull String var2);

    void addWidget(@NotNull StatusBarWidget var1, @NotNull Disposable var2);

    void addWidget(@NotNull StatusBarWidget var1, @NotNull String var2, @NotNull Disposable var3);
...
 }
Получить же сам StatusBar проекта можно следующим образом:
statusBar = WindowManager.getInstance().getStatusBar(currentProject);
Главной проблемой для меня стала имплементация CustomStatusBarWidget, а также расположение его по отношению к другим виджетам (я не знал их названий, так что найти их в исходном коде среды не удалось).
Спасение пришло отсюда. То есть, виджет можно добавить относительно других следующим образом:
statusBar.addWidget(myWidget1,"before " + IdeMessagePanel.FATAL_ERROR);
statusBar.addWidget(myWidget2, "after Encoding");
statusBar.addWidget(myWidget3,"after InsertOverwrite");
statusBar.addWidget(myWidget4,"after Position");
Имплементируем CustomStatusBarWidget:
    class Widget implements CustomStatusBarWidget{

        private JLabel myLabel = new JLabel("00:00:00");

        @Override
        public JComponent getComponent() {
           return myLabel;
        }

        @NotNull
        @Override
        public String ID() {
            return null;
        }

        @Nullable
        @Override
        public WidgetPresentation getPresentation(@NotNull PlatformType platformType) {
            return null;
        }

        @Override
        public void install(@NotNull StatusBar statusBar) {

        }

        @Override
        public void dispose() {

        }
    }
Добавим наш виджет на StatusBar, дополним JLabel иконкой…
Получение ToolBar’a действий из Java кода
Подробно про саму систему действий в плагинах Intellij IDEA можно почитать тут.
Получение компонента при помощи ActionManager.
    private JComponent createActionToolBar(AnAction ...actions){
        DefaultActionGroup actionGroup = new DefaultActionGroup();
        for(AnAction anAction : actions){
            actionGroup.add(anAction);
        }
        ActionToolbar toolbar = ActionManager.getInstance().createActionToolbar("Tempore.MainPanel", actionGroup, false);
        return toolbar.getComponent();
    }
Адрес проекта, в котором работает плагин
Путь к проекту можно получить с помощью экземпляра класса Project. Например, путь к папке .idea проекта:
String path = currentProject.getProjectFile().getParent().getPath();
Получение компонентов из метода actionPerformed()
Из параметра AnActionEvent можно получить доступ к компонентам:
Project currentProject = DataKeys.PROJECT.getData(actionEvent.getDataContext());
VirtualFile currentFile = DataKeys.VIRTUAL_FILE.getData(actionEvent.getDataContext());
Editor editor = DataKeys.EDITOR.getData(actionEvent.getDataContext());
StatusBar statusBar = WindowManager.getInstance().getStatusBar(DataKeys.PROJECT.getData(actionEvent.getDataContext()));
                  .
Всплывающие сообщения
Простое сообщение с информацией или сообщение об ошибке можно добавить на StatusBar следующим образом:
                                    JBPopupFactory.getInstance()
                                            .createHtmlTextBalloonBuilder("You have been working for two hours! Recommend to have a break ", MessageType.INFO, null)
                                            .setFadeoutTime(7500)
                                            .createBalloon()
                                            .show(RelativePoint.getCenterOf(statusBar.getComponent()),
                                                    Balloon.Position.atRight);
Выглядит вот так:

Совместимость со средами Intellij Platform
Так как подсчет времени работы над проектом полезен не только в Intellij IDEA, я решил сделать плагин совместимым с другими средами Intellij Platform. Для этого нужно добавить тег в файле plugin.xml:
<idea-plugin version="0.5.5b">
  ...
  <depends>com.intellij.modules.lang</depends>
  ...
</idea-plugin>
Теперь помимо Intellij IDEA плагин подходит еще и для RubyMine, WebStorm, PhpStorm, PyCharm и AppCode.
Итоги
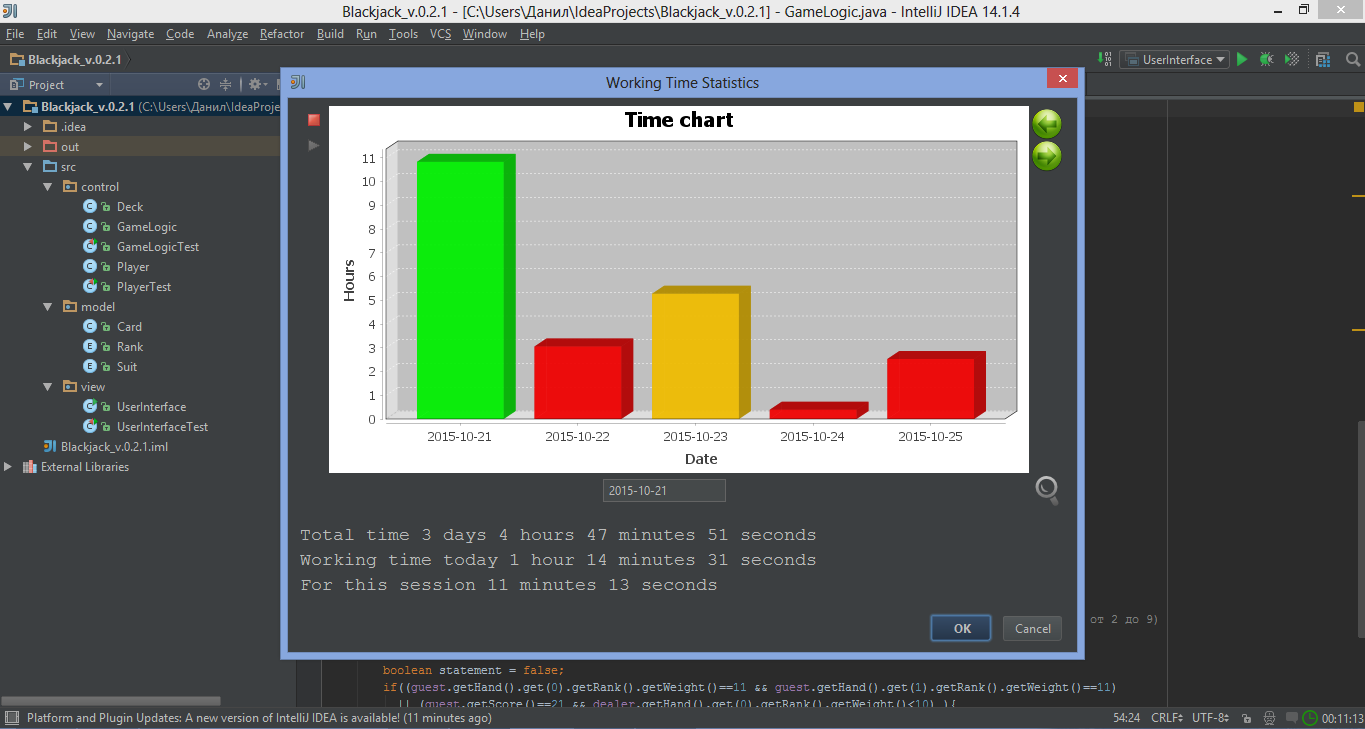
Примерно за месяц, мне удалось создать плагин, который следит за тем, сколько времени вы тратите на свои проекты, советует сделать перерыв, если вы пишете код нон-стоп несколько часов и рисует диаграмму потраченных часов за каждый день.
Так же он останавливается, если активность в среде прекратилась больше, чем на 5 минут и запускается, когда пользователь снова принялся за работу.
При желании, сам плагин можно скачать тут.
Надеюсь, кому-то эта статья поможет разобраться с некоторыми аспектами разработки и избавит от бессонных ночей за чтением API.
1. Вступление
За последние несколько лет
IntelliJ
от JetBrains быстро стал лучшей IDE для разработчиков Java. В нашем последнем отчете
State of Java
IntelliJ был IDE для 55% респондентов по сравнению с 48% годом ранее.
Одна особенность, которая делает IntelliJ такой привлекательной для разработчиков Java, — это возможность расширять и создавать новые функциональные возможности с помощью плагинов. В этом руководстве мы рассмотрим создание плагина IntelliJ, чтобы продемонстрировать несколько способов расширения IDE.
И обратите внимание, что хотя эта статья посвящена плагинам IntelliJ, все интегрированные среды разработки JetBrains имеют общий код. Поэтому
многие из методов, использованных здесь, могут быть применены к другим IDE JetBrain
, таким как PyCharm, RubyMine и другие.
2. Функциональность плагина
Функциональность плагина для IntelliJ обычно подпадает под одну из 4 категорий:
-
Пользовательские языки
: способность писать, интерпретировать и компилировать код
написано на разных языках
Frameworks ** : поддержка сторонних фреймворков, таких как Spring
-
Инструменты
: интеграция с внешними инструментами, такими как Gradle -
Дополнения пользовательского интерфейса
: новые пункты меню, окна инструментов и кнопки,
и больше
-
Плагины часто попадают в несколько категорий ** . Например, плагин
Git
, который поставляется с IntelliJ, взаимодействует с исполняемым файлом git, установленным в системе. Плагин предоставляет окно инструментов и элементы всплывающего меню, а также интегрируется в рабочий процесс создания проекта, окно настроек и многое другое.
3. Создание плагина
ссылка:/uploads/intellij-plugin-100×66.jpg%20100w[]
-
Обратите внимание, что мы должны использовать JetBrains JDK ** , чтобы обеспечить наличие необходимых классов плагинов на пути к классам. IntelliJ должен поставляться с подходящим JDK по умолчанию, но если нет, мы можем скачать его с
here
.
На момент написания этой статьи
мы можем использовать только Java 8 для написания плагинов IntelliJ
. Это потому, что JetBrains в настоящее время не предоставляет официальный JDK для Java 9 или выше.
4. Пример плагина
Чтобы продемонстрировать написание плагина IntelliJ, мы создадим плагин, обеспечивающий быстрый доступ к популярному веб-сайту Stack Overflow из нескольких областей в среде IDE. Мы добавим:
-
Пункт меню Инструменты, чтобы посетить страницу Задать вопрос
-
Элемент всплывающего меню как в текстовом редакторе, так и в консоли для поиска
Переполнение стека для выделенного текста.
4.1. Создание действий
-
Действия являются основным компонентом, используемым для написания плагинов IntelliJ ** .
Действия инициируются событиями в IDE, такими как нажатие элемента меню или кнопки панели инструментов.
Первым шагом в создании действия является создание класса Java, который расширяет
AnAction
. Для нашего плагина Stack Overflow мы создадим 2 действия.
Первое действие открывает страницу «Задать вопрос» в новом окне браузера:
public class AskQuestionAction extends AnAction {
   @Override
   public void actionPerformed(AnActionEvent e) {
       BrowserUtil.browse("https://stackoverflow.com/questions/ask");
   }
}
Мы используем встроенный класс
BrowserUtil
, поскольку он обрабатывает все нюансы открытия веб-страницы в разных операционных системах и браузерах.
Второе действие открывает страницу поиска переполнения стека и передает текст поиска в виде строки запроса. На этот раз мы реализуем два метода.
Первый метод, который мы реализуем, похож на наше первое действие и обрабатывает открытие веб-браузера.
Однако сначала нам нужно собрать два значения для StackOverflow. Одним из них является языковой тег, а другим — текст для поиска.
Чтобы получить языковой тег, мы будем использовать
Program Structure Interface
.
Этот API анализирует все файлы в проекте и предоставляет программный способ их проверки.
В этом случае мы используем PSI для определения языка программирования файла:
PsiFile file = e.getData(CommonDataKeys.PSI__FILE);
Language lang = e.getData(CommonDataKeys.PSI__FILE).getLanguage();
String languageTag = "+[" + lang.getDisplayName().toLowerCase() + "]";
Обратите внимание, что PSI также предоставляет информацию о файле для конкретного языка.
Например,
мы могли бы использовать PSI для поиска всех открытых методов в классе Java.
Чтобы получить текст для поиска, мы будем использовать
__Editor
__API для получения выделенного текста на экране:
final Editor editor = e.getRequiredData(CommonDataKeys.EDITOR);
CaretModel caretModel = editor.getCaretModel();
String selectedText = caretModel.getCurrentCaret().getSelectedText();
Хотя это действие одинаково для окон редактора и консоли, доступ к выделенному тексту работает одинаково.
Теперь мы можем собрать все это вместе в объявлении
actionPerformed
:
@Override
public void actionPerformed(AnActionEvent e) {

    PsiFile file = e.getData(CommonDataKeys.PSI__FILE);
    Language lang = e.getData(CommonDataKeys.PSI__FILE).getLanguage();
    String languageTag = "+[" + lang.getDisplayName().toLowerCase() + "]";

    Editor editor = e.getRequiredData(CommonDataKeys.EDITOR);
    CaretModel caretModel = editor.getCaretModel();
    String selectedText = caretModel.getCurrentCaret().getSelectedText()

    String query = selectedText.replace(' ', '+') + languageTag;
    BrowserUtil.browse("https://stackoverflow.com/search?q=" + query);
}
Это действие также отменяет второй метод с именем
update
. Это позволяет нам включать или отключать действие в различных условиях.
В этом случае мы отключаем действие поиска, когда нет выделенного текста:
@Override
public void update(AnActionEvent e) {
     Editor editor = e.getRequiredData(CommonDataKeys.EDITOR);
     CaretModel caretModel = editor.getCaretModel();
     e.getPresentation().setEnabledAndVisible(caretModel.getCurrentCaret().hasSelection());
}
4.2. Регистрация действий
Как только мы написали наши действия,
нам нужно зарегистрировать их в IDE
. Есть два способа сделать это.
Первый способ — использовать файл
plugin.xml
, который создается для нас, когда мы начинаем новый проект.
По умолчанию в файле будет пустой элемент
<actions>
, куда мы добавим наши действия:
<actions>
    <action
      id="StackOverflow.AskQuestion.ToolsMenu"
      class="com.baeldung.intellij.stackoverflowplugin.AskQuestionAction"
      text="Ask Question on Stack Overflow"
      description="Ask a Question on Stack Overflow">
        <add-to-group group-id="ToolsMenu" anchor="last"/>
    </action>
    <action
      id="StackOverflow.Search.Editor"
      class="com.baeldung.intellij.stackoverflowplugin.SearchAction"
      text="Search on Stack Overflow"
      description="Search on Stack Overflow">
        <add-to-group group-id="EditorPopupMenu" anchor="last"/>
    </action>
    <action
      id="StackOverflow.Search.Console"
      class="com.baeldung.intellij.stackoverflowplugin.SearchAction"
      text="Search on Stack Overflow"
      description="Search on Stack Overflow">
        <add-to-group group-id="ConsoleEditorPopupMenu" anchor="last"/>
    </action>
</actions>
Использование файла XML для регистрации действий обеспечит их регистрацию во время запуска IDE, что обычно является предпочтительным.
Второй способ зарегистрировать действия — это программно использовать класс
ActionManager
:
ActionManager.getInstance().registerAction("StackOverflow.SearchAction", new SearchAction());Это имеет то преимущество, что позволяет нам динамически регистрировать действия. Например, если мы напишем плагин для интеграции с удаленным API, нам может потребоваться зарегистрировать другой набор действий в зависимости от версии API, которую мы вызываем.
Недостатком этого подхода является то, что действия не регистрируются при запуске. Мы должны создать экземпляр
ApplicationComponent
для управления действиями, что требует больше кодирования и настройки XML.
5. Тестирование плагина
Как и в любой программе, написание плагина IntelliJ требует тестирования. Для небольшого плагина, подобного тому, который мы написали, достаточно убедиться, что плагин компилируется и что созданные нами действия работают, как и ожидалось, когда мы нажимаем на них.
Мы можем вручную протестировать (и отладить) наш плагин, используя конфигурацию запуска плагина:
ссылка:/uploads/intellij-plugin-run-configuration-100×71.jpg%20100w[]
Это запустит новый экземпляр IntelliJ с активированным нашим плагином.
Это позволяет нам щелкать по различным пунктам меню, которые мы создали, и открывать соответствующие страницы переполнения стека.
Если вы хотите выполнить более традиционное модульное тестирование, IntelliJ предоставляет
headlessless environment
для запуска модульных тестов. Мы можем писать тесты, используя любую среду тестирования, какую захотим, и тесты выполняются с использованием реальных немодированных компонентов из IDE.
6. Развертывание плагина
Плагин DevKit предоставляет простой способ упаковки плагинов, чтобы мы могли их устанавливать и распространять. Просто щелкните правой кнопкой мыши по проекту плагина и выберите «Подготовить модуль плагина к развертыванию». Это сгенерирует файл JAR внутри директории проекта.
Сгенерированный файл JAR содержит код и файлы конфигурации, необходимые для загрузки в IntelliJ. Вы можете установить его локально или опубликовать в
plugin хранилище
для использования другими.
На снимке экрана ниже показан один из новых пунктов меню Stack Overflow в действии:
ссылка:/uploads/intellij-stackoverflow-pluginjpg-100×41.jpg%20100w[]
7. Заключение
В этой статье мы разработали простой плагин, который подчеркивает лишь некоторые из способов улучшения IntelliJ IDE.
Хотя мы в основном работали с действиями, плагин IntelliJ SDK предлагает несколько способов добавления новых функций в IDE. Для дальнейшего чтения, ознакомьтесь с
official руководством по началу работы
.
Как всегда, полный код нашего примера плагина можно найти в нашем
GitHub репозитории
.

- Introduction
- What are plugins?
- plugin.xml — “entry point” into your plugin
- Declarative nature and dependency injection
- Actions
- Dynamic plugins
- Main thread, performance, and UI freezes
- Extending your plugin or another plugin
- References
- Plugin architecture
- PicoContainer
- plugin.xml
- Migrating from Components to Dynamic Plugins (2020-07-17)
- Components (deprecated)
- Extensions and extension points
- Services
- Persisting state between IDE restarts
- PersistentStateComponent and Services
- Actions
- IntelliJ platform version, Gradle version, Kotlin version, gradle-intellij-plugin, intellij-plugin-verifier
- intellij-plugin-verifier
- Notes on the build or version codes
- Using the latest version of Gradle and gradle-intellij-plugin
- In build.gradle.kts which intellij version should we use?
- intellij-plugin-verifier
- Declaring dependencies on other plugins
- Misc
- Analyze startup performance
- How to use project specific JDKs
- Using ResourceBundles for localization
- Imperative approach
- Declarative approach
- Testing
- AssertJ
- Example tests
- Fixtures
- Test data
- Mocking actions
- References
This tutorial (originally published on 2019-08-25) covers the basics of creating a plugin for
IntelliJ IDEA using the Plugin SDK. It covers the basics, like what components and services are,
what extension points and extensions are, along with persistent state components, and unit testing.
Topics like disposables, PSI, VFS, read/write locks, are not covered in this tutorial. I will write
more tutorials in the future to cover these advanced topics as well.
To get the code for this tutorial, please clone the
nazmulidris/idea-plugin-example repo from
github. Please check out the README for this repo, and clone it to your computer, and get it running
before following along in this tutorial. It’s much easier when you have some real code and examples
to play with in the IDE to understand the concepts in this very long tutorial.
There is quite a lot of information to absorb as you embark on this journey! The following is a link
to the official JetBrains Platform SDK docs to create a plugin from scratch. In this tutorial we
will cover using the gradle based plugin (and not the old Plugin DevKit based approach).
- Getting started w/ Gradle based IntelliJ Platform Plugin.
Once you are done with the basics, and want to get into more advanced topics, please read the
Advanced guide to creating IntelliJ IDEA
plugins.
What are plugins? #
IntelliJ IDEA is a very powerful IDE platform. This platform is used to roll out a variety of IDEs
(eg: IntelliJ Community Edition (FOSS), IntelliJ Ultimate, Android Studio, Webstorm, etc). You can
find the source code for the Community Edition in this repo
intellij-community. The platform SDK is part of
this repo.
JetBrains allows you or anyone to extend their IDE in any way that they choose by writing their own
plugin. IDEA itself is
comprised of a very small core set of classes, with a ton of plugins that are supplied by JetBrains.
So if you are thinking of writing a plugin to extend the functionality of IDEA, then you have come
to the right place. Think of your plugin as an application that will live in the container of the
IDEA window in a desktop environment. There are some rules that you have to comply with in order to
be a good citizen of this container. This tutorial will guide you through some of what these
constraints are.
plugin.xml — “entry point” into your plugin #
When creating a plugin, you must let the “IDEA container” know what your plugin actually does, so
that IDEA can load it properly and allow users to interact with it (via keyboard shortcuts, menus,
toolbars). Things like the name of your plugin, associate icons, internationalized string bundles,
etc all have to be provided to IDEA so that it can render your plugin properly. All of this
declarative information about your plugin is stored in a file called
plugin.xml which is
the most important “entry point” into the code for your plugin.
Declarative nature and dependency injection #
IDEA itself uses PicoContainer to load all the classes required by your
plugin via very simple dependency injection. This is why all of the things in plugin.xml tend to
be declarative. You won’t find any calls to constructors and such. IDEA uses something like
classgraph in order to look thru its various
classpaths and figure out which actual classes to load at runtime.
Here is an example of how you can use
classgraph in your Kotlin / Java code.
Actions #
One of the main ways in which IDEA users will interact with your plugin is via
actions. Actions can be invoked by
using Search Anywhere (Shift + Shift) and typing the name of the action. Or by pressing the
keyboard shortcut to invoke that action. Or by clicking on a toolbar that has the action, or
selecting a menu that is mapped to this action. All the actions that are exposed by your plugin are
explicitly listed in this plugin.xml file.
Dynamic plugins #
All IDEA plugins need to be
dynamic. This means they can be
unloaded and loaded on demand. So if the user uninstalls your plugin it should not require an IDE
restart. Similarly if they install your plugin, or upgrade it, it should not require an IDE restart.
For this reason you can think of your plugin as a set of actions, and a set of
services that can be provided on
demand. You can learn more about services in
Services.
There are tasks that your plugin might need to happen when a project is first opened that requires
the use of this plugin. You can handle this by declaring the use of the
backgroundPostStartupActivity
extension point. You may also have tasks that might need to happen when the IDE itself is started in
which can you try using the
AppLifecycleListener.
Main thread, performance, and UI freezes #
So following is another reason dynamic plugins and the declarative nature of plugin.xml go hand in
hand — performance. In order for IDEA itself to load quickly, plugins that are not needed by any
open projects should not be loaded at startup. If the user opens a project, then only the plugins
required by that project should be loaded without making the IDE unresponsive, or at least be
delayed after the UI is responsive. A lot of code in IDEA runs in the UI (main) thread. This is
unfortunate and unavoidable for a lot of reasons (which will become clear when you learn about
PSI and
VFS; more about these in the advanced
tutorial). In order to be a “good
citizen” in the IDE container itself, your plugin will need to do things that are unintuitive just
so that it
does not freeze
the main thread, and make the IDE itself unresponsive to the user.
Extending your plugin or another plugin #
Even your plugin can be built in a way that it can be extended by other plugins! And your plugin can
extend another plugin created by someone else. These are called extension points and extensions
and you can learn about them in detail in Extensions and extension
points.
References #
Docs:
- Introduction to creating IntelliJ IDEA
plugins - Official JetBrains IntelliJ Platform SDK docs
- Official JetBrains IntelliJ Platform Explorer (extension point explorer)
Code examples (GitHub repos):
- idea-plugin-example
- idea-plugin-example2
- shorty-idea-plugin
- intellij-community
Plugin architecture #
An IDEA plugin really is an extension of the IDE that you are writing. Most of IDEA itself is
constructed as a set of plugins that are layered on top of the base platform code.
- Each plugin has a
plugin.xmlfile which is a manifest that declares what is inside the plugin
and how it hooks into IDEA itself. If you’re familiar w/ Android, this is similar to the
AndroidManifest.xmlfile. - Each plugin gets its own classloader, and IDEA itself uses PicoContainer (more on this below) to
perform dependency injection to handle loading classes via reflection. - In many situations in IDEA, classes are loaded via reflection, and there are even situations where
classes loaded by a classloader are indexed and searched. Here’s a github repo for a really fast
classpath scanner called classgraph to give you an
idea of how this might work.
PicoContainer #
IDEA uses PicoContainer for dependency injection (DI).
- PicoContainer is a very simple DI engine that supports both constructor and field injection
injection and uses Java reflection. Even though it supports field injection, IDEA uses it
primarily for constructor injection. - Here’s a github repo which contains some examples
of how to use PicoContainer.
When IDEA itself launches, it uses PicoContainer to manage loading all of its classes, interfaces,
and objects. And this is extended to any plugin that you write (to extend IDEA itself). So you don’t
really manage the lifecycle of your plugin, IDEA does. And it does it via PicoContainer components.
When your plugin is loaded into IDEA, PicoContainer is used to instantiate the classes that your
plugin provides to IDEA itself, and this is where things like project and application components can
be injected into the constructors of your components (more on this below).
plugin.xml #
This is a really important file that really tells IDEA about what is inside of your component and
how IDEA should deal with loading it, and having it interact w/ other 3rd party components, and IDEA
itself. This is very similar to AndroidManifest.xml if you’re used to Android development.
In this file you have to declare the id of your plugin. This is a really important piece of
information as this will be used as a “namespace” for many of the things that are listed below.
You also have to list all the components, services, and actions that your plugin provides to IDEA in
this file.
Here’s an example of a plugin.xml file.
- It provides a custom extension point that allows some extensions (which are simple
Runnable
classes that are run at IDE startup).- The
extensionPointis calledconfiguratorRunnable. - The
postStartupActivityimplemented byextensionPoints.ConfiguratorComponent.ktfinds all
itsextensions(declared below) after the IDE finishes loading and does “something” with each
of them. - Two
extensionseach of which implement theconfiguratorRunnableextension point (declared
above) which is simplyRunnable.
- The
- A
PersistentStateComponentcalledservices.LogServiceis also declared which is a
applicationService. Services are the preferred way of creating plugin functionality since they
don’t all have to be created until actually needed.- Note that if you use
light services
then there’s no need to have this block inplugin.xml.
- Note that if you use
- It exposes a bunch of actions and specifies where these actions should appear.
- It creates a menu group and adds some actions to it.
More on all of this in the following sections.
<idea-plugin>
  <!-- Namespace of this plugin. Used in extensions and extension points. -->
  <id>com.developerlife.example.idea-plugin-example</id>
  <name>developerlife example</name>
  <vendor email="support@developerlife.com" url="http://developerlife.com">
    developerlife.com
  </vendor>

  <description><![CDATA[
    This sample plugin does the following things ...
    ]]></description>

  <!-- Add post startup activity to load extensions for our custom extension point. -->
  <extensions defaultExtensionNs="com.intellij">
    <postStartupActivity implementation="extensionPoints.ConfiguratorStartupActivity" />
  </extensions>

  <!-- Extension point for the application component above. -->
  <extensionPoints>
    <extensionPoint name="configuratorRunnable"
        interface="java.lang.Runnable" />
  </extensionPoints>

  <!-- Extensions that run when the application component above is
  initialized. -->
  <extensions
      defaultExtensionNs="com.developerlife.example.idea-plugin-example">
    <configuratorRunnable order="first"
        implementation="extensions.AnInitializer"
        id="MyPlugin.extensions.AnInitializer" />
    <configuratorRunnable order="last"
        implementation="extensions.AnotherInitializer"
        id="MyPlugin.extensions.AnotherInitializer" />
  </extensions>

  <!-- Extension to publish the LogService. -->
  <extensions defaultExtensionNs="com.intellij">
    <applicationService serviceImplementation="services.LogService" />
  </extensions>

  <!-- Add SearchOnStackOverflowAction to both the EditorPopupMenu and
  ConsoleEditorPopupMenu -->
  <actions>
    <action id="MyPlugin.Editor.actions.SearchOnStackOverflowAction"
        class="actions.SearchOnStackOverflowAction"
        text="Search on Stack Overflow"
        description="Search selected text on Stack Overflow"
        icon="/icons/ic_stackoverflow.svg">
      <add-to-group group-id="EditorPopupMenu" anchor="last" />
      <add-to-group group-id="ConsoleEditorPopupMenu" anchor="last" />
    </action>
  </actions>

  <!-- Create a new Greeting menu and add the following to it: HelloAction and
  AskQuestionOnStackOverflowAction. -->
  <actions>
    <!-- Create a new Greeting menu -->
    <group id="MyPlugin.SampleMenu" text="Greeting" description="Greeting menu">
      <add-to-group group-id="MainMenu" anchor="last" />

      <!-- Add HelloAction to the Greeting menu -->
      <action id="MyPlugin.actions.HelloAction" class="actions.HelloAction"
          text="Hello" description="Says hello"
          icon="/icons/ic_check_circle.svg">
        <add-to-group group-id="MainMenu" anchor="first" />
      </action>

      <!-- Add AskQuestionOnStackOverflowAction to the Greeting menu -->
      <action id="MyPlugin.actions.AskQuestionOnStackOverflowAction"
          class="actions.AskQuestionOnStackOverflowAction" text="Ask Question"
          description="Opens a browser" icon="/icons/ic_stackoverflow.svg">
        <add-to-group group-id="MainMenu" anchor="last" />
      </action>
    </group>
  </actions>
</idea-plugin>
Migrating from Components to Dynamic Plugins (2020-07-17) #
Components are now deprecated, so just use services instead. To migrate your plugin to be Dynamic,
use the following links to determine how to make the switch. Dynamic Plugins allow IDEA to
load/unload/reload your plugin w/out restarting IDEA and it makes IDEA much faster to startup, and
more memory and CPU efficient as well (when done correctly).
- Plugin extension points
- Dynamic plugins
- Migrate components to services
- Dynamic plugins and choosing a parent disposable
- Initialize plugin on startup
In this plugin, here are
the changes
that are related to making it dynamic.
- The component (
ConfiguratorComponent.kt) that runs the Runnables when the plugin loads after
the IDE starts, was replaced w/ apostStartupActivitycalledConfiguratorStartupActivity.kt
that actually does what the old component did. The extensions for our custom extension point are
instantiated and run here. This is essentially all that the old component actually did. The entry
for the component inplugin.xmlwas removed and thepostStartupActivityentry was added. - The custom extension point is actually marked as
dynamic. - The service (
LogService.kt) is marked w/ an annotation@Servicemaking it a
light service.
This does not require anyplugin.xmlentry, which was removed.
Components (deprecated) #
Components are classes that are loaded by IDEA when it starts. You have to careful about creating
too many components in your plugin, since they are created at IDEA startup and if they take a long
time to execute, they will delay the launch of the IDE.
Also, the code in components is executed on the main thread. JetBrains recommends that services
should be used instead of components wherever possible, since these are loaded lazily, and are
better for IDE performance.
There are 3 kinds of components, a) application components, b) project components, and c) module
components. Here are
the official docs.
This a link to older docs
from JetBrains which are a really good reference as well.
Application Components — These are created and initialized when the IDE starts up.
- You can either declare a constructor in your class which accepts an
Applicationobject, eg:
class ConfiguratorComponent(val application : Application ) {}. PicoContainer injects the
application object into your constructor. - Or call the static method
ApplicationManager.getInstance().getComponent(YourComponent.class ).
WhereYourComponent.classis your component class. -
You also have to register the component class (eg:
YourComponent.class) withplugin.xml.<!-- Add application component. --> <application-components> <component> <implementation-class>YourComponent</implementation-class> </component> </application-components> - Here’s an example on github for this tutorial
idea-plugin-example .
Project Components — These are created for each project instance in the IDE.
- You have to implement the
ProjectComponentinterface. - You can use constructor injection, that accepts a
Projectobject. -
You have to register the component class with
plugin.xml.<project-components> <component> <implementation-class>YourProjectComponent</implementation-class> </component> </project-components> - You can get a list of all the open projects by using
ProjectManager.getInstance().getOpenProjects(). - Here’s an example project on github called
max_opened_projects.
Module Components — These are created for each module inside of every project in the IDE.
- You have to implement the
ModuleComponentinterface. - The constructor of a module-level component can have a parameter of the
Moduletype, if it
needs the module instance (this will be injected by PicoContainer). It can also specify other
application-level, project-level or module-level components as parameters, if it needs them
(these will also be injected). -
You have to register the component class with
plugin.xml.<!-- Plugin's module components --> <module-components> <component> <interface-class>YourModuleComponent</interface-class> </component> </module-components>
Extensions and extension points #
An IDEA extension is a way for a plugin to extend what IDEA can do. For eg, IDEA doesn’t know how to
work w/ Bash files. You can install a plugin that gives IDEA syntax highlighting for Bash. This
plugin provides this capability of turning a Bash filed loaded in the editor, into PSI via an
extension that this plugin provides, which binds to an extension point that is provided by IDEA.
IDEA itself is a set of plugins, and many parts of IDEA define extension points, that can be
implemented by extensions that are provided by various plugins. In fact, there are some scenarios
where multiple extensions are provided as an implementation of a single extension point. The IDE
itself doesn’t know what extensions are available or even extension points, until it loads itself
and all the bundled plugins and 3rd party plugins that are installed.
There are many important extension points that are exposed by IDEA itself that are listed here:
- LangExtensionPoints.xml
- PlatformExtensionPoints.xml
- VcsExtensionPoints.xml
Here are the official docs on extension and extension points.
IDEA services are themselves implemented via this extension mechanism (more on that in the section
below). There is a very consistent convention / idiom exposed by extension points and extensions.
- The extension point defines an interface that an extension must implement. The name attribute
of the extension point becomes the XML element/tag name of the extension itself. - Any attributes that are passed in to the extension are declared by the extension point as things
it requires to be instantiated. For any extension point that you create, there are 2 attributes
to consider:interfaceattribute is declared in the extension point, and theimplementation
attribute, which is used by each of the extensions that may be declared. Examples of these
attributes for services (eg:applicationService,projectService, ormoduleService
extension points) areserviceInterface, andserviceImplementation.
Here’s an example of this convention for a plugin providing its own extension point.
<extensionPoints>
  <extensionPoint name="MyExtensionPoint2" interface="MyPlugin.MyInterface"/>
</extensionPoints>

<extensions defaultExtensionNs="MyPluginID">
  <MyExtensionPoint2 implementation="MyTestPackage.MyClassImpl">
  </MyExtensionPoint2>
</extensions>
Here’s an example of this convention for a plugin providing an extension to IDEA extension points:
appStarter and applicationConfigurable.
<extensions defaultExtensionNs="com.intellij">
  <appStarter implementation="MyTestPackage.MyTestExtension1" />
  <applicationConfigurable implementation="MyTestPackage.MyTestExtension2" />
</extensions>
There are 2 namespaces that you should be aware of. Here is an example of this in use:
<extensions defaultExtensionNs="com.intellij">...</extensions>
<extensions defaultExtensionNs="MyPluginID">...</extensions>
com.intellijmeans that you want to extend IDEA extension points itself.MyPluginID(which is really any string that you use for your plugin id) means that this
extension implements the extension point that your plugin itself is exposing (and not IDEA
directly).
So, how are these extensions and extensions points loaded by IDEA? It seems magic that you just
declare them in plugin.xml and then they are automagically instantiated and hooked up in the right
way to do all the right things.
The answer is
PluginManagerCore.java.
It searches the plugins directory for plugins, parses their plugin.xml files, and then uses
reflection to instantiate the extensions listed there. And PicoContainer takes care of injecting the
platform dependencies.
Here’s an example of this in the extension point implementation that is provided in the git repo of
this tutorial
(extensionPoints/ConfiguratorComponent.kt).
package extensionPoints

/**
 * Create an ExtensionPointName given the namespace of the plugin and the
 * name of the extension point itself. Note that the namespace is "com
 * .intellij" if IntelliJ Platform core functionality is extended, otherwise,
 * it is the namespace of the plugin itself.
 */
object EP_NAME {
  private const val nameSpace =
      "com.developerlife.example.idea-plugin-example"
  private const val name = "configuratorRunnable"
  private const val fullyQualifiedName = "$nameSpace.$name"
  operator fun invoke(): ExtensionPointName<Runnable> =
      ExtensionPointName.create<Runnable>(fullyQualifiedName)
}

/**
 * An ApplicationComponent that loads all the extensions that are registered to
 * the extension point. Note that this class does not have to implement any
 * IntelliJ platform interfaces.
 */
class ConfiguratorComponent(val application: Application) {
  init {
    EP_NAME().extensionList.forEach { it.run() }
  }
}
Here are some examples of real plugins that use extensions and extension points. You can use these
links to browse the source code for these plugins.
- OpenInTerminal
- DateTimeConverter
- max_opened_projects sample
- Customizing IDEA settings dialog
- How to create a Tool Window
Services #
JetBrains recommends using services instead of components, since they are created on demand, and
don’t slow down startup, or allocate resources even though they aren’t being used.
Services are classes that can be instantiated by IDEA when needed, and these objects/instances
reused, so they are stateful. It’s a way to provide any arbitrary class and interface to anything
required by a plugin, such as components, actions, etc.
Services utilize IDEA extensions. And they are unlike components (which are pre-loaded when the IDE
starts up).
In order to create services, here are the IDEA extension points that can be used (to create
services, which are the extensions):
applicationService— this is equivalent to application componentprojectService— this is equivalent to project componentmoduleService— this is equivalent to module component
Here’s an example:
<extensions defaultExtensionNs="com.intellij">
    <applicationService
        serviceImplementation="settings.OpenInTerminalSettings"/>
    <applicationConfigurable
        id="OpenInTerminal.settings"
        instance="settings.OpenInTerminalSettingsConfigurable"/>
</extensions>
It’s a very common pattern to provide a static factory method called getInstance() to get an
object for the given service class. Here’s an example that gets an instance of YourService class:
/**
 * This is used by IDEA to get a reference to the single instance of this
 * service (used by [ServiceManager]).
 */
val instance: LogService
  get() = ServiceManager.getService(YourService::class.java)
Here is more information on this:
- Docs (jetbrains.org)
- Example (OpenInTerminal plugin)
- Example (max_open_projects sample plugin)
Persisting state between IDE restarts #
IDEA allows components and services to persist their state across IDE restarts. You can specify the
storage location, or use the defaults. And you can specify the data that gets stored as well (public
fields of the “state” class that you pick). Annotations are used to specify all these things
(combination of @State and @Storage, look at the details link
for more info).
There are 2 ways (each saves/loads from a different location):
- Preferred:
- Simple:
PropertiesComponent(saves toworkspace.xml) - Complex:
@State,@Storage,PersistentStateComponentinterface
- Simple:
- Deprecated:
JDOMExternalizableinterface
Settings are persisted across IDEA restarts:
- Application components are in global IDEA configuration.
- Project components are saved in project specific configuration.
- Module components are saved in project specific configuration.
More info on persisting state (and lifecycle):
- Overview.
- Details.
PersistentStateComponent and Services #
It is a very common pattern to combine services and PersistentStateComponent. Zooming out from the
implementation details, this is how you can use these types of services:
- You can call
getInstance()on the companion object, or singleton instance of a service class.
And IDEA will already restore its state from persistence (XML file in
$IDEA_CONFIG_FOLDER/config/system/folder). - You can use the instance and mutate its state.
- IDEA will automatically save the mutated state to persistence (XML) files for you in the
background.
Here’s an
example.
@State(name = "LogServiceData", storages = [Storage("logServiceData.xml")])
object LogService : PersistentStateComponent<LogService.State> {
  /**
   * This is used by IDEA to get a reference to the single instance of this
   * service (used by [ServiceManager]).
   */
  val instance: LogService
    get() = ServiceManager.getService(LogService::class.java)

  fun addMessage(message: String) {
    with(state.messageList) {
      add(message)
      add("LogService: ${whichThread()}")
    }
  }

  override fun toString(): String {
    return with(state.messageList) {
      "messageList.size=$size" + "n${joinToString(separator = "n")}"
    }
  }

  private var state = State()

  data class State(
      var messageList: MutableList<String> =
          CopyOnWriteArrayList()
  )

  /**
   * Called by IDEA to get the current state of this service, so that it can
   * be saved to persistence.
   */
  override fun getState(): State {
    "IDEA called getState()".logWithoutHistory()
    return state
  }

  /**
   * Called by IDEA when new component state is loaded. This state object should
   * be used directly, defensive copying is not required.
   */
  override fun loadState(stateLoadedFromPersistence: State) {
    "IDEA called loadState(stateLoadedFromPersistence)".logWithoutHistory()
    stateLoadedFromPersistence.messageList
        .joinToString(separator = ",", prefix = "{", postfix = "}")
        .logWithoutHistory()
    state = stateLoadedFromPersistence
  }

}
Notes on PersistentStateComponent implementation.
-
The
loadState()method is called by IDEA after the component has been created (only if there is
some non-default state persisted for the component), and after the XML file with the persisted
state is changed externally (for example, if the project file was updated from the version control
system). In the latter case, the component is responsible for updating the UI and other related
components according to the changed state. -
The
getState()method is called by IDEA every time the settings are saved (for example, on frame
deactivation or when closing the IDE). If the state returned fromgetState()is equal to the
default state (obtained by creating the state class with a default constructor), nothing is
persisted in the XML. Otherwise, the returned state is serialized in XML and stored.
In this example, you can use the following instructions to locate the XML files and log files that
are generated.
To find the IDEA log look at the $PROJECT_DIR/build/idea-sandbox/system/log/idea.log file. A
simple command to do this (from the project directory) is:
find . -name "idea.log" | xargs tail -f | grep MyPlugin
To find the "logServiceData.xml" take a look at the
$PROJECT_DIR/build/idea-sandbox/config/options/logServiceData.xml file. A simple command to do
this (from the project directory) is:
find . -name "logServiceData.xml" | xargs subl -n
Actions #
Actions are one of the simplest ways in which to extend IDE functionality. The official docs do a
great job of going over the action system
here. I recommend reading
that page before continuing with this tutorial (as I’m not going to repeat that material here).
You can declare actions in XML and you can also register them in code. Some of the built in actions
in IDEA itself are registered in code (eg: Coverage action, which is the “Run with Coverage” icon
that shows up in the main toolbar, and main menu). In fact, all the executors are actually
registered in code (and not declaratively in XML).
Here are some examples of actions declared in XML and implemented in Kotlin from the sample plugin
created for this tutorial.
plugin.xml.Actions implemented in Kotlin.
IntelliJ platform version, Gradle version, Kotlin version, gradle-intellij-plugin, intellij-plugin-verifier #
When creating your plugin, you have to make a decision about which IntelliJ products your plugin
will support (the products inside of which your plugin will run once they’re installed). Keep in
mind that these products are rapidly evolving and platform updates (for the IntelliJ platform that
all the IDE products are based on) are released quite often, about 3 releases a year. Oftentimes
breaking changes are released and this requires big architectural or structural changes in your
plugin codebase.
intellij-plugin-verifier #
JetBrains have a plugin verifier
intellij-plugin-verifier that makes it easy
for you to know if your plugin is compatible w/ your chosen IntelliJ platform version or build
codes. Instead of running this manually against your plugin, the
gradle-intellij-plugin
makes it easy to run this as a gradle task. Note that you are using this gradle plugin to build your
plugin. Here’s a snippet in your build.gradle.kts that you can add to configure this verification
task.
// See https://github.com/JetBrains/gradle-intellij-plugin#plugin-verifier-dsl
// See https://data.services.jetbrains.com/products?fields=code,name,releases.version,releases.build,releases.type&code=IIC,IIU
tasks {
  runPluginVerifier {
    ideVersions(listOf<String>("2020.1.4", "2020.2.3", "2020.3"))
  }
}
You can run this task from IDEA, or from the command line using ./gradlew runPluginVerifier to
ensure that this the intellij-plugin-verifier runs. It points out any deprecations or any other
mistakes that need to be corrected before publishing this plugin. Also, make sure to choose which
IDEA versions you would like the plugin to be verified against in the ideVersions function. More
on this below.
You can learn more about this DSL
here. There’s a detailed
report that is generated in ${project.buildDir}/reports/pluginVerifier for each ideVersion that
this plugin is tested against. Here’s an example of the output this task produces on the command
line.
Starting the IntelliJ Plugin Verifier 1.253
2020-11-21T13:25:17 [main] INFO  c.j.p.options.OptionsParser - Delete the verification directory /home/nazmul/github/idea-plugin-example/build/reports/pluginVerifier because it isn't empty
Verification reports directory: /home/nazmul/github/idea-plugin-example/build/reports/pluginVerifier
2020-11-21T13:25:17 [main] INFO  verification - Reading IDE /home/nazmul/.pluginVerifier/ides/IC-2020.1.4
2020-11-21T13:25:19 [main] INFO  verification - Reading IDE /home/nazmul/.pluginVerifier/ides/IC-2020.2.3
2020-11-21T13:25:21 [main] INFO  verification - Reading IDE /home/nazmul/.pluginVerifier/ides/IC-2020.3
2020-11-21T13:25:22 [main] INFO  verification - Reading plugin to check from /home/nazmul/github/idea-plugin-example/build/distributions/idea-plugin-example-1.0.zip
2020-11-21T13:25:33 [main] INFO  verification - Task check-plugin parameters:
Scheduled verifications (3):
com.developerlife.example.idea-plugin-example:1.0 against IC-201.8743.12, com.developerlife.example.idea-plugin-example:1.0 against IC-202.7660.26, com.developerlife.example.idea-plugin-example:1.0 against IC-203.5981.41

2020-11-21T13:25:34 [main] INFO  verification - Finished 1 of 3 verifications (in 0.6 s): IC-201.8743.12 against com.developerlife.example.idea-plugin-example:1.0: Compatible
2020-11-21T13:25:34 [main] INFO  verification - Finished 2 of 3 verifications (in 0.6 s): IC-202.7660.26 against com.developerlife.example.idea-plugin-example:1.0: Compatible. 3 usages of internal API
2020-11-21T13:25:34 [main] INFO  verification - Finished 3 of 3 verifications (in 0.6 s): IC-203.5981.41 against com.developerlife.example.idea-plugin-example:1.0: Compatible. 3 usages of deprecated API. 3 usages of internal API
Plugin com.developerlife.example.idea-plugin-example:1.0 against IC-201.8743.12: Compatible
    Plugin can be loaded/unloaded without IDE restart

Plugin com.developerlife.example.idea-plugin-example:1.0 against IC-202.7660.26: Compatible. 3 usages of internal API
Internal API usages (3):
    #Internal method com.intellij.ide.plugins.PluginManager.getLogger() invocation
        Internal method com.intellij.ide.plugins.PluginManager.getLogger() : com.intellij.openapi.diagnostic.Logger is invoked in UtilsKt.logWithHistory(String) : void. This method is marked with @org.jetbrains.annotations.ApiStatus.Internal annotation and indicates that the method is not supposed to be used in client code.
        Internal method com.intellij.ide.plugins.PluginManager.getLogger() : com.intellij.openapi.diagnostic.Logger is invoked in UtilsKt.log(String) : void. This method is marked with @org.jetbrains.annotations.ApiStatus.Internal annotation and indicates that the method is not supposed to be used in client code.
        Internal method com.intellij.ide.plugins.PluginManager.getLogger() : com.intellij.openapi.diagnostic.Logger is invoked in UtilsKt.logWithoutHistory(String) : void. This method is marked with @org.jetbrains.annotations.ApiStatus.Internal annotation and indicates that the method is not supposed to be used in client code.
    Plugin can be loaded/unloaded without IDE restart

Plugin com.developerlife.example.idea-plugin-example:1.0 against IC-203.5981.41: Compatible. 3 usages of deprecated API. 3 usages of internal API
Deprecated API usages (3):
    #Deprecated method com.intellij.openapi.util.IconLoader.getIcon(String) invocation
        Deprecated method com.intellij.openapi.util.IconLoader.getIcon(java.lang.String path) : javax.swing.Icon is invoked in actions.PluginIcons.DefaultImpls.getHELLO_ACTION(PluginIcons) : Icon
        Deprecated method com.intellij.openapi.util.IconLoader.getIcon(java.lang.String path) : javax.swing.Icon is invoked in actions.PluginIcons.DefaultImpls.getSTACKOVERFLOW_ACTION(PluginIcons) : Icon
    #Deprecated constructor com.intellij.notification.NotificationGroup.<init>(String, NotificationDisplayType, boolean, String, Icon, int, DefaultConstructorMarker) invocation
        Deprecated constructor com.intellij.notification.NotificationGroup.<init>(java.lang.String arg0, com.intellij.notification.NotificationDisplayType arg1, boolean arg2, java.lang.String arg3, javax.swing.Icon arg4, int arg5, kotlin.jvm.internal.DefaultConstructorMarker arg6) is invoked in ui.ShowNotificationSampleAction.anotherNotification(AnActionEvent) : void
Internal API usages (3):
    #Internal method com.intellij.ide.plugins.PluginManager.getLogger() invocation
        Internal method com.intellij.ide.plugins.PluginManager.getLogger() : com.intellij.openapi.diagnostic.Logger is invoked in UtilsKt.logWithHistory(String) : void. This method is marked with @org.jetbrains.annotations.ApiStatus.Internal annotation and indicates that the method is not supposed to be used in client code.
        Internal method com.intellij.ide.plugins.PluginManager.getLogger() : com.intellij.openapi.diagnostic.Logger is invoked in UtilsKt.log(String) : void. This method is marked with @org.jetbrains.annotations.ApiStatus.Internal annotation and indicates that the method is not supposed to be used in client code.
        Internal method com.intellij.ide.plugins.PluginManager.getLogger() : com.intellij.openapi.diagnostic.Logger is invoked in UtilsKt.logWithoutHistory(String) : void. This method is marked with @org.jetbrains.annotations.ApiStatus.Internal annotation and indicates that the method is not supposed to be used in client code.
    Plugin can be loaded/unloaded without IDE restart

2020-11-21T13:25:34 [main] INFO  verification - Total time spent downloading plugins and their dependencies: 0 ms
2020-11-21T13:25:34 [main] INFO  verification - Total amount of plugins and dependencies downloaded: 0 B
2020-11-21T13:25:34 [main] INFO  verification - Total amount of space used for plugins and dependencies: 0 B
Notes on the build or version codes #
The gradle task shown above requires a ideVersions array to be passed in. This array contains the
build or version codes for IDEA releases or EAPs that we want our plugin to be tested against. Where
do we find these codes that are required? The following link has a list of build and version codes
for IIC - IntelliJ IDEA Community Edition, and IIU - IntelliJ IDEA Ultimate Edition. You can
modify the URL to get other product codes that you need to include. To view this link in Chrome,
please use an extension like JSON Formatter since
there the JSON blob returned by this URL is quite big.
- IIC, IIU release version, build, download
Once you have decided which versions of IDEA that you want this plugin to be verified against, make
sure that you have declared this plugin to be compatible w/ these IDE build ranges in the following
two places:
build.gradle—intellij { version { "<version-or-build-code>" } }plugin.xml—
<idea-version since-build="<version-or-build-code>" until-build="<version-or-build-code" />- Note that you can use wildcards here, eg:
2020.*for the<version-or-build-code>
- Note that you can use wildcards here, eg:
Using the latest version of Gradle and gradle-intellij-plugin #
On a somewhat related note, you might have to upgrade your existing plugin to use the latest Gradle
and gradle-intellij-plugin. You might also have to upgrade the version of Kotlin you support. Most
of these changes can be made in the build.gradle.kts file. However, upgrading Gradle itself has to
be done from the command line.
Here’s more information on staying up to date w/ the latest version of
gradle-intellij-plugin. This requires changes
to be made to the plugin section of build.gradle w/
id "org.jetbrains.intellij" version "<latest-version-here>"
Here’s more information on staying up to date w/ the latest version of the
Gradle wrapper that is required. You can
run the following command upgrade the Gradle wrapper
./gradlew wrapper --gradle-version <latest-version-here>, where <latest-version-here> is the
latest version of Gradle, eg: 6.7.
To update to the latest version of Kotlin, in build.gradle.kts, you have to update
plugins { kotlin("jvm") version "<new-version>" } where <new-version> is the latest version of
Kotlin, eg: 1.4.10.
In build.gradle.kts which intellij version should we use? #
Using version 'LATEST-EAP-SNAPSHOT can be very unstable, and cause gradle tasks to fail in strange
ways, and cause other issues w/ the gradle plugins (IntelliJ, Kotlin, etc). Instead it is best to
pick a specific stable version from here.
You can get a list of EAP snapshots from
here but these are also most likely
unstable. For our plugin, it is a little bit more complex, since it has a dependency on “java” and
“markdown” plugins. The workflow to update to the latest version of IDEA and Markdown plugin goes
something like this:
- Find the latest Markdown plugin release from
here, and insert it below
(replacing whatever version is there now). The webpage will also tell you which version of IDEA
this is compatible w/. - Find the IDEA snapshot that is compatible w/ the Markdown plugin above (which probably won’t be
the latest EAP snapshot). Replace theintellij.versioninbuild.gradle.ktsw/ this supported
snapshot.
You can read more about this on the
JB official docs plugin dependencies.
Declaring dependencies on other plugins #
It is common for some plugins to have dependencies on portions of the IntelliJ Platform that are
themselves built and distributed as plugins, some of which can be bundled w/ the IDE itself. In the
example used in for this tutorial there are dependencies declared on a few of these plugins: java,
markdown, and platform.
Since the example does PSI manipulation, the markdown and java plugins are needed. And the
platform modules is needed for the following: Messaging, UI Themes, UI Components, Files,
Documents, Actions, Components, Services, Extensions, Editors. You can read more about this in the
IntelliJ Platform SDK DevGuide.
The confusing thing about these dependencies is that they have to be declared in 2 places. Let’s
take a look at the markdown plugin dependency. Here are the places where you have to declare this.
- In
build.gradle.kts— You have to specify the dependency in
intellij { setPlugin("markdown", ...) }. - In
plugin.xml— You have to specify the dependency in
<depends>org.intellij.plugins.markdown</depends>.
Similarly for the java dependency, you have to declare this in 2 places.
- In
build.gradle.kts— You have to specify the dependency in
intellij { setPlugin("java", ...) }. - In
plugin.xml— You have to specify the dependency in
<depends>com.intellij.modules.java</depends>.
And finally, for the platform you only have to specify this in plugin.xml. Hoever, you don’t
have to specify this in build.gradle.kts, since the code for these plugins are already included in
the version of the platform that you choose in
intellij { version = "<idea-build-code-or-version-here> }.
- In
plugin.xml— You have to specify the dependency in
<depends>com.intellij.modules.platform</depends>.
Misc #
Analyze startup performance #
IDEA has an action called “Analyze Plugin Startup Performance”. It is hidden away in the main menu
“Help -> Diagnostic Tools -> Analyze Plugin Startup Performance”. This gem of an action will show
you how much time your plugin is taking, and all the other plugins that you have loaded are taking,
at startup. For those other plugins, it provides a useful feature to disable them from this dialog.
IDEA has yet another hidden gem to analyze the startup performance of an IDE instance. Visit
ij-perf.jetbrains.com/#/report and it will give you the
ability to connect to an IDE instance running on your machine, or you can upload the logs to get the
startup performance report.
How to use project specific JDKs #
If for some reason you use an embedded JDK in the plugin project that you are working on, then it
can become cumbersome to have to manually change the JDK table settings in IDEA on every single
machine that you have cloned this project on.
There is a plugin called
EmbeddedProjectJdk plugin that
enables per project JDK settings (that are not loaded from your IDEA user settings).
This doc contains information of where IDEA stores its configuration files.
This plugin allows you to put the jdk.table.xml file (stored in
$IDEA_SETTINGS/config/options/jdk.table.xml in
IDEA settings directory),
into the project folder and commit to your VCS. If the JDK defined in the per project
$PROJECT_DIR/.idea/jdk.table.xml is not found or invalid, then the plugin will it automatically.
You can also define OS-dependent $PROJECT_DIR/.idea/jdk.table.*.xml files like so:
- Windows:
jdk.table.win.xml - Linux:
jdk.table.lin.xml - MacOS:
jdk.table.mac.xml
Using ResourceBundles for localization #
In order to use localized strings for use in your plugin, you can use an imperative or declarative
approach.
Imperative approach #
For the imperative approach, create a MyStringsBundle.properties file in your
$PROJECT_DIR/resources/ folder. You can name this whatever you want. This file can contain
something like this.
dialog.title=My awesome dialog
You can then use this code snippet to get the values of the properties that you have defined in that
file.
fun getStringFromBundle(key: String): String {
  val strings: ResourceBundle = ResourceBundle.getBundle("MyStringsBundle", Locale.getDefault())
  return strings.getString(key)
}
Declarative approach #
plugin.xml
supports getting values out of this properties file declaratively
as long as the following is done.
- Add a
<resource-bundle>element in theplugin.xmlfor theMyStringsBundleresource. For
example, add<resource-bundle>MyStringsBundle</resource-bundle>in the<idea-plugin>element. - In
MyStringsBundle.propertiesfile, if you want to provide atextvalue for an action, use
the following naming pattern:action.<YOUR_ACTION_ID>.text. Fordescriptionvalue, use the
following pattern:action.<YOUR_ACTION_ID>.description.
Testing #
IDEA provides capabilities to do functional or integration testing of high level functionality. You
can still use JUnit4 and AssertJ for example to create unit tests for your plugins. Please read
the official docs on testing
before reading further in the tutorial.
AssertJ #
In order to enable AssertJ in your project you can add the following to your build.gradle.kts
file.
// Testing
dependencies {
  testImplementation("org.assertj:assertj-core:3.11.1")
}
And when you create tests in IDEA, it will ask you if you want to use JUnit3, 4, or 5.
Example tests #
You can see the tests that are created for the sample plugin created for this tutorial
here.
Fixtures #
When using fixtures that provide an empty project that you can run your plugin code on, you must
make sure to call super.setUp() in the setUp() method. If you don’t then the test won’t really
work. Here’s an example.
class LogServiceTest : BasePlatformTestCase() {

  @Before
  public override fun setUp() {
    super.setUp()
  }

  // snip
}
Test data #
It is very common to load some files into the testing fixtures and then have your plugin code do
some work on those files. Then compare the results, to see if things worked or failed.
In order to load these test data files, you have to tell the test fixtures which folder to look for
your test data. This is more complex than you think.
Here’s an example (from the sample plugin created for this tutorial) that demonstrates this.
@file:JvmName("TestUtils")

class TestUtils {

  companion object {
    val testDataFolder = "testdata"
    /**
     * @throws [IllegalStateException] if the [testDataFolder] folder
     * can't be found somewhere on the classpath.
     */
    fun computeBasePath(): String {
      val urlFromClassloader =
          TestUtils::class.java.classLoader.getResource("TestUtils.class")
      checkNotNull(urlFromClassloader) { "Could not find $testDataFolder" }

      var path: File? = File(urlFromClassloader.toURI())
      while (path != null &&
             path.exists() &&
             !File(path, testDataFolder).isDirectory
      ) {
        path = path.parentFile
      }
      checkNotNull(path) { "Could not find $testDataFolder" }
      return File(path, testDataFolder).absolutePath
    }

  }
}
Files needed to be loaded from the plugin project’s testdata directory. By default, IntelliJ
Platform BasePlatformTestCase provides a location that is invalid for use by 3rd party plugins
(provided by BasePlatformTestCase.myFixture#basePath) 😳. This assumes that the files are in the
classpath of the IntelliJ IDEA codebase itself.
In contrast, the
TestUtils.kt
that provides the computeBasePath function uses the classpath of its own self (class) in order to
locate where on disk, this class is loaded from. And then walks up the path (tree) to locate the
testdata folder (which is a leaf off of one of these parent nodes). Also, note that this class
uses an annotation (@file:JvmName()) in order to explicitly set its own classname and not use the
computed TestUtilsKt.class (which would be the default w/out using this annotation).
Mocking actions #
By default, when you invoke an action from via the fixture, it will execute the action, and if this
means that it does something to change something in your OS, then it will do that.
For example in the
SearchOnStackOverflowActionTest,
I open a browser tab w/ the text that’s selected in the test data file testFle.md. And when the
test would run, it would open a tab in my Chrome browser.
In order to prevent this, I ended up mocking the action performed method of the action itself, by
passing a lambda for testing purposes. If no lambda is passed, then the action does what it is
supposed to do. However, if I pass a lambda (for testing) then I can verify some state information
from that lambda to ensure that my action is doing what its supposed to.
Here’s the action code
StackOverflowActions.kt.
/**
 * [handler] allows this class to be mocked. If nothing is passed, then this
 * action does what it is supposed to. Otherwise, this handler gets passed
 * two things:
 * 1. selectedText: String
 * 2. langTag: String
 */
class SearchOnStackOverflowAction(
    val handler: ((String, String) -> Unit)? = null
) : AnAction() {
  override fun update(event: AnActionEvent) {
    with(event.getRequiredData(CommonDataKeys.EDITOR)) {
      val condition = caretModel.currentCaret.hasSelection()
      event.presentation.isEnabledAndVisible = condition
    }
  }

  override fun actionPerformed(event: AnActionEvent) {
    val langTag: String = with(event.getData(CommonDataKeys.PSI_FILE)) {
      this?.run {
        "+[${language.displayName.toLowerCase()}+]"
      }
    } ?: ""

    val selectedText: String =
        with(event.getRequiredData(CommonDataKeys.EDITOR)) {
          caretModel.currentCaret.selectedText
        } ?: ""

    val myHandler = handler ?: { _, _ ->
      if (selectedText.isEmpty()) {
        Messages.showMessageDialog(
            event.project,
            "Please select something before running this action",
            "Search on Stack Overflow",
            Messages.getWarningIcon())
      }
      else {
        val query = URLEncoder.encode(selectedText, "UTF-8") + langTag
        BrowserUtil.browse("https://stackoverflow.com/search?q=$query")
      }
    }

    myHandler.invoke(selectedText, langTag)

  }
Here’s the
test code SearchOnStackOverflowActionTest.kt.
class SearchOnStackOverflowActionTest : BasePlatformTestCase() {

private lateinit var testFolderLocation: String

@Before
public override fun setUp() {
  super.setUp()
  testFolderLocation = computeBasePath()
  assertThat(testFolderLocation).isNotNull()
}

@Test
fun testSelectedTextIsSearchedOnStackOverflow() {
  // Load test file w/ text selected.
  myFixture.configureByFile(
      testFolderLocation + File.separator + "testFile.md")

  // Try and perform the action.
  lateinit var selectedText: String
  lateinit var langTag: String
  val action = SearchOnStackOverflowAction { text, lang ->
    selectedText = text
    langTag = lang
  }

  val presentation = myFixture.testAction(action)
  assertThat(presentation.isEnabledAndVisible).isTrue()

  assertThat(selectedText).isEqualTo("jetbrains sdk plugin testing")
  assertThat(langTag).isEqualTo("+[plain text+]")
  }
}
References #
There aren’t many publicly available resources outside of JetBrains official docs (which are sparse,
and tend to focus on the “how?” and never the “why?”) and open source plugins (which can be used as
examples to learn from).
Here are a few that I’ve found. Sources (where and if you can find them) serve as a good source of
learning for how the Platform SDK APIs work, how they can be used, and even how to write tests for
them. Using the debugger to set breakpoints and
analyzing the stack traces are also a valid approach to understanding what this platform code does
(since it is 15+ years old and has gone through many many revisions).
- JetBrains IntelliJ Platform SDK official docs.
- Information about Platform SDK by the author of the BashSupport plugin.
- Article on ApplicationConfigurable and ProjectConfigurable.
- All 3rd party plugins, the source can be used as examples.
- Browse Code examples for open source plugins (from their github repos).
- Comparison of plugin development on IDEA, VSCode, etc

by Oliver Nybroe
Most of us developers use IntelliJ platforms, either IDEA, PHPStorm, WebStorm, Android Studio, PyCharm and the list goes on and on. However sometimes when we use it, we find that a feature is missing, but we have no idea how to actually add that feature and eventually just live without it.
In this article I will cover how we can create a simple plugin for all of the IntelliJ IDEs so when you add a project.dic file, it will automatically add it as one of your dictionaries. It will also search for the file in packages, so packages can add custom words to the dictionary. A .dic file is a simple dictionary where each line is a word in the dictionary.
The project is just a sample to get you started on developing your own plugins. But it’s actually also a feature I have been missing, as when I develop a custom package with my own words in it, I hate that I have to add them each time in the project level dictionary.
Creating the project
When creating plugins for IntelliJ, we have to option to do it in either Java or Kotlin. I will do it in Java as most users are familiar with that. As this is a Java project, we will use IntelliJ IDEA as our IDE.
According to the development guide, the recommended way to create a project is by using Gradle. We start by opening up preferences and check if Gradle and Plugin DevKit plugins are installed.
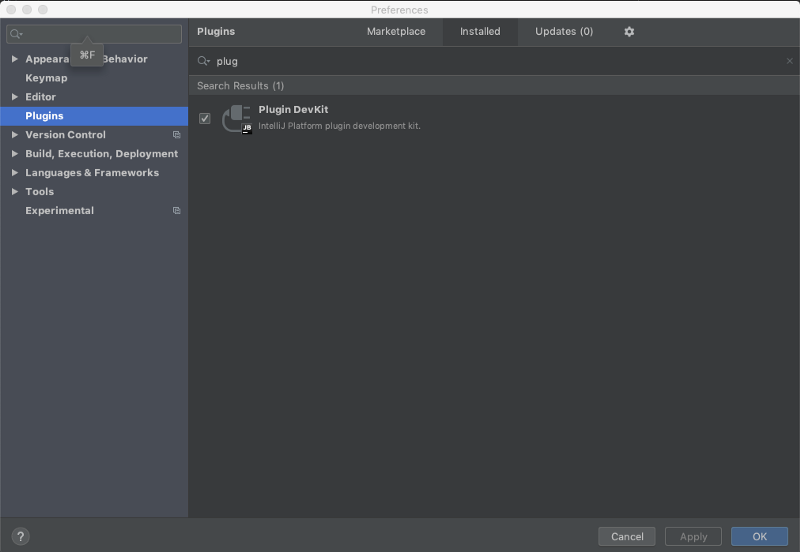
After installing the plugins and restarting the IDE, we go to the new projects flow and under Gradle. In here there is now an option called IntelliJ Platform Plugin which is the one we need.
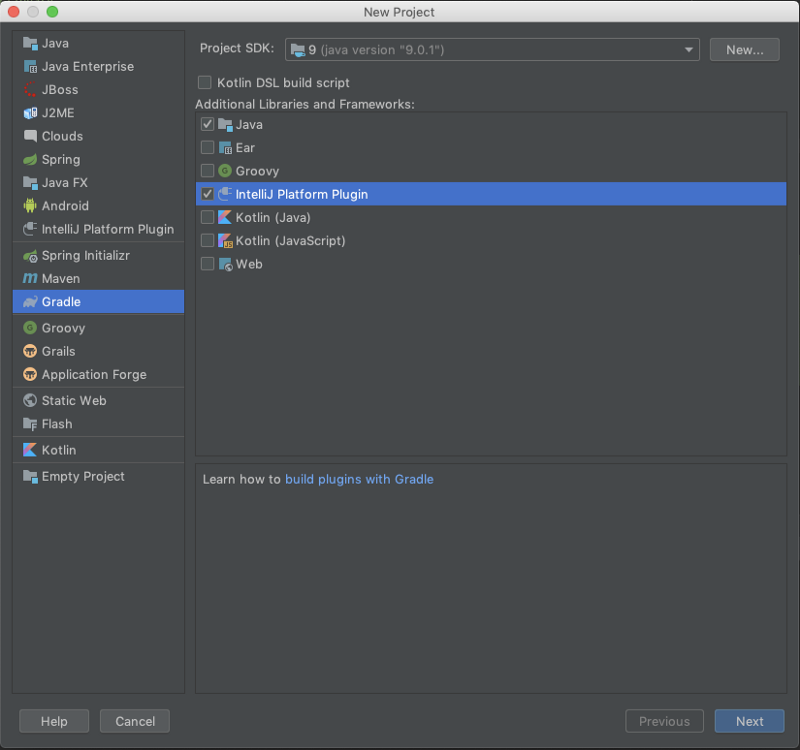
Then go through the rest of the project creation flow as normal — in this project I choose the following configuration.

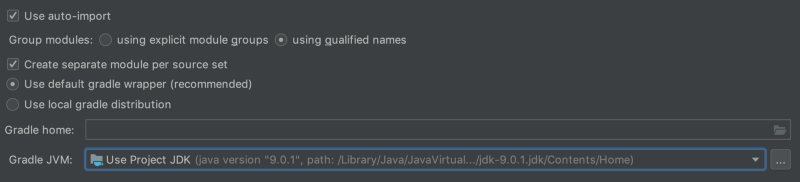

Setting up plugin.xml
Now that we have a project, we have to setup our plugin.xml file and build.gradle. The plugin.xml file is a file used by IntelliJ which defines all the information about the plugin. This includes the name, dependencies, what actions it should add or if it should extend something in IntelliJ. Basically this file defines everything your plugin should do and is the root of your project. In our build.gradle file we can define some of the values from plugin.xml, and information like which version of IntelliJ we want to test our plugin on when building with gradle.
Let’s start by defining our plugin.xml file. You can find the file in src/main/resources/META-INF/plugin.xml. We want our plugin to be available on all IntelliJ IDE’s so we set our dependencies to com.intellij.modules.lang. Right now our file looks like this:
<idea-plugin> <id>dk.lost_world.Dictionary</id> <name>Dictionary</name> <vendor email="olivernybroe@gmail.com" url="https://github.com/olivernybroe/intellij-Dictionary">GitHub</vendor> <depends>com.intellij.modules.lang</depends></idea-plugin>However right now this does not have any logic, and we do not register anything to the IntelliJ platform.
As this project will find project.dic files inside a project and register them as dictionaries in that project, we will have to register a Project level component. This component will be called when a project is opened and closed. Let’s create a class and implement the ProjectComponent interface. When we hover over the class name it tells us that the component is not registered.
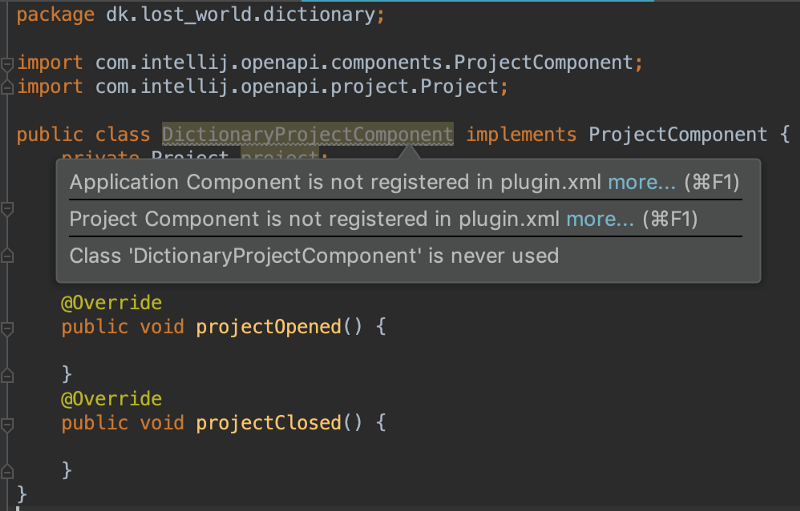
We can then call the action called Register Project Component and it will register it for us in the plugin.xml file.
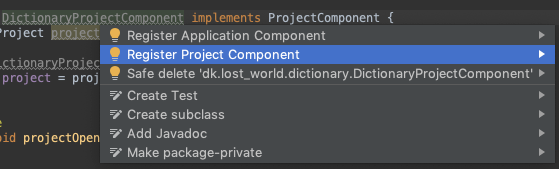
If we open plugin.xml the following code should be added. If it wasn’t added when calling the action, then just add it manually.
<project-components> <component> <implementation-class>dk.lost_world.dictionary.DictionaryProjectComponent</implementation-class> </component></project-components>IntelliJ Filesystem
When working with files in IntelliJ, we use a Virtual File System (VFS). The VFS gives us a universal API to talk with files, without us having to think about if they are from FTP, an HTTP server or just on the local disk.
As our plugin looks for files called project.dic it will of course need to talk with the Virtual File System. All files in the VFS are Virtual Files. This can sound a little intimidating, but in reality it is just an API for a filesystem and for a file. The way to think about it is just that the Virtual File System is your file system interface and the Virtual Files are your files.
Spell Checker Settings
As IntelliJ already has support for .dic files and spell checking in general, the only thing we need to do is register our project.dic files in the spell checkers settings.
All the settings for the spell checker are saved in a class called com.intellij.spellchecker.settings.SpellCheckerSettings. To get an instance of it, simply call the getInstance method (most of the IntelliJ classes got a getInstance method which uses IntelliJ’s ServiceManager underneath).
The settings class got a method called getCustomDictionariesPaths which returns all of the paths to dictionaries which are installed by the user.

When looking at the method signature, we also see an annotation called AvailableSince. We will later use the value in this annotation to specify the minimum required version for our plugin to work.
As the method returns a list, we can simply call add on the method to add in a new path to a dictionary.
Running Our Plugin (build.gradle)
As we now know how to add a dictionary to the spell checker, let’s add a small code example in our DictionaryProjectComponent class for doing this.
public class DictionaryProjectComponent implements ProjectComponent { private Project project; public DictionaryProjectComponent(Project project) { this.project = project; } @Override public void projectOpened() { SpellCheckerSettings .getInstance(project) .getCustomDictionariesPaths() .add("./project.dic"); }}This code will register a project.dic file from the root of our project whenever the project is opened.
To test out our little example, we need to update our build.gradle file. In the intellij section of the gradle file we add in what version of IntelliJ we want to use. This version number is the one from the AvailableSince annotation on the SpellCheckerSettings class.
plugins { id 'java' id 'org.jetbrains.intellij' version '0.4.4'}group 'dk.lost_world'version '1.0-SNAPSHOT'sourceCompatibility = 1.8repositories { mavenCentral()}dependencies { testCompile group: 'junit', name: 'junit', version: '4.12'}// See https://github.com/JetBrains/gradle-intellij-plugin/intellij { pluginName 'Dictionary' version '181.2784.17' type 'IC' downloadSources true}Running the runIde command from gradle will start up an instance of IntelliJ of the specific version. After starting up the testing IDE our plugin should have been run. If we open up preferences > Editor > Spelling > Dictionaries we can see under custom dictionaries that the path we specified in our example is now added.
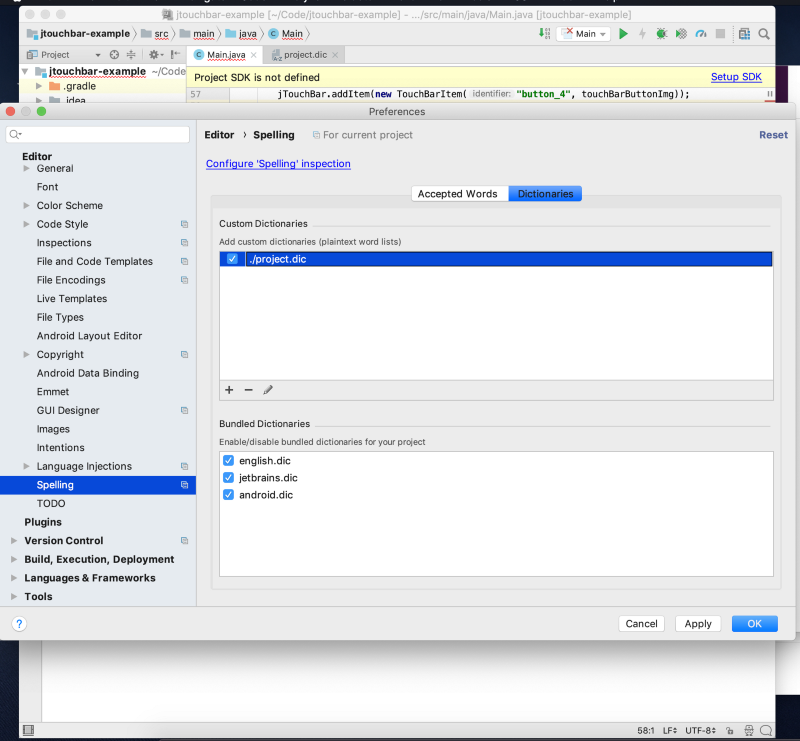
We are now able to test our plugin, so now it is time to build it out correctly so it finds the project.dic files and registers them for us.
In the DictionaryProjectComponent::projectOpened method, we need to first find all files called project.dic and register them and also add a file listener so when new project.dic files are added, they are registered automatically.
Dictionary Class
We will have a class called Dictionary, this class will contain the logic for us to register and remove files from the dictionary. The class will have the following public methods: void registerAndNotify(Collection<VirtualFile> files)void registerAndNotify(VirtualFile file)void removeAndNotify(VirtualFile file)void moveAndNotify(VirtualFile oldFile, VirtualFile newFile)
These methods will also create a notification about what happened, so the end user knows what changed with the custom dictionaries. The end file for this will look the following way:
Finding all dictionary files
For finding all the dictionary files in the project called project.dic we use the class FilenameIndex. The file is in the namespace com.intellij.psi.search.FilenameIndex, it has a method getVirtualFilesByName which we can use to find our project.dic files.
FilenameIndex.getVirtualFilesByName( project, "project.dic", false, GlobalSearchScope.allScope(project))This call will return all Virtual Files which matches the search criteria. We then put the return result into the Dictionary class method registerAndNotify.
@Overridepublic void projectOpened() { Dictionary dictionary = new Dictionary(project); dictionary.registerAndNotify( FilenameIndex.getVirtualFilesByName( project, "project.dic", false, GlobalSearchScope.allScope(project) ) );}Our code is now able to find project.dic files at start up and register them, if they are not already registered. It will also notify about the newly registered files.
Adding a Virtual File Listener
The next part is for us to listen for changes in virtual files. To do this we need a listener. For this we need the com.intellij.openapi.vfs.VirtualFileListener.
In the docblock for the listener class we can see that to register it we can use VirtualFilemanager#addVirtualFileListener.
Let’s create a class named DictionaryFileListener and implement the methods which we need for our project.
Then we update our projectOpened class to also add the VirtualFileListener.
@Overridepublic void projectOpened() { Dictionary dictionary = new Dictionary(project); dictionary.registerAndNotify( FilenameIndex.getVirtualFilesByName( project, "project.dic", false, GlobalSearchScope.allScope(project) ) ); VirtualFileManager.getInstance().addVirtualFileListener( new DictionaryFileListener(dictionary) );}Our plugin is now able to find our dictionary files at startup, but also listen for if a dictionary file is added later on. The next thing we need is to add information for our plugin listing.
Adding plugin information
To add information about the plugin, we open the build.gradle file and edit the object patchPluginXml. In here we need to specify which build version is required for the plugin, version of the plugin, description and change notes.
patchPluginXml { sinceBuild intellij.version untilBuild null version project.version pluginDescription """Plugin for having a shared dictionary for all members of your project. <br><br>It will automatically find any <code>project.dic</code> files and add themto the list of dictionaries. <br><br>It will also search packages for dictionary files and add them to our list of dictionaries. """ changeNotes """<p>0.2</p><ul> <li>Added support for listening for when a <code>project.dic</code> file is added, moved, deleted, copied.</li></ul><p>0.1</p><ul> <li>First edition of the plugin.</li></ul> """}We also update the version property to '0.2'of the gradle project itself. The plugin can now run on all versions since the method for registering custom dictionaries was added.
To test if it generates the desired output, we can run the gradle task patchPluginXml and under build/patchedPluginXmlFiles our generated plugin.xml file will be there.
Since IntelliJ version 2019.1, all plugins supports icons. As this is fairly new a lot of plugins do not have an icon, and your plugin can stand out a lot by having one. The naming convention is pluginIcon.svg as the default icon and pluginIcon_dark.svg for the darcula theme.
The plugin icons should be listed together with the plugin.xml file in the path resources/META-INF.
Building for distribution
The plugin is now ready to be built and shipped. To do this we run the gradle task buildPlugin. Under build/distributions a zip file will appear which you can distribute and install manually in your IDE. Add this zip file as a release under your github repo, so users have the option to download it manually from you repo.
Publishing a plugin
To publish our plugin so it can be downloaded directly from IntelliJ’s plugin repository, we need to login on our JetBrains account on the Plugin Repository website. When in here, a dropdown from your profile name shows an option to upload a plugin.
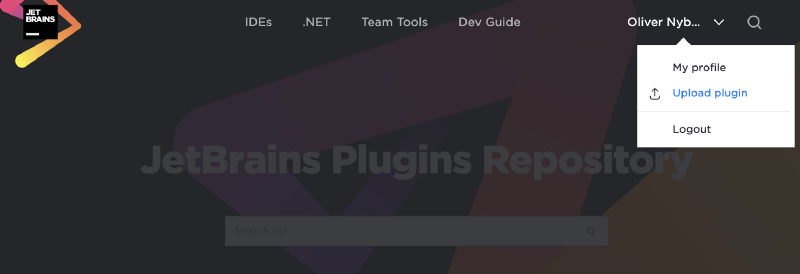
Input all the information in the dialog (you have to add a license, but that is pretty straightforward with Github). Here we add the distribution zip file.
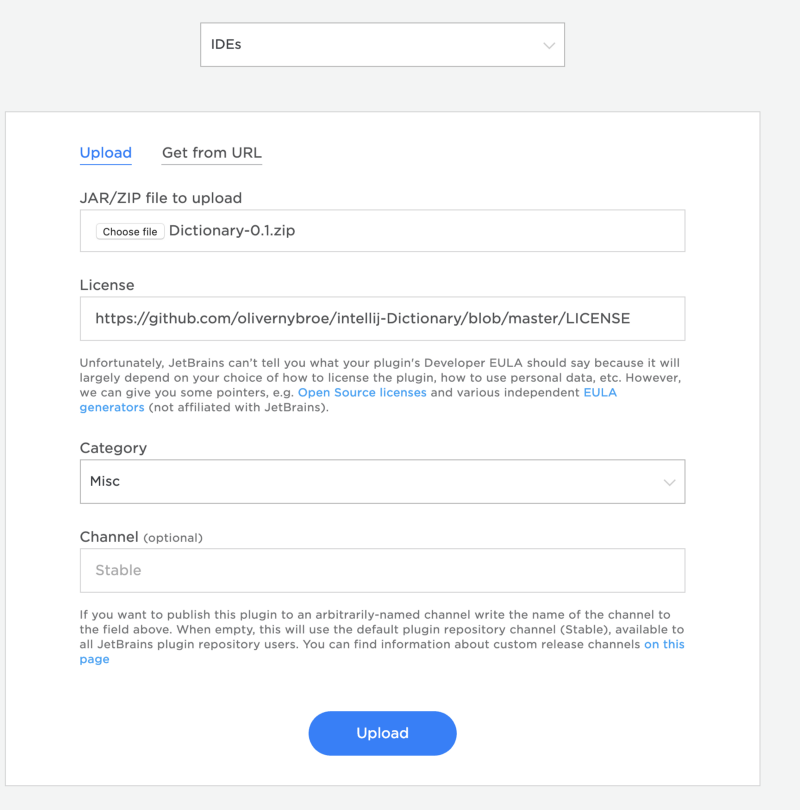
When you submit the form, you can now see your plugin in the plugin repository. However other users do not have access to it before IntelliJ has approved it. Approving your plugin normally takes 2–3 days.
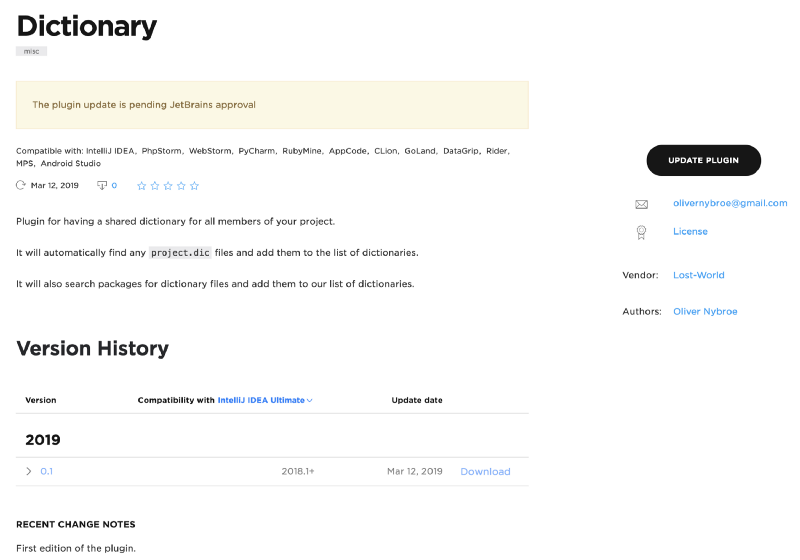
Updating your plugin via Gradle
After the plugin has been created, we can update it programmatically. To do this the best practice is to create a token. Open up jetbrains hub and go to the authentification tab. From here press New token... and add the scope Plugin Repository.

When pressing create you get a token. Create a file called gradle.properties and add the token under the key intellijPublishToken (remember to git ignore this file).
In our build.gradle file, we simply add the following:
publishPlugin { token intellijPublishToken}And we can now run the gradle task publishPlugin for publishing our new version. All versions numbers have to be unique or else it will fail updating. When an update is created, you have to wait 2–3 days again for them to approve the update.
After waiting some days our plugin has now been approved and can now be found in the plugin marketplace by searching for dictionary!
Conclusion
I hope this article has given you more courage to start developing your own plugins. One of the biggest problems I had while developing it was to find out which classes to use. IntelliJ has an extensive guide which I would recommend that you read from start to end, however a lot of classes are not mentioned in there. In cases where you get stuck, they have a Gitter chat which is really helpful and there are people from IntelliJ on there to help also.
The source code for this project can be found on Github and the plugin we created is in the JetBrains marketplace.
Learn to code for free. freeCodeCamp’s open source curriculum has helped more than 40,000 people get jobs as developers. Get started