Время на прочтение
11 мин
Количество просмотров 325K
Сразу оговорюсь, что здесь написано для
самых маленьких
начинающих.
Давно хотел попробовать себя в качестве игродела, и недавно выпал случай изучить Python и исполнить давнюю мечту.
Что такое платформер?
Платформер(platformer)— жанр компьютерных игр, в которых основной чертой игрового процесса является прыгание по платформам, лазанье по лестницам, собирание предметов, обычно необходимых для завершения уровня.
Вики
Одними из моих любимых игр данного жанра являются «Super Mario Brothers» и «Super Meat Boy». Давайте попробуем создать нечто среднее между ними.
Самое — самое начало.
Внимание! Используем python ветки 2.х, с 3.х обнаружены проблемы запуска нижеописанных скриптов!
Наверное, не только игры, да и все приложения, использующие pygame начинаются примерно так:
#!/usr/bin/env python
# -*- coding: utf-8 -*-

# Импортируем библиотеку pygame
import pygame
from pygame import *

#Объявляем переменные
WIN_WIDTH = 800 #Ширина создаваемого окна
WIN_HEIGHT = 640 # Высота
DISPLAY = (WIN_WIDTH, WIN_HEIGHT) # Группируем ширину и высоту в одну переменную
BACKGROUND_COLOR = "#004400"

def main():
    pygame.init() # Инициация PyGame, обязательная строчка
    screen = pygame.display.set_mode(DISPLAY) # Создаем окошко
    pygame.display.set_caption("Super Mario Boy") # Пишем в шапку
    bg = Surface((WIN_WIDTH,WIN_HEIGHT)) # Создание видимой поверхности
                                         # будем использовать как фон
    bg.fill(Color(BACKGROUND_COLOR))     # Заливаем поверхность сплошным цветом

    while 1: # Основной цикл программы
        for e in pygame.event.get(): # Обрабатываем события
            if e.type == QUIT:
                raise SystemExit, "QUIT"
        screen.blit(bg, (0,0))      # Каждую итерацию необходимо всё перерисовывать
        pygame.display.update()     # обновление и вывод всех изменений на экран


if __name__ == "__main__":
    main()
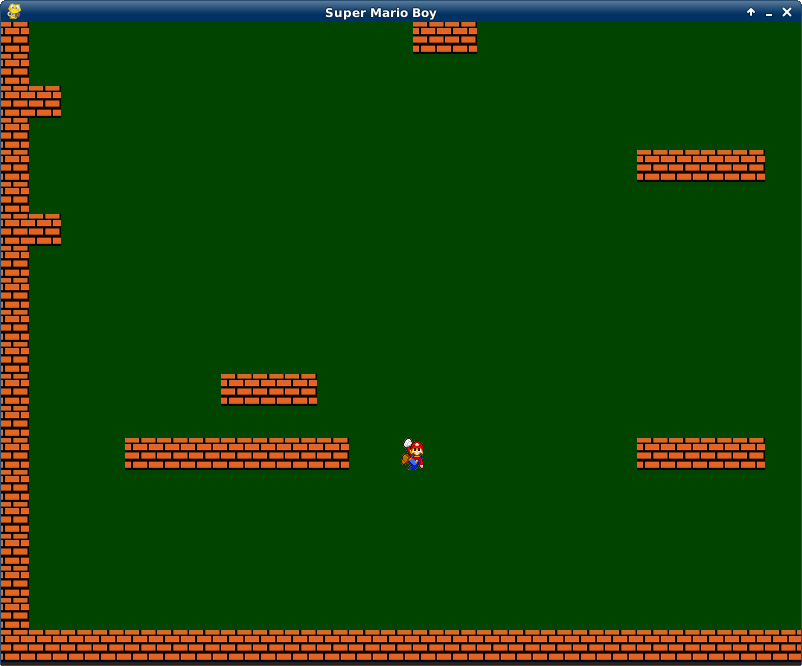
Игра будет «крутиться» в цикле ( while 1), каждую итерацию необходимо перерисовывать всё (фон, платформы, монстров, цифровые сообщения и т.д). Важно заметить, что рисование идет последовательно, т.е. если сперва нарисовать героя, а потом залить фон, то героя видно не будет, учтите это на будущее.
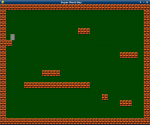
Запустив этот код, мы увидим окно, залитое зелененьким цветом.
(Картинка кликабельна)
Ну что же, начало положено, идём дальше.
Уровень.
А как без него? Под словом «уровень» будем подразумевать ограниченную область виртуального двумерного пространства, заполненную всякой — всячиной, и по которой будет передвигаться наш персонаж.
Для построения уровня создадим двумерный массив m на n. Каждая ячейка (m,n) будет представлять из себя прямоугольник. Прямоугольник может в себе что-то содержать, а может и быть пустым. Мы в прямоугольниках будем рисовать платформы.
Добавим еще константы
PLATFORM_WIDTH = 32
PLATFORM_HEIGHT = 32
PLATFORM_COLOR = "#FF6262"
Затем добавим объявление уровня в функцию main
level = [
       "-------------------------",
       "-                       -",
       "-                       -",
       "-                       -",
       "-            --         -",
       "-                       -",
       "--                      -",
       "-                       -",
       "-                   --- -",
       "-                       -",
       "-                       -",
       "-      ---              -",
       "-                       -",
       "-   -----------        -",
       "-                       -",
       "-                -      -",
       "-                   --  -",
       "-                       -",
       "-                       -",
       "-------------------------"]
И в основной цикл добавим следующее:
  x=y=0 # координаты
  for row in level: # вся строка
      for col in row: # каждый символ
          if col == "-":
              #создаем блок, заливаем его цветом и рисеум его
              pf = Surface((PLATFORM_WIDTH,PLATFORM_HEIGHT))
              pf.fill(Color(PLATFORM_COLOR))
              screen.blit(pf,(x,y))

          x += PLATFORM_WIDTH #блоки платформы ставятся на ширине блоков
      y += PLATFORM_HEIGHT    #то же самое и с высотой
      x = 0                   #на каждой новой строчке начинаем с нуля
Т.е. Мы перебираем двумерный массив level, и, если находим символ «-», то по координатам (x * PLATFORM_WIDTH, y * PLATFORM_HEIGHT), где x,y — индекс в массиве level
Запустив, мы увидим следующее:

Персонаж
Просто кубики на фоне — это очень скучно. Нам нужен наш персонаж, который будет бегать и прыгать по платформам.
Создаём класс нашего героя.
Для удобства, будем держать нашего персонажа в отдельном файле player.py
#!/usr/bin/env python
# -*- coding: utf-8 -*-

from pygame import *

MOVE_SPEED = 7
WIDTH = 22
HEIGHT = 32
COLOR =  "#888888"


class Player(sprite.Sprite):
    def __init__(self, x, y):
        sprite.Sprite.__init__(self)
        self.xvel = 0   #скорость перемещения. 0 - стоять на месте
        self.startX = x # Начальная позиция Х, пригодится когда будем переигрывать уровень
        self.startY = y
        self.image = Surface((WIDTH,HEIGHT))
        self.image.fill(Color(COLOR))
        self.rect = Rect(x, y, WIDTH, HEIGHT) # прямоугольный объект

    def update(self,  left, right):
        if left:
            self.xvel = -MOVE_SPEED # Лево = x- n

        if right:
            self.xvel = MOVE_SPEED # Право = x + n

        if not(left or right): # стоим, когда нет указаний идти
            self.xvel = 0

        self.rect.x += self.xvel # переносим свои положение на xvel

    def draw(self, screen): # Выводим себя на экран
        screen.blit(self.image, (self.rect.x,self.rect.y))
Что тут интересного?
Начнём с того, что мы создаём новый класс, наследуясь от класса pygame.sprite.Sprite, тем самым наследую все характеристики спрайта.
Cпрайт — это движущееся растровое изображение. Имеет ряд полезных методов и свойств.
self.rect = Rect(x, y, WIDTH, HEIGHT), в этой строчке мы создаем фактические границы нашего персонажа, прямоугольник, по которому мы будем не только перемещать героя, но и проверять его на столкновения. Но об этом чуть ниже.
Метод update(self, left, right)) используется для описания поведения объекта. Переопределяет родительский update(*args) → None. Может вызываться в группах спрайтов.
Метод draw(self, screen) используется для вывода персонажа на экран. Далее мы уберем этот метод и будем использовать более интересный способ отображения героя.
Добавим нашего героя в основную часть программы.
Перед определением уровня добавим определение героя и переменные его перемещения.
hero = Player(55,55) # создаем героя по (x,y) координатам
left = right = False    # по умолчанию — стоим
В проверку событий добавим следующее:
if e.type == KEYDOWN and e.key == K_LEFT:
   left = True
if e.type == KEYDOWN and e.key == K_RIGHT:
   right = True

if e.type == KEYUP and e.key == K_RIGHT:
   right = False
if e.type == KEYUP and e.key == K_LEFT:
    left = False
Т.е. Если нажали на клавишу «лево», то идём влево. Если отпустили — останавливаемся. Так же с кнопкой «право»
Само передвижение вызывается так: (добавляем после перерисовки фона и платформ)
hero.update(left, right) # передвижение
hero.draw(screen) # отображение
Но, как мы видим, наш серый блок слишком быстро перемещается, добавим ограничение в количестве кадров в секунду. Для этого после определения уровня добавим таймер
timer = pygame.time.Clock()
И в начало основного цикла добавим следующее:
timer.tick(60)
Завис в воздухе
Да, наш герой в безвыходном положении, он завис в воздухе.
Добавим гравитации и возможности прыгать.
И так, работаем в файле player.py
Добавим еще констант
JUMP_POWER = 10
GRAVITY = 0.35 # Сила, которая будет тянуть нас вниз
В метод _init_ добавляем строки:
 self.yvel = 0 # скорость вертикального перемещения
 self.onGround = False # На земле ли я?
Добавляем входной аргумент в метод update
def update(self, left, right, up):
И в начало метода добавляем:
if up:
   if self.onGround: # прыгаем, только когда можем оттолкнуться от земли
       self.yvel = -JUMP_POWER
И перед строчкой self.rect.x += self.xvel
Добавляем
if not self.onGround:
    self.yvel +=  GRAVITY

self.onGround = False; # Мы не знаем, когда мы на земле((
self.rect.y += self.yvel
И добавим в основную часть программы:
После строчки left = right = False
Добавим переменную up
up = false
В проверку событий добавим
if e.type == KEYDOWN and e.key == K_UP:
       up = True

if e.type == KEYUP and e.key == K_UP:
      up = False
И изменим вызов метода update, добавив новый аргумент up:
hero.update(left, right)
на
hero.update(left, right, up)
Здесь мы создали силу гравитации, которая будет тянуть нас вниз, постоянно наращивая скорость, если мы не стоим на земле, и прыгать в полете мы не умеем. А мы пока не можем твердо встать на что-то, поэтому на следующей анимации наш герой падает далеко за границы видимости.

Встань обеими ногами на землю свою.
Как узнать, что мы на земле или другой твердой поверхности? Ответ очевиден — использовать проверку на пересечение, но для этого изменим создание платформ.
Создадим еще один файл blocks.py, и перенесем в него описание платформы.
PLATFORM_WIDTH = 32
PLATFORM_HEIGHT = 32
PLATFORM_COLOR = "#FF6262"
Дальше создадим класс, наследуясь от pygame.sprite.Sprite
class Platform(sprite.Sprite):
    def __init__(self, x, y):
        sprite.Sprite.__init__(self)
        self.image = Surface((PLATFORM_WIDTH, PLATFORM_HEIGHT))
        self.image.fill(Color(PLATFORM_COLOR))
        self.rect = Rect(x, y, PLATFORM_WIDTH, PLATFORM_HEIGHT)
Тут нет ни чего нам уже не знакомого, идём дальше.
В основной файле произведем изменения, перед описанием массива level добавим
entities = pygame.sprite.Group() # Все объекты
platforms = [] # то, во что мы будем врезаться или опираться
entities.add(hero)
Группа спрайтов entities будем использовать для отображения всех элементов этой группы.
Массив platforms будем использовать для проверки на пересечение с платформой.
Далее, блок
if col == "-":
   #создаем блок, заливаем его цветом и рисеум его
   pf = Surface((PLATFORM_WIDTH,PLATFORM_HEIGHT))
   pf.fill(Color(PLATFORM_COLOR))
   screen.blit(pf,(x,y))
Заменим на
if col == "-":
   pf = Platform(x,y)
   entities.add(pf)
   platforms.append(pf)
Т.е. создаём экземплр класса Platform, добавляем его в группу спрайтов entities и массив platforms. В entities, чтобы для каждого блока не писать логику отображения. В platforms добавили, чтобы потом проверить массив блоков на пересечение с игроком.
Дальше, весь код генерации уровня выносим из цикла.
И так же строчку
hero.draw(screen) # отображение
Заменим на
entities.draw(screen) # отображение всего
Запустив, мы увидим, что ни чего не изменилось. Верно. Ведь мы не проверяем нашего героя на столкновения. Начнём это исправлять.
Работаем в файле player.py
Удаляем метод draw, он нам больше не нужен. И добавляем новый метод collide
def collide(self, xvel, yvel, platforms):
        for p in platforms:
            if sprite.collide_rect(self, p): # если есть пересечение платформы с игроком

                if xvel > 0:                      # если движется вправо
                    self.rect.right = p.rect.left # то не движется вправо

                if xvel < 0:                      # если движется влево
                    self.rect.left = p.rect.right # то не движется влево

                if yvel > 0:                      # если падает вниз
                    self.rect.bottom = p.rect.top # то не падает вниз
                    self.onGround = True          # и становится на что-то твердое
                    self.yvel = 0                 # и энергия падения пропадает

                if yvel < 0:                      # если движется вверх
                    self.rect.top = p.rect.bottom # то не движется вверх
                    self.yvel = 0                 # и энергия прыжка пропадает
В этом методе происходит проверка на пересечение координат героя и платформ, если таковое имеется, то выше описанной логике происходит действие.
Ну, и для того, что бы это всё происходило, необходимо вызывать этот метод.
Изменим число аргументов для метода update, теперь он выглядит так:
update(self, left, right, up, platforms)
И не забудьте изменить его вызов в основном файле.
И строчки
self.rect.y += self.yvel
self.rect.x += self.xvel # переносим свои положение на xvel
Заменям на:
self.rect.y += self.yvel
self.collide(0, self.yvel, platforms)

self.rect.x += self.xvel # переносим свои положение на xvel
self.collide(self.xvel, 0, platforms)
Т.е. передвинули героя вертикально, проверили на пересечение по вертикали, передвинули горизонтально, снова проверили на пересечение по горизонтали.
Вот, что получится, когда запустим.
Фу[у]! Движущийся прямоугольник — не красиво!
Давайте немного приукрасим нашего МариоБоя.
Начнем с платформ. Для этого в файле blocks.py сделаем небольшие изменения.
Заменим заливку цветом на картинку, для этого строчку
self.image.fill(Color(PLATFORM_COLOR))
Заменим на
self.image = image.load("blocks/platform.png")
Мы загружаем картинку вместо сплошного цвета. Разумеется, файл «platform.png» должен находиться в папке «blocks», которая должна располагаться в каталоге с исходными кодами.
Вот, что получилось
Теперь переходим к нашему герою. Для движущегося объекта нужна не статическая картинка, а анимация. Дабы облегчить себе эту задачу, воспользуемся замечательной библиотекой pyganim . Приступим.
Сперва добавим в блок констант.
ANIMATION_DELAY = 0.1 # скорость смены кадров
ANIMATION_RIGHT = [('mario/r1.png'),
            ('mario/r2.png'),
            ('mario/r3.png'),
            ('mario/r4.png'),
            ('mario/r5.png')]
ANIMATION_LEFT = [('mario/l1.png'),
            ('mario/l2.png'),
            ('mario/l3.png'),
            ('mario/l4.png'),
            ('mario/l5.png')]
ANIMATION_JUMP_LEFT = [('mario/jl.png', 0.1)]
ANIMATION_JUMP_RIGHT = [('mario/jr.png', 0.1)]
ANIMATION_JUMP = [('mario/j.png', 0.1)]
ANIMATION_STAY = [('mario/0.png', 0.1)]
Тут, думаю, понятно, анимация разных действий героя.
Теперь добавим следующее в метод __init__
self.image.set_colorkey(Color(COLOR)) # делаем фон прозрачным
#        Анимация движения вправо
boltAnim = []
for anim in ANIMATION_RIGHT:
   boltAnim.append((anim, ANIMATION_DELAY))
self.boltAnimRight = pyganim.PygAnimation(boltAnim)
self.boltAnimRight.play()
#        Анимация движения влево
boltAnim = []
for anim in ANIMATION_LEFT:
   boltAnim.append((anim, ANIMATION_DELAY))
self.boltAnimLeft = pyganim.PygAnimation(boltAnim)
self.boltAnimLeft.play()

self.boltAnimStay = pyganim.PygAnimation(ANIMATION_STAY)
self.boltAnimStay.play()
self.boltAnimStay.blit(self.image, (0, 0)) # По-умолчанию, стоим

self.boltAnimJumpLeft= pyganim.PygAnimation(ANIMATION_JUMP_LEFT)
self.boltAnimJumpLeft.play()

self.boltAnimJumpRight= pyganim.PygAnimation(ANIMATION_JUMP_RIGHT)
self.boltAnimJumpRight.play()

self.boltAnimJump= pyganim.PygAnimation(ANIMATION_JUMP)
self.boltAnimJump.play()
Здесь для каждого действия мы создаем набор анимаций, и включаем их(т.е. Включаем смену кадров).
for anim in ANIMATION_LEFT:
            boltAnim.append((anim, ANIMATION_DELAY
))
Каждый кадр имеет картинку и время показа.
Осталось в нужный момент показать нужную анимацию.
Добавим смену анимаций в метод update.
if up:
    if self.onGround: # прыгаем, только когда можем оттолкнуться от земли
       self.yvel = -JUMP_POWER
     self.image.fill(Color(COLOR))
     self.boltAnimJump.blit(self.image, (0, 0))

if left:
   self.xvel = -MOVE_SPEED # Лево = x- n
   self.image.fill(Color(COLOR))
   if up: # для прыжка влево есть отдельная анимация
      self.boltAnimJumpLeft.blit(self.image, (0, 0))
   else:
      self.boltAnimLeft.blit(self.image, (0, 0))

if right:
   self.xvel = MOVE_SPEED # Право = x + n
   self.image.fill(Color(COLOR))
      if up:
         self.boltAnimJumpRight.blit(self.image, (0, 0))
      else:
         self.boltAnimRight.blit(self.image, (0, 0))

if not(left or right): # стоим, когда нет указаний идти
   self.xvel = 0
   if not up:
      self.image.fill(Color(COLOR))
      self.boltAnimStay.blit(self.image, (0, 0))
Вуаля!
Больше, нужно больше места
Ограничение в размере окна мы преодолеем созданием динамической камеры.
Для этого создадим класс Camera
class Camera(object):
    def __init__(self, camera_func, width, height):
        self.camera_func = camera_func
        self.state = Rect(0, 0, width, height)

    def apply(self, target):
        return target.rect.move(self.state.topleft)

    def update(self, target):
        self.state = self.camera_func(self.state, target.rect)
Далее, добавим начальное конфигурирование камеры
def camera_configure(camera, target_rect):
    l, t, _, _ = target_rect
    _, _, w, h = camera
    l, t = -l+WIN_WIDTH / 2, -t+WIN_HEIGHT / 2

    l = min(0, l)                           # Не движемся дальше левой границы
    l = max(-(camera.width-WIN_WIDTH), l)   # Не движемся дальше правой границы
    t = max(-(camera.height-WIN_HEIGHT), t) # Не движемся дальше нижней границы
    t = min(0, t)                           # Не движемся дальше верхней границы

    return Rect(l, t, w, h)
Создадим экземпляр камеры, добавим перед основным циклом:
total_level_width  = len(level[0])*PLATFORM_WIDTH # Высчитываем фактическую ширину уровня
total_level_height = len(level)*PLATFORM_HEIGHT   # высоту

camera = Camera(camera_configure, total_level_width, total_level_height)
Что мы сделали?
Мы создали внутри большого прямоугольника, размеры которого вычисляются так:
total_level_width  = len(level[0])*PLATFORM_WIDTH # Высчитываем фактическую ширину уровня
total_level_height = len(level)*PLATFORM_HEIGHT   # высоту
меньший прямоугольник, размером, идентичным размеру окна.
Меньший прямоугольник центрируется относительно главного персонажа(метод update), и все объекты рисуются в меньшем прямоугольнике (метод apply), за счет чего создаётся впечатление движения камеры.
Для работы вышеописанного, нужно изменить рисование объектов.
Заменим строчку
entities.draw(screen) # отображение
На
for e in entities:
   screen.blit(e.image, camera.apply(e))
И перед ней добавим
camera.update(hero) # центризируем камеру относительно персонажа
Теперь можем изменить уровень.
level = [
       "----------------------------------",
       "-                                -",
       "-                       --       -",
       "-                                -",
       "-            --                  -",
       "-                                -",
       "--                               -",
       "-                                -",
       "-                   ----     --- -",
       "-                                -",
       "--                               -",
       "-                                -",
       "-                            --- -",
       "-                                -",
       "-                                -",
       "-      ---                       -",
       "-                                -",
       "-   -------         ----         -",
       "-                                -",
       "-                         -      -",
       "-                            --  -",
       "-                                -",
       "-                                -",
       "----------------------------------"]
Вот, собственно, и результат
Результат можно скачать, ссылка на GitHub
В следующей части, если будет востребовано сообществом, мы создадим свой генератор уровней
с блэкджеком и шлюхами
с разными типами платформ, монстрами, телепортами, и конечно же, принцессой.
upd pygame можно скачать отсюда, спасибо, Chris_Griffin за замечание
upd1 Вторая часть
Для многих Python — это язык для написания веб проектов, машинного обучения или для анализа данных. На самом деле он более функционален и в этой статье мы вам это докажем.
Для реализации игр на Питон мы можем выбрать одну из нескольких библиотек. Можно работать с: Kivy, Tkinter, PyQt или же с любой другой библиотекой, что обеспечивает построение графического интерфейса через Python. Таких библиотек много, но мы возьмем библиотеку PyGame, которая даже своим названием говорит о её предназначении.
PyGame появился в 2000 году. С тех пор на его основе было сделано много интересных проектов. К сожалению, PyGame не универсален и разработка на нём ведется лишь под Андроид устройства.
Настройка проекта
Перед использованием PyGame его нужно установить через терминал. Прописываем команду:
pip install pygameДля создания базового окна игры, необходимо лишь импортировать библиотеку, инициализировать главный объект, указать размеры, а также название окна и создать основной цикл, что должен вызываться постоянно и тем самым проект будет запущен и работать все время.
import pygame

pygame.init()
win = pygame.display.set_mode((500, 500)) # размеры X и Y
pygame.display.set_caption("Название игры")

while(True):
	pass
Сюда же дописываем отслеживание действий пользователя. Если он закроет окно, то мы будем останавливать программу.
import pygame

pygame.init()
win = pygame.display.set_mode((500, 500)) # размеры X и Y
pygame.display.set_caption("Название игры")

run = True
while(run):
	for event in pygame.event.get():
		if event.type == pygame.QUIT:
			run = False

pygame.quit()
Создание платформера
Для создания платформера потребуется написать куда больше строк кода. Мы прикрепляем весь код проекта ниже. В коде есть комментарии для лучшего понимания:
import pygame

# Переменные для установки ширины и высоты окна
SCREEN_WIDTH = 800
SCREEN_HEIGHT = 600

# Подключение фото для заднего фона
# Здесь лишь создание переменной, вывод заднего фона ниже в коде
bg = pygame.image.load('bg.jpg')


# Класс, описывающий поведение главного игрока
class Player(pygame.sprite.Sprite):
	# Изначально игрок смотрит вправо, поэтому эта переменная True
	right = True

	# Методы
	def __init__(self):
		# Стандартный конструктор класса
		# Нужно ещё вызывать конструктор родительского класса
		super().__init__()

		# Создаем изображение для игрока
		# Изображение находится в этой же папке проекта
		self.image = pygame.image.load('idle.png')

		# Установите ссылку на изображение прямоугольника
		self.rect = self.image.get_rect()

		# Задаем вектор скорости игрока
		self.change_x = 0
		self.change_y = 0

	def update(self):
		# В этой функции мы передвигаем игрока
		# Сперва устанавливаем для него гравитацию
		self.calc_grav()

		# Передвигаем его на право/лево
		# change_x будет меняться позже при нажатии на стрелочки клавиатуры
		self.rect.x += self.change_x

		# Следим ударяем ли мы какой-то другой объект, платформы, например
		block_hit_list = pygame.sprite.spritecollide(self, self.level.platform_list, False)
		# Перебираем все возможные объекты, с которыми могли бы столкнуться
		for block in block_hit_list:
			# Если мы идем направо,
			# устанавливает нашу правую сторону на левой стороне предмета, которого мы ударили
			if self.change_x > 0:
				self.rect.right = block.rect.left
			elif self.change_x < 0:
				# В противном случае, если мы движемся влево, то делаем наоборот
				self.rect.left = block.rect.right

		# Передвигаемся вверх/вниз
		self.rect.y += self.change_y

		# То же самое, вот только уже для вверх/вниз
		block_hit_list = pygame.sprite.spritecollide(self, self.level.platform_list, False)
		for block in block_hit_list:
			# Устанавливаем нашу позицию на основе верхней / нижней части объекта, на который мы попали
			if self.change_y > 0:
				self.rect.bottom = block.rect.top
			elif self.change_y < 0:
				self.rect.top = block.rect.bottom

			# Останавливаем вертикальное движение
			self.change_y = 0

	def calc_grav(self):
		# Здесь мы вычисляем как быстро объект будет
		# падать на землю под действием гравитации
		if self.change_y == 0:
			self.change_y = 1
		else:
			self.change_y += .95

		# Если уже на земле, то ставим позицию Y как 0
		if self.rect.y >= SCREEN_HEIGHT - self.rect.height and self.change_y >= 0:
			self.change_y = 0
			self.rect.y = SCREEN_HEIGHT - self.rect.height

	def jump(self):
		# Обработка прыжка
		# Нам нужно проверять здесь, контактируем ли мы с чем-либо
		# или другими словами, не находимся ли мы в полете.
		# Для этого опускаемся на 10 единиц, проверем соприкосновение и далее поднимаемся обратно
		self.rect.y += 10
		platform_hit_list = pygame.sprite.spritecollide(self, self.level.platform_list, False)
		self.rect.y -= 10

		# Если все в порядке, прыгаем вверх
		if len(platform_hit_list) > 0 or self.rect.bottom >= SCREEN_HEIGHT:
			self.change_y = -16

	# Передвижение игрока
	def go_left(self):
		# Сами функции будут вызваны позже из основного цикла
		self.change_x = -9 # Двигаем игрока по Х
		if(self.right): # Проверяем куда он смотрит и если что, то переворачиваем его
			self.flip()
			self.right = False

	def go_right(self):
		# то же самое, но вправо
		self.change_x = 9
		if (not self.right):
			self.flip()
			self.right = True


	def stop(self):
		# вызываем этот метод, когда не нажимаем на клавиши
		self.change_x = 0

	def flip(self):
		# переворот игрока (зеркальное отражение)
		self.image = pygame.transform.flip(self.image, True, False)


# Класс для описания платформы
class Platform(pygame.sprite.Sprite):
	def __init__(self, width, height):
		# Конструктор платформ
		super().__init__()
		# Также указываем фото платформы
		self.image = pygame.image.load('platform.png')

		# Установите ссылку на изображение прямоугольника
		self.rect = self.image.get_rect()


# Класс для расстановки платформ на сцене
class Level(object):
	def __init__(self, player):
		# Создаем группу спрайтов (поместим платформы различные сюда)
		self.platform_list = pygame.sprite.Group()
		# Ссылка на основного игрока
		self.player = player

	# Чтобы все рисовалось, то нужно обновлять экран
	# При вызове этого метода обновление будет происходить
	def update(self):
		self.platform_list.update()

	# Метод для рисования объектов на сцене
	def draw(self, screen):
		# Рисуем задний фон
		screen.blit(bg, (0, 0))

		# Рисуем все платформы из группы спрайтов
		self.platform_list.draw(screen)


# Класс, что описывает где будут находится все платформы
# на определенном уровне игры
class Level_01(Level):
	def __init__(self, player):
		# Вызываем родительский конструктор
		Level.__init__(self, player)

		# Массив с данными про платформы. Данные в таком формате:
		# ширина, высота, x и y позиция
		level = [
			[210, 32, 500, 500],
			[210, 32, 200, 400],
			[210, 32, 600, 300],
		]

		# Перебираем массив и добавляем каждую платформу в группу спрайтов - platform_list
		for platform in level:
			block = Platform(platform[0], platform[1])
			block.rect.x = platform[2]
			block.rect.y = platform[3]
			block.player = self.player
			self.platform_list.add(block)


# Основная функция прогарммы
def main():
	# Инициализация
	pygame.init()

	# Установка высоты и ширины
	size = [SCREEN_WIDTH, SCREEN_HEIGHT]
	screen = pygame.display.set_mode(size)

	# Название игры
	pygame.display.set_caption("Платформер")

	# Создаем игрока
	player = Player()

	# Создаем все уровни
	level_list = []
	level_list.append(Level_01(player))

	# Устанавливаем текущий уровень
	current_level_no = 0
	current_level = level_list[current_level_no]

	active_sprite_list = pygame.sprite.Group()
	player.level = current_level

	player.rect.x = 340
	player.rect.y = SCREEN_HEIGHT - player.rect.height
	active_sprite_list.add(player)

	# Цикл будет до тех пор, пока пользователь не нажмет кнопку закрытия
	done = False

	# Используется для управления скоростью обновления экрана
	clock = pygame.time.Clock()

	# Основной цикл программы
	while not done:
		# Отслеживание действий
		for event in pygame.event.get():
			if event.type == pygame.QUIT: # Если закрыл программу, то останавливаем цикл
				done = True

			# Если нажали на стрелки клавиатуры, то двигаем объект
			if event.type == pygame.KEYDOWN:
				if event.key == pygame.K_LEFT:
					player.go_left()
				if event.key == pygame.K_RIGHT:
					player.go_right()
				if event.key == pygame.K_UP:
					player.jump()

			if event.type == pygame.KEYUP:
				if event.key == pygame.K_LEFT and player.change_x < 0:
					player.stop()
				if event.key == pygame.K_RIGHT and player.change_x > 0:
					player.stop()

		# Обновляем игрока
		active_sprite_list.update()

		# Обновляем объекты на сцене
		current_level.update()

		# Если игрок приблизится к правой стороне, то дальше его не двигаем
		if player.rect.right > SCREEN_WIDTH:
			player.rect.right = SCREEN_WIDTH

		# Если игрок приблизится к левой стороне, то дальше его не двигаем
		if player.rect.left < 0:
			player.rect.left = 0

		# Рисуем объекты на окне
		current_level.draw(screen)
		active_sprite_list.draw(screen)

		# Устанавливаем количество фреймов
		clock.tick(30)

		# Обновляем экран после рисования объектов
		pygame.display.flip()

	# Корректное закртытие программы
	pygame.quit()
Также для игры вам потребуются картинки игрока и платформы. Вы можете их скачать ниже.

(фото игрока — оригинальный сайт)

(фото платформы — оригинальный сайт)

(фото на задний фон)
Видео на эту тему
Также вы можете просмотреть детальное видео по разработке 2D платформера на Python + PyGame:
Дополнительный курс
На нашем сайте также есть углубленный курс по изучению языка Питон. В ходе огромной программы вы изучите не только язык Питон, но также научитесь создавать веб сайты за счёт веб технологий и фреймворка Джанго. За курс вы изучите массу нового и к концу программы будете уметь работать с языком Питон, создавать на нём полноценные ПК приложения на основе библиотеки Kivy, а также создавать веб сайты на основе библиотеки Джанго.

This article covers the game development of a Platformer game in Pygame.
Welcome to the Pygame Platformer Game Development! In this section, we’ll be building a 2D Platformer game using the Python game library, Pygame. Fair warning to all our readers, this article is primarily targeted towards people already somewhat familiar with Pygame.
We will only be skimming over basic pygame concepts, reserving most of our time for the more advanced concepts. If you’re quick and intuitive you’ll probably be able to follow along, but I still recommend you read our Pygame Tutorial (aimed towards absolute beginners) first.
This article will cover some advanced concepts (listed below). Due to the sheer size of the code (300+ lines) and the explanation required, we’ll be splitting the game across several articles, each tackling a certain number of problems and features.
About the Game
Chances are you’ve played one of these platformer games before. It’s a simple game where you keep moving your character upwards by jumping on the available platforms. If you miss a platform and fall to your doom, it’s game over. You earn a point for every platform you cross. There’s no limit to the game, ending only when you fall and die (or get bored and quit).
Included Concepts
Below are all the Pygame game programming concepts included in this game. Don’t worry, all of them will be explained alongside the source code. As mentioned earlier, these will be split across several articles due to size limitations.
- Collision Detection
- Player movement (realistic sideways movement)
- Jump mechanics
- Gravity and Friction
- Random Level Generation
- Warpable screen movement
- Scrolling the screen (creating an infinite height)
- Creating a Score counter
- “Game Over” Mechanic
- Random Platform movement
Part 1 – Setting the Foundation
In this article we’ll set the foundation for our game. Creating our player sprite and setting up some movement controls.
Initialization and Constants
import pygame
from pygame.locals import *

pygame.init()
vec = pygame.math.Vector2  # 2 for two dimensional

HEIGHT = 450
WIDTH = 400
ACC = 0.5
FRIC = -0.12
FPS = 60

FramePerSec = pygame.time.Clock()

displaysurface = pygame.display.set_mode((WIDTH, HEIGHT))
pygame.display.set_caption("Game")
The above code is all pre-game related. You can see us importing the pygame module(s), calling pygame.init() to initialize pygame, setting up several constants such as screen height and width etc. We also set up a clock in pygame, which we’ll use later to control the Frames displayed per second.
Next we’ve set up the display screen using the WIDTH and HEIGHT variables and given the display window the name “Game”.
You’ll have noticed the constants ACC and FRIC and the variable called vec. These, we’ll be using later on in the article to create realistic movement and implement gravity.
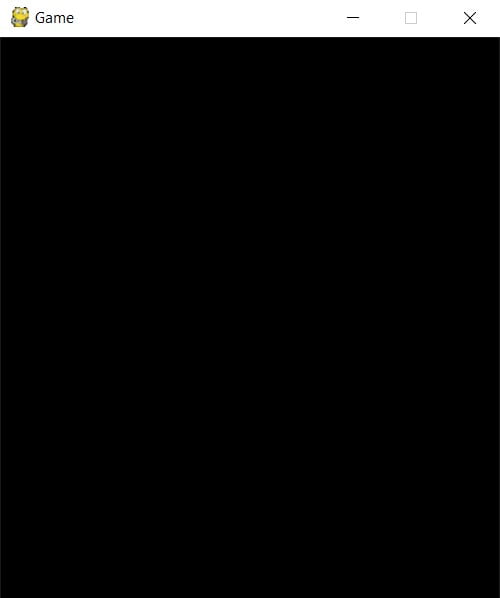
Above is an image of our current progress. A 450 by 500 pixel display screen. We have no objects made, so it’s a blank screen with the default black color.
Player and Platform Classes
In this game, we’re going to have two different types of entities. The player who we will be controlling and the platforms on which we’ll be jumping. We’re going to create two different classes for each one of these entities.
If you haven’t been using classes until now, this is a good time to start. This approach allow us to easily duplicate and access the objects we’re going to be creating. You’ll realize this once we begin creating many platforms. For now we’re just making one.
class Player(pygame.sprite.Sprite):
    def __init__(self):
        super().__init__()
        self.surf = pygame.Surface((30, 30))
        self.surf.fill((128,255,40))
        self.rect = self.surf.get_rect(center = (10, 420))

class platform(pygame.sprite.Sprite):
    def __init__(self):
        super().__init__()
        self.surf = pygame.Surface((WIDTH, 20))
        self.surf.fill((255,0,0))
        self.rect = self.surf.get_rect(center = (WIDTH/2, HEIGHT - 10))

PT1 = platform()
P1 = Player()
Most of this should only require basic Pygame knowledge. We create surface objects for each class with a fixed size. We give each of them a color using the fill() function (RGB format). Finally, we create a rect object from the surface object using the get_rect() method on the surface object.
The center = (10, 420) and center = (WIDTH/2, HEIGHT - 10) parameters we passed are used to define the starting position of the objects when they are drawn to screen. Remember, top left hand corner is the origin point with the co-ordinates (0, 0).
Finally, we create two objects, PT1 (stands for platform 1) and P1 (stands for Player 1). These names are completely arbitrary of course, and you can change them to whatever you want.
We have no images to show our progress so far, because the screen still shows the same black screen as before. This is because we haven’t drawn any of the objects we created above to the display screen.
Sprites Groups + Game Loop
In this section we’ll work on creating the game loop as well as introducing sprite groups.
For now we’ll go with a generic “all_sprites“, Sprite group and if the need arises, we’ll create more later. We’ve proceeded to add both the platform and the player to this sprite group. This enables us to easily access all these sprites at the same time as you’ll see later.
all_sprites = pygame.sprite.Group()
all_sprites.add(PT1)
all_sprites.add(P1)

while True:
    for event in pygame.event.get():
        if event.type == QUIT:
            pygame.quit()
            sys.exit()

    displaysurface.fill((0,0,0))

    for entity in all_sprites:
        displaysurface.blit(entity.surf, entity.rect)

    pygame.display.update()
    FramePerSec.tick(FPS)
We’ve setup the game loop to be able look for the QUIT event and shut down Pygame accordingly. Besides this, we use the fill() function on the displaysurface to refresh the screen with each iteration.
Next up in the game loop, we iterate through the all_sprites() group, drawing all of them to the screen. Without sprite groups, we would have to individually draw each one of them to screen.
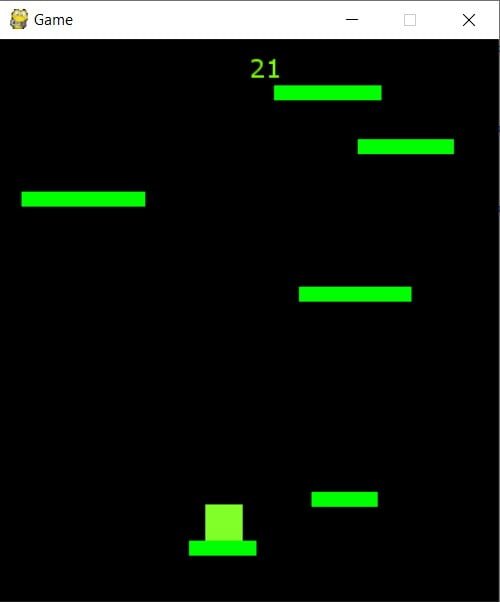
Finally, we use the update() function to push all the changes to the screen and update it. The tick() function, used on the Clock() object we created earlier limits the Game loop to refreshing 60 times per second.
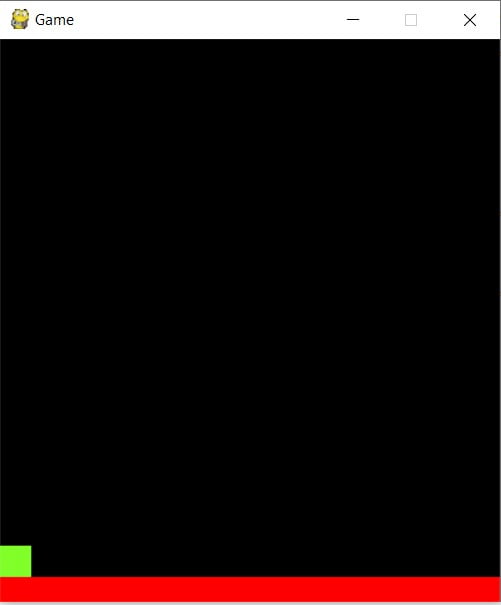
This is what our current progress in our Platformer game has resulted in. However, we can’t interact with or control our player in any way yet. We’ll be dealing with this in the next section.
Implementing Movement
Now, this is a fairly complex part that uses concepts from Kinematics (Physics) and the equations of motion to bring in the concept of acceleration and deceleration. Furthermore, we’ve also added the element of friction, else your speed would be sending you flying all over the place.
Due to the complexity, we’ll study this in shorter pieces. First we’re going to add the following three lines to the Player class (init function).
class Player(pygame.sprite.Sprite):
    def __init__(self):
        super().__init__()
        self.surf = pygame.Surface((30, 30))
        self.surf.fill((128,255,40))
        self.rect = self.surf.get_rect()

        self.pos = vec((10, 385))
        self.vel = vec(0,0)
        self.acc = vec(0,0)
It’s not as complicated as it looks. vec is simply used to create variables with two dimensions. If you go back and look at the start where we initialized it, you’ll see that it’s creating vectors. If you’re good with maths and physics, you’ll understand this quickly.
Creating two dimensional vectors allows us to keep things simpler. Remember, velocity and acceleration are vector quantities. There is horizontal acceleration and also vertical acceleration. Same goes for velocity.
The first parameters represents acceleration/velocity along the X axis and the second is for the Y axis. Notice that we’ve removed the center parameter. This is because we’ve shifted control of the Player’s position to the self.pos variable. Next up is the move() function that will allow us to control our player.
    def move(self):
        self.acc = vec(0,0)

        pressed_keys = pygame.key.get_pressed()

        if pressed_keys[K_LEFT]:
            self.acc.x = -ACC
        if pressed_keys[K_RIGHT]:
            self.acc.x = ACC
This first part is pretty simple. The function first re-sets the value of the acceleration to 0, then checks for key presses. If the left key has been pressed, it will update the acceleration with a negative value (acceleration in the opposite direction). If the right key has been pressed, acceleration will have a positive value.
        self.acc.x += self.vel.x * FRIC
        self.vel += self.acc
        self.pos += self.vel + 0.5 * self.acc
This part is a bit complicated, so you can simply copy it if you want. You can see an equation of motion there on the third line. We also use friction to to decrease the value of the velocity. Without friction, our player would not de-accelerate. You can tweak the value of the FRIC variable to adjust the movement.
        if self.pos.x > WIDTH:
            self.pos.x = 0
        if self.pos.x < 0:
            self.pos.x = WIDTH

        self.rect.midbottom = self.pos
These two if statements are a clever trick that allows “screen warping”. In other words, you can “go through” the left side of the screen, and pop up on the right side. Of course, if you don’t want this feature, you can re-purpose the two if statements and wrap them around the whole code to ensure you don’t move off screen.
The last line updates the rect() object of the Player with the new position that it has gained after being moved.
If you don’t want to add these concepts of Friction and acceleration, you can just go with the regular movement system that most games use. You can find it anywhere online or at our own Pygame Tutorial here.
We’ve created the move function, but it’s useful until we’ve actually connected it to the rest of our code. Simply add the following line into your game loop.
This will cause the move() function of Player 1 to be called in every iteration of the game loop.
Below is a short video, show casing what we’ve accomplished so far.
If you have any trouble with some of the code above, I recommend you try running it piece by piece and experimenting with it on your own. Leave out certain lines to discover their effect on the game. Game development in Pygame is a skill learnt best when you’re the one tinkering with the Platformer (or any game) code yourself.
Click on the button below to head over to the next Part in this series of Game Development with Pygame Platformer. The complete code for this article is also available in Part 2.
Related Articles:
- Pygame – The full tutorial
- Pygame projects with source code
- Audio and Sound – Pygame Mixer
- Pygame RPG Tutorial Series
Interested in taking things to the next level? Check out this article on Game Development Books to become a real Game Developer!
This marks the end of the Pygame Platformer Game Development article. Any suggestions or contributions for CodersLegacy are more than welcome. Questions regarding the article material can be asked in the comments section below.
This is part 6 in an ongoing series about creating video games in Python 3 using the Pygame module. Previous articles are:
- Learn how to program in Python by building a simple dice game
- Build a game framework with Python using the Pygame module
- How to add a player to your Python game
- Using Pygame to move your game character around
- What’s a hero without a villain? How to add one to your Python game
A platformer game needs platforms.
In Pygame, the platforms themselves are sprites, just like your playable sprite. That’s important because having platforms that are objects makes it a lot easier for your player sprite to interact with them.
There are two major steps in creating platforms. First, you must code the objects, and then you must map out where you want the objects to appear.
Coding platform objects
To build a platform object, you create a class called Platform. It’s a sprite, just like your Player sprite, with many of the same properties.
Your Platform class needs to know a lot of information about what kind of platform you want, where it should appear in the game world, and what image it should contain. A lot of that information might not even exist yet, depending on how much you have planned out your game, but that’s all right. Just as you didn’t tell your Player sprite how fast to move until the end of the Movement article, you don’t have to tell Platform everything upfront.
In the objects section of your script, create a new class:
# x location, y location, img width, img height, img file
class Platform(pygame.sprite.Sprite):
    def __init__(self, xloc, yloc, imgw, imgh, img):
        pygame.sprite.Sprite.__init__(self)
        self.image = pygame.image.load(os.path.join('images', img)).convert()
        self.image.convert_alpha()
        self.image.set_colorkey(ALPHA)
        self.rect = self.image.get_rect()
        self.rect.y = yloc
        self.rect.x = xloc
When called, this class creates an object onscreen in some X and Y location, with some width and height, using some image file for texture. It’s very similar to how players or enemies are drawn onscreen. You probably recognize this same code structure from the Player and Enemy classes.
Types of platforms
The next step is to map out where all your platforms need to appear.
The tile method
There are a few different ways to implement a platform game world. In the original side-scroller games, such as Mario Super Bros. and Sonic the Hedgehog, the technique was to use «tiles,» meaning that there were a few blocks to represent the ground and various platforms, and these blocks were used and reused to make a level. You have only eight or 12 different kinds of blocks, and you line them up onscreen to create the ground, floating platforms, and whatever else your game needs. Some people find this the easier way to make a game since you just have to make (or download) a small set of level assets to create many different levels. The code, however, requires a little more math.

Image by:
SuperTux, a tile-based video game.
The hand-painted method
Another method is to make each and every asset as one whole image. If you enjoy creating assets for your game world, this is a great excuse to spend time in a graphics application, building each and every part of your game world. This method requires less math, because all the platforms are whole, complete objects, and you tell Python where to place them onscreen.
Each method has advantages and disadvantages, and the code you must use is slightly different depending on the method you choose. I’ll cover both so you can use one or the other, or even a mix of both, in your project.
Level mapping
Mapping out your game world is a vital part of level design and game programming in general. It does involve math, but nothing too difficult, and Python is good at math so it can help some.
You might find it helpful to design on paper first. Get a sheet of paper and draw a box to represent your game window. Draw platforms in the box, labeling each with its X and Y coordinates, as well as its intended width and height. The actual positions in the box don’t have to be exact, as long as you keep the numbers realistic. For instance, if your screen is 720 pixels wide, then you can’t fit eight platforms at 100 pixels each all on one screen.
Of course, not all platforms in your game have to fit in one screen-sized box, because your game will scroll as your player walks through it. So keep drawing your game world to the right of the first screen until the end of the level.
If you prefer a little more precision, you can use graph paper. This is especially helpful when designing a game with tiles because each grid square can represent one tile.

Coordinates
You may have learned in school about the Cartesian coordinate system. What you learned applies to Pygame, except that in Pygame, your game world’s coordinates place 0,0 in the top-left corner of your screen instead of in the middle, which is probably what you’re used to from Geometry class.

Image by:
Example of coordinates in Pygame.
The X axis starts at 0 on the far left and increases infinitely to the right. The Y axis starts at 0 at the top of the screen and extends down.
Image sizes
Mapping out a game world is meaningless if you don’t know how big your players, enemies, and platforms are. You can find the dimensions of your platforms or tiles in a graphics program. In Krita, for example, click on the Image menu and select Properties. You can find the dimensions at the very top of the Properties window.
Alternately, you can create a simple Python script to tell you the dimensions of an image. To do that, you must install a Python module called Pillow, which provides the Python Image Library (PIL). Add Pillow to your project’s requirements.txt file:
pygame~=1.9.6
Pillow
Create a new Python file in PyCharm and name it identify. Type this code into it:
#!/usr/bin/env python3

# GNU All-Permissive License
# Copying and distribution of this file, with or without modification,
# are permitted in any medium without royalty provided the copyright
# notice and this notice are preserved.  This file is offered as-is,
# without any warranty.

from PIL import Image
import os.path
import sys

if len(sys.argv) > 1:
    print(sys.argv[1])
else:
    sys.exit('Syntax: identify.py [filename]')

pic = sys.argv[1]
img = Image.open(pic)
X   = img.size[0]
Y   = img.size[1]

print(X, Y)
Click on the Terminal tab at the bottom of the PyCharm window to open a terminal within your virtual environment. Now you can install the Pillow module into your environment:
(venv) pip install -r requirements.txt
Requirement already satisfied: pygame~=1.9.6 [...]
Installed Pillow [...]
Once that is installed, run your script from within your game project directory:
(venv) python ./identify.py images/ground.png
(1080, 97)
The image size of the ground platform in this example is 1080 pixels wide and 97 high.
Platform blocks
If you choose to draw each asset individually, you must create several platforms and any other elements you want to insert into your game world, each within its own file. In other words, you should have one file per asset, like this:

Image by:
One image file per object.
You can reuse each platform as many times as you want, just make sure that each file only contains one platform. You cannot use a file that contains everything, like this:

Image by:
Your level cannot be one image file.
You might want your game to look like that when you’ve finished, but if you create your level in one big file, there is no way to distinguish a platform from the background, so either paint your objects in their own file or crop them from a large file and save individual copies.
Note: As with your other assets, you can use GIMP, Krita, MyPaint, or Inkscape to create your game assets.
Platforms appear on the screen at the start of each level, so you must add a platform function in your Level class. The special case here is the ground platform, which is important enough to be treated as its own platform group. By treating the ground as its own special kind of platform, you can choose whether it scrolls or whether it stands still while other platforms float over the top of it. It’s up to you.
Add these two functions to your Level class:
def ground(lvl,x,y,w,h):
    ground_list = pygame.sprite.Group()
    if lvl == 1:
        ground = Platform(x,y,w,h,'block-ground.png')
        ground_list.add(ground)

    if lvl == 2:
        print("Level " + str(lvl) )

    return ground_list

def platform( lvl ):
    plat_list = pygame.sprite.Group()
    if lvl == 1:
        plat = Platform(200, worldy-97-128, 285,67,'block-big.png')
        plat_list.add(plat)
        plat = Platform(500, worldy-97-320, 197,54,'block-small.png')
        plat_list.add(plat)
    if lvl == 2:
        print("Level " + str(lvl) )

    return plat_list
The ground function requires an X and Y location so Pygame knows where to place the ground platform. It also requires the width and height of the platform so Pygame knows how far the ground extends in each direction. The function uses your Platform class to generate an object onscreen, and then adds that object to the ground_list group.
The platform function is essentially the same, except that there are more platforms to list. In this example, there are only two, but you can have as many as you like. After entering one platform, you must add it to the plat_list before listing another. If you don’t add a platform to the group, then it won’t appear in your game.
Tip: It can be difficult to think of your game world with 0 at the top, since the opposite is what happens in the real world; when figuring out how tall you are, you don’t measure yourself from the sky down, you measure yourself from your feet to the top of your head.
If it’s easier for you to build your game world from the «ground» up, it might help to express Y-axis values as negatives. For instance, you know that the bottom of your game world is the value of
worldy. Soworldyminus the height of the ground (97, in this example) is where your player is normally standing. If your character is 64 pixels tall, then the ground minus 128 is exactly twice as tall as your player. Effectively, a platform placed at 128 pixels is about two stories tall, relative to your player. A platform at -320 is three more stories. And so on.
As you probably know by now, none of your classes and functions are worth much if you don’t use them. Add this code to your setup section:
ground_list = Level.ground(1, 0, worldy-97, 1080, 97)
plat_list = Level.platform(1)
And add these lines to your main loop (again, the first line is just for context):
enemy_list.draw(world)  # refresh enemies
ground_list.draw(world)  # refresh ground
plat_list.draw(world)  # refresh platforms
Tiled platforms
Tiled game worlds are considered easier to make because you just have to draw a few blocks upfront and can use them over and over to create every platform in the game. There are sets of tiles with a Creative Commons license for you to use on sites like kenney.nl and OpenGameArt.org. The simplified-platformer-pack from kenney.nl are 64 pixels square, so that’s the dimension for tiles this article uses. Should you download or create tiles with a different size, adjust the code as needed.
The Platform class is the same as the one provided in the previous sections.
The ground and platform in the Level class, however, must use loops to calculate how many blocks to use to create each platform.
If you intend to have one solid ground in your game world, the ground is simple. You just «clone» your ground tile across the whole window. For instance, you could create a list of X and Y values to dictate where each tile should be placed, and then use a loop to take each value and draw one tile. This is just an example, so don’t add this to your code:
# Do not add this to your code
gloc = [0,656,64,656,128,656,192,656,256,656,320,656,384,656]
If you look carefully, though, you can see all the Y values are always the same (656, to be specific), and the X values increase steadily in increments of 64, which is the size of the tile. That kind of repetition is exactly what computers are good at, so you can use a little bit of math logic to have the computer do all the calculations for you:
Add this to the setup part of your script:
gloc = []
tx   = 64
ty   = 64

i=0
while i <= (worldx/tx)+tx:
    gloc.append(i*tx)
    i=i+1

ground_list = Level.ground( 1,gloc,tx,ty )
With this code, regardless of the size of your window, Python divides the width of the game world by the width of the tile and creates an array listing each X value. This doesn’t calculate the Y value, but that never changes on flat ground anyway.
To use the array in a function, use a while loop that looks at each entry and adds a ground tile at the appropriate location. Add this function to your Level class:
def ground(lvl,gloc,tx,ty):
    ground_list = pygame.sprite.Group()
    i=0
    if lvl == 1:
        while i < len(gloc):
            ground = Platform(gloc[i],worldy-ty,tx,ty,'tile-ground.png')
            ground_list.add(ground)
            i=i+1

    if lvl == 2:
        print("Level " + str(lvl) )

    return ground_list
This is nearly the same code as the ground function for the block-style platformer, provided in the previous section, aside from the while loop.
For moving platforms, the principle is similar, but there are some tricks you can use to make your life easier.
Rather than mapping every platform by pixels, you can define a platform by its starting pixel (its X value), the height from the ground (its Y value), and how many tiles to draw. That way, you don’t have to worry about the width and height of every platform.
The logic for this trick is a little more complex, so copy this code carefully. There is a while loop inside of another while loop because this function must look at all three values within each array entry to successfully construct a full platform. In this example, there are only three platforms defined as ploc.append statements, but your game probably needs more, so define as many as you need. Of course, some won’t appear yet because they’re far offscreen, but they’ll come into view once you implement scrolling.
def platform(lvl,tx,ty):
    plat_list = pygame.sprite.Group()
    ploc = []
    i=0
    if lvl == 1:
        ploc.append((200,worldy-ty-128,3))
        ploc.append((300,worldy-ty-256,3))
        ploc.append((500,worldy-ty-128,4))
        while i < len(ploc):
            j=0
            while j <= ploc[i][2]:
                plat = Platform((ploc[i][0]+(j*tx)),ploc[i][1],tx,ty,'tile.png')
                plat_list.add(plat)
                j=j+1
            print('run' + str(i) + str(ploc[i]))
            i=i+1

    if lvl == 2:
        print("Level " + str(lvl) )

    return plat_list
Of course, this has only created a function to calculate platforms for each level. You code doesn’t invoke the function yet.
In the setup section of your program, add this line:
plat_list = Level.platform(1, tx, ty)To get the platforms to appear in your game world, they must be in your main loop. If you haven’t already done so, add these lines to your main loop (again, the first line is just for context):
        enemy_list.draw(world)  # refresh enemies
        ground_list.draw(world) # refresh ground
        plat_list.draw(world)   # refresh platforms
Launch your game, and adjust the placement of your platforms as needed. Don’t worry that you can’t see the platforms that are spawned offscreen; you’ll fix that soon.

Applying what you know
I haven’t demonstrated how to place your enemy in your game world, but apply what you’ve learnt so far to position the enemy sprite either on a platform or down on the ground.
Don’t position your hero sprite yet. That must be managed by the forces of gravity (or at least an emulation of it), which you’ll learn in the next two articles.
For now, here’s the code so far:
#!/usr/bin/env python3
# by Seth Kenlon

# GPLv3
# This program is free software: you can redistribute it and/or
# modify it under the terms of the GNU General Public License as
# published by the Free Software Foundation, either version 3 of the
# License, or (at your option) any later version.
#
# This program is distributed in the hope that it will be useful, but
# WITHOUT ANY WARRANTY; without even the implied warranty of
# MERCHANTABILITY or FITNESS FOR A PARTICULAR PURPOSE.  See the GNU
# General Public License for more details.
#
# You should have received a copy of the GNU General Public License
# along with this program.  If not, see <http://www.gnu.org/licenses/>.

import pygame
import sys
import os

'''
Variables
'''

worldx = 960
worldy = 720
fps = 40
ani = 4
world = pygame.display.set_mode([worldx, worldy])

BLUE = (25, 25, 200)
BLACK = (23, 23, 23)
WHITE = (254, 254, 254)
ALPHA = (0, 255, 0)

'''
Objects
'''

# x location, y location, img width, img height, img file
class Platform(pygame.sprite.Sprite):
    def __init__(self, xloc, yloc, imgw, imgh, img):
        pygame.sprite.Sprite.__init__(self)
        self.image = pygame.image.load(os.path.join('images', img)).convert()
        self.image.convert_alpha()
        self.image.set_colorkey(ALPHA)
        self.rect = self.image.get_rect()
        self.rect.y = yloc
        self.rect.x = xloc

class Player(pygame.sprite.Sprite):
    """
    Spawn a player
    """

    def __init__(self):
        pygame.sprite.Sprite.__init__(self)
        self.movex = 0
        self.movey = 0
        self.frame = 0
        self.health = 10
        self.images = []
        for i in range(1, 5):
            img = pygame.image.load(os.path.join('images', 'hero' + str(i) + '.png')).convert()
            img.convert_alpha()
            img.set_colorkey(ALPHA)
            self.images.append(img)
            self.image = self.images[0]
            self.rect = self.image.get_rect()

    def control(self, x, y):
        """
        control player movement
        """
        self.movex += x
        self.movey += y

    def update(self):
        """
        Update sprite position
        """

        self.rect.x = self.rect.x + self.movex
        self.rect.y = self.rect.y + self.movey

        # moving left
        if self.movex < 0:
            self.frame += 1
            if self.frame > 3 * ani:
                self.frame = 0
            self.image = pygame.transform.flip(self.images[self.frame // ani], True, False)

        # moving right
        if self.movex > 0:
            self.frame += 1
            if self.frame > 3 * ani:
                self.frame = 0
            self.image = self.images[self.frame // ani]

        hit_list = pygame.sprite.spritecollide(self, enemy_list, False)
        for enemy in hit_list:
            self.health -= 1
            print(self.health)


class Enemy(pygame.sprite.Sprite):
    """
    Spawn an enemy
    """

    def __init__(self, x, y, img):
        pygame.sprite.Sprite.__init__(self)
        self.image = pygame.image.load(os.path.join('images', img))
        self.image.convert_alpha()
        self.image.set_colorkey(ALPHA)
        self.rect = self.image.get_rect()
        self.rect.x = x
        self.rect.y = y
        self.counter = 0

    def move(self):
        """
        enemy movement
        """
        distance = 80
        speed = 8

        if self.counter >= 0 and self.counter <= distance:
            self.rect.x += speed
        elif self.counter >= distance and self.counter <= distance * 2:
            self.rect.x -= speed
        else:
            self.counter = 0

        self.counter += 1


class Level:
    def ground(lvl, gloc, tx, ty):
        ground_list = pygame.sprite.Group()
        i = 0
        if lvl == 1:
            while i < len(gloc):
                ground = Platform(gloc[i], worldy - ty, tx, ty, 'tile-ground.png')
                ground_list.add(ground)
                i = i + 1

        if lvl == 2:
            print("Level " + str(lvl))

        return ground_list

    def bad(lvl, eloc):
        if lvl == 1:
            enemy = Enemy(eloc[0], eloc[1], 'enemy.png')
            enemy_list = pygame.sprite.Group()
            enemy_list.add(enemy)
        if lvl == 2:
            print("Level " + str(lvl))

        return enemy_list

    # x location, y location, img width, img height, img file
    def platform(lvl, tx, ty):
        plat_list = pygame.sprite.Group()
        ploc = []
        i = 0
        if lvl == 1:
            ploc.append((200, worldy - ty - 128, 3))
            ploc.append((300, worldy - ty - 256, 3))
            ploc.append((500, worldy - ty - 128, 4))
            while i < len(ploc):
                j = 0
                while j <= ploc[i][2]:
                    plat = Platform((ploc[i][0] + (j * tx)), ploc[i][1], tx, ty, 'tile.png')
                    plat_list.add(plat)
                    j = j + 1
                print('run' + str(i) + str(ploc[i]))
                i = i + 1

        if lvl == 2:
            print("Level " + str(lvl))

        return plat_list


'''
Setup
'''

backdrop = pygame.image.load(os.path.join('images', 'stage.png'))
clock = pygame.time.Clock()
pygame.init()
backdropbox = world.get_rect()
main = True

player = Player()  # spawn player
player.rect.x = 0  # go to x
player.rect.y = 30  # go to y
player_list = pygame.sprite.Group()
player_list.add(player)
steps = 10

eloc = []
eloc = [300, 0]
enemy_list = Level.bad(1, eloc)

gloc = []
tx = 64
ty = 64

i = 0
while i <= (worldx / tx) + tx:
    gloc.append(i * tx)
    i = i + 1

ground_list = Level.ground(1, gloc, tx, ty)
plat_list = Level.platform(1, tx, ty)


'''
Main Loop
'''

while main:
    for event in pygame.event.get():
        if event.type == pygame.QUIT:
            pygame.quit()
            try:
                sys.exit()
            finally:
                main = False

        if event.type == pygame.KEYDOWN:
            if event.key == ord('q'):
                pygame.quit()
                try:
                    sys.exit()
                finally:
                    main = False
            if event.key == pygame.K_LEFT or event.key == ord('a'):
                player.control(-steps, 0)
            if event.key == pygame.K_RIGHT or event.key == ord('d'):
                player.control(steps, 0)
            if event.key == pygame.K_UP or event.key == ord('w'):
                print('jump')

        if event.type == pygame.KEYUP:
            if event.key == pygame.K_LEFT or event.key == ord('a'):
                player.control(steps, 0)
            if event.key == pygame.K_RIGHT or event.key == ord('d'):
                player.control(-steps, 0)

    world.blit(backdrop, backdropbox)
    player.update()
    player_list.draw(world)
    enemy_list.draw(world)
    ground_list.draw(world)
    plat_list.draw(world)
    for e in enemy_list:
        e.move()
    pygame.display.flip()
    clock.tick(fps)
For many video game players, the lure of writing games is a prime reason to learn computer programming. However, building a 2D platform game such as Lode Runner, Pitfall!, or Super Mario Bros. without proper tools or guidance can leave you frustrated. Fortunately, the Python arcade library makes creating a 2D game in Python accessible for many programmers!
If you haven’t already heard about it, the arcade library is a modern Python framework for crafting games with compelling graphics and sound. Object oriented and built for Python 3.6 and above, arcade provides you with a modern set of tools for crafting great game experiences, including platform games.
By the end of this tutorial, you’ll be able to:
- Install the Python
arcadelibrary - Create a basic 2D game structure
- Find usable game artwork and other assets
- Build platform maps using the Tiled map editor
- Define player actions, game rewards, and obstacles
- Control your player with keyboard and joystick input
- Play sound effects for game actions
- Scroll the game screen with viewports to keep your player in view
- Add title, instruction, and pause screens
- Move nonplayer game elements on the screen
This tutorial assumes you have a basic understanding of writing Python programs. You should also be comfortable using the arcade library and familiar with object-oriented Python, which is used extensively in arcade.
You can download all the code, images, and sounds for this tutorial by clicking the link below:
Installing Python arcade
You can install arcade and its dependencies using pip:
$ python -m pip install arcade
Complete installation instructions are available for Windows, Mac, and Linux. You can even install arcade directly from source if you’d prefer.
This tutorial uses Python 3.9 and arcade 2.5.5 throughout.
Designing the Game
Before you begin writing any code, it’s beneficial to have a plan in place. Since your goal is to write a 2D platform game, it would be a good idea to define exactly what makes a game a platformer.
What Is a Platform Game?
There are a few characteristics that separate platform games from other types of games:
- The player jumps and climbs between various platforms on the game field.
- The platforms often feature uneven terrain and uneven height placements.
- Obstacles are placed in the player’s path and must be overcome to reach a goal.
These are just the minimum requirements for a platform game, and you’re free to add other features as you see fit, including:
- Multiple levels of increasing difficulty
- Rewards available throughout the game
- Multiple player lives
- Ability to destroy game obstacles
The game plan developed in this tutorial includes increasing difficulty and rewards.
Game Story
All good games have some backstory to them, even if it’s a simple one:
- The miner in Lode Runner has to collect all the gold.
- Pitfall Harry has to collect thirty-two different treasures in a set amount of time.
- Mario is tasked with rescuing Princess Toadstool.
Your game benefits from a story that connects the actions taken by the player to some overarching goal.
For this tutorial, the game story concerns a space traveler named Roz, who has crash-landed on an alien world. Before their craft crashed, Roz was thrown clear and now needs to find their space ship, fix it, and return home.
To do this, Roz must travel from their current location to the exit of each level, which brings them closer to the ship. Along the way, Roz can collect coins, which are used to fix the damaged craft. Since Roz was ejected from the ship, they don’t have any weapons and so must avoid any dangerous obstacles in the way.
While this story may seem silly, it serves the important purpose of informing the design of your levels and characters. This helps you make decisions as you implement features:
- Since Roz has no weapons, there is no way to shoot enemies that may appear.
- Roz crashed on an alien world, so enemies can be anywhere and anything.
- Because the planet is alien, gravity can be different, which may affect Roz’s jump and movement abilities.
- Roz needs to fix their damaged spaceship, which requires collecting items to do so. Right now, coins are available, but other items may be available later.
When designing a game, you can make the story as simple or involved as you like.
Game Mechanics
With a rough design in mind, you can also begin planning how you will control gameplay. Moving Roz around the game field requires a way to control several different movements:
- Left and Right to move on a platform
- Up and Down to climb ladders between platforms
- Jump to collect coins, avoid enemies, or move between platforms
Traditionally, players are controlled using the four arrow keys for directional movement, along with Space for jumping. You can also use keys such as IJKL, IJKM, or WASD if you’d like.
You aren’t limited to just keyboard input, either. The arcade library includes support for joysticks and game controllers, which you’ll explore later. Once a joystick is connected to your computer, you can move Roz by checking the position of the X- and Y-axis of the stick and jump by checking for specific button presses.
Game Assets
Now that you have an idea of how the game should work, you need to make some decisions about how the game will look and sound. The images, sprites, sounds, and even text used to display the score are collectively known as assets. They define your game in the eyes of your players. Creating them can be a challenge, taking as much time, if not more, than writing the actual game code.
Rather than create your own assets, you can download free or low-cost assets to use in your game. Many artists and designers provide sprites, backgrounds, fonts, sounds, and other content for game makers to use. Here are some sources for music, sound, and art that you can search for useful content:
For the game outlined in this tutorial, you’ll use freely available map tile images and sprites created by Kenney.nl. Sound effects provided in the downloadable source code were created by the author using MuseScore and Audacity.
The final step before you can begin writing code is deciding how you will structure and store everything.
Defining the Program Structure
Because video games consist of graphic and sound assets as well as code, it’s important to organize your project. Keeping game assets and code properly organized will allow you to make targeted changes to the design or behavior of your game while minimizing the impact to other game aspects.
The project uses the following structure:
arcade_platformer/
|
├── arcade_platformer/
|
├── assets/
|   |
│   ├── images/
|   |   |
│   │   ├── enemies/
|   |   |
│   │   ├── ground/
|   |   |
│   │   ├── HUD/
|   |   |
│   │   ├── items/
|   |   |
│   │   ├── player/
|   |   |
│   │   └── tiles/
|   |
│   └── sounds/
|
└── tests/
Under the root folder of the project are the following subfolders:
arcade_platformerholds all the Python code for the game.assetsconsists of all your game images, fonts, sounds, and tile maps.testscontains any tests you may choose to write.
While there are some other gameplay decisions to be made, this is enough to begin writing code. You’ll get started by defining the basic arcade code structure in which you can build your platform game!
Defining the Game Structure in Python arcade
Your game uses the full object-oriented capabilities of arcade. To do so, you define a new class based on arcade.Window, then override methods in that class to update and render your game graphics.
Here’s a basic skeleton of what a finished game might look like. You will build on this skeleton as the game progresses:
 1"""
 2Arcade Platformer
 3
 4Demonstrating the capabilities of arcade in a platformer game
 5Supporting the Arcade Platformer article
 6at https://realpython.com/platformer-python-arcade/
 7
 8All game artwork from www.kenney.nl
 9Game sounds and tile maps by author
10"""
11
12import arcade
13
14class Platformer(arcade.Window):
15    def __init__(self):
16        pass
17
18    def setup(self):
19        """Sets up the game for the current level"""
20        pass
21
22    def on_key_press(self, key: int, modifiers: int):
23        """Processes key presses
24
25        Arguments:
26            key {int} -- Which key was pressed
27            modifiers {int} -- Which modifiers were down at the time
28        """
29
30    def on_key_release(self, key: int, modifiers: int):
31        """Processes key releases
32
33        Arguments:
34            key {int} -- Which key was released
35            modifiers {int} -- Which modifiers were down at the time
36        """
37
38    def on_update(self, delta_time: float):
39        """Updates the position of all game objects
40
41        Arguments:
42            delta_time {float} -- How much time since the last call
43        """
44        pass
45
46    def on_draw(self):
47        pass
48
49if __name__ == "__main__":
50    window = Platformer()
51    window.setup()
52    arcade.run()
This basic structure provides almost everything you need to construct a 2D platformer game:
-
Line 12 imports the
arcadelibrary. -
Line 14 defines the class used to run the entire game. Methods of this class are called to update game state, process user input, and draw items on the screen.
-
Line 15 defines
.__init__(), which initializes the game object. You add code here to handle actions that should only be taken when the game first starts. -
Line 18 defines
.setup(), which sets up the game to begin playing. You add code to this method that may need to be repeated throughout the game. For example, this a great place to initialize new levels on success or reset the current level on failure. -
Lines 22 and 30 define
.on_key_press()and.on_key_release(), which allow you to process keyboard input independently.arcadetreats key presses and key releases separately, which helps avoid problems with keyboard auto-repeat. -
Line 38 defines
.on_update(), where you update the state of your game and all the objects in it. This is where collisions between objects are handled, most sound effects are played, scores are updated, and sprites are animated. This method is where everything in your game actually happens, so there is usually a lot of code here. -
Line 46 defines
.on_draw(), where everything displayed in your game is drawn. In contrast to.on_update(), this method usually contains only a few lines of code. -
Lines 49 to 52 define the main entry point for your game. This is where you:
- Create the game object
windowbased on your class defined on line 13 - Set up the game by calling
window.setup() - Kick off the game loop by calling
arcade.run()
- Create the game object
This basic structure works well for most Python arcade games.
As you progress through this tutorial, you’ll flesh out each of these methods and add new ones to implement your game’s functionality.
Adding Initial Game Functionality
The first thing to do when starting the game is to open the game window. By the end of this section, your game will look something like this:
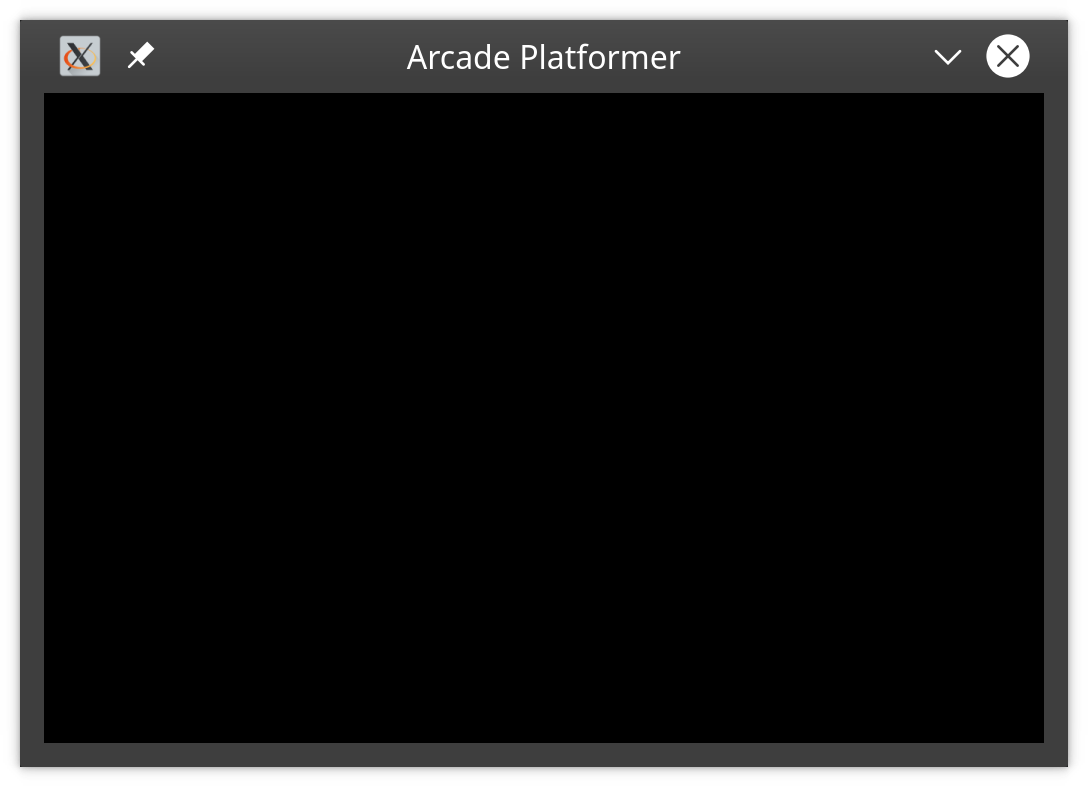
You can see the changes to your game skeleton in arcade_platformer/02_open_game_window.py:
11import arcade
12import pathlib
13
14# Game constants
15# Window dimensions
16SCREEN_WIDTH = 1000
17SCREEN_HEIGHT = 650
18SCREEN_TITLE = "Arcade Platformer"
19
20# Assets path
21ASSETS_PATH = pathlib.Path(__file__).resolve().parent.parent / "assets"
22
23class Platformer(arcade.Window):
24    def __init__(self) -> None:
25        super().__init__(SCREEN_WIDTH, SCREEN_HEIGHT, SCREEN_TITLE)
26
27        # These lists will hold different sets of sprites
28        self.coins = None
29        self.background = None
30        self.walls = None
31        self.ladders = None
32        self.goals = None
33        self.enemies = None
34
35        # One sprite for the player, no more is needed
36        self.player = None
37
38        # We need a physics engine as well
39        self.physics_engine = None
40
41        # Someplace to keep score
42        self.score = 0
43
44        # Which level are we on?
45        self.level = 1
46
47        # Load up our sounds here
48        self.coin_sound = arcade.load_sound(
49            str(ASSETS_PATH / "sounds" / "coin.wav")
50        )
51        self.jump_sound = arcade.load_sound(
52            str(ASSETS_PATH / "sounds" / "jump.wav")
53        )
54        self.victory_sound = arcade.load_sound(
55            str(ASSETS_PATH / "sounds" / "victory.wav")
56        )
Here’s a breakdown:
-
Lines 11 and 12 import the
arcadeandpathliblibraries you need. -
Lines 16 to 18 define several game window constants that are used to open the game window later.
-
Line 21 saves the path to your
assetsfolder, using the path of the current file as a base. Since you will be using these assets throughout the game, knowing where they are is vital. Usingpathlibensures your paths will work correctly on Windows, Mac, or Linux. -
Line 25 sets up your game window by calling the parent class’
.__init__()method usingsuper()and the constants defined above on lines 16 to 18. -
Lines 28 to 33 define six different sprite lists to hold the various sprites used in the game. It’s not strictly necessary to declare and define these here, as they will be properly and fully defined later in
.setup(). Declaring object properties is a holdover from languages like C++ or Java. Each level will have a different set of objects, which are populated in.setup():-
coinsare collectible objects Roz can find throughout the game. -
backgroundobjects are presented for visual interest only and don’t interact with anything. -
wallsare objects that Roz can’t move through. These include actual walls and the platforms on which Roz walks and jumps. -
laddersare objects that allow Roz to climb up or down. -
goalsare objects Roz must find to move to the next level. -
enemiesare objects Roz must avoid throughout the game. Contact with an enemy will end the game.
-
-
Line 36 declares the player object, which will be properly defined in
.setup(). -
Line 39 declares a physics engine that is used to manage movement and collisions.
-
Line 42 defines a variable to track the current score.
-
Line 45 defines a variable to track the current game level.
-
Lines 48 to 56 use the
ASSETS_PATHconstant defined earlier to locate and load the sound files used for collecting coins, jumping, and finishing each level.
You can add more here if you wish, but remember that .__init__() is only run when the game first starts.
Roz needs to be able to walk, jump, and climb around the game world. Managing when and how that happens is the job of the physics engine.
What Is a Physics Engine?
In most platformers, the user moves the player using a joystick or the keyboard. They might make the player jump or walk the player off a platform. Once the player is in midair, the user doesn’t need to do anything else to make them fall to a lower platform. Controlling where a player can walk and how they fall after they jump or walk off a platform is handled by the physics engine.
In a game, the physics engine provides an approximation of the physical forces that act on players and other game objects. These forces may impart or impact the movement of game objects, including jumping, climbing, falling, and blocking movement.
There are three physics engines included in Python arcade:
-
arcade.PhysicsEngineSimpleis a very basic engine that handles the movement and interactions of a single player sprite and a sprite list of walls. This is useful for top-down games, where gravity is not a factor. -
arcade.PhysicsEnginePlatformeris a more complex engine tailored for use in platform games. In addition to basic movement, it provides a gravity force that pulls objects to the bottom of the screen. It also provides the player a way to jump and climb ladders. -
arcade.PymunkPhysicsEngineis built on top of Pymunk, a 2D physics library that uses the Chipmunk library. Pymunk makes extremely realistic physics calculations available toarcadeapplications.
For this tutorial you will use the arcade.PhysicsEnginePlatformer.
In order to properly set up the arcade.PhysicsEnginePlatformer, you must provide the player sprite as well as two sprite lists containing the walls and ladders with which the player interacts. Since the walls and ladders vary based on the level, you can’t define the physics engine formally until the level is set up, which happens in .setup().
Speaking of levels, how do you define those anyway? As with most things, there’s more than one way to get the job done.
Building Game Levels
Back when video games were still distributed on floppy disks, it was difficult to store all the game level data needed for a game. Many game makers resorted to writing code to create levels. While this method saves disk space, using imperative code to generate game levels limits your ability to modify or augment them later.
As storage space became less expensive, games took advantage by storing more of their assets in data files, which were read and processed by the code. Game levels could now be created and modified without changing the game code, which allowed artists and game designers to contribute without needing to understand the underlying code. This declarative method of level design allows for more flexibility when designing and developing games.
The disadvantage to declarative game level design is the need to not only define the data but store it as well. Fortunately, there’s a tool available that can do both, and it works extremely well with arcade.
Tiled is an open source 2D game level editor that produces files that can be read and used by Python arcade. Tiled allows you to create a collection of images called a tileset, which is used to create a tile map defining each level of your game. You can use Tiled to create tile maps for top-down, isometric, and side-scrolling games, including the levels for your game:
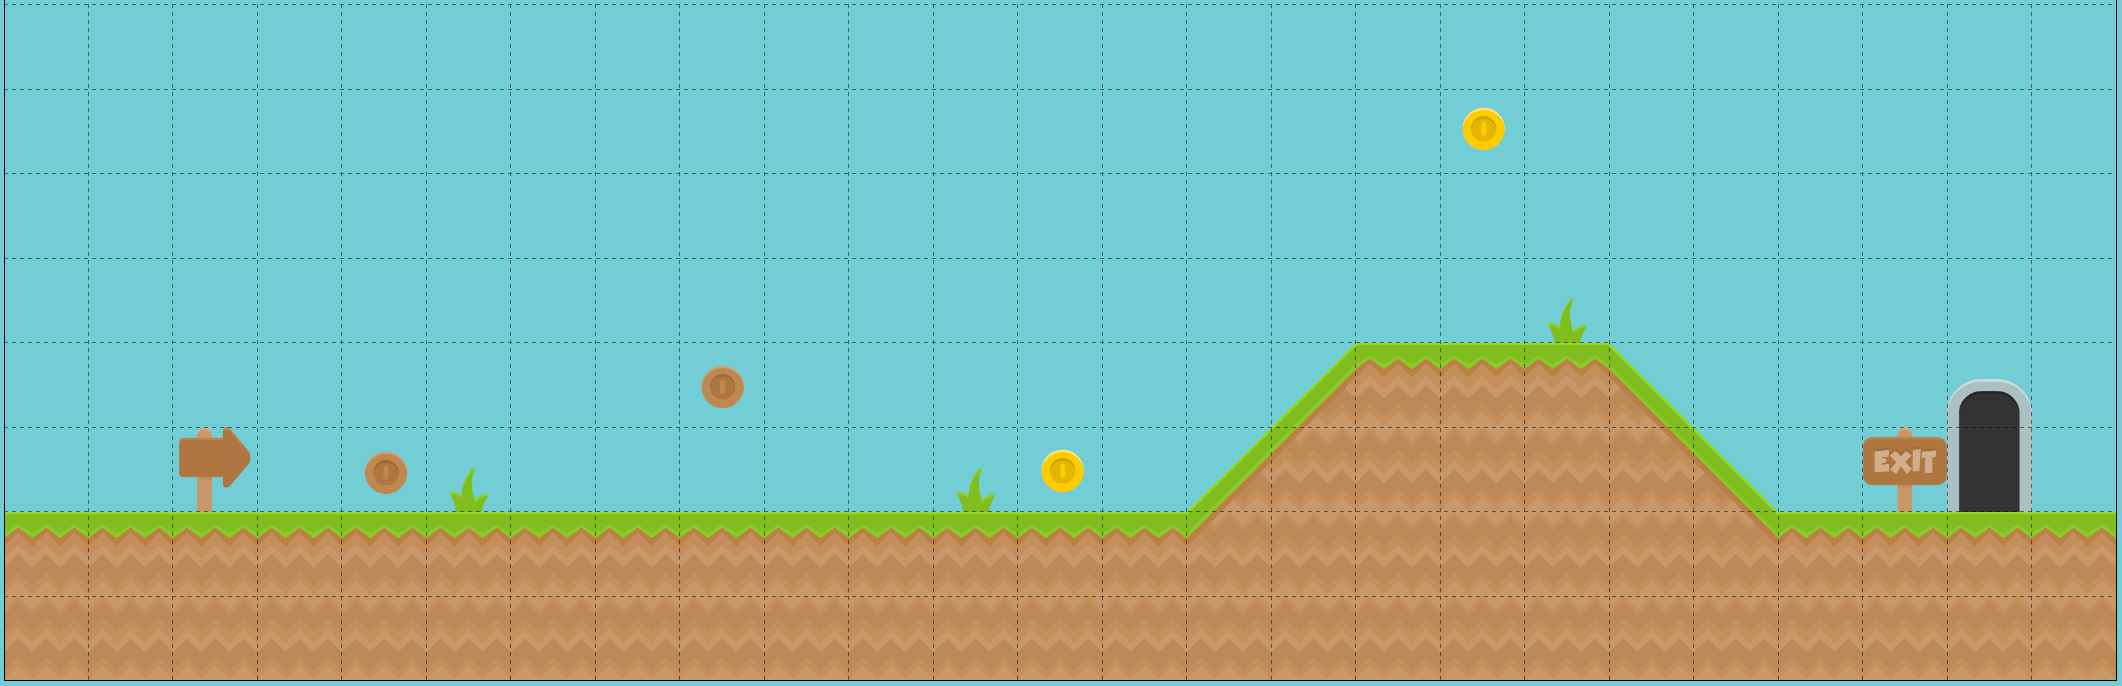
Tiled comes with a great set of docs and a great intro tutorial as well. To get you started and hopefully whet your appetite for more, next you’ll walk through the steps to create your first map level.
Downloading and Starting Tiled
Before you run Tiled, you need to download it. The current version at the time of writing was Tiled version 1.4.3, which was available for Windows, Mac, and Linux in a variety of formats. When downloading, consider supporting its continued maintenance by making a donation as well.
Once you’ve downloaded Tiled, you can start it for the first time. You’ll see the following window:
Click New Map to create the tile map for your first level. The following dialog will appear:
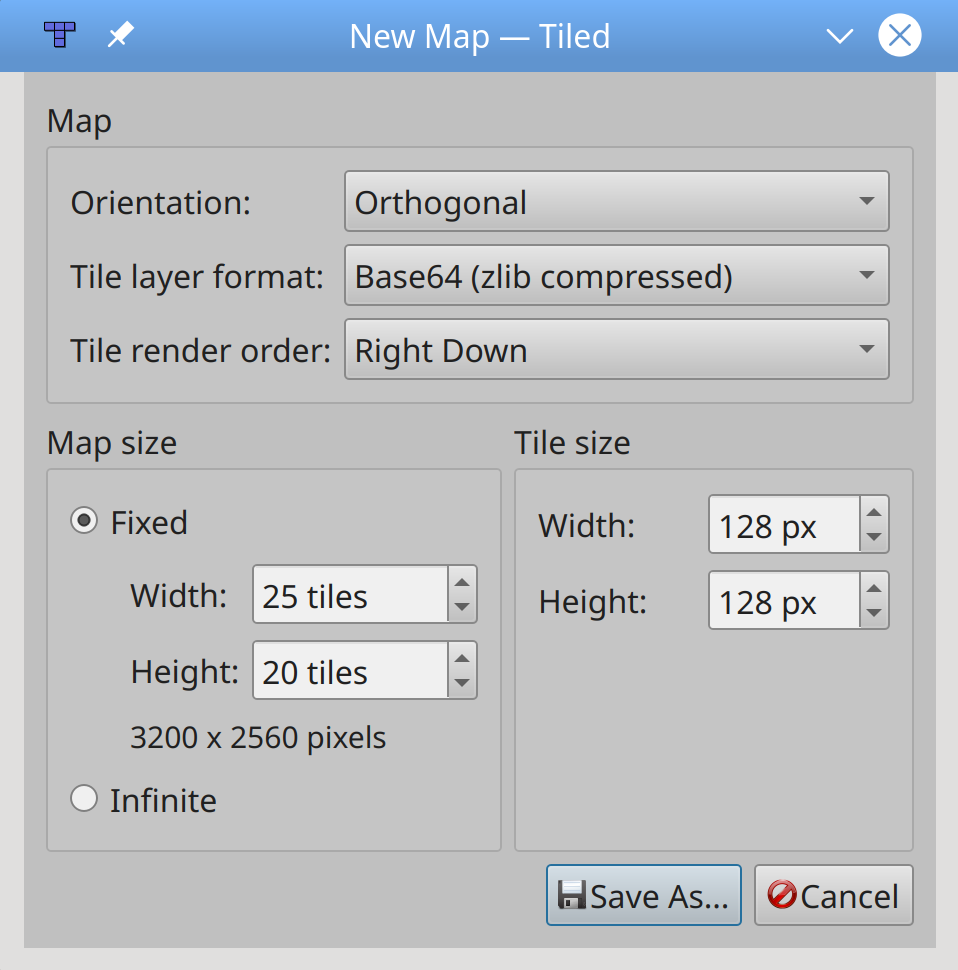
These default tile map properties are great for platform games and represent the best options for an arcade game. Here’s a quick breakdown of other options you can select:
- Orientation specifies how the map is displayed and edited.
- Orthogonal maps are square and are used for top-down and platform games.
arcadeworks best with orthogonal maps. - Isometric maps shift the viewpoint to be a nonsquare angle to the game field, providing a pseudo-3D view of the 2D world. Staggered isometric maps specify that the top edge of the map is the top edge of the view.
- Hexagonal maps use hexagons rather than squares for each map tile (although Tiled displays squares in the editor).
- Orthogonal maps are square and are used for top-down and platform games.
- Tile layer format specifies how the map is stored on disk. Compression using zlib helps conserve disk space.
- Tile render order specifies how tiles are stored in the file and ultimately how they’re rendered by the game engine.
- Map size sets the size of the map to be stored, in tile units. Specifying the map as Infinite tells Tiled to determine the final size based on the edits made.
- Tile size specifies the size of each tile in pixels. If you’re using artwork from an external source, set this to the size of the tiles in that set. The artwork provided for this tutorial uses square sprites that measure 128 × 128 pixels. This means that every tile consists of around 16,000 pixels and that they can be stored on disk and in memory in a way that can increase game performance if necessary.
Click Save As to save the level. Since this is a game asset, save it as arcade_platformer/assets/platform_level_01.tmx.
Tile maps consist of a set of tiles that are placed on specific map layers. To begin defining a tile map for a level, you must first define the tileset to use and the layers on which they appear.
Creating a Tileset
The tiles used to create your level are contained in a tileset. The tileset is associated with the tile map and provides all the sprite images required to define the level.
You define and interact with a tileset using the Tilesets view, located in the lower-right corner of the Tiled window:
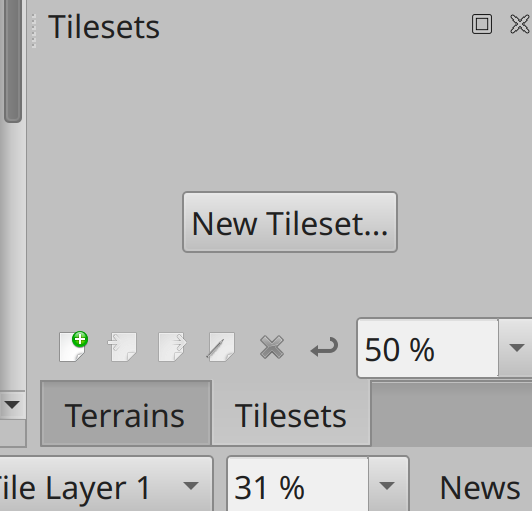
Click the New Tileset button to define the tileset for this level. Tiled presents a dialog asking for some information about the new tileset to create:
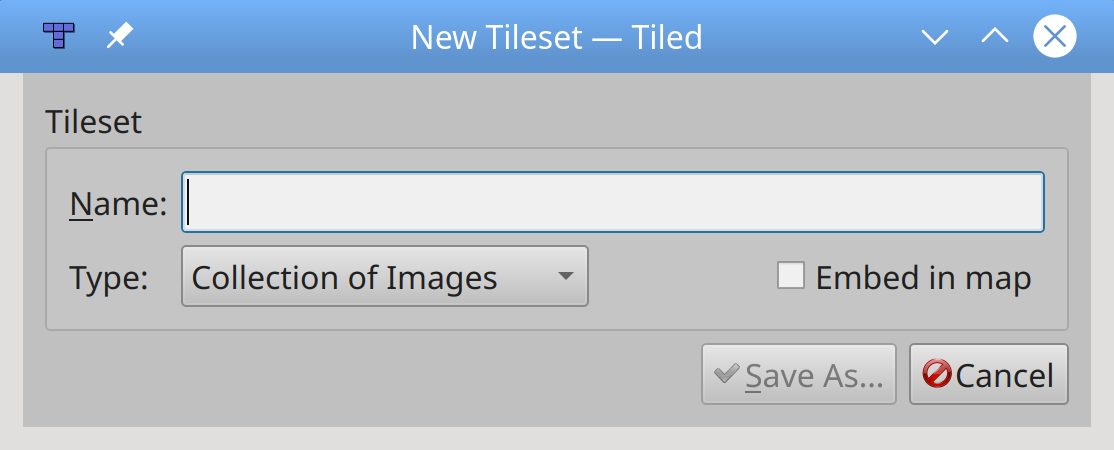
You have the following options for your new tileset:
- Name is the name of your tileset. Call this one
arcade_platformer. - Type specifies how the tileset will be defined:
- Collection of Images indicates that each tile is contained in a single, separate image on disk. You should select this option, as
arcadeworks best with individual tile images. - Based on Tileset Image indicates that all the tiles are combined into one single large image that Tiled needs to process to locate each individual image. Only select this option if the assets you are using require it.
- Collection of Images indicates that each tile is contained in a single, separate image on disk. You should select this option, as
- Embed in Map tells Tiled to store the tileset in the tile map. Keep this unchecked, as you will save and use the tileset as a separate resource in multiple tile maps.
Click Save As and save it as assets/arcade_platformer.tsx. To reuse this tileset on future tile maps, select Map → Add External Tileset to include it.
Defining the Tileset
Your new tileset is initially empty, so you need to populate it with tiles. You do this by locating your tile images and adding them to the set. Each image should be the same dimensions as the Tile size you defined when you created the tile map.
This example assumes you have downloaded the game assets for this tutorial. You can do so by clicking the link below:
Alternatively, you can download the Platformer Pack Redux (360 Assets) and move the contents of the PNG folder to your arcade-platformer/assets/images folder. Recall that your tile map is located under arcade-platformer/assets, as this will be important later.
On the toolbar, click the blue plus sign (+) or select Tileset → Add Tiles to begin the process. You will be presented with the following dialog:
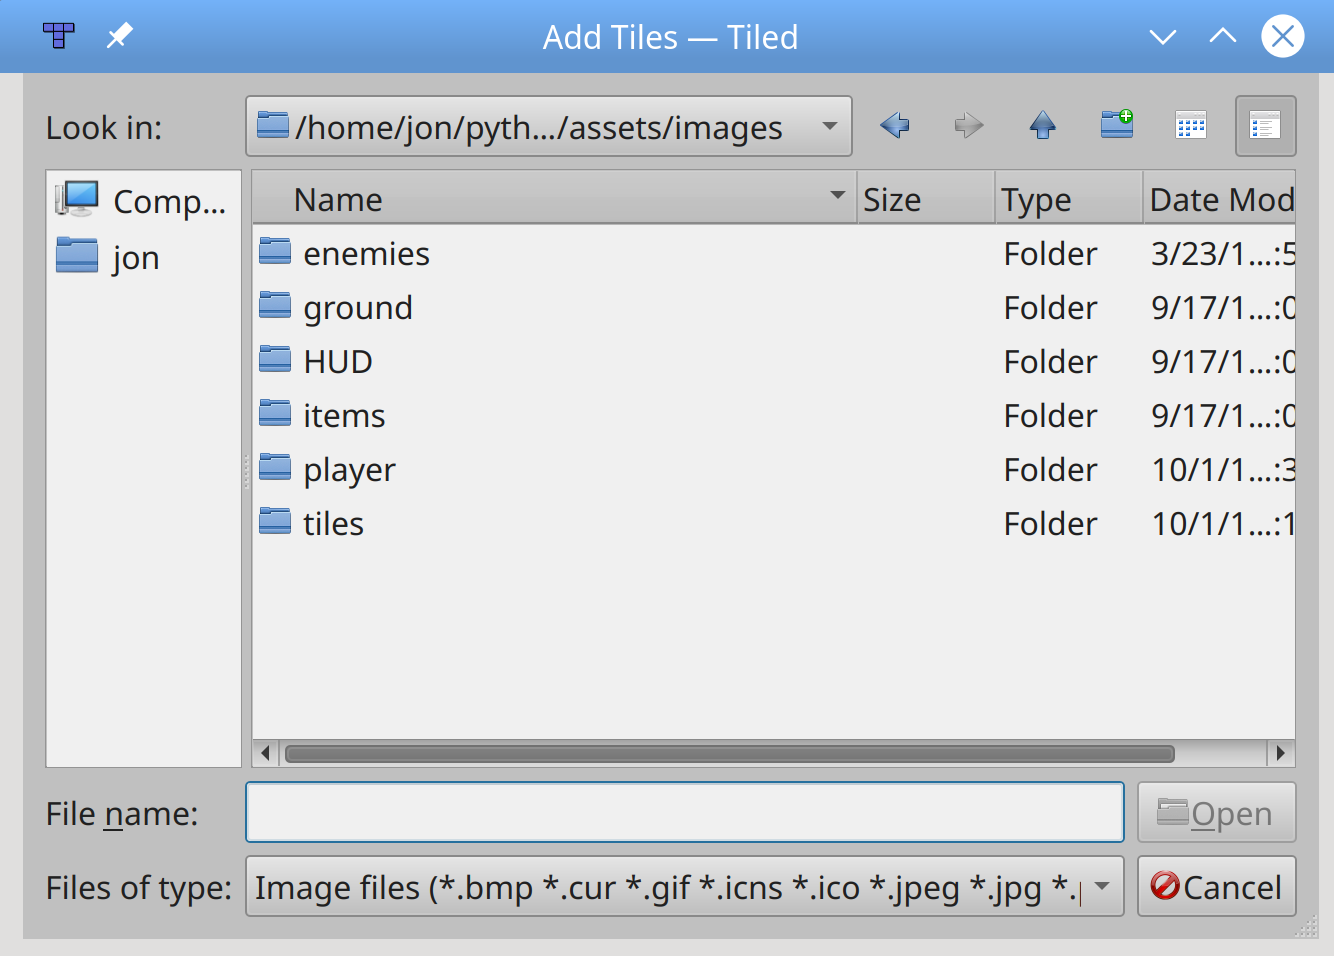
From here, navigate to the folders listed below to add the specified resources to your tileset:
| Folder | File |
|---|---|
arcade-platformer/assets/images/ground/Grass |
All Files |
arcade-platformer/assets/images/HUD |
hudHeart_empty.png |
hudHeart_full.png |
|
hudHeart_half.png |
|
hudX.png |
|
arcade-platformer/assets/images/items |
coinBronze.png |
coinGold.png |
|
coinSilver.png |
|
flagGreen_down.png |
|
flagGreen1.png |
|
flagGreen2.png |
|
arcade-platformer/assets/images/tiles |
doorOpen_mid.png |
doorOpen_top.png |
|
grass.png |
|
ladderMid.png |
|
ladderTop.png |
|
signExit.png |
|
signLeft.png |
|
signRight.png |
|
torch1.png |
|
torch2.png |
|
water.png |
|
waterTop_high.png |
|
waterTop_low.png |
When you’re done adding files, your tileset should look like this:
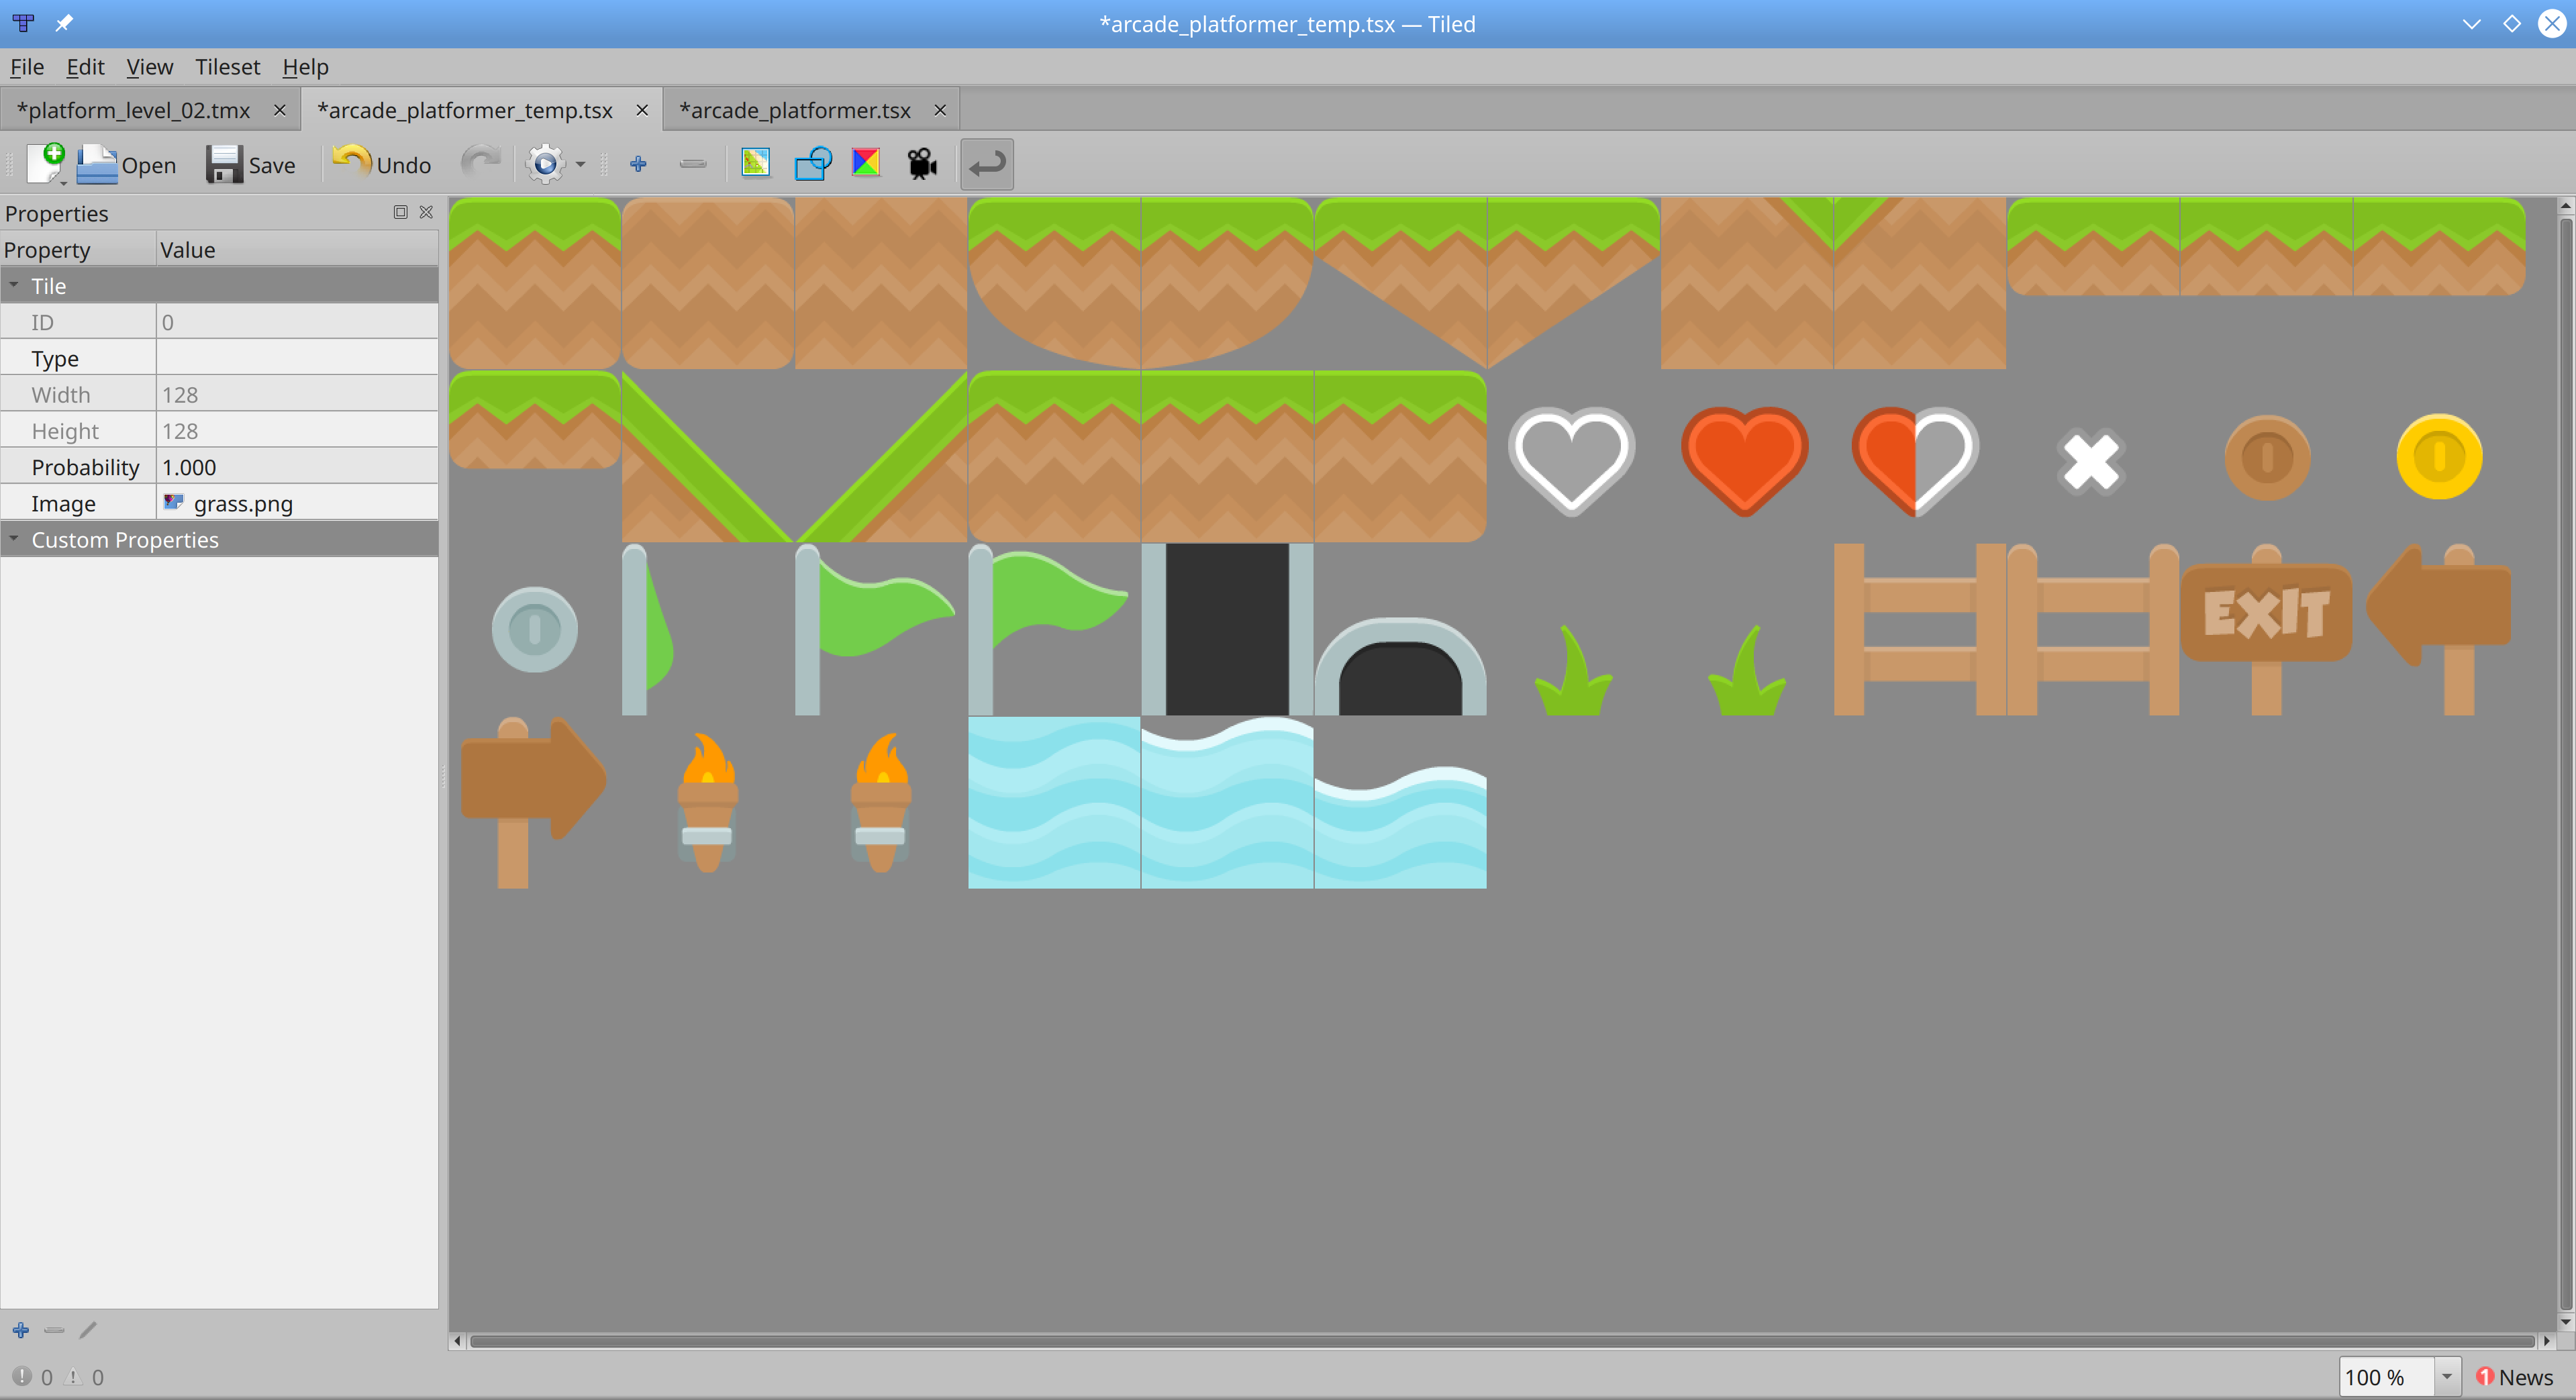
If you don’t see all your tiles, click the Dynamically Wrap Tiles button on the toolbar to show them all.
Save your new tileset using Ctrl+S or File → Save from the menu and return to your tile map. You’ll see the new tileset in the lower right of the Tiled interface, ready for use in defining your tile map!
Defining Map Layers
Every item in a level serves a specific purpose:
- Ground and walls define where and how your player can move.
- Coins and other collectible items score points and unlock achievements.
- Ladders allow the player to climb to new platforms but don’t otherwise block movement.
- Background items provide visual interest and may provide information.
- Enemies provide obstacles for the player to avoid.
- Goals provide a reason to move around the level.
Each of these different item types requires different handling in arcade. Therefore, it makes sense to keep them separate when defining them in Tiled. Tiled allows you to do just that by using map layers. By placing different item types on different map layers and processing each layer separately, you can track and handle each type of sprite differently.
To define a layer, first open the Layers view in the upper-right corner of the Tiled screen:
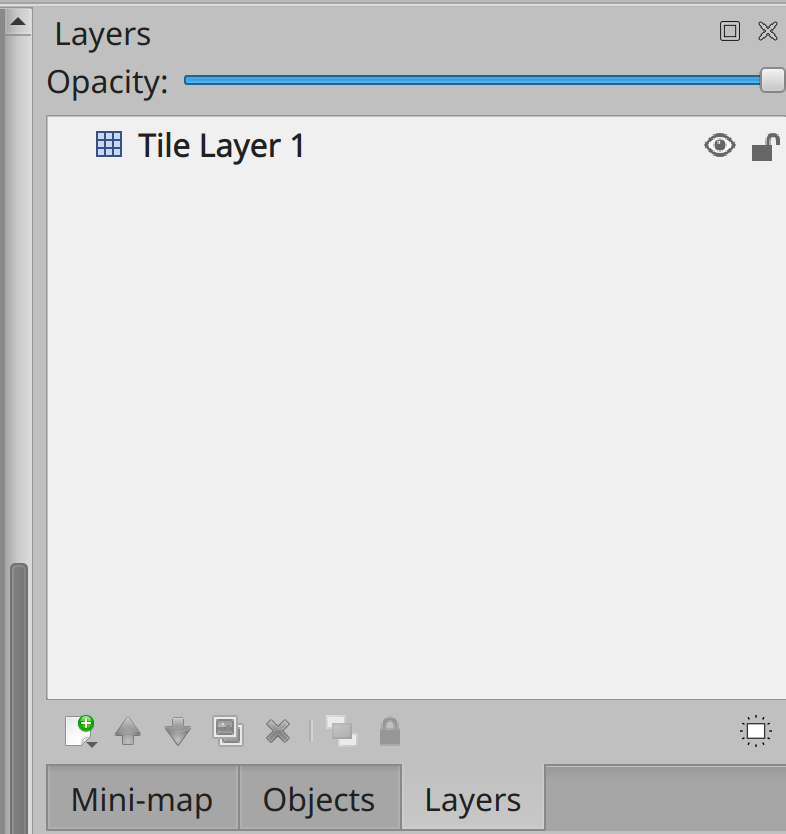
The default layer is already set and selected. Rename this layer as ground by clicking the layer, then changing the Name in the Properties view on the left. Alternatively, you can double-click the name to edit it directly in the Layers panel:

This layer will contain your ground tiles, including walls through which the player can’t walk.
Creating new layers requires you to define not only the layer name but also the layer type. Tiled provides four types of layers:
- Tile layers allow you to place tiles from your tileset onto the map. Placement is restricted to grid locations, and tiles must be placed as defined.
- Object layers allow you to place objects such as collectibles or triggers on the map. Objects may be tiles from the tile map or freely drawn shapes, and they may be visible or not. Each object can be freely positioned, scaled, and rotated.
- Image layers allow you to place images onto the map for use as background or foreground imagery.
- Group layers allow you to gather layers into groups for easier map management.
For this tutorial, you’ll use an object layer to place coins on the map and tile layers for everything else.
To create the new tile layers, click New Layer in the Layers view, then select Tile Layer:
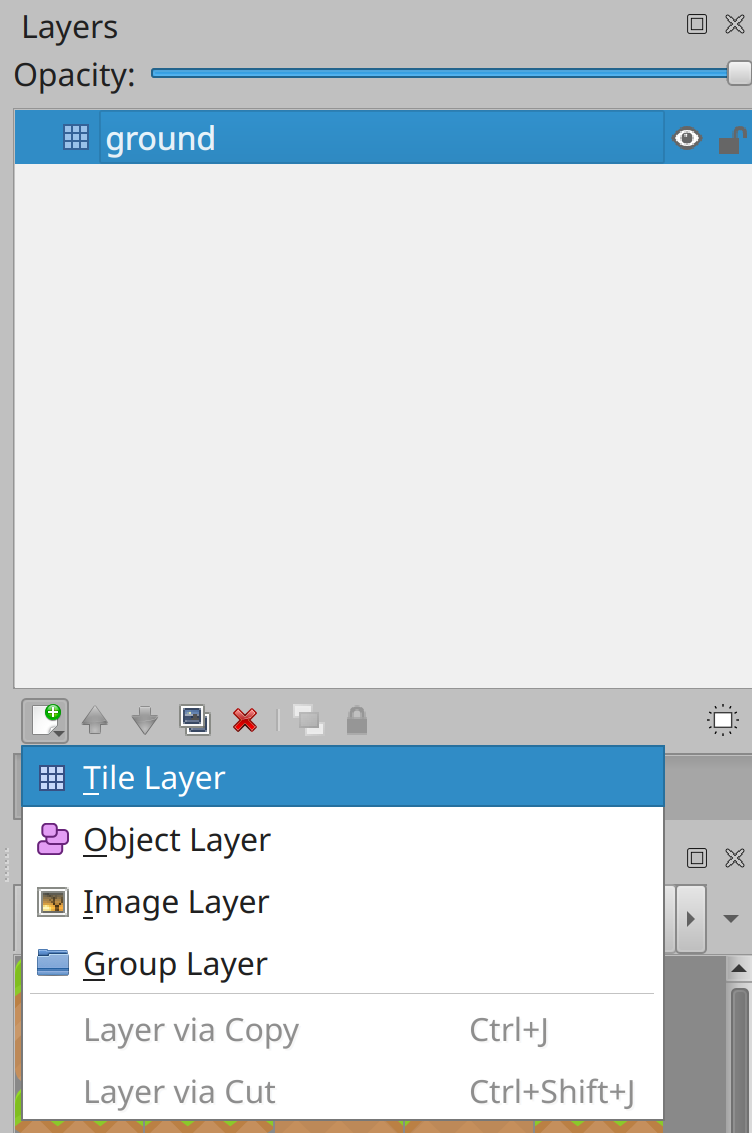
Create three new tile layers named ladders, background, and goal.
Next, create a new object layer called coins to hold your collectibles:
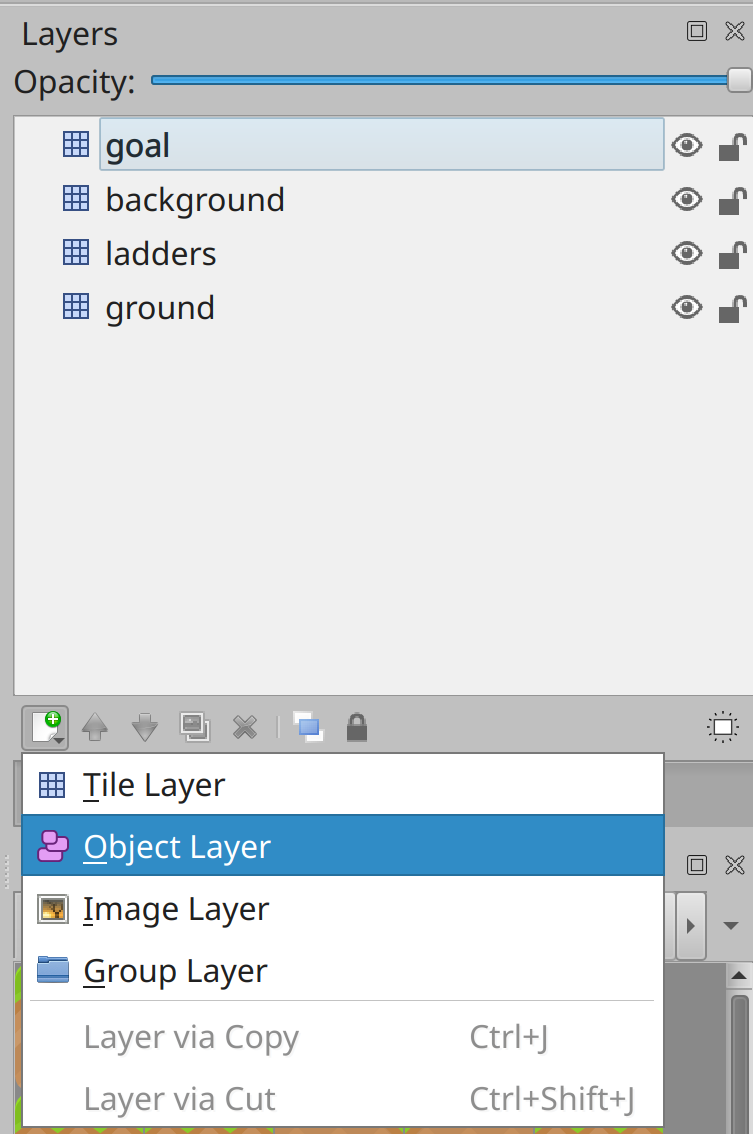
You can arrange the layers in any order you like using the arrow buttons at the bottom of the layer view. Now you can start laying out your level!
Designing a Level
In the book Classic Game Design, author and game developer Franz Lanzinger defines eight rules for classic game design. Here are the first three rules:
- Keep it simple.
- Start gameplay immediately.
- Ramp difficulty from easy to hard.
Similarly, veteran game developer Steve Goodwin talks about balancing games in his book Polished Game Development. He stresses that good game balance starts with level 1, which “should be the first one developed and the last one finished.”
With these ideas in mind, here are some guidelines for designing your platformer levels:
- The first level of the game should introduce the user to basic game features and controls.
- Make the initial obstacles easy to overcome.
- Make the first collectibles impossible to miss and later ones more difficult to obtain.
- Don’t introduce obstacles that require finesse to overcome until the user has learned to navigate the world.
- Don’t introduce enemies until the user has learned to overcome obstacles.
Below is a closer look at a first level designed with these guidelines in mind. In the downloadable materials, this complete level design is found under assets/platform_level_01.tmx:
The player starts on the left and proceeds to the right, indicated by the arrow pointing to the right. As the player moves right, they find a bronze coin, which will increase their score. A second bronze coin is found later hanging higher in the air, which demonstrates to the player that coins may be anywhere. Then the player finds a gold coin, which has a different point value.
The player then climbs a ramp, which demonstrates that there is more of the world above them. At the top of the hill is the final gold coin, which they have to jump to get. On the other side of the hill is the exit, which is also marked.
This simple level helps show the user how to move and jump. It shows that there are collectible items in the world worth points. It also shows items that are informative or decorative and with which the player does not interact, such as the arrow sign, exit sign, and grass tufts. Finally, it shows them what the goal looks like.
With the hard work of designing your first level complete, you can now build it in Tiled.
Building a Level
Before you can place coins and the goal, you need to know how to get there. So the first thing to define is where the ground is located. With your tile map selected in Tiled, select the ground layer to build.
From your tileset, select the grassCenter tile. Then, click in any grid on the bottom row of your tile map to set that tile in place:
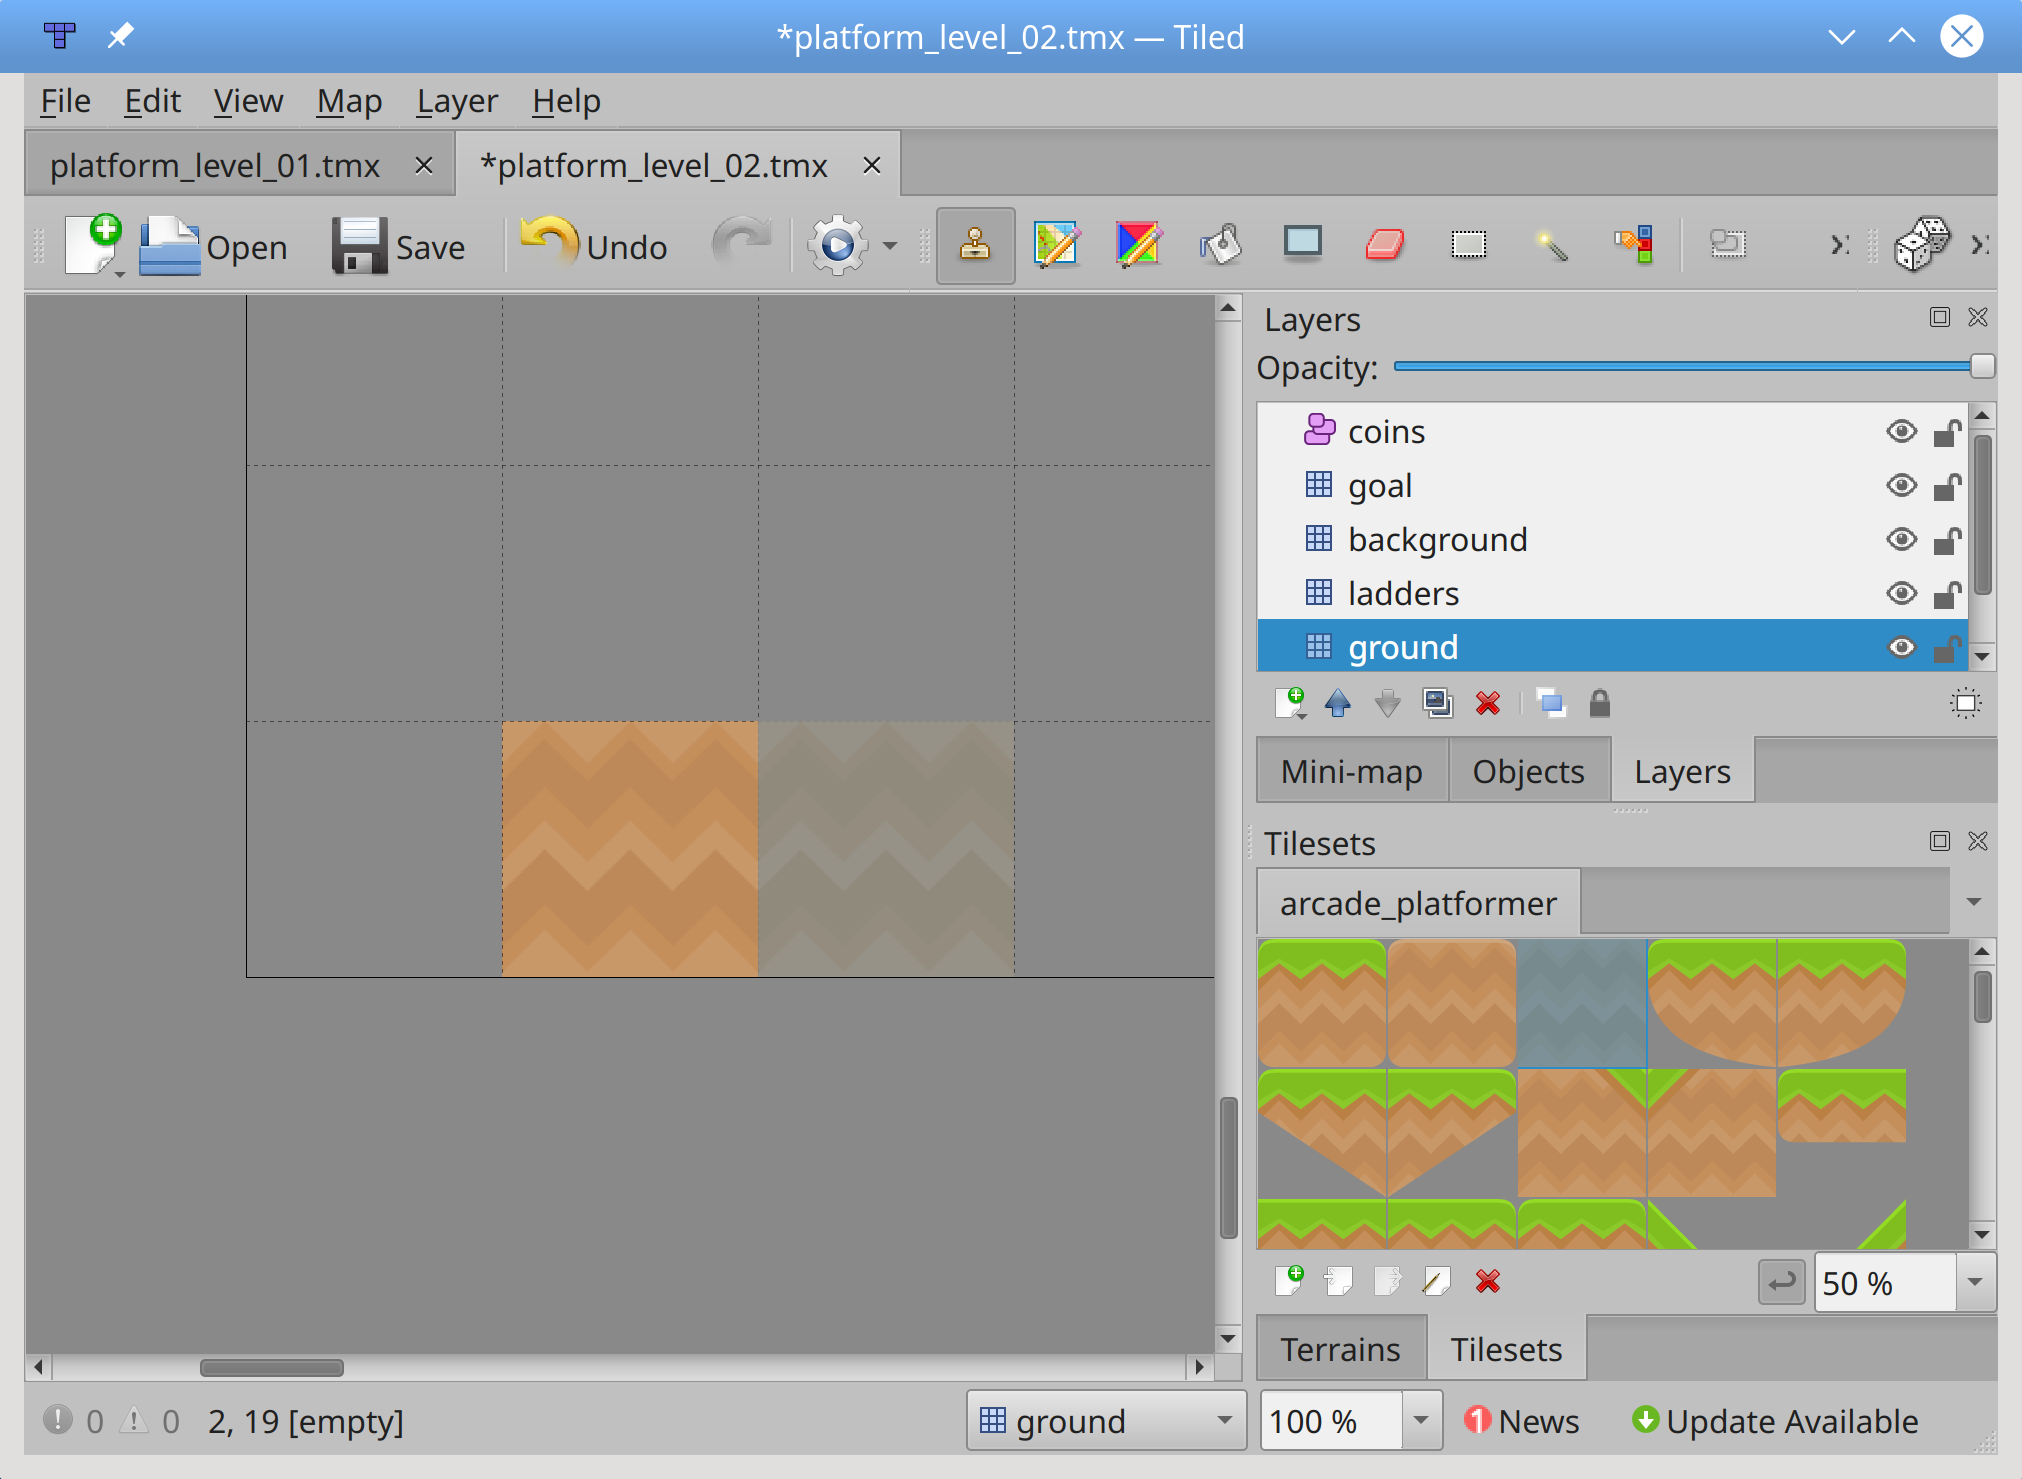
With the first tileset, you can drag across the bottom row to set everything to grassCenter. Then, select the grassMid tile to draw the grassy top of the level across the second row:
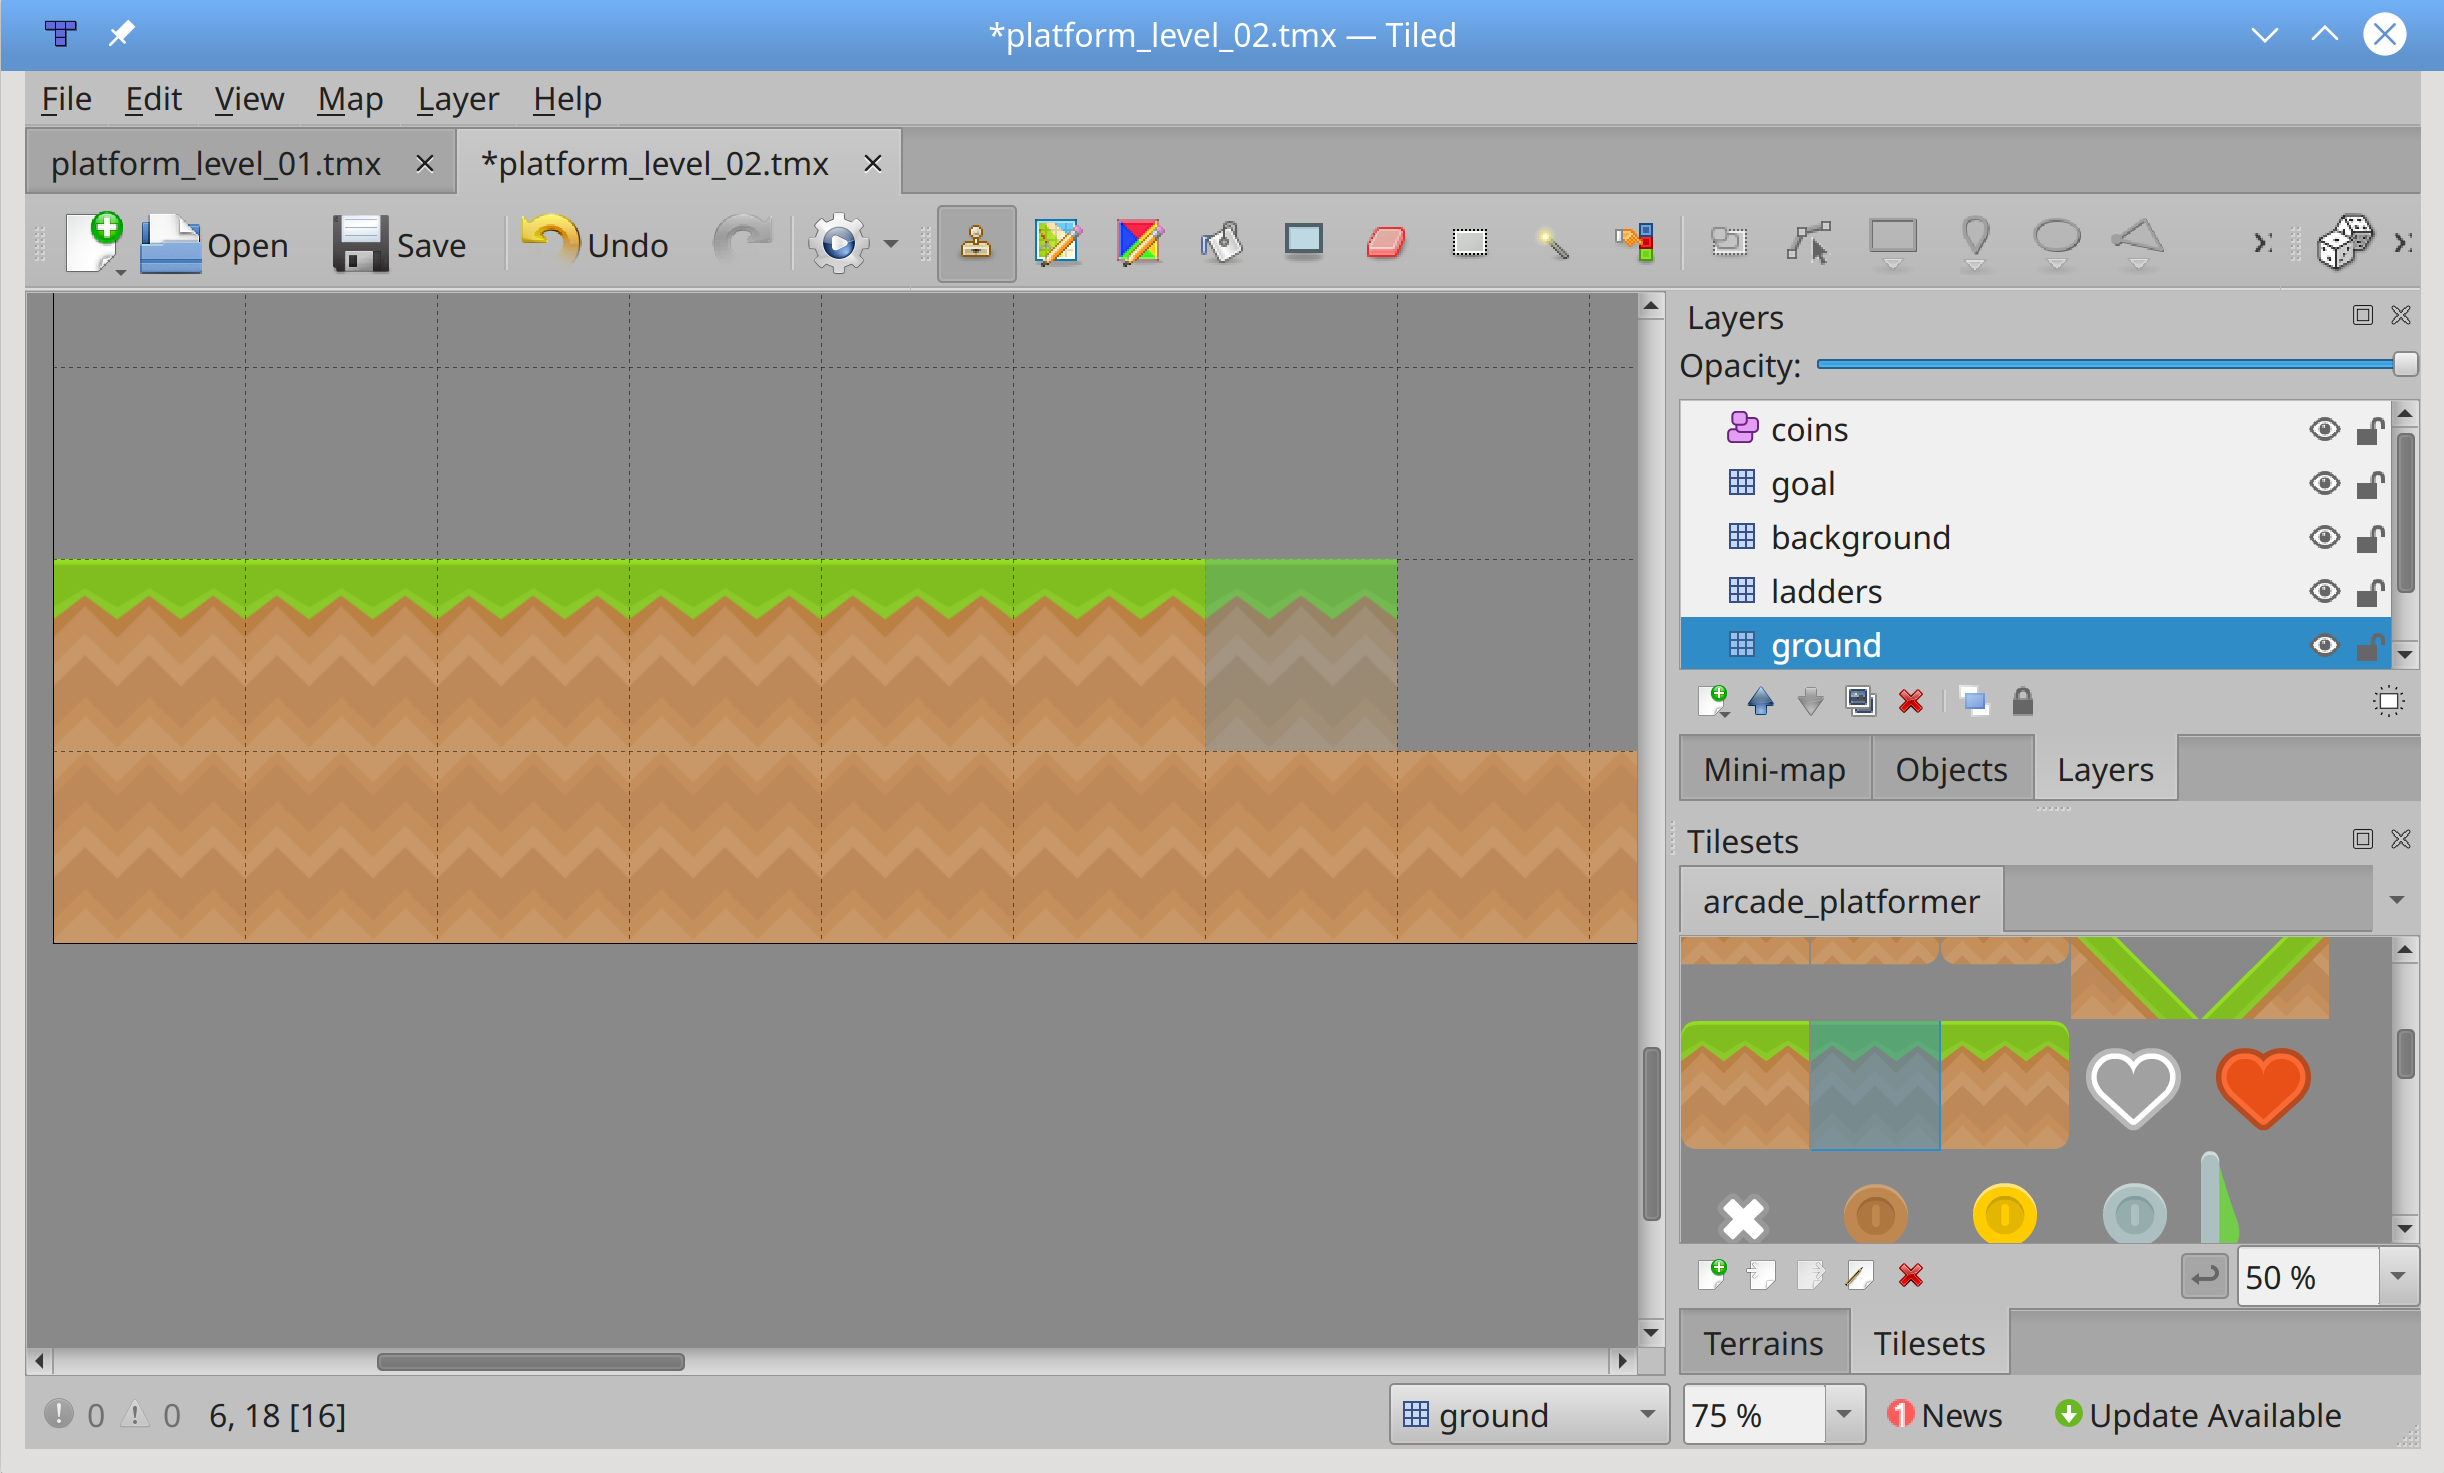
Continue building the level using the grass tiles to build a two-tile-high hill starting about halfway through the world. Leave a space of four tiles at the right edge to provide room for the player to walk down the hill and for the exit sign and exit portal.
Next, switch to the goal layer and place the exit portal tiles one tile in from the far-right edge:
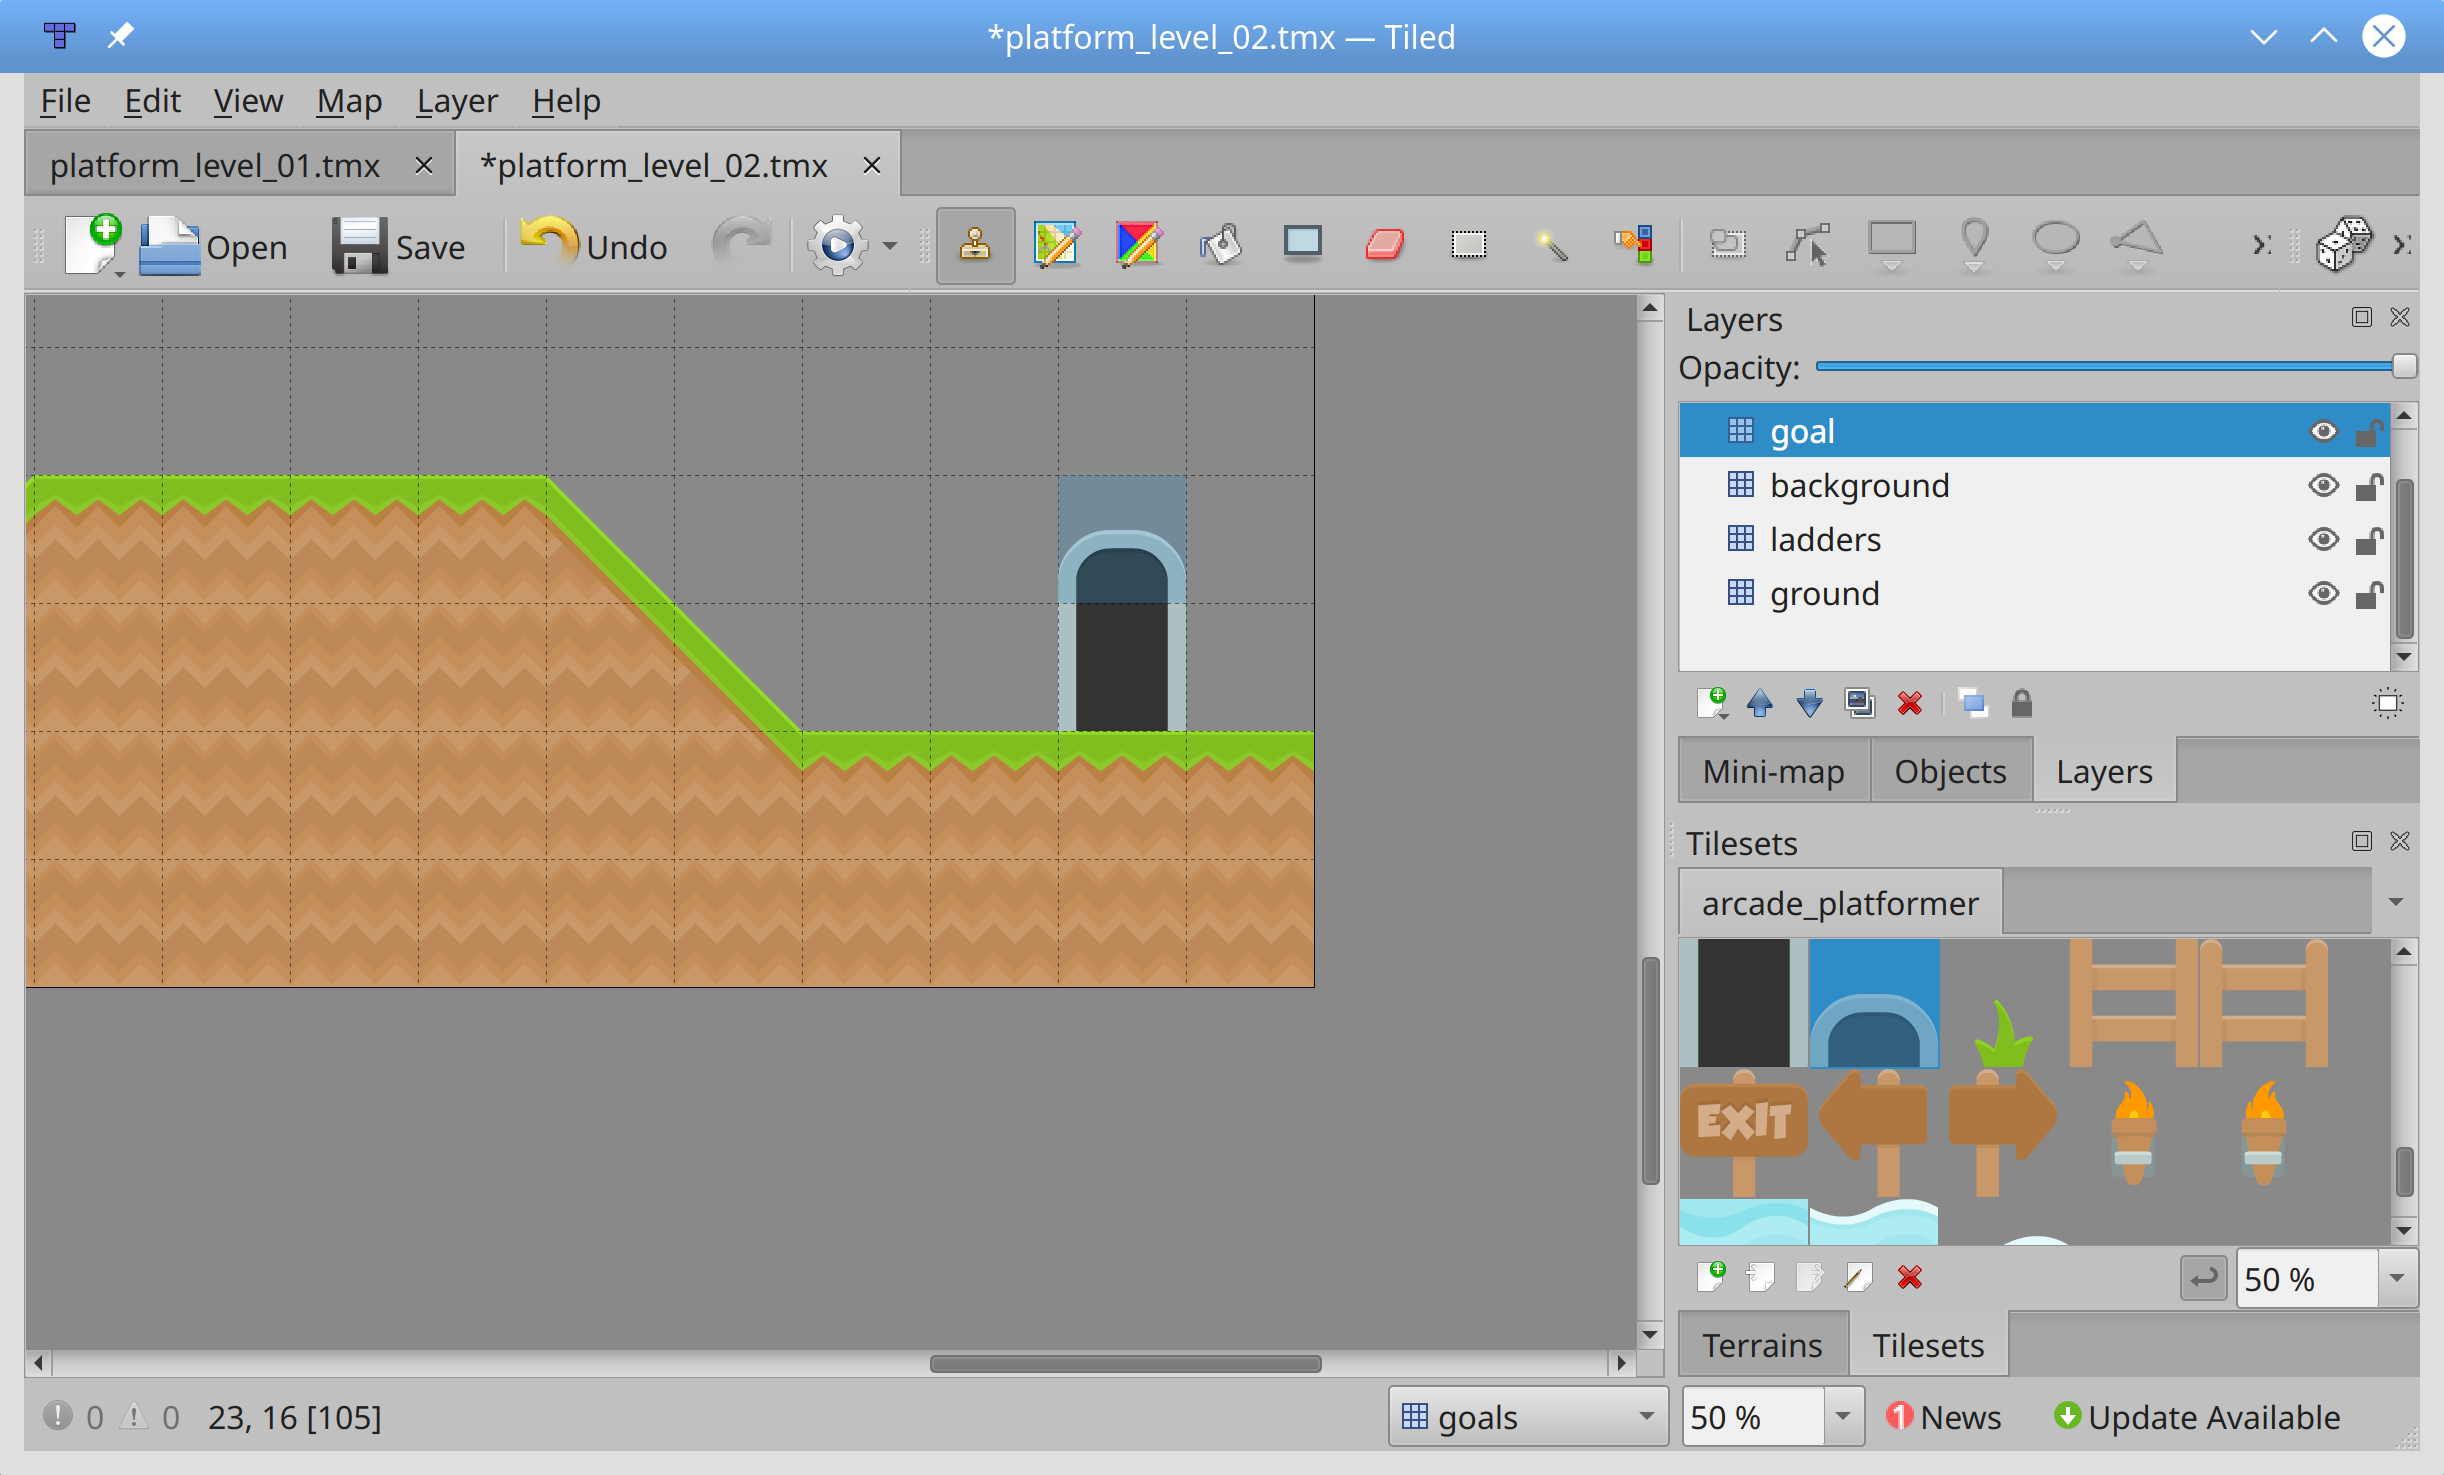
With the basic platform and goal in place, you can place some background items. Switch to the background layer, place an arrow on the left side to direct the player where to go and an Exit sign next to the portal. You can also place grass tufts anywhere you’d like on the map:
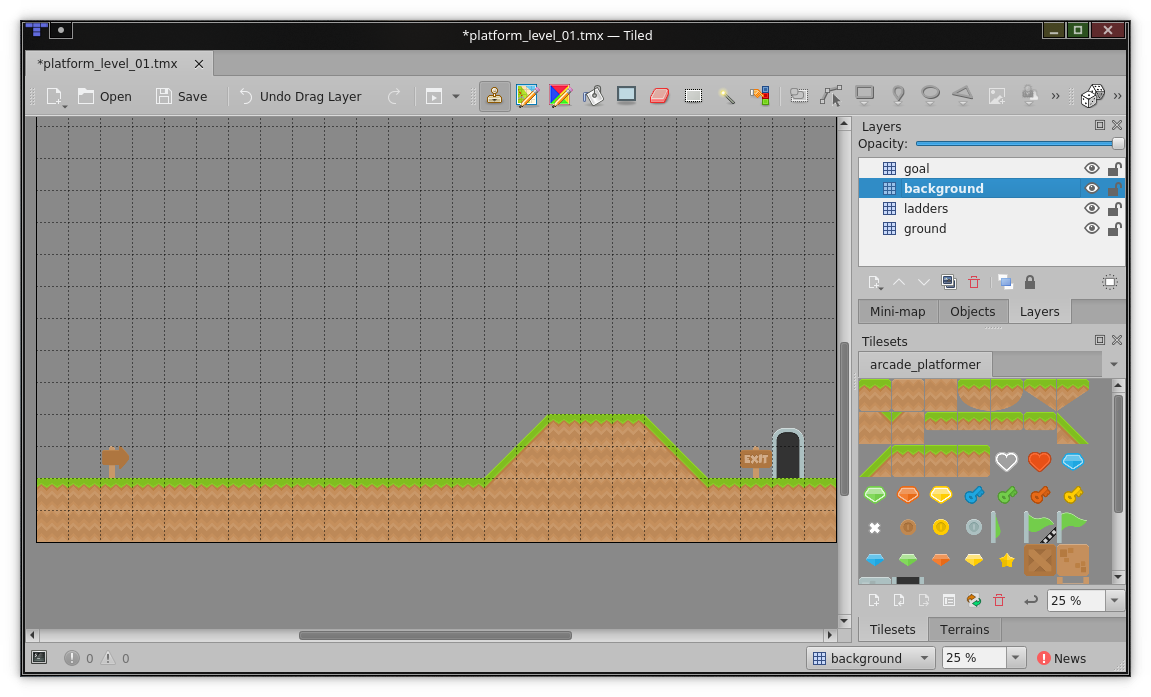
Now you can define where to place the coins. Switch to your coins layer to do so. Remember, this is an object layer, so you’re not limited to placing coins on the grid. Select the bronze coin and place it close to the starting arrow. Place a second bronze coin a little further to the right and a little higher:
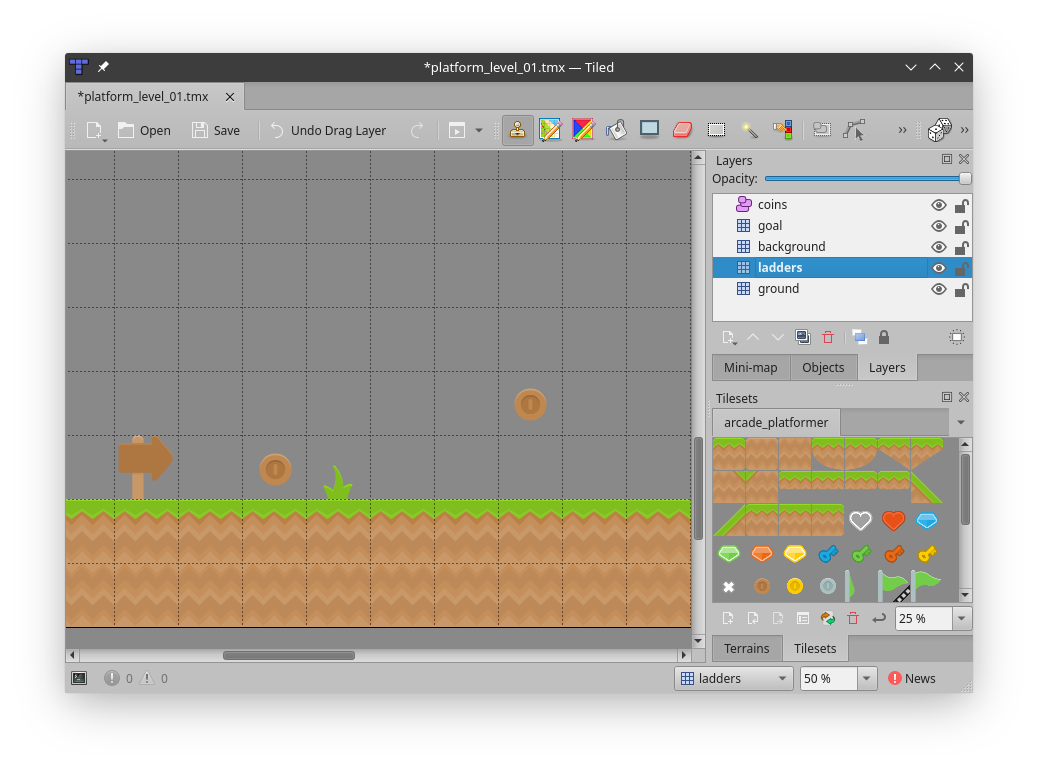
Repeat this process with two gold coins, placing one just before the hill and one on top, at least three tiles above the top of the hill:
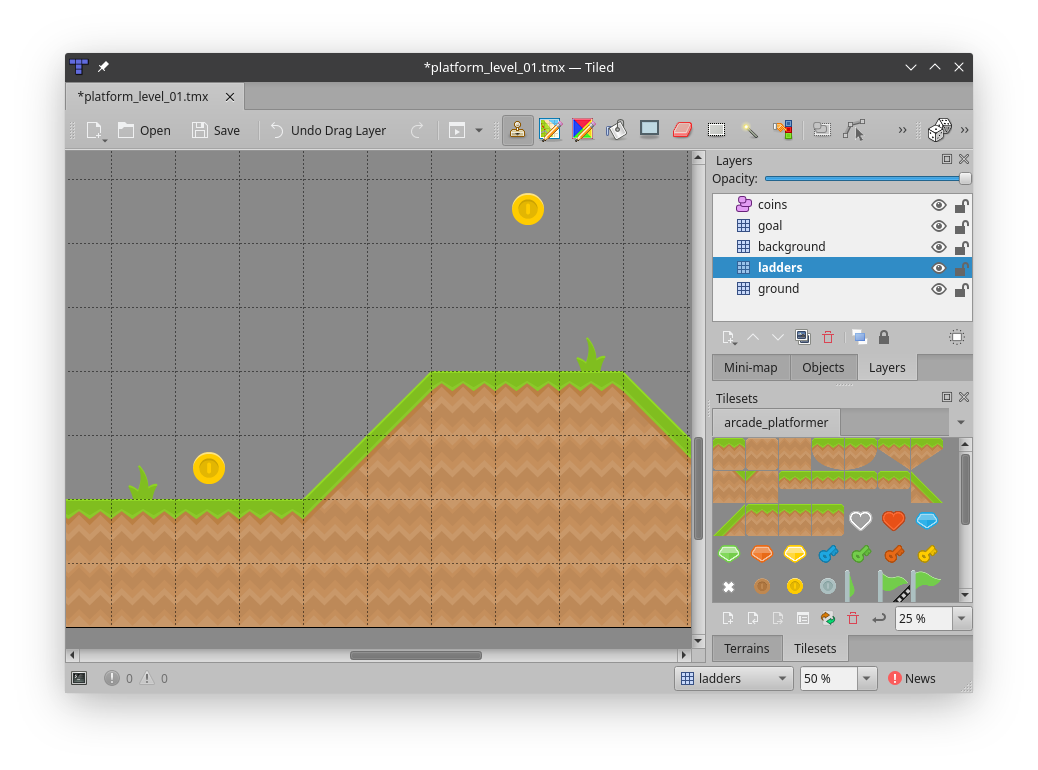
The different coins should score different point values when the player collects them. There are a couple of ways you can do this, but for this tutorial you’ll set a custom property to track each coin’s point value.
Defining Custom Properties
One of the benefits of using an object layer is the ability to set custom properties on objects on that layer. Custom properties are defined by you and represent any value you wish. In this case, you’ll use them to specify the point value for each coin on the layer.
With the coins layer selected, press S to begin selecting objects. Then right-click the first bronze coin you placed, and select Object Properties from the context menu to view its properties:
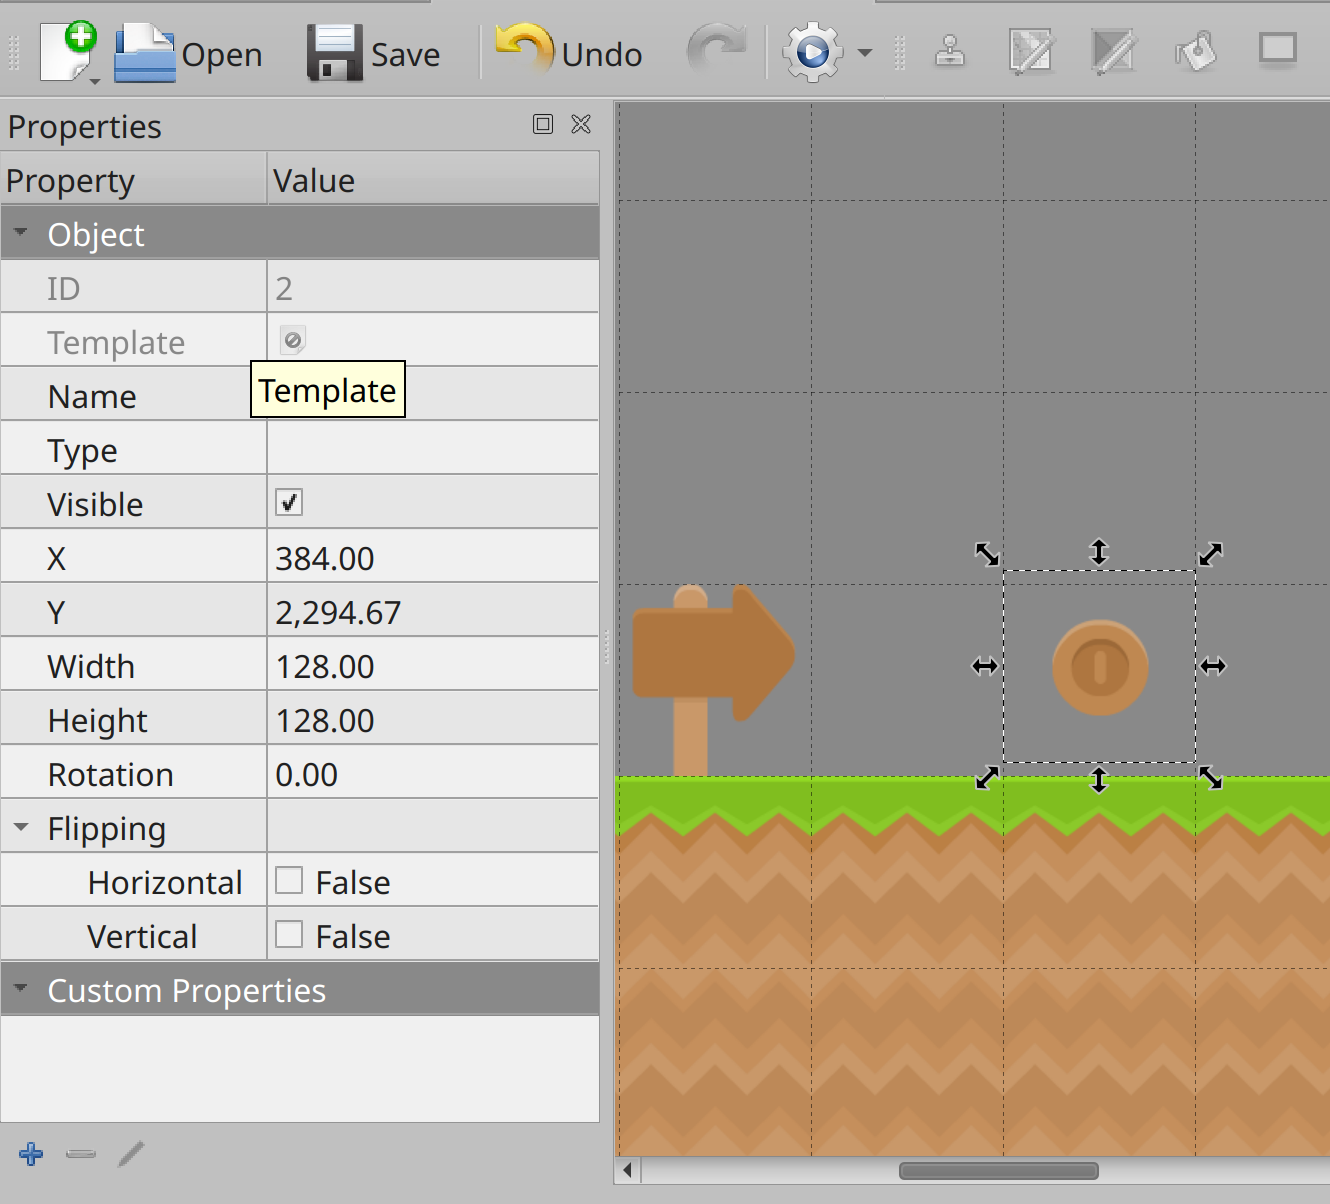
Predefined object properties are shown at the top of the Object Properties view, while custom properties are shown below. Currently there are no custom properties, so you need to add one. Click the blue plus sign at the bottom of the Object Properties view to add a new custom property:
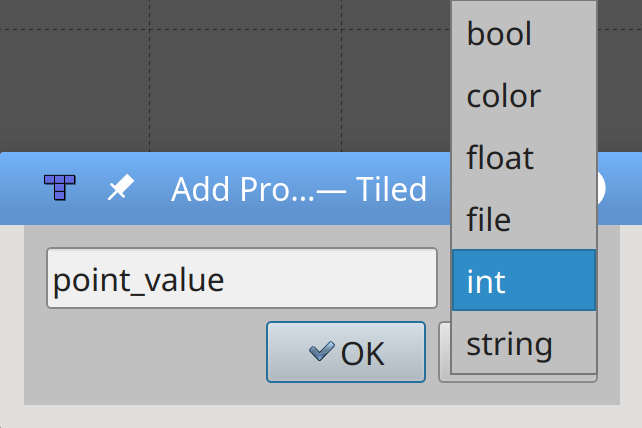
You define both the name and the type of the custom property. In this case, you set the property as an int and the name as point_value.
With the custom property defined, you can set its value in the Object Properties view:
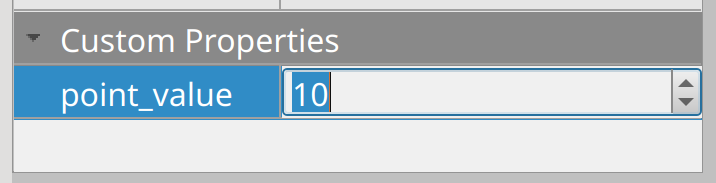
Perform these same steps for each of the coins in your level, setting the values to 10 for bronze coins and 20 for gold coins. Don’t forget to save the level, because next you’ll learn how to read it into arcade.
Reading Game Levels
Defining a game level in Tiled is great, but unless you can read it into arcade, it’s not very useful. Luckily, arcade natively supports reading Tiled tile maps and processing the layers. Once done, your game will look like this:
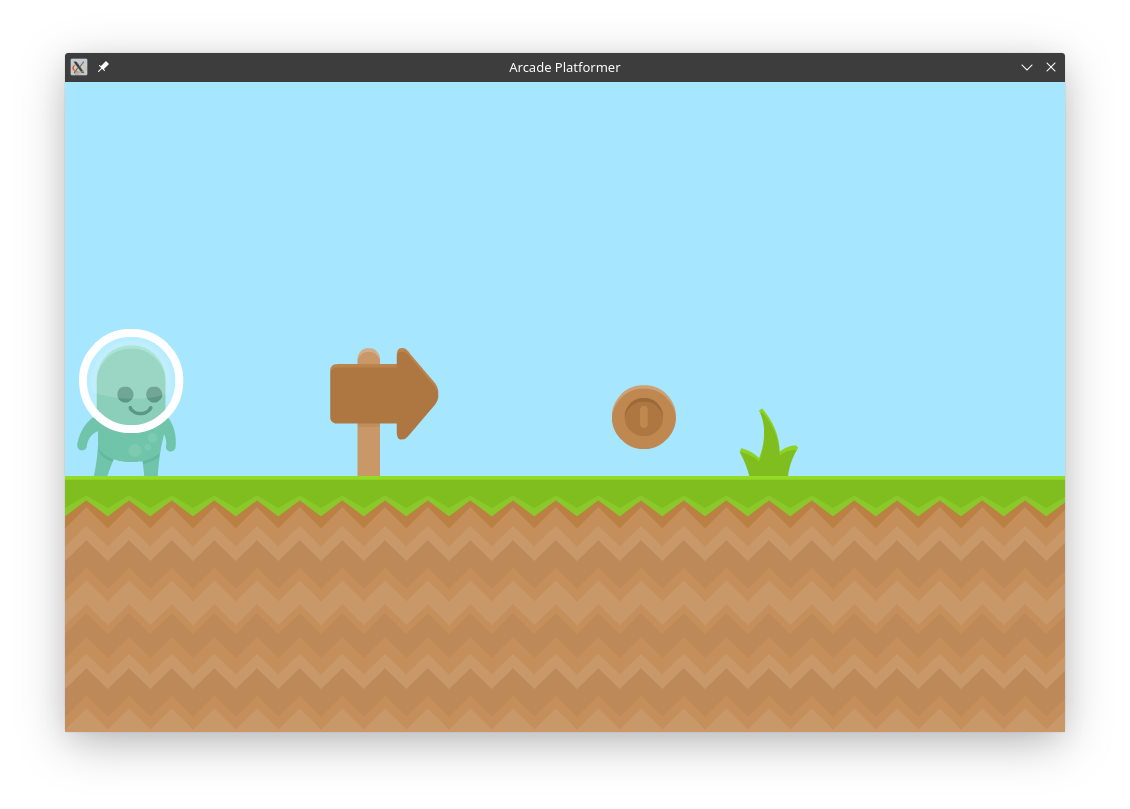
Reading your game level is handled completely in .setup(). This code can be found in the file arcade_platformer/03_read_level_one.py.
First, you add a few more constants:
# Game constants
# Window dimensions
SCREEN_WIDTH = 1000
SCREEN_HEIGHT = 650
SCREEN_TITLE = "Arcade Platformer"

# Scaling constants
MAP_SCALING = 1.0

# Player constants
GRAVITY = 1.0
PLAYER_START_X = 65
PLAYER_START_Y = 256
These constants define the scaling factor for your maps as well as the starting position of your player and the strength of gravity in your world. These constants are used to define the level in .setup():
def setup(self) -> None:
    """Sets up the game for the current level"""

    # Get the current map based on the level
    map_name = f"platform_level_{self.level:02}.tmx"
    map_path = ASSETS_PATH / map_name

    # What are the names of the layers?
    wall_layer = "ground"
    coin_layer = "coins"
    goal_layer = "goal"
    background_layer = "background"
    ladders_layer = "ladders"

    # Load the current map
    game_map = arcade.tilemap.read_tmx(str(map_path))

    # Load the layers
    self.background = arcade.tilemap.process_layer(
        game_map, layer_name=background_layer, scaling=MAP_SCALING
    )
    self.goals = arcade.tilemap.process_layer(
        game_map, layer_name=goal_layer, scaling=MAP_SCALING
    )
    self.walls = arcade.tilemap.process_layer(
        game_map, layer_name=wall_layer, scaling=MAP_SCALING
    )
    self.ladders = arcade.tilemap.process_layer(
        game_map, layer_name=ladders_layer, scaling=MAP_SCALING
    )
    self.coins = arcade.tilemap.process_layer(
        game_map, layer_name=coin_layer, scaling=MAP_SCALING
    )

    # Set the background color
    background_color = arcade.color.FRESH_AIR
    if game_map.background_color:
        background_color = game_map.background_color
    arcade.set_background_color(background_color)

    # Create the player sprite if they're not already set up
    if not self.player:
        self.player = self.create_player_sprite()

    # Move the player sprite back to the beginning
    self.player.center_x = PLAYER_START_X
    self.player.center_y = PLAYER_START_Y
    self.player.change_x = 0
    self.player.change_y = 0

    # Load the physics engine for this map
    self.physics_engine = arcade.PhysicsEnginePlatformer(
        player_sprite=self.player,
        platforms=self.walls,
        gravity_constant=GRAVITY,
        ladders=self.ladders,
    )
First, you build the name of the current tile map using the current level. The format string {self.level:02} results in a two-digit level number and allows you to define up to ninety-nine different map levels.
Next, using pathlib syntax, define the full path to your maps. This allows arcade to properly locate all your game resources.
Next, define the names of your layers, which you will use shortly. Make sure these match the layer names you defined in Tiled.
Now you open the tile map so you can process the previously named layers. The function arcade.tilemap.process_layer() takes a number of arguments, but you will provide only three of them:
- The
game_map, which contains the layer to be processed - The name of the layer to read and process
- Any scaling to apply to the tiles
arcade.tilemap.process_layer() returns a SpriteList populated with Sprite objects representing the tiles in the layer. Any custom properties defined for a tile, such as point_value for the tiles in the coins layer, are stored with the Sprite in a dictionary called .properties. You’ll see how to access them later.
You also set the background color of the level. You can define your own background color in Tiled using Map → Map Properties and defining the Background Color property. If a background color isn’t set in Tiled, you use the predefined .FRESH_AIR color.
Next, check to see if a player is already created. This might be the case if you call .setup() to restart the level or move to the next level. If not, you call a method to create the player sprite (more on that a little later). If there is a player, then you place the player into position and ensure it’s not moving.
Finally, you can define the physics engine to use, passing in the following parameters:
- The player sprite
- A
SpriteListcontaining walls - A constant defining gravity
- A
SpriteListcontaining ladders
Walls determine where the player can move and when they can jump, and ladders enable climbing. The gravity constant controls how fast or slow the player falls.
Of course, running this code now won’t work, as you still need to define the player.
Defining the Player
The one thing missing from your game so far is a player:
In .setup(), you called a method called .create_player_sprite() to define the player if it didn’t already exist. You create the player sprite in a separate method for two main reasons:
- It isolates any changes in the player from other code in
.setup(). - It helps simplify the game setup code.
In any game, sprites can be static or animated. Static sprites don’t change their appearance as the game progresses, such as the sprites that represent your ground tiles, background items, and coins. Animated sprites, by contrast, change their appearance as the game progresses. To add some visual interest, you’ll make your player sprite animated.
In Python arcade, you create an animated sprite by defining a list of images, called textures, for each animation sequence, such as climbing or walking. As the game progresses, arcade picks the next texture to display from the list for the sequence being animated. When the end of the list is reached, arcade starts over again from the beginning. By picking textures carefully, you can create the illusion of movement in your animated sprites:
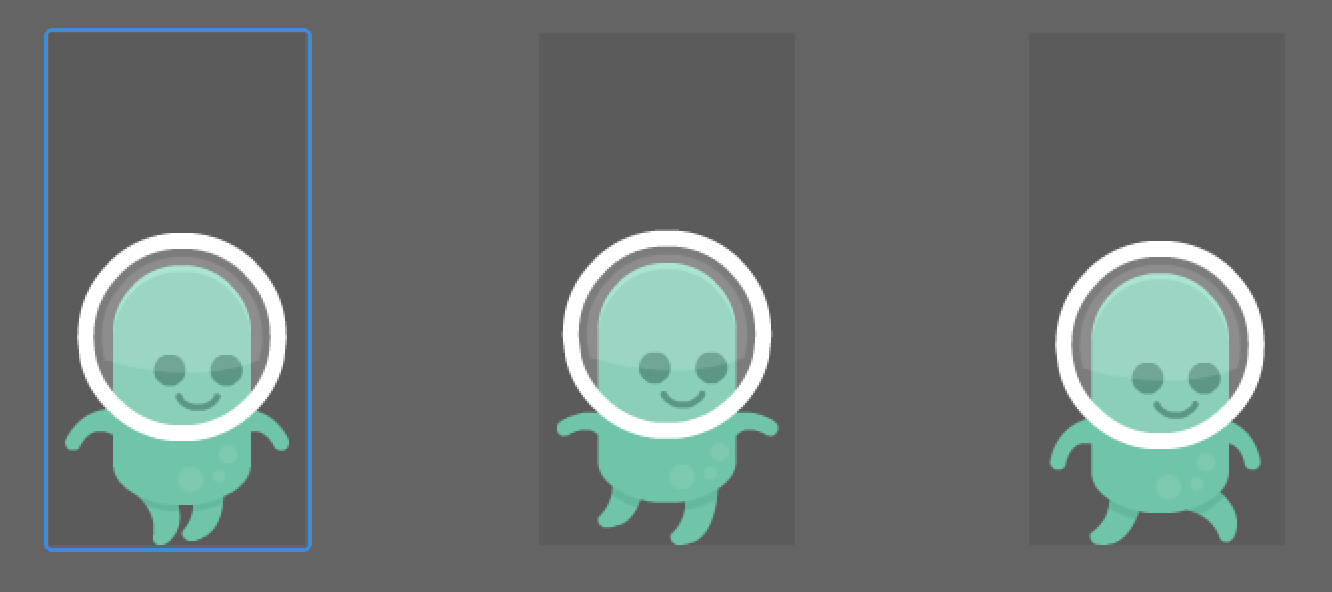
Because your player sprite performs a number of different activities, you provide texture lists for each of the following:
- Standing, facing both right and left
- Walking to the right and to the left
- Climbing up and down a ladder
You can provide any number of textures for each of these activities. If you don’t want an action animated, you can provide a single texture.
The file arcade_platformer/04_define_player.py contains the definition of .create_player_sprite(), which defines the animated player sprite. Place this method in your Platformer class below .setup():
def create_player_sprite(self) -> arcade.AnimatedWalkingSprite:
    """Creates the animated player sprite

    Returns:
        The properly set up player sprite
    """
    # Where are the player images stored?
    texture_path = ASSETS_PATH / "images" / "player"

    # Set up the appropriate textures
    walking_paths = [
        texture_path / f"alienGreen_walk{x}.png" for x in (1, 2)
    ]
    climbing_paths = [
        texture_path / f"alienGreen_climb{x}.png" for x in (1, 2)
    ]
    standing_path = texture_path / "alienGreen_stand.png"

    # Load them all now
    walking_right_textures = [
        arcade.load_texture(texture) for texture in walking_paths
    ]
    walking_left_textures = [
        arcade.load_texture(texture, mirrored=True)
        for texture in walking_paths
    ]

    walking_up_textures = [
        arcade.load_texture(texture) for texture in climbing_paths
    ]
    walking_down_textures = [
        arcade.load_texture(texture) for texture in climbing_paths
    ]

    standing_right_textures = [arcade.load_texture(standing_path)]

    standing_left_textures = [
        arcade.load_texture(standing_path, mirrored=True)
    ]

    # Create the sprite
    player = arcade.AnimatedWalkingSprite()

    # Add the proper textures
    player.stand_left_textures = standing_left_textures
    player.stand_right_textures = standing_right_textures
    player.walk_left_textures = walking_left_textures
    player.walk_right_textures = walking_right_textures
    player.walk_up_textures = walking_up_textures
    player.walk_down_textures = walking_down_textures

    # Set the player defaults
    player.center_x = PLAYER_START_X
    player.center_y = PLAYER_START_Y
    player.state = arcade.FACE_RIGHT

    # Set the initial texture
    player.texture = player.stand_right_textures[0]

    return player
For your game, you animate Roz when they walk and climb but not when they are simply standing still. Each animation has two separate images, and your first task is to locate those images. You can download all the assets and source code used in this tutorial by clicking the link below:
Alternatively, you can create a folder called assets/images/player to store the textures used to draw Roz. Then, in the Platformer Pack Redux (360 Assets) archive you downloaded earlier, locate the PNG/Players/128x256/Green folder, and copy all the images there to your new assets/images/player folder.
This new path containing the player textures is defined in texture_path. Using this path, you create full pathnames to each texture resource using list comprehensions and f-string formatting.
Having these paths allows you to create a list of textures with arcade.load_texture() using more list comprehensions. Since Roz can walk left and right, you define different lists for each direction. The images show Roz pointing to the right, so you use the mirrored parameter when defining the textures for Roz walking or standing facing left. Moving up or down a ladder looks the same, so those lists are defined identically.
Even though there is only one standing texture, you still need to place it in a list so arcade can deal with the AnimatedSprite properly.
All the really hard work is done now. You create the actual AnimatedWalkingSprite, specifying the texture lists to use. Next, you set Roz’s initial location and direction as well as the first texture to display. Finally, you return the completely constructed sprite at the end of the method.
Now you have an initial map and a player sprite. If you run this code, you should see the following:
Well, that’s not very entertaining. That’s because while you’ve created everything, you aren’t currently updating or drawing anything. Time to fix that!
Updating and Drawing
Updating the state of your game occurs in .on_update(), which arcade calls roughly sixty times per second. This method handles the following actions and events:
- Moving player and enemy sprites
- Detecting collisions with enemies or collectibles
- Updating scores
- Animating sprites
In short, everything that makes your game playable occurs in .on_update(). After everything has been updated, arcade calls .on_draw() to render everything to the screen.
This separation of game logic from game display means you can add or modify features in your game freely without affecting code that displays the game. In fact, because most of the game logic occurs in .on_update(), your .on_draw() method is often very short.
You can find all the code below in arcade_platformer/05_update_and_draw.py in the downloadable materials. Add .on_draw() to your Platformer class:
def on_draw(self) -> None:
    arcade.start_render()

    # Draw all the sprites
    self.background.draw()
    self.walls.draw()
    self.coins.draw()
    self.goals.draw()
    self.ladders.draw()
    self.player.draw()
After the obligatory call to arcade.start_render(), you call .draw() on all your sprite lists, followed by the player sprite. Note the order in which items are drawn. You should start with sprites that appear farthest back and proceed forward. Now when you run the code, it should look like this:
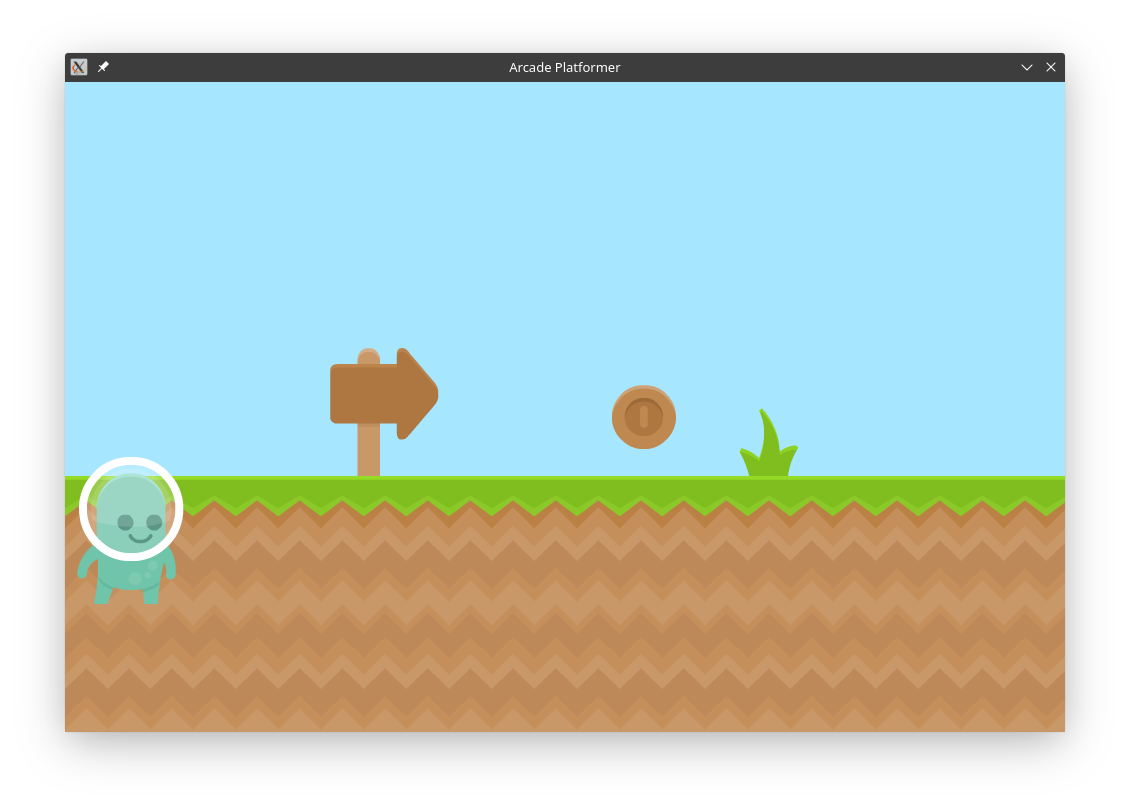
The only thing missing is proper placement of the player sprite. Why? Because animated sprites need to be updated to select the proper texture to display and proper placement on the screen, and you haven’t updated anything yet. Here’s what that looks like:
def on_update(self, delta_time: float) -> None:
    """Updates the position of all game objects

    Arguments:
        delta_time {float} -- How much time since the last call
    """

    # Update the player animation
    self.player.update_animation(delta_time)

    # Update player movement based on the physics engine
    self.physics_engine.update()

    # Restrict user movement so they can't walk off screen
    if self.player.left < 0:
        self.player.left = 0

    # Check if we've picked up a coin
    coins_hit = arcade.check_for_collision_with_list(
        sprite=self.player, sprite_list=self.coins
    )

    for coin in coins_hit:
        # Add the coin score to our score
        self.score += int(coin.properties["point_value"])

        # Play the coin sound
        arcade.play_sound(self.coin_sound)

        # Remove the coin
        coin.remove_from_sprite_lists()

    # Now check if we're at the ending goal
    goals_hit = arcade.check_for_collision_with_list(
        sprite=self.player, sprite_list=self.goals
    )

    if goals_hit:
        # Play the victory sound
        self.victory_sound.play()

        # Set up the next level
        self.level += 1
        self.setup()
To make sure your game operates at a constant speed no matter the actual frame rate, .on_update() takes a single float parameter called delta_time, which indicates the time since the last update.
The first thing to do is to animate the player sprite. Based on the player’s movement, .update_animation() automatically selects the correct texture to use.
Next, you update the movement of everything that can move. Since you defined a physics engine in .setup(), it makes sense to let it handle movement. However, the physics engine will let the player run off the left side of the game map, so you also need to take steps to prevent that.
Now that the player has moved, you check if they have collided with a coin. If so, that counts as collecting the coin, so you increment the player’s score using the point_value custom property you defined in Tiled. Then you play a sound and remove the coin from the play field.
You also check if the player has reached the final goal. If so, you play the victory sound, increment the level, and call .setup() again to load the next map and reset the player in it.
But how does the user reach that final goal? The physics engine will make sure Roz doesn’t fall through the floor and can jump, but it doesn’t actually know where to move Roz or when to jump. That’s something the user should decide, and you need to provide a way for them to do that.
Moving the Player Sprite
In the early days of computer gaming, the only input device available was the keyboard. Even today, many games—including this one—still provide keyboard control.
Moving the player using the keyboard can be done in a variety of ways. There are many different popular keyboard arrangements, including:
- Arrow keys
- IJKM keys
- IJKL keys
- WASD keys for left-handed control
Of course, there are many other keyboard arrangements to choose from.
Since you need to allow Roz to move in all four directions as well as jump, for this game you’ll use the arrow and IJKL keys for movement and the space bar for jumping:
All keyboard input in arcade is handled by .on_key_press() and .on_key_release(). You can find the code for making Roz move via the keyboard in arcade_platformer/06_keyboard_movement.py.
First, you need two new constants:
23# Player constants
24GRAVITY = 1.0
25PLAYER_START_X = 65
26PLAYER_START_Y = 256
27PLAYER_MOVE_SPEED = 10
28PLAYER_JUMP_SPEED = 20
These constants control how fast Roz moves. PLAYER_MOVE_SPEED controls their movement left, right, and up and down ladders. PLAYER_JUMP_SPEED indicates how high Roz can jump. By setting these values as constants, you can tweak them to dial in the proper gameplay during testing.
You use those constants in .on_key_press():
def on_key_press(self, key: int, modifiers: int) -> None:
    """Arguments:
    key -- Which key was pressed
    modifiers -- Which modifiers were down at the time
    """

    # Check for player left or right movement
    if key in [arcade.key.LEFT, arcade.key.J]:
        self.player.change_x = -PLAYER_MOVE_SPEED
    elif key in [arcade.key.RIGHT, arcade.key.L]:
        self.player.change_x = PLAYER_MOVE_SPEED

    # Check if player can climb up or down
    elif key in [arcade.key.UP, arcade.key.I]:
        if self.physics_engine.is_on_ladder():
            self.player.change_y = PLAYER_MOVE_SPEED
    elif key in [arcade.key.DOWN, arcade.key.K]:
        if self.physics_engine.is_on_ladder():
            self.player.change_y = -PLAYER_MOVE_SPEED

    # Check if player can jump
    elif key == arcade.key.SPACE:
        if self.physics_engine.can_jump():
            self.player.change_y = PLAYER_JUMP_SPEED
            # Play the jump sound
            arcade.play_sound(self.jump_sound)
There are three major components to this code:
-
You handle horizontal movement by checking for the Left and Right arrows and the J and L keys from your IJKL arrangement. You then set the
.change_xproperty appropriately. -
You handle vertical movement by checking for the Up and Down arrows as well as the I and K keys. However, since Roz can only move up and down on ladders, you verify that using
.is_on_ladder()before moving up or down. -
You handle jumping via the Space key. To prevent Roz from jumping in midair, you check if Roz can jump using
.can_jump(), which returnsTrueonly if Roz is standing on a wall. If so, you move the player up and play the jump sound.
When you release a key, Roz should stop moving. You set that up in .on_key_release():
def on_key_release(self, key: int, modifiers: int) -> None:
    """Arguments:
    key -- The key which was released
    modifiers -- Which modifiers were down at the time
    """

    # Check for player left or right movement
    if key in [
        arcade.key.LEFT,
        arcade.key.J,
        arcade.key.RIGHT,
        arcade.key.L,
    ]:
        self.player.change_x = 0

    # Check if player can climb up or down
    elif key in [
        arcade.key.UP,
        arcade.key.I,
        arcade.key.DOWN,
        arcade.key.K,
    ]:
        if self.physics_engine.is_on_ladder():
            self.player.change_y = 0
This code follows a similar pattern to .on_key_press():
- You check if any of the horizontal movement keys were released. If so, then Roz’s
change_xis set to 0. - You check if the vertical movement keys were released. Again, since Roz needs to be on a ladder to move up and down, you need to check
.is_on_ladder()here as well. If not, a player could jump and then press and release Up, leaving Roz hanging in midair!
Note that you don’t need to check if the jump key was released.
OK, now you can move Roz around, but why does Roz just walk out of the window to the right? You need a way to keep Roz visible in the game world as they move around, and that’s where viewports come in.
Scrolling the Viewport
Early video games restricted gameplay to a single window, which was the entire world for the player. However, modern video game worlds can be too large to fit in a tiny game window. Most games implement a scrolling view, which shows a portion of game world to the player. In Python arcade, this scrolling view is called a viewport. It is essentially a rectangle that defines which part of the game world you show in the gameplay window:
You can find this code in the downloadable materials under arcade_platformer/07_scrolling_view.py.
To implement the scrolling view, you define the viewport based on Roz’s current location. When Roz travels close to any edge of the gameplay window, you move the viewport in the direction of travel so Roz remains comfortably on screen. You also ensure the viewport doesn’t scroll outside the visible world. To do this, you need to know a few things:
- How close can Roz travel to the gameplay window edge before the viewport scrolls? This is known as the margin, and it can be different for each window edge.
- Where is the current viewport now?
- How wide is your game map?
- Where is Roz now?
First, you define the margins as constants at the top of the code:
# Player constants
GRAVITY = 1.0
PLAYER_START_X = 65
PLAYER_START_Y = 256
PLAYER_MOVE_SPEED = 10
PLAYER_JUMP_SPEED = 20

# Viewport margins
# How close do we have to be to scroll the viewport?
LEFT_VIEWPORT_MARGIN = 50
RIGHT_VIEWPORT_MARGIN = 300
TOP_VIEWPORT_MARGIN = 150
BOTTOM_VIEWPORT_MARGIN = 150
Note the difference between LEFT_VIEWPORT_MARGIN and RIGHT_VIEWPORT_MARGIN. This allows Roz to get closer to the left edge than the right. This way, as Roz moves right, the user has more time to see and react to obstacles.
The viewport is a rectangle with the same width and height as the gameplay window, which are the constants SCREEN_WIDTH and SCREEN_HEIGHT. Therefore, to fully describe the viewport, you only need to know the location of the bottom-left corner. By changing this corner, the viewport will react to Roz’s movement. You track this corner in your game object and define it in .setup(), right after you move Roz to the start of the level:
# Move the player sprite back to the beginning
self.player.center_x = PLAYER_START_X
self.player.center_y = PLAYER_START_Y
self.player.change_x = 0
self.player.change_y = 0

# Reset the viewport
self.view_left = 0
self.view_bottom = 0
For this tutorial, since every level starts in the same place, the bottom-left corner of the viewport always starts in the same place as well.
You can calculate the width of the game map by multiplying the number of tiles contained in the game map by the width of each tile. You calculate this after you read each map and set the background color in .setup():
# Set the background color
background_color = arcade.color.FRESH_AIR
if game_map.background_color:
    background_color = game_map.background_color
arcade.set_background_color(background_color)

# Find the edge of the map to control viewport scrolling
self.map_width = (
    game_map.map_size.width - 1
) * game_map.tile_size.width
Subtracting 1 from game_map.map_size.width corrects for the tile indexing used by Tiled.
Lastly, you know where Roz is located at any time by inspecting any of the position properties in self.player.
Here’s how you use all this information to scroll the viewport in .update():
- After updating Roz’s position, you calculate whether they are within a margin’s distance of any of the four edges.
- If so, you move the viewport in that direction by the amount Roz is inside the margin.
You can put this code in a separate method of the Platformer class to make updates easier:
def scroll_viewport(self) -> None:
    """Scrolls the viewport when the player gets close to the edges"""
    # Scroll left
    # Find the current left boundary
    left_boundary = self.view_left + LEFT_VIEWPORT_MARGIN

    # Are we to the left of this boundary? Then we should scroll left.
    if self.player.left < left_boundary:
        self.view_left -= left_boundary - self.player.left
        # But don't scroll past the left edge of the map
        if self.view_left < 0:
            self.view_left = 0

    # Scroll right
    # Find the current right boundary
    right_boundary = self.view_left + SCREEN_WIDTH - RIGHT_VIEWPORT_MARGIN

    # Are we to the right of this boundary? Then we should scroll right.
    if self.player.right > right_boundary:
        self.view_left += self.player.right - right_boundary
        # Don't scroll past the right edge of the map
        if self.view_left > self.map_width - SCREEN_WIDTH:
            self.view_left = self.map_width - SCREEN_WIDTH

    # Scroll up
    top_boundary = self.view_bottom + SCREEN_HEIGHT - TOP_VIEWPORT_MARGIN
    if self.player.top > top_boundary:
        self.view_bottom += self.player.top - top_boundary

    # Scroll down
    bottom_boundary = self.view_bottom + BOTTOM_VIEWPORT_MARGIN
    if self.player.bottom < bottom_boundary:
        self.view_bottom -= bottom_boundary - self.player.bottom

    # Only scroll to integers. Otherwise we end up with pixels that
    # don't line up on the screen.
    self.view_bottom = int(self.view_bottom)
    self.view_left = int(self.view_left)

    # Do the scrolling
    arcade.set_viewport(
        left=self.view_left,
        right=SCREEN_WIDTH + self.view_left,
        bottom=self.view_bottom,
        top=SCREEN_HEIGHT + self.view_bottom,
    )
This code can look a little confusing, so it may be useful to look at a concrete example, such as what happens when Roz moves right and you need to scroll the viewport. Here’s the code you’ll walk through:
# Scroll right
# Find the current right boundary
right_boundary = self.view_left + SCREEN_WIDTH - RIGHT_VIEWPORT_MARGIN

# Are we right of this boundary? Then we should scroll right.
if self.player.right > right_boundary:
    self.view_left += self.player.right - right_boundary
    # Don't scroll past the right edge of the map
    if self.view_left > self.map_width - SCREEN_WIDTH:
        self.view_left = self.map_width - SCREEN_WIDTH
Here are some sample values for your key variables:
- Roz has moved right, setting their
self.player.rightproperty to710. - The viewport hasn’t changed yet, so
self.view_leftis currently0. - The constant
SCREEN_WIDTHis1000. - The constant
RIGHT_VIEWPORT_MARGINis300.
First, calculate the value of right_boundary, which determines if Roz is within the margin of the right edge of the viewport:
- The right edge of the visible viewport is
self.view_left + SCREEN_WIDTH, which is1000. - Subtracting the
RIGHT_VIEWPORT_MARGINfrom this gives you aright_boundaryof700.
Next, check if Roz has moved beyond the right_boundary. Since self.player.right > right_boundary is True, you need to move the viewport, so you calculate how far to move it:
- Calculate
self.player.right - right_boundaryas10, which is how far Roz has moved into the right margin. - Since the viewport rectangle is measured from the left, add this to
self.view_leftto make it10.
However, you don’t want to move the viewport off the edge of the world. If the viewport were scrolled all the way to the right, its left edge would be a full screen width smaller than the width of the map:
- Check if
self.view_left > self.map_width - SCREEN_WIDTH. - If so, simply set
self.view_leftto that value to restrict the viewport movement.
You do the same sequence of steps for the left boundary. The top and bottom edges are also checked to update self.view_bottom. With both view variables updated, the last thing to do is to set the viewport using arcade.set_viewport().
Since you put this code in a separate method, call it at the end of .on_update():
if goals_hit:
    # Play the victory sound
    self.victory_sound.play()

    # Set up the next level
    self.level += 1
    self.setup()

# Set the viewport, scrolling if necessary
self.scroll_viewport()
With this in place, your game view should follow Roz as they move left, right, up, or down, never letting them get off screen!
That’s it—you have a platformer! Now it’s time to add some extras!
Conclusion
The Python arcade library is a modern Python framework, ideal for crafting games with compelling graphics and sound. Object oriented and built for Python 3.6 and up, arcade provides the programmer with a modern set of tools for crafting great game experiences, including platform games. arcade is open source and contributions are always welcome.
After reading this tutorial, you’re now able to:
- Install the Python
arcadelibrary - Create a basic 2D game structure
- Find usable game artwork and other assets
- Build platform maps using the Tiled map editor
- Define player actions, game rewards, and obstacles
- Control your player with keyboard and joystick input
- Play sound effects for game actions
- Scroll the game screen with viewports to keep your player in view
- Add title, instruction, and pause screens
- Move nonplayer game elements on the screen
There’s still plenty to do with this game. Here are some feature ideas you can implement:
- Add a Game Over screen.
- Animate coins on screen.
- Add animations when Roz collides with an enemy.
- Detect when Roz falls off the map.
- Give Roz multiple lives.
- Add a high score table.
- Use the
arcade.PymunkPhysicsEngineto provide more realistic physics interactions.
There’s lots more to explore in the arcade library as well. With these techniques, you’re now fully equipped to get out there and make some cool games!
You can download all the code, images, and sounds used in this tutorial by clicking the link below:

Сразу оговорюсь, что здесь написано для самых маленькихначинающих.
Давно хотел попробовать себя в качестве игродела, и недавно выпал случай изучить Python и исполнить давнюю мечту.
Что такое платформер?
Платформер(platformer)— жанр компьютерных игр, в которых основной чертой игрового процесса является прыгание по платформам, лазанье по лестницам, собирание предметов, обычно необходимых для завершения уровня.
Вики
Одними из моих любимых игр данного жанра являются «Super Mario Brothers» и «Super Meat Boy». Давайте попробуем создать нечто среднее между ними.
Самое — самое начало.
Наверное, не только игры, да и все приложения, использующие pygame начинаются примерно так:
#!/usr/bin/env python
# -*- coding: utf-8 -*-# Импортируем библиотеку pygame
import pygame
from pygame import *#Объявляем переменные
WIN_WIDTH = 800 #Ширина создаваемого окна
WIN_HEIGHT = 640 # Высота
DISPLAY = (WIN_WIDTH, WIN_HEIGHT) # Группируем ширину и высоту в одну переменную
BACKGROUND_COLOR = "#004400"def main():
pygame.init() # Инициация PyGame, обязательная строчка
screen = pygame.display.set_mode(DISPLAY) # Создаем окошко
pygame.display.set_caption("Super Mario Boy") # Пишем в шапку
bg = Surface((WIN_WIDTH,WIN_HEIGHT)) # Создание видимой поверхности
# будем использовать как фон
bg.fill(Color(BACKGROUND_COLOR)) # Заливаем поверхность сплошным цветомwhile 1: # Основной цикл программы
for e in pygame.event.get(): # Обрабатываем события
if e.type == QUIT:
raise SystemExit, "QUIT"
screen.blit(bg, (0,0)) # Каждую итерацию необходимо всё перерисовывать
pygame.display.update() # обновление и вывод всех изменений на экранif __name__ == "__main__":
main()
Игра будет «крутиться» в цикле ( while 1), каждую итерацию необходимо перерисовывать всё (фон, платформы, монстров, цифровые сообщения и т.д). Важно заметить, что рисование идет последовательно, т.е. если сперва нарисовать героя, а потом залить фон, то героя видно не будет, учтите это на будущее.
Запустив этот код, мы увидим окно, залитое зелененьким цветом.

(Картинка кликабельна)
Ну что же, начало положено, идём дальше.
Уровень.
А как без него? Под словом «уровень» будем подразумевать ограниченную область виртуального двумерного пространства, заполненную всякой — всячиной, и по которой будет передвигаться наш персонаж.
Для построения уровня создадим двумерный массив m на n. Каждая ячейка (m,n) будет представлять из себя прямоугольник. Прямоугольник может в себе что-то содержать, а может и быть пустым. Мы в прямоугольниках будем рисовать платформы.
Добавим еще константы
PLATFORM_WIDTH = 32
PLATFORM_HEIGHT = 32
PLATFORM_COLOR = "#FF6262"
Затем добавим объявление уровня в функцию main
level = [
       "-------------------------",
       "-                       -",
       "-                       -",
       "-                       -",
       "-            --         -",
       "-                       -",
       "--                      -",
       "-                       -",
       "-                   --- -",
       "-                       -",
       "-                       -",
       "-      ---              -",
       "-                       -",
       "-   -----------        -",
       "-                       -",
       "-                -      -",
       "-                   --  -",
       "-                       -",
       "-                       -",
       "-------------------------"]
И в основной цикл добавим следующее:
x=y=0 # координаты
for row in level: # вся строка
for col in row: # каждый символ
if col == "-":
#создаем блок, заливаем его цветом и рисеум его
pf = Surface((PLATFORM_WIDTH,PLATFORM_HEIGHT))
pf.fill(Color(PLATFORM_COLOR))
screen.blit(pf,(x,y))x += PLATFORM_WIDTH #блоки платформы ставятся на ширине блоков
y += PLATFORM_HEIGHT #то же самое и с высотой
x = 0 #на каждой новой строчке начинаем с нуля
Т.е. Мы перебираем двумерный массив level, и, если находим символ «-», то по координатам (x * PLATFORM_WIDTH, y * PLATFORM_HEIGHT), где x,y — индекс в массиве level
Запустив, мы увидим следующее:

Персонаж
Просто кубики на фоне — это очень скучно. Нам нужен наш персонаж, который будет бегать и прыгать по платформам.
Создаём класс нашего героя.
Для удобства, будем держать нашего персонажа в отдельном файле player.py
#!/usr/bin/env python
# -*- coding: utf-8 -*-from pygame import *
MOVE_SPEED = 7
WIDTH = 22
HEIGHT = 32
COLOR = "#888888"class Player(sprite.Sprite):
def __init__(self, x, y):
sprite.Sprite.__init__(self)
self.xvel = 0 #скорость перемещения. 0 - стоять на месте
self.startX = x # Начальная позиция Х, пригодится когда будем переигрывать уровень
self.startY = y
self.image = Surface((WIDTH,HEIGHT))
self.image.fill(Color(COLOR))
self.rect = Rect(x, y, WIDTH, HEIGHT) # прямоугольный объектdef update(self, left, right):
if left:
self.xvel = -MOVE_SPEED # Лево = x- nif right:
self.xvel = MOVE_SPEED # Право = x + nif not(left or right): # стоим, когда нет указаний идти
self.xvel = 0self.rect.x += self.xvel # переносим свои положение на xvel
def draw(self, screen): # Выводим себя на экран
screen.blit(self.image, (self.rect.x,self.rect.y))
Что тут интересного?
Начнём с того, что мы создаём новый класс, наследуясь от класса pygame.sprite.Sprite, тем самым наследую все характеристики спрайта.
Cпрайт — это движущееся растровое изображение. Имеет ряд полезных методов и свойств.
self.rect = Rect(x, y, WIDTH, HEIGHT), в этой строчке мы создаем фактические границы нашего персонажа, прямоугольник, по которому мы будем не только перемещать героя, но и проверять его на столкновения. Но об этом чуть ниже.
Метод update(self, left, right)) используется для описания поведения объекта. Переопределяет родительский update(*args) → None. Может вызываться в группах спрайтов.
Метод draw(self, screen) используется для вывода персонажа на экран. Далее мы уберем этот метод и будем использовать более интересный способ отображения героя.
Добавим нашего героя в основную часть программы.
Перед определением уровня добавим определение героя и переменные его перемещения.
hero = Player(55,55) # создаем героя по (x,y) координатам
left = right = False    # по умолчанию — стоим
В проверку событий добавим следующее:
if e.type == KEYDOWN and e.key == K_LEFT:
   left = True
if e.type == KEYDOWN and e.key == K_RIGHT:
   right = Trueif e.type == KEYUP and e.key == K_RIGHT:
   right = False
if e.type == KEYUP and e.key == K_LEFT:
    left = False
Т.е. Если нажали на клавишу «лево», то идём влево. Если отпустили — останавливаемся. Так же с кнопкой «право»
Само передвижение вызывается так: (добавляем после перерисовки фона и платформ)
hero.update(left, right) # передвижение
hero.draw(screen) # отображение

Но, как мы видим, наш серый блок слишком быстро перемещается, добавим ограничение в количестве кадров в секунду. Для этого после определения уровня добавим таймер
timer = pygame.time.Clock()
И в начало основного цикла добавим следующее:
timer.tick(60)
Завис в воздухе
Да, наш герой в безвыходном положении, он завис в воздухе.
Добавим гравитации и возможности прыгать.
И так, работаем в файле player.py
Добавим еще констант
JUMP_POWER = 10
GRAVITY = 0.35 # Сила, которая будет тянуть нас вниз
В метод _init_ добавляем строки:
 self.yvel = 0 # скорость вертикального перемещения
 self.onGround = False # На земле ли я?
Добавляем входной аргумент в метод update
def update(self, left, right, up):
И в начало метода добавляем:
if up:
   if self.onGround: # прыгаем, только когда можем оттолкнуться от земли
       self.yvel = -JUMP_POWER
И перед строчкой self.rect.x += self.xvel
Добавляем
if not self.onGround:
    self.yvel +=  GRAVITYself.onGround = False; # Мы не знаем, когда мы на земле((
self.rect.y += self.yvel
И добавим в основную часть программы:
После строчки left = right = False
Добавим переменную up
up = false
В проверку событий добавим
if e.type == KEYDOWN and e.key == K_UP:
       up = Trueif e.type == KEYUP and e.key == K_UP:
      up = False
И изменим вызов метода update, добавив новый аргумент up:
hero.update(left, right)
на
hero.update(left, right, up)
Здесь мы создали силу гравитации, которая будет тянуть нас вниз, постоянно наращивая скорость, если мы не стоим на земле, и прыгать в полете мы не умеем. А мы пока не можем твердо встать на что-то, поэтому на следующей анимации наш герой падает далеко за границы видимости.

Встань обеими ногами на землю свою.
Как узнать, что мы на земле или другой твердой поверхности? Ответ очевиден — использовать проверку на пересечение, но для этого изменим создание платформ.
Создадим еще один файл blocks.py, и перенесем в него описание платформы.
PLATFORM_WIDTH = 32
PLATFORM_HEIGHT = 32
PLATFORM_COLOR = "#FF6262"
Дальше создадим класс, наследуясь от pygame.sprite.Sprite
class Platform(sprite.Sprite):
    def __init__(self, x, y):
        sprite.Sprite.__init__(self)
        self.image = Surface((PLATFORM_WIDTH, PLATFORM_HEIGHT))
        self.image.fill(Color(PLATFORM_COLOR))
        self.rect = Rect(x, y, PLATFORM_WIDTH, PLATFORM_HEIGHT)
Тут нет ни чего нам уже не знакомого, идём дальше.
В основной файле произведем изменения, перед описанием массива level добавим
entities = pygame.sprite.Group() # Все объекты
platforms = [] # то, во что мы будем врезаться или опираться
entities.add(hero)
Группа спрайтов entities будем использовать для отображения всех элементов этой группы.
Массив platforms будем использовать для проверки на пересечение с платформой.
Далее, блок
if col == "-":
   #создаем блок, заливаем его цветом и рисеум его
   pf = Surface((PLATFORM_WIDTH,PLATFORM_HEIGHT))
   pf.fill(Color(PLATFORM_COLOR))
   screen.blit(pf,(x,y))
Заменим на
if col == "-":
   pf = Platform(x,y)
   entities.add(pf)
   platforms.append(pf)
Т.е. создаём экземплр класса Platform, добавляем его в группу спрайтов entities и массив platforms. В entities, чтобы для каждого блока не писать логику отображения. В platforms добавили, чтобы потом проверить массив блоков на пересечение с игроком.
Дальше, весь код генерации уровня выносим из цикла.
И так же строчку
hero.draw(screen) # отображение
Заменим на
entities.draw(screen) # отображение всего
Запустив, мы увидим, что ни чего не изменилось. Верно. Ведь мы не проверяем нашего героя на столкновения. Начнём это исправлять.
Работаем в файле player.py
Удаляем метод draw, он нам больше не нужен. И добавляем новый метод collide
def collide(self, xvel, yvel, platforms):
for p in platforms:
if sprite.collide_rect(self, p): # если есть пересечение платформы с игрокомif xvel > 0: # если движется вправо
self.rect.right = p.rect.left # то не движется вправоif xvel < 0: # если движется влево
self.rect.left = p.rect.right # то не движется влевоif yvel > 0: # если падает вниз
self.rect.bottom = p.rect.top # то не падает вниз
self.onGround = True # и становится на что-то твердое
self.yvel = 0 # и энергия падения пропадаетif yvel < 0: # если движется вверх
self.rect.top = p.rect.bottom # то не движется вверх
self.yvel = 0 # и энергия прыжка пропадает
В этом методе происходит проверка на пересечение координат героя и платформ, если таковое имеется, то выше описанной логике происходит действие.
Ну, и для того, что бы это всё происходило, необходимо вызывать этот метод.
Изменим число аргументов для метода update, теперь он выглядит так:
update(self, left, right, up, platforms)
И не забудьте изменить его вызов в основном файле.
И строчки
self.rect.y += self.yvel
self.rect.x += self.xvel # переносим свои положение на xvel
Заменям на:
self.rect.y += self.yvel
self.collide(0, self.yvel, platforms)self.rect.x += self.xvel # переносим свои положение на xvel
self.collide(self.xvel, 0, platforms)
Т.е. передвинули героя вертикально, проверили на пересечение по вертикали, передвинули горизонтально, снова проверили на пересечение по горизонтали.
Вот, что получится, когда запустим.

Фу[у]! Движущийся прямоугольник — не красиво!
Давайте немного приукрасим нашего МариоБоя.
Начнем с платформ. Для этого в файле blocks.py сделаем небольшие изменения.
Заменим заливку цветом на картинку, для этого строчку
self.image.fill(Color(PLATFORM_COLOR))
Заменим на
self.image = image.load("blocks/platform.png")
Мы загружаем картинку вместо сплошного цвета. Разумеется, файл «platform.png» должен находиться в папке «blocks», которая должна располагаться в каталоге с исходными кодами.
Вот, что получилось

Теперь переходим к нашему герою. Для движущегося объекта нужна не статическая картинка, а анимация. Дабы облегчить себе эту задачу, воспользуемся замечательной библиотекой pyganim . Приступим.
Сперва добавим в блок констант.
ANIMATION_DELAY = 0.1 # скорость смены кадров
ANIMATION_RIGHT = [('mario/r1.png'),
            ('mario/r2.png'),
            ('mario/r3.png'),
            ('mario/r4.png'),
            ('mario/r5.png')]
ANIMATION_LEFT = [('mario/l1.png'),
            ('mario/l2.png'),
            ('mario/l3.png'),
            ('mario/l4.png'),
            ('mario/l5.png')]
ANIMATION_JUMP_LEFT = [('mario/jl.png', 0.1)]
ANIMATION_JUMP_RIGHT = [('mario/jr.png', 0.1)]
ANIMATION_JUMP = [('mario/j.png', 0.1)]
ANIMATION_STAY = [('mario/0.png', 0.1)]
Тут, думаю, понятно, анимация разных действий героя.
Теперь добавим следующее в метод __init__
self.image.set_colorkey(Color(COLOR)) # делаем фон прозрачным
# Анимация движения вправо
boltAnim = []
for anim in ANIMATION_RIGHT:
boltAnim.append((anim, ANIMATION_DELAY))
self.boltAnimRight = pyganim.PygAnimation(boltAnim)
self.boltAnimRight.play()
# Анимация движения влево
boltAnim = []
for anim in ANIMATION_LEFT:
            boltAnim.append((anim, ANIMATION_DELAY
))
self.boltAnimLeft = pyganim.PygAnimation(boltAnim)
self.boltAnimLeft.play()self.boltAnimStay = pyganim.PygAnimation(ANIMATION_STAY)
self.boltAnimStay.play()
self.boltAnimStay.blit(self.image, (0, 0)) # По-умолчанию, стоимself.boltAnimJumpLeft= pyganim.PygAnimation(ANIMATION_JUMP_LEFT)
self.boltAnimJumpLeft.play()self.boltAnimJumpRight= pyganim.PygAnimation(ANIMATION_JUMP_RIGHT)
self.boltAnimJumpRight.play()self.boltAnimJump= pyganim.PygAnimation(ANIMATION_JUMP)
self.boltAnimJump.play()
Здесь для каждого действия мы создаем набор анимаций, и включаем их(т.е. Включаем смену кадров).
for anim in ANIMATION_LEFT:
boltAnim.append((anim, ANIMATION_DELAY
))
Каждый кадр имеет картинку и время показа.
Осталось в нужный момент показать нужную анимацию.
Добавим смену анимаций в метод update.
if up:
if self.onGround: # прыгаем, только когда можем оттолкнуться от земли
self.yvel = -JUMP_POWER
self.image.fill(Color(COLOR))
self.boltAnimJump.blit(self.image, (0, 0))if left:
self.xvel = -MOVE_SPEED # Лево = x- n
self.image.fill(Color(COLOR))
if up: # для прыжка влево есть отдельная анимация
self.boltAnimJumpLeft.blit(self.image, (0, 0))
else:
self.boltAnimLeft.blit(self.image, (0, 0))if right:
self.xvel = MOVE_SPEED # Право = x + n
self.image.fill(Color(COLOR))
if up:
self.boltAnimJumpRight.blit(self.image, (0, 0))
else:
self.boltAnimRight.blit(self.image, (0, 0))if not(left or right): # стоим, когда нет указаний идти
self.xvel = 0
if not up:
self.image.fill(Color(COLOR))
self.boltAnimStay.blit(self.image, (0, 0))
Вуаля!

Больше, нужно больше места
Ограничение в размере окна мы преодолеем созданием динамической камеры.
Для этого создадим класс Camera
class Camera(object):
def __init__(self, camera_func, width, height):
self.camera_func = camera_func
self.state = Rect(0, 0, width, height)def apply(self, target):
return target.rect.move(self.state.topleft)def update(self, target):
self.state = self.camera_func(self.state, target.rect)
Далее, добавим начальное конфигурирование камеры
def camera_configure(camera, target_rect):
l, t, _, _ = target_rect
_, _, w, h = camera
l, t = -l+WIN_WIDTH / 2, -t+WIN_HEIGHT / 2l = min(0, l) # Не движемся дальше левой границы
l = max(-(camera.width-WIN_WIDTH), l) # Не движемся дальше правой границы
t = max(-(camera.height-WIN_HEIGHT), t) # Не движемся дальше нижней границы
t = min(0, t) # Не движемся дальше верхней границыreturn Rect(l, t, w, h)
Создадим экземпляр камеры, добавим перед основным циклом:
total_level_width  = len(level[0])*PLATFORM_WIDTH # Высчитываем фактическую ширину уровня
total_level_height = len(level)*PLATFORM_HEIGHT # высотуcamera = Camera(camera_configure, total_level_width, total_level_height)
Что мы сделали?
Мы создали внутри большого прямоугольника, размеры которого вычисляются так:
total_level_width = len(level[0])*PLATFORM_WIDTH # Высчитываем фактическую ширину уровня
total_level_height = len(level)*PLATFORM_HEIGHT # высоту
меньший прямоугольник, размером, идентичным размеру окна.
Меньший прямоугольник центрируется относительно главного персонажа(метод update), и все объекты рисуются в меньшем прямоугольнике (метод apply), за счет чего создаётся впечатление движения камеры.
Для работы вышеописанного, нужно изменить рисование объектов.
Заменим строчку
entities.draw(screen) # отображение
На
for e in entities:
   screen.blit(e.image, camera.apply(e))
И перед ней добавим
camera.update(hero) # центризируем камеру относительно персонажа
Теперь можем изменить уровень.
level = [
       "----------------------------------",
       "-                                -",
       "-                       --       -",
       "-                                -",
       "-            --                  -",
       "-                                -",
       "--                               -",
       "-                                -",
       "-                   ----     --- -",
       "-                                -",
       "--                               -",
       "-                                -",
       "-                            --- -",
       "-                                -",
       "-                                -",
       "-      ---                       -",
       "-                                -",
       "-   -------         ----         -",
       "-                                -",
       "-                         -      -",
       "-                            --  -",
       "-                                -",
       "-                                -",
       "----------------------------------"]
Вот, собственно, и результат

Результат можно скачать
В следующей части, если будет востребовано сообществом, мы создадим свой генератор уровней с блэкджеком и шлюхами с разными типами платформ, монстрами, телепортами, и конечно же, принцессой.
This entry passed through the Full-Text RSS service — if this is your content and you’re reading it on someone else’s site, please read the FAQ at fivefilters.org/content-only/faq.php#publishers. Five Filters recommends:
- Massacres That Matter — Part 1 — ‘Responsibility To Protect’ In Egypt, Libya And Syria
- Massacres That Matter — Part 2 — The Media Response On Egypt, Libya And Syria
- National demonstration: No attack on Syria — Saturday 31 August, 12 noon, Temple Place, London, UK
I am going to follow the tutorial of dafluffypotato, getting inspiration from his tutorial and trying to figure out a platform with pygame and Python.
Here is the png image for the player. Right click and save it in the folder where you saved the code of the game.
![]()
In the following code I resemble the code from the first 2 videos starting from skratch till we make the player move, jump and interact with a rectangle on the screen. This is the code:
|
1 2 3 4 5 6 7 8 9 10 11 12 13 14 15 16 17 18 19 20 21 22 23 24 25 26 27 28 29 30 31 32 33 34 35 36 37 38 39 40 41 42 43 44 45 46 47 48 49 50 51 52 53 54 55 56 57 58 59 60 61 62 63 64 65 66 67 68 69 70 71 72 73 74 |
import pygame from pygame.locals import * #pip install pygame into cmd, use 3.7 21/12/2019 pygame.init() clock = pygame.time.Clock() WINDOW_SIZE = (400, 400) pygame.display.set_caption(«Game») screen = pygame.display.set_mode(WINDOW_SIZE, 0, 32) # Image player_image = pygame.image.load(«player.png») # other variables for movements location = [50, 50] moving_right = False moving_left = False # collitions # rectangle that wraps the player player_rect = pygame.Rect(location[0], location[1], player_image.get_width(), player_image.get_height()) # another rectangle for test test = pygame.Rect(100, 100, 100, 50) momentum = 0 loop = 1 while loop: # clear the screen screen.fill((146, 244, 255)) # show the player screen.blit(player_image, location) # check if the player collide the test rectangle if player_rect.colliderect(test): print(«collided») # if they collide the rectangle goes red pygame.draw.rect(screen, (255, 0, 0), test) else: # if not it is drawed in black pygame.draw.rect(screen, (0, 0, 0), test) player_rect.x = location[0] player_rect.y = location[1] # Goes down until reaches 0 then goes up til top and down again… if location[1] > WINDOW_SIZE[1] — player_image.get_height(): momentum = —momentum else: momentum += 0.2 location[1] += momentum if moving_right == True: location[0] += 4 if moving_left == True: location[0] -= 4 for event in pygame.event.get(): if event.type == QUIT: loop = 0 if event.type == KEYDOWN: if event.key == K_RIGHT: moving_right = True if event.key == K_LEFT: moving_left = True if event.type == KEYUP: if event.key == K_RIGHT: moving_right = False if event.key == K_LEFT: moving_left = False pygame.display.update() clock.tick(60) pygame.quit() |
Live coding
How can it become… a look at a basic map
I just wanna show a little more graphic in the game to see how can it become. To make the maps is very easy.
Some explanations
The collisions. The most important stuff in a game is the collision detection, that makes us know when two elements collide so that we can make something happen like collect an item, damage something, increase score etc. In pygame you create a rectangle area that wraps the items whose position needs to be controlled to check if they collides.
In the example above the two rectangle are here:
|
# collitions # rectangle that wraps the player player_rect = pygame.Rect(location[0], location[1], player_image.get_width(), player_image.get_height()) # another rectangle for test test = pygame.Rect(100, 100, 100, 50) |
The first surround the player the second is just a rectangle. as you can see in the video, when the player touches the rectangle it changes color. The rectangles are created with the Rect class of pygame that takes the coordinates of the starting point of the rectangle (from the player position that we stored in location) and the width and height of the image of the player (player_image) obtained with the method get_width() and get_height() of the pygame.image.load object. This code is in the while loop that loops 60 time each second.
|
# check if the player collide the test rectangle if player_rect.colliderect(test): print(«collided») # if they collide the rectangle goes red pygame.draw.rect(screen, (255, 0, 0), test) else: # if not it is drawed in black pygame.draw.rect(screen, (0, 0, 0), test) |
The control is in the if statement that checks if the player_rect collides with the other (test) using the method with the intuitive name of colliderect that has as argument the other rectangle object. The test object created with pygame.Rect is drawed in red or black each frame if there is a collision or not.
Other posts about pygame
Pygame’s Platform Game
