В наши дни каждый разработчик может столкнуться с необходимостью работы над мобильным или веб-приложением на Python. В Python нет встроенных инструментов для мобильных устройств, тем не менее существуют пакеты, которые можно использовать для создания мобильных приложений. Это Kivy, PyQt и даже библиотека Toga от Beeware.
Содержание
- Принципы работы фреймворка Kivy Python
- Установка Kivy
- Работа с виджетами в Kivy
- Запуск программы «Hello, Kivy!»
- Отображение виджета Image в Kivy Python
- Разметка (Layout) в UI Kivy
- Добавление событий в Kivy
- Использование языка дизайна KV
- Создание приложения Kivy Python
- Создаем apk приложения для Android на Python
- Создание приложений для iPhone (iOS) на Python
- Создание exe приложений для Windows на Python используя Kivy
- Создание приложений для macOS на Python используя Kivy
Библиотеки являются основными элементами мобильного мира Python. Однако, говоря о Kivy, нельзя игнорировать преимущества данного фреймворка при работе с мобильными приложениями. Внешний вид приложения автоматически подстраивается под все платформы, разработчику при этом не нужно компилировать код после каждой поправки. Кроме того, здесь для создания приложений можно использовать чистый синтаксис Python.
В руководстве будут разобраны следующие темы:
- Работа с виджетами Kivy;
- Планировка UI и лейауты;
- Добавление событий;
- Использование языка KV;
- Создание приложения-калькулятора;
- Упаковка приложения для iOS, Android, Windows и macOS.
Разбор данного руководства предполагает, что читатель знаком с объектно-ориентированным программированием. Для введения в курс дела можете просмотреть статью об Объектно-ориентированном программировании (ООП) в Python 3.
Приступим!
Принципы работы фреймворка Kivy Python
Kivy был создан в 2011 году. Данный кросс-платформенный фреймворк Python работает на Windows, Mac, Linux и Raspberry Pi. В дополнение к стандартному вводу через клавиатуру и мышь он поддерживает мультитач. Kivy даже поддерживает ускорение GPU своей графики, что во многом является следствием использования OpenGL ES2. У проекта есть лицензия MIT, поэтому библиотеку можно использовать бесплатно и вкупе с коммерческим программным обеспечением.
Во время разработки приложения через Kivy создается интуитивно понятный интерфейс (Natural user Interface), или NUI. Его главная идея в том, чтобы пользователь мог легко и быстро приспособиться к программному обеспечению без чтения инструкций.
Kivy не задействует нативные элементы управления, или виджеты. Все его виджеты настраиваются. Это значит, что приложения Kivy будут выглядеть одинаково на всех платформах. Тем не менее, это также предполагает, что внешний вид вашего приложения будет отличаться от нативных приложений пользователя. Это может стать как преимуществом, так и недостатком, все зависит от аудитории.
Установка Kivy
У Kivy есть множество зависимостей, поэтому лучше устанавливать его в виртуальную среду Python. Можно использовать встроенную библиотеку Python venv или же пакет virtualenv.
Виртуальная среда Python создается следующим образом:
|
$ python3 —m venv my_kivy_project |
По ходу данного действия исполняемый файл Python 3 будет скопирован в папку под названием my_kivy_project, куда также будут добавлено несколько других папок.
Есть вопросы по Python?
На нашем форуме вы можете задать любой вопрос и получить ответ от всего нашего сообщества!
Telegram Чат & Канал
Вступите в наш дружный чат по Python и начните общение с единомышленниками! Станьте частью большого сообщества!
Паблик VK
Одно из самых больших сообществ по Python в социальной сети ВК. Видео уроки и книги для вас!
Для использования виртуальной среды ее нужно активировать. На Mac или Linux это можно сделать, выполнив следующую команду, будучи внутри папки my_kivy_project:
Команда для Windows точно такая же, но активировать скрипт нужно в другом месте — через папку Scripts, а не bin.
После активации виртуальной среды Python можно запустить pip для установки Kivy. На Linux и Mac нужно выполнить следующую команду:
|
$ python —m pip install kivy |
Инсталляция на Windows несколько сложнее. В официальной документации фреймворка изучите пункт, касающийся установки Kivy на Windows. Пользователи Mac также могут скачать файл dmg и установить Kivy данным образом.
В случае возникновения проблем во время установки Kivy на вашу платформу изучите дополнительные инструкции, с которыми можно ознакомиться через страницу загрузки.
Работа с виджетами в Kivy
Виджеты — это отображаемые на экране элементы управления, которыми пользователь может оперировать. Любой инструментарий графического интерфейса пользователя поставляется с набором виджетов. Типичными представителями виджетов, что вы не раз использовали, являются кнопки, выпадающие списки и вкладки. Внутри фреймворка Kivy встроено много виджетов.
Запуск программы «Hello, Kivy!»
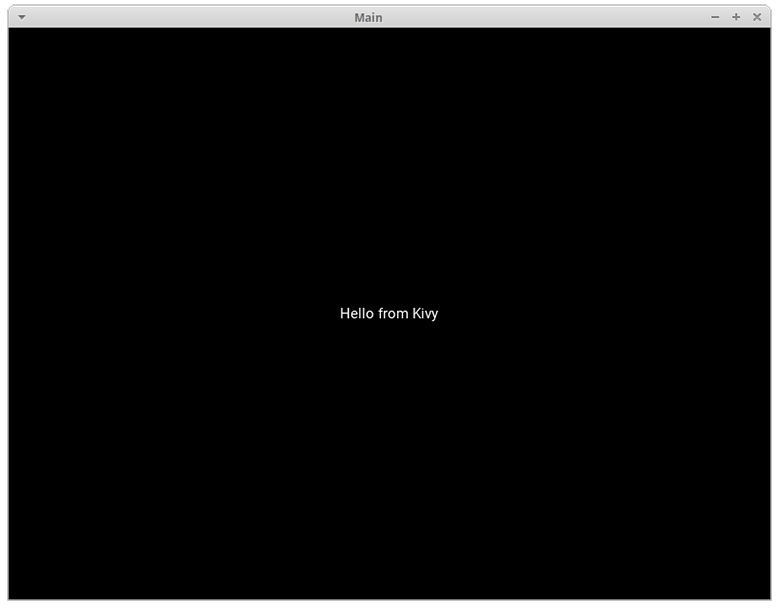
Принцип работы Kivy можно уловить, взглянув на следующее приложение «Hello, World!»:
|
from kivy.app import App from kivy.uix.label import Label class MainApp(App): def build(self): label = Label(text=‘Hello from Kivy’, size_hint=(.5, .5), pos_hint={‘center_x’: .5, ‘center_y’: .5}) return label if __name__ == ‘__main__’: app = MainApp() app.run() |
Каждому приложению Kivy требуется создать подкласс App и переопределить метод build(). Сюда вы помещаете код UI или вызываете другие функции, которые определяют код UI. В данном случае создается виджет Label и передается text, size_hint и pos_hint. Последние два аргумента не обязательны.
size_hint говорит Kivy о размерах что нужно использовать при создании виджета. Используются два числа:
- Первое число
xуказывает на размер ширины элемента управления. - Второе число
yуказывает на размер высоты элемента управления.
Значение обоих чисел должно быть в промежутке между 0 и 1. Значение по обоих показателей по умолчанию равно 1. Также можно задействовать pos_hint, что используется для позиционирования виджета. В коде, размещенном выше, указывается, что виджет должен быть размещен в центре осей x и y.
Для запуска приложения нужно инициализировать класс MainApp и вызвать метод run(). После этих действий на экране появится следующее:
Kivy также выводит в stdout довольно много текста:
|
1 2 3 4 5 6 7 8 9 10 11 12 13 14 15 16 17 18 19 20 21 22 23 |
[INFO ] [Logger ] Record log in /home/mdriscoll/.kivy/logs/kivy_19—06—07_2.txt [INFO ] [Kivy ] v1.11.0 [INFO ] [Kivy ] Installed at «/home/mdriscoll/code/test/lib/python3.6/site-packages/kivy/__init__.py» [INFO ] [Python ] v3.6.7 (default, Oct 22 2018, 11:32:17) [GCC 8.2.0] [INFO ] [Python ] Interpreter at «/home/mdriscoll/code/test/bin/python» [INFO ] [Factory ] 184 symbols loaded [INFO ] [Image ] Providers: img_tex, img_dds, img_sdl2, img_gif (img_pil, img_ffpyplayer ignored) [INFO ] [Text ] Provider: sdl2([‘text_pango’] ignored) [INFO ] [Window ] Provider: sdl2([‘window_egl_rpi’] ignored) [INFO ] [GL ] Using the «OpenGL» graphics system [INFO ] [GL ] Backend used <sdl2> [INFO ] [GL ] OpenGL version <b‘4.6.0 NVIDIA 390.116’> [INFO ] [GL ] OpenGL vendor <b‘NVIDIA Corporation’> [INFO ] [GL ] OpenGL renderer <b‘NVS 310/PCIe/SSE2’> [INFO ] [GL ] OpenGL parsed version: 4, 6 [INFO ] [GL ] Shading version <b‘4.60 NVIDIA’> [INFO ] [GL ] Texture max size <16384> [INFO ] [GL ] Texture max units <32> [INFO ] [Window ] auto add sdl2 input provider [INFO ] [Window ] virtual keyboard not allowed, single mode, not docked [INFO ] [Base ] Start application main loop [INFO ] [GL ] NPOT texture support is available |
Это может быть полезно для отладки приложения.
Далее добавим виджет Image и посмотрим, чем он отличается от Label.
Отображение виджета Image в Kivy Python
В Kivy есть несколько видов виджетов, связанных с изображениями. Для загрузки картинок с жесткого диска можно задействовать Image, а при использовании адреса URL подойдет AsyncImage. К следующем примере берется стандартный класс Image:
|
from kivy.app import App from kivy.uix.image import Image class MainApp(App): def build(self): img = Image(source=‘/path/to/real_python.png’, size_hint=(1, .5), pos_hint={‘center_x’:.5, ‘center_y’:.5}) return img if __name__ == ‘__main__’: app = MainApp() app.run() |
В данном коде импортируется Image из подпакета kivy.uix.image. Класс Image принимает много разных параметров, однако единственным для нас нужным является source, что указывает Kivy, какое изображение должно быть загружено. Здесь передается полный путь к выбранному изображению. Оставшаяся часть кода такая же, как и в прошлом примере.
После запуска кода должно выводиться нечто подобное:
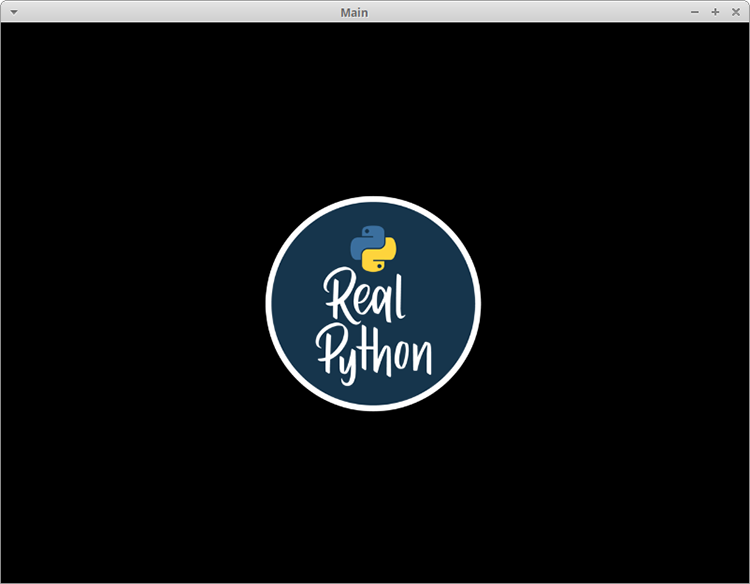
Текст из предыдущего примера был заменен картинкой.
Теперь рассмотрим, как добавить и оптимально расположить несколько виджетов в приложении.
Разметка (Layout) в UI Kivy
У каждого фреймворка есть свой собственный метод для размещения виджетов. К примеру, в wxPython используются классификаторы, а в Tkinter будет задействован лейаут, или менеджер геометрии. В Kivy за это отвечают Лейауты (Layouts). Доступно несколько различных типов Лейаутов. Чаще всего используются следующие виды:
- BoxLayout;
- FloatLayout;
- GridLayout.
Найти полный список доступных Лейаутов можно в документации Kivy. Рабочий исходный код можно найти в kivy.uix.
Рассмотрим BoxLayout на примере следующего кода:
|
1 2 3 4 5 6 7 8 9 10 11 12 13 14 15 16 17 18 19 20 21 22 23 24 25 26 27 28 |
import kivy import random from kivy.app import App from kivy.uix.button import Button from kivy.uix.boxlayout import BoxLayout red = [1,0,0,1] green = [0,1,0,1] blue = [0,0,1,1] purple = [1,0,1,1] class HBoxLayoutExample(App): def build(self): layout = BoxLayout(padding=10) colors = [red, green, blue, purple] for i in range(5): btn = Button(text=«Button #%s» % (i+1), background_color=random.choice(colors) ) layout.add_widget(btn) return layout if __name__ == «__main__»: app = HBoxLayoutExample() app.run() |
Здесь из kivy.uix.boxlayout импортируется модуль BoxLayout и затем устанавливается. После этого создается список цветов, которые представляют собой цвета RGB (Red-Blue-Green).
В конечном итоге формируется цикл для range из 5, результатом чего является кнопка btn для каждой итерации. Сделаем вещи немного интереснее и поставим в качестве фона кнопки background_color случайный цвет. Теперь можно добавить кнопку в лейаут при помощи layout.add_widget(btn).
После запуска кода выведется нечто подобное:
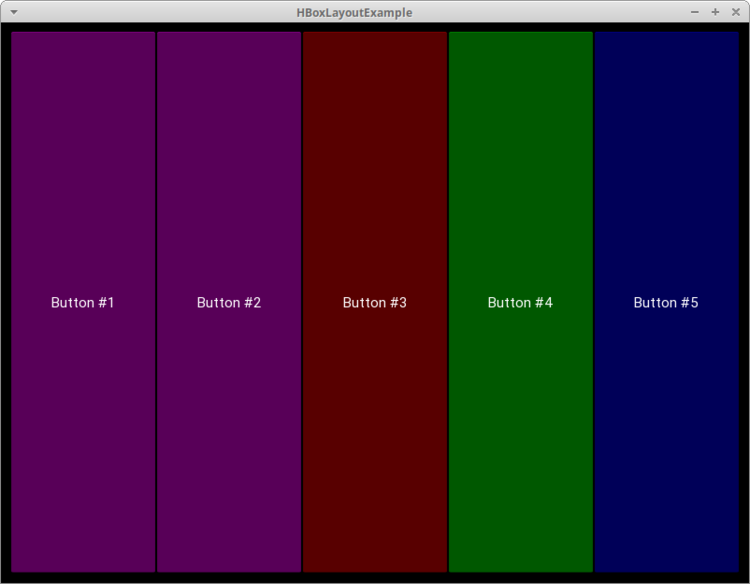
Здесь представлены 5 кнопок, окрашенных случайным образом, по одной для каждой итерации цикла for.
Во время создания лейаута следует учитывать следующие аргументы:
- padding: Отступ
paddingмежду лейаутом и его дочерними элементами уточняется в пикселях. Для этого можно выбрать один из трех способов:- Список из четырех аргументов:
[padding_left, padding_top, padding_right, padding_bottom] - Список из двух аргументов:
[padding_horizontal, padding_vertical] - Один аргумент:
padding=10
- Список из четырех аргументов:
- spacing: При помощи данного аргумента добавляется расстояние между дочерними виджетами.
- orientation: Позволяет изменить значение
orientationдляBoxLayoutпо умолчанию — с горизонтального на вертикальное.
Добавление событий в Kivy
Как и многие другие инструментарии GUI, по большей части Kivy полагается на события. Фреймворк отзывается на нажатие клавиш, кнопки мышки или прикосновение к сенсорному экрану. В Kivy задействован концепт Часов (Clock), что дает возможность создать своего рода график для вызова определенных функций в будущем.
В Kivy также используется концепт Свойств (Properties), что работает с EventDispatcher. Свойства помогают осуществить проверку достоверности. Они также запускают события, когда виджет меняет размер или позицию.
Добавим событие для кнопки из предыдущего кода:
|
1 2 3 4 5 6 7 8 9 10 11 12 13 14 15 16 17 18 |
from kivy.app import App from kivy.uix.button import Button class MainApp(App): def build(self): button = Button(text=‘Hello from Kivy’, size_hint=(.5, .5), pos_hint={‘center_x’: .5, ‘center_y’: .5}) button.bind(on_press=self.on_press_button) return button def on_press_button(self, instance): print(‘Вы нажали на кнопку!’) if __name__ == ‘__main__’: app = MainApp() app.run() |
В данном коде вызывается button.bind(), а событие on_press ссылается на MainApp.on_press_button().
Этот метод неявно принимает экземпляр виджета, который является самим объектом кнопки. Сообщение будет выводиться на stdout всякий раз при нажатии пользователем на кнопку.
Использование языка дизайна KV
Kivy предоставляет язык дизайна KV, что можно использовать в приложениях Kivy. Язык KV позволяет отделить дизайн интерфейса от логики приложения. Он придерживается принципа разделения ответственности и является частью архитектурного паттерна Модель-Представление-Контроллер (Model-View-Controller). Предыдущий пример можно обновить, используя язык KV:
|
from kivy.app import App from kivy.uix.button import Button class ButtonApp(App): def build(self): return Button() def on_press_button(self): print(‘Вы нажали на кнопку!’) if __name__ == ‘__main__’: app = ButtonApp() app.run() |
С первого взгляда данный код может показаться несколько странным, так как кнопка Button создается без указания атрибутов или привязывания к ним событий. Здесь Kivy автоматически ищет файл с таким же названием, что и у класса, только строчными буквами и без части App в названии класса.
В данном случае названием класса является ButtonApp, поэтому Kivy будет искать файл button.kv. Если такой файл существует, и он также форматирован должным образом, тогда Kivy использует его при загрузке UI. Попробуйте создать такой файл и добавить следующий код:
|
<Button>: text: ‘Press me’ size_hint: (.5, .5) pos_hint: {‘center_x’: .5, ‘center_y’: .5} on_press: app.on_press_button() |
Действия каждой строки:
- Строка 1 соответствует вызову
Buttonв коде Python. Kivy должен осмотреть инициализированный объект для определения кнопки; - Строка 2 устанавливает
textкнопки; - Строка 3 устанавливает ширину и высоту при помощи
size_hint; - Строка 4 устанавливает позицию кнопки через
pos_hint; - Строка 5 устанавливает обработчик событий
on_press. Для указания Kivy места обработчика событий используетсяapp.on_press_button(). Здесь Kivy будет искать метод.on_press_button()в классеApplication.
Вы можете установить все ваши виджеты и лейауты внутри одного или нескольких файлов языка KV. Язык KV также поддерживает импорт модулей Python в KV, создавая динамичные классы, и это далеко не предел. Ознакомиться с полным перечнем его возможностей можно в гиде Kivy по языку KV.
Теперь мы можем приступить к созданию настоящего рабочего приложения.
Создание приложения Kivy Python
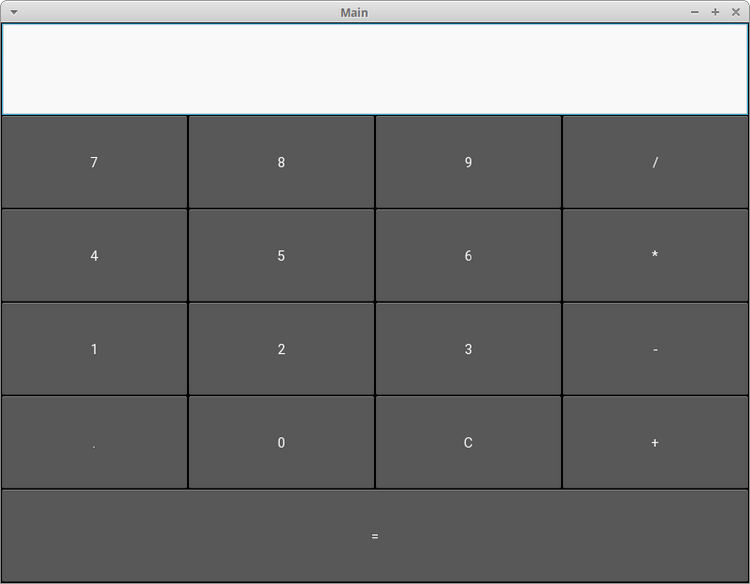
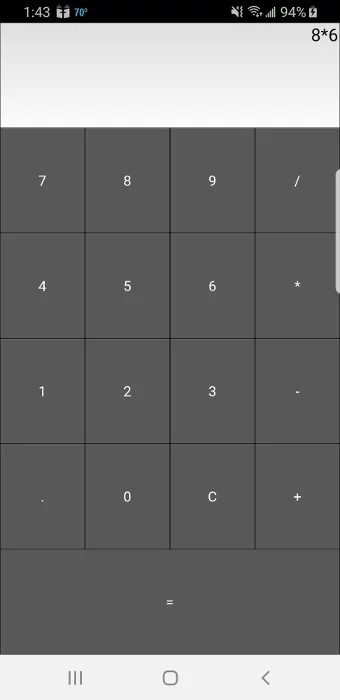
Создание чего-то полезное несомненно является отличным способом выучить новый навык. Учитывая данное утверждение, давайте используем Kivy при создании калькулятора, который будет поддерживать следующие операции:
- Сложение;
- Вычитание;
- Умножение;
- Деление.
В данном приложении будет использован набор кнопок в своего рода лейауте. В верхней части также будет специальный блок для вывода операций и их результатов. В итоге калькулятор будет выглядеть следующим образом:

Теперь, когда у нас есть в наличии целевой UI, может составить код:
|
1 2 3 4 5 6 7 8 9 10 11 12 13 14 15 16 17 18 19 20 21 22 23 24 25 26 27 28 29 30 31 32 33 34 35 36 37 38 39 |
from kivy.app import App from kivy.uix.boxlayout import BoxLayout from kivy.uix.button import Button from kivy.uix.textinput import TextInput class MainApp(App): def build(self): self.operators = [«/», «*», «+», «-«] self.last_was_operator = None self.last_button = None main_layout = BoxLayout(orientation=«vertical») self.solution = TextInput( multiline=False, readonly=True, halign=«right», font_size=55 ) main_layout.add_widget(self.solution) buttons = [ [«7», «8», «9», «/»], [«4», «5», «6», «*»], [«1», «2», «3», «-«], [«.», «0», «C», «+»], ] for row in buttons: h_layout = BoxLayout() for label in row: button = Button( text=label, pos_hint={«center_x»: 0.5, «center_y»: 0.5}, ) button.bind(on_press=self.on_button_press) h_layout.add_widget(button) main_layout.add_widget(h_layout) equals_button = Button( text=«=», pos_hint={«center_x»: 0.5, «center_y»: 0.5} ) equals_button.bind(on_press=self.on_solution) main_layout.add_widget(equals_button) return main_layout |
Калькулятор работает следующим образом:
- В строках с 8 по 10 создается список
operatorsи несколько полезных значений,last_was_operatorиlast_button, которые будут использованы чуть позже. - В строках с 11 по 15 создается лейаут верхнего уровня
main_layout, к нему также добавляется виджет только для чтенияTextInput. - В строках с 16 по 21 создается вложенный список из списков, где есть большая часть кнопок для калькулятора.
- В строке 22 начинается цикл for для кнопок. Для каждого вложенного списка делается следующее:
- В строке 23 создается
BoxLayoutс горизонтальной ориентацией. - В строке 24 начинается еще один цикл
forдля элементов вложенного списка. - В строках с 25 по 39 создаются кнопки для ряда и связываются обработчиком событий, после чего кнопки добавляются к горизонтальному
BoxLayoutиз строки 23. - В строке 31 этот лейаут добавляется к
main_layout.
- В строке 23 создается
- В строках с 33 по 37 создается кнопка равно (=) и привязывается к обработчику событий, после чего она добавляется к
main_layout.
Далее создается обработчик событий .on_button_press(). Код будет выглядеть следующим образом:
|
1 2 3 4 5 6 7 8 9 10 11 12 13 14 15 16 17 18 19 20 |
def on_button_press(self, instance): current = self.solution.text button_text = instance.text if button_text == «C»: # Очистка виджета с решением self.solution.text = «» else: if current and ( self.last_was_operator and button_text in self.operators): # Не добавляйте два оператора подряд, рядом друг с другом return elif current == «» and button_text in self.operators: # Первый символ не может быть оператором return else: new_text = current + button_text self.solution.text = new_text self.last_button = button_text self.last_was_operator = self.last_button in self.operators |
Почти все виджеты приложения вызывают .on_button_press(). Это работает следующим образом:
- Строка 41 принимает аргумент
instance, в результате чего можно узнать, какой виджет вызвал функцию. - Строки между 42 и 43 извлекают и хранят значения
solutionиtextкнопки. - Строки c 45 по 47 проверяют, на какую кнопку нажали. Если пользователь нажимает с, тогда очищается
solution. В противном случае используется утверждениеelse. - Строка 49 проверяет, было ли у решения предыдущее значение.
- Строки с 50 по 52 проверяют, была ли последняя нажатая кнопка оператором. Если да, тогда
solutionобновляться не будет. Это необходимо для предотвращения создания двух операций в одном ряду. К примеру,1 * /будет недействительным утверждением. - Строки с 53 по 55 проверяют, является ли первый символ оператором. Если да, тогда solution обновляться не будет, так как первое значение не может быть значением оператора.
- Строки с 56 по 58 переходят к условию
else. Если никакое из предыдущих значений не найдено, тогда обновляетсяsolution. - Строка 59 устанавливает
last_buttonк метке последней нажатой кнопки. - Строка 60 устанавливает
last_was_operatorк значениюTrueилиFalseв зависимости от того, был символ оператором или нет.
Последней частью кода будет .on_solution():
|
def on_solution(self, instance): text = self.solution.text if text: solution = str(eval(self.solution.text)) self.solution.text = solution |
Здесь берется текущий текст из solution и используется встроенный в Python eval() для исполнения. Если пользователь создал формулу вроде 1+2, тогда eval() запустит код и вернет результат. В конце результат устанавливается как новое значение виджета solution.
На заметку: порой
eval()бывает опасным, так как он может запустить произвольный код. Многие разработчики избегают его использование именно по этой причине. Тем не менее, ввиду задействования только целых чисел, операторов и точки в качестве вводных данных дляeval(), в данном контексте его можно использовать безопасно.
При запуске данного кода на рабочем столе компьютера приложение будет выглядеть следующим образом:
Полный текст кода примера калькулятора представлен ниже:
|
1 2 3 4 5 6 7 8 9 10 11 12 13 14 15 16 17 18 19 20 21 22 23 24 25 26 27 28 29 30 31 32 33 34 35 36 37 38 39 40 41 42 43 44 45 46 47 48 49 50 51 52 53 54 55 56 57 58 59 60 61 62 63 64 65 66 67 68 69 70 71 |
from kivy.app import App from kivy.uix.boxlayout import BoxLayout from kivy.uix.button import Button from kivy.uix.textinput import TextInput class MainApp(App): def build(self): self.operators = [«/», «*», «+», «-«] self.last_was_operator = None self.last_button = None main_layout = BoxLayout(orientation=«vertical») self.solution = TextInput( multiline=False, readonly=True, halign=«right», font_size=55 ) main_layout.add_widget(self.solution) buttons = [ [«7», «8», «9», «/»], [«4», «5», «6», «*»], [«1», «2», «3», «-«], [«.», «0», «C», «+»], ] for row in buttons: h_layout = BoxLayout() for label in row: button = Button( text=label, pos_hint={«center_x»: 0.5, «center_y»: 0.5}, ) button.bind(on_press=self.on_button_press) h_layout.add_widget(button) main_layout.add_widget(h_layout) equals_button = Button( text=«=», pos_hint={«center_x»: 0.5, «center_y»: 0.5} ) equals_button.bind(on_press=self.on_solution) main_layout.add_widget(equals_button) return main_layout def on_button_press(self, instance): current = self.solution.text button_text = instance.text if button_text == «C»: # Очистка виджета с решением self.solution.text = «» else: if current and ( self.last_was_operator and button_text in self.operators): # Не добавляйте два оператора подряд, рядом друг с другом return elif current == «» and button_text in self.operators: # Первый символ не может быть оператором return else: new_text = current + button_text self.solution.text = new_text self.last_button = button_text self.last_was_operator = self.last_button in self.operators def on_solution(self, instance): text = self.solution.text if text: solution = str(eval(self.solution.text)) self.solution.text = solution if __name__ == «__main__»: app = MainApp() app.run() |
Пришло время разместить приложение в Google Play или в AppStore!
По завершении составления кода вы можете поделиться своим приложением с другими. Хорошим способом сделать это может стать превращение вашего кода в приложения для смартфона на Android. Для этого вначале нужно установить пакет buildozer через pip:
Затем создается новая папка, после чего нужно перейти в нее через терминал. Затем выполняется следующая команда:
После этого создается файл buildozer.spec, который будет использован для конфигурации сборки. К примеру, первые две строчки файла спецификации можно редактировать следующим образом:
|
[app] # (str) Название вашего приложения title = KvCalc # (str) Название упаковки package.name = kvcalc # (str) Домен упаковки (нужен для упаковки android/ios) package.domain = org.kvcalc |
Не бойтесь посмотреть оставшуюся часть файла для выяснения того, что еще можно поменять.
На данный момент приложение почти готово к сборке, однако для начала нужно установить зависимости для buildozer. После их установки скопируйте ваше приложение калькулятора в новую папку и переименуйте его в main.py. Этого требует buildozer. Если файл будет назван неверно, тогда процесс сборки завершится неудачей.
Теперь можно запустить следующую команду:
|
$ buildozer —v android debug |
Этап сборки займет время! На моем компьютере на это ушло около 15-20 минут. Здесь все зависит от вашего железа, так что времени может потребоваться еще больше. Расслабьтесь, налейте чашечку кофе или прогуляйтесь. Buildozer скачает те элементы Android SDK, которые нужны для процесса сборки. Если все идет по плану, тогда в папке bin появится файл под названием, напоминающим что-то вроде kvcalc-0.1-debug.apk.
Далее требуется связать телефон Android с компьютером и перенести туда файл apk. Затем откройте менеджер файлов телефона и кликните на файл apk. Android должен спросить, хотите ли вы установить приложение. Есть вероятность появления предупреждения, ведь приложение было скачано не из Google Play. Тем не менее, вы по-прежнему сможете установить его.
Вот как выглядит калькулятор, запущенный на Samsung S9:
У buildozer также есть несколько других команд, которые вы можете использовать. Изучите документацию, чтобы подробнее узнать об этом.
При необходимости добиться более детального управления упаковку можно осуществить через python-for-android. Здесь это обсуждаться не будет, но если интересно, ознакомьтесь, как еще можно быстро начать проект.
Создание приложений для iPhone (iOS) на Python
Инструкция для сборки приложения для iOS будет немного сложнее, нежели для Android. Для получения последней информации всегда проверяйте обновления официальной документации Kivy.
Вам нужен будет компьютер с операционной системой OS X: MacBook или iMac. На Linux или Windows вы не сможете создать приложения для Apple.
Перед упаковкой приложения для iOS на Mac необходимо выполнить следующие команды:
|
$ brew install autoconf automake libtool pkg—config $ brew link libtool $ sudo easy_install pip $ sudo pip install Cython==0.29.10 |
После успешной установки нужно скомпилировать при использования следующих команд:
|
$ git clone git://github.com/kivy/kivy—ios $ cd kivy—ios $ ./toolchain.py build python3 kivy |
Если вы получаете ошибку, где говорится, что iphonesimulator не найден, тогда поищите способ решение проблемы на StackOverflow, после чего попробуйте запустить команды вновь.
Если вы получаете ошибки SSL, тогда скорее всего у вас не установлен OpenSSL от Python. Следующая команда должна это исправить:
|
$ cd /Applications/Python 3.7/ $ ./Install Certificates.command |
Теперь вернитесь назад и запустите команду toolchain опять.
После успешного выполнения всех указанных выше команд можете создать проект Xcode при помощи использования скрипта toolchain. Перед созданием проекта Xcode переименуйте ваше главное приложение в main.py, это важно. Выполните следующую команду.
|
./toolchain.py create <title> <app_directory> |
Здесь должна быть папка под названием title, внутри которой будет проект Xcode. Теперь можно открыть проект Xcode и работать над ним отсюда. Обратите внимание, что если вы хотите разместить свое приложение на AppStore, вам понадобится создать аккаунт разработчика на developer.apple.com и заплатить годовой взнос.
Создание exe приложений для Windows на Python используя Kivy
Упаковать приложение Kivy для Windows можно при помощи PyInstaller. Если ранее вы никогда не работали с ним, тогда изучите тему использования PyInstaller для упаковки кода Python в исполняемый файл.
Для установки PyInstaller можно использовать pip:
|
$ pip install pyinstaller |
Следующая команда упакует ваше приложение:
Команда создаст исполняемый файл Windows, а вместе с ним еще несколько других файлов. Аргумент -w говорит PyInstaller, что приложение открывается в оконном режиме и не является приложение для командной строки. Если вы хотите, чтобы PyInstaller создал только один исполняемый файл, тогда можете передать в дополнение к -w аргумент --onefile.
Создание приложений для macOS на Python используя Kivy
Как и в случае с Windows, для создания исполняемого файла Mac можно также использовать PyInstaller. Единственным условием является запуск следующей команды на Mac:
|
$ pyinstaller main.py —w —onefile |
Результатом станет один исполняемый файл в папке dist. Название исполняемого файла будет таким же, как и название файла Python, что был передан PyInstaller.
Если вы хотите уменьшить размер исполняемого файла или использовать в приложении GStreamer, тогда для получения дополнительной информации изучите тему упаковки для macOS.
Заключение
Kivy является действительно интересным фреймворком GUI, что можно использовать для создания пользовательских интерфейсов и мобильных приложений для Android и iOS. Внешне приложения Kivy будут отличаться от нативных приложений выбранной платформы. В том случае, если вы хотите выделяться на фоне конкурентов, это может быть выгодным преимуществом.
В данном руководстве были рассмотрены основы Kivy, среди которых стоит выделить добавление виджетов, привязку событий, планировку виджетов и лейауты, а также использование языка KV. В результате мы получили рабочее приложение Kivy и рассмотрели способы его переноса на другие платформы, в том числе мобильные.
В Kivy есть множество виджетов и концептов, которые не были рассмотрены в статьи. Для дальнейшего изучения темы можете изучить официальный сайт Kivy, где размещены разнообразные руководства, примеры приложений и многое другое.
Рекомендации
Для дальнейшего изучения Kivy ознакомьтесь со следующими ресурсами:
- Гид программирования на Kivy
- Документация по упаковке приложений Kivy
- Сборка приложений GUI через Python
Чтобы посмотреть, как создать приложение с графическим интерфейсом при использовании другого GUI фреймфорка Python, можете ознакомиться со статьями о wxPython.

Являюсь администратором нескольких порталов по обучению языков программирования Python, Golang и Kotlin. В составе небольшой команды единомышленников, мы занимаемся популяризацией языков программирования на русскоязычную аудиторию. Большая часть статей была адаптирована нами на русский язык и распространяется бесплатно.
E-mail: vasile.buldumac@ati.utm.md
Образование
Universitatea Tehnică a Moldovei (utm.md)
- 2014 — 2018 Технический Университет Молдовы, ИТ-Инженер. Тема дипломной работы «Автоматизация покупки и продажи криптовалюты используя технический анализ»
- 2018 — 2020 Технический Университет Молдовы, Магистр, Магистерская диссертация «Идентификация человека в киберпространстве по фотографии лица»
Рассказывает Александр Тейлор, разработчик проекта Kivy
В последнее время появляется большое количество ресурсов по разработке на Python под Android. Все чаще упоминается предназначенный для этой задачи фреймворк Kivy (и его ответвления), ведь он является одним из самых проверенных временем и надежных проектов в этой области. Тем не менее, одну важную деталь незаслуженно обделяют вниманием — что вообще мы сможем делать после того, как Python станет запускаться на устройстве? Есть ли какие-то ограничения? Все ли библиотеки можно подключать? Возможно ли делать все то же, что и при написании приложения на Java? Данные вопросы волнуют многих, и они рассматриваются и решаются в рамках проекта Kivy. В этой статье я постараюсь рассмотреть наиболее интересные и важные детали.
Python-for-android
Прежде всего давайте посмотрим на то, с помощью чего Python получает возможность работать под Android — инструмент, названный, как ни странно, python-for-android. Его основная функция состоит в том, чтобы создать дистрибутив — папку проекта, содержащую все необходимое для запуска вашего приложения. А точнее, сам интерпретатор, Kivy и библиотеки, от которых он зависит: Pygame, SDL и несколько других. Также дистрибутив включает в себя загрузчик Java, отображающий OpenGL и выступающий в качестве посредника между Kivy и операционной системой. Затем вы добавляете ко всему этому свои скрипты, настройки вроде иконки и имени, компилируете с помощью Android NDK и вуаля — APK с вашим приложением готов!
И это всего лишь базовая процедура, на самом деле сгенерированный пакетный файл может включать (и включает) в себя гораздо больше. Вместе со всем прочим в APK вшивается большая часть стандартной библиотеки, а любой сторонний модуль, написанный на Python, может быть легко добавлен — все так же, как и при разработке десктоп-приложений. Добавка модулей с компилируемыми компонентами тоже не вызывает трудностей, необходимо лишь указать, как их нужно собирать. Как правило, это не представляет собой ничего сложного, достаточно лишь поставить пару галочек перед запуском процедуры сборки, хотя в редких отдельных случаях могут понадобиться дополнительные действия. Python-for-android уже включает в себя указания для компиляции таких популярных модулей, как: numpy, sqlite3, twisted и даже django!
Вышеописанные принципы лишь в общих словах объясняют, как работает python-for-android. В любой момент вы можете получить больше информации на данную тему, заглянув в документацию Kivy. Я рекомендую вам Buildozer — надстройку для python-for-android, предоставляющую собой удобный интерфейс и автоматическое разрешение некоторых зависимостей. Мы стараемся сделать так, чтобы написанная выше цепочка действий использовалась не только в Kivy, но и в других проектах. Основной процесс сборки останется таким же, но нужда в загрузчике Java отпадет, так как он необходим только для поддержки некоторых специфичных нужд фреймворка.
Обращение к Android API с помощью PyJNIus
Взаимодействие с Android API: получение информации с сенсоров, создание уведомлений, вибрация, пауза и перезапуск, да что угодно — важная часть вашего приложения. Kivy за вас позаботится об основном, но многими вещами вы захотите управлять сами. Для этого создан PyJNIus — инструмент, автоматически оборачивающий код на Java в интерфейс Python.
В качестве простого примера приведем программу, которая заставит телефон вибрировать на протяжении 10 секунд:
from jnius import autoclass
# Для начала нам нужна ссылка на Java Activity, в которой
# запущено приложение, она хранится в загрузчике Kivy PythonActivity
PythonActivity = autoclass('org.renpy.android.PythonActivity')
activity = PythonActivity.mActivity
Context = autoclass('android.content.Context')
vibrator = activity.getSystemService(Context.VIBRATOR_SERVICE)
vibrator.vibrate(10000)  # аргумент указывается в миллисекундах
Если вы знакомы с Android API, то без труда заметите, что код выше очень похож на аналогичный на Java — PyJNIus просто позволяет нам обращаться к тому же API, но прямо из Python. Большая часть Android API может быть вызвана подобным образом, что позволяет достичь того же функционала, что и при разработке на Java.
Главный минус PyJNIus в том, что он требует неплохого понимания структуры Android API, а код выходит громоздким, хотя его эквивалент на Java выглядит точно так же. Для решения этой проблемы Kivy включает в себя Plyer.
Plyer: кроссплатформенное API для платформоспецифичных задач
Проект Plyer ставит себе цель создать простой «питоничный» интерфейс для функций, которые присутствуют на большинстве платформ. Например, код выше легким движением руки превращается в…
from plyer.vibrator import vibrate
vibrate(10)  # В Plyer аргументы указываются в секундах
Более того, написанный код попытается выполнить свою задачу на всех поддерживаемых Plyer платформах — на данный момент это: Android, iOS, Linux, Windows и OS X (для iOS также существует аналог PyJNIus, называемая PyOBJus). На самом деле, вибрация — не самый лучший пример, потому что сейчас она реализована только для Android, но такие функции как проверка уровня заряда батареи:
from plyer import battery; print(battery.status)или text-to-speech:
from plyer import tts; tts.speak('hello world')— работают как в десктопных, так и в мобильных приложениях, а получение данных с компаса/гироскопа и отправка SMS без проблем реализуются на Android и iOS.
Plyer находится на начальной стадии развития, так что любая помощь в разработке приветствуется. Также, мы участвуем с ним в Google Summer of Code в этом году.
Не только ради Kivy
Все вышеперечисленные инструменты были разработаны для нашего фреймворка, но на самом деле они больше предназначены для разработки под Python в целом. В Plyer мы специально избегаем какой-либо зависимости от Kivy, а PyJNIus нужен лишь для доступа к Android JNI. Искренне надеемся, что эти инструменты станут полезны для любого, кто пишет на Python под Android. Вы уже можете попробовать PyJNIus, используя QPython. Python-for-android больше завязан на взаимодействии с Kivy, но мы будем рады обсудить этот вопрос.
Многое можно реализовать при разработке на Android с помощью Python, несмотря на все различия с Java, которая предназначена для этого, но эти возможности могут быть расширены еще больше в ближайшем будущем. И если вы заинтересовались описанными выше проектами, то самое время присоединиться к нашей команде!
Перевод статьи «Python on Android»
Язык программирования Python занимает первое место в списке языков программирования. Одна из многих причин — отличная поддержка библиотек для создания приложений мирового класса. Одной из таких библиотек является Kivy на Python, которая является кроссплатформенной библиотекой и используется для создания приложений с поддержкой multi-touch. Мы подробно узнаем о различных аспектах в этом руководстве по Kivy, в этой статье рассматриваются следующие темы:
- Что такое Киви?
- Киви Архитектура
- Создание простого приложения с использованием Python Kivy
- Виджеты Kivy
- Еще несколько взаимодействий с виджетами
- Что такое язык киви?
- Python и язык киви
- Киви Недвижимость
- Анимации
- Панель настроек Kivy
- Создание Android APK
Что такое Киви?
Kivy — это кроссплатформенная бесплатная библиотека Python с открытым исходным кодом для создания мультитач-приложений с естественным пользовательским интерфейсом. Kivy работает на поддерживаемых платформах, таких как Windows, OS X, Linux, Raspberry Pi, Android и т. Д.

Он распространяется под лицензией MIT и полностью бесплатен для использования. Фреймворк kivy стабилен и имеет хорошо документированный API.
Графический движок построен на OpenGL ES2 с использованием быстрого и современного конвейера. В набор инструментов входит более 20 виджетов, и все они легко расширяемы.
Киви Архитектура
Архитектура Киви состоит из следующего:
- Основные поставщики и поставщики ввода
- Графика
- Основной
- UIX
- Модули
- Входные события
- Виджеты и диспетчеризация ввода
Давайте посмотрим на простое приложение, использующее Python kivy и несколько основных виджетов, таких как label и FloatLayout.
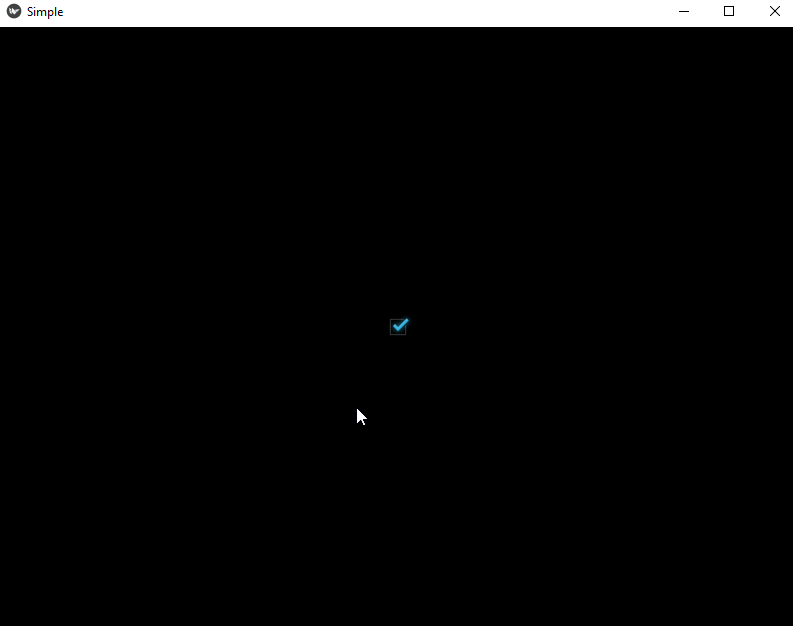
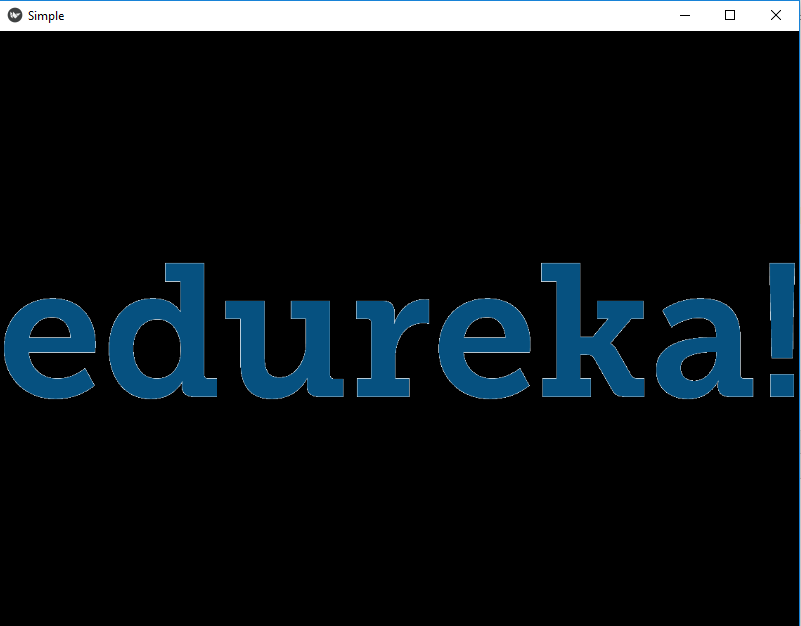
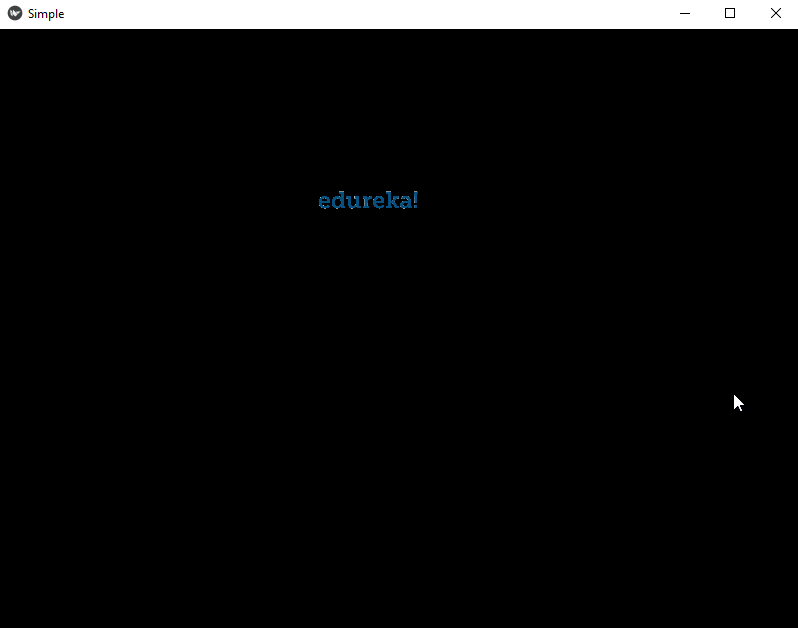
Создание простого приложения с использованием Python Kivy
В этом приложении метка будет перемещаться с помощью мультитач, и вы даже можете изменить размер метки.
from kivy.app import App
from kivy.uix.scatter import Scatter
from kivy.uix.label import Label
from kivy.uix.floatlayout import FloatLayout


class SimpleApp(App):
    def build(self):
        f = FloatLayout()
        s = Scatter()
        l = Label(text="Edureka!", font_size=150)

        f.add_widget(s)
        s.add_widget(l)
        return f


if __name__ == "__main__":
    SimpleApp().run()
Вывод:

Kivy Widgets
Давайте посмотрим на различные виджеты kivy. Виджеты kivy можно разделить на следующие категории.
- Виджеты UX
- Макеты
- Сложные UX-виджеты
- Виджеты поведения
- Диспетчер экрана
Виджеты UX
- Этикетка
- Кнопка
- Флажок
- Изображение
- Слайдер
- Индикатор
- Ввод текста
- Кнопка-переключатель
- Выключатель
- видео
Ярлык
Виджет метки используется для визуализации текста. Он поддерживает строки как ascii, так и unicode. Вот простой пример, показывающий, как мы можем использовать виджет метки в нашем приложении.
from kivy.app import App
from kivy.uix.label import Label


class SimpleApp(App):
    def build(self):
        l = Label(text="Edureka!",font_size=150)
        return l


if __name__ == "__main__":
    SimpleApp().run()
Вывод:

Кнопка
Кнопка — это метка с действиями, которые запускаются при нажатии кнопки. Для настройки кнопки используются те же параметры, что и для метки. Вот простой пример, показывающий виджет кнопки. Он меняет состояние при нажатии, и мы даже можем добавить свойства или привязать некоторые действия к кнопке.
from kivy.app import App
from kivy.uix.button import Button


class SimpleApp(App):
    def build(self):
        def a(instance,value):
            print("welcome to edureka")
        btn = Button(text="Edureka!",font_size=150)
        btn.bind(state=a)
        return btn


if __name__ == "__main__":
    SimpleApp().run()
Вывод:
Флажок
Флажок — это кнопка с двумя состояниями, которую можно установить или снять. Вот небольшой пример, показывающий, как мы можем использовать флажок в приложении kivy.
from kivy.app import App
from kivy.uix.checkbox import CheckBox


class SimpleApp(App):
    def build(self):
        def on_checkbox_active(checkbox, value):
            if value:
                print('The checkbox', checkbox, 'is active')
            else:
                print('The checkbox', checkbox, 'is inactive')

        checkbox = CheckBox()
        checkbox.bind(active=on_checkbox_active)
        return checkbox


if __name__ == "__main__":
    SimpleApp().run()
Вывод:
Изображение
Этот виджет используется для отображения изображения. Когда вы запустите эту программу, она покажет изображение в приложении.
from kivy.app import App
from kivy.uix.image import Image


class SimpleApp(App):
    def build(self):
        img = Image(source="logo.png")
        return img


if __name__ == "__main__":
    SimpleApp().run()
Вывод:
Ползунок
Виджет ползунка поддерживает горизонтальную и вертикальную ориентацию и используется в качестве полосы прокрутки. Вот простой пример, показывающий слайдер в приложении kivy.
from kivy.app import App
from kivy.uix.slider import Slider


class SimpleApp(App):
    def build(self):
        slide = Slider(orientation='vertical', value_track=True, value_track_color=(1,0,0,1))
        return slide


if __name__ == "__main__":
    SimpleApp().run()
Вывод:
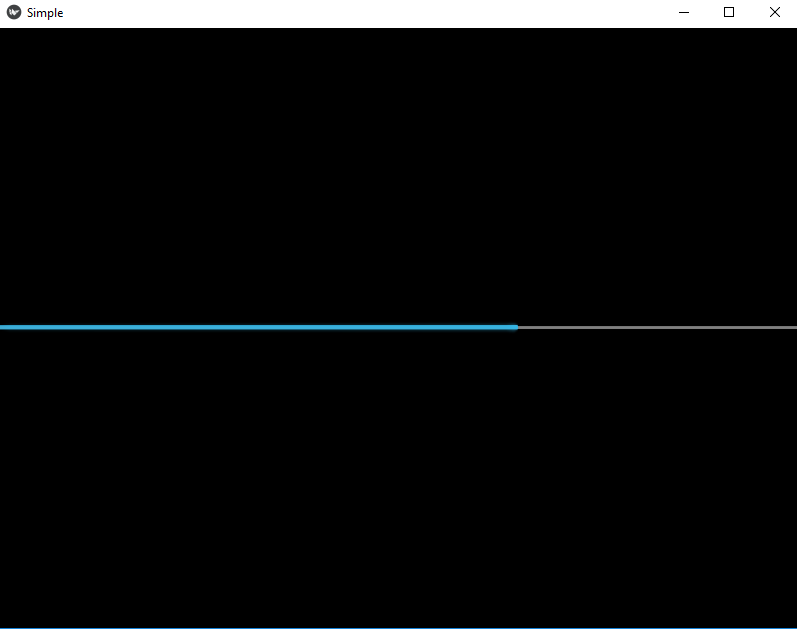
Индикатор выполнения
Он используется для отслеживания прогресса любой задачи. Вот простой пример, показывающий, как мы используем индикатор выполнения в приложении kivy.
from kivy.app import App
from kivy.uix.progressbar import ProgressBar


class SimpleApp(App):
    def build(self):
        Progress  = ProgressBar(max=1000)
        Progress.value = 650
        return Progress


if __name__ == "__main__":
    SimpleApp().run()
Вывод:
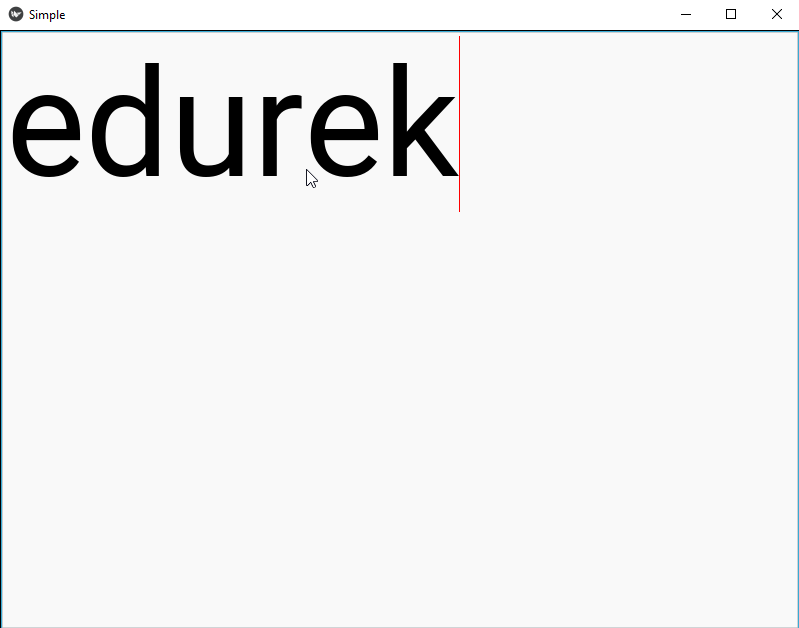
Ввод текста
Он предоставляет поле для редактирования простого текста.
from kivy.app import App
from kivy.uix.textinput import TextInput


class SimpleApp(App):
    def build(self):
        t = TextInput(font_size=150)
        return t


if __name__ == "__main__":
    SimpleApp().run()
Вывод:
Кнопка-переключатель
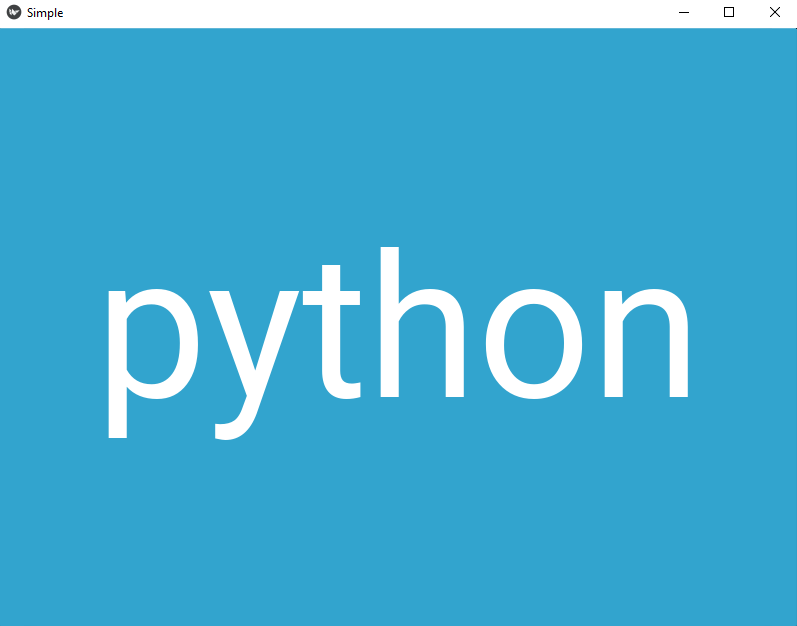
Он действует как флажок, когда вы касаетесь или щелкаете его, состояние переключается. Вот пример, чтобы показать кнопку-переключатель в приложении kivy. Когда вы нажимаете на переключатель, он меняет состояние с «нормального» на «вниз».
from kivy.app import App
from kivy.uix.togglebutton import ToggleButton
from kivy.uix.floatlayout import FloatLayout


class SimpleApp(App):
    def build(self):

        b = ToggleButton(text="python", border=(26,26,26,26), font_size=200)
        return b


if __name__ == "__main__":
    SimpleApp().run()
Вывод:
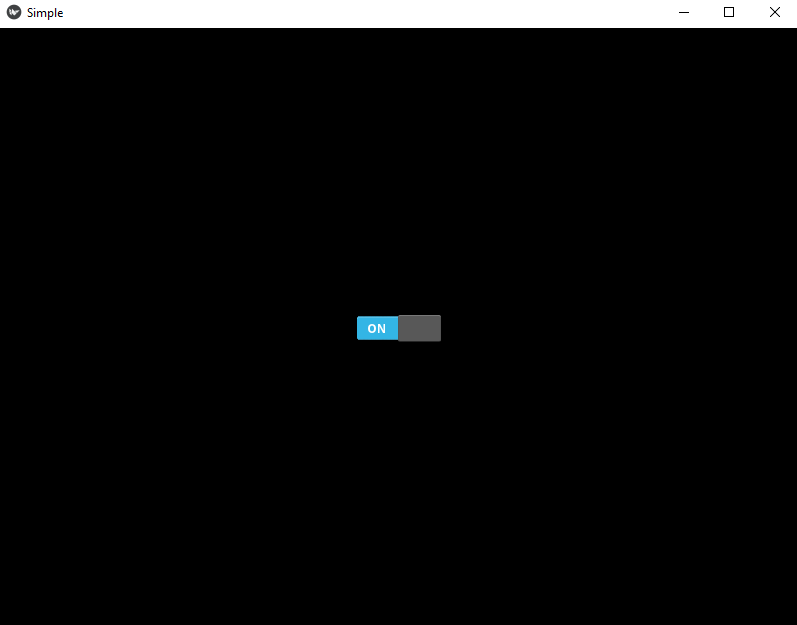
Переключить
Это похоже на механический переключатель, который включается или выключается. Вот простой пример, показывающий, как он используется в приложении kivy.
from kivy.app import App
from kivy.uix.switch import Switch


class SimpleApp(App):
    def build(self):

        s = Switch(active=True)
        return s


if __name__ == "__main__":
    SimpleApp().run()
Вывод:
Видео
Он используется для отображения видео файлов или потоков. Вот простой пример, демонстрирующий, как это работает в приложении kivy.
from kivy.app import App
from kivy.uix.video import Video


class SimpleApp(App):
    def build(self):

        s = Video(source="abc.mp4", play=True)
        return s


if __name__ == "__main__":
    SimpleApp().run()
Вывод: будет воспроизведено видео, указанное в ссылке на файл.
Макеты
Виджет макета не выполняет рендеринг, а просто действует как триггер, который определенным образом упорядочивает свои дочерние элементы.
- Макет якоря
- Макет коробки
- Макет поплавка
- Макет сетки
- Макет страницы
- Относительный макет
- Макет разброса
- Макет стека
Макет якоря
Он выравнивает дочерние виджеты по границе (слева, справа, вверх, вниз) или по центру. Вот простой пример, показывающий, как макет привязки используется в приложении kivy, когда привязка установлена в центральное положение, мы можем установить ее в разные положения, такие как нижний левый, снизу вверх и т. Д.
from kivy.app import App
from kivy.uix.button import Button
from kivy.uix.anchorlayout import AnchorLayout


class SimpleApp(App):
    def build(self):
        layout = AnchorLayout(
            anchor_x='center', anchor_y='center')
        btn = Button(text='Hello World')
        layout.add_widget(btn)
        return layout


if __name__ == "__main__":
    SimpleApp().run()
Вывод:

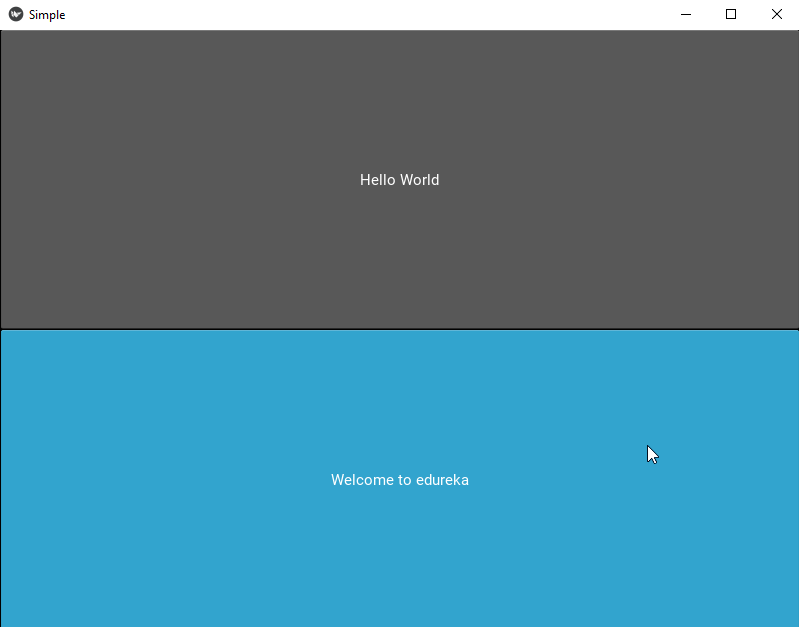
Макет коробки
Он размещает дочерние виджеты в горизонтальных или вертикальных полях. В этом примере макет блока хранит виджеты в двух блоках, как показано ниже.
from kivy.app import App
from kivy.uix.button import Button
from kivy.uix.boxlayout import BoxLayout


class SimpleApp(App):
    def build(self):
        layout = BoxLayout(orientation='vertical')
        btn = Button(text='Hello World')
        btn1 = Button(text="Welcome to edureka")
        layout.add_widget(btn)
        layout.add_widget((btn1))
        return layout


if __name__ == "__main__":
    SimpleApp().run()
Вывод:
Плавающий макет
Он учитывает свойства size_hint и pos_hint своих дочерних виджетов.
from kivy.app import App
from kivy.uix.scatter import Scatter
from kivy.uix.label import Label
from kivy.uix.floatlayout import FloatLayout


class SimpleApp(App):
    def build(self):
        f = FloatLayout()
        s = Scatter()
        l = Label(text="Edureka!", font_size=150)

        f.add_widget(s)
        s.add_widget(l)
        return f


if __name__ == "__main__":
    SimpleApp().run()
Вывод:
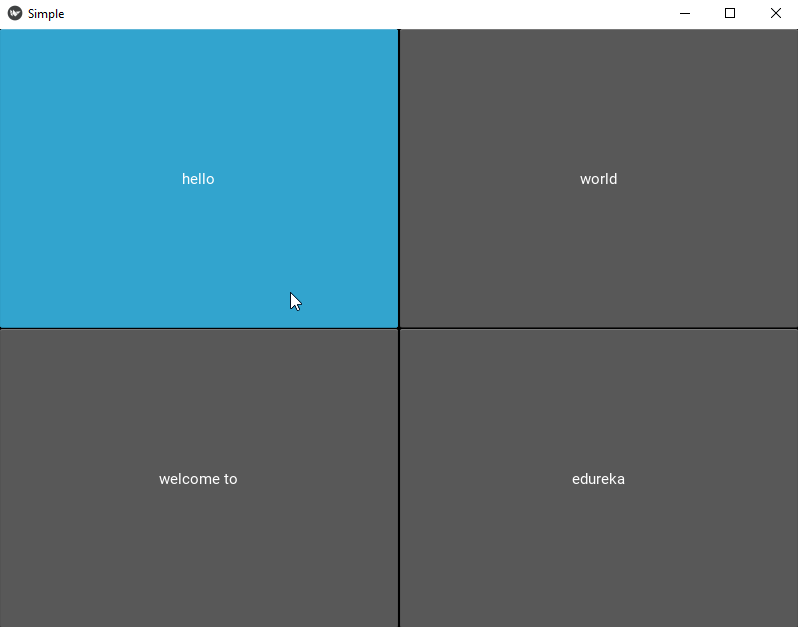
Макет сетки
Он помещает дочерние виджеты в коробку.
from kivy.app import App
from kivy.uix.button import Button
from kivy.uix.gridlayout import GridLayout


class SimpleApp(App):
    def build(self):
        layout = GridLayout(cols=2)
        layout.add_widget(Button(text='hello'))
        layout.add_widget(Button(text='world'))
        layout.add_widget(Button(text='welcome to'))
        layout.add_widget(Button(text='edureka'))
        return layout


if __name__ == "__main__":
    SimpleApp().run()
Вывод:
Макет страницы
Он используется для создания многостраничного макета.
from kivy.app import App
from kivy.uix.button import Button
from kivy.uix.pagelayout import PageLayout


class SimpleApp(App):
    def build(self):
        layout = PageLayout()
        layout.add_widget(Button(text='hello',background_color=(1,0,0,1)))
        layout.add_widget(Button(text='world',background_color=(0,1,0,1)))
        layout.add_widget(Button(text='welcome to',background_color=(1,1,1,1)))
        layout.add_widget(Button(text='edureka',background_color=(0,1,1,1)))
        return layout


if __name__ == "__main__":
    SimpleApp().run()
Вывод:
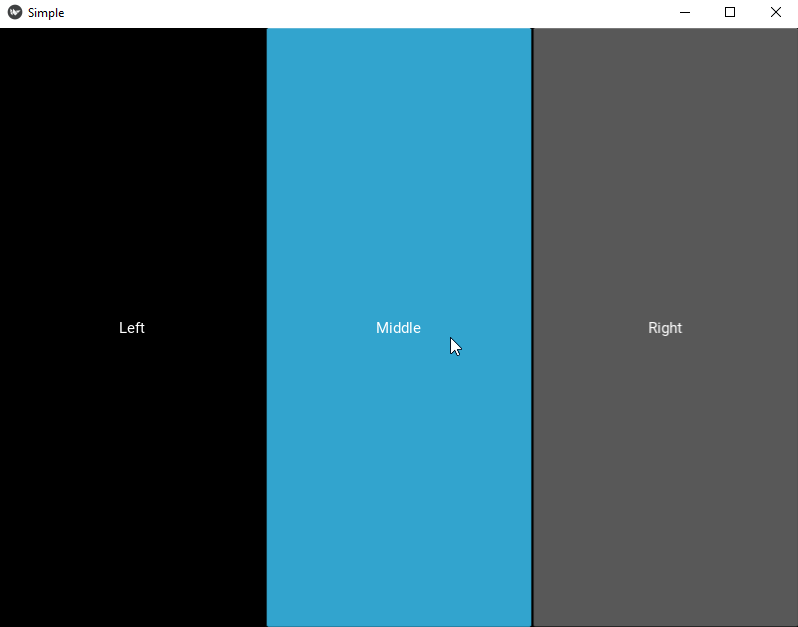
Относительный макет
Он позволяет вам устанавливать относительные координаты для дочерних виджетов.
from kivy.app import App
from kivy.uix.relativelayout import RelativeLayout
from kivy.uix.boxlayout import BoxLayout
from kivy.uix.button import Button
from kivy.uix.label import Label
from kivy.lang import Builder

res = Builder.load_string('''BoxLayout:
    Label:
        text: 'Left'
    Button:
        text: 'Middle'
        on_touch_down: print('Middle: {}'.format(args[1].pos))
    RelativeLayout:
        on_touch_down: print('Relative: {}'.format(args[1].pos))
        Button:
            text: 'Right'
            on_touch_down: print('Right: {}'.format(args[1].pos))''')


class SimpleApp(App):
    def build(self):
        return res


if __name__ == "__main__":
    SimpleApp().run()
В этой программе мы использовали подход на языке KV, он будет рассмотрен позже на этом занятии.
Вывод:
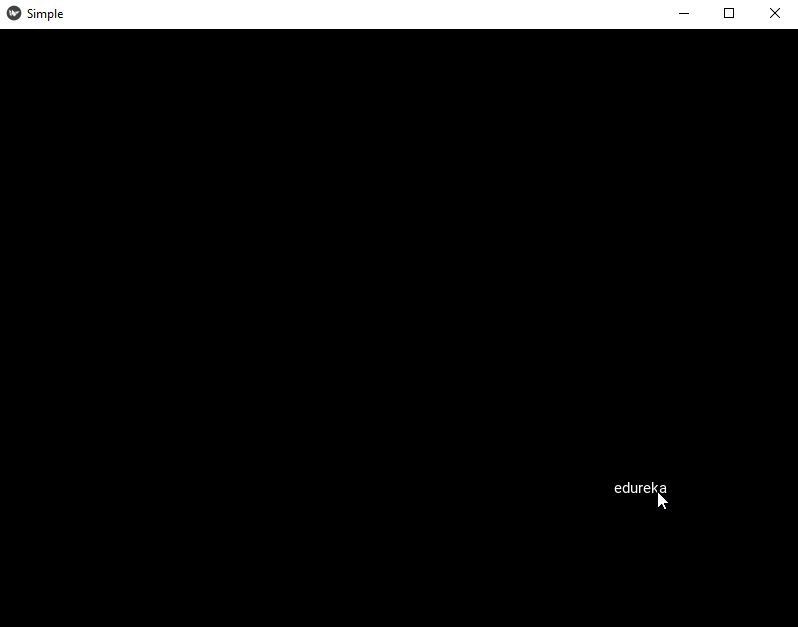
Точечный макет
Он реализован в виде плавающего макета внутри скаттера. Вы можете изменить положение виджетов, используя разброс.
from kivy.app import App
from kivy.uix.scatterlayout import ScatterLayout
from kivy.uix.label import Label

class SimpleApp(App):
    def build(self):
        s = ScatterLayout()
        l = Label(text='edureka')
        s.add_widget(l)
        return s


if __name__ == "__main__":
    SimpleApp().run()
Вывод:
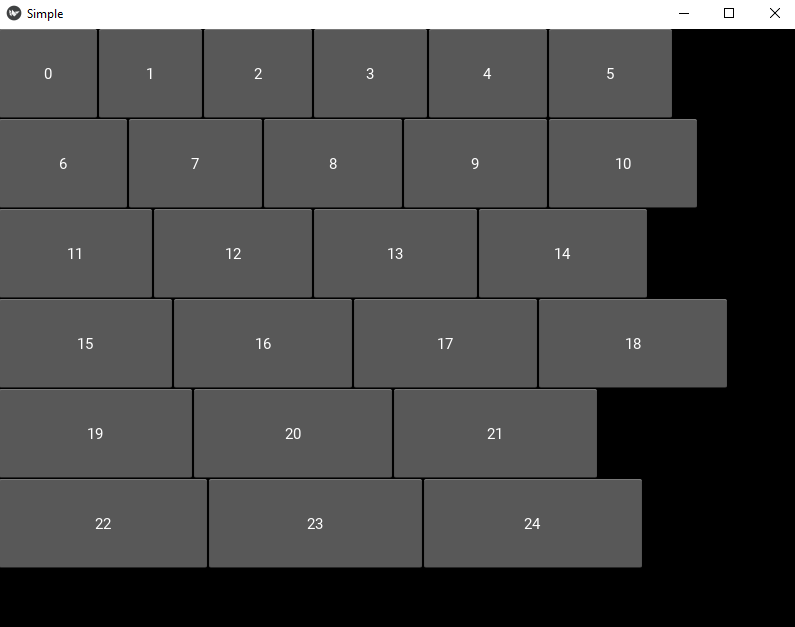
Макет стека
Он размещает виджеты по горизонтали или вертикали и столько, сколько может поместиться.
from kivy.app import App
from kivy.uix.stacklayout import StackLayout
from kivy.uix.button import Button

class SimpleApp(App):
    def build(self):
        root = StackLayout()
        for i in range(25):
            btn = Button(text=str(i), width=100 + i * 5, size_hint=(None, 0.15))
            root.add_widget(btn)
        return root


if __name__ == "__main__":
    SimpleApp().run()
Вывод:
Теперь, когда мы закончили с макетами, давайте взглянем на виджеты поведения в Kivy.
Виджеты поведения
Эти виджеты не выполняют рендеринга, а действуют в соответствии с графическими инструкциями или взаимодействием (касанием) своих дочерних элементов.
- Разброс
- Просмотр трафарета
Разброс
Scatter используется для создания интерактивных виджетов, которые можно вращать и масштабировать двумя или более пальцами в системе мультитач.
from kivy.app import App
from kivy.uix.scatter import Scatter
from kivy.uix.image import Image


class SimpleApp(App):
    def build(self):
        s = Scatter()
        s.add_widget(Image(source="logo.png"))
        return s


if __name__ == "__main__":
    SimpleApp().run()
Вывод:
Просмотр по шаблону
Представление трафарета ограничивает рисование дочерних виджетов ограничивающей рамкой вида трафарета. В этом примере мы используем простой виджет метки. Вид трафарета лучше всего использовать, когда мы рисуем на холсте, и он ограничивает действия ограниченной областью в приложении, а не всем окном.
from kivy.app import App
from kivy.uix.stencilview import StencilView
from kivy.uix.label import Label
from kivy.uix.scatter import Scatter


class SimpleApp(App):
    def build(self):
        s = StencilView()
        sc = Scatter()
        s.add_widget(sc)
        sc.add_widget(Label(text='edureka'))
        return s


if __name__ == "__main__":
    SimpleApp().run()
Вывод:
Диспетчер экрана
Это виджет, который используется для управления несколькими экранами вашего приложения. Он использует переходную базу для переключения с одного экрана на другой.
from kivy.app import App
from kivy.base import runTouchApp
from kivy.lang import Builder
from kivy.properties import ListProperty
from kivy.uix.boxlayout import BoxLayout

from kivy.uix.screenmanager import ScreenManager, Screen, FadeTransition

import time
import random

class FirstScreen(Screen):
    pass

class SecondScreen(Screen):
    pass

class ColourScreen(Screen):
    colour = ListProperty([1., 0., 0., 1.])

class MyScreenManager(ScreenManager):
    def new_colour_screen(self):
        name = str(time.time())
        s = ColourScreen(name=name,
                         colour=[random.random() for _ in range(3)] + [1])
        self.add_widget(s)
        self.current = name

root_widget = Builder.load_string('''
#:import FadeTransition kivy.uix.screenmanager.FadeTransition
MyScreenManager:
    transition: FadeTransition()
    FirstScreen:
    SecondScreen:
<FirstScreen>:
    name: 'first'
    BoxLayout:
        orientation: 'vertical'
        Label:
            text: 'first screen!'
            font_size: 30
        Image:
            source: 'logo.png'
            allow_stretch: False
            keep_ratio: False
        BoxLayout:
            Button:
                text: 'goto second screen'
                font_size: 30
                on_release: app.root.current = 'second'
            Button:
                text: 'get random colour screen'
                font_size: 30
                on_release: app.root.new_colour_screen()
<SecondScreen>:
    name: 'second'
    BoxLayout:
        orientation: 'vertical'
        Label:
            text: 'second screen!'
            font_size: 30
        Image:
            source: 'logo1.jpg'
            allow_stretch: False
            keep_ratio: False
        BoxLayout:
            Button:
                text: 'goto first screen'
                font_size: 30
                on_release: app.root.current = 'first'
            Button:
                text: 'get random colour screen'
                font_size: 30
                on_release: app.root.new_colour_screen()
<ColourScreen>:
    BoxLayout:
        orientation: 'vertical'
        Label:
            text: 'colour {:.2},{:.2},{:.2} screen'.format(*root.colour[:3])
            font_size: 30
        Widget:
            canvas:
                Color:
                    rgba: root.colour
                Ellipse:
                    pos: self.pos
                    size: self.size
        BoxLayout:
            Button:
                text: 'goto first screen'
                font_size: 30
                on_release: app.root.current = 'first'
            Button:
                text: 'get random colour screen'
                font_size: 30
                on_release: app.root.new_colour_screen()
''')

class ScreenManagerApp(App):
    def build(self):
        return root_widget

ScreenManagerApp().run()
Вывод:
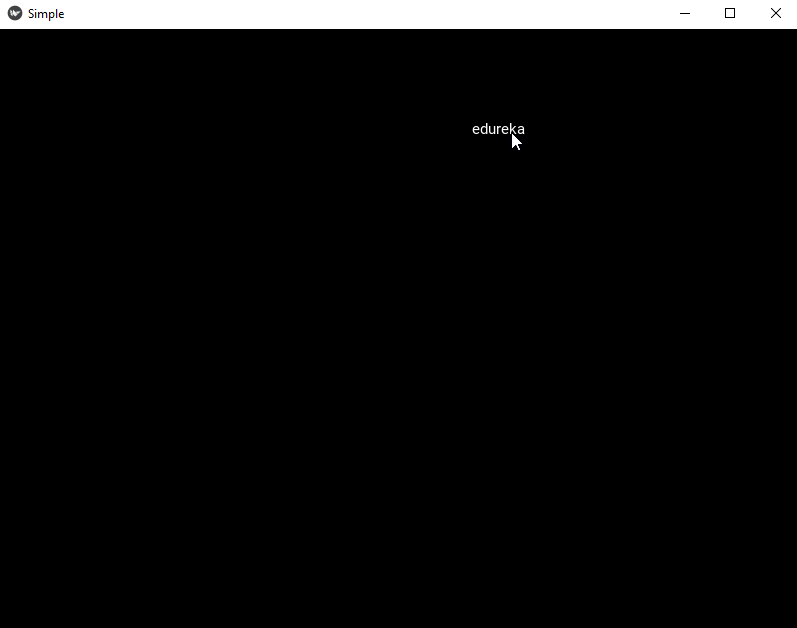
Еще несколько взаимодействий с виджетами
Давайте посмотрим на довольно интересный пример, где мы собираемся связать взаимодействие двух виджетов вместе с помощью метода bind.
from kivy.app import App
from kivy.uix.scatter import Scatter
from kivy.uix.label import Label
from kivy.uix.floatlayout import FloatLayout
from kivy.uix.boxlayout import BoxLayout
from kivy.uix.textinput import TextInput

class SimpleApp(App):
    def build(self):
        b = BoxLayout(orientation="vertical")
        t = TextInput(font_size=100,text="default",size_hint_y=None, height=100)
        f = FloatLayout()
        s = Scatter()
        l = Label(text="default", font_size=150)

        t.bind(text=l.setter("text"))
        f.add_widget(s)
        s.add_widget(l)
        b.add_widget(t)
        b.add_widget(f)
        return b


if __name__ == "__main__":
    SimpleApp().run()
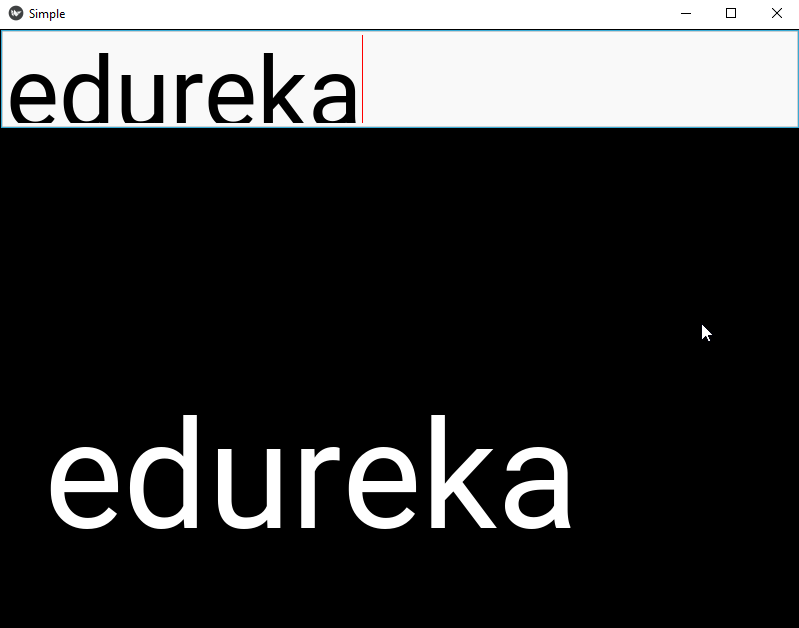
Что такое язык киви?
По мере того, как наше приложение становится все более сложным, становится трудно поддерживать конструкцию виджетов и явное объявление привязок. Чтобы преодолеть эти недостатки, альтернативой является язык kv, также известный как язык kivy или kvlang.
Язык kv позволяет создавать дерево виджетов декларативным образом, он позволяет создавать очень быстрые прототипы и гибко вносить изменения в пользовательский интерфейс. Это также помогает, отделяя логику приложения от пользовательского интерфейса.
Как загрузить файл KV?
Есть два способа загрузить файл kv в свое приложение.
- Соглашение по названию — kivy ищет файл с тем же именем, что и ваше приложение, начиная со строчной буквы минус «приложение», если он присутствует в имени вашего приложения.
SimpleApp -simple.kv
Если это определяет корневой виджет, он будет добавлен в дерево виджетов в качестве основы приложения.
2. Builder — вы можете напрямую указать kivy загрузить файл kv с помощью Builder.
Builder.load_file("filename.kv")
#or
Builder.load_string('''
''') #you can directly put your kv file as string using this approach.
Языковые правила KV
Корень объявляется путем объявления класса вашего корневого виджета
Widget:
Правило класса, объявленное именем класса виджета между ‹›, определяет внешний вид и поведение экземпляра этого класса
<Widget>:
Для языка KV есть три конкретных ключевых слова.
- приложение: относится к экземпляру приложения.
- root: относится к базовому виджету или корневому виджету.
- self: относится к текущему виджету.
Давайте рассмотрим простой пример, чтобы понять, как мы используем язык KV в нашем приложении.
from kivy.app import App

from kivy.uix.scatter import Scatter
from kivy.uix.label import Label
from kivy.uix.floatlayout import FloatLayout
from kivy.uix.textinput import TextInput
from kivy.uix.boxlayout import BoxLayout


class ScatterTextWidget(BoxLayout):
    pass


class SimpleApp(App):
    def build(self):
        return ScatterTextWidget()


if __name__ == "__main__":
    SimpleApp().run()
Файл .KV
<ScatterTextWidget>:
    orientation: 'vertical'
    TextInput:
        id: my_textinput
        font_size: 150
        size_hint_y: None
        height: 200
        text: 'default'
    FloatLayout:
        Scatter:
            Label:
                text: my_textinput.text
                font_size: 150
Вывод:
Python и язык киви
Язык Python и kivy значительно упрощает любому разработчику написание читаемого кода для любого приложения, а также упрощает определение свойств и привязок для различных виджетов.
Давайте попробуем смешать языки Python и Kivy в следующем примере.
from kivy.app import App

from kivy.uix.scatter import Scatter
from kivy.uix.label import Label
from kivy.uix.floatlayout import FloatLayout
from kivy.uix.textinput import TextInput
from kivy.uix.boxlayout import BoxLayout
import random


class Text(BoxLayout):
    def change_label_colour(self, *args):
        colour = [random.random() for i in range(3)] + [1]
        label = self.ids['my_label']
        label.color = colour


class SimpleApp(App):
    def build(self):
        return Text()


if __name__ == "__main__":
    SimpleApp().run()
Файл .KV
#:import color random
<Text>:
    orientation: 'vertical'
    TextInput:
        id: my_textinput
        font_size: 150
        size_hint_y: None
        height: 200
        text: 'default'
        on_text: my_label.color = [color.random() for i in range(3)] + [1]
    FloatLayout:
        Scatter:
            Label:
                id: my_label
                text: my_textinput.text
                font_size: 150
Вывод:
Киви Недвижимость
Свойства — это более простой способ определять события и связывать их вместе. Существуют различные типы свойств для описания типа данных, которые вы хотите обрабатывать.
- StringProperty
- NumericProperty
- BoundedNumericProperty
- ObjectProperty
- DictProperty
- ListProperty
- OptionProperty
- Псевдоним
- BooleanProperty
- ReferenceListProperty
Как декларировать недвижимость?
Мы должны объявить свойства на уровне класса. Вот простой пример, показывающий, как мы можем использовать свойства в приложении.
from kivy.app import App
from kivy.uix.widget import Widget
from kivy.uix.button import Button
from kivy.uix.boxlayout import BoxLayout
from kivy.properties import ListProperty


class RootWidget(BoxLayout):

    def __init__(self, **kwargs):
        super(RootWidget, self).__init__(**kwargs)
        self.add_widget(Button(text='btn 1'))
        cb = CustomBtn()
        cb.bind(pressed=self.btn_pressed)
        self.add_widget(cb)
        self.add_widget(Button(text='btn 2'))

    def btn_pressed(self, instance, pos):
        print('pos: printed from root widget: {pos}'.format(pos=pos))


class CustomBtn(Widget):
    pressed = ListProperty([0, 0])

    def on_touch_down(self, touch):
        if self.collide_point(*touch.pos):
            self.pressed = touch.pos
            # we consumed the touch. return False here to propagate
            # the touch further to the children.
            return True
        return super(CustomBtn, self).on_touch_down(touch)

    def on_pressed(self, instance, pos):
        print('pressed at {pos}'.format(pos=pos))


class TestApp(App):

    def build(self):
        return RootWidget()


if __name__ == '__main__':
    TestApp().run()
Вывод:
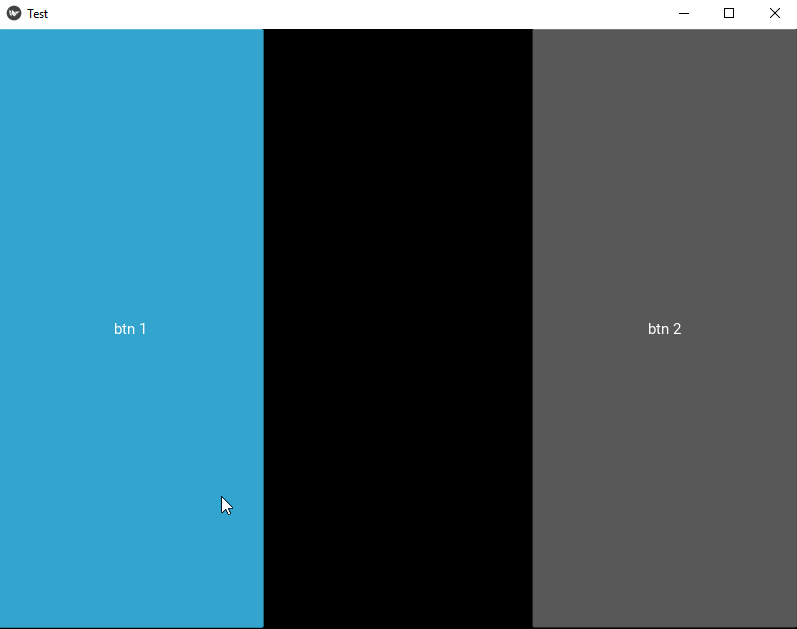
Наш CustomBtn не имеет визуального представления и поэтому выглядит черным. Вы можете коснуться / щелкнуть черную область, чтобы увидеть результат на консоли.
Анимации
Мы можем добавлять анимацию в kivy-приложение, используя animation или animationTransition для анимации свойств виджета. В этом примере прямоугольник перемещается в случайное место при каждом щелчке по прямоугольнику.
from kivy.base import runTouchApp
from kivy.lang import Builder
from kivy.uix.widget import Widget
from kivy.animation import Animation
from kivy.core.window import Window
from random import random

Builder.load_string('''
<Root>:
    ARect:
        pos: 500, 300
<ARect>:
    canvas:
        Color:
            rgba: 0, 0, 1, 1
        Rectangle:
            pos: self.pos
            size: self.size
''')

class Root(Widget):
    pass

class ARect(Widget):
    def circle_pos(self):
        Animation.cancel_all(self)
        random_x = random() * (Window.width - self.width)
        random_y = random() * (Window.height - self.height)

        anim = Animation(x=random_x, y=random_y,
                         duration=4,
                         t='out_elastic')
        anim.start(self)

    def on_touch_down(self, touch):
        if self.collide_point(*touch.pos):
            self.circle_pos()

runTouchApp(Root())
Вывод:
Панель настроек Kivy
Панель настроек в kivy в основном предоставляет различные параметры, которые мы можем выбрать для настройки приложения. В следующем примере показана кнопка, открывающая панель настроек после освобождения.
from kivy.app import App
from kivy.lang import Builder

from kivy.uix.boxlayout import BoxLayout


Builder.load_string('''
<Interface>:
    orientation: 'vertical'
    Button:
        text: 'Settings'
        font_size: 100
        on_release: app.open_settings()
''')

class Interface(BoxLayout):
    pass

class SettingsApp(App):
    def build(self):
        return Interface()

SettingsApp().run()
Вывод:
Создание Android APK
Мы можем использовать инструмент Buildozer, чтобы сделать автономный полнофункциональный APK для Android. В первую очередь следует позаботиться о зависимостях после установки инструмента. Если вы используете kivy в Windows, может быть несколько избыточностей, поэтому лучше использовать Linux или любую другую платформу. Вместо этого вы также можете использовать виртуальную коробку, чтобы сделать APK и для Windows.
Ниже приведены шаги, которые необходимо выполнить, чтобы создать автономный APK-файл для Android вашего приложения kivy.
- Первым шагом после установки является создание файла .spec с помощью buildozer. Этот файл будет содержать все параметры, которые вам понадобятся при создании вашего приложения. Следующая команда создаст файл .spec со значениями по умолчанию.
buildozer init
2. После создания файла .spec вам необходимо внести несколько изменений, например заголовок, имя пакета, ориентацию, версию, требования и т. Д.
3. Следующим шагом после внесения всех необходимых изменений в файл .spec является сборка APK. Следующая команда переведет APK-файл Android в режим сборки.
buildozer android debug
4. Последний аргумент «deploy» указывает buildozer на автоматическую установку APK на ваше устройство после завершения процесса сборки.
buildozer android debug deploy
На этом мы подошли к концу статьи, где мы узнали, как создавать приложения с поддержкой multi-touch, используя библиотеку kivy python. Я надеюсь, что вы понимаете все, о чем вам рассказали в этом уроке.
Если вы хотите ознакомиться с другими статьями о самых популярных технологиях на рынке, таких как искусственный интеллект, DevOps, этический взлом, посетите официальный сайт Edureka.
Обязательно обратите внимание на другие статьи в этой серии, которые объяснят различные другие аспекты Python и Data Science.
1. Классификатор машинного обучения на Python
2. Шпаргалка по Python Scikit-Learn
3. Инструменты машинного обучения
4. Библиотеки Python для науки о данных и машинного обучения
5. Чат-бот на Python
6. Коллекции Python
7. Модули Python
8. Навыки разработчика Python
9. Вопросы и ответы на собеседовании ООП
10. Резюме для Python-разработчика
11. Исследовательский анализ данных в Python
12. Змейка с модулем Python Turtle
13. Зарплата разработчика Python
14. Анализ главных компонентов
15. Python vs C ++
16. Учебник по царапинам
17. Python SciPy
18. Метод регрессии наименьших квадратов
19. Шпаргалка по Jupyter Notebook
20. Основы Python
21. Программы-шаблоны Python
22. Генераторы в Python
23. Python Decorator
24. Python Spyder IDE
25. Что такое программирование сокетов в Python
26. 10 лучших книг для изучения и практики Python
27. Робот-фреймворк с Python
28. Змейка на Python с использованием PyGame
29. Интервью с Django: вопросы и ответы
30. 10 лучших приложений Python
31. Хеш-таблицы и хэш-карты в Python
32. Python 3.8
33. Машина опорных векторов
34. Учебник по Python
Первоначально опубликовано на https://www.edureka.co 14 октября 2019 г.
Hey there, how are you? I’m an 18 year old a backend developer and an aspiring Machine Learning Engineer. And in this article, I’m going to be writing about how to build a web app on your phone using Python 😁. Let’s dive into it.

Requirements
The first thing we need here is an Android phone, at least version 6.0 and upward. But what if I told you that’s all we need? Seems too good to be true.
Now the next thing we need to do is install a mobile application on our phone called pydroid3.
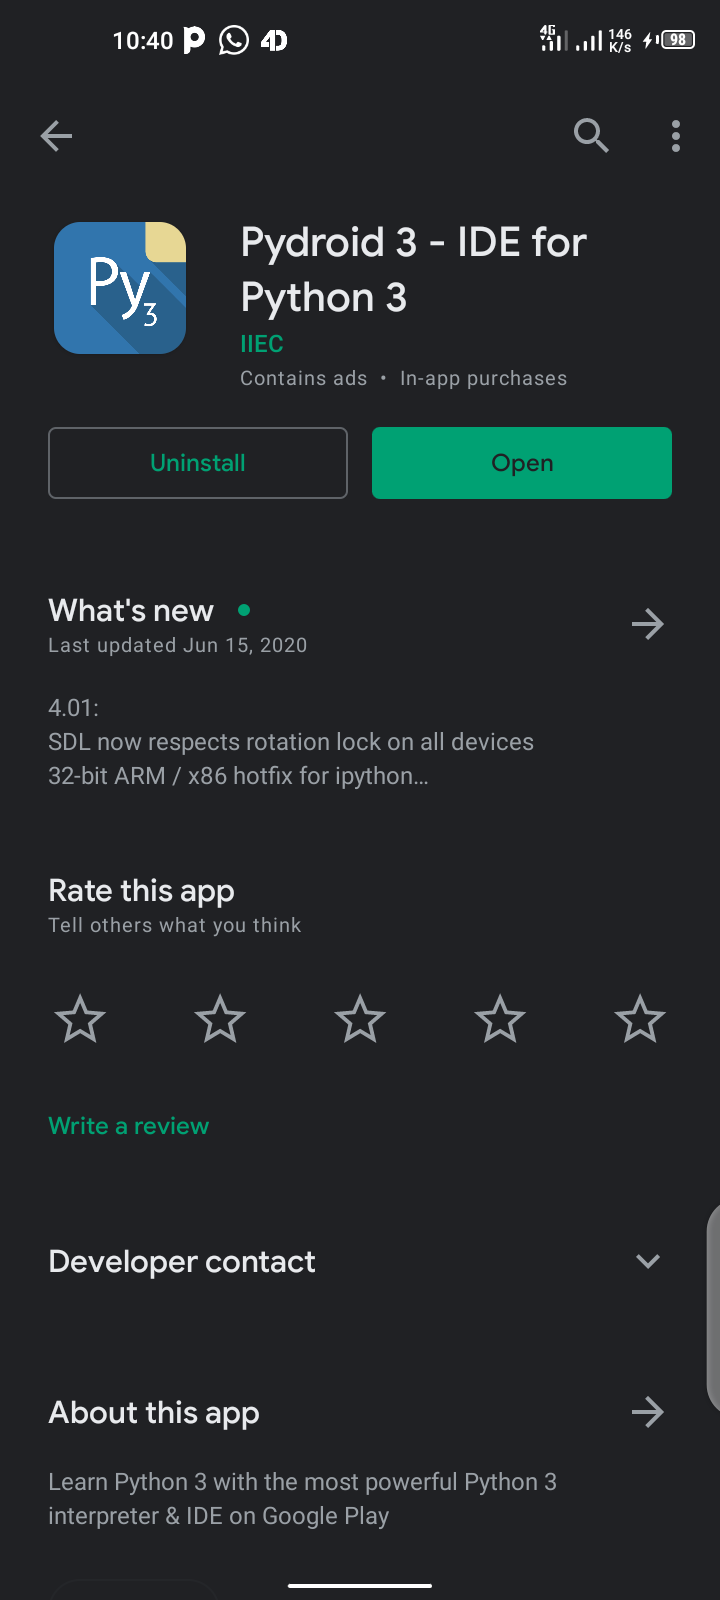
As you can see, pydroid3 is a mobile application that lets you write Python on your mobile phone, so go ahead and install it.
The next thing we need to do is install Django. If you’re not familiar with Django, please check out the Django docs here.
To install Django we need to open up the side navigation in our pydroid3 and select Terminal:

Then click on it and we should see this:

Once that is done all you need to do is type the following command:
pip install djangoAnd you should get the below. I am getting a «requirements satisfied» message because I already have it installed.

It has installed successfully, but let’s confirm that. In the terminal type django-admin and hit enter.
You should get this:
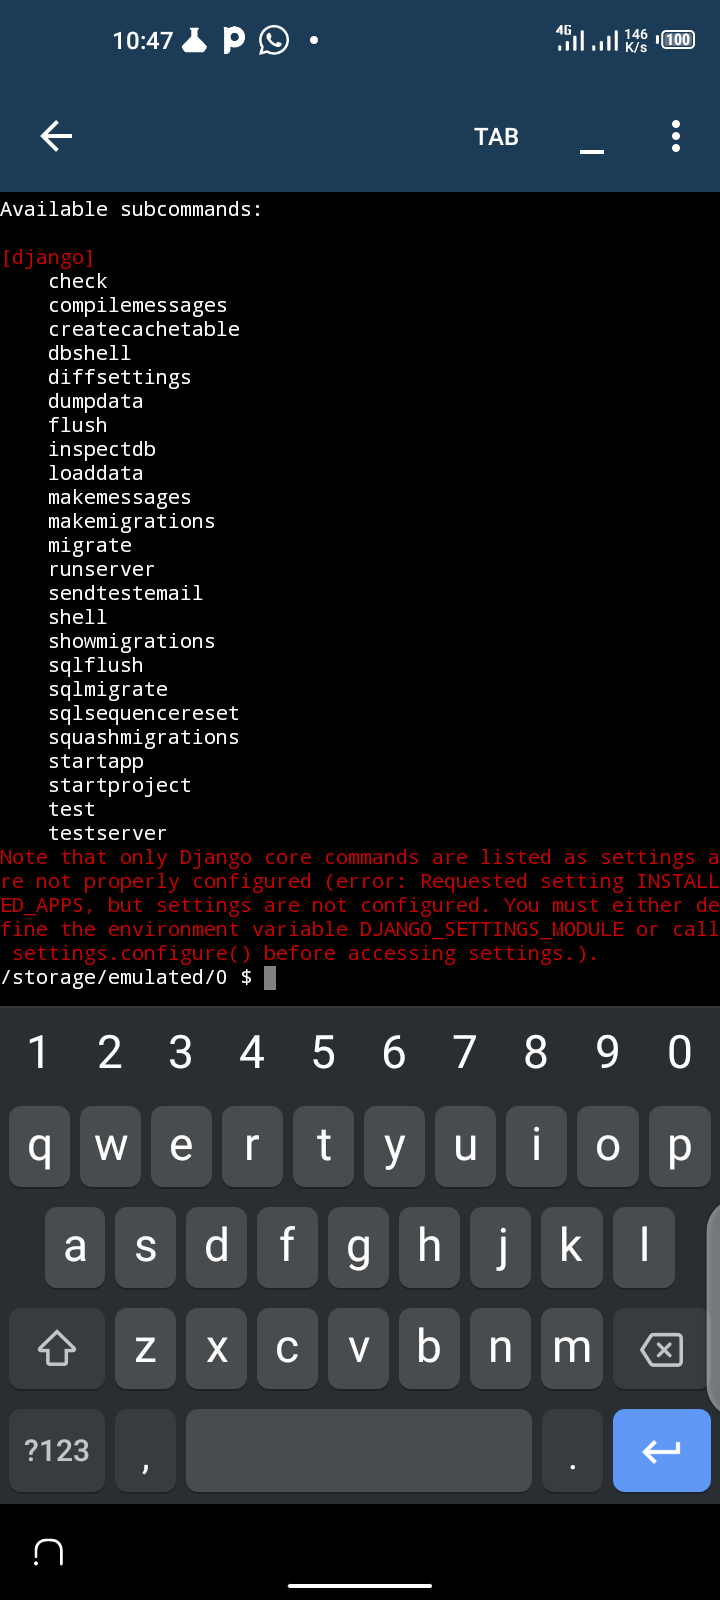
This means that it’s actually installed already.
How to Build our Project
So let’s get started with building our project. Open up your terminal and type in the following command:
django-admin startproject myapp
This creates a Django application called myapp in your root folder.
Change directory to it by typing cd myapp and type in python manage.py runserver. Then you should get this:
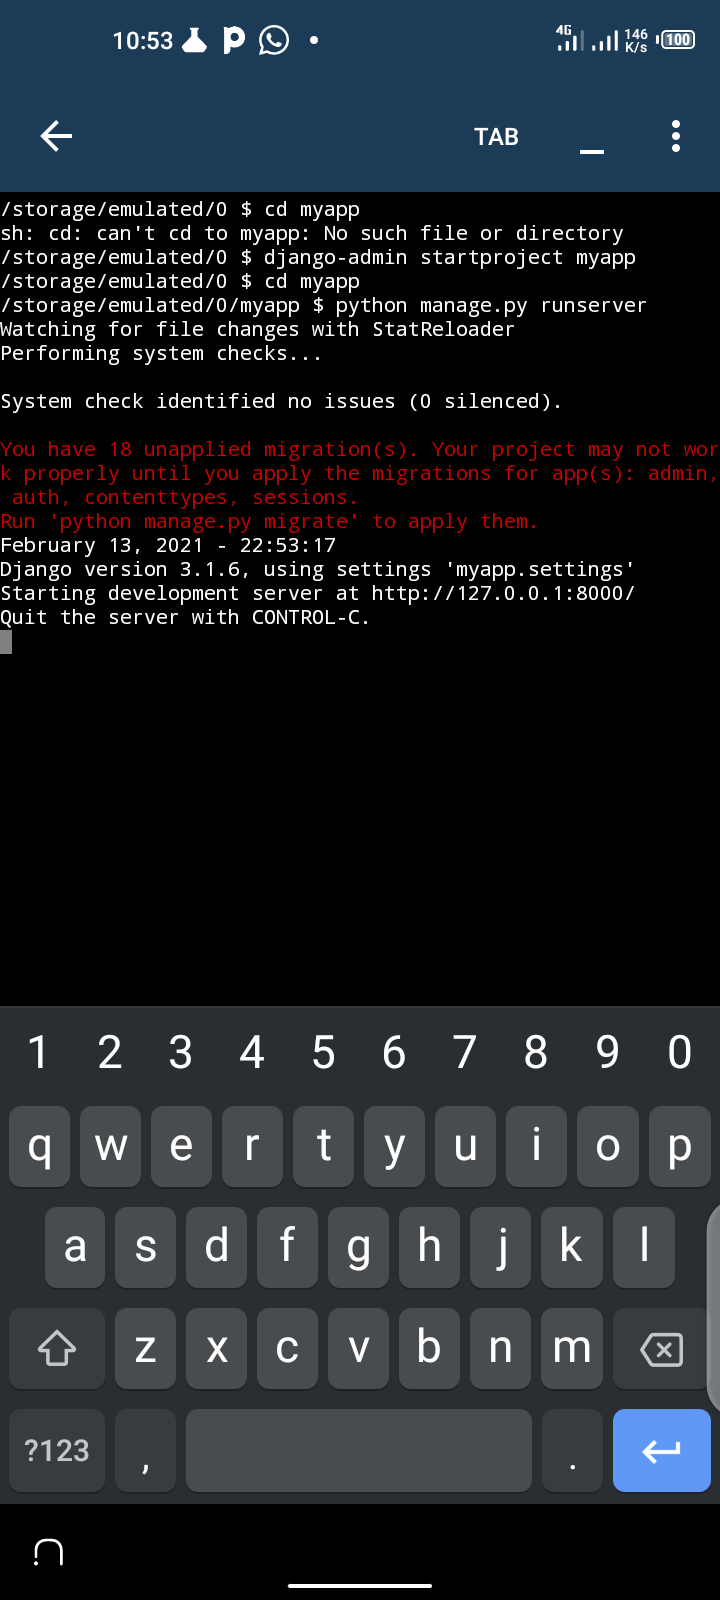
Now the server has started. Next, to test it in the browser visit 127.0.0.1:8000.

And boom! You should see that Django has been setup successfully.
The next thing we need to do is create our Django app. In Django, the project folder serves as the root while the app serves as the application itself.
To create a Django app, make sure you are still in the directory, then type python manage.py startapp todo. This creates a To-do app in our myapp project like this:
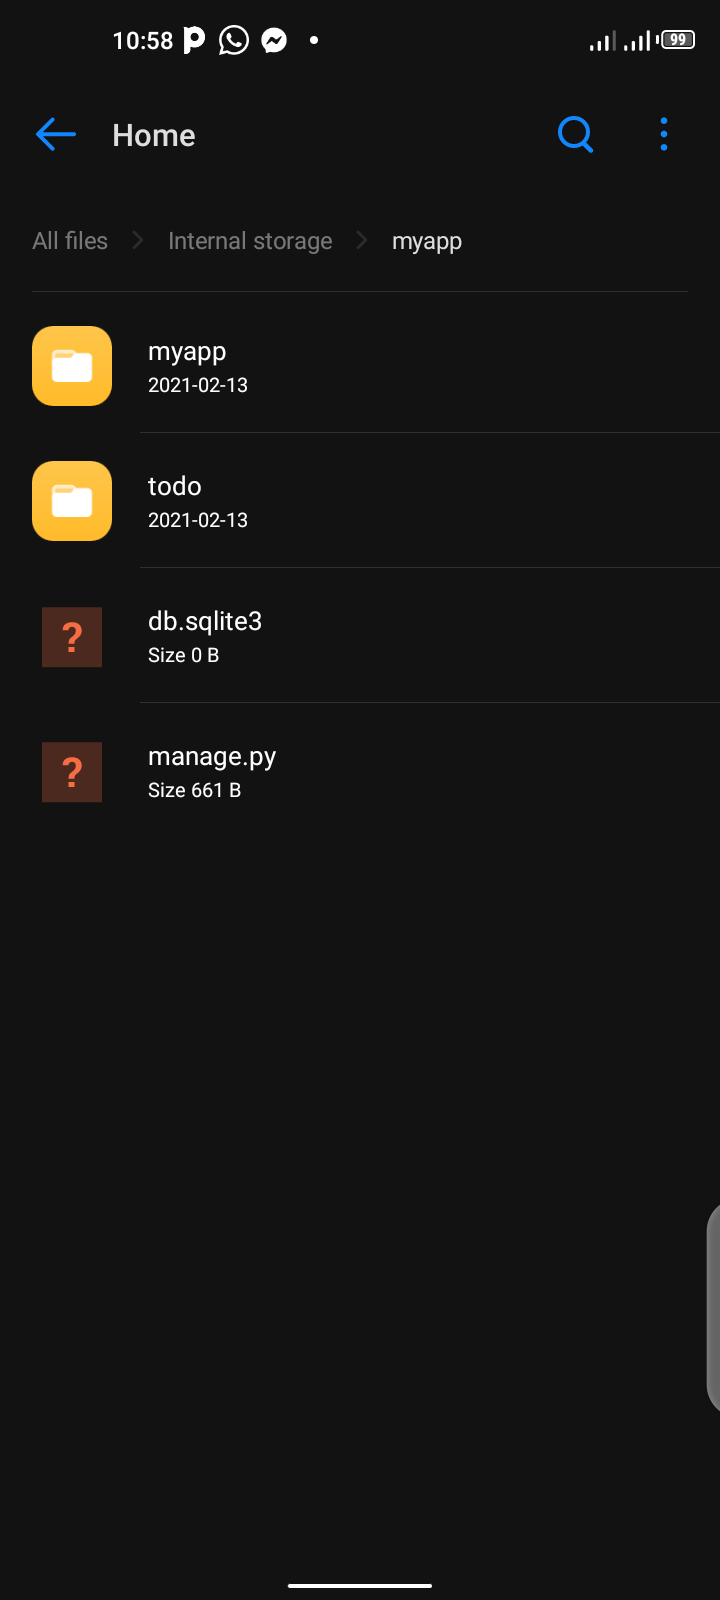
Then inside the todo folder we should see something like this:

We will take a further look at the files when we begin working with them.
How to Configure our Application
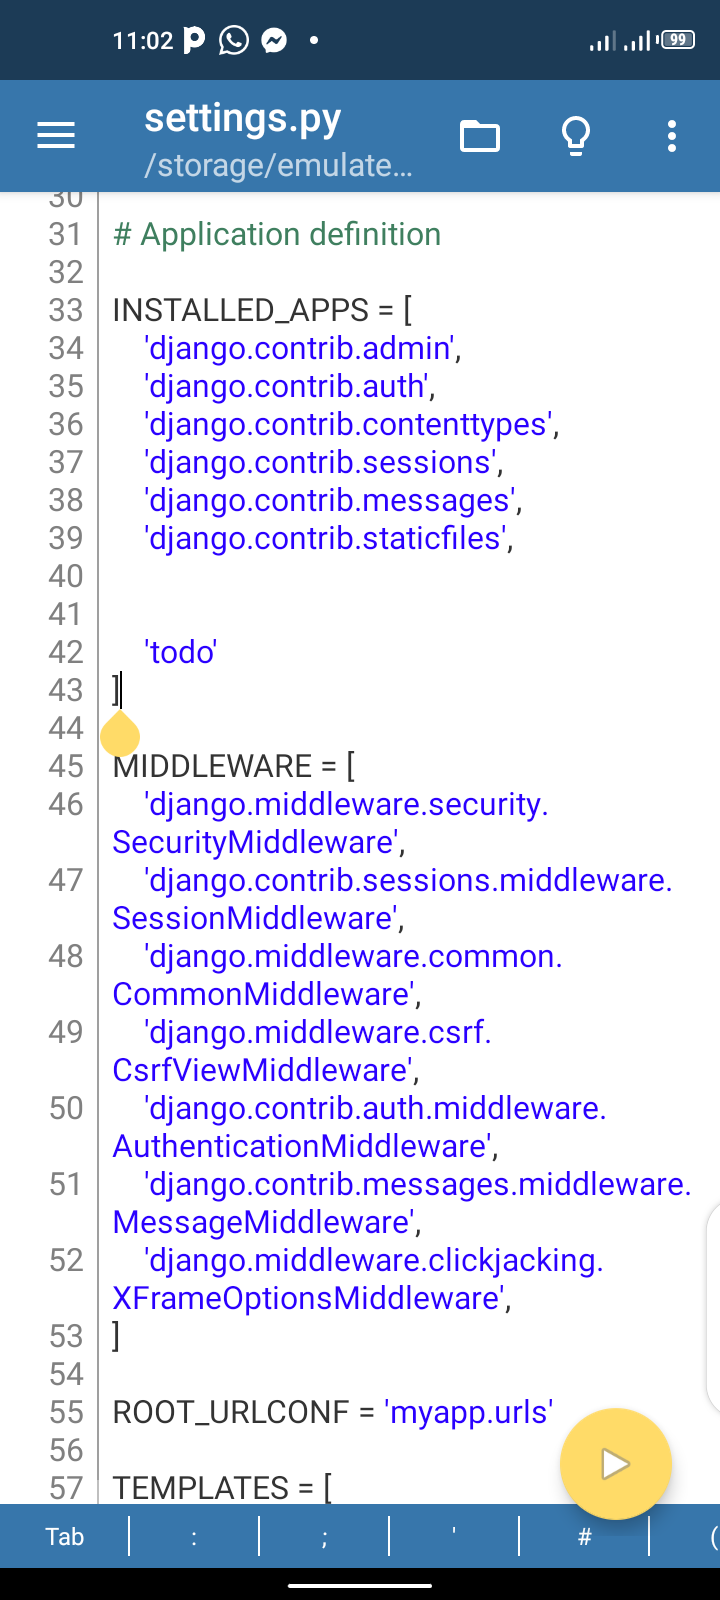
Now let’s make it possible for the app to be served by the Django project. First of all, open up your settings.py file in the myapp folder and add 'todo' to the installed apps like this:
Next we need to open up our urls.py and add the following to your code:
from django.urls import path, include

path('', include('todo.urls'))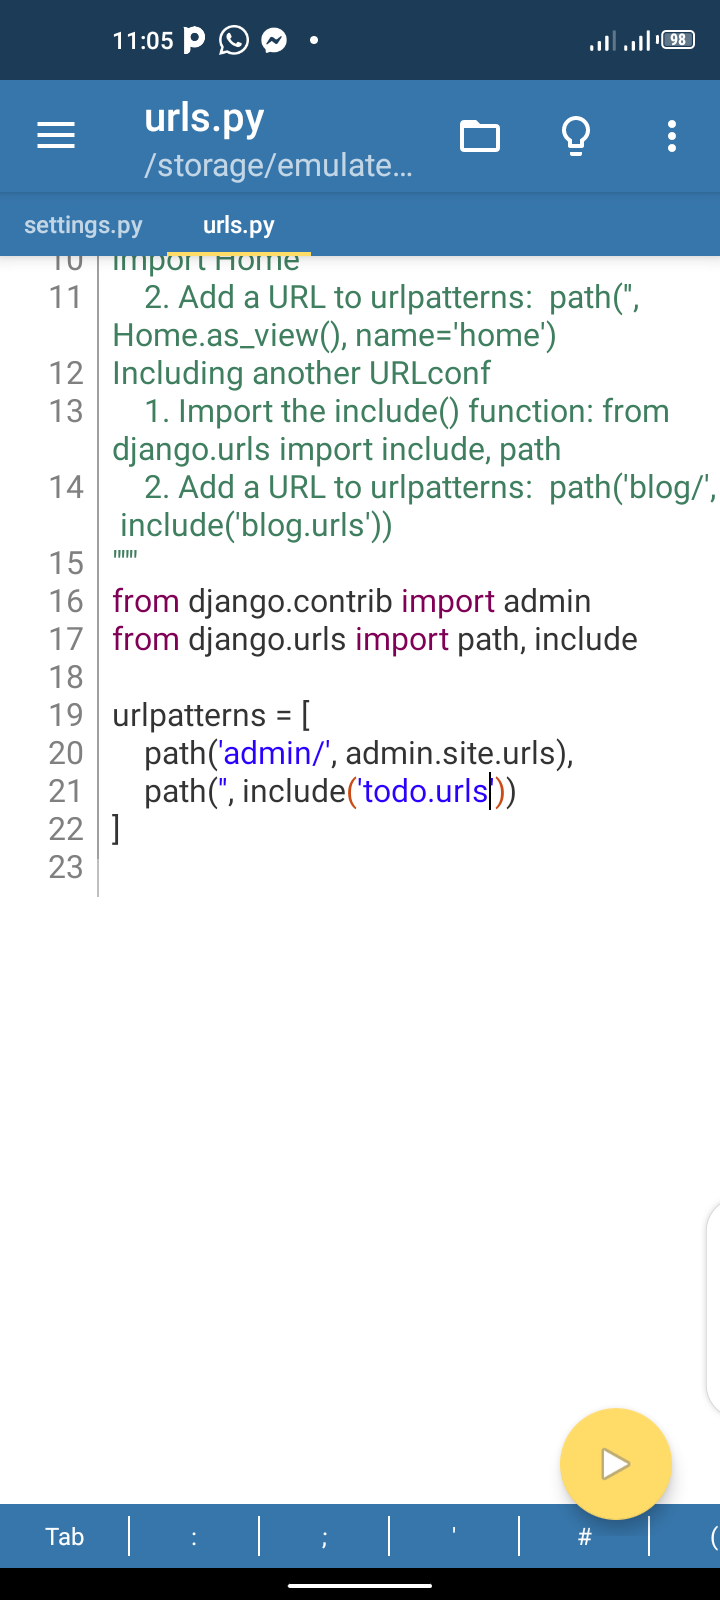
What actually happened was that I added include to the from the django.urls import path. And below the path (admin) , we created an empty path that points to or includes the urls.py file in the todo app directory. I hope that’s clear.
Next we need to create a new file in the todo file directory named urls.py and add the following code in it:
from django.urls import path
from . import views

urlpatterns = [
	path('', views.index, name='home')
 ]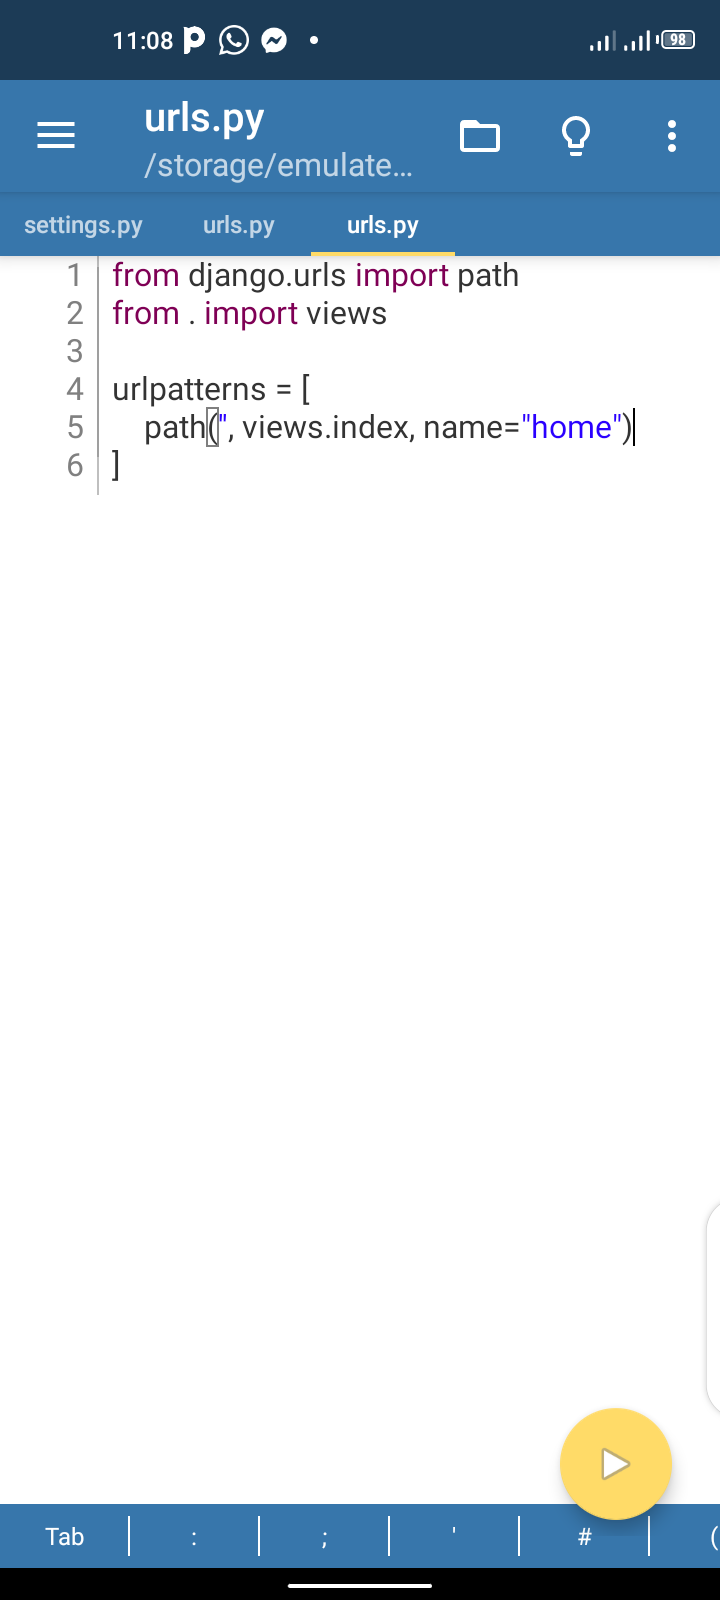
We imported path from Django.urls and also imported views from the root directory. Then we created our urlpatterns with the first part as the root link. As you can see, the views.index just means that we’re pointing this views to the index function in on views.py file. You will see how that works in a jiffy.
Let’s go ahead to our views.py file and add some code.
At the top, import HttpResponse like this:
from django.http import HttpResponse
And add this below it:
def index(request):
	return HttpResponse('Hello')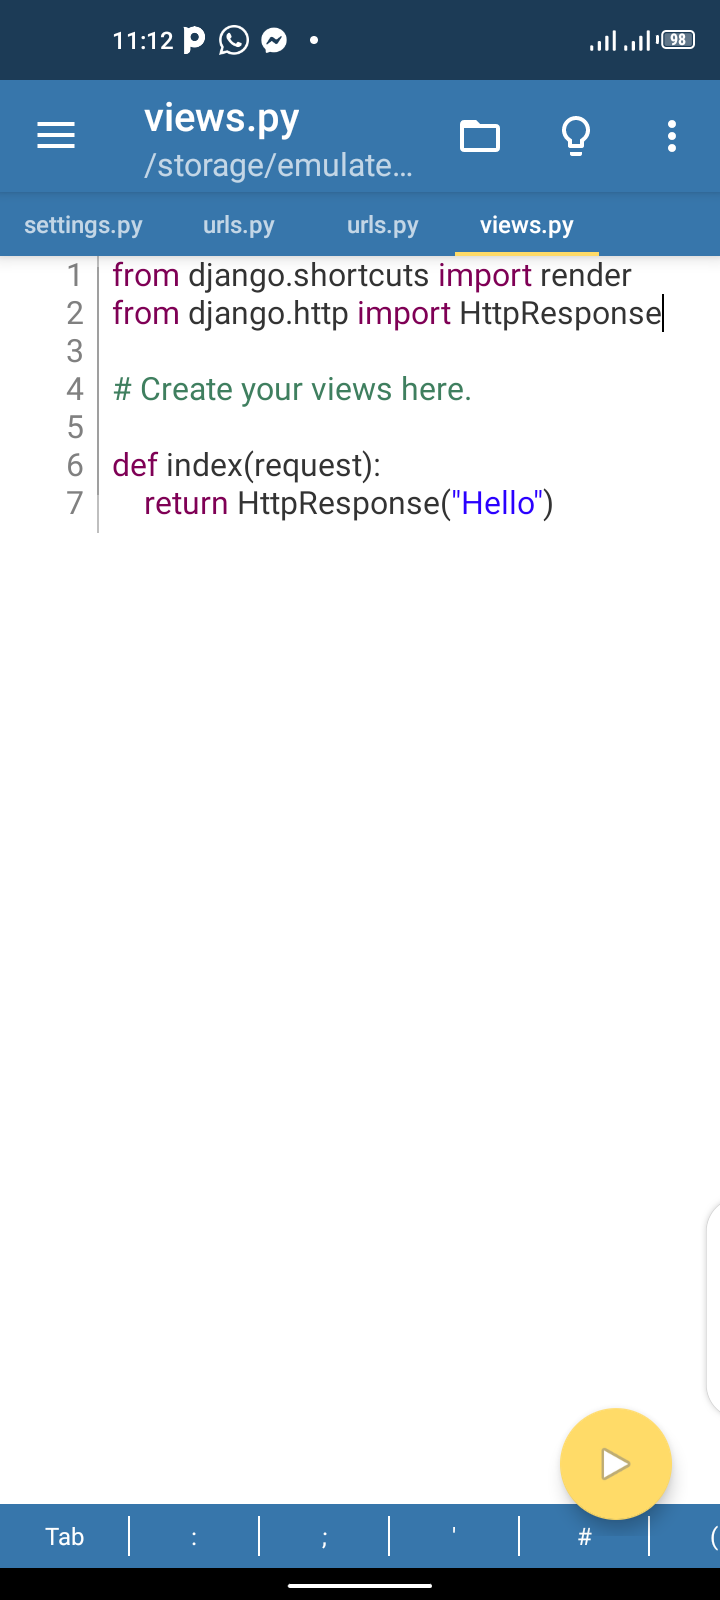
As you can see, we created the index function we called in our urls.py and we passed in a request parameter into it. Then we returned an HttpResponse.
But before the HttpResponse can work, we have to import it from django.http import HttpResponse – as simple as ABC. Let’s try this: open up your terminal and cd into myapp and type python manage.py runserver to test it.

As you can see, it returned the response. So next we will load our template HTML files.
To load our HTML files we need to create a folder like this in the todo directory in this order:
todo/templates/todo
In the todo directory, create a folder called templates. Inside that folder, create a folder called todo, as simple as that.
Then go ahead and create a simple HTML file called index.html and write this in it:
<h1>Hello world</h1>
To load it, make your views.py code look like this:
def index(request):
	return render(request, 'todo/index.html')
Now instead of returning response we returned a render view that allows us to render our HTML template now, save this open up your terminal cd into myapp and run it. We should have this
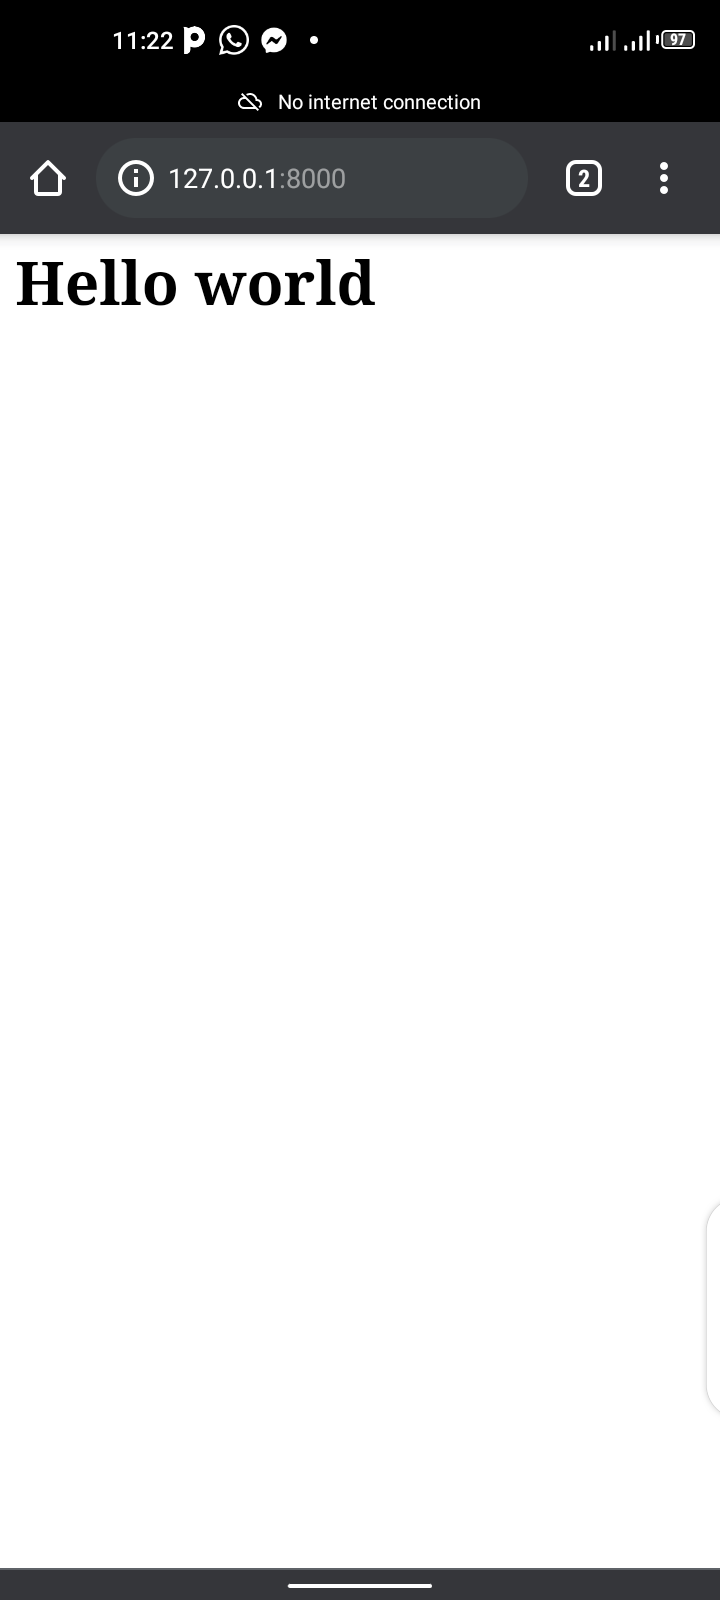
As you can see it works well — on to the next step.
How to Set Up the Static Files
Now to set up the static files, create a new folder in your todo directory and name it static. Inside that folder, create a folder and name it todo.
So it should be like this: /static/todo/.
In the todo directory, create a file and name it main.css. Then let’s write a little styling in it:
body {
background-color: red;
}
And save it.
Now let’s re-edit our index.html file by writing this code:
{% load static %}
<!Doctype html>
<html>
<head>
<title>My page</title>
<link rel="stylesheet" href="{% static 'todo/main.css' %}" >
</head>
<body>
Hello
</body>
</html>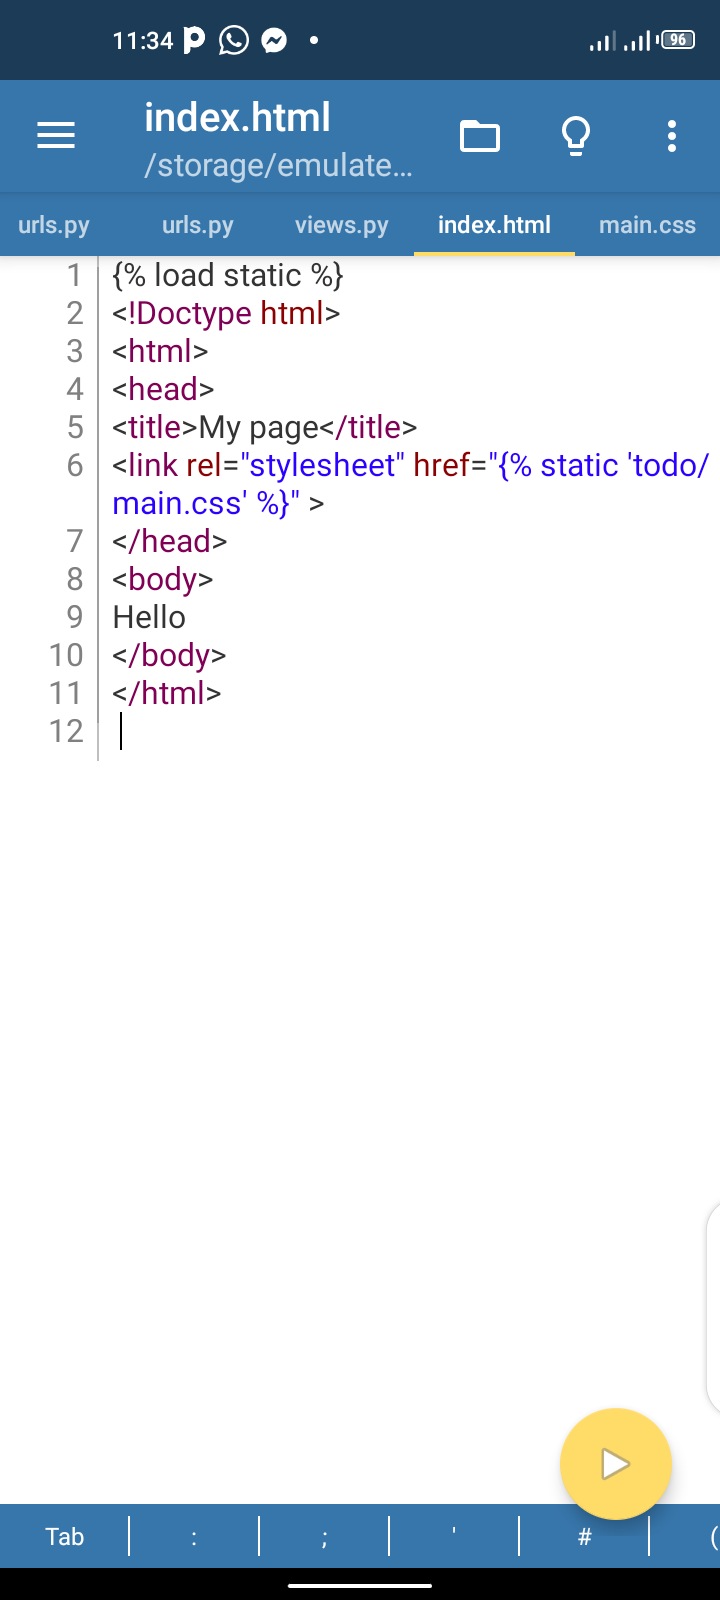
And now let’s run it:

If you’ve followed along with me, then you should have the above.
How to Load the Models and Admin Panel
Now to load up our admin panel, we need to create a superuser. This is simple to do – just open up your terminal and cd into the myapp folder then type python manage.py createsuperuser and hit enter. You should see this:
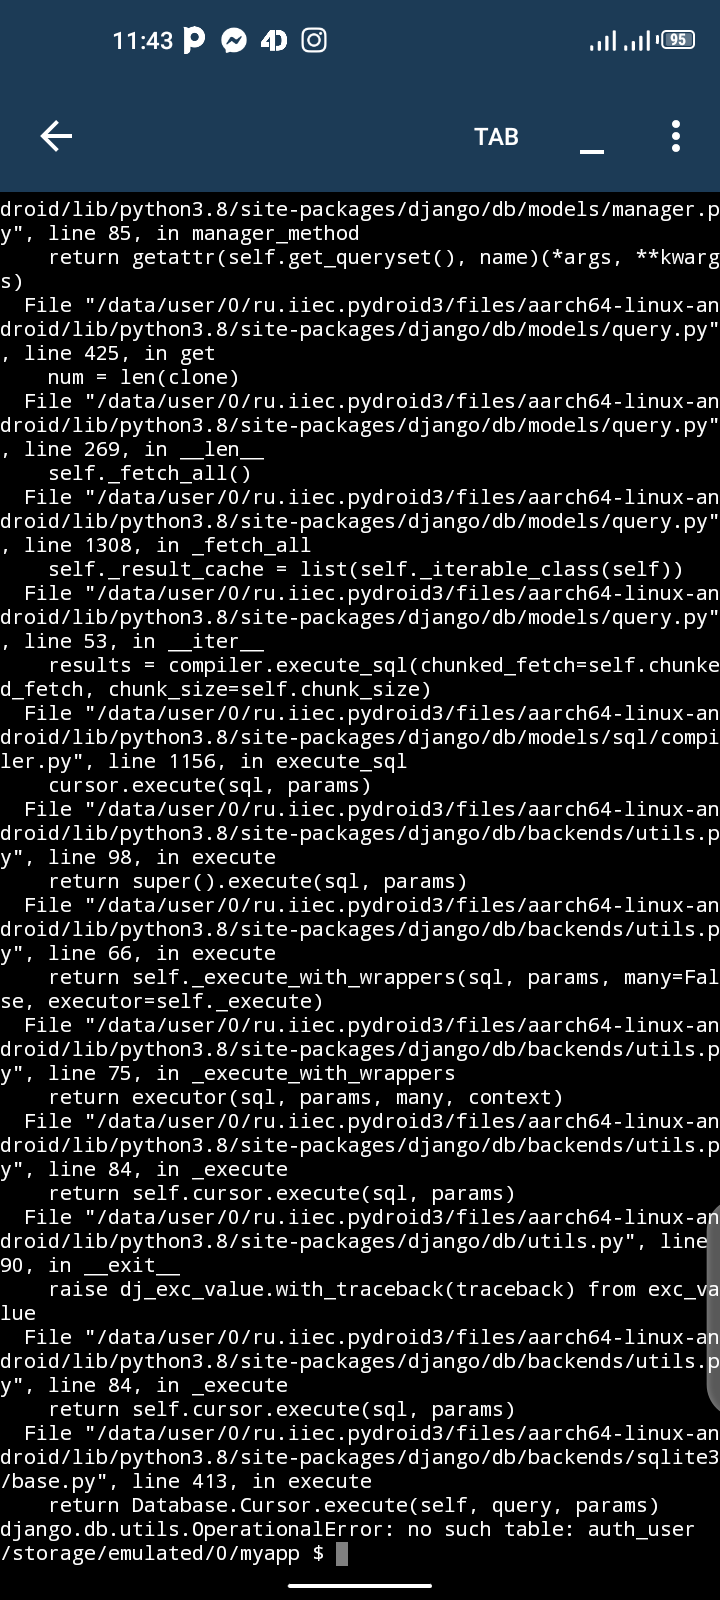
We get an error because we haven’t run python manage.py migrate yet. So type that and hit enter, and you should have something like this:

Now type in python manage.py createsuperuser and hit enter:

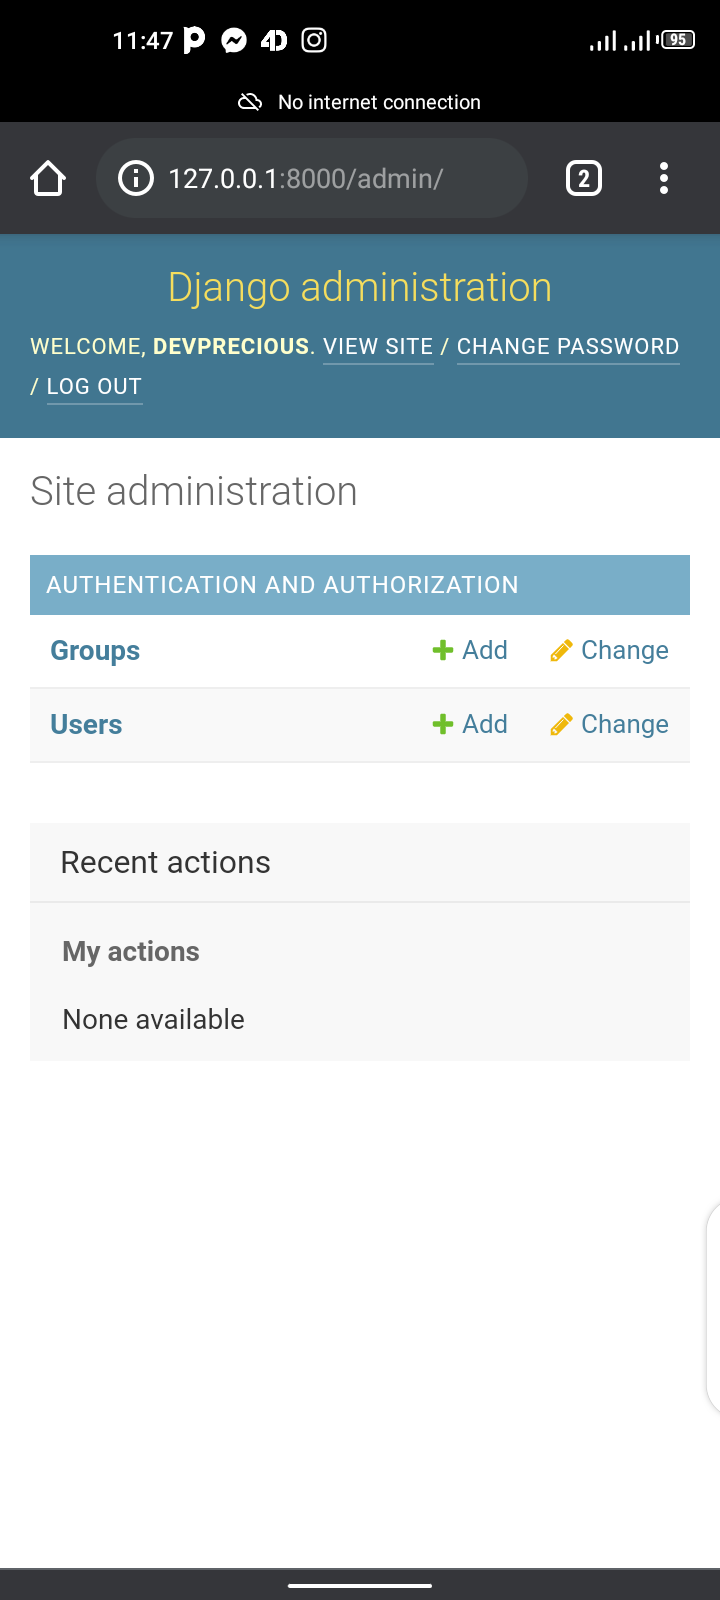
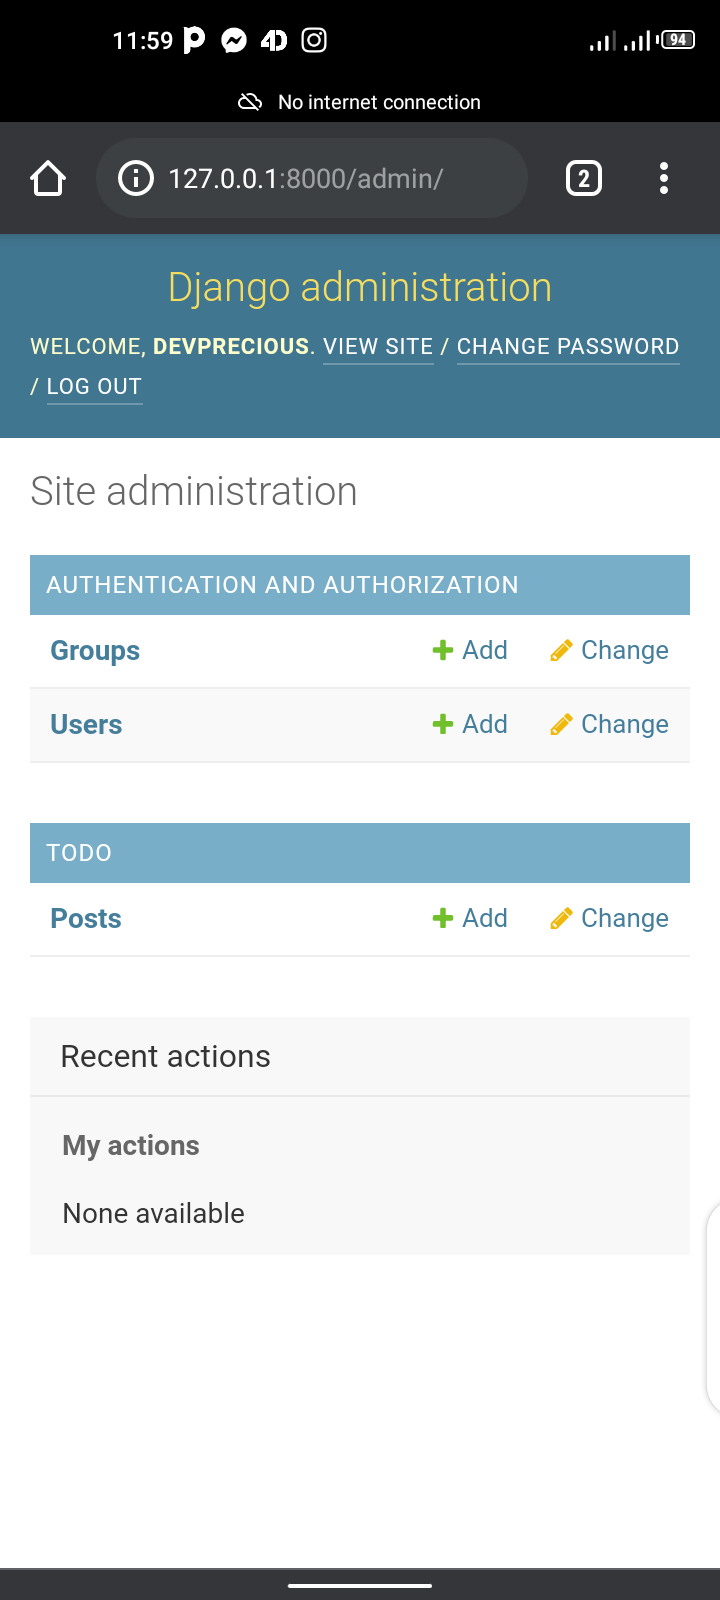
Just fill in the credentials. The next thing we need to do is to run our server and point to 127.0.0.1:8000/admin.
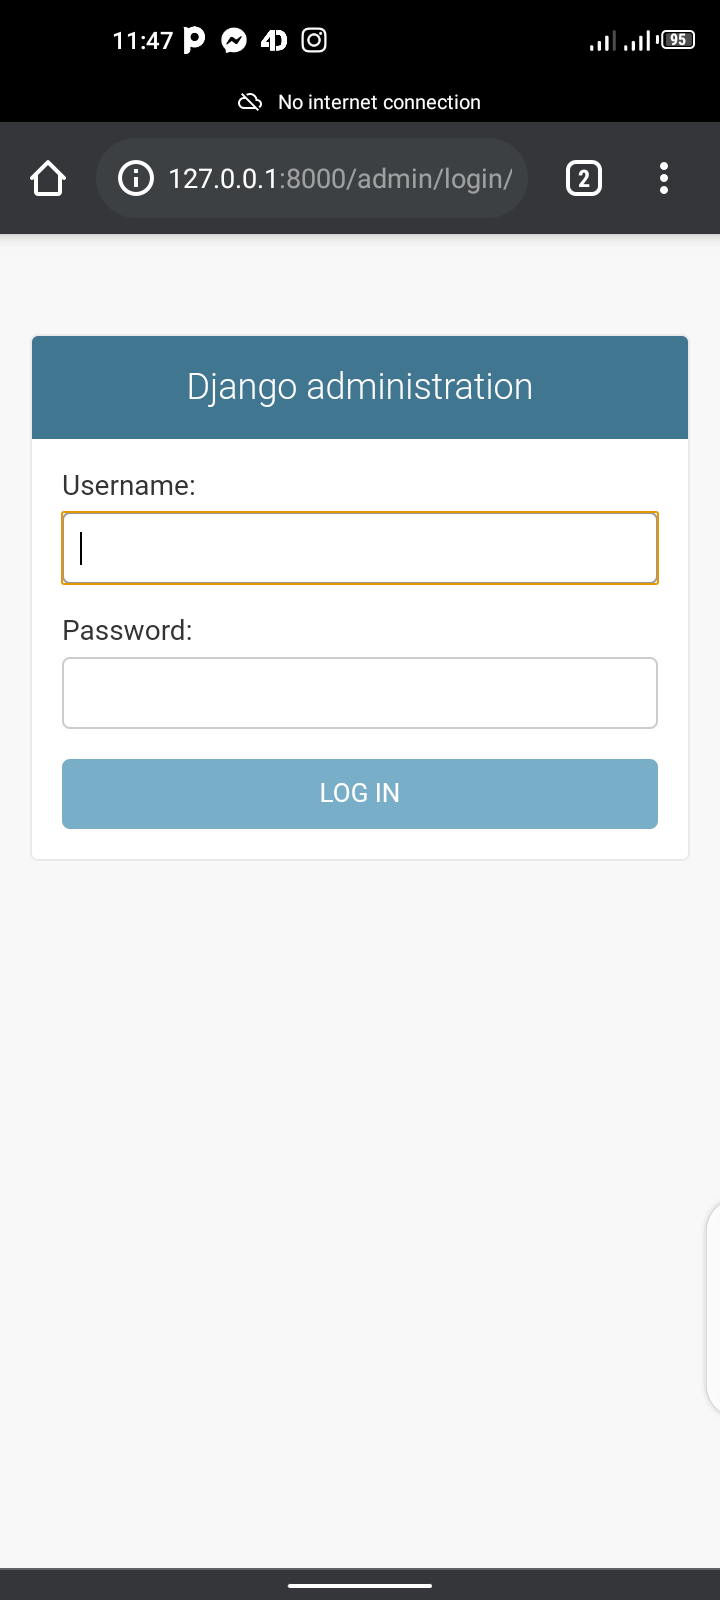
Login and you will be directed to the dashboard:
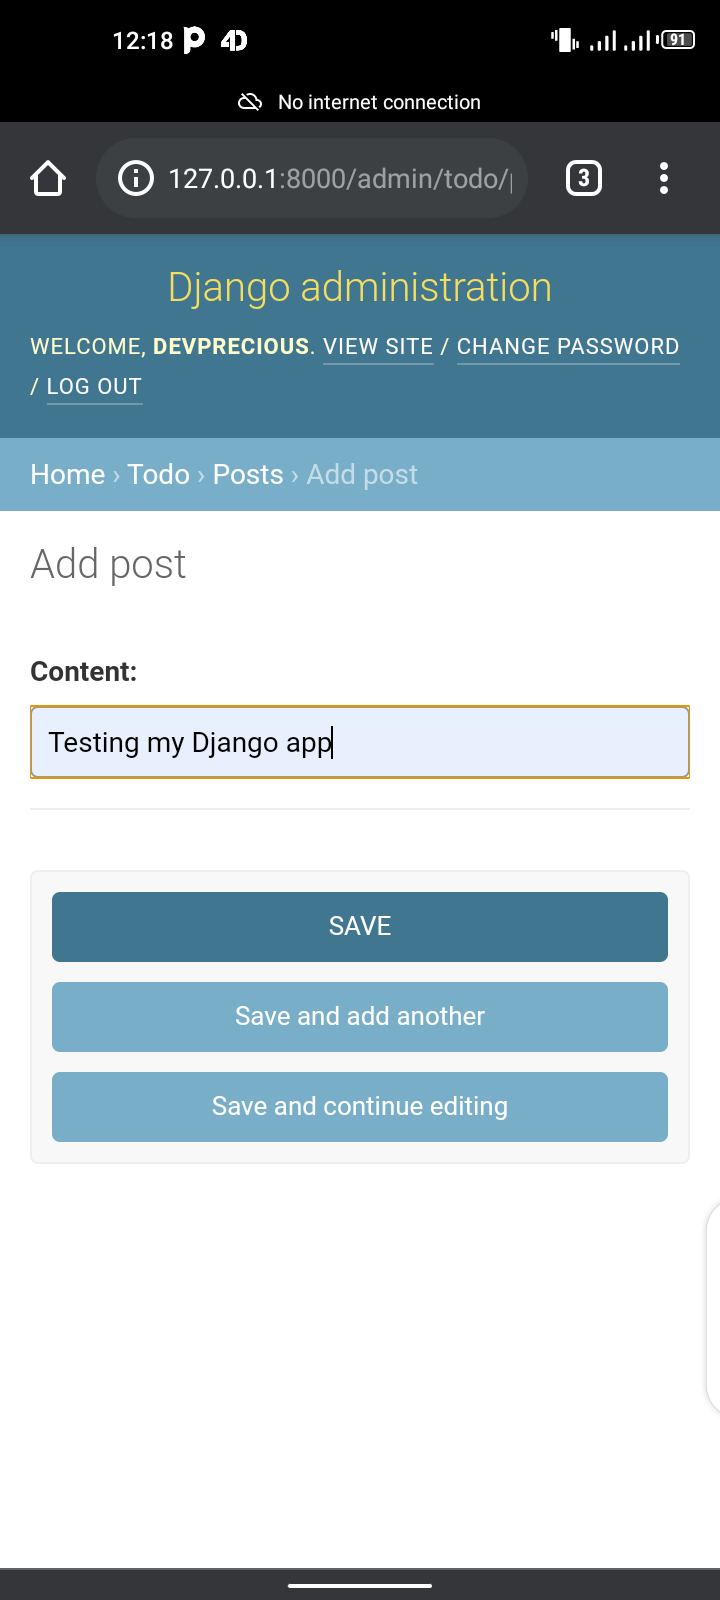
Now that we have done the admin panel, let’s work with the model (database). We’ll create a model that collects contents. So open your models.py file and type in this code:
class Post(models.Model):
	content = models.CharField(max_length=255, null=False)

    def __str__(self):
    	return self.content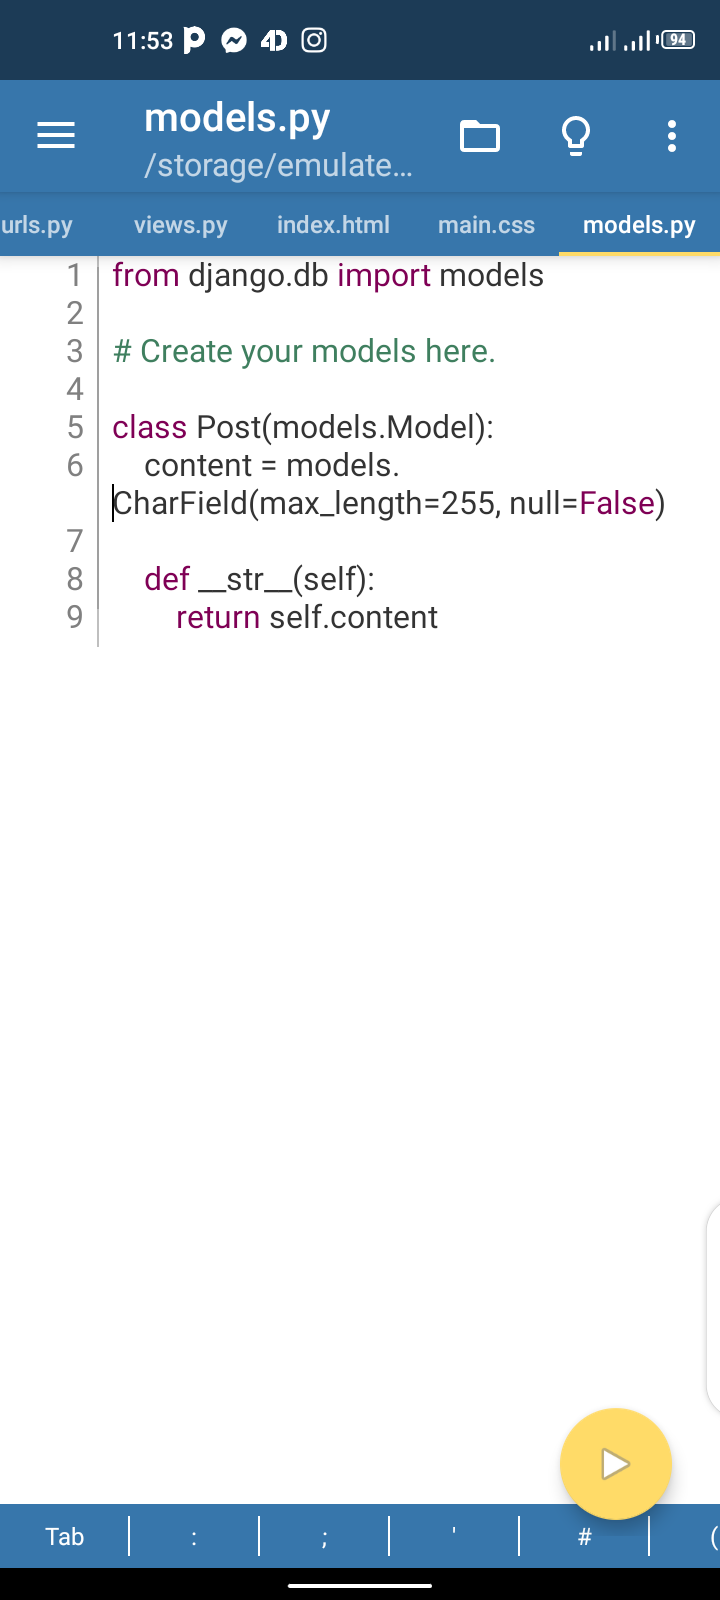
We create a class that has the parameter models.Model and gives a variable content that holds a CharField(), more like a text field. Lastly we create a magic str that returns the name of the model instead of an object.
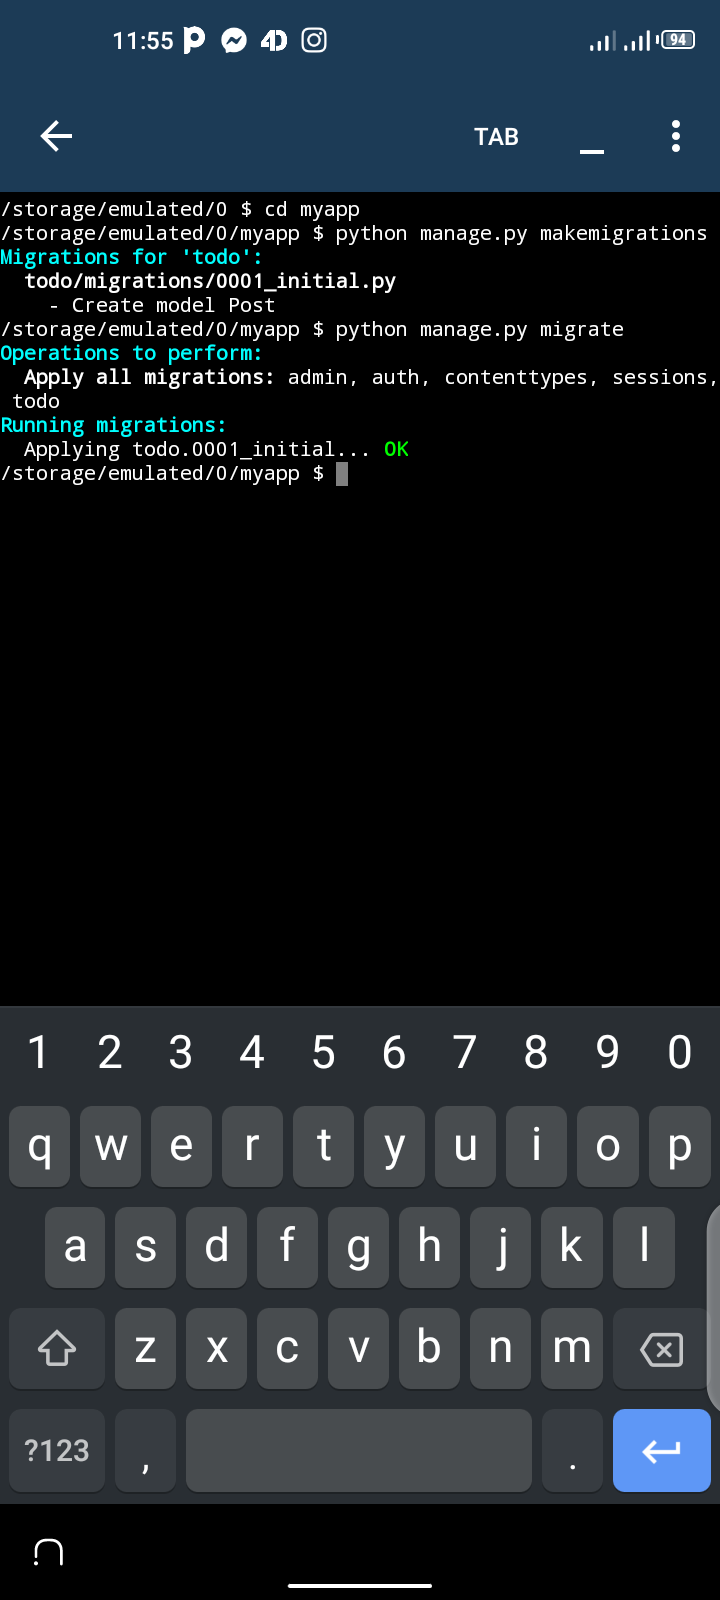
So next we need to run the migration. Open your terminal, cd into myapp, and type python manage.py makemigrations. You should see this:
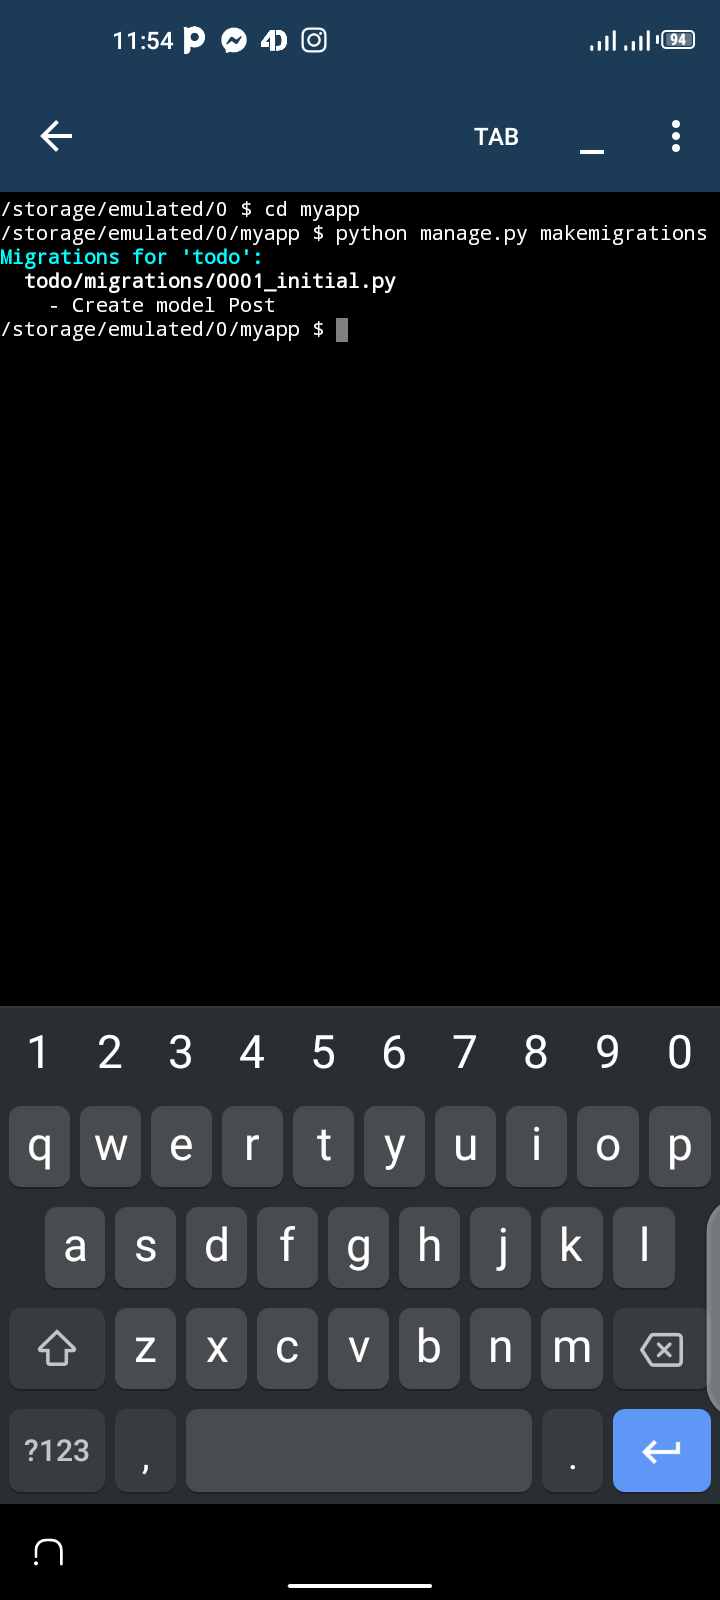
That means it has created the Post table in our database. Then also run python manage.py migrate which will result in the following:
This means that all is clear. Now to add it to the admin page, open up admin.py and type in this code:
from .models import *

admin.site.register(Post)
We imported all model classes from the model and registered the post model in the admin panel. Now if we open the admin panel we should see the post and save some data.
Notice that it’s now in the todo app list:

After clicking on it you should see this:
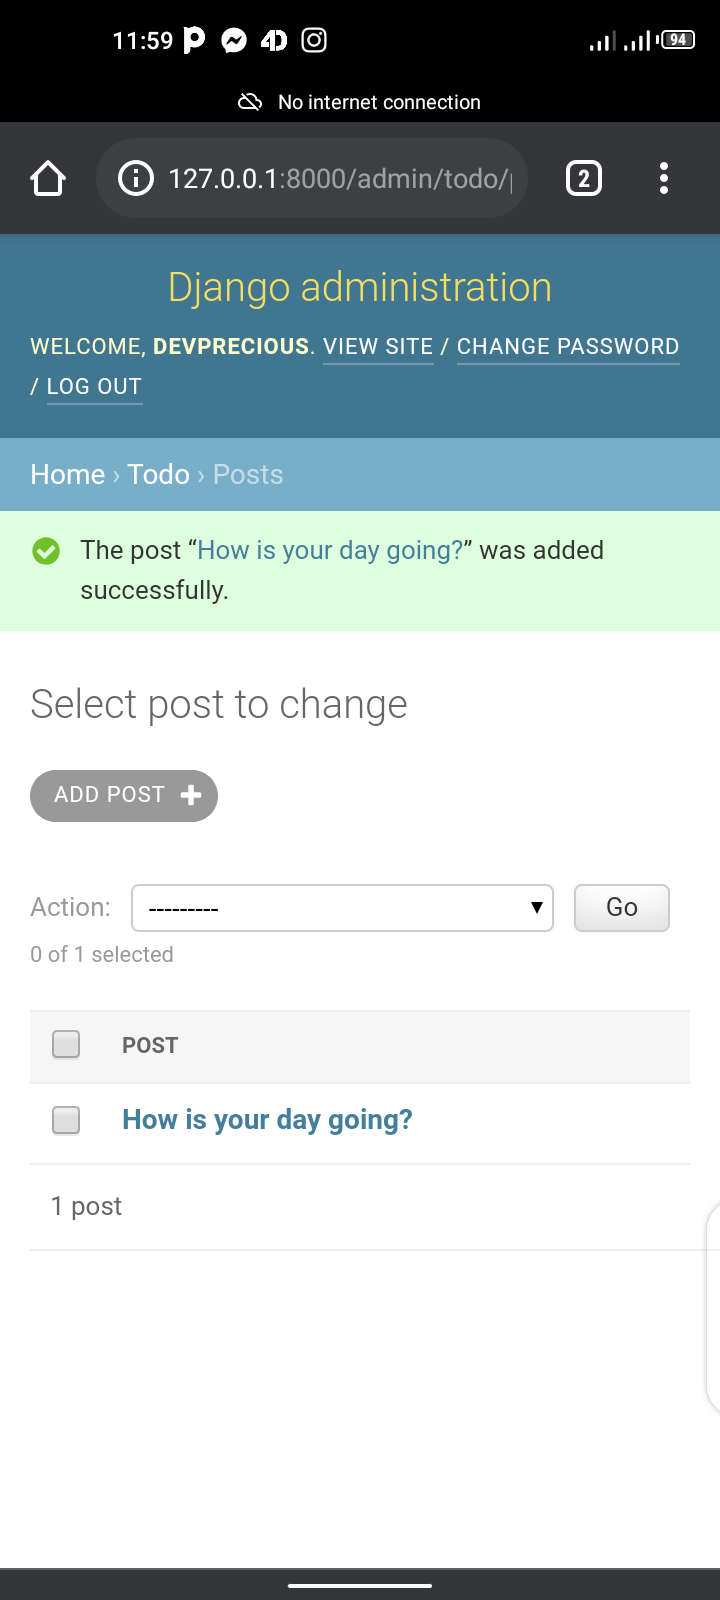
Then you can create a post if you like.
How to Render Data from DB to View
Lastly we will fetch our data from the DB. To do so we need to update our views.py as follows:
from .models import *

def index(request):
	content = Post.objects.all()
    context = {'content': content}
    return render(request, 'todo/index.html', context)
It’s as simple as that: we imported all from models.py, created a variable called content, and retrieved all the data from the table Post. Then we passed it as a dictionary to our view. So in our index.html to make it work just add this:
{% for contents in content %}
{{content.content}}
{% endfor %}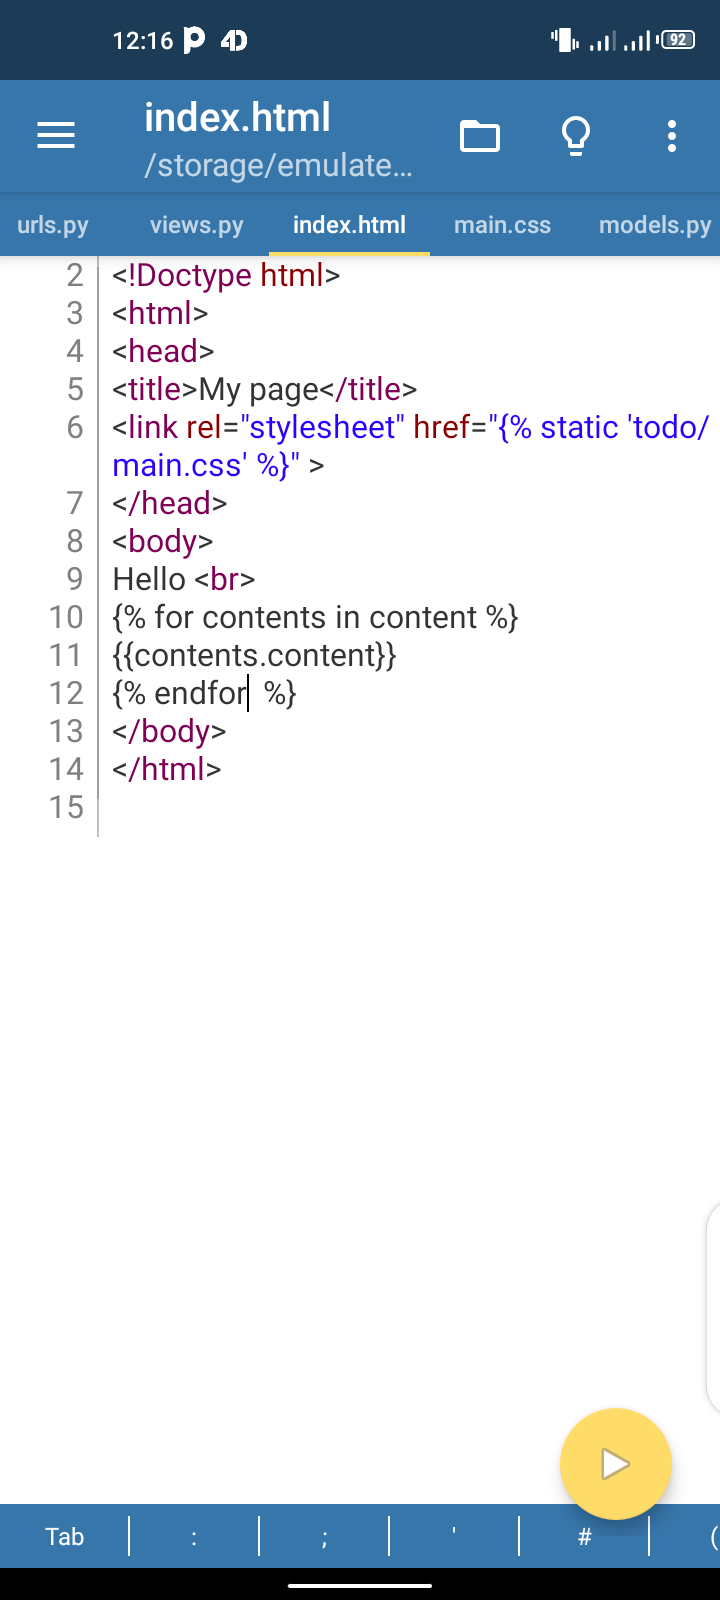
Here, we wrote a loop using the templates tag and fetched all the data content. Now open your terminal, cd into myapp, and run the server to see the magic happen:

It works, but let’s confirm that it does:
And the result should be the following:
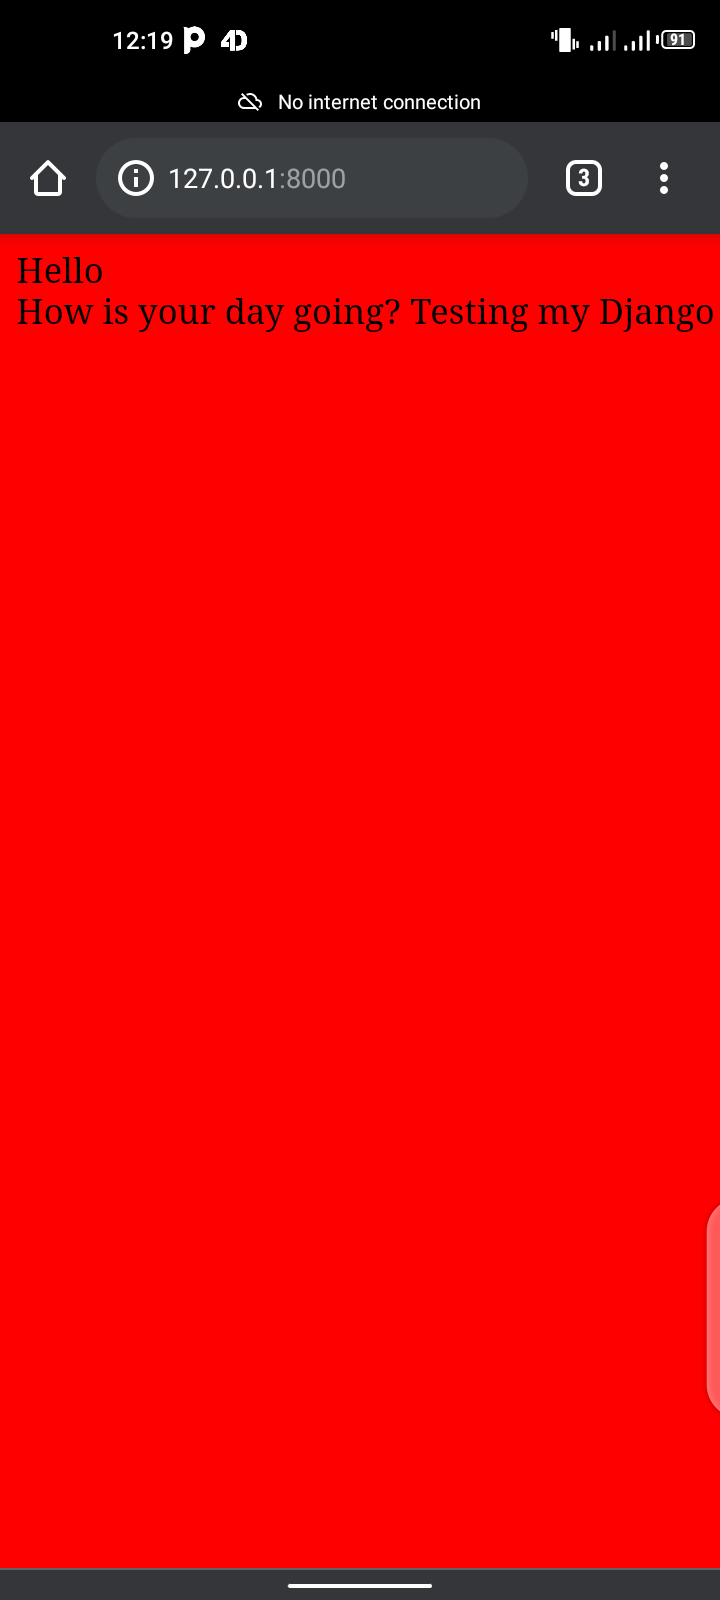
Violà – it works fine. Lastly you can just add a line break so you can read it more clearly. And we’re done!
Thank you for reading. If you want to go through an in-depth Django tutorial please visit my YouTube channel Devstack and subscribe.
Learn to code for free. freeCodeCamp’s open source curriculum has helped more than 40,000 people get jobs as developers. Get started
Hey there, how are you? I’m an 18 year old a backend developer and an aspiring Machine Learning Engineer. And in this article, I’m going to be writing about how to build a web app on your phone using Python 😁. Let’s dive into it.
Requirements
The first thing we need here is an Android phone, at least version 6.0 and upward. But what if I told you that’s all we need? Seems too good to be true.
Now the next thing we need to do is install a mobile application on our phone called pydroid3.
As you can see, pydroid3 is a mobile application that lets you write Python on your mobile phone, so go ahead and install it.
The next thing we need to do is install Django. If you’re not familiar with Django, please check out the Django docs here.
To install Django we need to open up the side navigation in our pydroid3 and select Terminal:
Then click on it and we should see this:
Once that is done all you need to do is type the following command:
pip install djangoAnd you should get the below. I am getting a «requirements satisfied» message because I already have it installed.
It has installed successfully, but let’s confirm that. In the terminal type django-admin and hit enter.
You should get this:
This means that it’s actually installed already.
How to Build our Project
So let’s get started with building our project. Open up your terminal and type in the following command:
django-admin startproject myapp
This creates a Django application called myapp in your root folder.
Change directory to it by typing cd myapp and type in python manage.py runserver. Then you should get this:
Now the server has started. Next, to test it in the browser visit 127.0.0.1:8000.
And boom! You should see that Django has been setup successfully.
The next thing we need to do is create our Django app. In Django, the project folder serves as the root while the app serves as the application itself.
To create a Django app, make sure you are still in the directory, then type python manage.py startapp todo. This creates a To-do app in our myapp project like this:
Then inside the todo folder we should see something like this:
We will take a further look at the files when we begin working with them.
How to Configure our Application
Now let’s make it possible for the app to be served by the Django project. First of all, open up your settings.py file in the myapp folder and add 'todo' to the installed apps like this:
Next we need to open up our urls.py and add the following to your code:
from django.urls import path, include

path('', include('todo.urls'))
What actually happened was that I added include to the from the django.urls import path. And below the path (admin) , we created an empty path that points to or includes the urls.py file in the todo app directory. I hope that’s clear.
Next we need to create a new file in the todo file directory named urls.py and add the following code in it:
from django.urls import path
from . import views

urlpatterns = [
	path('', views.index, name='home')
 ]
We imported path from Django.urls and also imported views from the root directory. Then we created our urlpatterns with the first part as the root link. As you can see, the views.index just means that we’re pointing this views to the index function in on views.py file. You will see how that works in a jiffy.
Let’s go ahead to our views.py file and add some code.
At the top, import HttpResponse like this:
from django.http import HttpResponse
And add this below it:
def index(request):
	return HttpResponse('Hello')
As you can see, we created the index function we called in our urls.py and we passed in a request parameter into it. Then we returned an HttpResponse.
But before the HttpResponse can work, we have to import it from django.http import HttpResponse – as simple as ABC. Let’s try this: open up your terminal and cd into myapp and type python manage.py runserver to test it.
As you can see, it returned the response. So next we will load our template HTML files.
To load our HTML files we need to create a folder like this in the todo directory in this order:
todo/templates/todo
In the todo directory, create a folder called templates. Inside that folder, create a folder called todo, as simple as that.
Then go ahead and create a simple HTML file called index.html and write this in it:
<h1>Hello world</h1>
To load it, make your views.py code look like this:
def index(request):
	return render(request, 'todo/index.html')
Now instead of returning response we returned a render view that allows us to render our HTML template now, save this open up your terminal cd into myapp and run it. We should have this
As you can see it works well — on to the next step.
How to Set Up the Static Files
Now to set up the static files, create a new folder in your todo directory and name it static. Inside that folder, create a folder and name it todo.
So it should be like this: /static/todo/.
In the todo directory, create a file and name it main.css. Then let’s write a little styling in it:
body {
background-color: red;
}
And save it.
Now let’s re-edit our index.html file by writing this code:
{% load static %}
<!Doctype html>
<html>
<head>
<title>My page</title>
<link rel="stylesheet" href="{% static 'todo/main.css' %}" >
</head>
<body>
Hello
</body>
</html>
And now let’s run it:
If you’ve followed along with me, then you should have the above.
How to Load the Models and Admin Panel
Now to load up our admin panel, we need to create a superuser. This is simple to do – just open up your terminal and cd into the myapp folder then type python manage.py createsuperuser and hit enter. You should see this:
We get an error because we haven’t run python manage.py migrate yet. So type that and hit enter, and you should have something like this:
Now type in python manage.py createsuperuser and hit enter:
Just fill in the credentials. The next thing we need to do is to run our server and point to 127.0.0.1:8000/admin.
Login and you will be directed to the dashboard:
Now that we have done the admin panel, let’s work with the model (database). We’ll create a model that collects contents. So open your models.py file and type in this code:
class Post(models.Model):
	content = models.CharField(max_length=255, null=False)

    def __str__(self):
    	return self.content
We create a class that has the parameter models.Model and gives a variable content that holds a CharField(), more like a text field. Lastly we create a magic str that returns the name of the model instead of an object.
So next we need to run the migration. Open your terminal, cd into myapp, and type python manage.py makemigrations. You should see this:
That means it has created the Post table in our database. Then also run python manage.py migrate which will result in the following:
This means that all is clear. Now to add it to the admin page, open up admin.py and type in this code:
from .models import *

admin.site.register(Post)
We imported all model classes from the model and registered the post model in the admin panel. Now if we open the admin panel we should see the post and save some data.
Notice that it’s now in the todo app list:
After clicking on it you should see this:
Then you can create a post if you like.
How to Render Data from DB to View
Lastly we will fetch our data from the DB. To do so we need to update our views.py as follows:
from .models import *

def index(request):
	content = Post.objects.all()
    context = {'content': content}
    return render(request, 'todo/index.html', context)
It’s as simple as that: we imported all from models.py, created a variable called content, and retrieved all the data from the table Post. Then we passed it as a dictionary to our view. So in our index.html to make it work just add this:
{% for contents in content %}
{{content.content}}
{% endfor %}
Here, we wrote a loop using the templates tag and fetched all the data content. Now open your terminal, cd into myapp, and run the server to see the magic happen:
It works, but let’s confirm that it does:
And the result should be the following:
Violà – it works fine. Lastly you can just add a line break so you can read it more clearly. And we’re done!
Thank you for reading. If you want to go through an in-depth Django tutorial please visit my YouTube channel Devstack and subscribe.
Learn to code for free. freeCodeCamp’s open source curriculum has helped more than 40,000 people get jobs as developers. Get started
Getting Started
Getting up and running on python-for-android (p4a) is a simple process
and should only take you a couple of minutes. We’ll refer to Python
for android as p4a in this documentation.
Concepts
Basic:
- requirements: For p4a, all your app’s dependencies must be specified
via--requirementssimilar to the standard requirements.txt.
(Unless you specify them via a setup.py/install_requires)
All dependencies will be mapped to «recipes» if any exist, so that
many common libraries will just work. See «recipe» below for details. - distribution: A distribution is the final «build» of your
compiled project + requirements, as an Android project assembled by
p4a that can be turned directly into an APK. p4a can contain multiple
distributions with different sets of requirements. - build: A build refers to a compiled recipe or distribution.
- bootstrap: A bootstrap is the app backend that will start your
application. The default for graphical applications is SDL2.
You can also use e.g. the webview for web apps, or service_only/service_library for
background services. Different bootstraps have different additional
build options.
Advanced:
- recipe:
A recipe is a file telling p4a how to install a requirement
that isn’t by default fully Android compatible.
This is often necessary for Cython or C/C++-using python extensions.
p4a has recipes for many common libraries already included, and any
dependency you specified will be automatically mapped to its recipe.
If a dependency doesn’t work and has no recipe included in p4a,
then it may need one to work.
Installation
Installing p4a
p4a is now available on Pypi, so you can install it using pip:
pip install python-for-android
You can also test the master branch from Github using:
pip install git+https://github.com/kivy/python-for-android.git
Installing Dependencies
p4a has several dependencies that must be installed:
- ant
- autoconf (for libffi and other recipes)
- automake
- ccache (optional)
- cmake (required for some native code recipes like jpeg’s recipe)
- cython (can be installed via pip)
- gcc
- git
- libncurses (including 32 bit)
- libtool (for libffi and recipes)
- libssl-dev (for TLS/SSL support on hostpython3 and recipe)
- openjdk-8
- patch
- python3
- unzip
- virtualenv (can be installed via pip)
- zlib (including 32 bit)
- zip
On recent versions of Ubuntu and its derivatives you may be able to
install most of these with:
sudo dpkg --add-architecture i386
sudo apt-get update
sudo apt-get install -y build-essential ccache git zlib1g-dev python3 python3-dev libncurses5:i386 libstdc++6:i386 zlib1g:i386 openjdk-8-jdk unzip ant ccache autoconf libtool libssl-dev
On Arch Linux you should be able to run the following to
install most of the dependencies (note: this list may not be
complete):
sudo pacman -S core/autoconf core/automake core/gcc core/make core/patch core/pkgconf extra/cmake extra/jdk8-openjdk extra/python-pip extra/unzip extra/zip
On macOS:
brew install autoconf automake libtool openssl pkg-config
brew tap homebrew/cask-versions
brew install --cask homebrew/cask-versions/adoptopenjdk8
Installing Android SDK
Warning
python-for-android is often picky about the SDK/NDK versions.
Pick the recommended ones from below to avoid problems.
Basic SDK install
You need to download and unpack the Android SDK and NDK to a directory (let’s say $HOME/Documents/):
- Android SDK
- Android NDK
For the Android SDK, you can download ‘just the command line
tools’. When you have extracted these you’ll see only a directory
named tools, and you will need to run extra commands to install
the SDK packages needed.
For Android NDK, note that modern releases will only work on a 64-bit
operating system. The minimal, and recommended, NDK version to use is r25b:
- Go to ndk downloads page
- Windows users should create a virtual machine with an GNU Linux os
installed, and then you can follow the described instructions from within
your virtual machine.
Platform and build tools
First, install an API platform to target. The recommended *target* API
level is 27, you can replace it with a different number but
keep in mind other API versions are less well-tested and older devices
are still supported down to the recommended specified *minimum*
API/NDK API level 21:
$SDK_DIR/tools/bin/sdkmanager "platforms;android-27"
Second, install the build-tools. You can use
$SDK_DIR/tools/bin/sdkmanager --list to see all the
possibilities, but 28.0.2 is the latest version at the time of writing:
$SDK_DIR/tools/bin/sdkmanager "build-tools;28.0.2"
Configure p4a to use your SDK/NDK
Then, you can edit your ~/.bashrc or other favorite shell to include new environment
variables necessary for building on android:
# Adjust the paths!
export ANDROIDSDK="$HOME/Documents/android-sdk-27"
export ANDROIDNDK="$HOME/Documents/android-ndk-r23b"
export ANDROIDAPI="27"  # Target API version of your application
export NDKAPI="21"  # Minimum supported API version of your application
export ANDROIDNDKVER="r10e"  # Version of the NDK you installed
You have the possibility to configure on any command the PATH to the SDK, NDK and Android API using:
--sdk-dir PATHas an equivalent of $ANDROIDSDK--ndk-dir PATHas an equivalent of $ANDROIDNDK--android-api VERSIONas an equivalent of $ANDROIDAPI--ndk-api VERSIONas an equivalent of $NDKAPI--ndk-version VERSIONas an equivalent of $ANDROIDNDKVER
Usage
Build a Kivy or SDL2 application
To build your application, you need to specify name, version, a package
identifier, the bootstrap you want to use (sdl2 for kivy or sdl2 apps)
and the requirements:
p4a apk --private $HOME/code/myapp --package=org.example.myapp --name "My application" --version 0.1 --bootstrap=sdl2 --requirements=python3,kivy
Note on --requirements: you must add all
libraries/dependencies your app needs to run.
Example: --requirements=python3,kivy,vispy. For an SDL2 app,
kivy is not needed, but you need to add any wrappers you might
use (e.g. pysdl2).
This p4a apk … command builds a distribution with python3,
kivy, and everything else you specified in the requirements.
It will be packaged using a SDL2 bootstrap, and produce
an .apk file.
Compatibility notes:
- Python 2 is no longer supported by python-for-android. The last release supporting Python 2 was v2019.10.06.
Build a WebView application
To build your application, you need to have a name, version, a package
identifier, and explicitly use the webview bootstrap, as
well as the requirements:
p4a apk --private $HOME/code/myapp --package=org.example.myapp --name "My WebView Application" --version 0.1 --bootstrap=webview --requirements=flask --port=5000
Please note as with kivy/SDL2, you need to specify all your
additional requirements/dependencies.
You can also replace flask with another web framework.
Replace --port=5000 with the port on which your app will serve a
website. The default for Flask is 5000.
Build a Service library archive
To build an android archive (.aar), containing an android service , you need a name, version, package identifier, explicitly use the
service_library bootstrap, and declare service entry point (See :ref:`services <arbitrary_scripts_services>` for more options), as well as the requirements and arch(s):
p4a aar --private $HOME/code/myapp --package=org.example.myapp --name "My library" --version 0.1 --bootstrap=service_library --requirements=python3 --release --service=myservice:service.py --arch=arm64-v8a --arch=armeabi-v7a
You can then call the generated Java entrypoint(s) for your Python service(s) in other apk build frameworks.
Exporting the Android App Bundle (aab) for distributing it on Google Play
Starting from August 2021 for new apps and from November 2021 for updates to existings apps,
Google Play Console will require the Android App Bundle instead of the long lived apk.
python-for-android handles by itself the needed work to accomplish the new requirements:
p4a aab —private $HOME/code/myapp —package=org.example.myapp —name=»My App» —version 0.1 —bootstrap=sdl2 —requirements=python3,kivy —arch=arm64-v8a —arch=armeabi-v7a —release
This p4a aab … command builds a distribution with python3,
kivy, and everything else you specified in the requirements.
It will be packaged using a SDL2 bootstrap, and produce
an .aab file that contains binaries for both armeabi-v7a and arm64-v8a ABIs.
The Android App Bundle, is supposed to be used for distributing your app.
If you need to test it locally, on your device, you can use bundletool <https://developer.android.com/studio/command-line/bundletool>
Other options
You can pass other command line arguments to control app behaviours
such as orientation, wakelock and app permissions. See
:ref:`bootstrap_build_options`.
Rebuild everything
If anything goes wrong and you want to clean the downloads and builds to retry everything, run:
p4a clean_all
If you just want to clean the builds to avoid redownloading dependencies, run:
p4a clean_builds && p4a clean_dists
Getting help
If something goes wrong and you don’t know how to fix it, add the
--debug option and post the output log to the kivy-users Google
group or the
kivy #support Discord channel.
See :doc:`troubleshooting` for more information.
Advanced usage
Recipe management
You can see the list of the available recipes with:
p4a recipes
If you are contributing to p4a and want to test a recipes again,
you need to clean the build and rebuild your distribution:
p4a clean_recipe_build RECIPENAME
p4a clean_dists
# then rebuild your distribution
You can write «private» recipes for your application, just create a
p4a-recipes folder in your build directory, and place a recipe in
it (edit the __init__.py):
mkdir -p p4a-recipes/myrecipe
touch p4a-recipes/myrecipe/__init__.py
Distribution management
Every time you start a new project, python-for-android will internally
create a new distribution (an Android build project including Python
and your other dependencies compiled for Android), according to the
requirements you added on the command line. You can force the reuse of
an existing distribution by adding:
p4a apk --dist_name=myproject ...
This will ensure your distribution will always be built in the same
directory, and avoids using more disk space every time you adjust a
requirement.
You can list the available distributions:
p4a distributions
And clean all of them:
p4a clean_dists
Configuration file
python-for-android checks in the current directory for a configuration
file named .p4a. If found, it adds all the lines as options to the
command line. For example, you can add the options you would always
include such as:
--dist_name my_example
--android_api 27
--requirements kivy,openssl
Overriding recipes sources
You can override the source of any recipe using the
$P4A_recipename_DIR environment variable. For instance, to test
your own Kivy branch you might set:
export P4A_kivy_DIR=/home/username/kivy
The specified directory will be copied into python-for-android instead
of downloading from the normal url specified in the recipe.
setup.py file (experimental)
If your application is also packaged for desktop using setup.py,
you may want to use your setup.py instead of the
--requirements option to avoid specifying things twice.
For that purpose, check out :doc:`distutils`
Going further
See the other pages of this doc for more information on specific topics:
- :doc:`buildoptions`
- :doc:`commands`
- :doc:`recipes`
- :doc:`bootstraps`
- :doc:`apis`
- :doc:`troubleshooting`
- :doc:`launcher`
- :doc:`contribute`
If you’re a Python developer thinking about getting started with mobile development, then the Kivy framework is your best bet. With Kivy, you can develop platform-independent applications that compile for iOS, Android, Windows, MacOS, and Linux. In this article, we’ll cover:
- Getting started with Kivy
- Creating the
RandomNumberclass - Outsourcing the interface
- A note on file naming
- Applying the box layout
- Kivy color values
- Building the rest of the UI
- Generating the random number function
- Manually testing the app
- Compiling our app for Android, Windows, and iOS
To follow along with this article, you should be familiar with Python. Let’s get started!
Getting started with Kivy
First, you’ll need a new directory for your app. Make sure you have Python installed on your machine and open a new Python file. You’ll need to install the Kivy module from your terminal using either of the commands below. To avoid any package conflicts, be sure you’re installing Kivy in a virtual environment:
pip install kivy
//
pip3 install kivy
Once you have installed Kivy, you should see a success message from your terminal that looks like the screenshots below:
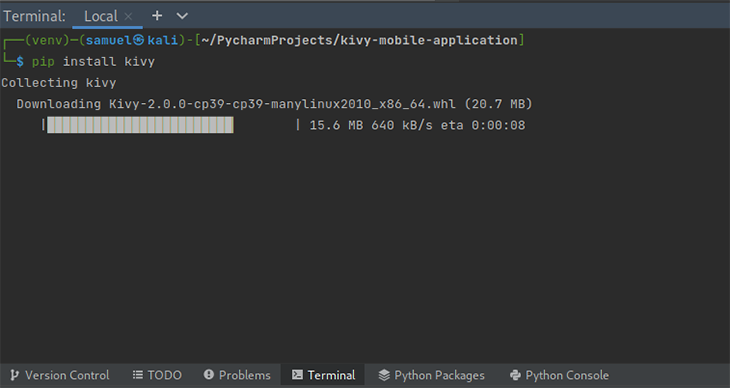
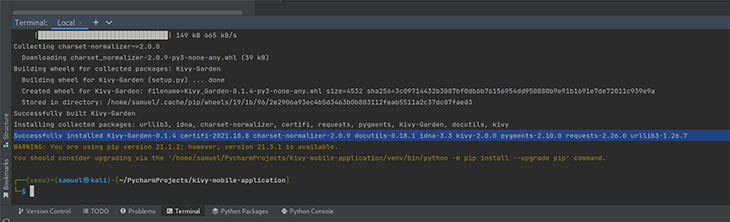
Next, navigate into your project folder. In the main.py file, we’ll need to import the Kivy module and specify which version we want. You can use Kivy v2.0.0, but if you have a smartphone that is older than Android v8, I recommend v1.9.0. You can mess around with the different versions during the build to see the differences in features and performance.
To specify the version, add the version number right after the import kivy line as follows:
kivy.require('1.9.0')
Creating the RandomNumber class
Now, we’ll create a class that will define our app; I’ll name mine RandomNumber. This class will inherit the app class from Kivy. Therefore, you need to import the app by adding from kivy.app import App:
class RandomNumber(App):
In the RandomNumber class, you’ll need to add a function called build, which takes a self parameter. To actually return the UI, we’ll use the build function. For now, I have it returned as a simple label. To do this, you’ll need to import Label using the line from kivy.uix.label import Label:
import kivy
from kivy.app import App
from kivy.uix.label import Label

class RandomNumber(App):
  def build(self):
    return Label(text="Random Number Generator")
Now, our app skeleton is complete! Before moving forward, you should create an instance of the RandomNumber class and run it in your terminal or IDE to see the interface:
import kivy
from kivy.app import App
from kivy.uix.label import Label

class RandomNumber(App):
  def build(self):
    return Label(text="Random Number Generator")

randomApp = RandomNumber()
randomApp.run()
When you run the class instance with the text Random Number Generator, you should see a simple interface or window that looks like the screenshot below:
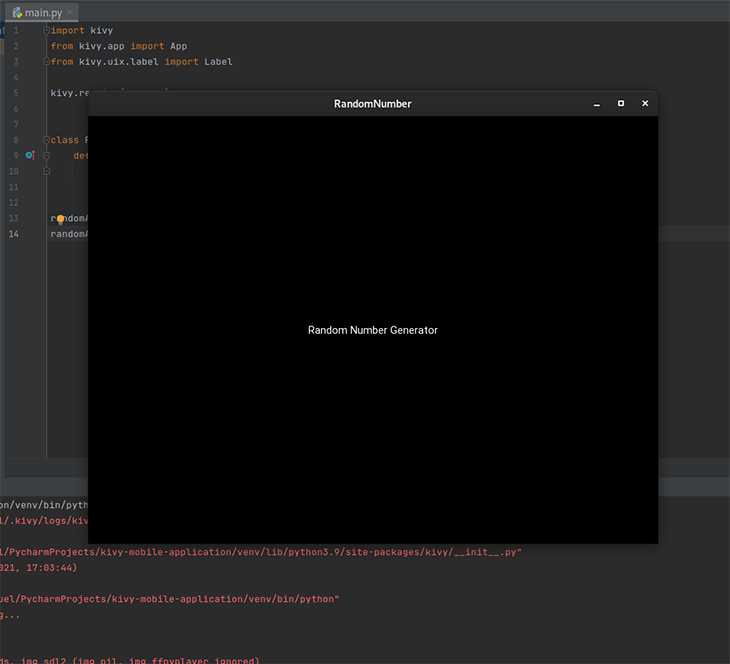
You won’t be able to run the text on Android until you’ve finished building the whole thing.
Outsourcing the interface
Next, we’ll need a way to outsource the interface. First, we’ll create a Kivy file in our directory that will house most of our design work.
A note on file naming
You’ll want to name this file the same name as your class using lowercase letters and a .kv extension. Kivy will automatically associate the class name and the filename, but it may not work on Android if they are exactly the same. (This might have been a glitch on my end, but you can mess around with it on your side. From what I tested, you have to write your Kivy file name in lowercase letters.)
Inside that .kv file, you need to specify the layout of your app, including elements like the label, buttons, forms, etc. Layouts in Kivy are of different types, but have the same function — they are all containers used to arrange widgets in ways that are specific to the chosen layout; you can read more information about different Kivy layouts in their getting started guide.
Applying the box layout
To keep this application simple, I will use the box layout. In a nutshell, the box layout arranges widgets and other elements in one of two orientations: vertical or horizontal. I’ll add three labels:
- One for the title
RandomNumber - One to serve as a placeholder for the random number that is generated
_ - A
Generatebutton that calls thegeneratefunction
Keep in mind that these labels will be stacked on top of each other.
My .kv file looks like the code below, but you can mess around with the different values to fit your requirements:
<boxLayout>:
    orientation: "vertical"
    Label:
        text: "Random Number"
        font_size: 30
        color: 0, 0.62, 0.96

    Label:
        text: "_"
        font_size: 30

    Button:
        text: "Generate"
        font_size: 15
In the above code snippet, line 2 specifies the type of layout I am using for my app, and line 3 specifies the orientation I just mentioned. The rest of the lines are customizable, so you can specify how you want your UI elements to appear.
Kivy color values
The color values in Kivy are not your typical RGB values — they are normalized. To understand color normalization, you need to be aware that the distribution of color values is normally dependent on illumination. This varies depending on factors like lighting conditions, lens effects, and other factors.
To avoid this, Kivy accepts the (1, 1, 1) convention. This is Kivy’s representation of RGB’s (255, 255, 255). To convert your normal RGB values to Kivy’s convention, you need to divide all of your values by 255. That way, you get values from 0–1.
Building the rest of the UI
In the main.py file, you no longer need the Label import statement because the Kivy file takes care of your UI. However, you do need to import the boxlayout, which you will use in the Kivy file.
In your main file, add the import statement and edit your main.py file to read return BoxLayout() in the build method:
from kivy.uix.boxlayout import BoxLayout
If you run the command above, you should see a simple interface that has the random number title, the _ placeholder, and the clickable generate button:
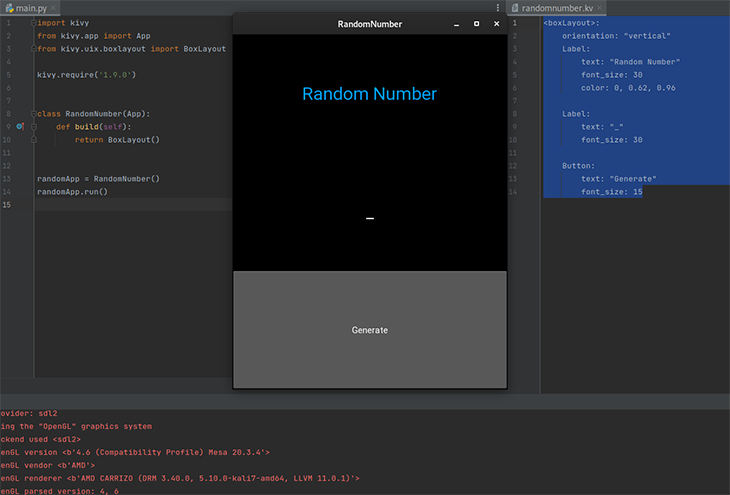
Notice that you didn’t have to import anything additional for the Kivy file to work. Basically, when you run the app, it returns boxlayout by looking for a file inside the Kivy file that has the same name as your class. Keep in mind, this is a simple interface, so you can make your app as robust as you want. Be sure to check out the Kv language documentation for ideas.
Generating the random number function
Now that our app is almost done, we’ll need a simple function to generate random numbers when a user clicks the generate button. Then, it will render that random number into the app interface. To do this, we’ll need to change a few things in our files.
First, import the random module that you’ll use to generate a random number and create a function or method that calls the generated number. To import the random module, use the statement import random.
For this demonstration, I’ll use a range between 0 and 2000. Generating the random number is simple with the random.randint(0, 2000) one-liner. We’ll add this into our code in a moment.
Next, we’ll create another class that will be our own version of the box layout. Our class will inherit the box layout class, which houses the method to generate random numbers and render them on the interface:
class MyRoot(BoxLayout):
    def __init__(self):
        super(MyRoot, self).__init__()
After that, you need to create the generate method within that class, which will not only generate random numbers, but also manipulate the label that controls what is displayed as the random number in the Kivy file.
In order to accommodate this method, we’ll first need to make changes to the .kv file. Since the MyRoot class has inherited the box layout, you can make MyRoot the top level element in your .kv file:
<MyRoot>:
    BoxLayout:
        orientation: "vertical"
        Label:
            text: "Random Number"
            font_size: 30
            color: 0, 0.62, 0.96

        Label:
            text: "_"
            font_size: 30

        Button:
            text: "Generate"
            font_size: 15
Notice that you are still keeping all your UI specifications indented in the Box Layout. After this, you need to add an ID to the label to hold the generated numbers, making it easy to manipulate when the generate function is called. You need to specify the relationship between the id in this file and another in the main code at the top, just before the BoxLayout line:
<MyRoot>:
    random_label: random_label
    BoxLayout:
        orientation: "vertical"
        Label:
            text: "Random Number"
            font_size: 30
            color: 0, 0.62, 0.96

        Label:
            id: random_label
            text: "_"
            font_size: 30

        Button:
            text: "Generate"
            font_size: 15
This random_label: random_label line basically means that the label with the ID random_label will be mapped to random_label in the main.py file, so that any action that manipulates random_label will be mapped on the label with the specified name.
You can now create the method to generate the random number in the main.py file:
def generate_number(self):
    self.random_label.text = str(random.randint(0, 2000))
Notice how the class method manipulates the text attribute of the random_label by assigning it a new random number generated by the 'random.randint(0, 2000)' function. Since the random number generated is an integer, typecasting is required to make it a string — otherwise, you will get a type error in your terminal when you run it.
The MyRoot class should now look like the code below:
class MyRoot(BoxLayout):
    def __init__(self):
        super(MyRoot, self).__init__()

    def generate_number(self):
        self.random_label.text = str(random.randint(0, 2000))
Congratulations! You’re now done with the main file of the app.
Manually testing the app
The only thing left to do is making sure that you call this function when the generate button is clicked. You need only add the line on_press: root.generate_number() to the button selection part of your .kv file:
<MyRoot>:
    random_label: random_label
    BoxLayout:
        orientation: "vertical"
        Label:
            text: "Random Number"
            font_size: 30
            color: 0, 0.62, 0.96

        Label:
            id: random_label
            text: "_"
            font_size: 30

        Button:
            text: "Generate"
            font_size: 15
            on_press: root.generate_number()
Now, you can run this app:
Compiling our app for Android, Windows, and iOS
Before compiling our app for Android, I have some bad news for Windows users. You’ll need Linux or macOS to compile your Android application. However, you don’t need to have a separate Linux distribution — instead, you can use a virtual machine.
To compile and generate a full Android .apk application, we’ll use a tool called Buildozer. Install Buildozer through our terminal using one of the commands below:
pip3 install buildozer
//
pip install buildozer
Now, we’ll install some of Buildozer’s required dependencies. I am using Linux Ergo, so I’ll use Linux-specific commands. You should execute these commands one by one:
sudo apt update
sudo apt install -y git zip unzip openjdk-13-jdk python3-pip autoconf libtool pkg-config zlib1g-dev libncurses5-dev libncursesw5-dev libtinfo5 cmake libffi-dev libssl-dev

pip3 install --upgrade Cython==0.29.19 virtualenv

# add the following line at the end of your ~/.bashrc file
export PATH=$PATH:~/.local/bin/
After executing the specific commands, run buildozer init. You should see an output similar to the screenshot below:
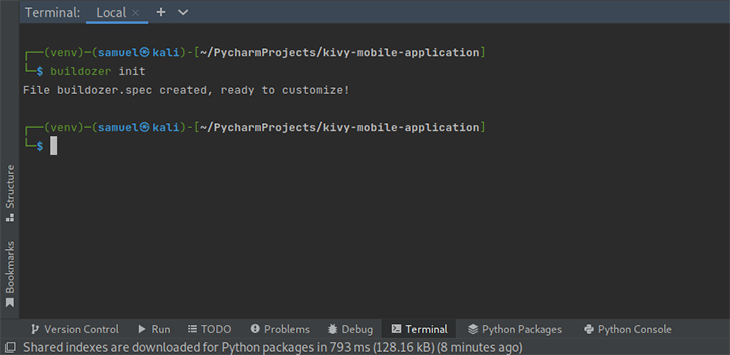
The command above creates a buildozer .spec file, which you can use to make specifications to your app, including the name of the app, the icon, etc. The .spec file should look like the code block below:
[app]

# (str) Title of your application
title = My Application

# (str) Package name
package.name = myapp

# (str) Package domain (needed for android/ios packaging)
package.domain = org.test

# (str) Source code where the main.py live
source.dir = .

# (list) Source files to include (let empty to include all the files)
source.include_exts = py,png,jpg,kv,atlas

# (list) List of inclusions using pattern matching
#source.include_patterns = assets/*,images/*.png

# (list) Source files to exclude (let empty to not exclude anything)
#source.exclude_exts = spec

# (list) List of directory to exclude (let empty to not exclude anything)
#source.exclude_dirs = tests, bin

# (list) List of exclusions using pattern matching
#source.exclude_patterns = license,images/*/*.jpg

# (str) Application versioning (method 1)
version = 0.1

# (str) Application versioning (method 2)
# version.regex = __version__ = ['"](.*)['"]
# version.filename = %(source.dir)s/main.py

# (list) Application requirements
# comma separated e.g. requirements = sqlite3,kivy
requirements = python3,kivy

# (str) Custom source folders for requirements
# Sets custom source for any requirements with recipes
# requirements.source.kivy = ../../kivy

# (list) Garden requirements
#garden_requirements =

# (str) Presplash of the application
#presplash.filename = %(source.dir)s/data/presplash.png

# (str) Icon of the application
#icon.filename = %(source.dir)s/data/icon.png

# (str) Supported orientation (one of landscape, sensorLandscape, portrait or all)
orientation = portrait

# (list) List of service to declare
#services = NAME:ENTRYPOINT_TO_PY,NAME2:ENTRYPOINT2_TO_PY

#
# OSX Specific
#

#
# author = © Copyright Info

# change the major version of python used by the app
osx.python_version = 3

# Kivy version to use
osx.kivy_version = 1.9.1

#
# Android specific
#

# (bool) Indicate if the application should be fullscreen or not
fullscreen = 0

# (string) Presplash background color (for new android toolchain)
# Supported formats are: #RRGGBB #AARRGGBB or one of the following names:
# red, blue, green, black, white, gray, cyan, magenta, yellow, lightgray,
# darkgray, grey, lightgrey, darkgrey, aqua, fuchsia, lime, maroon, navy,
# olive, purple, silver, teal.
#android.presplash_color = #FFFFFF

# (list) Permissions
#android.permissions = INTERNET

# (int) Target Android API, should be as high as possible.
#android.api = 27

# (int) Minimum API your APK will support.
#android.minapi = 21

# (int) Android SDK version to use
#android.sdk = 20

# (str) Android NDK version to use
#android.ndk = 19b

# (int) Android NDK API to use. This is the minimum API your app will support, it should usually match android.minapi.
#android.ndk_api = 21

# (bool) Use --private data storage (True) or --dir public storage (False)
#android.private_storage = True

# (str) Android NDK directory (if empty, it will be automatically downloaded.)
#android.ndk_path =

# (str) Android SDK directory (if empty, it will be automatically downloaded.)
#android.sdk_path =

# (str) ANT directory (if empty, it will be automatically downloaded.)
#android.ant_path =

# (bool) If True, then skip trying to update the Android sdk
# This can be useful to avoid excess Internet downloads or save time
# when an update is due and you just want to test/build your package
# android.skip_update = False

# (bool) If True, then automatically accept SDK license
# agreements. This is intended for automation only. If set to False,
# the default, you will be shown the license when first running
# buildozer.
# android.accept_sdk_license = False

# (str) Android entry point, default is ok for Kivy-based app
#android.entrypoint = org.renpy.android.PythonActivity

# (str) Android app theme, default is ok for Kivy-based app
# android.apptheme = "@android:style/Theme.NoTitleBar"

# (list) Pattern to whitelist for the whole project
#android.whitelist =

# (str) Path to a custom whitelist file
#android.whitelist_src =

# (str) Path to a custom blacklist file
#android.blacklist_src =

# (list) List of Java .jar files to add to the libs so that pyjnius can access
# their classes. Don't add jars that you do not need, since extra jars can slow
# down the build process. Allows wildcards matching, for example:
# OUYA-ODK/libs/*.jar
#android.add_jars = foo.jar,bar.jar,path/to/more/*.jar

# (list) List of Java files to add to the android project (can be java or a
# directory containing the files)
#android.add_src =

# (list) Android AAR archives to add (currently works only with sdl2_gradle
# bootstrap)
#android.add_aars =

# (list) Gradle dependencies to add (currently works only with sdl2_gradle
# bootstrap)
#android.gradle_dependencies =

# (list) add java compile options
# this can for example be necessary when importing certain java libraries using the 'android.gradle_dependencies' option
# see https://developer.android.com/studio/write/java8-support for further information
# android.add_compile_options = "sourceCompatibility = 1.8", "targetCompatibility = 1.8"

# (list) Gradle repositories to add {can be necessary for some android.gradle_dependencies}
# please enclose in double quotes
# e.g. android.gradle_repositories = "maven { url 'https://kotlin.bintray.com/ktor' }"
#android.add_gradle_repositories =

# (list) packaging options to add
# see https://google.github.io/android-gradle-dsl/current/com.android.build.gradle.internal.dsl.PackagingOptions.html
# can be necessary to solve conflicts in gradle_dependencies
# please enclose in double quotes
# e.g. android.add_packaging_options = "exclude 'META-INF/common.kotlin_module'", "exclude 'META-INF/*.kotlin_module'"
#android.add_gradle_repositories =

# (list) Java classes to add as activities to the manifest.
#android.add_activities = com.example.ExampleActivity

# (str) OUYA Console category. Should be one of GAME or APP
# If you leave this blank, OUYA support will not be enabled
#android.ouya.category = GAME

# (str) Filename of OUYA Console icon. It must be a 732x412 png image.
#android.ouya.icon.filename = %(source.dir)s/data/ouya_icon.png

# (str) XML file to include as an intent filters in <activity> tag
#android.manifest.intent_filters =

# (str) launchMode to set for the main activity
#android.manifest.launch_mode = standard

# (list) Android additional libraries to copy into libs/armeabi
#android.add_libs_armeabi = libs/android/*.so
#android.add_libs_armeabi_v7a = libs/android-v7/*.so
#android.add_libs_arm64_v8a = libs/android-v8/*.so
#android.add_libs_x86 = libs/android-x86/*.so
#android.add_libs_mips = libs/android-mips/*.so

# (bool) Indicate whether the screen should stay on
# Don't forget to add the WAKE_LOCK permission if you set this to True
#android.wakelock = False

# (list) Android application meta-data to set (key=value format)
#android.meta_data =

# (list) Android library project to add (will be added in the
# project.properties automatically.)
#android.library_references =

# (list) Android shared libraries which will be added to AndroidManifest.xml using <uses-library> tag
#android.uses_library =

# (str) Android logcat filters to use
#android.logcat_filters = *:S python:D

# (bool) Copy library instead of making a libpymodules.so
#android.copy_libs = 1

# (str) The Android arch to build for, choices: armeabi-v7a, arm64-v8a, x86, x86_64
android.arch = armeabi-v7a

# (int) overrides automatic versionCode computation (used in build.gradle)
# this is not the same as app version and should only be edited if you know what you're doing
# android.numeric_version = 1

#
# Python for android (p4a) specific
#

# (str) python-for-android fork to use, defaults to upstream (kivy)
#p4a.fork = kivy

# (str) python-for-android branch to use, defaults to master
#p4a.branch = master

# (str) python-for-android git clone directory (if empty, it will be automatically cloned from github)
#p4a.source_dir =

# (str) The directory in which python-for-android should look for your own build recipes (if any)
#p4a.local_recipes =

# (str) Filename to the hook for p4a
#p4a.hook =

# (str) Bootstrap to use for android builds
# p4a.bootstrap = sdl2

# (int) port number to specify an explicit --port= p4a argument (eg for bootstrap flask)
#p4a.port =


#
# iOS specific
#

# (str) Path to a custom kivy-ios folder
#ios.kivy_ios_dir = ../kivy-ios
# Alternately, specify the URL and branch of a git checkout:
ios.kivy_ios_url = https://github.com/kivy/kivy-ios
ios.kivy_ios_branch = master

# Another platform dependency: ios-deploy
# Uncomment to use a custom checkout
#ios.ios_deploy_dir = ../ios_deploy
# Or specify URL and branch
ios.ios_deploy_url = https://github.com/phonegap/ios-deploy
ios.ios_deploy_branch = 1.7.0

# (str) Name of the certificate to use for signing the debug version
# Get a list of available identities: buildozer ios list_identities
#ios.codesign.debug = "iPhone Developer: <lastname> <firstname> (<hexstring>)"

# (str) Name of the certificate to use for signing the release version
#ios.codesign.release = %(ios.codesign.debug)s


[buildozer]

# (int) Log level (0 = error only, 1 = info, 2 = debug (with command output))
log_level = 2

# (int) Display warning if buildozer is run as root (0 = False, 1 = True)
warn_on_root = 1

# (str) Path to build artifact storage, absolute or relative to spec file
# build_dir = ./.buildozer

# (str) Path to build output (i.e. .apk, .ipa) storage
# bin_dir = ./bin

#    -----------------------------------------------------------------------------
#    List as sections
#
#    You can define all the "list" as [section:key].
#    Each line will be considered as a option to the list.
#    Let's take [app] / source.exclude_patterns.
#    Instead of doing:
#
#[app]
#source.exclude_patterns = license,data/audio/*.wav,data/images/original/*
#
#    This can be translated into:
#
#[app:source.exclude_patterns]
#license
#data/audio/*.wav
#data/images/original/*
#


#    -----------------------------------------------------------------------------
#    Profiles
#
#    You can extend section / key with a profile
#    For example, you want to deploy a demo version of your application without
#    HD content. You could first change the title to add "(demo)" in the name
#    and extend the excluded directories to remove the HD content.
#
#[[email protected]]
#title = My Application (demo)
#
#[app:[email protected]]
#images/hd/*
#
#    Then, invoke the command line with the "demo" profile:
#
#buildozer --profile demo android debug
If you want to specify things like the icon, requirements, or loading screen, you should edit this file.
After making all the desired edits to your application, run buildozer -v android debug from your app directory to build and compile your application. This may take a while, especially if you have a slow machine.
After the process is done, your terminal should have some logs, one confirming that the build was successful:
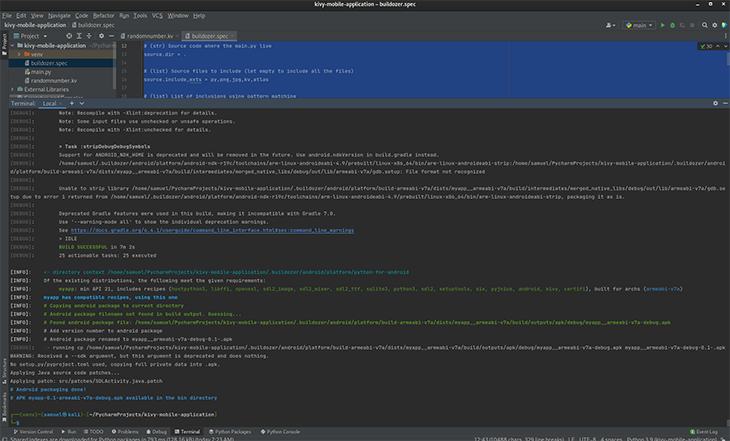
You should also have an APK version of your app in your bin directory. This is the application executable that you will install and run on your phone:
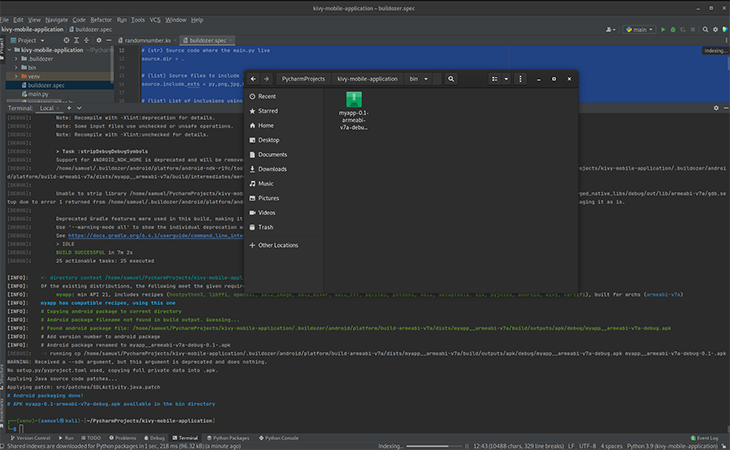
Congratulations! If you have followed this tutorial step by step, you should have a simple random number generator app on your phone. Play around with it and tweak some values, then rebuild. Running the rebuild will not take as much time as the first build.
Conclusion
As you can see, building a mobile application with Python is fairly straightforward, as long as you are familiar with the framework or module you are working with. Regardless, the logic is executed the same way: if you want to package the application for other platforms, you can check out the steps here. Keep in mind that for the Apple ecosystem, you’ll need to be on a Mac.
That being said, get familiar with the Kivy module and its widgets. You can never know everything all at once. You need only find a project and get your feet wet as early as possible. Happy coding!
Cut through the noise of traditional error reporting with LogRocket

LogRocket is a digital experience analytics solution that shields you from the hundreds of false-positive errors alerts to just a few truly important items. LogRocket tells you the most impactful bugs and UX issues actually impacting users in your applications.
Then, use session replay with deep technical telemetry to see exactly what the user saw and what caused the problem, as if you were looking over their shoulder.
LogRocket automatically aggregates client side errors, JS exceptions, frontend performance metrics, and user interactions. Then LogRocket uses machine learning to tell you which problems are affecting the most users and provides the context you need to fix it.
Focus on the bugs that matter — try LogRocket today.