Эта статья предназначена для тех, кто только начинает своё знакомство с созданием приложений с графическим интерфейсом (GUI) на Python. В ней мы рассмотрим основы использования PyQt в связке с Qt Designer. Шаг за шагом мы создадим простое Python GUI приложение, которое будет отображать содержимое выбранной директории.
Что нам потребуется
Нам понадобятся PyQt и Qt Designer, ну и Python, само собой.
В этой статье используется PyQt5 с Python 3, но особых различий между PyQt и PySide или их версиями для Python 2 нет.
Windows: PyQt можно скачать здесь. В комплекте с ним идёт Qt Designer.
macOS: Вы можете установить PyQt с помощью Homebrew:
$ brew install pyqt5
Скачать пакет с большинством компонентов и инструментов Qt, который содержит Qt Designer, можно по этой ссылке.
Linux: Всё нужное, вероятно, есть в репозиториях вашего дистрибутива. Qt Designer можно установить из Центра Приложений, но PyQt придётся устанавливать через терминал. Установить всё, что нам понадобится, одной командой можно, например, так:
# для Fedora:
$ sudo dnf install python3-qt5 qt-creator
# для Debian/Ubuntu:
$ sudo apt install python3-qt5 pyqt5-dev-tools qtcreator
После того как вы закончили с приготовлениями, откройте командную строку/терминал и убедитесь, что вы можете использовать команду pyuic5. Вы должны увидеть следующее:
$ pyuic5
Error: one input ui-file must be specified
Если вы видите сообщение, что такой команды нет или что-то в таком роде, попробуйте загуглить решение проблемы для вашей операционной системы и версии PyQt.
Если вы используете Windows, то, скорее всего, путь C:Python36Scripts (измените 36 на вашу версию Python) не прописан в вашем PATH. Загляните в этот тред на Stack Overflow, чтобы узнать, как решить проблему.
Дизайн
Основы
Теперь, когда у нас всё готово к работе, давайте начнём с простого дизайна.
Откройте Qt Designer, где вы увидите диалог новой формы, выберите Main Window и нажмите Create.
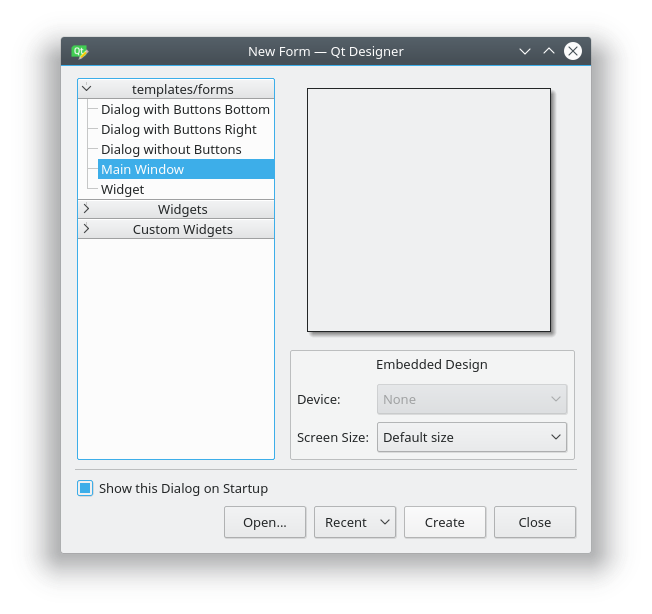
После этого у вас должна появиться форма — шаблон для окна, размер которого можно менять и куда можно вставлять объекты из окна виджетов и т.д. Ознакомьтесь с интерфейсом, он довольно простой.
Теперь давайте немного изменим размер нашего главного окна, т.к. нам не нужно, чтобы оно было таким большим. А ещё давайте уберём автоматически добавленное меню и строку состояния, поскольку в нашем приложении они не пригодятся.
Все элементы формы и их иерархия по умолчанию отображаются в правой части окна Qt Designer под названием Object Inspector. Вы с лёгкостью можете удалять объекты, кликая по ним правой кнопкой мыши в этом окне. Или же вы можете выбрать их в основной форме и нажать клавишу DEL на клавиатуре.

В итоге мы имеем почти пустую форму. Единственный оставшийся объект — centralwidget, но он нам понадобится, поэтому с ним мы ничего не будем делать.
Теперь перетащите куда-нибудь в основную форму List Widget (не List View) и Push Button из Widget Box.
Макеты
Вместо использования фиксированных позиций и размеров элементов в приложении лучше использовать макеты. Фиксированные позиции и размеры у вас будут выглядеть хорошо (пока вы не измените размер окна), но вы никогда не можете быть уверены, что всё будет точно так же на других машинах и/или операционных системах.
Макеты представляют собой контейнеры для виджетов, которые будут удерживать их на определённой позиции относительно других элементов. Поэтому при изменении размера окна размер виджетов тоже будет меняться.
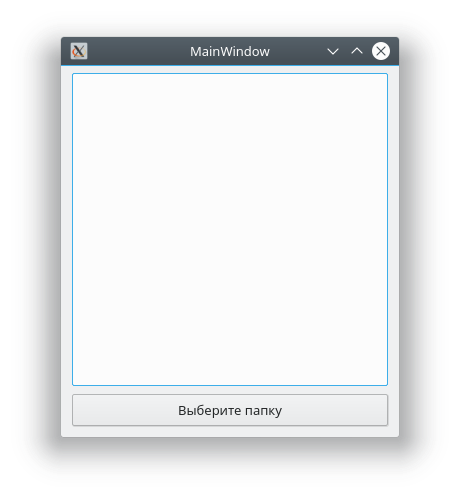
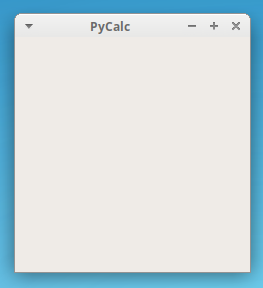
Давайте создадим нашу первую форму без использования макетов. Перетащите список и кнопку в форме и измените их размер, чтобы вышло вот так:
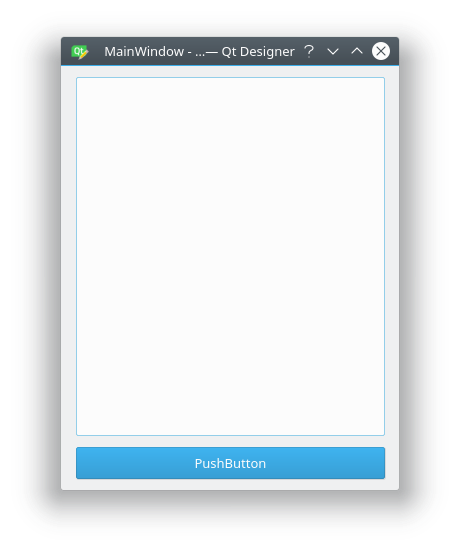
Теперь в меню Qt Designer нажмите Form, затем выберите Preview и увидите что-то похожее на скриншот выше. Выглядит хорошо, не так ли? Но вот что случится, когда мы изменим размер окна:

Наши объекты остались на тех же местах и сохранили свои размеры, несмотря на то что размер основного окна изменился и кнопку почти не видно. Вот поэтому в большинстве случаев стоит использовать макеты. Конечно, бывают случаи, когда вам, например, нужна фиксированная или минимальная/максимальная ширина объекта. Но вообще при разработке приложения лучше использовать макеты.
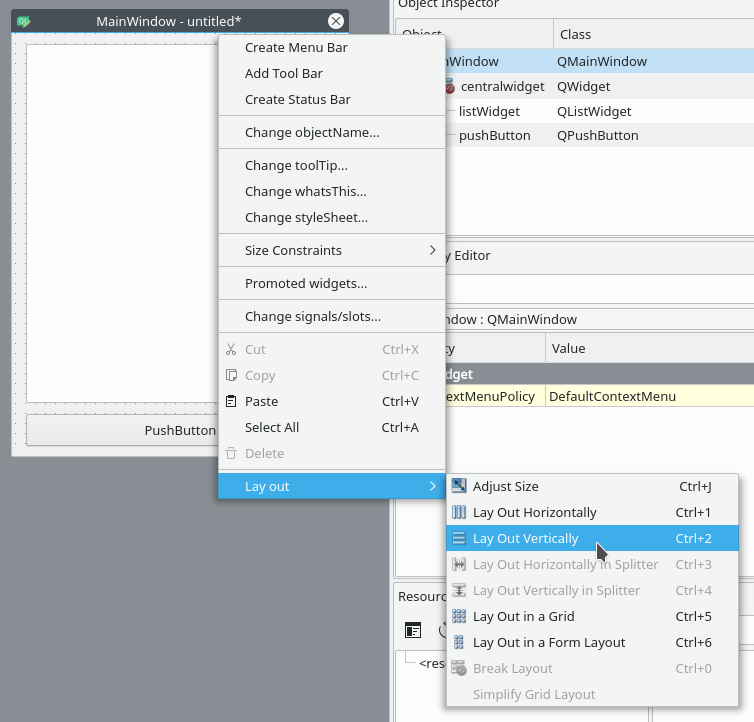
Основное окно уже поддерживает макеты, поэтому нам ничего не нужно добавлять в нашу форму. Просто кликните правой кнопкой мыши по Main Window в Object Inspector и выберите Lay out → Lay out vertically. Также вы можете кликнуть правой кнопкой по пустой области в форме и выбрать те же опции:
Ваши элементы должны быть в том же порядке, что и до внесённых изменений, но если это не так, то просто перетащите их на нужное место.
Так как мы использовали вертикальное размещение, все элементы, которые мы добавим, будут располагаться вертикально. Можно комбинировать размещения для получения желаемого результата. Например, горизонтальное размещение двух кнопок в вертикальном будет выглядеть так:
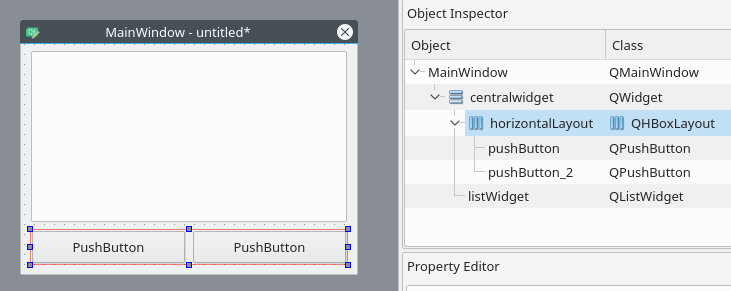
Если у вас не получается переместить элемент в главном окне, вы можете сделать это в окне Object Inspector.
Последние штрихи
Теперь, благодаря вертикальному размещению, наши элементы выровнены правильно. Единственное, что осталось сделать (но не обязательно), — изменить имя элементов и их текст.
В простом приложении вроде этого с одним лишь списком и кнопкой изменение имён не обязательно, так как им в любом случае просто пользоваться. Тем не менее правильное именование элементов — то, к чему стоит привыкать с самого начала.
Свойства элементов можно изменить в разделе Property Editor.
Подсказка: вы можете менять размер, передвигать или добавлять часто используемые элементы в интерфейс Qt Designer для ускорения рабочего процесса. Вы можете добавлять скрытые/закрытые части интерфейса через пункт меню View.
Нажмите на кнопку, которую вы добавили в форму. Теперь в Property Editor вы должны видеть все свойства этого элемента. В данный момент нас интересуют objectName и text в разделе QAbstractButton. Вы можете сворачивать разделы в Property Editor нажатием по названию раздела.
Измените значение objectName на btnBrowse и text на Выберите папку.
Должно получиться так:

Именем объекта списка является listWidget, что вполне подходит в данном случае.
Сохраните дизайн как design.ui в папке проекта.
Превращаем дизайн в код
Конечно, можно использовать .ui-файлы напрямую из Python-кода, однако есть и другой путь, который может показаться легче. Можно конвертировать код .ui-файла в Python-файл, который мы потом сможем импортировать и использовать. Для этого мы используем команду pyuic5 из терминала/командной строки.
Чтобы конвертировать .ui-файл в Python-файл с названием design.py, используйте следующую команду:
$ pyuic5 path/to/design.ui -o output/path/to/design.pyПишем код
Теперь у нас есть файл design.py с нужной частью дизайна нашего приложения и мы начинать работу над созданием его логики.
Создайте файл main.py в папке, где находится design.py.
Другие интересные статьи по Python.
Используем дизайн
Для Python GUI приложения понадобятся следующие модули:
import sys  # sys нужен для передачи argv в QApplication
from PyQt5 import QtWidgets
Также нам нужен код дизайна, который мы создали ранее, поэтому его мы тоже импортируем:
import design # Это наш конвертированный файл дизайнаТак как файл с дизайном будет полностью перезаписываться каждый раз при изменении дизайна, мы не будем изменять его. Вместо этого мы создадим новый класс ExampleApp, который объединим с кодом дизайна для использования всех его функций:
class ExampleApp(QtWidgets.QMainWindow, design.Ui_MainWindow):
    def __init__(self):
        # Это здесь нужно для доступа к переменным, методам
        # и т.д. в файле design.py
        super().__init__()
        self.setupUi(self)  # Это нужно для инициализации нашего дизайна
В этом классе мы будем взаимодействовать с элементами интерфейса, добавлять соединения и всё остальное, что нам потребуется. Но для начала нам нужно инициализировать класс при запуске кода. С этим мы разберёмся в функции main():
def main():
    app = QtWidgets.QApplication(sys.argv)  # Новый экземпляр QApplication
    window = ExampleApp()  # Создаём объект класса ExampleApp
    window.show()  # Показываем окно
    app.exec_()  # и запускаем приложение
И чтобы выполнить эту функцию, мы воспользуемся привычной конструкцией:
if __name__ == '__main__':  # Если мы запускаем файл напрямую, а не импортируем
    main()  # то запускаем функцию main()
В итоге main.py выглядит таким образом:
import sys  # sys нужен для передачи argv в QApplication
from PyQt5 import QtWidgets
import design  # Это наш конвертированный файл дизайна

class ExampleApp(QtWidgets.QMainWindow, design.Ui_MainWindow):
    def __init__(self):
        # Это здесь нужно для доступа к переменным, методам
        # и т.д. в файле design.py
        super().__init__()
        self.setupUi(self)  # Это нужно для инициализации нашего дизайна

def main():
    app = QtWidgets.QApplication(sys.argv)  # Новый экземпляр QApplication
    window = ExampleApp()  # Создаём объект класса ExampleApp
    window.show()  # Показываем окно
    app.exec_()  # и запускаем приложение

if __name__ == '__main__':  # Если мы запускаем файл напрямую, а не импортируем
    main()  # то запускаем функцию main()
Если запустить этот код: $ python3 main.py, то наше приложение запустится!
Но нажатие на кнопку ничего не даёт, поэтому нам придётся с этим разобраться.
Добавляем функциональность в наше Python GUI приложение
Примечание Весь дальнейший код пишется внутри класса ExampleApp.
Начнём с кнопки Выберите папку. Привязать к функции событие вроде нажатия на кнопку можно следующим образом:
self.btnBrowse.clicked.connect(self.browse_folder)Добавьте эту строку в метод __init__ класса ExampleApp, чтобы выполнить привязку при запуске приложения. А теперь взглянем на неё поближе:
self.btnBrowse: здесьbtnBrowse— имя объекта, который мы определили в Qt Designer.selfговорит само за себя и означает принадлежность к текущему классу;clicked— событие, которое мы хотим привязать. У разных элементов разные события, например, у виджетов списка естьitemSelectionChangedи т.д.;connect()— метод, который привязывает событие к вызову переданной функции;self.browse_folder— просто функция (метод), которую мы описали в классеExampleApp.
Для открытия диалога выбора папки мы можем использовать встроенный метод QtWidgets.QFileDialog.getExistingDirectory:
directory = QtWidgets.QFileDialog.getExistingDirectory(self, "Выберите папку")Если пользователь выберет директорию, переменной directory присвоится абсолютный путь к выбранной директории, в противном случае она будет равна None. Чтобы не выполнять код дальше, если пользователь закроет диалог, мы используем команду if directory:.
Для отображения содержимого директории нам нужно импортировать os:
import osИ получить список содержимого следующим образом:
os.listdir(path)Для добавления элементов в listWidget мы используем метод addItem(), а для удаления всех элементов у нас есть self.listWidget.clear().
В итоге функция browse_folder должна выглядеть так:
def browse_folder(self):
self.listWidget.clear() # На случай, если в списке уже есть элементы
directory = QtWidgets.QFileDialog.getExistingDirectory(self, "Выберите папку")
# открыть диалог выбора директории и установить значение переменной
# равной пути к выбранной директории
if directory: # не продолжать выполнение, если пользователь не выбрал директорию
for file_name in os.listdir(directory): # для каждого файла в директории
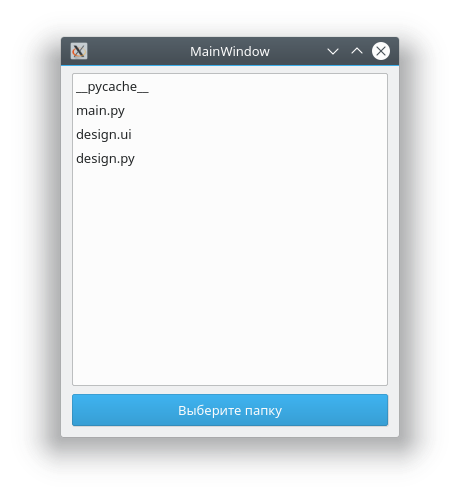
self.listWidget.addItem(file_name) # добавить файл в listWidgetТеперь, если запустить приложение, нажать на кнопку и выбрать директорию, мы увидим:
Так выглядит весь код нашего Python GUI приложения:
import sys  # sys нужен для передачи argv в QApplication
import os  # Отсюда нам понадобятся методы для отображения содержимого директорий

from PyQt5 import QtWidgets

import design  # Это наш конвертированный файл дизайна

class ExampleApp(QtWidgets.QMainWindow, design.Ui_MainWindow):
    def __init__(self):
        # Это здесь нужно для доступа к переменным, методам
        # и т.д. в файле design.py
        super().__init__()
        self.setupUi(self)  # Это нужно для инициализации нашего дизайна
        self.btnBrowse.clicked.connect(self.browse_folder)  # Выполнить функцию browse_folder
                                                            # при нажатии кнопки

    def browse_folder(self):
        self.listWidget.clear()  # На случай, если в списке уже есть элементы
        directory = QtWidgets.QFileDialog.getExistingDirectory(self, "Выберите папку")
        # открыть диалог выбора директории и установить значение переменной
        # равной пути к выбранной директории

        if directory:  # не продолжать выполнение, если пользователь не выбрал директорию
            for file_name in os.listdir(directory):  # для каждого файла в директории
                self.listWidget.addItem(file_name)   # добавить файл в listWidget

def main():
    app = QtWidgets.QApplication(sys.argv)  # Новый экземпляр QApplication
    window = ExampleApp()  # Создаём объект класса ExampleApp
    window.show()  # Показываем окно
    app.exec_()  # и запускаем приложение

if __name__ == '__main__':  # Если мы запускаем файл напрямую, а не импортируем
    main()  # то запускаем функцию main()
Это были основы использования Qt Designer и PyQt для разработки Python GUI приложения. Теперь вы можете спокойно изменять дизайн приложения и использовать команду pyuic5 без страха потерять написанный код.
Перевод статьи «PyQt: Getting started with PyQt and Qt Designer»
#статьи
- 25 июл 2022
-

0
Знакомимся с библиотекой Tkinter — пишем на Python кросс-платформенный калькулятор, который рассчитывает вес человека.
Иллюстрация: Merry Mary для Skillbox Media

Изучает Python, его библиотеки и занимается анализом данных. Любит путешествовать в горах.
Десктопные приложения пишут на разных языках программирования: C++, C#, C, Python и других. Начинающим разработчикам проще всего использовать Python и его библиотеки для работы над графическими интерфейсами.
Одна из таких библиотек — Tkinter. Она входит в стандартный пакет Python и позволяет создавать приложения для Windows, mac OS и Linux. Давайте разберёмся, как устроена эта библиотека, и напишем десктопный калькулятор, помогающий рассчитать вес человека.
GUI (Graphical User Interface) — это графический интерфейс пользователя, оболочка программы, с которой мы взаимодействуем с помощью клавиатуры и мыши. На современных операционных системах почти все программы работают с графическим интерфейсом, и мы каждый день сталкиваемся с GUI: читаем статьи в браузере, набираем текст в редакторе или играем в игры.
Противоположность графическому интерфейсу — командная строка, позволяющая управлять приложением с помощью текстовых команд. Такой интерфейс реализован в терминале macOS и командной строке Windows.
Для работы с GUI в Python есть четыре библиотеки:
- Tkinter;
- Kivy;
- Python QT;
- wxPython.
Мы выбрали Tkinter, потому что она не требует дополнительной установки и позволяет быстро создавать приложения с простым графическим интерфейсом.
Tkinter — это удобный интерфейс для работы со средствами Tk. Приложения, созданные на основе этой библиотеки, кросс-платформенные, то есть могут запускаться на разных операционных системах.
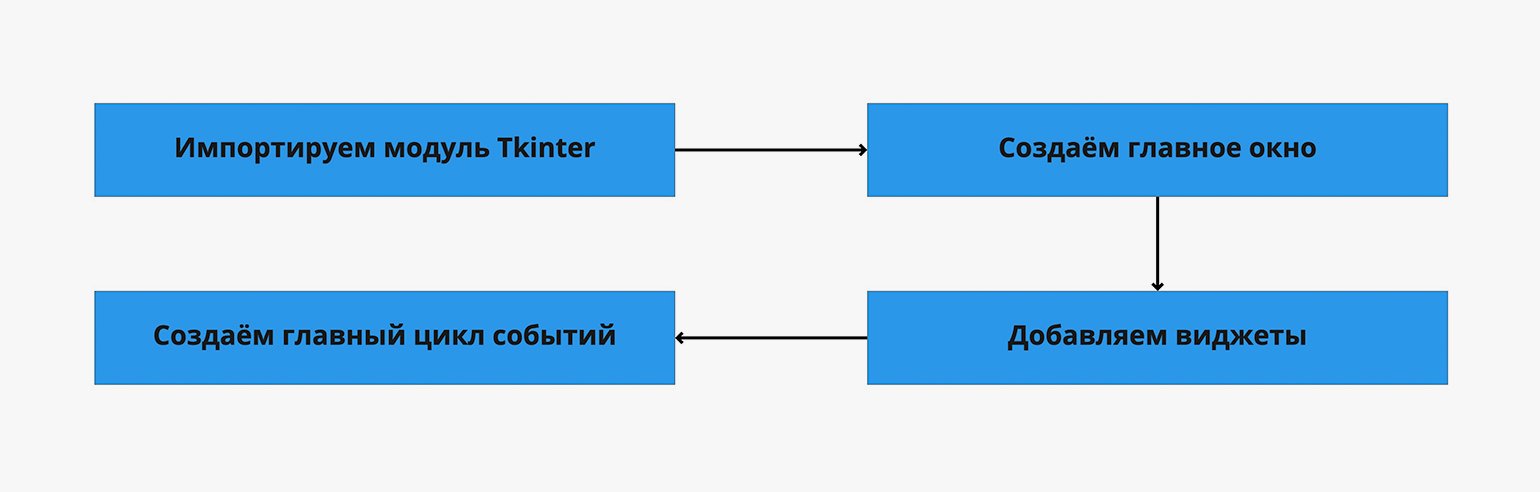
Схематично работу с Tkinter можно представить в виде четырёх шагов:
Что здесь происходит:
- Мы подключаем библиотеку Tkinter с помощью директивы import.
- Создаём главное окно приложения, в котором будут размещаться все графические элементы.
- Добавляем виджеты — визуальные элементы, выполняющие определённые действия.
- Создаём главный цикл событий — он включает в себя все события, происходящие при взаимодействии пользователя с интерфейсом.
Ключевые объекты в работе с Tkinter — виджеты. Это аналоги тегов из HTML, которые позволяют создавать интерактивные и неинтерактивные элементы, например надписи или кнопки. Всего их 18, но чаще всего используют следующие:
- Button — кнопки;
- Canvas — «холст», на котором рисуют графические фигуры;
- Entry — виджет для создания полей ввода;
- Label — контейнер для размещения текста или изображения;
- Menu — виджет для создания пунктов меню.
Понять работу с виджетами легче всего на практике. Но прежде чем к ней приступить, обсудим идею нашего первого десктопного приложения.
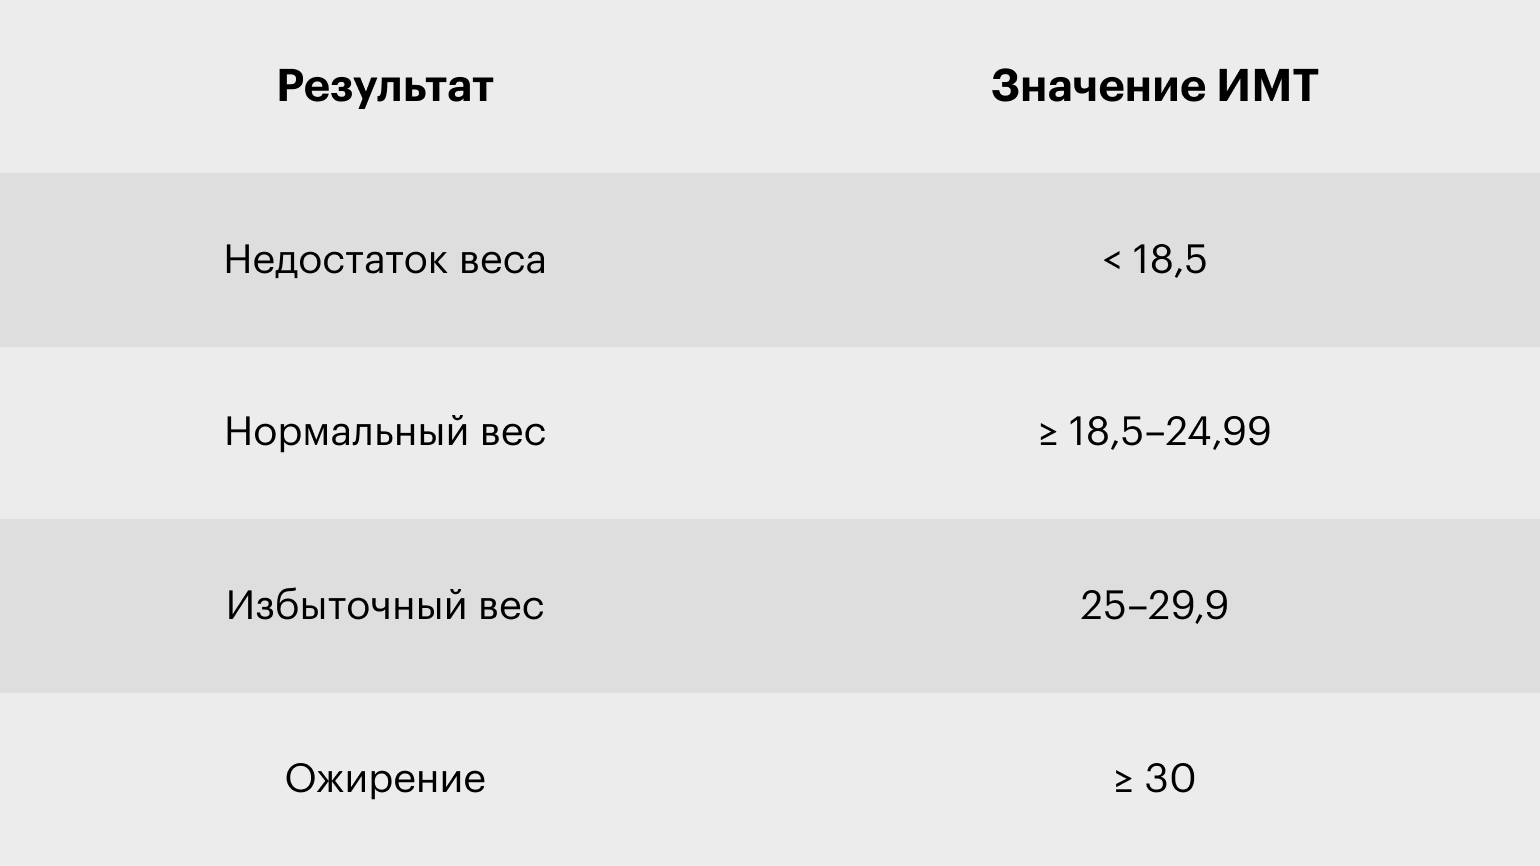
Мы напишем калькулятор индекса массы тела. ИМТ — это важный медицинский показатель, который позволяет оценить, есть ли у человека избыточный вес или ожирение. Он рассчитывается по следующей формуле:
Результаты расчётов оценивают с помощью специальной таблицы. У врачей она имеет много градаций, мы же воспользуемся упрощённой версией:
Писать код на Python лучше всего в специальной IDE, например в PyCharm или Visual Studio Code. Они подсвечивают синтаксис и предлагают продолжение кода — это сильно упрощает работу программиста. Весь код из этой статьи мы писали в Visual Studio Code.
Библиотека Tkinter предустановлена в Python. Поэтому её нужно только импортировать:
import tkinter as tk
Теперь мы можем использовать любые модули из этой библиотеки.

Прежде чем писать код, необходимо ответить на несколько вопросов:
- Какие данные мы хотим получить от пользователя и в каком виде?
- Какое событие будет запускать расчёт ИМТ: нажатие кнопки, получение приложением всех необходимых данных или что-то другое?
- Как будем показывать результат?
В нашем случае необходимо получить от пользователя вес и рост в виде целых чисел. При этом вес должен быть введён в килограммах, а рост — в сантиметрах. ИМТ будет рассчитываться по нажатии кнопки, а результат — выводиться во всплывающем окне в виде значения ИМТ и категории, к которой он относится.
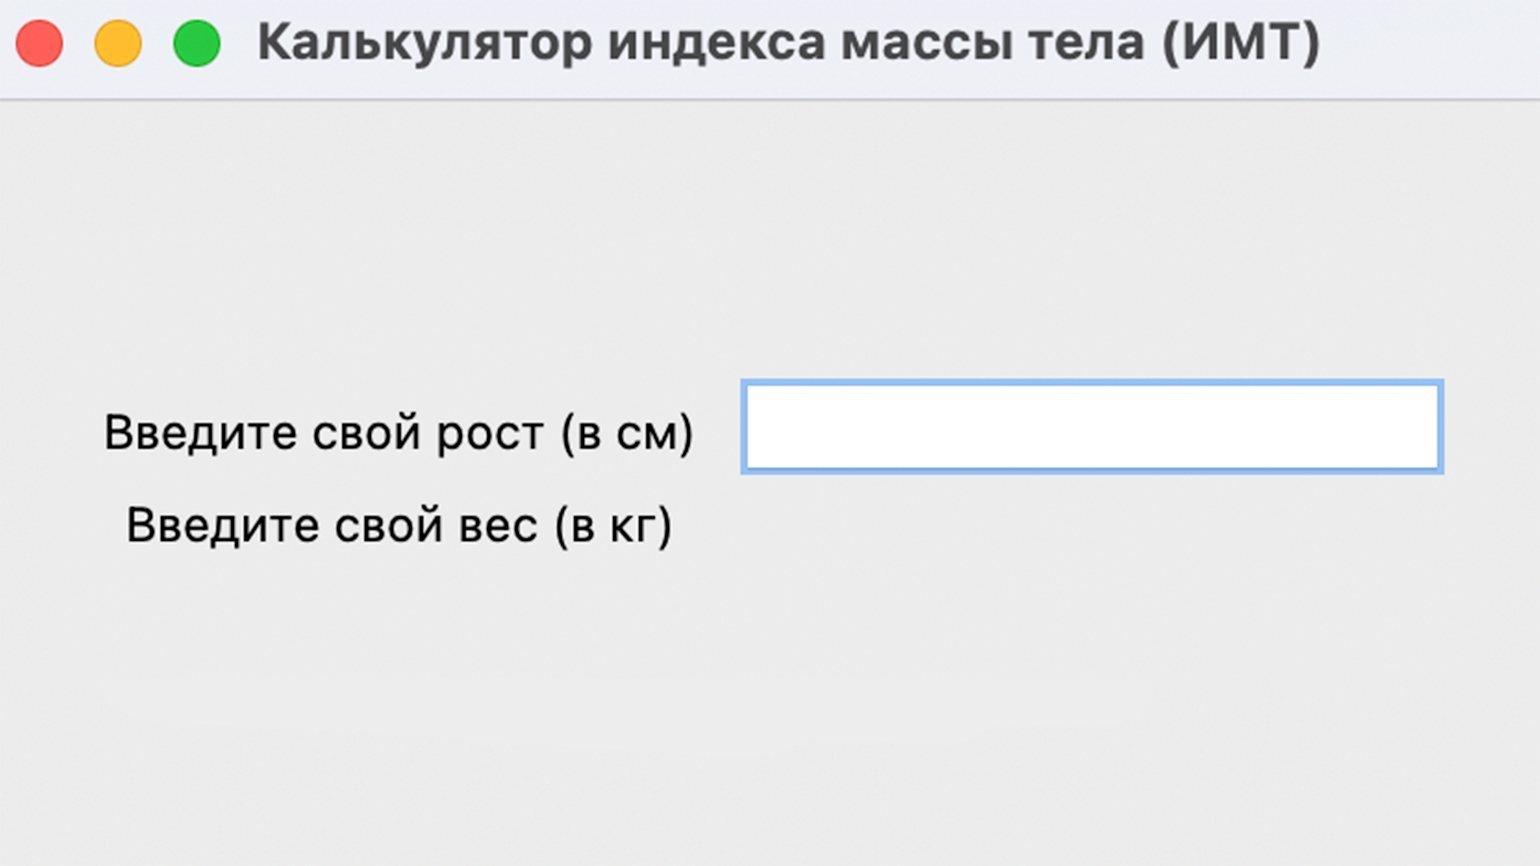
Схематично графический интерфейс нашего калькулятора будет выглядеть так:

Теперь попробуем реализовать интерфейс и работу калькулятора с помощью Python и Tkinter.
После импорта библиотеки в Python загрузим её методы:
from tkinter import *
from tkinter import messagebox
Первая строка позволяет нам загрузить все методы Tkinter и использовать их в коде без ссылки на их наименование. Второй строкой мы явно импортируем метод messagebox, который будем использовать для вывода всплывающего окна с результатом. Это удобно, так как метод потребуется нам несколько раз.
Теперь создадим окно нашего приложения. Для этого воспользуемся модулем Tk. Приложение назовём «Калькулятор индекса массы тела (ИМТ)»:
window = Tk() #Создаём окно приложения.
window.title("Калькулятор индекса массы тела (ИМТ)") #Добавляем название приложения.
После запуска кода ничего не произойдёт. Это не ошибка. На самом деле код выполнился и окно закрылось. Необходимо явно указать, что окно приложения не должно закрываться до тех пор, пока пользователь сам не сделает этого. Для этого к коду добавим функцию window.mainloop (), указывающую на запуск цикла событий:
window.mainloop()
Запустив код, увидим экран приложения:
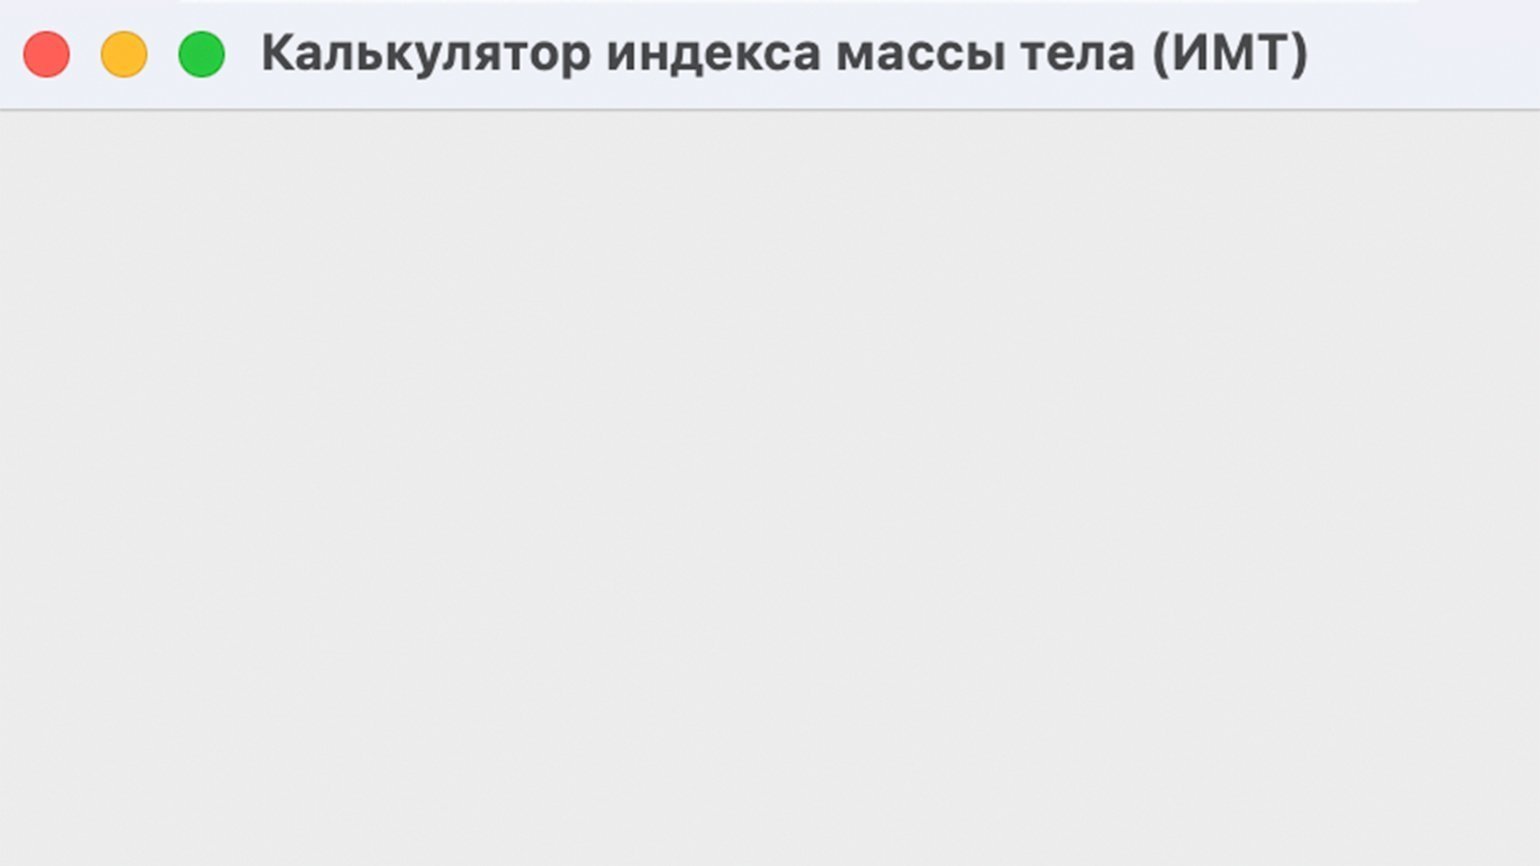
Мы не указали размер окна, поэтому название приложения не помещается в него полностью. Исправим это с помощью метода geometry:
window.geometry('400x300')
Теперь название приложения видно полностью:
В окне приложения необходимо разместить несколько элементов с нашего эскиза: два поля ввода информации с подписями и одну кнопку. Важно, чтобы поля не накладывались друг на друга и не уходили за пределы окна. В Tkinter для этого есть несколько методов:
- pack — используется, когда мы работаем с контейнерами для элементов. Позволяет позиционировать кнопки, надписи или другие элементы внутри контейнеров.
- place — позволяет позиционировать элементы, указывая точные координаты.
- grid — размещает элементы по ячейкам условной сетки, разделяющей окно приложения.
Мы воспользуемся комбинацией методов pack и grid. Для начала создадим виджет Frame для размещения надписей, полей ввода и кнопок. Подробное описание работы виджета есть в документации. Мы же используем только два свойства: padx и pady.
Обозначим отступы по вертикали и горизонтали в 10 пикселей для элементов, которые будут расположены внутри Frame:
frame = Frame(
   window, #Обязательный параметр, который указывает окно для размещения Frame.
   padx = 10, #Задаём отступ по горизонтали.
   pady = 10 #Задаём отступ по вертикали.
)
frame.pack(expand=True) #Не забываем позиционировать виджет в окне. Здесь используется метод pack. С помощью свойства expand=True указываем, что Frame заполняет весь контейнер, созданный для него.
В окне приложения нам необходимо добавить три вида виджетов: поле для ввода информации (Entry), текстовые надписи (Label) и кнопку (Button).
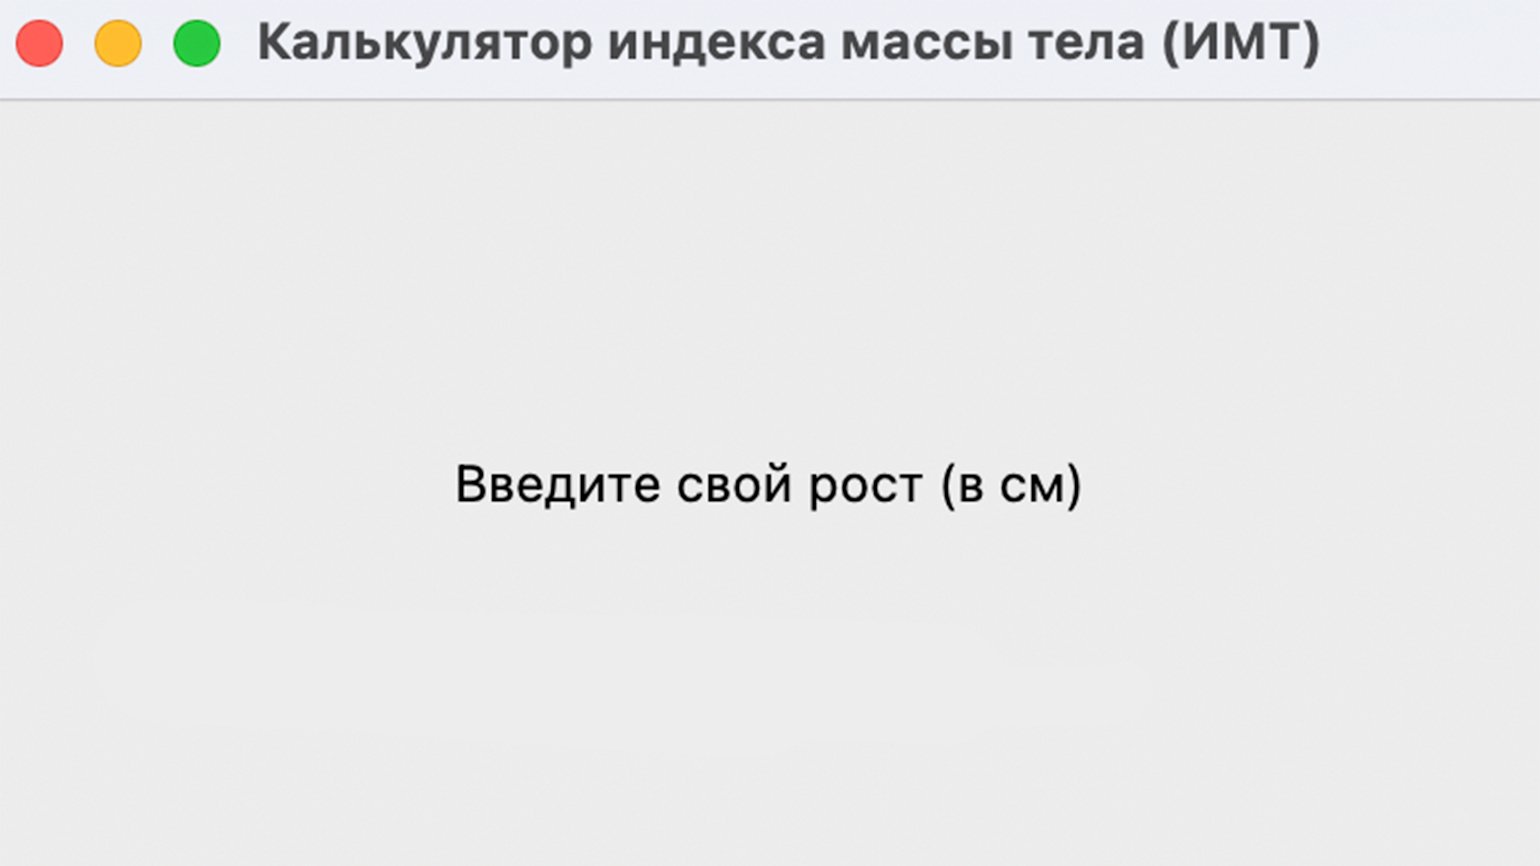
Начнём с надписей. Воспользуемся виджетом Label:
height_lb = Label(
   frame,
   text="Введите свой рост (в см)  "
)
height_lb.grid(row=3, column=1)
Мы передаём виджету Label два параметра:
- frame — используем заготовку виджета Frame, в которой уже настроены отступы по вертикали и горизонтали.
- text — текст, который должен быть выведен на экран.
Для позиционирования виджета используем метод grid. Укажем, что текст должен располагаться в ячейке с координатами «3-я строка, 1-й столбец». Если запустим код, то увидим там единственный элемент:
Сейчас элемент расположен в центре окна, но он займёт правильное положение, когда мы напишем другие элементы.
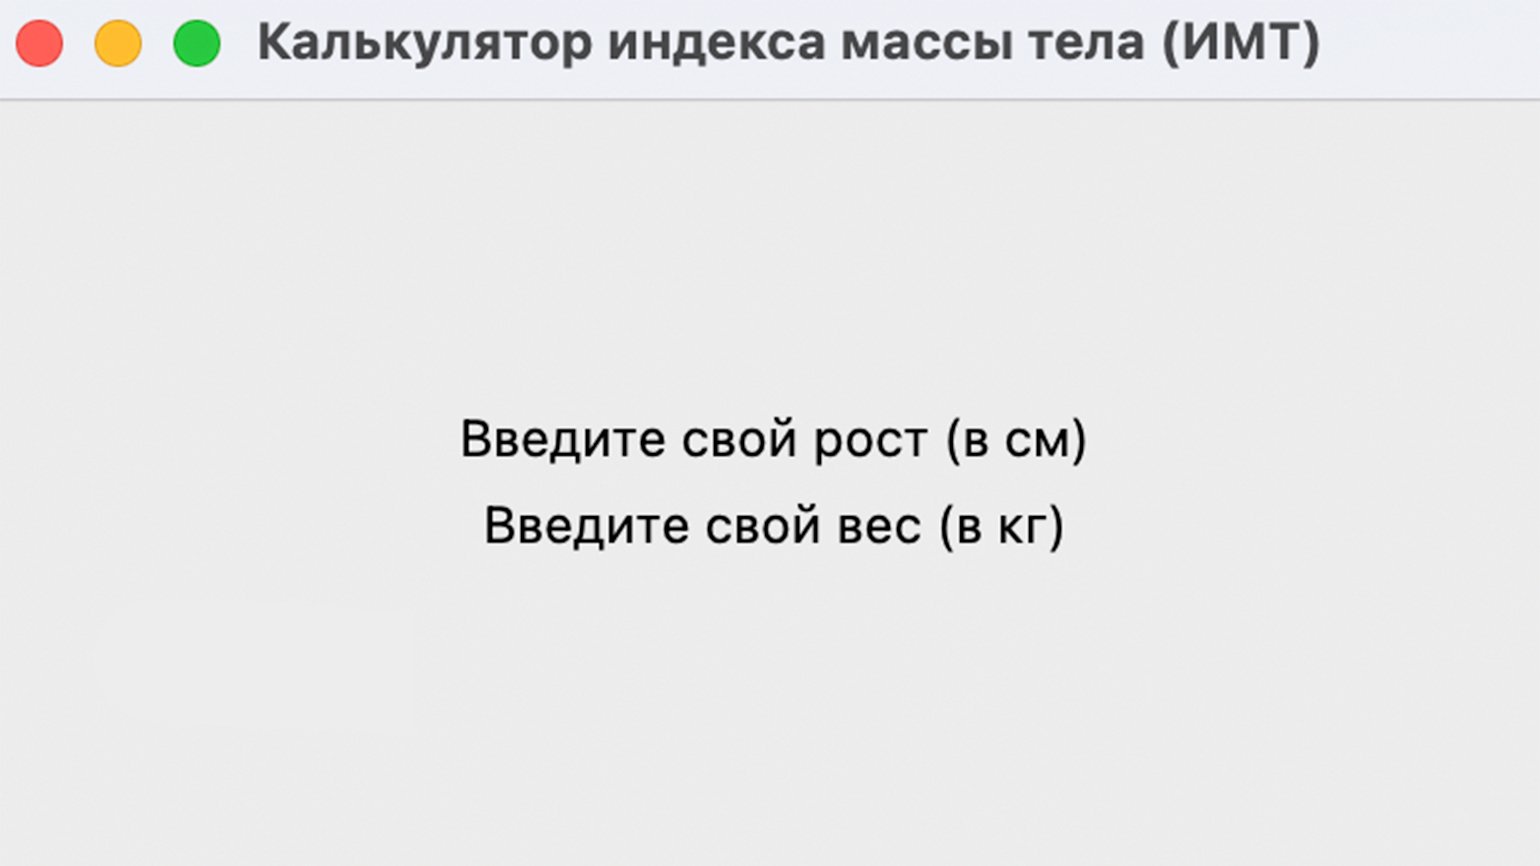
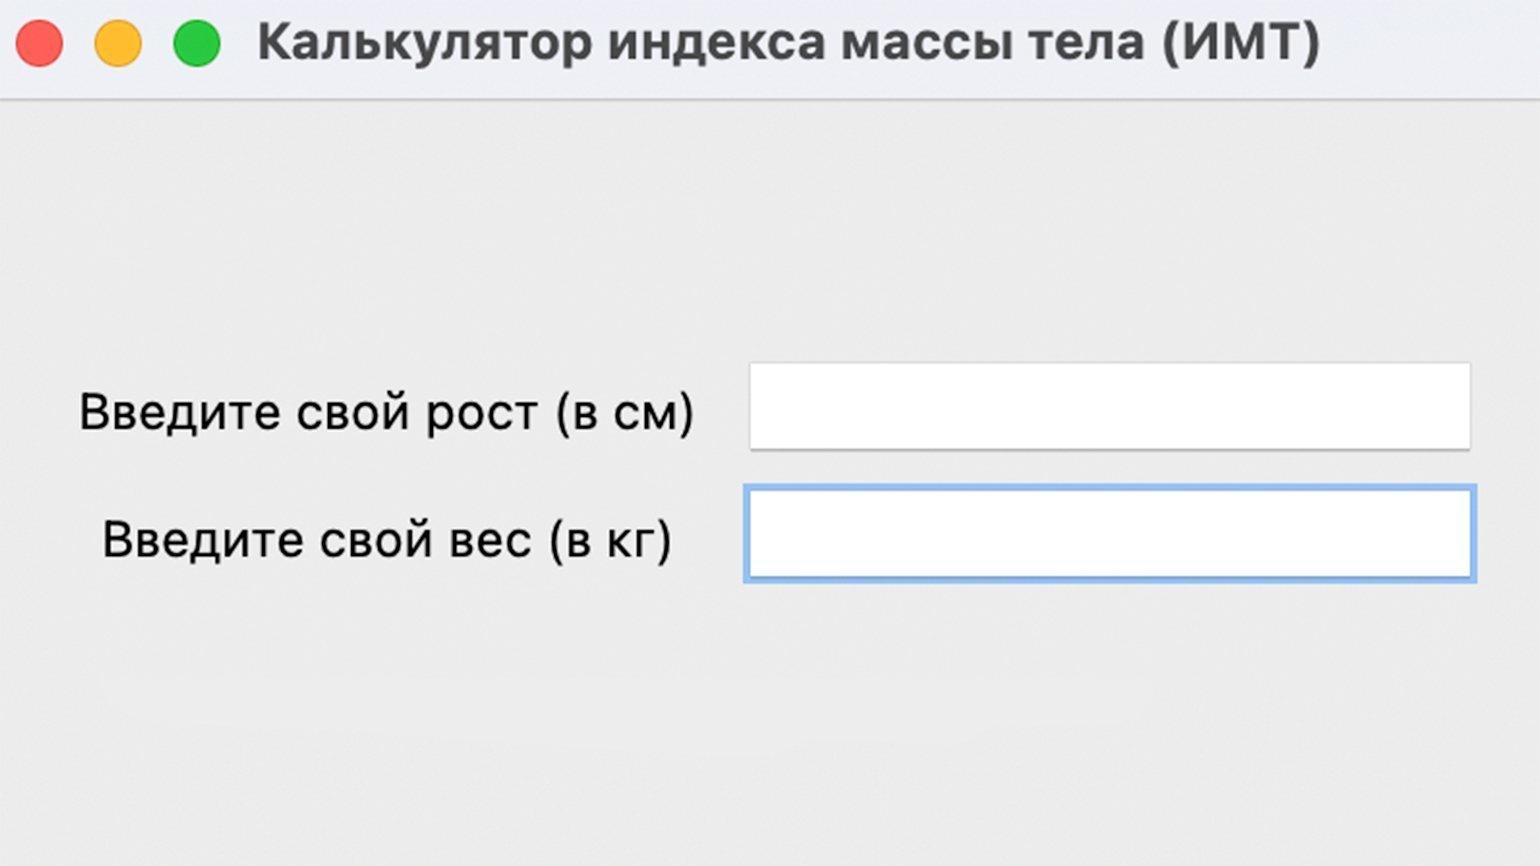
Добавим вторую надпись о весе аналогичным образом, но при позиционировании в grid укажем следующую, четвёртую строку:
weight_lb = Label(
   frame,
   text="Введите свой вес (в кг)  ",
)
weight_lb.grid(row=4, column=1)
Запускаем код и смотрим на результат:
Теперь добавим поля для ввода пользовательской информации, используя виджет Entry:
height_tf = Entry(
   frame, #Используем нашу заготовку с настроенными отступами.
)
height_tf.grid(row=3, column=2)
Для позиционирования мы также воспользовались методом grid. Обратите внимание, что наш элемент должен быть расположен напротив надписи «Введите свой рост (в см)». Поэтому мы используем ячейку в той же строке, но уже во втором столбце. Запустим код и посмотрим на результат:
Всё получилось. Остаётся по аналогии добавить поле ввода веса:
weight_tf = Entry(
   frame,
)
weight_tf.grid(row=4, column=2, pady=5)
Посмотрим на результат:
Теперь добавим кнопку, которая будет запускать расчёт ИМТ. Сделаем это с помощью виджета Button:
cal_btn = Button(
   frame, #Заготовка с настроенными отступами.
   text='Рассчитать ИМТ', #Надпись на кнопке.
)
cal_btn.grid(row=5, column=2) #Размещаем кнопку в ячейке, расположенной ниже, чем наши надписи, но во втором столбце, то есть под ячейками для ввода информации.
Посмотрим на результат:
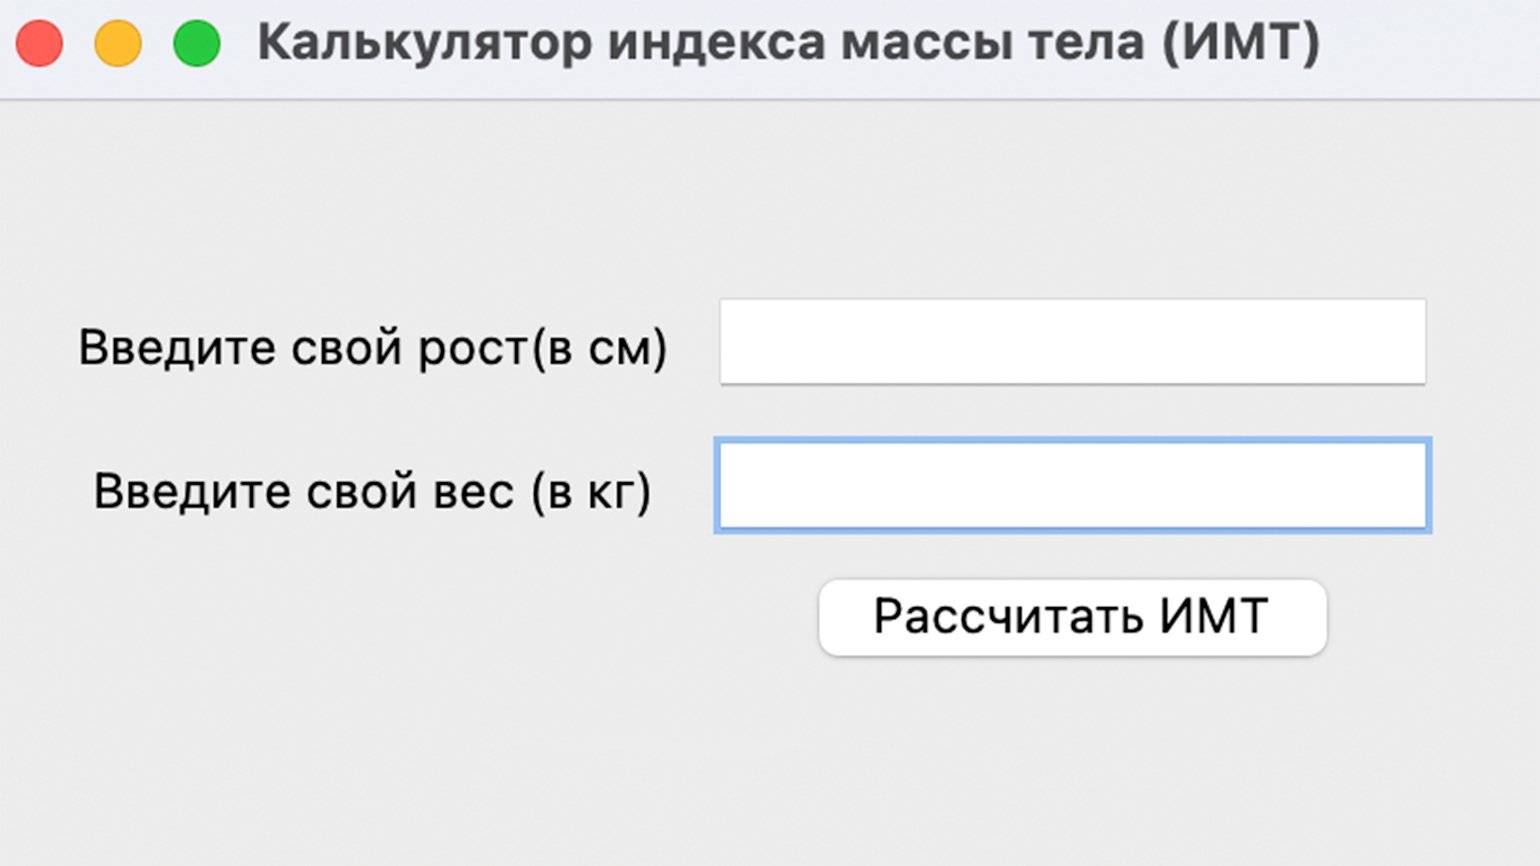
Теперь в приложении есть все графические элементы. Остаётся лишь написать код, который будет получать информацию из виджетов Entry и рассчитывать индекс массы тела.
Напишем простую функцию и разберём её построчно:
def calculate_bmi(): #Объявляем функцию.
   kg = int(weight_tf.get()) #С помощью метода .get получаем из поля ввода с именем weight_tf значение веса, которое ввёл пользователь и конвертируем в целое число с помощью int().
   m = int(height_tf.get())/100 #С помощью метода .get получаем из поля ввода с именем height_tf значение роста и конвертируем в целое число с помощью int(). Обязательно делим его на 100, так как пользователь вводит рост в сантиметрах, а в формуле для расчёта ИМТ используются метры.
   bmi = kg/(m*m)#Рассчитываем значение индекса массы тела.
   bmi = round(bmi, 1) #Округляем результат до одного знака после запятой.
Функция готова. Но теперь нам необходимо оценить полученный результат расчёта и вывести сообщение для пользователя.
Дополним нашу функцию calculate_bmi. Воспользуемся условным оператором if, чтобы учесть полученные значения ИМТ, и методом Tkinter messagebox для отображения сообщения во всплывающем окне:
if bmi < 18.5:
       messagebox.showinfo('bmi-pythonguides', f'ИМТ = {bmi} соответствует недостаточному весу')
   elif (bmi > 18.5) and (bmi < 24.9):
       messagebox.showinfo('bmi-pythonguides', f'ИМТ = {bmi} соответствует нормальному весу')
   elif (bmi > 24.9) and (bmi < 29.9):
       messagebox.showinfo('bmi-pythonguides', f'ИМТ = {bmi} соответствует избыточному весу')
   else:
       messagebox.showinfo('bmi-pythonguides', f'ИМТ = {bmi} соответствует ожирению')
Остаётся последний шаг — наша функция должна запускаться при нажатии на кнопку «Рассчитать ИМТ». Для этого добавим свойство command в виджет Button:
cal_btn = Button(
   frame,
   text='Рассчитать ИМТ',
   command=calculate_bmi #Позволяет запустить событие с функцией при нажатии на кнопку.
)
cal_btn.grid(row=5, column=2)
Запустим код и посмотрим на результат:
Всё работает. Функция получает данные из полей ввода и рассчитывает индекс массы тела, показывая результат на экране.
from tkinter import *
from tkinter import messagebox

def calculate_bmi():
   kg = int(weight_tf.get())
   m = int(height_tf.get())/100
   bmi = kg/(m*m)
   bmi = round(bmi, 1)

   if bmi < 18.5:
       messagebox.showinfo('bmi-pythonguides', f'ИМТ = {bmi} соответствует недостаточному весу')
   elif (bmi > 18.5) and (bmi < 24.9):
       messagebox.showinfo('bmi-pythonguides', f'ИМТ = {bmi} соответствует нормальному весу')
   elif (bmi > 24.9) and (bmi < 29.9):
       messagebox.showinfo('bmi-pythonguides', f'ИМТ = {bmi} соответствует избыточному весу')
   else:
       messagebox.showinfo('bmi-pythonguides', f'ИМТ = {bmi} соответствует ожирению')

window = Tk()
window.title('Калькулятор индекса массы тела (ИМТ)')
window.geometry('400x300')


frame = Frame(
   window,
   padx=10,
   pady=10
)
frame.pack(expand=True)


height_lb = Label(
   frame,
   text="Введите свой рост (в см)  "
)
height_lb.grid(row=3, column=1)

weight_lb = Label(
   frame,
   text="Введите свой вес (в кг)  ",
)
weight_lb.grid(row=4, column=1)

height_tf = Entry(
   frame,
)
height_tf.grid(row=3, column=2, pady=5)

weight_tf = Entry(
   frame,
)
weight_tf.grid(row=4, column=2, pady=5)

cal_btn = Button(
   frame,
   text='Рассчитать ИМТ',
   command=calculate_bmi
)
cal_btn.grid(row=5, column=2)

window.mainloop()
Узнать о возможностях Tkinter и особенностях работы с виджетами можно в официальной документации. А если хотите найти больше реальных примеров для практики, советуем две книги:
- Python GUI Programming with Tkinter. Develop responsive and powerful GUI applications with Tkinter, Алан Мур.
- Tkinter GUI Programming by Example, Дэвид Лав.

Учись бесплатно:
вебинары по программированию, маркетингу и дизайну.
Участвовать
Время на прочтение
4 мин
Количество просмотров 144K
Причиной написания статьи, явилось огромное количество постоянно возникающих у новичков вопросов такого содержания: «Как собрать проект c pyqt5», «Почему не работает», «Какой инструмент выбрать» и т.д. Сегодня научимся собирать проекты без мучений и танцев с бубном.
Как-то пришлось написать небольшое desktop-приложение. В качестве языка программирования для разработки был выбран python, поскольку для решения моей задачи он подходил идеально. В стандартную библиотеку Python уже входит библиотека tkinter, позволяющая создавать GUI. Но проблема tkinter в том, что данной библиотеке посвящено мало внимания, и найти в интернете курс, книгу или FAQ по ней довольно-таки сложно. Поэтому было решено использовать более мощную, современную и функциональную библиотеку Qt, которая имеет привязки к языку программирования python в виде библиотеки PyQT5. Более подробно про PyQT можете почитать здесь. В качестве примера я буду использовать код:
#!/usr/bin/python3
# -*- coding: utf-8 -*-

import sys
from PyQt5.QtWidgets import QApplication, QWidget
from PyQt5.QtGui import QIcon

class Example(QWidget):

    def __init__(self):
        super().__init__()

        self.initUI()

    def initUI(self):

        self.setGeometry(300, 300, 300, 220)
        self.setWindowTitle('Icon')
        self.setWindowIcon(QIcon('web.png'))

        self.show()

if __name__ == '__main__':

    app = QApplication(sys.argv)
    ex = Example()
    sys.exit(app.exec_())
Если вы более-менее опытный разработчик, то понимаете, что без интерпретатора код на python не запустить. А хотелось бы дать возможность каждому пользователю использовать программу. Вот здесь к нам на помощь и приходят специальные библиотеки позволяющие собирать проекты в .exe, которые можно потом без проблем запустить, как обычное приложение.
Существует большое количество библиотек, позволяющих это сделать, среди которых самые популярные: cx_Freeze, py2exe, nuitka, PyInstaller и др. Про каждую написано довольно много. Но надо сказать, что многие из этих решений позволяют запускать код только на компьютере, с предустановленным интерпретатором и pyqt5. Не думаю, что пользователь будет заморачиваться и ставить себе дополнительные пакеты и программы. Надеюсь, вы понимаете, что запуск программы на dev-среде и у пользователя это не одно и тоже. Также нужно отметить, что у каждого решения были свои проблемы: один не запускался, другой собирал то, что не смог потом запустить, третий вообще отказывался что-либо делать.
После долгих танцев с бубном и активным гуглением, мне все же удалось собрать проект с помощью pyinstaller, в полностью работоспособное приложение.
Немного о Pyinstaller
Pyinstaller собирает python-приложение и все зависимости в один пакет. Пользователь может запускать приложение без установки интерпретатора python или каких-либо модулей. Pyinstaller поддерживает python 2.7 и python 3.3+ и такие библиотеки как: numpy, PyQt, Django, wxPython и другие.
Pyinstaller тестировался на Windows, Mac OS X и Linux. Как бы там ни было, это не кросс-платформенный компилятор: чтобы сделать приложение под Windows, делай это на Windows; Чтобы сделать приложение под Linux, делай это на Linux и т.д.
PyInstaller успешно используется с AIX, Solaris и FreeBSD, но тестирование не проводилось.
Подробнее о PyInstaller можно почитать здесь: документация.
К тому же после сборки приложение весило всего около 15 мб. Это к слову и является преимуществом pyinstaller, поскольку он не собирает все подряд, а только необходимое. Аналогичные же библиотеки выдавали результат за 200-300 мб.
Приступаем к сборке
Прежде чем приступить к сборке мы должны установить необходимые библиотеки, а именно pywin32 и собственно pyinstaller:
pip install pypiwin32
pip install pyinstaller
Чтобы убедится, что все нормально установилось, вводим команду:
pyinstaller --versionдолжна высветиться версия pyinstaller. Если все правильно установилось, идем дальше.
В папке с проектом запускаем cmd и набираем:
pyinstaller myscript.pyСобственно это и есть простейшая команда, которая соберет наш проект.
Синтаксис команды pyinstaller таков:
pyinstaller [options] script [script …] | specfile
Наиболее часто используемые опции:
—onefile — сборка в один файл, т.е. файлы .dll не пишутся.
—windowed -при запуске приложения, будет появляться консоль.
—noconsole — при запуске приложения, консоль появляться не будет.
—icon=app.ico — добавляем иконку в окно.
—paths — возможность вручную прописать путь к необходимым файлам, если pyinstaller
не может их найти(например: —paths D:python35Libsite-packagesPyQt5Qtbin)
PyInstaller анализирует файл myscript.py и делает следующее:
- Пишет файл myscript.spec в той же папке, где находится скрипт.
- Создает папку build в той же папке, где находится скрипт.
- Записывает некоторые логи и рабочие файлы в папку build.
- Создает папку dist в той же папке, где находится скрипт.
- Пишет исполняемый файл в папку dist.
В итоге наша команда будет выглядеть так:
pyinstaller --onefile --icon=name.ico --noconsole myscript.pyПосле работы программы вы найдете две папки: dist и build. Собственно в папке dist и находится наше приложение. Впоследствии папку build можно спокойно удалить, она не влияет на работоспособность приложения.
Спасибо за внимание. Надеюсь статья была вам полезна.
Even though web and mobile applications appear to have taken over the software development market, there’s still demand for traditional graphical user interface (GUI) desktop applications. If you’re interested in building these kinds of applications in Python, then you’ll find a wide variety of libraries to choose from. They include Tkinter, wxPython, PyQt, PySide, and a few others.
In this tutorial, you’ll learn the basics of building GUI desktop applications with Python and PyQt.
In this tutorial, you’ll learn how to:
- Create graphical user interfaces with Python and PyQt
- Connect the user’s events on the app’s GUI with the app’s logic
- Organize a PyQt app using a proper project layout
- Create a fully functional GUI application with PyQt
For this tutorial, you’ll create a calculator app with Python and PyQt. This short project will help you grasp the fundamentals and get you up and running with this GUI library.
You can download the source code for the project and all examples in this tutorial by clicking on the link below:
Getting to Know PyQt
PyQt is a Python binding for Qt, which is a set of C++ libraries and development tools providing platform-independent abstractions for graphical user interfaces (GUIs). Qt also provides tools for networking, threads, regular expressions, SQL databases, SVG, OpenGL, XML, and many other powerful features.
Developed by RiverBank Computing Ltd, PyQt’s latest editions are:
- PyQt5: An edition that’s built against Qt 5.x only
- PyQt6: An edition that’s built against Qt 6.x only
In this tutorial, you’ll use PyQt6, as this version is the future of the library. From now on, be sure to consider any mention of PyQt as a reference to PyQt6.
PyQt6 is based on Qt v6. Therefore, it provides classes and tools for GUI creation, XML handling, network communication, regular expressions, threads, SQL databases, web browsing, and other technologies available in Qt. PyQt6 implements binding for many Qt classes in a set of Python modules, which are organized in a top-level Python package called PyQt6. For PyQt6 to work, you need Python 3.6.1 or later.
PyQt6 is compatible with Windows, Unix, Linux, macOS, iOS, and Android. This is an attractive feature if you’re looking for a GUI framework to develop multiplatform applications that have a native look and feel on each platform.
PyQt6 is available under two licenses:
- The Riverbank Commercial License
- The General Public License (GPL), version 3
Your PyQt6 license must be compatible with your Qt license. If you use the GPL license, then your code must also use a GPL-compatible license. If you want to use PyQt6 to create commercial applications, then you need a commercial license for your installation.
If you need more information about PyQt6 licensing, then check out the license FAQs page on the project’s official documentation.
Installing PyQt
You have several options for installing PyQt on your system or development environment. The recommended option is to use to use binary wheels. Wheels are the standard way to install Python packages from the Python package index, PyPI.
In any case, you need to consider that wheels for PyQt6 are only available for Python 3.6.1 and later. There are wheels for Linux, macOS, and Windows (64-bit).
All of these wheels include copies of the corresponding Qt libraries, so you won’t need to install them separately.
Another installation option is to build PyQt from source. This can be a bit complicated, so you might want to avoid it if possible. If you really need to build from source, then check out what the library’s documentation recommends in those cases.
Alternatively, you have the option of using package managers, such as APT on Linux or Homebrew on macOS, to install PyQt6. In the next few sections, you’ll go through some of the options for installing PyQt6 from different sources and on different platforms.
Virtual Environment Installation With pip
Most of the time, you should create a Python virtual environment to install PyQt6 in an isolated way. To create a virtual environment and install PyQt6 in it, run the following on your command line:
- Windows
- Linux + macOS
PS> python -m venv venv
PS> venvScriptsactivate
(venv) PS> python -m pip install pyqt6
$ python -m venv venv
$ source venv/bin/activate
(venv) $ python -m pip install pyqt6
Here, you first create a virtual environment using the venv module from the standard library. Then you activate it, and finally you install PyQt6 in it using pip. Note that you must have Python 3.6.1 or later for the install command to work correctly.
System-Wide Installation With pip
You’ll rarely need to install PyQt directly on your system Python environment. If you ever need to do this kind of installation, then run the following command on your command line or in your terminal window without activating any virtual environment:
$ python -m pip install pyqt6
With this command, you’ll install PyQt6 in your system Python environment directly. You can start using the library immediately after the installation finishes. Depending on your operating system, you may need root or administrator privileges for this installation to work.
Even though this is a fast way to install PyQt6 and start using it right away, it’s not the recommended approach. The recommended approach is to use a Python virtual environment, as you learned in the previous section.
Platform-Specific Installation
Several Linux distributions include binary packages for PyQt6 in their repositories. If this your case, then you can install the library using the distribution’s package manager. On Ubuntu, for example, you can use the following command:
$ sudo apt install python3-pyqt6
With this command, you’ll install PyQt6 and all of its dependencies in your base system, so you can use the library in any of your GUI projects. Note that root privileges are needed, which you invoke here with the sudo command.
If you’re a macOS user, then you can install PyQt6 using the Homebrew package manager. To do this, open a terminal and run the following command:
After running this command, you’ll have PyQt6 installed on your Homebrew Python environment, and it’ll be ready for you to use.
If you use a package manager on Linux or macOS, then there’s a chance you won’t get the latest version of PyQt6. A pip installation will be better if you want to ensure that you have the latest release.
Creating Your First PyQt Application
Now that you have a working PyQt installation, you’re ready to create your first GUI app. You’ll create a Hello, World! application with Python and PyQt. Here are the steps that you’ll follow:
- Import
QApplicationand all the required widgets fromPyQt6.QtWidgets. - Create an instance of
QApplication. - Create your application’s GUI.
- Show your application’s GUI.
- Run your application’s event loop, or main loop.
You can download the source code for the examples that you’ll code in this section by clicking the link below:
To kick things off, start by creating a new file called hello.py in your current working directory:
# hello.py

"""Simple Hello, World example with PyQt6."""

import sys

# 1. Import QApplication and all the required widgets
from PyQt6.QtWidgets import QApplication, QLabel, QWidget
First, you import sys, which will allow you to handle the application’s termination and exit status through the exit() function. Then you import QApplication, QLabel, and QWidget from QtWidgets, which is part of the PyQt6 package. With these imports, you’re done with step one.
To complete step two, you just need to create an instance of QApplication. Do this as you would create an instance of any Python class:
# hello.py
# ...

# 2. Create an instance of QApplication
app = QApplication([])
In this line of code, you create the instance of QApplication. You should create your app instance before you create any GUI object in PyQt.
Internally, the QApplication class deals with command-line arguments. That’s why you need to pass in a list of command-line arguments to the class constructor. In this example, you use an empty list because your app won’t be handling any command-line arguments.
Step three involves creating the application’s GUI. In this example, your GUI will be based on the QWidget class, which is the base class of all user interface objects in PyQt.
Here’s how you can create the app’s GUI:
# hello.py
# ...

# 3. Create your application's GUI
window = QWidget()
window.setWindowTitle("PyQt App")
window.setGeometry(100, 100, 280, 80)
helloMsg = QLabel("<h1>Hello, World!</h1>", parent=window)
helloMsg.move(60, 15)
In this code, window is an instance of QWidget, which provides all the features that you’ll need to create the application’s window, or form. As its names suggests, .setWindowTitle() sets the window’s title in your application. In this example, the app’s window will show PyQt App as its title.
You can use .setGeometry() to define the window’s size and screen position. The first two arguments are the x and y screen coordinates where the window will be placed. The third and fourth arguments are the window’s width and height.
Every GUI application needs widgets, or graphical components that make the app’s GUI. In this example, you use a QLabel widget, helloMsg, to show the message Hello, World! on your application’s window.
QLabel objects can display HTML-formatted text, so you can use the HTML element "<h1>Hello, World!</h1>" to provide the desired text as an h1 header. Finally, you use .move() to place helloMsg at the coordinates (60, 15) on the application’s window.
You’re done with step three, so you can continue with the final two steps and get your PyQt GUI application ready to run:
# hello.py
# ...

# 4. Show your application's GUI
window.show()

# 5. Run your application's event loop
sys.exit(app.exec())
In this code snippet, you call .show() on window. The call to .show() schedules a paint event, which is a request to paint the widgets that compose a GUI. This event is then added to the application’s event queue. You’ll learn more about PyQt’s event loop in a later section.
Finally, you start the application’s event loop by calling .exec(). The call to .exec() is wrapped in a call to sys.exit(), which allows you to cleanly exit Python and release memory resources when the application terminates.
You can run your first PyQt app with the following command:
When you run this script, you’ll see a window that’ll look something like this:
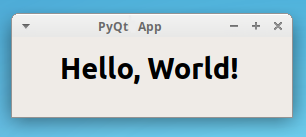
Your application shows a window based on QWidget. The window displays the Hello, World! message. To show the message, it uses a QLabel widget. And with that, you’ve written your first GUI desktop application using PyQt and Python! Isn’t that cool?
Considering Code Styles
If you check the code of your sample GUI application from the previous section, then you’ll notice that PyQt’s API doesn’t follow PEP 8 coding style and naming conventions. PyQt is built around Qt, which is written in C++ and uses the camel case naming style for functions, methods, and variables. That said, when you start writing a PyQt project, you need to decide which naming style you’ll use.
In this regard, PEP 8 states that:
New modules and packages (including third party frameworks) should be written to these standards, but where an existing library has a different style, internal consistency is preferred. (Source)
In addition, the Zen of Python says:
…practicality beats purity. (Source)
If you want to write consistent PyQt-related code, then you should stick to the framework’s coding style. In this tutorial, you’ll follow the PyQt coding style for consistency. You’ll use camel case instead of the usual Python snake case.
Learning the Basics of PyQt
You’ll need to master the basic components of PyQt if you want to proficiently use this library to develop your GUI applications. Some of these components include:
- Widgets
- Layout managers
- Dialogs
- Main windows
- Applications
- Event loops
- Signals and slots
These elements are the building blocks of any PyQt GUI application. Most of them are represented as Python classes that live in the PyQt6.QtWidgets module. These elements are extremely important. You’ll learn more about them in the following few sections.
Widgets
Widgets are rectangular graphical components that you can place on your application’s windows to build the GUI. Widgets have several attributes and methods that allow you to tweak their appearance and behavior. They can also paint a representation of themselves on the screen.
Widgets also detect mouse clicks, keypresses, and other events from the user, the window system, and other sources. Each time a widget catches an event, it emits a signal to announce its state change. PyQt has a rich and modern collection of widgets. Each of those widgets serves a different purpose.
Some of the most common and useful PyQt widgets are:
- Buttons
- Labels
- Line edits
- Combo boxes
- Radio buttons
First up is the button. You can create a button by instantiating QPushButton, a class that provides a classic command button. Typical buttons are Ok, Cancel, Apply, Yes, No, and Close. Here’s how they look on a Linux system:
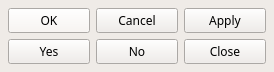
Buttons like these are perhaps the most commonly used widgets in any GUI. When someone clicks them, your app commands the computer to perform actions. This is how you can execute computations when a user clicks a button.
Up next are labels, which you can create with QLabel. Labels let you display useful information as text or images:

You’ll use labels like these to explain how to use your app’s GUI. You can tweak a label’s appearance in several ways. A label can even accept HTML-formatted text, as you saw earlier. You can also use labels to specify a keyboard shortcut to move the cursor focus to a given widget on your GUI.
Another common widget is the line edit, also known as the input box. This widget allows you to enter a single line of text. You can create line edits with the QLineEdit class. Line edits are useful when you need to get the user’s input as plain text.
Here’s how line edits look on a Linux system:
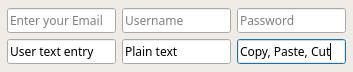
Line edits like these automatically provide basic editing operations like copy, paste, undo, redo, drag, drop, and so on. In the above figure, you can also see that the objects on the first row show placeholder text to inform the user what kind of input is required.
Combo boxes are another fundamental type of widget in GUI applications. You can create them by instantiating QComboBox. A combo box will present your user with a dropdown list of options in a way that takes up minimal screen space.
Here’s an example of a combo box that provides a dropdown list of popular programming languages:
This combo box is read-only, which means that users can select one of several options but can’t add their own options. Combo boxes can also be editable, allowing users to add new options on the fly. Combo boxes can also contain pixmaps, strings, or both.
The last widget that you’ll learn about is the radio button, which you can create with QRadioButton. A QRadioButton object is an option button that you can click to switch on. Radio buttons are useful when you need the user to select one of many options. All options in a radio button are visible on the screen at the same time:
In this radio buttons group, only one button can be checked at a given time. If the user selects another radio button, then the previously selected button will switch off automatically.
PyQt has a large collection of widgets. At the time of this writing, there are over forty available for you to use to create your application’s GUI. Here, you’ve studied only a small sample. However, that’s enough to show you the power and flexibility of PyQt. In the next section, you’ll learn how to lay out different widgets to build modern and fully functional GUIs for your applications.
Layout Managers
Now that you know about widgets and how they’re used to build GUIs, you need to know how to arrange a set of widgets so that your GUI is both coherent and functional. In PyQt, you’ll find a few techniques for laying out the widgets on a form or window. For instance, you can use the .resize() and .move() methods to give widgets absolute sizes and positions.
However, this technique can have some drawbacks. You’ll have to:
- Do many manual calculations to determine the correct size and position of every widget
- Do extra calculations to respond to window resize events
- Redo most of your calculations when the window’s layout changes in any way
Another technique involves using .resizeEvent() to calculate the widget’s size and position dynamically. In this case, you’ll have similar headaches as with the previous technique.
The most effective and recommended technique is to use PyQt’s layout managers. They’ll increase your productivity, mitigate the risk of errors, and improve your code’s maintainability.
Layout managers are classes that allow you to size and position your widgets on the application’s window or form. They automatically adapt to resize events and GUI changes, controlling the size and position of all their child widgets.
PyQt provides four basic layout manager classes:
QHBoxLayoutQVBoxLayoutQGridLayoutQFormLayout
The first layout manager class, QHBoxLayout, arranges widgets horizontally from left to right, like with the hypothetical widgets in the following figure:
In the horizontal layout, the widgets will appear one next to the other, starting from the left. The code example below shows how to use QHBoxLayout to arrange three buttons horizontally:
 1# h_layout.py
 2
 3"""Horizontal layout example."""
 4
 5import sys
 6
 7from PyQt6.QtWidgets import (
 8    QApplication,
 9    QHBoxLayout,
10    QPushButton,
11    QWidget,
12)
13
14app = QApplication([])
15window = QWidget()
16window.setWindowTitle("QHBoxLayout")
17
18layout = QHBoxLayout()
19layout.addWidget(QPushButton("Left"))
20layout.addWidget(QPushButton("Center"))
21layout.addWidget(QPushButton("Right"))
22window.setLayout(layout)
23
24window.show()
25sys.exit(app.exec())
Here’s how this example creates a horizontal layout of buttons:
- Line 18 creates a
QHBoxLayoutobject calledlayout. - Lines 19 to 21 add three buttons to
layoutby calling the.addWidget()method. - Line 22 sets
layoutas your window’s layout with.setLayout().
When you run python h_layout.py from your command line, you’ll get the following output:
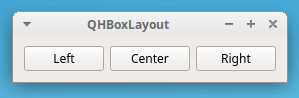
The above figure shows three buttons in a horizontal arrangement. The buttons are shown from left to right in the same order as you added them in your code.
The next layout manager class is QVBoxLayout, which arranges widgets vertically from top to bottom, like in the following figure:
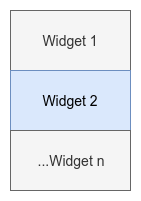
Each new widget will appear beneath the previous one. This layout allows you to to construct vertical layouts and organize your widgets from top to bottom on your GUI.
Here’s how you can create a QVBoxLayout object containing three buttons:
 1# v_layout.py
 2
 3"""Vertical layout example."""
 4
 5import sys
 6
 7from PyQt6.QtWidgets import (
 8    QApplication,
 9    QPushButton,
10    QVBoxLayout,
11    QWidget,
12)
13
14app = QApplication([])
15window = QWidget()
16window.setWindowTitle("QVBoxLayout")
17
18layout = QVBoxLayout()
19layout.addWidget(QPushButton("Top"))
20layout.addWidget(QPushButton("Center"))
21layout.addWidget(QPushButton("Bottom"))
22window.setLayout(layout)
23
24window.show()
25sys.exit(app.exec())
On line 18, you create an instance of QVBoxLayout called layout. In the next three lines, you add three buttons to layout. Finally, you use the layout object to arrange the widget in a vertical layout through the .setLayout() method on line 22.
When you run this sample application, you’ll get a window that looks something like this:
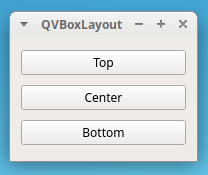
This figure shows three buttons in a vertical arrangement, one below the other. The buttons appear in the same order as you added them to your code, from top to bottom.
The third layout manager in your list is QGridLayout. This class arranges widgets in a grid of rows and columns. Every widget will have a relative position on the grid. You can define a widget’s position with a pair of coordinates like (row, column). Each coordinate must be an integer number. These pairs of coordinates define which cell on the grid a given widget will occupy.
The grid layout will look something like this:
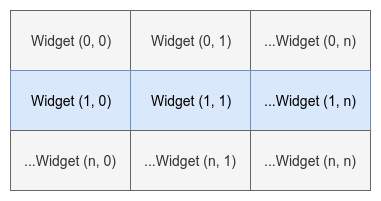
QGridLayout takes the available space, divides it up into rows and columns, and puts each child widget into its own cell.
Here’s how to create a grid layout arrangement in your GUI:
 1# g_layout.py
 2
 3"""Grid layout example."""
 4
 5import sys
 6
 7from PyQt6.QtWidgets import (
 8    QApplication,
 9    QGridLayout,
10    QPushButton,
11    QWidget,
12)
13
14app = QApplication([])
15window = QWidget()
16window.setWindowTitle("QGridLayout")
17
18layout = QGridLayout()
19layout.addWidget(QPushButton("Button (0, 0)"), 0, 0)
20layout.addWidget(QPushButton("Button (0, 1)"), 0, 1)
21layout.addWidget(QPushButton("Button (0, 2)"), 0, 2)
22layout.addWidget(QPushButton("Button (1, 0)"), 1, 0)
23layout.addWidget(QPushButton("Button (1, 1)"), 1, 1)
24layout.addWidget(QPushButton("Button (1, 2)"), 1, 2)
25layout.addWidget(QPushButton("Button (2, 0)"), 2, 0)
26layout.addWidget(
27    QPushButton("Button (2, 1) + 2 Columns Span"), 2, 1, 1, 2
28)
29window.setLayout(layout)
30
31window.show()
32sys.exit(app.exec())
In this example, you create an application that uses a QGridLayout object to organize its widgets on the screen. Note that, in this case, the second and third arguments that you pass to .addWidget() are integer numbers defining each widget’s position on the grid.
On lines 26 to 28, you pass two more arguments to .addWidget(). These arguments are rowSpan and columnSpan, and they’re the fourth and fifth arguments passed to the function. You can use them to make a widget occupy more than one row or column, like you did in the example.
If you run this code from your command line, then you’ll get a window that looks something like this:
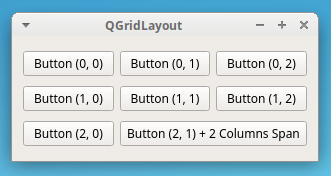
In this figure, you can see your widgets arranged in a grid of rows and columns. The last widget occupies two columns, as you specified on lines 26 to 28.
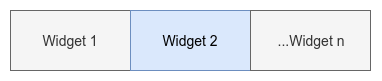
The last layout manager that you’ll learn about is QFormLayout. This class arranges widgets in a two-column layout. The first column usually displays messages in labels. The second column generally contains widgets like QLineEdit, QComboBox, QSpinBox, and so on. These allow the user to enter or edit data regarding the information in the first column.
The following diagram shows how form layouts work in practice:
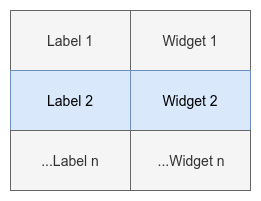
The left column consists of labels, while the right column consists of input widgets. If you’re developing a database application, then this kind of layout can be a useful tool that’ll increase your productivity when creating input forms.
The following example shows how to create an application that uses a QFormLayout object to arrange its widgets:
 1# f_layout.py
 2
 3"""Form layout example."""
 4
 5import sys
 6
 7from PyQt6.QtWidgets import (
 8    QApplication,
 9    QFormLayout,
10    QLineEdit,
11    QWidget,
12)
13
14app = QApplication([])
15window = QWidget()
16window.setWindowTitle("QFormLayout")
17
18layout = QFormLayout()
19layout.addRow("Name:", QLineEdit())
20layout.addRow("Age:", QLineEdit())
21layout.addRow("Job:", QLineEdit())
22layout.addRow("Hobbies:", QLineEdit())
23window.setLayout(layout)
24
25window.show()
26sys.exit(app.exec())
Lines 18 to 23 do the hard work in this example. QFormLayout has a convenient method called .addRow(). You can use this method to add a two-widget row to the layout. The first argument to .addRow() should be a label or a string. Then, the second argument can be any widget that allows the user to enter or edit data. In this specific example, you’ve used line edits.
If you run this code, then you’ll get a window that looks something like this:
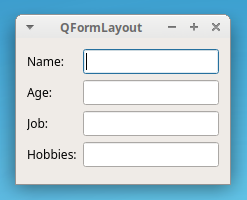
The above figure shows a window that uses a form layout. The first column contains labels to ask the user for some information. The second column shows widgets that allow the user to enter or edit the required information.
Dialogs
With PyQt, you can develop two types of GUI desktop applications. Depending on the class that you use to create the main form or window, you’ll have one of the following:
- A main window–style application: The application’s main window inherits from
QMainWindow. - A dialog-style application: The application’s main window inherits from
QDialog.
You’ll start with dialog-style applications first. In the next section, you’ll learn about main window–style applications.
To develop a dialog-style application, you need to create a GUI class that inherits from QDialog, which is the base class of all dialog windows. A dialog window is a stand-alone window that you can use as the main window for your application.
A dialog is always an independent window. If a dialog has a parent, then it’ll display centered on top of the parent widget. Dialogs with a parent will share the parent’s task bar entry. If you don’t set parent for a given dialog, then the dialog will get its own entry in the system’s task bar.
Here’s an example of how you’d use QDialog to develop a dialog-style application:
 1# dialog.py
 2
 3"""Dialog-style application."""
 4
 5import sys
 6
 7from PyQt6.QtWidgets import (
 8    QApplication,
 9    QDialog,
10    QDialogButtonBox,
11    QFormLayout,
12    QLineEdit,
13    QVBoxLayout,
14)
15
16class Window(QDialog):
17    def __init__(self):
18        super().__init__(parent=None)
19        self.setWindowTitle("QDialog")
20        dialogLayout = QVBoxLayout()
21        formLayout = QFormLayout()
22        formLayout.addRow("Name:", QLineEdit())
23        formLayout.addRow("Age:", QLineEdit())
24        formLayout.addRow("Job:", QLineEdit())
25        formLayout.addRow("Hobbies:", QLineEdit())
26        dialogLayout.addLayout(formLayout)
27        buttons = QDialogButtonBox()
28        buttons.setStandardButtons(
29            QDialogButtonBox.StandardButton.Cancel
30            | QDialogButtonBox.StandardButton.Ok
31        )
32        dialogLayout.addWidget(buttons)
33        self.setLayout(dialogLayout)
34
35if __name__ == "__main__":
36    app = QApplication([])
37    window = Window()
38    window.show()
39    sys.exit(app.exec())
This application is a bit more elaborate. Here’s what this code does:
- Line 16 defines a
Windowclass for the app’s GUI by inheriting fromQDialog. - Line 18 calls the parent class’s
.__init__()method usingsuper(). This call allows you to properly initialize instances of this class. In this example, theparentargument is set toNonebecause this dialog will be your main window. - Line 19 sets the window’s title.
- Line 20 assigns a
QVBoxLayoutobject todialogLayout. - Line 21 assigns a
QFormLayoutobject toformLayout. - Lines 22 to 25 add widgets to
formLayout. - Line 26 calls
.addLayout()ondialogLayout. This call embeds the form layout into the global dialog layout. - Line 27 defines a button box, which provides a convenient space to display the dialog’s buttons.
- Lines 28 to 31 add two standard buttons,
OkandCancel, to the dialog. - Line 32 adds the button box to the dialog by calling
.addWidget().
The if __name__ == "__main__": construct wraps up the app’s main code. This kind of conditional statement is common in Python apps. It ensures that the indented code will only run if the containing file is executed as a program rather than imported as a module. For more about this construct, check out What Does if name == “main” Do in Python?.
The above code example will show a window that looks something like this:
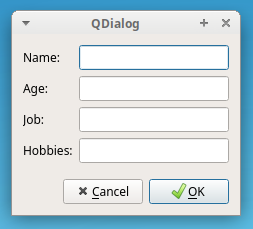
This figure shows the GUI that you’ve created using a QFormLayout object to arrange the widgets and a QVBoxLayout layout for the application’s global layout.
Main Windows
Most of the time, your GUI applications will be main window–style apps. This means that they’ll have a menu bar, some toolbars, a status bar, and a central widget that’ll be the GUI’s main element. It’s also common for your apps to have several dialogs to accomplish secondary actions that depend on a user’s input.
You’ll inherit from QMainWindow to develop main window–style applications. An instance of a class that derives from QMainWindow is considered the app’s main window and should be unique.
QMainWindow provides a framework for building your application’s GUI quickly. This class has its own built-in layout, which accepts the following graphical components:
| Component | Position on Window | Description |
|---|---|---|
| One menu bar | Top | Holds the application’s main menu |
| One or more toolbars | Sides | Hold tool buttons and other widgets, such as QComboBox, QSpinBox, and more |
| One central widget | Center | Holds the window’s central widget, which can be of any type, including a composite widget |
| One or more dock widgets | Around the central widget | Are small, movable, and hidable windows |
| One status bar | Bottom | Holds the app’s status bar, which shows status information |
You can’t create a main window without a central widget. You need a central widget even if it’s just a placeholder. When this is the case, you can use a QWidget object as your central widget.
You can set the window’s central widget with the .setCentralWidget() method. The main window’s layout will allow you to have only one central widget, but it can be a single or a composite widget. The following code example shows you how to use QMainWindow to create a main window–style application:
 1# main_window.py
 2
 3"""Main window-style application."""
 4
 5import sys
 6
 7from PyQt6.QtWidgets import (
 8    QApplication,
 9    QLabel,
10    QMainWindow,
11    QStatusBar,
12    QToolBar,
13)
14
15class Window(QMainWindow):
16    def __init__(self):
17        super().__init__(parent=None)
18        self.setWindowTitle("QMainWindow")
19        self.setCentralWidget(QLabel("I'm the Central Widget"))
20        self._createMenu()
21        self._createToolBar()
22        self._createStatusBar()
23
24    def _createMenu(self):
25        menu = self.menuBar().addMenu("&Menu")
26        menu.addAction("&Exit", self.close)
27
28    def _createToolBar(self):
29        tools = QToolBar()
30        tools.addAction("Exit", self.close)
31        self.addToolBar(tools)
32
33    def _createStatusBar(self):
34        status = QStatusBar()
35        status.showMessage("I'm the Status Bar")
36        self.setStatusBar(status)
37
38if __name__ == "__main__":
39    app = QApplication([])
40    window = Window()
41    window.show()
42    sys.exit(app.exec())
Here’s how this code works:
- Line 15 creates a class,
Window, that inherits fromQMainWindow. - Line 16 defines the class initializer.
- Line 17 calls the base class’s initializer. Again, the
parentargument is set toNonebecause this is your app’s main window, so it must not have a parent. - Line 18 sets the window’s title.
- Line 19 sets a
QLabelas the window’s central widget. - Lines 20 to 22 call non-public methods to create different GUI elements:
- Lines 24 to 26 create the main menubar with a drop-down menu called Menu. This menu will have a menu option to exit the app.
- Lines 28 to 31 create the toolbar, which will have a toolbar button to exit the app.
- Lines 33 to 36 create the app’s status bar.
When you implement GUI components using their own methods, like you did with the menu bar, toolbar, and status bar in this example, you’re making your code more readable and more maintainable.
When you run the above sample application, you’ll get a window like the following:
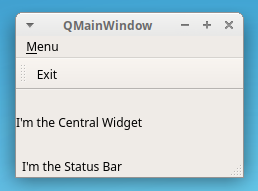
As you can confirm, your main window–style application has the following components:
- One main menu generically called Menu
- One toolbar with an Exit tool button
- One central widget consisting of a
QLabelobject with a text message - One status bar at the window’s bottom
That’s it! You’ve learned how to build a main window–style application with Python and PyQt. Up to this point, you’ve learned about some of the more important graphical components in PyQt’s set of widgets. In the next few sections, you’ll study other important concepts related to building GUI applications with PyQt.
Applications
QApplication is the most foundational class that you’ll use when developing PyQt GUI applications. This class is the core component of any PyQt application. It manages the application’s control flow as well as its main settings.
In PyQt, any instance of QApplication is an application. Every PyQt GUI application must have one QApplication instance. Some of the responsibilities of this class include:
- Handling the app’s initialization and finalization
- Providing the event loop and event handling
- Handling most system-wide and application-wide settings
- Providing access to global information, such as the application’s directory, screen size, and so on
- Parsing common command-line arguments
- Defining the application’s look and feel
- Providing localization capabilities
These are just some of the core responsibilities of QApplication. So, this is a fundamental class when it comes to developing PyQt GUI applications.
One of the most important responsibilities of QApplication is to provide the event loop and the entire event handling mechanism. In the following section, you’ll take a closer look at what the event loop is and how it works.
Event Loops
GUI applications are event-driven. This means that functions and methods are called in response to user actions, like clicking on a button, selecting an item from a combo box, entering or updating the text in a text edit, pressing a key on the keyboard, and so on. These user actions are commonly known as events.
Events are handled by an event loop, also known as a main loop. An event loop is an infinite loop in which all events from the user, the window system, and any other sources are processed and dispatched. The event loop waits for an event to occur and then dispatches it to perform some task. The event loop continues to work until the application is terminated.
All GUI applications have an event loop. When an event happens, then the loop checks if it’s a terminate event. In that case, the loop finishes, and the application exits. Otherwise, the event is sent to the application’s event queue for further processing, and the loop iterates again. In PyQt6, you can run the app’s event loop by calling .exec() on the QApplication object.
For an event to trigger an action, you need to connect the event with the action that you want to execute. In PyQt, you can establish that connection with the signals and slots mechanism, which you’ll explore in the next section.
Signals and Slots
PyQt widgets act as event-catchers. This means that every widget can catch specific events, like mouse clicks, keypresses, and so on. In response to these events, a widget emits a signal, which is a kind of message that announces a change in its state.
The signal on its own doesn’t perform any action. If you want a signal to trigger an action, then you need to connect it to a slot. This is the function or method that’ll perform an action whenever its associated signal is emitted. You can use any Python callable as a slot.
If a signal is connected to a slot, then the slot is called whenever the signal is emitted. If a signal isn’t connected to any slot, then nothing happens and the signal is ignored. Some of the most relevant features of signals and slots include the following:
- A signal can be connected to one or many slots.
- A signal may also be connected to another signal.
- A slot may be connected to one or many signals.
You can use the following syntax to connect a signal and a slot:
widget.signal.connect(slot_function)
This will connect slot_function to widget.signal. From now on, whenever .signal is emitted, slot_function() will be called.
The code below shows how to use the signals and slots mechanism in a PyQt application:
 1# signals_slots.py
 2
 3"""Signals and slots example."""
 4
 5import sys
 6
 7from PyQt6.QtWidgets import (
 8    QApplication,
 9    QLabel,
10    QPushButton,
11    QVBoxLayout,
12    QWidget,
13)
14
15def greet():
16    if msgLabel.text():
17        msgLabel.setText("")
18    else:
19        msgLabel.setText("Hello, World!")
20
21app = QApplication([])
22window = QWidget()
23window.setWindowTitle("Signals and slots")
24layout = QVBoxLayout()
25
26button = QPushButton("Greet")
27button.clicked.connect(greet)
28
29layout.addWidget(button)
30msgLabel = QLabel("")
31layout.addWidget(msgLabel)
32window.setLayout(layout)
33window.show()
34sys.exit(app.exec())
On line 15, you create greet(), which you’ll use as a slot. Then in line 27, you connect the button’s .clicked signal to greet(). This way, whenever the user clicks the Greet button, the greet() slot is called and the label object’s text alternates between Hello, World! and an empty string:
When you click the Greet button, the Hello, World! message appears and disappears on your application’s main window.
If your slot function needs to receive extra arguments, then you can pass them using functools.partial(). For example, you can modify greet() to take an argument, like in the following code:
# signals_slots.py
# ...

def greet(name):
    if msg.text():
        msg.setText("")
    else:
        msg.setText(f"Hello, {name}")

# ...
Now greet() needs to receive an argument called name. If you want to connect this new version of greet() to the .clicked signal, then you can do something like this:
# signals_slots.py

"""Signals and slots example."""

import sys
from functools import partial

# ...

button = QPushButton("Greet")
button.clicked.connect(partial(greet, "World!"))

# ...
For this code to work, you need to import partial() from functools first. The call to partial() returns a function object that behaves similarly to greet() when called with name="World!". Now, when the user clicks on the button, the message Hello, World! will appear in the label just like before.
The signals and slots mechanism is what you’ll use to give life to your PyQt GUI applications. This mechanism will allow you to turn user events into concrete actions. You can dive deeper into signals and slots by checking out the PyQt6 documentation on the topic.
Now you know the basics of several important concepts of PyQt. With this knowledge and the library’s documentation at hand, you’re ready to start developing your own GUI applications. In the next section, you’ll build your first fully functional GUI application.
Creating a Calculator App With Python and PyQt
In this section, you’ll develop a calculator GUI app using the Model-View-Controller (MVC) design pattern. This pattern has three layers of code, with each one having different roles:
-
The model takes care of your app’s business logic. It contains the core functionality and data. In your calculator app, the model will handle the input values and the calculations.
-
The view implements your app’s GUI. It hosts all the widgets that the end user would need to interact with the application. The view also receives a user’s actions and events. For your example, the view will be the calculator window on your screen.
-
The controller connects the model and the view to make the application work. Users’ events, or requests, are sent to the controller, which puts the model to work. When the model delivers the requested result, or data, in the right format, the controller forwards it to the view. In your calculator app, the controller will receive the target math expressions from the GUI, ask the model to perform calculations, and update the GUI with the result.
Here’s a step-by-step description of how your GUI calculator app will work:
- The user performs an action or request (event) on the view (GUI).
- The view notifies the controller about the user’s action.
- The controller gets the user’s request and queries the model for a response.
- The model processes the controller’s query, performs the required computations, and returns the result.
- The controller receives the model’s response and updates the view accordingly.
- The user finally sees the requested result on the view.
You’ll use this MVC design to build your calculator app with Python and PyQt.
Creating the Skeleton for Your PyQt Calculator App
To kick things off, you’ll start by implementing a minimal skeleton for your application in a file called pycalc.py. You can get this file and the rest of the source code for your calculator app by clicking the link below:
If you’d prefer to code the project on your own, then go ahead and create pycalc.py in your current working directory. Open the file in your favorite code editor or IDE and type the following code:
 1# pycalc.py
 2
 3"""PyCalc is a simple calculator built with Python and PyQt."""
 4
 5import sys
 6
 7from PyQt6.QtWidgets import QApplication, QMainWindow, QWidget
 8
 9WINDOW_SIZE = 235
10
11class PyCalcWindow(QMainWindow):
12    """PyCalc's main window (GUI or view)."""
13
14    def __init__(self):
15        super().__init__()
16        self.setWindowTitle("PyCalc")
17        self.setFixedSize(WINDOW_SIZE, WINDOW_SIZE)
18        centralWidget = QWidget(self)
19        self.setCentralWidget(centralWidget)
20
21def main():
22    """PyCalc's main function."""
23    pycalcApp = QApplication([])
24    pycalcWindow = PyCalcWindow()
25    pycalcWindow.show()
26    sys.exit(pycalcApp.exec())
27
28if __name__ == "__main__":
29    main()
This script implements all the boilerplate code that you’ll need to run a basic GUI application. You’ll use this skeleton to build your calculator app.
Here’s how this code works:
-
Line 5 imports
sys. This module provides theexit()function, which you’ll use to cleanly terminate the app. -
Line 7 imports the required classes from
PyQt6.QtWidgets. -
Line 9 creates a Python constant to hold a fixed window size in pixels for your calculator app.
-
Line 11 creates the
PyCalcWindowclass to provide the app’s GUI. Note that this class inherits fromQMainWindow. -
Line 14 defines the class initializer.
-
Line 15 calls
.__init__()on the super class for initialization purposes. -
Line 16 sets the window’s title to
"PyCalc". -
Line 17 uses
.setFixedSize()to give the window a fixed size. This ensures that the user won’t be able to resize the window during the app’s execution. -
Lines 18 and 19 create a
QWidgetobject and set it as the window’s central widget. This object will be the parent of all the required GUI components in your calculator app. -
Line 21 defines your calculator’s main function. Having a
main()function like this is a best practice in Python. This function provides the application’s entry point. Insidemain(), your program does the following:- Line 23 creates a
QApplicationobject namedpycalcApp. - Line 24 creates an instance of the app’s window,
pycalcWindow. - Line 25 shows the GUI by calling
.show()on the window object. - Line 26 runs the application’s event loop with
.exec().
- Line 23 creates a
Finally, line 29 calls main() to execute your calculator app. When you run the above script, the following window appears on your screen:
That’s it! You’ve successfully built a fully functional app skeleton for your GUI calculator app. Now you’re ready to continue building the project.
Completing the App’s View
The GUI that you have at this point doesn’t really look like a calculator. You need to finish this GUI by adding a display to show the target math operation and a keyboard of buttons representing numbers and basic math operators. You’ll also add buttons representing other required symbols and actions, like clearing the display.
First, you need to update your imports like in the code below:
# pycalc.py

import sys

from PyQt6.QtCore import Qt
from PyQt6.QtWidgets import (
    QApplication,
    QGridLayout,
    QLineEdit,
    QMainWindow,
    QPushButton,
    QVBoxLayout,
    QWidget,
)

# ...
You’ll use a QVBoxLayout layout manager for the calculator’s global layout. To arrange the buttons, you’ll use a QGridLayout object. The QLineEdit class will work as the calculator’s display and QPushButton will provide the required buttons.
Now you can update the initializer for PyCalcWindow:
# pycalc.py
# ...

class PyCalcWindow(QMainWindow):
    """PyCalc's main window (GUI or view)."""

    def __init__(self):
        super().__init__()
        self.setWindowTitle("PyCalc")
        self.setFixedSize(WINDOW_SIZE, WINDOW_SIZE)
        self.generalLayout = QVBoxLayout()
        centralWidget = QWidget(self)
        centralWidget.setLayout(self.generalLayout)
        self.setCentralWidget(centralWidget)
        self._createDisplay()
        self._createButtons()

# ...
You’ve added the highlighted lines of code. You’ll use .generalLayout as the app’s general layout. In this layout, you’ll place the display at the top and the keyboard buttons in a grid layout at the bottom.
The calls to ._createDisplay() and ._createButtons() won’t work at this point, because you haven’t implemented those methods yet. To fix this issue, you’ll start by coding ._createDisplay().
Get back to your code editor and update pycalc.py like in the following code:
# pycalc.py
# ...

WINDOW_SIZE = 235
DISPLAY_HEIGHT = 35

class PyCalcWindow(QMainWindow):
    # ...

    def _createDisplay(self):
        self.display = QLineEdit()
        self.display.setFixedHeight(DISPLAY_HEIGHT)
        self.display.setAlignment(Qt.AlignmentFlag.AlignRight)
        self.display.setReadOnly(True)
        self.generalLayout.addWidget(self.display)

# ...
In this code snippet, you first define a new constant to hold the display height in pixels. Then you define ._createDisplay() inside PyCalcWindow.
To create the calculator’s display, you use a QLineEdit widget. Then you set a fixed height of thirty-five pixels for your display using the DISPLAY_HEIGHT constant. The display will have its text left-aligned. Finally, the display will be read-only to prevent direct editing by the user. The last line of code adds the display to the calculator’s general layout.
Next up, you’ll implement the ._createButtons() method to create the required buttons for your calculator’s keyboard. These buttons will live in a grid layout, so you need a way to represent their coordinates on the grid. Each coordinate pair will consist of a row and a column. To represent a coordinate pair, you’ll use a list of lists. Each nested list will represent a row.
Now go ahead and update the pycalc.py file with the following code:
# pycalc.py
# ...

WINDOW_SIZE = 235
DISPLAY_HEIGHT = 35
BUTTON_SIZE = 40

# ...
In this piece of code, you define a new constant called BUTTON_SIZE. You’ll use this constant to provide the size of your calculator’s buttons. In this specific example, all the buttons will have a square shape with forty pixels per side.
With this initial setup, you can code the ._createButtons() method. You’ll use a list of lists to hold the keys or buttons and their position on the calculator keyboard. A QGridLayout will allow you to arrange the buttons on the calculator’s window:
# pycalc.py
# ...

class PyCalcWindow(QMainWindow):
    # ...

    def _createButtons(self):
        self.buttonMap = {}
        buttonsLayout = QGridLayout()
        keyBoard = [
            ["7", "8", "9", "/", "C"],
            ["4", "5", "6", "*", "("],
            ["1", "2", "3", "-", ")"],
            ["0", "00", ".", "+", "="],
        ]

        for row, keys in enumerate(keyBoard):
            for col, key in enumerate(keys):
                self.buttonMap[key] = QPushButton(key)
                self.buttonMap[key].setFixedSize(BUTTON_SIZE, BUTTON_SIZE)
                buttonsLayout.addWidget(self.buttonMap[key], row, col)

        self.generalLayout.addLayout(buttonsLayout)

# ...
You first create the empty dictionary self.buttonMap to hold the calculator buttons. Then, you create a list of lists to store the key labels. Each row or nested list will represent a row in the grid layout, while the index of each key label will represent the corresponding column on the layout.
Then you define two for loops. The outer loop iterates over the rows and the inner loop iterates over the columns. Inside the inner loop, you create the buttons and add them to both self.buttonMap and buttonsLayout. Every button will have a fixed size of 40x40 pixels, which you set with .setFixedSize() and the BUTTON_SIZE constant.
Finally, you embed the grid layout into the calculator’s general layout by calling .addLayout() on the .generalLayout object.
Now your calculator’s GUI will show the display and the buttons gracefully. However, you have no way to update the information shown on the display. You’ll fix this by adding a few extra methods to PyCalcWindow:
| Method | Description |
|---|---|
.setDisplayText() |
Sets and updates the display’s text |
.displayText() |
Gets the current display’s text |
.clearDisplay() |
Clears the display’s text |
These methods will provides the GUI’s public interface and complete the view class for your Python calculator app.
Here’s a possible implementation:
# pycalc.py
# ...

class PyCalcWindow(QMainWindow):
    # ...

    def setDisplayText(self, text):
        """Set the display's text."""
        self.display.setText(text)
        self.display.setFocus()

    def displayText(self):
        """Get the display's text."""
        return self.display.text()

    def clearDisplay(self):
        """Clear the display."""
        self.setDisplayText("")

# ...
Here’s a breakdown of what each method does:
-
.setDisplayText()uses.setText()to set and update the display’s text. It also uses.setFocus()to set the cursor’s focus on the display. -
.displayText()is a getter method that returns the display’s current text. When the user clicks the equal sign (=) on the calculator’s keyboard, the app will use the return value of.displayText()as the math expression to be evaluated. -
.clearDisplay()sets the display’s text to an empty string ("") so that the user can introduce a new math expression. This method will be triggered every time the user presses the C button on the calculator’s board.
Now your calculator’s GUI is ready for use! When you run the application, you’ll get a window like the following:
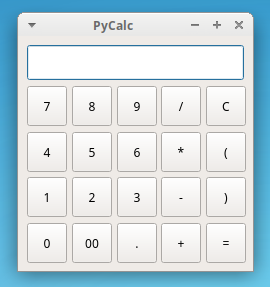
You’ve completed the calculator’s GUI, which looks pretty sleek! However, if you try to do some calculations, then the calculator won’t respond as expected. That’s because you haven’t implemented the model and the controller components. In the next section, you’ll write the calculator’s model.
Implementing the Calculator’s Model
In the MVC pattern, the model is the layer of code that takes care of the business logic. In your calculator app, the business logic is all about basic math calculations. So, your model will evaluate the math expressions that your users introduced in the calculator’s GUI.
The calculator’s model also needs to handle errors. To this end, you’ll define the following global constant:
# pycalc.py
# ...

ERROR_MSG = "ERROR"
WINDOW_SIZE = 235
# ...
This ERROR_MSG constant is the message that the user will see on the calculator’s display if they introduce an invalid math expression.
With the above change, you’re ready to code your app’s model, which will be a single function in this example:
# pycalc.py
# ...

class PyCalcWindow(QMainWindow):
    # ...

def evaluateExpression(expression):
    """Evaluate an expression (Model)."""
    try:
        result = str(eval(expression, {}, {}))
    except Exception:
        result = ERROR_MSG
    return result

# ...
In evaluateExpression(), you use eval() to evaluate a math expression that comes as a string. If the evaluation is successful, then you return result. Otherwise, you return the predefined error message. Note that this function isn’t perfect. It has a couple of important issues:
- The
try…exceptblock doesn’t catch a specific exception, so it’s using a practice that’s discouraged in Python. - The function uses
eval(), which can lead to some serious security issues.
You’re free to rework the function to make it more reliable and secure. In this tutorial, you’ll use the function as is to keep the focus on implementing the GUI.
Creating the Controller Class for Your Calculator
In this section, you’re going to code the calculator’s controller class. This class will connect the view to the model that you just coded. You’ll use the controller class to make the calculator perform actions in response to user events.
Your controller class needs to perform three main tasks:
- Access the GUI’s public interface.
- Handle the creation of math expressions.
- Connect all the buttons’
.clickedsignals with the appropriate slots.
To perform all these actions, you’ll code a new PyCalc class in a moment. Go ahead and update pycalc.py with the following code:
# pytcalc.py

import sys
from functools import partial
# ...

def evaluateExpression(expression):
    # ...

class PyCalc:
    """PyCalc's controller class."""

    def __init__(self, model, view):
        self._evaluate = model
        self._view = view
        self._connectSignalsAndSlots()

    def _calculateResult(self):
        result = self._evaluate(expression=self._view.displayText())
        self._view.setDisplayText(result)

    def _buildExpression(self, subExpression):
        if self._view.displayText() == ERROR_MSG:
            self._view.clearDisplay()
        expression = self._view.displayText() + subExpression
        self._view.setDisplayText(expression)

    def _connectSignalsAndSlots(self):
        for keySymbol, button in self._view.buttonMap.items():
            if keySymbol not in {"=", "C"}:
                button.clicked.connect(
                    partial(self._buildExpression, keySymbol)
                )
        self._view.buttonMap["="].clicked.connect(self._calculateResult)
        self._view.display.returnPressed.connect(self._calculateResult)
        self._view.buttonMap["C"].clicked.connect(self._view.clearDisplay)

# ...
At the top of pycalc.py, you import partial() from functools. You’ll use this function to connect signals with methods that need to take extra arguments.
Inside PyCalc, you define the class initializer, which takes two arguments: the app’s model and its view. Then you store these arguments in appropriate instance attributes. Finally, you call ._connectSignalsAndSlots() to make all the required connections of signals and slots.
In ._calculateResult(), you use ._evaluate() to evaluate the math expression that the user has just typed into the calculator’s display. Then you call .setDisplayText() on the calculator’s view to update the display text with the computation result.
As its name suggests, the ._buildExpression() method takes care of building the target math expression. To do this, the method concatenates the initial display value with every new value that the user enters on the calculator’s keyboard.
Finally, the ._connectSignalsAndSlots() method connects all the buttons’ .clicked signals with the appropriate slots method in the controller class.
That’s it! Your controller class is ready. However, for all this code to work as a real calculator, you need to update the app’s main() function like in the code below:
# pytcalc.py
# ...

def main():
    """PyCalc's main function."""
    pycalcApp = QApplication([])
    pycalcWindow = PyCalcWindow()
    pycalcWindow.show()
    PyCalc(model=evaluateExpression, view=pycalcWindow)
    sys.exit(pycalcApp.exec())
This piece of code creates a new instance of PyCalc. The model argument to the PyCalc class constructor holds a reference to the evaluateExpression() function, while the view argument holds a reference to the pycalcWindow object, which provides the app’s GUI. Now your PyQt calculator application is ready to run.
Running the Calculator
Now that you’ve finished writing your calculator app with Python and PyQt, it’s time for a live test! If you run the application from your command line, then you’ll get something like this:
To use PyCalc, enter a valid math expression with your mouse. Then, press Enter or click the equal sign (=) button to compute and show the expression result on the calculator’s display. That’s it! You’ve developed your first fully functional GUI desktop application with Python and PyQt!
Additional Tools
PyQt6 offers a useful set of additional tools that can help you build solid, modern, and full-featured GUI applications. Some of the most remarkable tools related to PyQt include Qt Designer and the internationalization kit.
Qt Designer allows you to design and build graphical user interfaces using a drag-and-drop interface. You can use this tool to design widgets, dialogs, and main windows by using on-screen forms and a drag-and-drop mechanism. The following animation shows some of Qt Designer’s features:
Qt Designer uses XML .ui files to store your GUI designs. PyQt includes a module called uic to help with .ui files. You can also convert the .ui file content into Python code with a command-line tool called pyuic6.
PyQt6 also provides a comprehensive set of tools for the internationalization of apps into local languages. The pylupdate6 command-line tool creates and updates translation (.ts) files, which can contain translations of interface strings. If you prefer GUI tools, then you can use Qt Linguist to create and update .ts files with translations of interface strings.
Conclusion
Graphical user interface (GUI) applications still hold a substantial share of the software development market. Python offers a handful of frameworks and libraries that can help you develop modern and robust GUI applications.
In this tutorial, you learned how to use PyQt, which is one of the most popular and solid libraries for GUI application development in Python. Now you know how to effectively use PyQt to build modern GUI applications.
In this tutorial, you’ve learned how to:
- Build graphical user interfaces with Python and PyQt
- Connect the user’s events with the app’s logic
- Organize a PyQt application using a proper project layout
- Create a real-world GUI application with PyQt
Now you can use your Python and PyQt knowledge to give life to your own desktop GUI applications. Isn’t that cool?
You can get the source code of your calculator app project and all its associated resources by clicking the link below:
Further Reading
To dive deeper into PyQt and its ecosystem, check out some of the following resources:
- PyQt6’s documentation
- PyQt5’s documentation
- PyQt4’s documentation
- Qt v6’s documentation
- The PyQt wiki
- The Rapid GUI Programming with Python and Qt book
- The Qt Designer manual
- Qt for Python’s documentation
Although the PyQt6 Documentation is the first resource listed here, some important parts of it are still missing or incomplete. Fortunately, you can use the Qt documentation to fill in the blanks.
В этом уроке мы создадим на основе языка программирования Python свое первое программное обеспечение с .exe файлом.
Содержание
- Введение в GUI
- Создаем собственный калькулятор
- Создание GUI
- Создание функции
- Процесс вычислений
- Обработка исключений
- Создание EXE
- Шаг 1
- Шаг 2
Введение в GUI
GUI (Graphical user interface) — графический интерфейс пользователя. С этого понятия мы и начнем. На самом деле никаких скрытых смыслов здесь нет и GUI — это графическое представление для всех ваших программ.
То есть вы могли бы запустить программу из командной строки и получить результат в том же самом виде. Но чтобы ваш код взаимодействовал с пользователем, необходим интерфейс для взаимодействия.
В «питоне» есть много модулей, которые вы можете импортировать и на его основе создавать свой графический интерфейс. Мы будем использовать Tkinter — встроенный GUI для Python. Он устанавливается вместе «питоном».
Кроме того, вы также можете попробовать PyQT, Kivy (лучше всего подходит для кроссплатформенности, при создании ПО под apk, exe или MAC). Официальный сайт — kivy.org.
В этом уроке я собираюсь использовать Tkinter. Удобная вещь в Python состоит в том, что вы можете импортировать другие файлы в свой файл. Точно также нужно импортировать Tkinter, аналогично #include в C.
from Tkinter import *
import Tkinter
import tkMessageBox
top = Tk()
L1 = Label(top, text="HI")
L1.pack( side = LEFT)
E1 = Entry(top, bd =5)
E1.pack(side = RIGHT)
B=Button(top, text ="Hello",)
B.pack()

top.mainloop()
Здесь Tk() относится к классу в модуле Tkinter, который мы сохраняем, инициализируя в top. Label — это метод для печати текста, Entry — для создания пустой записи, Button — для создания кнопки.
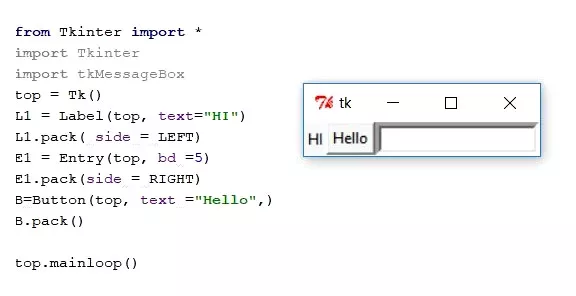
pack — это ключ для упаковки всего в макет. mainloop сохраняет все видимым, пока вы не закроете графический интерфейс.
Создаем собственный калькулятор
Выше мы увидели простой графический интерфейс с кнопкой и полями. Приступим к созданию простого калькулятора Python.
Сразу скажу, что стиль кода, названия переменных очень важны и существует n-способов создания кода, но здесь мы только хотим понять суть создания ПО, а не выучить все правила правильного написания кода.

Создание GUI
Прежде чем перейти к коду, мы создадим графический интерфейс для нашего приложения-калькулятора. Для более легкого понимания мы будем использовать только одну кнопку и 4 строчки для ввода.
Воспользуемся написанным кодом выше и возьмем оттуда label, entry и button.
from Tkinter import *
import Tkinter
import tkMessageBox

top = Tkinter.Tk()
L1 = Label(top, text="My calculator",).grid(row=0,column=1)
L2 = Label(top, text="Number 1",).grid(row=1,column=0)
L3 = Label(top, text="Number 2",).grid(row=2,column=0)
L4 = Label(top, text="Operator",).grid(row=3,column=0)
L4 = Label(top, text="Answer",).grid(row=4,column=0)
E1 = Entry(top, bd =5)
E1.grid(row=1,column=1)
E2 = Entry(top, bd =5)
E2.grid(row=2,column=1)
E3 = Entry(top, bd =5)
E3.grid(row=3,column=1)
E4 = Entry(top, bd =5)
E4.grid(row=4,column=1)
B=Button(top, text ="Submit",).grid(row=5,column=1,)

top.mainloop()
Создание функции
В нашем случае сразу после ввода 2 чисел и указания операции между ними должен быть показан ответ.
Начнем с кнопки Submit (см. изображение калькулятора выше).
Нам нужно дать команду кнопке, создать функцию, которая предназначена для этого.
B=Button(top, text ="Submit", command =processing).grid(row=5,column=1)

def process():
    number1=Entry.get(E1)
    number2=Entry.get(E2)
    operator=Entry.get(E3)
Называем функцию process, которая после нажатия кнопки, простыми словами, обращается за данными к нашим строкам ввода и получает значения, введенные пользователем. Полученные данные мы сохраняем в number1, number2, operator.
Процесс вычислений
На этом этапе нам нужно обработать ввод, полученный от пользователя. По умолчанию полученное значение является строкой.
Для того, чтобы преобразовать тип данных мы строковую переменную оборачиваем в int.
number1 = int(number1)
number2 = int(number2)
Тем не менее, есть еще одна проблема — получение значения оператора (например, + — * /) для работы.
На самом деле решение довольно простое — использовать условный оператор if и делать вычисления внутри условий.
number1=int(number1)
number2=int(number2)
if operator == "+&quфot;:
    answer = number1 + number2
if operator == "-":
    answer = number1 - number2
if operator == "*":
    answer= number1 * number2
if operator == "/":
    answer = number1 / number2
Строка в Python обозначается как » « или ‘ ‘, то есть здесь в if мы проверяем строковый оператор, полученный от пользователя и сохраняем результат в переменной answer.
Теперь, наконец, нам нужно отправить вывод:
Entry.insert(E4,0,answer)
Код целиком будет выглядеть так:
from Tkinter import *
import Tkinter
import tkMessageBox
def process():
    number1=Entry.get(E1)
    number2=Entry.get(E2)
    operator=Entry.get(E3)
    number1=int(number1)
    number2=int(number2)
    if operator =="+":
        answer=number1+number2
    if operator =="-":
        answer=number1-number2
    if operator=="*":
        answer=number1*number2
    if operator=="/":
        answer=number1/number2
    Entry.insert(E4,0,answer)
    print(answer)

top = Tkinter.Tk()
L1 = Label(top, text="My calculator",).grid(row=0,column=1)
L2 = Label(top, text="Number 1",).grid(row=1,column=0)
L3 = Label(top, text="Number 2",).grid(row=2,column=0)
L4 = Label(top, text="Operator",).grid(row=3,column=0)
L4 = Label(top, text="Answer",).grid(row=4,column=0)
E1 = Entry(top, bd =5)
E1.grid(row=1,column=1)
E2 = Entry(top, bd =5)
E2.grid(row=2,column=1)
E3 = Entry(top, bd =5)
E3.grid(row=3,column=1)
E4 = Entry(top, bd =5)
E4.grid(row=4,column=1)
B=Button(top, text ="Submit",command = process).grid(row=5,column=1,)

top.mainloop()
Вы успешно написали код нашего калькулятора.
Обработка исключений
Заголовок звучит слишком техническим? Определенно нет, не переживайте. Мы всегда должны учитывать много разных моментов.
Предположим, вы сделали этот калькулятор и показали его другу. Друг вместо того, чтобы вводить целое число вводит буквы, которые должны быть там где цифры. Python выдает ошибку и сразу останавливается.

Здесь идет процесс обработки исключений Python, также во многих программах и на веб-страницах выдается предупреждение или предупреждающие сообщения.
Обработка исключений считается простым процессом. Давайте посмотрим, как это сделать в нашей программе:
def proces():
    try:
        number1=Entry.get(E1)
        number2=Entry.get(E2)
        operator=Entry.get(E3)
        number1=int(number1)
        number2=int(number2)
        if operator =="+":
            answer=number1+number2
        if operator =="-":
            answer=number1-number2
        if operator=="*":
            answer=number1*number2
        if operator=="/":
            answer=number1/number2
        Entry.insert(E4,0,answer)
        print(answer)
    except ValueError:
        tkMessageBox.showwarning("Warning","Please enter the value in integer")
Здесь мы сделали простое диалоговое окно с предупреждением. tkMessageBox.showwarning — это настраиваемое предупреждение для Tkinter, где в скобках указываются заголовок диалогового окна и сообщение.
Создание EXE
Вы создали программу на Python, которая полностью работаете после отладки ошибок. Но есть одна проблема — что если вы хотите поделиться своим кодом Python с другими? У них должен быть установлен Python, но часто это просто невозможно. Кроме того вы можете не иметь делания раскрыть свой код и тогда лучше всего создать *.exe — файл.
Чтобы создать исполняемую *.exe версию или Apk (для Android) необходимо «заморозить» (freeze) ваш код.
Есть много способов «заморозить» ваш код, но я бы предложил использовать Pyinstaller.
Шаг 1
Перейдите на сайт pyinstaller.org и установите его. Можно это сделать через pip, а можно скачать Pyinstaller.
pip install pyinstaller
Шаг 2
Перейдите в папку, в которой находится код, нажмите SHIFT + правую клавишу мыши и далее «Открыть в командной строке». Т.е. либо «open in command prompt» или «power shell» в зависимости от вашей версии ОС.
python pyinstaller.py --noconsole yourscript.py
pyinstaller.exe --onefile --windowed --name myapps --icon=yourico.ico yourscript.py

Добавляем свой значок для EXE-файла и помещаем всё в один файл с помощью второй команды.

Исходную программу на Python и *.exe файл вы можете скачать ниже:
На этом мы заканчиваем урок по разработке своего первого программного обеспечения на Python.

Python регулярно включают в разнообразные рейтинги лучших языков программирования благодаря большому сообществу и легко читаемому синтаксису. Более того, Python под силу создать современный графический пользовательский интерфейс — GUI — для обычных скриптов. В руководстве уделим внимание модулю для разработки GUI PyQt5, но стоит также упомянуть аналоги: Tkinter и WxWidget.

Статья подойдет в том числе и начинающим программистам, поэтому, не теряя времени, приступаем!
Содержание руководства:
- Установка и настройка PyQt5.
- Основы PyQt5.
- Заголовок окна.
- События и кнопки.
- Поля ввода.
- Окна сообщений и всплывающие окна.
- Выводы.
1. Установка и настройка PyQt5
Скачайте и установите последнюю версию Python для вашей системы, а если Python уже на месте, то установите пакеты при помощи следующей команды (откройте командную строку, введите и нажмите Enter):
pip install pyqt52. Основы PyQt5
Теперь на вашем компьютере сохранен пакет PyQt5, поэтому давайте начнем с написания первого окна графического интерфейса. Откройте ваш любимый текстовый редактор или IDE и выполните приведенный ниже код:
# Построение Windows GUI

import sys
from PyQt5 import QtWidgets
from PyQt5.QtWidgets import QApplication, QMainWindow, QLabel

def main():
    app = QApplication(sys.argv)
    win = QMainWindow()
    win.setGeometry(400,400,400,300)
    win.setWindowTitle("Pyqt5 Tutorial")
    win.show()
    sys.exit(app.exec_())

main()
Результат выполнения программы:
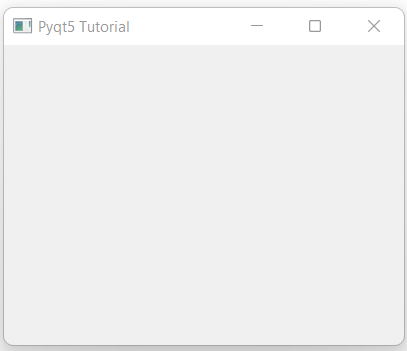
Теперь разберем код окна интерфейса с заголовком сверху. Если обсуждать кратко, то в первую очередь импортируем PyQt5 и его классы, полезные в создании виджета GUI, а затем создаем функцию main() для реализации оконного интерфейса.
QMainWindow()— словно контейнер, содержащий все виджеты, такие как кнопки, текст, поле ввода и т. д.SetGeometry()— один из методовQMainWindow(), устанавливает размер окна. Синтаксис:setGeometry(x, y, длина, ширина).SetWindowTitle()— устанавливает заголовок окна.Win.show()— создает и отображает весь разработанный интерфейс.Sys.exit(app.exec_())— устанавливает, что конкретное окно не закроется без нажатия на кнопку с крестиком. Без этой строчки кода GUI-программа завершится через секунду после выполнения.
3. Заголовок окна
Label Text — это текст, отображаемый внутри окна. С написанием Label Text в PyQt5 вам поможет виджет Qlabel.
Выполните следующий код:
import sys
from PyQt5 import QtWidgets
from PyQt5.QtWidgets import QApplication, QMainWindow, QLabel

def main():
    app = QApplication(sys.argv)
    win = QMainWindow()
    win.setGeometry(400,400,400,300)
    win.setWindowTitle("Pyqt5 Tutorial")

#Label Text
    label= QLabel(win)
    label.setText("Hi this is Pyqt5")
    label.move(100,100)

win.show()
    sys.exit(app.exec_())

main()
Результат выполнения программы:
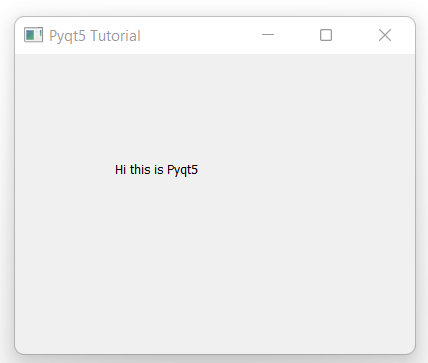
Если кратко, то вызываем метод Qlabel() и передаем в него переменную QMainWindow.
- Метод
SetText()устанавливает Label Text, в качестве аргумента принимает только строковые данные. - Метод
Move(x, y)применяется для установки положения Label Text внутри окна.
4. События и кнопки
Кнопки — важная часть любого программного обеспечения, ведь именно кнопка определяет действие пользователя, а следовательно, и результат работы программы тоже. Для создания кнопок в PyQt5 придётся применить другой виджет под названием QtWidgets, выполните следующий код:
import sys
from PyQt5 import QtWidgets
from PyQt5.QtWidgets import QApplication, QMainWindow, QLabel

def main():
    app = QApplication(sys.argv)
    win = QMainWindow()
    win.setGeometry(400,400,400,300)
    win.setWindowTitle("Pyqt5 Tutorial")

#Button
    button = QtWidgets.QPushButton(win)
    button.setText("Hi! Click Me")
    button.move(100,100)

win.show()
    sys.exit(app.exec_())

main()
Результат выполнения программы:
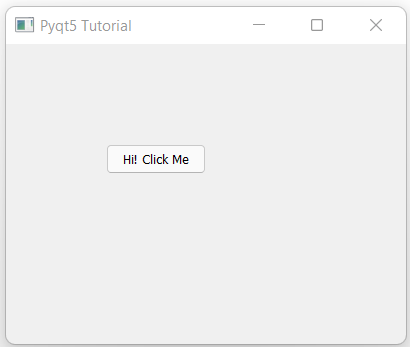
В коде вышеизложенного примера переменная QMainWindow передается в метод из Qwidget под названием QPushbutton. Далее разберем код примера по пунктам.
SetText()устанавливает название для кнопки, как можно увидеть на приведенном выше изображении.Move()снова применяется для установки положения кнопки в окне по координатам на осях x и y.
Теперь пришел черед событийно-ориентированного программирования (Event-Driven-Programming)! Проще говоря, нужно определить действие для кнопки, то есть, если пользователь на нее нажмет, то что-то должно произойти. Ознакомьтесь со следующим кодом, а дальше рассмотрим подробные объяснения:
import sys
from PyQt5 import QtWidgets
from PyQt5.QtWidgets import QApplication, QMainWindow, QLabel

def click():
    print("Hy Button is clicked!")

def main():
    app = QApplication(sys.argv)
    win = QMainWindow()
    win.setGeometry(400,400,400,300)
    win.setWindowTitle("Pyqt5 Tutorial")

#Button Click
    button = QtWidgets.QPushButton(win)
    button.setText("Hi! Click Me")
    button.move(100,100)
    button.clicked.connect(click)

win.show()
    sys.exit(app.exec_())

main()
Теперь в примере определяется не только главная функция по имени main(), но и функция по имени click(), передающаяся в качестве параметра для button.clicked.connect() в main(). Таким образом указывается конкретная функция, срабатывающая при нажатии на конкретную кнопку.
Запустив такой код и нажав на кнопку, вы увидите вывод на экране консоли. Дело за вами, что же написать внутри функции click()! Протестируйте код на вашей операционной системе.
5. Поля ввода
Поля ввода также называются текстовыми полями — это области для пользовательского ввода информации. Для объявления поля ввода в PyQt5 применяется специальный виджет QlineEdit(), а в него, как обычно, передается в качестве параметра QMainWindow.
Посмотрите на следующий код и обратите внимание на его результат:
import sys
from PyQt5 import QtWidgets
from PyQt5.QtWidgets import QApplication, QMainWindow, QLabel

def main():
    app = QApplication(sys.argv)
    win = QMainWindow()
    win.setGeometry(400,400,400,300)
    win.setWindowTitle("Pyqt5 Tutorial")

#Entry Box / Text Box
    textbox = QtWidgets.QLineEdit(win)
    textbox.move(100, 100)
    textbox.resize(180,40)

win.show()
    sys.exit(app.exec_())

main()
Результат выполнения программы:
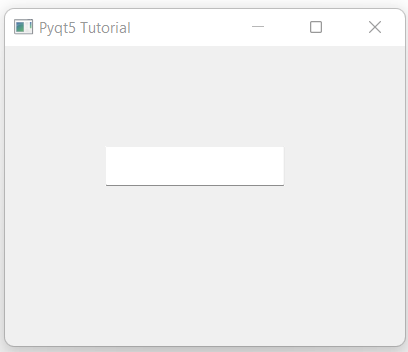
Resize(width, height)изменяет размер виджета поля ввода.
6. Окна сообщений и всплывающие окна
Окна сообщений и всплывающие окна (popups) — это альтернативные маленькие окна, например, вы создаете программу для регистрации электронной почты, а пользователь не ввел надежный пароль, тогда вы предупреждаете пользователя об этом через окна сообщений.
Для создания окон сообщений в PyQt5 применяется виджет QMessageBox, он опять таки принимает QMainWindow в качестве параметра.
Проанализируйте следующий код:
import sys
from PyQt5 import QtWidgets
from PyQt5.QtWidgets import QApplication, QMainWindow, QLabel

def main():
    app = QApplication(sys.argv)
    win = QMainWindow()
    win.setGeometry(400,400,400,300)
    win.setWindowTitle("Pyqt5 Tutorial")

#Message Box
    msg = QtWidgets.QMessageBox(win)
    msg.setWindowTitle("Pyqt5 Alert")
    msg.setText("Message box in Pyqt5!")
    msg.exec_()

win.show()
    sys.exit(app.exec_())

main()
Результат выполнения программы:
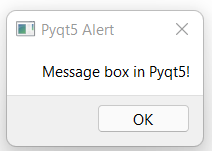
SetWindowTitle()устанавливает заголовок для окна сообщения.
Также в окне сообщения всегда можно показать специальный значок, как показано в следующем коде и результате его выполнения:
msg = QtWidgets.QMessageBox(win)
msg.setWindowTitle("Pyqt5 Alert")
msg.setText("Message box in Pyqt5!")
msg.setIcon(QtWidgets.QMessageBox.Critical)
msg.exec_()
Результат выполнения программы:
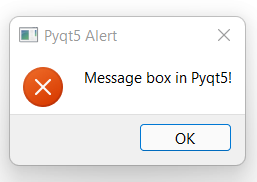
Ниже приведен список допустимых для окон сообщений значков:
QMessageBox.WarningQMessageBox.CriticalQMessageBox.InformationQMessageBox.Question
Выводы
Что же, руководство предоставило вам все необходимые знания для самостоятельного создания графических пользовательских интерфейсов на PyQt5.
Читайте также:
- Пусть говорят… расходящиеся гистограммы!
- 5 способов выйти из вложенного цикла в Python
- Осваиваем веб-скрэпинг на Python
Читайте нас в Telegram, VK и Яндекс.Дзен
Перевод статьи Haider Imtiaz: Build Modern GUI in Python using PyQt5 Framework
In this tutorial we’ll learn how to use PyQt to create desktop applications with Python.
First we’ll create a series of simple windows on your desktop to ensure that PyQt is working and introduce some of the basic concepts. Then we’ll take a brief look at the event loop and how it relates to GUI programming in Python. Finally we’ll look at Qt’s QMainWindow which offers some useful common interface elements such as toolbars and menus. These will be explored in more detail in the subsequent tutorials.
Creating an application
Let’s create our first application! To start create a new Python file — you can call it whatever you like (e.g. app.py) and save it somewhere accessible. We’ll write our simple app in this file.
We’ll be editing within this file as we go along, and you may want to come back to earlier versions of your code, so remember to keep regular backups.
The source code for the application is shown below. Type it in verbatim, and be careful not to make mistakes. If you do mess up, Python will let you know what’s wrong.
python
from PyQt5.QtWidgets import QApplication, QWidget

# Only needed for access to command line arguments
import sys

# You need one (and only one) QApplication instance per application.
# Pass in sys.argv to allow command line arguments for your app.
# If you know you won't use command line arguments QApplication([]) works too.
app = QApplication(sys.argv)

# Create a Qt widget, which will be our window.
window = QWidget()
window.show()  # IMPORTANT!!!!! Windows are hidden by default.

# Start the event loop.
app.exec()


# Your application won't reach here until you exit and the event
# loop has stopped.
First, launch your application. You can run it from the command line like any other Python script, for example —
Run it! You will now see your window. Qt automatically creates a window with the normal window decorations and you can drag it around and resize it like any window.
What you’ll see will depend on what platform you’re running this example on. The image below shows the window as displayed on Windows, macOS and Linux (Ubuntu).

Our window, as seen on Windows, macOS and Linux.
Stepping through the code
Let’s step through the code line by line, so we understand exactly what is happening.
First, we import the PyQt classes that we need for the application. Here we’re importing QApplication, the application handler and QWidget, a basic empty GUI widget, both from the QtWidgets module.
python
from PyQt5.QtWidgets import QApplication, QWidget
The main modules for Qt are QtWidgets, QtGui and QtCore.
You could do from <module> import * but this kind of global import is generally frowned upon in Python, so we’ll avoid it here.
Next we create an instance of QApplication, passing in sys.arg, which is Python list containing the command line arguments passed to the application.
python
app = QApplication(sys.argv)
If you know you won’t be using command line arguments to control Qt you can pass in an empty list instead, e.g.
python
app = QApplication([])
Next we create an instance of a QWidget using the variable name window.
python
window = QWidget()
window.show()
In Qt all top level widgets are windows — that is, they don’t have a parent and are not nested within another widget or layout. This means you can technically create a window using any widget you like.
Widgets without a parent are invisible by default. So, after creating the window object, we must always call .show() to make it visible. You can remove the .show() and run the app, but you’ll have no way to quit it!
What is a window?
— Holds the user-interface of your application
— Every application needs at least one (…but can have more)
— Application will (by default) exit when last window is closed
Finally, we call app.exec() to start up the event loop.
In PyQt5 you can also use app.exec_(). This was a legacy feature avoid a clash with the exec reserved word in Python 2.
What’s the event loop?
Before getting the window on the screen, there are a few key concepts to introduce about how applications are organized in the Qt world. If you’re already familiar with event loops you can safely skip to the next section.
The core of every Qt Applications is the QApplication class. Every application needs one — and only one — QApplication object to function. This object holds the event loop of your application — the core loop which governs all user interaction with the GUI.

Each interaction with your application — whether a press of a key, click of a mouse, or mouse movement — generates an event which is placed on the event queue. In the event loop, the queue is checked on each iteration and if a waiting event is found, the event and control is passed to the specific event handler for the event. The event handler deals with the event, then passes control back to the event loop to wait for more events. There is only one running event loop per application.
The QApplication class
— QApplication holds the Qt event loop
— One QApplication instance required
— You application sits waiting in the event loop until an action is taken
— There is only one event loop running at any time
Over 10,000 developers have bought Create GUI Applications with Python & Qt!
[[ discount.discount_pc ]]% OFF for
the next [[ discount.duration ]]
[[discount.description ]]
with the code [[ discount.coupon_code ]]
Purchasing Power Parity
Developers in [[ country ]] get [[ discount.discount_pc ]]% OFF on all books & courses
with code [[ discount.coupon_code ]]
QMainWindow
As we discovered in the last part, in Qt any widgets can be windows. For example, if you replace QtWidget with QPushButton. In the example below, you would get a window with a single push-able button in it.
python
import sys
from PyQt5.QtWidgets import QApplication, QPushButton

app = QApplication(sys.argv)

window = QPushButton("Push Me")
window.show()

app.exec()
This is neat, but not really very useful — it’s rare that you need a UI that consists of only a single control! But, as we’ll discover later, the ability to nest widgets within other widgets using layouts means you can construct complex UIs inside an empty QWidget.
But, Qt already has a solution for you — the QMainWindow. This is a pre-made widget which provides a lot of standard window features you’ll make use of in your apps, including toolbars, menus, a statusbar, dockable widgets and more. We’ll look at these advanced features later, but for now, we’ll add a simple empty QMainWindow to our application.
python
import sys
from PyQt5.QtWidgets import QApplication, QMainWindow

app = QApplication(sys.argv)

window = QMainWindow()
window.show()

# Start the event loop.
app.exec()
Run it! You will now see your main window. It looks exactly the same as before!
So our QMainWindow isn’t very interesting at the moment. We can fix that by adding some content. If you want to create a custom window, the best approach is to subclass QMainWindow and then include the setup for the window in the __init__ block. This allows the window behavior to be self contained. We can add our own subclass of QMainWindow — call it MainWindow to keep things simple.
python
import sys

from PyQt5.QtCore import QSize, Qt
from PyQt5.QtWidgets import QApplication, QMainWindow, QPushButton


# Subclass QMainWindow to customize your application's main window
class MainWindow(QMainWindow):
    def __init__(self):
        super().__init__()

        self.setWindowTitle("My App")
        button = QPushButton("Press Me!")

        # Set the central widget of the Window.
        self.setCentralWidget(button)


app = QApplication(sys.argv)

window = MainWindow()
window.show()

app.exec()
For this demo we’re using a QPushButton. The core Qt widgets are always imported from the QtWidgets namespace, as are the QMainWindow and QApplication classes.
When using QMainWindow we use .setCentralWidget to place a widget (here a QPushButton) in the QMainWindow — by default it takes the whole of the window. We’ll look at how to add multiple widgets to windows in the layouts tutorial.
When you subclass a Qt class you must always call the super __init__ function to allow Qt to set up the object.
In our __init__ block we first use .setWindowTitle() to change the title of our main window. Then we add our first widget — a QPushButton — to the middle of the window. This is one of the basic widgets available in Qt. When creating the button you can pass in the text that you want the button to display.
Finally, we call .setCentralWidget() on the window. This is a QMainWindow specific function that allows you to set the widget that goes in the middle of the window.
Run it! You will now see your window again, but this time with the QPushButton widget in the middle. Pressing the button will do nothing, we’ll sort that next.

Our QMainWindow with a single QPushButton on Windows, macOS and Linux.
We’ll cover more widgets in detail shortly but if you’re impatient and would like to jump ahead you can take a look at the QWidget documentation. Try adding the different widgets to your window!
The window is currently freely resizable — if you grab any corner with your mouse you can drag and resize it to any size you want. While it’s good to let your users resize your applications, sometimes you may want to place restrictions on minimum or maximum sizes, or lock a window to a fixed size.
In Qt sizes are defined using a QSize object. This accepts width and height parameters in that order. For example, the following will create a fixed size window of 400×300 pixels.
python
import sys

from PyQt5.QtCore import QSize, Qt
from PyQt5.QtWidgets import QApplication, QMainWindow, QPushButton


# Subclass QMainWindow to customize your application's main window
class MainWindow(QMainWindow):
    def __init__(self):
        super().__init__()

        self.setWindowTitle("My App")

        button = QPushButton("Press Me!")

        self.setFixedSize(QSize(400, 300))

        # Set the central widget of the Window.
        self.setCentralWidget(button)


app = QApplication(sys.argv)

window = MainWindow()
window.show()

app.exec()
Run it! You will see a fixed size window — try and resize it, it won’t work.

Our fixed-size window, notice that the _maximize control is disabled on Windows & Linux. On macOS you can maximize the app to fill the screen, but the central widget will not resize._
As well as .setFixedSize() you can also call .setMinimumSize() and .setMaximumSize() to set the minimum and maximum sizes respectively. Experiment with this yourself!
You can use these size methods on any widget.
In this section we’ve covered the QApplication class, the QMainWindow class, the event loop and experimented with adding a simple widget to a window. In the next section we’ll take a look at the mechanisms Qt provides for widgets and windows to communicate with one another and your own code.