
Расширение Google Chrome, созданное с помощью Python (бессерверный, метод B). _ (click to zoom)_Google Chrome плагин написан на HTML, JavaScript и CSS. Если вы никогда не писали плагин Chrome, я предлагаю ознакомиться с документацией по расширениям Chrome.
Вы можете использовать Python вместо JavaScript, и в этом руководстве мы покажем вам, как это сделать.
Создать подключаемый модуль Google Chrome
Для начала нам нужно создать файл манифеста: manifest.json.
{
  "manifest_version": 2,

  "name": "Python Chrome Plugin",
  "description": "This extension runs Python code.",
  "version": "1.0",

  "browser_action": {
    "default_icon": "icon.png",
    "default_popup": "popup.html"
  },
  "permissions": [
    "activeTab",
    "https://ajax.googleapis.com/"
  ]
}
Создайте файл с именем popup.html
<!doctype html>
<!--
 This page is shown when the extension button is clicked, because the
 "browser_action" field in manifest.json contains the "default_popup" key with
 value "popup.html".
 -->
<html>
  <head>
    <title>Getting Started Extension's Popup</title>
    <style>
      body {
        font-family: "Segoe UI", "Lucida Grande", Tahoma, sans-serif;
        font-size: 100%;
      }
      #status {
        /* avoid an excessively wide status text */
        white-space: pre;
        text-overflow: ellipsis;
        overflow: hidden;
        max-width: 400px;
      }
    </style>

    <!--
      - JavaScript and HTML must be in separate files: see our Content Security
      - Policy documentation[1] for details and explanation.
      -
      - [1]: https://developer.chrome.com/extensions/contentSecurityPolicy
     -->
    <script src="popup.js"></script>
  </head>
  <body>
    <div id="status"></div>
    <img id="image-result" hidden>
  </body>
</html>
Наконец, получите иконку и сохраните ее как icon.png. Откройте chrome://extensions и нажмите режим разработчика. Нажмите «загрузить распакованное расширение», выберите свой каталог и нажмите ок.
Добавление Python в расширение Chrome
У нас есть два варианта добавления Python в расширение Chrome:
- Метод A: включить Brython в iframe (требуется сервер)
- Метод B: скомпилируйте Python в Javascript с помощью Rapydscript (лучше всего, бессерверное, чистое расширение).
Метод A: Python (Brython) в iframe
Теперь, когда у вас есть основы, мы можем добавить Python в код. Для запуска Python в браузере у вас есть несколько вариантов, включая Brython и emcascripten. Мы решили попробовать Brython. Мы запустим сценарий Brython с сервера. Измените popup.html на:
<!DOCTYPE html PUBLIC "-//W3C//DTD HTML 4.01 Transitional//EN">
<html>
<head>
<meta charset="iso-8859-1">
<style>
body {
    margin: 0 !important;
    padding: 0 !important;
    width: 800;
}

#frame {
    overflow: hidden;
    width:790;
    height:324;
}
</style>
</head>
<body onLoad="">
<iframe src=http://brython.info/console.html id="frame" seamless="seamless" scrolling="no"></iframe>
</body>
</html>
После перезапуска плагина у вас будет интерпретатор Python (Brython) внутри вашего Google Chrome.
Запуск собственных скриптов
Чтобы запустить собственный скрипт, просто измените URL-адрес во фрейме popup.html:
<iframe src="BRYTHON SCRIPT URL" id="frame" seamless="seamless" scrolling="no"></iframe>
Скрипт должен работать на вашем собственном сервере. Вы можете запустить любой сценарий Brython из Интернета. Используя Brython, вы можете просто ввести код Python внутри тегов скрипта.
Метод Б. Скомпилируйте Python в Javascript. (без сервера, чистое расширение)
Есть несколько инструментов для компиляции Python в Javascript. Rapydscript работает нормально, Pyjs плохо работает с хромом (требуется специальный параметр при запуске).
Установите Rapydscript с помощью:
sudo apt-get install npm
sudo ln -s /usr/bin/nodejs /usr/bin/node
sudo npm install rapydscript
Измените файл /src/hello.py:
Example Python script
# (for rapydscript, a python to javascript compiler)

#def doHelloMessage():
#    alert('hello')
#doHelloMessage()

# modify html page
document.getElementById("result").innerHTML = 'Compiled Python script in Chrome'

# write into log
console.log('hello from python')
Выполните:
Вы можете найти свое расширение в /compiledpythonextension/. Загрузите его в хроме как распакованное расширение и посмотрите, как оно работает 
Заключение:
Плагины Chrome создаются с использованием HTML, JavaScript и CSS. Мы можем использовать Python для создания обычных расширений Chrome с помощью компилятора Python в Javascript (Rapydscript).
<caption id=”attachment_4920” align=”alignright” width=”300”]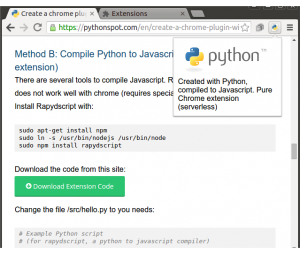 Google Chrome extension created with Python (serverless, method B). (click to zoom)Google Chrome plugins are written in HTML, JavaScript and and CSS. If you have never written a Chrome plugin before I suggest chrome extensions documentation
You can use Python instead of JavaScript and in this tutorial we will show you how to do that.
In a hurry? Download the code from this site:
Download Extension Code
(and scroll down to Method B)
Create an Google Chrome Plugin
To start, we will have to create a manifest file: manifest.json.
{
  "manifest_version": 2,

  "name": "Python Chrome Plugin",
  "description": "This extension runs Python code.",
  "version": "1.0",

  "browser_action": {
    "default_icon": "icon.png",
    "default_popup": "popup.html"
  },
  "permissions": [
    "activeTab",
    "https://ajax.googleapis.com/"
  ]
}
Create a file called popup.html
<!doctype html>
<!--
 This page is shown when the extension button is clicked, because the
 "browser_action" field in manifest.json contains the "default_popup" key with
 value "popup.html".
 -->
<html>
  <head>
    <title>Getting Started Extension's Popup</title>
    <style>
      body {
        font-family: "Segoe UI", "Lucida Grande", Tahoma, sans-serif;
        font-size: 100%;
      }
      #status {
        /* avoid an excessively wide status text */
        white-space: pre;
        text-overflow: ellipsis;
        overflow: hidden;
        max-width: 400px;
      }
    </style>

    <!--
      - JavaScript and HTML must be in separate files: see our Content Security
      - Policy documentation[1] for details and explanation.
      -
      - [1]: https://developer.chrome.com/extensions/contentSecurityPolicy
     -->
    <script src="popup.js"></script>
  </head>
  <body>
    <div id="status"></div>
    <img id="image-result" hidden>
  </body>
</html>
Finally get an icon and save it as icon.png. Open chrome://extensions and press developer mode. Press “load unpacked extension”, select your directory and press ok.
Adding Python to the Chrome extension
We have two options to add Python into a chrome extension:
- Method A: Include Brython in an iframe (requires server)
- Method B: Compile Python to Javascript using Rapydscript (best, serverless, pure extension.)
Method A: Python (Brython) in iframe
Now that you have the basics right we can add Python to the code. To run Python in the browser you have several options including Brython and emcascripten. We decided to give Brython a try. We will run the Brython script from a server. Change popup.html to:
<!DOCTYPE html PUBLIC "-//W3C//DTD HTML 4.01 Transitional//EN">
<html>
<head>
<meta charset="iso-8859-1">
<style>
body {
    margin: 0 !important;
    padding: 0 !important;
    width: 800;
}


    overflow: hidden;
    width:790;
    height:324;
}
</style>
</head>
<body onLoad="">
<iframe src=http://brython.info/console.html id="frame" seamless="seamless" scrolling="no"></iframe>
</body>
</html>
Once you restart your plugin you will have a Python (Brython) interpreter inside your Google Chrome.
<caption id=”attachment_483” align=”alignnone” width=”1000”] Python inside Google Chrome
Running your own scripts
To run your own script simply change the url inside the popup.html frame:
<iframe src="BRYTHON SCRIPT URL" id="frame" seamless="seamless" scrolling="no"></iframe>
The script should run on your own server. You can run any Brython script from the web. Using Brython you can simply type Python code inside the script tags. Have a look at this Brython examples or simply browse the gallery.
Method B: Compile Python to Javascript. (no server, pure extension)
There are several tools to compile Python to Javascript. Rapydscript works fine, Pyjs does not work well with chrome (requires special parameter on start).
Install Rapydscript with:
sudo apt-get install npm
sudo ln -s /usr/bin/nodejs /usr/bin/node
sudo npm install rapydscript
document.getElementById("result").innerHTML = 'Compiled Python script in Chrome'


console.log('hello from python')
Run:
./make.sh
You can find your extension in /compiledpythonextension/. Load it in chrome as unpackaged extension and see it working
Concluding:
Chrome plugins are created using HTML, JavaScript and CSS. We can use Python to create normal Chrome extensions using a Python to Javascript compiler (Rapydscript).
Leave a comment
Зависит от браузера, но 99.99%, что нативно не поддерживается. Так как для реализации расширения программы пользовательскими скриптами, необходимо использовать скриптовый язык. Так как любом браузере есть необходимость в обработке js, то его и используют для создания расширений, ибо это проще.
В принципе, нет особой разницы в языке, так как это просто инструмент. При написании расширения вам нужно будет работать с WebAPI и API браузера. И даже если вы будете использовать транспилятор из ответа Сергея, то вам всё равно придётся узнавать WebApi, из которого и состоит, по большей части, клиентский js.
Create a chrome plugin with Python
Ниже не читайте!
Нет. Python к js никакого отношения не имеет. Либо учите js(если знаете другой ЯП, то написать такое расширение можно за несколько дней), либо не учите js. Всё в ваших руках.
Нет. У браузеров только один язык программирования — JS.
Ни один из популярных браузеров не имеет подержки python для написания расширений. И врядли это случиться ближайщее время. Стандарт дефакто это javascript. Решения которые транслируют python в js могут быть изучены ради интереса, но вряд ли этот опыт поможет в проф. деятельности. Чистый js не сложный, но интересный язык, а главное современный, востребованный. Лучше потратить время на его изучение. Даже если нет цели стать в нем профессионалом, для общего развития это не помещает. А уж проблем с написанием расширений для браузера точно не будет.
I would like to create a google chrome extension. Specifically, I’d like to make a packaged app, but not a hosted app. Am I correct in thinking this limits me to JavaScript (and HTML/CSS)?
My problem is that I need to do some complex math (singular value decomposition, factor analysis) and I don’t want to write algorithms for this in javascript. Python already has libraries for the functions I need (SciPy), but I can’t find any indication that I can make a Chrome extension using python.
Is this correct? Do I have any other options?
![]()
boardrider
5,7026 gold badges48 silver badges80 bronze badges
asked Feb 19, 2011 at 2:23
![]()
1
There is no Python built into Chrome but I am wondering whether pyjs can help you.
answered Feb 19, 2011 at 2:37
![]()
chxchx
11.1k7 gold badges53 silver badges126 bronze badges
0
You can make a standard Google Chrome extension with Python (server-less)
https://pythonspot.com/en/create-a-chrome-plugin-with-python/
The idea is to compile Python to Javascript (technically a JS pre-compiler) using Rapydscript. Then include the generated script in the Chrome extension. The site above has a zip file with all the stuff inside.
I recommend using Rapydscript instead of Pyjamas. A Python script compiled with Rapydscript works like any other Chrome plugin.
Pyjamas scripts does not work well with Google Chrome (needs a special parameter when Chrome starts or server).
answered Aug 13, 2016 at 1:07
![]()
zxvnzxvn
2812 silver badges3 bronze badges
1
Although you mentioned you don’t want it to be a hosted app, but this is one typical scenario where a hosted app can do.
SciPy is not a package that is easy to deploy. Even if you are writing a installed application based on SciPy, it requires some effort to deploy this dependency. A web application can help here where you put most of the hard-to-deploy dependencies on the server side (which is a one-off thing). And the client side can be really light.
answered Mar 13, 2012 at 23:24
![]()
KFLKFL
16.7k16 gold badges64 silver badges89 bronze badges
1
You can make AJAX calls to a separate service with Python from your Google Chrome Extension. All complex logic will be moved to separate microservice.
There is a video how to create Chrome extension, maybe you will find something there — https://youtu.be/l17LDVytSE8
answered Jan 4, 2020 at 20:42
![]()
Python Bindings for Google Chrome API might provide what you are looking for.
http://code.google.com/p/cefpython/
answered Jan 6, 2013 at 14:47
![]()
SuryaSurya
4,7966 gold badges38 silver badges62 bronze badges
1
I’m writing an extension with Flexx PScript and like it very much. Here’s an overview of different tools compared to PScript (do not trust this article,
it’s written by flexx developers:).
answered Jul 3, 2017 at 18:40
![]()
WinandWinand
1,9133 gold badges25 silver badges47 bronze badges
This is a way to achieve this using C# MVC .NET and the Python compiler. The versions are really case specific, such as the infrastructure you are making use of.
Within a controller of choice in your Web App:
one can use :
using System.Diagnostics;


ProcessStartInfo start = new ProcessStartInfo();
            Console.WriteLine("Starting Python     Engine...");
            start.FileName =     @"~PythonPython39python.exe";// you will need to have a copy in an accessible folder.
             start.Arguments = string.Format("{0}",     @"~/PythonScripts/PythonScriptName.py");
            start.UseShellExecute = false;
            start.RedirectStandardOutput = true;
            Console.WriteLine("Starting Process..." +     DateTime.Now.ToString());
Results can be retrieved as for instance:
using (Process process = Process.Start(start)) {
    using (StreamReader reader =     process.StandardOutput)
    {
        string result = reader.ReadToEnd();
        Console.Write(result);
    } } Console.WriteLine("Process Succeeded..." + DateTime.Now.ToString());
The results can then be populated within a model and sent to your page on Load/Post.
You can see examples of how I make use of this to evaluate z-spreads with a web front-end using python in this manner.
enter link description here
answered May 29, 2022 at 18:41
![]()
Web Browser Programming in Python
TODO: merge in and research these, found on comp.lang.python
Yes, Python can do it… on Windows.
Two (examples) ways:
-
ActiveScripting (PythonScript), included in PyWin32
-
Gestalt (who mix Python, Ruby & JavaScript, via Silverlight)
TODO: Add mention of IPython Notebook which can be run remotely, easily on AWS, and used within your browser. The HTML client can also interact with JavaScript and DOM, though this feature isn’t quite merged yet. There’s a lot being done on it, but it’s already being used and probably should be mentioned here.
This topic covers ways in which python can be used in web browsers to control, create or manipulate the content within a user’s web browser, or a web-based technology (such as WebKit, the technology behind Safari, Midori, the OLPC Browser, Adobe AIR, Google Chrome and much more; XULrunner (the engine behind Firefox and much more); MSHTML (the engine behind IE and much more); and KDE’s KHTMLPart.
To clarify what type of technology goes onto this page, some examples of types of technology that can and cannot be added to this section:
-
Specifically excluded from the list is technology that simply generates static HTML content. So, an HTML pretty-printer library, as the resultant HTML simply uses the browser for «display» purposes rather than using the browser as an «application execution environment», is out. Such technologies can instead be found at WebClientProgramming.
-
Plugins for Web Browsers that provide direct access to the DOM model of the web browser. In exactly the same way that most web browsers have JavaScript by default as a language that can directly access the DOM model of the web browser, a plugin or other system that can do the same thing (with Python using <script type=»text/python» /> instead of JavaScript using <script language=»javascript» />) should be listed on this page.
-
Python-based technology that auto-generates or compiles JavaScript definitely counts, as the resultant JavaScript would be executed by the web browser.
-
Technology that simply uses JavaScript or depends on JavaScript libraries (such as mochikit, extjs or prototype) does not count, but a Python-based wrapper library around a JavaScript engine definitely counts.
This latter example requires some further explanation: Pyjamas, for example, is a Python-to-JavaScript compiler that can include inline JavaScript. So, although the input to Pyjamas is part Python, part JavaScript, the output is pure JavaScript that runs in a web browser, and so any such «mixed» language libraries should be included on this page.
Python-to-JavaScript Compilers
These are tools that convert Python into JavaScript, that can then be run either stand-alone, using technology such as Spidermonkey, Google’s V8 engine (for example, using pyv8), or in a web browser (where, in order to be useful, the applications must of course interface with the DOM model of the browser, typically using an AJAX library).
The translation from Python to Javascript can be done by a Python program
-
Pyjaco, the Python-to-Javascript Compiler is a python-based compiler that will compile most python code into fairly compact javascript. It uses a small (~60KB) standard library to implement all the usual python types like list, dict, int, bool, etc. It supports classes, inheritance, keyword and variable arguments, and much more. It has a comprehensive test suite, and aims to be the most fun and efficient way to create web applications with Python.
-
Pyjamas is a Python-to-JavaScript compiler and AJAX-based Web Toolkit and Framework that allows users to write code in standard Python that will be run in a web browser, after translation to JavaScript. pyjs — the compiler — can also be used as a stand-alone JavaScript compiler. There are three main modes: —strict, providing as close to full strict python compatibility and interoperability as is both possible and has been contributed so far (which is quite a lot); -O, providing a subset of python functionality and providing much faster performance as a result; —stupid-mode which falls back to javascript for certain operations, with the result that the output is much easier to read and to compare to the original python from which it was generated, but runs the risk of changing the meaning of the python application and requiring a deep understanding of how javascript operates (stupidly — hence the name of the mode).
-
Py2Js is an unmaintained project that can still be downloaded here. It is purely a Python-to-JavaScript compiler/translator.
-
Py2js is a maintained project that provides a Python-to-JavaScript compiler.
-
PyCow is an unmaintained project to translate Python code to Javascript with Mootools
-
Fiddle Salad is a web development IDE with HTML and CSS that compiles Python to JavaScript
-
Transcrypt is a new tool, intended for professional use, to precompile Python 3.6 into compact, readable JavaScript. It allows for seamless integration with any JavaScript library without gluecode or dataconversion. Compact downloads, kB’s rather than MB’s, runtine only 20kB. Load and execution speed the same as JavaScript. You can debug your application from the Python sourcecode, even it it’s minified. Optional static typechecking and linting included. Possibility to embed JSX into the sourcecode for use with React. Documentation with extensive examples using a diversity of JavaScript libraries. Native JavaScript code can be inserted anywhere in the Python source. Can be used in combination with Django or Bottle to have the same language on client and server side. Many demo’s are part of the distribution, including an iOS web app. Transcrypt can be pip-installed from PyPi.
or by a Javascript program, with the Python code translated and run on the fly by the web browser
-
Skulpt is a Python-to-JavaScript compiler that is focussing on providing (only) full Python syntax. The demo includes a Python interpreter prompt, which is actually running in the user’s web browser, not on a server, as pure JavaScript.
-
Brython is a Python 3 implementation that runs in a browser, providing <script type=»text/python»>…</script>.
Embedding Python inside Web Browsers
This section describes projects where a Python interpreter itself has been embedded into the web browser. Instead of downloading the standard Python executable and libraries, these projects come with the CPython runtime and libraries pre-embedded (and, as such, are typically very large downloads).
-
PyXPComExt has the full Python interpreter embedded. PyXPCOMExt is the interpreter as a XULRunner extension; PyDOM is a library that will almost certainly be needed, that allows you to manipulate the browser’s DOM model using Python. The API is (almost) identical to that of JavaScript. Effectively, where browsers have built-in support for lang=»javascript», PyXPComExt adds <script lang=»python»> …. </script> to Firefox.
-
AppCelerator’s Titanium provides support for <script type=»text/python»> … </script>, using IronPython and Silverlight.
-
Ironpython by itself also provides support for <script type=»text/python»> … </script>.
-
Firebreath is an NPAPI plugin that extends access to the full features of DOM programming out to other programming languages, including python.
Python Wrappers around Web «Libraries» and Browser Technology
This section describes projects where you can (or have to) create your own web browser application in Python. It includes web browser «engines» that have Python interfaces to access, control and present web pages and web-relevant rich media content (such as Adobe Flash).
-
CefPython provides python bindings for the Google Chrome browser by using Chromium Embedded Framework, a web browser control based on the Chromium project.
-
PythonWebKit — PythonWebKit is a Python wrapper around Webkit that provides direct access to the DOM model. PyWebKitGtk has been incorporated into the build, rather than being built separately. Unlike the patched version of PyWebKitGtk, PythonWebKit does not go via gobject to access DOM functions but instead calls the Webkit DOM functions direct.
-
PyWebKitGtk — PyWebkitGtk is a Python wrapper around Webkit that embeds the Webkit «engine» as a GTK widget. The standard version of PyWebKitGtk is unable to provide access to the DOM model, treating pywebkit as a hands-off widget that can be used to write your own Web Browser (see demobrowser.py). However, a patch to webkit and a corresponding patch to PyWebKitGtk will soon bring DOM model manipulation to python: see PyjamasDesktop for details.
-
PyWebkitQt4 is a python wrapper again around Webkit but this time as a Qt4 widget. An extremely limited subset of bindings to the DOM model have been added to PyWebkitQt4, along with the means to execute JavaScript code snippets. Whilst in principle this sounds like a fantastic idea, in practice it is insane to work with, especially for event callbacks and for anything beyond the most absolute and basic DOM manipulation. PyWebkitQt4 is best avoided for significant DOM manipulation, or is best treated as nothing more than a means to display HTML (and other web-based media such as Flash and Java applications).
-
PyKDE — KDE contains Python bindings to KHTMLPart (which is very similar to Webkit). This allows you to embed HTML into an application window. The Python bindings to the DOM model are slightly… obtuse. to say the least, and PyKHTML — PyKHTML makes them much more tolerable (see dom.py). However, there are limitations in PyKDE’s DOM bindings (that many people will never encounter) that you should investigate thoroughly before utilising PyKDE for seriously heavy-duty DOM model manipulation. To avoid those limitations you should ensure that the entire KDE platform is compiled with C++ RTTI enabled (it is typically disabled by most distributions, by default).
-
WebKit with the Objective-C bindings (MacOS X users only). Webkit itself has Objective-C bindings, on MacOS X. MacOS X’s Objective-C technology comes with automatic bindings to all major programming languages, including Python (using pyobjc). Consequently, you can directly manipulate the DOM model from Python. However, unlike the use of MSHTML, and unlike XULrunner and the patched version of WebKit, the Objective-C WebKit bindings are limited to just the DOM model, and are limited to strict accordance with the W3C standards (rather than the de-facto standards defined by real-world JavaScript usage). So, for example, XMLHttpRequest is not included in the Objective-C bindings (whereas it is in XULRunner); and the embed element takes width and height strictly as integers, rather than accepting 100px and stripping off px.
-
HulaHop provides Python access to DOM model manipulation — via XUL/Gecko Interfaces. HulaHop is part of the OLPC Sugar Project, but is available stand-alone. It depends on python-xpcom (part of XULRunner). HulaHop is being removed from Sugar and being replaced by WebKit.
-
PyWin32 comtypes can be used (with care!) to create an MSHTML IWebBrowser2 ActiveX window and thus provide access to the full DOM features of the MSHTML (Trident) engine. PyjamasDesktop uses this technique to create the mshtml.py port. Note that creation and use of XMLHttpRequest is also shown in PyjamasDesktop’s mshtml.py.
- python-wxWebKit is beginning to provide Python access to DOM model manipulation — via python bindings that are auto-generated using SWIG. The goal of the project is to provide full access to the entire DOM model, and this goal is, as of May 2011, approximately 25% completed.
Python Wrappers around Web Browser «Test Suite» Libraries
This section describes projects where you can test web applications, initiated from the command-line with python bindings.
-
Selenium, the browser test suite, has python bindings: Install HOWTO. Selenium is a suite of tools to automate web app testing across many platforms.
-
Windmill is a web testing tool designed to let you painlessly automate and debug your web application. Like selenium, it also has Python bindings.
В конце 2020 года мы делали проект со снежинками — писали специальный скрипт, который запускал падающий снег на сайтах. Если бы мы хотели сделать такой снег на любом своём сайте, это не составило бы труда: добавляешь скрипт в код страницы, и готово.
А вот на чужих сайтах была проблема. Скрипт нужно было вставлять через консоль. А если на сайте была настроена политика безопасности, которая запрещает запуск внешних скриптов, то магия не срабатывала.
Сегодня мы это исправим — сделаем расширение для браузера, которое может запускать любой скрипт на любой странице. Мы охватим принцип, на основе которого вы сможете сделать собственные расширения, в том числе намного более сложные.
👉 Что такое расширение
Расширение для Chrome — это небольшая программа, которая выполняется внутри браузера и помогает расширить возможности сайтов. Сила расширения в том, что оно может выполняться прямо из меню браузера и не зависит от политик безопасности.
Примеры того, что может сделать расширение:
- Сохранить ваши пароли и другие личные данные,
- Выдрать из страницы скрытые данные (например, ссылку на скачивание музыки).
- Менять что-то на странице, например, отключать рекламу, переводить текст, удалять ненужное.
- Собирать статистику вашей работы в интернете.
- Подключаться к другим сервисам (почте, чатам, файлообменникам) и взаимодействовать с ними из браузера.
В этой статье
Мы сделаем самое простое расширение для браузера Chrome, которое позволит запускать скрипт со снежинками на любом сайте, независимо от настроенной политики безопасности. Для этого воспользуемся официальным руководством Google по созданию расширений.
Манифест
В каждом расширении для браузера должен быть манифест — документ, в котором написано:
- как называется расширение;
- к чему расширение может получить доступ;
- какие скрипты будут работать в фоне;
- как должна выглядеть иконка расширения;
- что показать или что выполнить, когда пользователь нажмёт на иконку расширения.
Манифест задаёт общие правила для всего расширения, поэтому манифест — единственный обязательный компонент. Можно обойтись без иконок и скриптов, но манифест обязательно должен быть.Каждый манифест хранится в файле manifest.json — создадим пустой файл с таким именем и напишем внутри такое:
{

  «name»: «Запускаем снежинки на любом сайте»,

  «description»: «Проект журнала Код»,

  «version»: «1.0»,

  «manifest_version»: 3

}
Первые две строчки — это название и подробное описание расширения. Третья отвечает за номер версии расширения, а последняя говорит браузеру, какая версия манифеста используется в описании. На момент выхода статьи в феврале 2021 года используется третья версия.
Сохраняем файл и всё, расширение готово. Оно ничего не умеет, ничего не делает, зато мы уже можем добавить его в браузер. Для этого запускаем Хром и в адресной строке пишем:
chrome://extensions/
Мы попадаем на страницу, которая нам покажет все установленные расширения:

Чтобы добавить своё расширение, в правом верхнем углу включаем режим разработчика, а затем нажимаем «Загрузить распакованное расширение»:

Теперь выбираем папку, в которой лежит наш манифест:

Отлично, мы только что добавили в браузер новое расширение:

Теперь мы можем обновлять наш манифест, класть в ту же папку дополнительные файлы, а для обновления в браузере достаточно будет нажать на круглую стрелку на карточке расширения.
Чтобы было проще работать и тестировать расширение, закрепим его на панели браузера:

Иконки
У расширения есть две иконки, которыми мы можем управлять:
- Картинка в карточке расширения на странице настроек.
- Иконка на панели браузера.
Чтобы не рисовать всё с нуля, скачаем папку с иконками из того же руководства Google и положим её в ту же папку, что и манифест:
Теперь добавим иконки в манифест. За картинку в карточке отвечает блок icon, а за иконку на панели — блок action. Разные размеры картинки нужны для того, чтобы на разных мониторах с любой плотностью пикселей иконки выглядели хорошо:
{
  "name": "Запускаем снежинки на любом сайте",
  "description": "Проект журнала Код",
  "version": "1.0",
  "manifest_version": 3,

  "action": {
    "default_icon": {
      "16": "/images/get_started16.png",
      "32": "/images/get_started32.png",
      "48": "/images/get_started48.png",
      "128": "/images/get_started128.png"
    }
  },
  "icons": {
    "16": "/images/get_started16.png",
    "32": "/images/get_started32.png",
    "48": "/images/get_started48.png",
    "128": "/images/get_started128.png"
  }
}
Сохраняем манифест, обновляем расширение на странице настроек и смотрим результат:

Настраиваем разрешения
Разрешения — это то, что браузер позволяет делать расширению со страницами и с их содержимым. Для запуска снежинок нам нужно сделать две вещи:
- Понять, какая вкладка сейчас активная, чтобы запустить снежинки именно на ней.
- Запустить наш скрипт со снежинками.
Чтобы получить доступ к активной вкладке и к запуску скриптов, добавим в манифест такую строку:
"permissions": ["activeTab", "scripting"],
Показываем меню
Если мы сейчас нажмём на иконку расширения на панели браузера, то ничего не призойдёт, потому что мы ничего не запрограммировали. Исправим это — сделаем так, чтобы при нажатии расширение показывало кнопку запуска. Когда расширение будет уметь больше, вместо одной кнопки можно будет показать целое меню.
Чтобы сделать всплывающее меню, добавим в манифест в раздел action такую строку:
"default_popup": "popup.html",
Она означает, что при нажатии на иконку мы увидим рядом с ней мини-страничку, на которой что-то будет.Создадим в той же папке расширения файл popup.html и добавим в него такой код:
<!DOCTYPE html>
<html lang="ru">
  <head>
  	<meta charset="UTF-8">
    <style type="text/css">

    	/* задаём размеры кнопки и размер текста на кнопке  */
    	button {
	      font-size: 12px;
		  height: 40px;
		  width: 80px;
		}
    </style>
  </head>
  <body>
  	<!-- создаём кнопку на странице -->
    <button id="snow">Запустить снежинки</button>
    <!-- подключаем скрипт, который обработает нажатие на эту кнопку -->
    <script src="popup.js"></script>
  </body>
</html>
Чтобы браузер не ругался, что у нас нет файла popup.js, создадим пустой файл с таким названием и положим его в ту же папку:

Сохраняем манифест, обновляем его на странице настроек и видим, что у нашего расширения появилось меню с кнопкой:

Запускаем снежинки
Вся магия будет происходить в файле popup.js — откроем его и добавим такой код:
// получаем доступ к кнопке
let snow = document.getElementById("snow");
// когда кнопка нажата — находим активную вкладку и запускаем нужную функцию
snow.addEventListener("click", async () => {
  // получаем доступ к активной вкладке
  let [tab] = await chrome.tabs.query({ active: true, currentWindow: true });
  // выполняем скрипт
  chrome.scripting.executeScript({
  	// скрипт будет выполняться во вкладке, которую нашли на предыдущем этапе
    target: { tabId: tab.id },
    // вызываем функцию, в которой лежит запуск снежинок
    function: snowFall,
  });
});

// запускаем снег
function snowFall() {
}
Последнее, что нам осталось сделать, — положить в функцию snowFall() полный код скрипта из проекта со снежинками и сохранить файл.
Проверка
В прошлый раз мы не смогли запустить скрипт на любой странице Яндекса — мешала политика безопасности. Теперь всё работает:

Скачать упакованное расширение. Перед установкой его нужно распаковать в любую папку.
Source code:Lib/webbrowser.py
webbrowser модуль обеспечивает высокоуровневый интерфейс, позволяющий отображать веб-документы для пользователей. В большинстве случаев простой вызов функции open() из этого модуля будет делать правильные вещи.
В Unix графические браузеры предпочтительнее в X11,но браузеры в текстовом режиме будут использоваться,если графические браузеры недоступны или недоступен дисплей X11.Если используются браузеры текстового режима,вызывающий процесс будет блокироваться до тех пор,пока пользователь не выйдет из браузера.
Если существует переменная среды BROWSER , она интерпретируется как список обозревателей, os.pathsep , которые следует попробовать до использования по умолчанию для платформы. Когда значение части списка содержит строку %s , оно интерпретируется как литеральная командная строка браузера, которая должна использоваться с URL-адресом аргумента, замененным на %s ; если часть не содержит %s , она просто интерпретируется как имя запускаемого браузера. 1
Для неUnix-платформ,или когда удаленный браузер доступен на Unix,процесс управления не будет ждать,пока пользователь закончит работу с браузером,а позволит удаленному браузеру поддерживать свои собственные окна на дисплее.Если удаленный браузер недоступен на Unix,управляющий процесс запустит новый браузер и будет ждать.
Веб- браузер сценариев можно использовать в качестве интерфейса командной строки для модуля. Он принимает URL-адрес в качестве аргумента. Он принимает следующие необязательные параметры: -n открывает URL-адрес в новом окне браузера, если это возможно; -t открывает URL-адрес на новой странице браузера («вкладка»). Варианты, естественно, взаимоисключающие. Пример использования:
python -m webbrowser -t "https://www.python.org"
Доступность : не Emscripten, не WASI.
Этот модуль не работает или недоступен на платформах WebAssembly wasm32-emscripten и wasm32-wasi . Дополнительную информацию см. в разделе Платформы WebAssembly .
Определено следующее исключение:
-
exception webbrowser.Error -
Исключение поднято при ошибке управления браузером.
Определены следующие функции:
-
webbrowser.open(url, new=0, autoraise=True) -
Отображать URL с помощью браузера по умолчанию. Если новый равен 0, URL -адрес открывается в том же окне браузера, если это возможно. Если new равно 1, по возможности открывается новое окно браузера. Если new равно 2, по возможности открывается новая страница браузера («вкладка»). Если autoraise имеет значение
True, окно поднимается, если это возможно (обратите внимание, что во многих оконных менеджерах это происходит независимо от установки этой переменной).Обратите внимание,что на некоторых платформах попытка открыть имя файла с помощью этой функции может сработать и запустить соответствующую программу операционной системы.Однако это не поддерживается и не переносится.
Вызывает событие аудита
webbrowser.openс аргументомurl.
-
webbrowser.open_new(url) -
Открыть URL в новом окне браузера по умолчанию, если это возможно, в противном случае, откройте URL в единственном окне браузера.
-
webbrowser.open_new_tab(url) -
Откройте URL -адрес на новой странице («вкладке») браузера по умолчанию, если это возможно, в противном случае эквивалентно
open_new().
-
webbrowser.get(using=None) -
Верните объект контроллера для типа браузера, используя . Если используется значение
None, верните контроллер для браузера по умолчанию, соответствующий среде вызывающего объекта.
-
webbrowser.register(name, constructor, instance=None, *, preferred=False) -
Зарегистрируйте название типа браузера . После регистрации типа браузера функция
get()может вернуть контроллер для этого типа браузера. Если экземпляр не указан или равенNone, конструктор будет вызываться без параметров для создания экземпляра при необходимости. Если указан экземпляр , конструктор никогда не будет вызываться и может иметь значениеNone.Настройка предпочтительный в
True, делает этот браузер предпочтительным результата дляget()вызова без аргумента. В противном случае эта точка входа полезна только в том случае, если вы планируете либо установить переменнуюBROWSER, либо вызватьget()с непустым аргументом, соответствующим имени объявленного вами обработчика.Изменено в версии 3.7: добавлен предпочтительный параметр только для ключевых слов.
Предопределено несколько типов браузеров. В этой таблице приведены имена типов, которые могут быть переданы в функцию get() и соответствующие экземпляры для классов контроллера, все они определены в этом модуле.
|
Type Name |
Class Name |
Notes |
|---|---|---|
|
|
|
|
|
|
|
|
|
|
|
|
|
|
|
|
|
|
|
|
|
|
|
|
|
|
|
(1) |
|
|
|
(1) |
|
|
|
(1) |
|
|
|
|
|
|
|
|
|
|
|
|
|
|
|
|
|
|
|
|
|
|
|
|
|
|
|
|
|
|
|
(2) |
|
|
|
(3) |
|
|
|
(3) |
|
|
|
|
|
|
|
|
|
|
|
|
|
|
|
Notes:
- «Konqueror» — это файловый менеджер для среды рабочего стола KDE для Unix, и его имеет смысл использовать только в том случае, если KDE работает. Неплохо было бы найти какой-нибудь способ надежного обнаружения KDE; переменной
KDEDIRнедостаточно. Также обратите внимание, что имя «kfm» используется даже при использовании команды konqueror с KDE 2 — реализация выбирает наилучшую стратегию для запуска Konqueror. - Только на Windows-платформах.
- Только на платформе macOS.
Новинка в версии 3.3:добавлена поддержка Chrome/Chromium.
Устарело, начиная с версии 3.11, будет удалено в версии 3.13: MacOSX устарела, вместо этого используйте MacOSXOSAScript .
Вот несколько простых примеров:
url = 'https://docs.python.org/'

# Open URL in a new tab, if a browser window is already open.
webbrowser.open_new_tab(url)

# Open URL in new window, raising the window if possible.
webbrowser.open_new(url)
Объекты контроллера браузера
Контроллеры браузера предоставляют эти методы,которые параллельно выполняют три удобные функции модульного уровня:
-
webbrowser.name -
Системно-зависимое имя для браузера.
-
controller.open(url, new=0, autoraise=True) -
Отображать URL -адрес с помощью браузера, обрабатываемого этим контроллером. Если new равно 1, по возможности открывается новое окно браузера. Если new равно 2, по возможности открывается новая страница браузера («вкладка»).
-
controller.open_new(url) -
Открыть URL в новом окне браузера обрабатывается этим контроллером, если это возможно, в противном случае, откройте URL в единственном окне браузера. Псевдоним
open_new().
-
controller.open_new_tab(url) -
URL -адрес открытия на новой странице («вкладке») браузера, обрабатываемого этим контроллером, если это возможно, в противном случае эквивалентно
open_new().
Footnotes
-
1 -
Исполняемые файлы, названные здесь без полного пути, будут найдены в каталогах, указанных в
PATHсреды PATH .
Python
3.11
-
wave-чтение и запись файлов WAV
Исходный код:Lib/wave.py Модуль wave предоставляет удобный интерфейс для работы со звуковым форматом.
-
weakref-Слабые ссылки
Исходный код:Lib/weakref.py Модуль weakref позволяет программисту Python создавать объекты ссылок.
-
Специальные службы MS Windows
В этой главе описаны модули,доступные только для платформ MS Windows.
-
winreg-доступ к реестру Windows
Эти функции открывают API реестра Windows для Python.