Время на прочтение
3 мин
Количество просмотров 15K
Для кого эта статья
Странно говорить о таких понятиях, как расширение функционала такого продукта, как Visual Studio в контексте «для чайников», но есть люди, которые и журналы смотрят с последней страницы. Эта статья для тех, кто уже имеет представление как обращаться со студией, но пока мало знает, чем она может помочь, и уже очень хочется добавить свою фичу.
Ожидаемые результаты
Научиться создавать и встраивать VSPackage расширения в VS 2012, на примере расширения для запуска калькулятора прямо из студии.
Что потребуется
Для разработки расширения потребуется сама студия, я воспользуюсь VS 2012, а также необходимо установить VS SDK 2012. Отмечу, что для разработки в VS 2010 есть VSPackage Builder , и этот инструмент помогает создавать расширения в дизайнере. Мы же обойдемся только шаблоном проекта предоставляемого SDK.
Шаг 1. Создаем проект
Файл->Создать->Проект->Шаблоны->Другие типы проектов-Расширение среды->Visual Studio Package и задаем имя проекта VSPackageCalc.
Шаг 2. Редактируем способ запуска и отображение кнопки в студии
Искомый файл: VSPackageCalc.vsct — файл с расширением .vsct
Определимся где отобразить кнопку и как запускать расширение, Отмечу два варианта отображения:
— добавление пункта меню в меню «Сервис»
— добавление панели кнопок в тулбар
Группа команд для меню «Сервис» задается так (код уже сгенерирован):
<Group guid="guidVSPackageCalcCmdSet" id="MyMenuGroup" priority="0x0600">
        <Parent guid="guidSHLMainMenu" id="IDM_VS_MENU_TOOLS"/>
      </Group>
Как будет назваться панель инструментов в меню панелей инструментов (оставим имя по умолчанию VSPackageCalc Toolbar):
<Menu guid="guidVSPackageCalcCmdSet" id="IDM_TLB_RTF" priority="0x0000" type="Toolbar">
        <Parent guid="guidVSPackageCalcCmdSet" id="0"/>
        <Strings>
          <ButtonText>VSPackageCalc Toolbar</ButtonText>
        </Strings>
      </Menu>
Честно говоря идентификаторов типа IDM_VS_MENU_TOOLS, указывающих в какой раздел меню можно поместить вызов функции расширения, много, и разбираться со всеми не входит в рамки статьи, но кое-что можно почерпнуть в MSDN
Далее определимся с видом кнопки тулбара. Сначала удалим лишнее кнопки из нашего тулбара (по умолчанию создаются инструменты для редактирования), заменив код с описанием группы кнопок тулбара расширения:
<!-- Toolbar groups -->
      <Group guid="guidVSPackageCalcCmdSet" id="IDG_RTF_TLB_FONT1" priority="0x0100">
        <Parent guid="guidVSPackageCalcCmdSet" id="IDM_TLB_RTF"/>
      </Group>
      ...
на код одного элемента тулбара:
<!-- Toolbar groups -->
      <Group guid="guidVSPackageCalcCmdSet" id="MyMenuGroup" priority="0x0100">
        <Parent guid="guidVSPackageCalcCmdSet" id="IDM_TLB_RTF"/>
      </Group>
Далее можно редактировать текст и отображения самого пункта меню:
<Button guid="guidVSPackageCalcCmdSet" id="cmdidCalcStart" priority="0x0100" type="Button">
        <Parent guid="guidVSPackageCalcCmdSet" id="MyMenuGroup" />
        <Icon guid="guidImages" id="bmpPic1" />
        <Strings>
          <ButtonText>Калькулятор</ButtonText>
        </Strings>
      </Button>
Можно удалить элемент Icon (иконку), и тогда будет отображаться только текст. Иначе при отображении в тулбаре будет иконка, а чтобы показать и текст к ней, придется настраивать отдельно через инструмент настройки отображения кнопок тулбара в самой студии.
Шаг 3. Описание функционала расширения
Для задания функционала нашего расширения, его нужно описать в файле VSPackageCalcPackage.cs, отредактировав метод обработки нажатия на кнопку меню, который также был уже сгенерирован при создании проекта. Удалим все, что внутри метода и заменим на запуск приложения — стандартного калькулятора:
private void MenuItemCallback(object sender, EventArgs e)
        {
            // Запуск процесса:
            Process.Start("Calc.exe");
        }
Шаг 4. Встраивание расширения
Ну вот почти и готово, осталось только собрать проект и в папке построения запустить VSPackageCalc.vsix.
Процесс установки
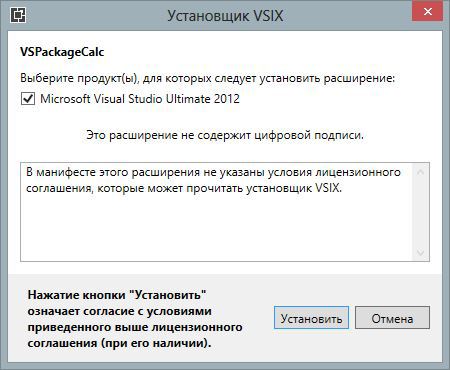
После установки необходимо перезапустить студию.
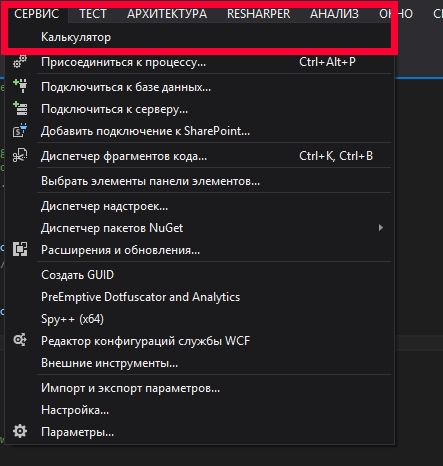
Шаг 5. Использование встроенной фичи
Запуск из меню Сервис
Запуск из тулбара
Сначала нужно добавить панель инструментов VSPackageCalc Toolbar средствами VS — правая мышь по тулбару и отметить галочкой. Тула появилась на панели:

Заключение
Пусть фича не очень полезная и не сложная получилась, но, надеюсь, полученные знания подтолкнут к более глубокому изучению вопроса разработки расширений для Visual Studio.
In this topic, we’ll teach you the fundamental concepts for building extensions. Make sure you have Node.js and Git installed, then install Yeoman and VS Code Extension Generator with:
npm install -g yo generator-code
The generator scaffolds a TypeScript or JavaScript project ready for development. Run the generator and fill out a few fields for a TypeScript project:
yo code

# ? What type of extension do you want to create? New Extension (TypeScript)
# ? What's the name of your extension? HelloWorld
### Press <Enter> to choose default for all options below ###

# ? What's the identifier of your extension? helloworld
# ? What's the description of your extension? LEAVE BLANK
# ? Initialize a git repository? Yes
# ? Bundle the source code with webpack? No
# ? Which package manager to use? npm

# ? Do you want to open the new folder with Visual Studio Code? Open with `code`
Then, inside the editor, press F5. This will compile and run the extension in a new Extension Development Host window.
Run the Hello World command from the Command Palette (⇧⌘P (Windows, Linux Ctrl+Shift+P)) in the new window:
You should see the Hello World from HelloWorld! notification showing up. Success!
Developing the extension
Let’s make a change to the message:
- Change the message from «Hello World from HelloWorld!» to «Hello VS Code» in
extension.ts. - Run Developer: Reload Window in the new window.
- Run the command Hello World again.
You should see the updated message showing up.
Here are some ideas for things for you to try:
- Give the Hello World command a new name in the Command Palette.
- Contribute another command that displays current time in an information message. Contribution points are static declarations you make in the
package.jsonExtension Manifest to extend VS Code, such as adding commands, menus, or keybindings to your extension. - Replace the
vscode.window.showInformationMessagewith another VS Code API call to show a warning message.
Debugging the extension
VS Code’s built-in debugging functionality makes it easy to debug extensions. Set a breakpoint by clicking the gutter next to a line, and VS Code will hit the breakpoint. You can hover over variables in the editor or use the Run and Debug view in the left to check a variable’s value. The Debug Console allows you to evaluate expressions.
You can learn more about debugging Node.js apps in VS Code in the Node.js Debugging Topic.
Next steps
In the next topic, Extension Anatomy, we’ll take a closer look at the source code of the Hello World sample and explain key concepts.
You can find the source code of this tutorial at: https://github.com/microsoft/vscode-extension-samples/tree/main/helloworld-sample. The Extension Guides topic contains other samples, each illustrating a different VS Code API or Contribution Point, and following the recommendations in our UX Guidelines.
Using JavaScript
In this guide, we mainly describe how to develop VS Code extension with TypeScript because we believe TypeScript offers the best experience for developing VS Code extensions. However, if you prefer JavaScript, you can still follow along using helloworld-minimal-sample.
UX Guidelines
This is also a good time to review our UX Guidelines so you can start designing your extension user interface to follow the VS Code best practices.
3/1/2023
Эта статья продолжает небольшую серию «Создаём ваш первый плагин для…», в которую уже вошли статьи про написания плагина для Grunt и Gulp.
Дисклеймер
Я люблю JavaScript. Мне довольно приятно наблюдать за тем, что этот прекрасный язык программирования вышел за пределы браузера и собирает всё больше и больше областей применения. Так, например, благодаря Electron от GitHub у меня появилось сразу несколько приложений, которые я использую в повседневной жизни. К таким приложениям относится Hain, 1Clipboard, Wagon, Gitify и, конечно же, Visual Studio Code.
Теперь поговорим о приятном для некоторых людей и противном для других. У меня нет симпатий к TypeScript. На то есть свои причины, в основном, связанные с типизацией — не люблю я её, что тут поделать. При этом я не буду отрицать, что когда-нибудь начну использовать TypeScript или подобный язык, компилируемый в JavaScript — всё бывает, мнение может меняться со временем. Однако, в связи с этим, в статье все примеры будут написаны на JavaScript, хотя сам редактор и вся документация к нему написана с применением TypeScript в примерах.
Кстати, я недавно узнал, что создателем TypeScript был Андерс Хейлсберг, который, оказывается, приложил руку к Turbo Pascal, Delphi и C#.
Что-то вместо введения
Герой нашего дня (VS Code) построен на Electron, который подробно рассматривался в статье «Построение Electron приложения. Введение». На момент написания статьи (июнь 2016) в основе редактора лежит Electron версии 0.37.6, что подразумевает под собой Chromium 49-ой ветки и Node.js версии 5.10.0. В репозитории на GitHub уже думают над переходом на новую версию Electron, где версия Chromium поднимется минимум до 51-ой ветки, а Node.js до версии 6.1.0 или выше. Всё это означает, что вы можете писать плагины, используя синтаксис ES2015 без Babel и его альтернатив, а также применяя любой API Node.js.
Предупреждение
Не стоит читать эту статью дальше введения, если вы не понимаете фишки, введённые в ES2015. Если говорить конкретно, то от вас требуется понимание деструктуризации, обещаний, стрелочных функций, const и let, а также понимание основ Node.js.
Итак, пожалуй, начнём с того, что плагины в VS Code изолированы от самого редактора и запускаются в отдельном хост-процессе (extension host process), который представляет собой процесс Node.js с возможностью использования VS Code API. Такой подход не позволяет плагинам влиять на производительность редактора при его запуске или в процессе его работы. Для пользователя это означает, что редактор не зависнет на время выполнения задач каким-либо плагином или, если плагин выдаст фатальную ошибку.
Для экономии расхода памяти разработчики также добавили ленивую загрузку плагинов. Это означает, что плагины активируются лишь в тот момент, когда они нужны. Например, если пользователь открывает Markdown-файл, то плагины, работающие с Markdown, будут загружены только в момент открытия файла. Разумеется, мы должны сообщить редактору о том, когда именно он должен активировать какой-либо плагин. О настройке ленивой загрузки мы поговорим позднее в разделе про файл манифеста.
Помимо всего прочего, плагины делятся на три вида в зависимости от функционала:
К первому виду относятся стандартные плагины, которые запускаются в хост-процессе, активируются в нужный момент и не требуют серьёзных вычислений.
Ко второму виду относятся так называемые «языковые серверы». Клиентская часть плагина запускается в хост-процессе, а серверная часть создаёт дополнительный процесс, в котором производятся все сложные вычисления. К такому виду плагинов относятся линтеры.
К третьему виду относят «службы отладки», которые пишутся в виде отдельной программы и взаимодействуют с VS Code по специальному протоколу CDP (VS Code Debug Protocol).
В этой статье будет рассматриваться лишь первый вид плагинов на примере vscode-lebab. Во второй статье разбирается процесс построения второго вида плагинов на примере vscode-puglint.
Манифест плагина
Написание плагина начинается не с кода, а с файла манифеста, которым в мире Node.js является файл package.json. VS Code дополняет стандартный файл манифеста своими полями. Ниже будут рассмотрены самые основные из них.
publisher [string]
Имя пользователя, под которым вы зарегистрировались в vsce.
icon [string]
Путь до иконки, которая будет отображаться в магазине расширений. Размер иконки 128×128 пикселей. Также поддерживается SVG формат.
displayName [string]
Название плагина, которое будет отображаться в магазине расширений.
categories [array]
Массив, содержащий имена категорий, к которым относится плагин. Доступны следующие категории: [Languages, Snippets, Linters, Themes, Debuggers, Other]. Пожалуйста, указывайте категорию или категории обдуманно. Например, если ваше расширение включает в себя подсветку синтаксиса языка и сниппеты, то указывайте только эти две категории.
galleryBanner [object]
Настройки оформления страницы расширения в магазине. Используется для того, чтобы иконка расширения и фон подложки были контрастны. Свойство color отвечает за цвет фона, свойство theme за цвет шрифта: dark — белый, light — чёрный.
"galleryBanner": {
    "color": "#0000FF",
    "theme": "dark"
}
preview [boolean]
Флаг, позволяющий пометить плагин сообщением о том, что он доступен в режиме предварительного просмотра.
activationEvents [array]
Массив событий, в случае наступления которых плагин будет активирован редактором. Поддерживаются следующие события, активирующие плагин в том случае, если будет:
onLanguage— открыт файл указанного языка (не расширения).onCommand— вызвана указанная команда.onDebug— запущен сеанс отладки указанного типа.workspaceContains— найден указанный файл в корневой папке проекта.
Отдельно стоит отметить событие *, которое активирует плагин при загрузке редактора. Однако, использовать это событие нужно крайне редко и в том случае, если комбинации других событий не могут решить сложившуюся проблему.
contributes [object]
С помощью этого поля в package.json разработчик описывает своё расширение. Доступно довольно большое количество всевозможных полей, описывающих:
configuration— поля, доступные пользователю в настройках редактора.commands— команды, доступные пользователю в палитре командF1.keybindings— сочетания клавиш для вызова команд.languages— языки.debuggers— отладочный адаптер.grammars— TextMate-грамматику, необходимую для подсветки синтаксиса.themes— темы.snippets— сниппеты.jsonValidation— схемы проверки определённых JSON-файлов.
Несложно догадаться, что поля необходимо указывать в зависимости от типа вашего расширения. Если это плагин, сортирующий строки, то, вероятнее всего, вы будете использовать поля: configuration, commands и keybindings.
extensionDependencies [array]
Массив идентификаторов расширений, которые требуются для работы плагина. Например, если ваше расширение требует поддержки синтаксиса C#, то необходимо будет добавить в массив строку vscode.csharp, где vscode — ник опубликовавшего расширение, а csharp — имя расширения.
Немного про VS Code API
Как и полагается любому крупному проекту, VS Code имеет довольно обширный API, доступный разработчикам плагинов. Рассмотрим лишь так называемые пространства имён:
- commands — это пространство имён для работы с командами. С помощью доступных методов разработчик может регистрировать, получать и выполнять команды.
- env — пространство имён, содержащее описание переменных окружения редактора при запуске. С помощью соответствующих методов можно получить имя окна редактора, его язык, идентификатор редактора в системе и идентификатора сессии редактора, которые устанавливается при запуске.
- extensions — пространство имён для работы с установленными расширениями. С помощью этого API можно получить все или конкретные расширения, известные редактору.
- languages — пространство имён, позволяющее получить доступ к языковым возможностям редактора, например, к IntelliSense, подсказкам, а также функциям диагностики кода для линтеров.
- window — пространство имён для работы с текущим окном редактора. Доступно API для работы с видимыми и активными окнами редактора, а также элементами пользовательского интерфейса. Последнее подразумевает под собой возможность отображения различных сообщений, ввода текста или выбора каких-либо вариантов.
- workspace — пространство имён для работы с текущей рабочей областью, включая открытую директорию и файлы. С помощью этого API осуществляется вся работа с содержимым открытого файла.
Пишем стандартный плагин
Постановка задачи
В этой части статьи я буду описывать процесс написания плагина для VS Code на основе lebab, который автоматически конвертирует JavaScript-код, написанный по стандарту ES5 в ES2015. Это проект является альтернативой проекту Babel, но в обратную сторону.
Манифест
И снова скажу, что написание плагина начинается не с кода на JavaScript, а с манифеста. Первым делом создаём файл package.json и пишем туда пару десятков строк, описывающих плагин. Полный листинг манифеста вы сможете найти в репозитории плагина vscode-lebab. Остановимся именно на тех моментах, которые касаются работы с VS Code.
Во-первых, укажем информацию, которая будет отображаться в маркете:
{
  "displayName": "lebab",
  "publisher": "mrmlnc",
  "icon": "icon.png",
  "homepage": "https://github.com/mrmlnc/vscode-lebab/blob/master/README.md",
  "categories": [
    "Other"
  ]
}
Во-вторых, укажем массив событий, на которые наш плагин должен откликаться. Про команду lebab.convert я расскажу немного позднее.
{
  "activationEvents": [
    "onCommand:lebab.convert"
  ]
}
В-третьих, опишем плагин. Предполагается, что пользователю будет доступна лишь одна команда, по вызову которой он получит сконвертированный ES5-код в синтаксис ES2015. Также предполагается, что в настройках редактора пользователь сможет указать, что именно он хочет конвертировать с помощью lebab. Для этого я определил опцию lebab.transforms, содержащую объект ключей, с которыми будет работать конвертер.
{
  "contributes": {

    "commands": [{
      "command": "lebab.convert",
      "title": "Lebab: convert JavaScript code from ES5 to ES2015"
    }],

    "configuration": {
      "type": "object",
      "title": "Lebab configuration",
      "properties": {
        "lebab.transforms": {
          "type": "object",
          "default": {},
          "description": "Convert your old-fashioned code with a specific transformation."
        }
      }
    }

  }
}
Убираем из маркета лишнее
Сколько раз не говори, но я всё равно встречаю модули в npm, у которых вместе с кодом я получаю файлы тестов, изображений и прочей лабуды. К счастью, теперь я могу ссылаться на эту статью в отношении npm. В случае VS Code, необходимо создать файл .vscodeignore, который действует так же, как и файл .gitignore, но в отношении маркета расширений.
У меня файл .vscodeignore имеет следующее содержимое:
.vscode/**
typings/**
test/**
.editorconfig
.gitignore
.travis.yml
jsconfig.json
Я очень прошу, убирайте всё лишнее из плагина, иначе я вас вычислю по IP и накажу.
Базовый код
В мире Node.js принято писать код модуля в файле index.js, а приложения — app.js. Мир VS Code тоже имеет традиции, и код плагина пишется в файле extension.js.
Внимание
Если очень хочется писать код в файле с именем, отличным от
extension.js, то, как и в мире Node.js, вам придётся указать имя файла в полеmainв манифесте.
Для начала определим две функции. Первая функция будет иметь имя activate и вызываться в том случае, если плагин был активирован событием, указанным в манифесте. Вторая функция имеет имя deactivate и вызывается в том случае, если плагин был деактивирован. Под деактивацией следует понимать последействие команды, а не удаление плагина. Её предназначение в большинстве плагинов излишне, поэтому она не обязательна. Далее в статье я не буду упоминать функцию деактивации плагина.
const vscode = require('vscode');

function activate(context) {
  // Code...
}

exports.activate = activate;

function deactivate() {
  // Code...
}

exports.deactivate = deactivate;
Напомню, что в файле манифеста была указана команда lebab.convert — самое время её зарегистрировать. Для регистрации команд существует два метода:
registerTextEditorCommand— регистрирует команду в контексте текстового редактора или файла.registerCommand— регистрирует команду в глобальном контексте, то есть вне зависимости от наличия открытого редатора с текстом.
Второй метод используется крайне редко, вследствие того, что, в основном, плагины нацелены на работу с содержимом текстового редактора.
В конце все объявленные команды должны быть добавлены в массив subscriptions.
'use strict';

const vscode = require('vscode');

function activate(context) {
  const convert = vscode.commands.registerTextEditorCommand('lebab.convert', (textEditor) => {
    // ...
  });

  context.subscriptions.push(convert);
}

exports.activate = activate;
При регистрации команды необходимо передать идентификатор команды, указанный в файле манифеста и функцию обратного вызова, в которую передаётся объект textEditor, содержащий всю информацию о текущем редакторе, такую как:
- Файл на диске или новый файл (untitled)
- Путь до файла и его имя
- Идентификатор языка
- Наличие EOL
- Если было выделение текста, то параметры этого выделения
- Статистика текста (количество символов в строке и прочее)
- Версия файла (проще говоря, номер сохранения в истории файла)
- Строки файла
- и т.д.
Чисто практически, вы можете обращаться к свойствам объекта и работать с полученными из него данными. Но, разумеется, лучше всего обращаться к этому объекту с помощью определённых методов. На данном этапе нам нужно получить текст файла, чтобы в дальнейшем обработать его, и настройки, определённые в редакторе для нашего плагина.
Получить текст открытого документа можно, используя метод getText, а настройки, используя метод getConfiguration у workspace API:
const convert = vscode.commands.registerTextEditorCommand('lebab.convert', (textEditor) => {
  // Обычный объект, где имена свойств совпадают с теми, что были обозначены в манифесте.
  const options = vscode.workspace.getConfiguration('lebab');

  // Текст открытого файла.
  const text = textEditor.document.getText();
});
Внимание
Настройки редактора нужно получать в момент вызова команды, иначе, если получить их в момент активации плагина, то при обновлении настроек редактора, объект в переменной не обновится.
Далее я не буду рассматривать процесс вызова Lebab, потому что это элементарное действие, не относящееся к VS Code. Покажу лишь тот участок, что отвечает за вставку обработанного текста обратно в окно редактора. Для этого мы обратимся к объекту textEditor и вызовем метод edit с коллбэком, представленным ниже. Конечно же, код должен располагаться после получения текста документа и настроек редактора в функции обратного вызова регистрации команды.
textEditor.edit((editBuilder) => {
  // Получаем текущий документ.
  const document = textEditor.document;

  // Получаем последнюю строку документа.
  const lastLine = document.lineAt(document.lineCount - 1);

  // Создаём нулевую позицию, то есть начало документа, где первый ноль — номер
  // строки, а второй ноль — номер символа в строке.
  const start = new vscode.Position(0, 0);

  // Создаём завершающую позицию, где первое число — последняя строка документа,
  // а второе — номер последнего символа в строке.
  const end = new vscode.Position(document.lineCount - 1, lastLine.text.length);

  // Создаём диапазон, используя специальное API.
  const range = new vscode.Range(start, end);

  // Заменяем текст в обозначенном диапазоне на что-либо.
  editBuilder.replace(range, text);
});
Собственно, это всё, что требуется сделать в обычном плагине для VS Code: получить текст, обработать его и вернуть обратно. Полный листинг кода содержит 52 строки и размещён на GitHub в репозитории vscode-lebab.
Как можно заметить, ничего сложно — простейший JavaScript-код, который разбавлен вызовами необходимых API редактора. В этой статье был рассмотрен простейший случай, когда у вас есть готовое решение и его нужно подружить с редактором. В случае, если готового решения нет, то лучше оформить его в виде npm-пакета по всем канонам (тесты, документация), а уже потом подружить его с редактором. В качестве примеров, если решите писать плагин на JavaScript, вы можете посмотреть код следующих плагинов:
- vscode-lebab
- vscode-attrs-sorter
- vscode-csscomb
- vscode-postcss-sorting
- vscode-stylefmt
Что-то вместо вывода
В этой статье я помог вам начать писать плагины для VS Code. Многое осталось за кулисами и не рассматривалось, однако вам в любом случае придётся обращаться к документации. Считайте, что эта статья преследует цель показать, что писать плагин для VS Code довольно просто, причём необязательно делать это на TypeScript. Хотя, при этом не стоит забывать, что TypeScript — это всё тот же JavaScript.
Также, советую посмотреть на код, представленный в репозитории VSCode-Sample. Здесь автор собрал примеры взаимодействия с UI редактора, которые, возможно, помогут вам освоиться.
Если вам интересна тема разработки плагинов для VS Code, то добро пожаловать во вторую часть этой статьи, в которой рассматривается процесс написания плагина, использующего языковой сервер.
Что почитать?
- Конечно, документацию:
- Обзор экосистемы расширений
- Обзор API
- Про публикацию расширений
- Про утилиты, упрощающие создание расширений
- Примеры
- Visual Studio Code Extensions: Editing the Document
- Getting Input and Displaying Output in a Visual Studio Code Extension
11 сентября, 2021 12:00 пп
2 073 views
| Комментариев нет
Development
Visual Studio Code – это редактор кода от Microsoft, доступный для систем Windows, Linux и macOS. Для внедрения дополнительных функций он предлагает готовые расширения, которые вы можете установить через Visual Studio Code Marketplace. Но если вы не можете найти расширение, которое делает именно то, что вам нужно, вы можете создать необходимое расширение самостоятельно.
В этом руководстве вы узнаете, как создать свое первое расширение Visual Studio Code.
Требования
Для выполнения этого урока нужно:
- Загрузить и установить последнюю версию Visual Studio Code.
- Установить Node.js. Инструкции по установке зависят от дистрибутива: Mac OS, Ubuntu, CentOS, Debian.
Это руководство было проверено на версиях Node v14.4.0, npm v6.14.5, yo v3.1.1 и generator-code v1.2.16.
1: Установка инструментов
Команда Visual Studio Code разработала специальный генератор для создания расширений. Он генерирует все необходимые стартовые файлы, чтобы вы легко могли начать создание вашего расширения.
Чтобы начать разработку расширений VS Code, вам понадобятся два пакета npm:
- yo – интерфейс командной строки для Yeoman.
- generator-code – генератор Yeoman для написания расширений Visual Studio Code.
Используйте встроенный терминал Visual Studio Code, чтобы при помощи npx запустить локальные копии yo и generator-code, а затем введите команду yo code для инициализации вашего нового проекта:
npx -p yo -p generator-code yo code
После этого Yeoman запустит генератор кода.
2: Создание расширения
Теперь вы готовы начать разработку вашего первого расширения. На вашем экране вы увидите сообщение:
Welcome to the Visual Studio Code Extension Generator!
Сейчас вам нужно будет ответить на несколько вопросов о проекте: указать, какое расширение вы создаете, а также выбрать между TypeScript и JavaScript. В этом уроке мы выберем JavaScript.
Затем вам будет предложено еще несколько вопросов. В этом мануале мы выбрали следующие ответы:
? What type of extension do you want to create? New Extension (JavaScript)
? What's the name of your extension? testytest
? What's the identifier of your extension? testytest
? What's the description of your extension? This is a test extension
? Enable JavaScript type checking in 'jsconfig.json'? Yes
? Initialize a git repository? Yes
? Which package manager to use? npm
После завершения этого процесса вы получите все файлы, необходимые для начала работы. Два самых важных файла:
- package.json
- extension.js
Откройте package.json и взгляните на его содержимое. Вы увидите название, описание проекта и т.п. В нем есть два очень важных раздела.
- activationEvents – это список событий, которые активируют ваше расширение. Расширения загружаются по ленивой загрузке, поэтому они не активируются, пока не произойдет одно из перечисленных событий.
- commands – список команд, которые пользователи смогут запускать через ваше расширение.
Мы вернемся к ним в ближайшее время.
{
  // ...
  "activationEvents": [
    "onCommand:testytest.helloWorld"
  ],
  "main": "./extension.js",
  "contributes": {
    "commands": [
      {
        "command": "testytest.helloWorld",
        "title": "Hello World"
      }
    ]
  },
  // ...
}
Вы также можете просмотреть файл extension.js. В нем мы напишем код для нашего расширения. Здесь уже есть шаблонный код, давайте разберемся с ним.
В выделенной ниже строке мы регистрируем в VS Code нашу команду. Обратите внимание, что имя helloWorld совпадает с именем команды в package.json. Это не случайно. Пакет package.json определяет, какие команды доступны пользователю, но файл extension.js регистрирует код для этой команды.
// ...

/**
 * @param {vscode.ExtensionContext} context
 */
function activate(context) {
  console.log('Congratulations, your extension "testytest" is now active!');

  let disposable = vscode.commands.registerCommand('testytest.helloWorld', function () {
    vscode.window.showInformationMessage('Hello World from testytest!');
  });

  context.subscriptions.push(disposable);
}

// ...
В этом примере наша команда будет только отображать на экране пользователя сообщение «Hello World».
3: Отладка расширения
Теперь, когда все необходимые файлы установлены, мы можем запустить наше расширение.
Папка .vscode – это место, где VS Code хранит конфигурационные файлы проекта. В нашем случае он включает файл launch.json, содержащий конфигурации отладки.
// ...
{
  // ...
  "configurations": [
    {
      "name": "Run Extension",
      "type": "extensionHost",
      "request": "launch",
      "runtimeExecutable": "${execPath}",
      "args": [
        "--extensionDevelopmentPath=${workspaceFolder}"
      ]
    },
    // ...
  ]
}
В этом файле проводится отладка расширения. Откройте вкладку debug в левой части экрана, а затем кликните на плей.
Это откроет новый (отладочный) экземпляр VS Code.
Открыв его, вы можете развернуть палитру команд (с помощью Command + Shift + P на Mac или Ctrl + Shift + P в Windows) и запустить Hello World.
Вы увидите всплывающее сообщение «Hello World» в правом нижнем углу.
4: Редактирование расширения
Прежде чем приступить к работе над кодом, давайте еще раз взглянем на раздел activateEvents в файле package.json. Как вы уже знаете, этот раздел содержит список событий, которые активируют наше расширение всякий раз, когда происходят. По умолчанию расширение активируется при запуске нашей команды.
Теоретически это событие может быть любым (что определяется символом *). Если установить для события активации значение *, то ваше расширение будет загружено при запуске VS Code.
{
  // ...
  "activationEvents": [
    "*"
  ],
  // ...
}
Примечание: Этого делать не нужно, это просто комментарий.
Итак, у нас есть необходимые файлы и мы знаем, как их отлаживать. Приступим же к созданию нашего расширения. Предположим, мы хотим, чтобы это расширение создавало HTML-файл, который содержит шаблонный код и добавляется в наш проект.
Сначала давайте обновим название нашей команды. Откройте extension.js и обновите имя команды с extension.helloworld на extension.createBoilerplate.
// ...

/**
 * @param {vscode.ExtensionContext} context
 */
function activate(context) {
  console.log('Congratulations, your extension "testytest" is now active!');

  let disposable = vscode.commands.registerCommand('testytest.createBoilerplate', function () {
    vscode.window.showInformationMessage('Hello World from testytest!');
  });

  context.subscriptions.push(disposable);
}

// ...
Соответствующим образом обновите package.json:
{
  // ...
  "activationEvents": [
    "onCommand:testytest.createBoilerplate"
  ],
  "main": "./extension.js",
  "contributes": {
    "commands": [
      {
        "command": "testytest.createBoilerplate",
        "title": "Create Boilerplate"
      }
    ]
  },
  // ...
}
Теперь напишем наш функционал. Первое, что нужно сделать, это потребовать пару пакетов. Мы будем использовать модули fs (file system) и path. В файл extension.js поместите:
const fs = require('fs');
const path = require('path');
Также нам нужно получить путь к текущей папке. Внутри раздела command поместите следующий фрагмент:
if (!vscode.workspace) {
  return vscode.window.showErrorMessage('Please open a project folder first');
}

const folderPath = vscode.workspace.workspaceFolders[0].uri
  .toString()
  .split(':')[1];
Нам также нужно присвоить шаблонный HTML-код переменной в файле extension.js, чтобы он автоматически записывался в файл. Вот этот шаблонный HTML:
const htmlContent = `<!DOCTYPE html>
<html lang="en">
<head>
  <meta charset="UTF-8" />
  <meta name="viewport" content="width=device-width, initial-scale=1.0" />
  <meta http-equiv="X-UA-Compatible" content="ie=edge" />
  <title>Document</title>
  <link rel="stylesheet" href="app.css" />
</head>
<body>
  <script src="app.js"></script>
</body>
</html>`;
Теперь нужно вызвать функцию writeFile модуля файловой системы и передать ее в пути к папке и HTML-коде.
Обратите внимание, мы используем модуль path, чтобы объединить путь к папке с именем файла, который мы хотим создать. Если внутри обратного вызова есть ошибка, мы отображаем ее пользователю. В противном случае расширение сообщает, что шаблонный файл успешно создан:
fs.writeFile(path.join(folderPath, 'index.html'), htmlContent, (err) => {
  if (err) {
    return vscode.window.showErrorMessage('Failed to create boilerplate file!');
  }
  vscode.window.showInformationMessage('Created boilerplate files');
});
Вот как выглядит полный код extension.js:
//...
  let disposable = vscode.commands.registerCommand(
    'testytest.createBoilerplate', async function () {
    // The code you place here will be executed every time your command is executed

    if (!vscode.workspace) {
      return vscode.window.showErrorMessage('Please open a project folder first');
    }

    const folderPath = vscode.workspace.workspaceFolders[0].uri
      .toString()
      .split(':')[1];

    const htmlContent = `<!DOCTYPE html>
<html lang="en">
<head>
  <meta charset="UTF-8" />
  <meta name="viewport" content="width=device-width, initial-scale=1.0" />
  <meta http-equiv="X-UA-Compatible" content="ie=edge" />
  <title>Document</title>
  <link rel="stylesheet" href="app.css" />
</head>
<body>
  <script src="app.js"></script>
</body>
</html>`;

    fs.writeFile(path.join(folderPath, 'index.html'), htmlContent, (err) => {
      if (err) {
        return vscode.window.showErrorMessage(
          'Failed to create boilerplate file!'
        );
      }
      vscode.window.showInformationMessage('Created boilerplate files');
    });

    // ...
  }
// ...
Попробуйте выполнить отладку вашего нового расширения. Откройте палитру команд и запустите Create Boilerplate (помните, мы изменили имя).
После выполнения команды вы увидите только что созданный файл index.html и сообщение, которое уведомляет вас об этом:
Created boilerplate files.
Заключение
Чтобы узнать больше о том, какие API можно использовать и как именно их использовать, прочтите документацию по API от Visual Studio.
Tags: Node.js, Visual Studio Code
Table of Contents
- Introduction
- VSIX Packages
- Prerequisites
- Create VSIX Package
- Step 1: Create a VSIX project
- Step 2: Configure Manifest file
- Step 3: Add Custom Command
- Step 4: Configure Custom Command
- Step 5: Test Custom Command with Default implementation
- Step 6: Add actual implementation
- Step 7: Test actual implementation
- Step 7: Optimizing the package
- Step 8: Test final package
- Conclusion
- References
- Complete Source Code
- Extension at marketplace
- See Also
Introduction
Visual Studio Extensibility features are not new in .NET. It’s just that they are not very commonly used which is a surprise because Visual Studio extensibility features are so powerful they give a new definition to customization. Customization of one’s
IDE, customization of the desired features that every developer would love to have and even customizations on the IDE that could eventually result in a whole new product altogether (for example, a custom Visual Studio with one’s own extensions and features).
When we talk about extensibility, this is nothing but a literal term that we are talking about, extensibility means that adding some more features or customizing the existing implementation of any product to fulfill one’s need.
In this article of Visual Studio Extensibility we’ll learn how to create a new Visual Studio package, deploy that on staging server and GIT via continuous integration setup and at the end create a Visual Studio isolated Shell application with that embedded
package. Although this is very rare topic and we could not find enough study material on this topic over the web that explains how to work with it step by step. MSDN contains good content but very generic, and to the point. This article will explain each and
every small part step by step, so that one can learn while coding.
VSIX Packages
VSIX packages that are Visual Studio packages that give us as a developer a flexibility to customize Visual Studio as per our need and requirements. As a developer, one always wants that the IDE on which he is working should have certain features apart from
the inbuilt one. One can read more about theoretical aspects and understanding the details of VSIX package
here. The following is a small definition from the same MSDN link.
«A VSIX package is a .vsix file that contains one or more Visual Studio extensions, together with the metadata Visual Studio uses to classify and install the extensions. That metadata is contained in the VSIX manifest and the [Content_Types].xml file.
A VSIX package may also contain one or more Extension.vsixlangpack files to provide localized setup text, and may contain additional VSIX packages to install dependencies.
The VSIX package format follows the Open Packaging Conventions (OPC) standard. The package contains binaries and supporting files, together with a [Content_Types].xml file and a .vsix manifest file. One VSIX package may contain the output of multiple
projects, or even multiple packages that have their own manifests. «
The power of Visual Studio extensibility gives us that opportunity to create our own extensions and packages that we can build on top of existing Visual Studio and even distribute/sell those over the Visual Studio market place
https://marketplace.visualstudio.com/. This article will explain how we can create an extension in Visual Studio to open the selected file in Windows Explorer. We know that we already have a feature to open
the selected project/folder in Windows Explorer directly from Visual Studio, but won’t it be cool to get the feature that, on right-clicking a file opens the selected file in Windows Explorer as well? So basically we create the extensions for ourselves, or
we can create an extension for our team members, or as per project’s requirement, or even for fun and to explore the technology.
Prerequisites
There are certain prerequisites that we need to take care of while working on extensibility projects. If Visual Studio 2015 installed is installed on the machine, go to control panel -> program and features and search for Visual Studio 2015 and right click
on it to select the «change» option

Here we need to enable Visual Studio extensibility feature to work on this project type. On the next screen click on «Modify», a list of all selected/unselected features would be available now and all we need to do is in the Features-> Common Tools, select
Visual Studio Extensibility Tools Update 3 as shown in the following image.

Now press the Update button and let Visual Studio update to extensibility features after which we are good to go.
Before we actually start, download install Extensibility tools written by Mads Kristensen from
https://marketplace.visualstudio.com/items?itemName=MadsKristensen.ExtensibilityTools.
This article series is also highly inspired with Mads Kristensen’s speech at Build 2016 and his work on Visual Studio extensibility.
Create VSIX Package
Now we can create our own VSIX package inside Visual Studio. We’ll go step by step, therefore capturing every minute step and taking that into account. We’ll try to create an extension that allows us to open the selected Visual Studio file in Windows Explorer.
Basically, something that is shown in the below image.

Step 1: Create a VSIX project
Let’s start from very basic. Open Visual Studio. It is recommended to use Visual Studio 2015 for this article.

Create a new project like we create every other project in Visual Studio. Select File->New->Project

Now in the Templates, navigate to Extensibility and select VSIX project. Note that these templates are shown here because we modified Visual Studio configuration to use Visual Studio Extensibility. Select VSIX project and give it a name. For example, «LoctateFolder».

As soon as the new project is created, a «Getting Started» page would be displayed with a lot of information and updates on Visual Studio extensibility. These are links to MSDN and useful resources that we can explore to learn more and almost everything
about extensibility. We got our project with a default structure to start with which has an HTML file, a CSS file and a vsixmanifest file. A manifest file (as the name suggests) keeps all the information related to the VSIX project and this file actually can
be called a manifest to the extension created in the project.


We can clearly see that the «Getting Started» page comes from the index.html file which uses
stylesheet.css. So in our project we really don’t need these files and we can remove these files.

And now we are only left with the manifest file. So technically speaking, our step one has been accomplished, and we created a VSIX project.
Step 2: Configure Manifest file
When we open the manifest file, we see certain kinds of related information for the type of project that we added. We can modify this manifest file as per our choice for our extension. For example, in the ProductID, we can remove the text that is prefixed
to the GUID and only keep the GUID. Note that GUID is necessary as all the linking of items is done via GUID in VSIX projects. We’ll wee this in more detail later.

Similarly, add a meaningful description in the Description box like «Helps to locate files and folder in windows explorer.» This description is necessary as it explains what this extension is for.
And if we look at the code of the manifest file by selecting the file, right-click and view code or just press F7 on the designer opened to view code, and we see an XML file that is created at the background and all this information is saved in a well-defined
XML format.

<?xml version="1.0" encoding="utf-8"?>
<PackageManifest Version="2.0.0" xmlns="http://schemas.microsoft.com/developer/vsx-schema/2011" xmlns:d="http://schemas.microsoft.com/developer/vsx-schema-design/2011">
  <Metadata>
    <Identity Id="106f5189-471d-40ab-9de2-687c0a3d98e4" Version="1.0" Language="en-US" Publisher="Akhil Mittal" />
    <DisplayName>LocateFolder</DisplayName>
    <Description xml:space="preserve">Helps to locate files and folder in windows explorer.Helps </Description>
    <Tags>file locator, folder locator, open file in explorer</Tags>ption>
Step 3: Add Custom Command
We successfully added a new project and configured its manifest file, but the real job is still pending and that is writing an extension to locate file. For that we need to add a new item to our project, so just right-click on the project and select add
a new item from the items template.

As soon as we open the item templates, we see an option to add a new Custom Command under Visual C# items — > Extensibility. The custom commands acts as a button in VSIX extensions. These buttons help us to bind an action to its click event, so we can add
our desired functionality to this button/command. Name the custom command we added, for example, give it a name «LocateFolderCommand» and then press Add like shown in the below image.

Once the command is added, we can see a lot of changes happening to our existing project. Like adding of some required nugget packages, a Resources folder with an icon and an image a .vsct file, a .resx file and a command and
CommandPackage.cs file.

Each of the files has its own significance here. In the tutorial we’ll cover all these details.
When we open the LocateFolderCommandPackage.vsct file, we again see an XML file

And when we remove all the comments to make it more readable, we get a file something like shown below:
<?xml version="1.0" encoding="utf-8"?>
<CommandTable xmlns="http://schemas.microsoft.com/VisualStudio/2005-10-18/CommandTable" xmlns:xs="http://www.w3.org/2001/XMLSchema">

  <Extern href="stdidcmd.h"/>
  <Extern href="vsshlids.h"/>
  <Commands package="guidLocateFolderCommandPackage">
    <Groups>
      <Group guid="guidLocateFolderCommandPackageCmdSet" id="MyMenuGroup" priority="0x0600">
        <Parent guid="guidSHLMainMenu" id="IDM_VS_MENU_TOOLS"/>
      </Group>
    </Groups>
    <Buttons>
      <Button guid="guidLocateFolderCommandPackageCmdSet" id="LocateFolderCommandId" priority="0x0100" type="Button">
        <Parent guid="guidLocateFolderCommandPackageCmdSet" id="MyMenuGroup" />
        <Icon guid="guidImages" id="bmpPic1" />
        <Strings>
          <ButtonText>Invoke LocateFolderCommand</ButtonText>
        </Strings>
      </Button>
    </Buttons>
    <Bitmaps>
      <Bitmap guid="guidImages" href="ResourcesLocateFolderCommand.png" usedList="bmpPic1, bmpPic2, bmpPicSearch, bmpPicX, bmpPicArrows, bmpPicStrikethrough"/>
    </Bitmaps>
  </Commands>
  <Symbols>
    <GuidSymbol name="guidLocateFolderCommandPackage" value="{a7836cc5-740b-4d5a-8a94-dc9bbc4f7db1}" />
    <GuidSymbol name="guidLocateFolderCommandPackageCmdSet" value="{031046af-15f9-44ab-9b2a-3f6cad1a89e3}">
      <IDSymbol name="MyMenuGroup" value="0x1020" />
      <IDSymbol name="LocateFolderCommandId" value="0x0100" />
    </GuidSymbol>
    <GuidSymbol name="guidImages" value="{8ac8d2e1-5ef5-4ad7-8aa6-84da2268566a}" >
      <IDSymbol name="bmpPic1" value="1" />
      <IDSymbol name="bmpPic2" value="2" />
      <IDSymbol name="bmpPicSearch" value="3" />
      <IDSymbol name="bmpPicX" value="4" />
      <IDSymbol name="bmpPicArrows" value="5" />
      <IDSymbol name="bmpPicStrikethrough" value="6" />
    </GuidSymbol>
  </Symbols>
</CommandTable>
So, primarily the file contains groups, buttons (that are commands lying in that group), button text and some IDSymbol and image options.
When we talk about «Groups,» it is a grouping of commands that are shown in Visual Studio. Like in the below image, when in Visual Studio we click on Debug, we see various commands like Windows, Graphics, Start Debugging, etc. some are separated by horizontal
lines as well. These separated horizontal lines are groups. So a group is something that holds commands, and acts as a logical separation between commands. In VSIX project we can create a new custom command and also define the groups to which it will associate,
we can create new groups as well or extend existing groups like shown in the .vsct XML file.

Step 4: Configure Custom Command
So first open the vsct file and let us decide where our command will be placed. We basically want our command to be visible when we right-click on any file in solution explorer. For that, in the .vsct file, we can specify the parent of our command, since
it is an item node, we can choose IDM_VS_CTXT_ITEMNODE.

We can check all available locations at the following link :
https://blogs.msdn.microsoft.com/martintracy/2006/05/16/common-context-menu-constants/
Similarly, we can also create menus, sub menus and sub items, but for now we’ll stick to our objective and place our command to item node.
Similarly, we can also define the position at which our command will be shown. Set the priority in the group, by default it is shown as 6th position as shown in the below image, but we can always change it. For example, changed the priority to
0X0200, to see my command at top level second position.

We can also change the default button text to «Open in File Explorer» and finally, after all the modifications, our XML will look as shown below.
<?xml version="1.0" encoding="utf-8"?>
<CommandTable xmlns="http://schemas.microsoft.com/VisualStudio/2005-10-18/CommandTable" xmlns:xs="http://www.w3.org/2001/XMLSchema">

  <Extern href="stdidcmd.h"/>
  <Extern href="vsshlids.h"/>
  <Commands package="guidLocateFolderCommandPackage">
    <Groups>
      <Group guid="guidLocateFolderCommandPackageCmdSet" id="MyMenuGroup" priority="0x0200">
        <Parent guid="guidSHLMainMenu" id="IDM_VS_CTXT_ITEMNODE"/>
      </Group>
    </Groups>
    <Buttons>
      <Button guid="guidLocateFolderCommandPackageCmdSet" id="LocateFolderCommandId" priority="0x0100" type="Button">
        <Parent guid="guidLocateFolderCommandPackageCmdSet" id="MyMenuGroup" />
        <Icon guid="guidImages" id="bmpPic1" />
        <Strings>
          <ButtonText>Open in File Explorer</ButtonText>
        </Strings>
      </Button>
    </Buttons>
    <Bitmaps>
      <Bitmap guid="guidImages" href="ResourcesLocateFolderCommand.png" usedList="bmpPic1, bmpPic2, bmpPicSearch, bmpPicX, bmpPicArrows, bmpPicStrikethrough"/>
    </Bitmaps>
  </Commands>
  <Symbols>
    <GuidSymbol name="guidLocateFolderCommandPackage" value="{a7836cc5-740b-4d5a-8a94-dc9bbc4f7db1}" />
    <GuidSymbol name="guidLocateFolderCommandPackageCmdSet" value="{031046af-15f9-44ab-9b2a-3f6cad1a89e3}">
      <IDSymbol name="MyMenuGroup" value="0x1020" />
      <IDSymbol name="LocateFolderCommandId" value="0x0100" />
    </GuidSymbol>
    <GuidSymbol name="guidImages" value="{8ac8d2e1-5ef5-4ad7-8aa6-84da2268566a}" >
      <IDSymbol name="bmpPic1" value="1" />
      <IDSymbol name="bmpPic2" value="2" />
      <IDSymbol name="bmpPicSearch" value="3" />
      <IDSymbol name="bmpPicX" value="4" />
      <IDSymbol name="bmpPicArrows" value="5" />
      <IDSymbol name="bmpPicStrikethrough" value="6" />
    </GuidSymbol>
  </Symbols>
</CommandTable>
When we open the LocateFolderCommand.cs, that’s the actual place where we need to put our logic. In VS extensibility project/command everything is handled and connected via GUIDs. Here we see in the below image that a commandset is created with
a new GUID.

Now when we scroll down, we see in the private constructor, we retrieve the command service that is fetched from the current service provider. This service is responsible for adding the command, provided that the command has a valid
menuCommandId with defined commandSet and commandId

We also see that there is a call back method bound to the command. This is the same call back method that is called when the command is invoked, and that is the best place to put our logic. By default, this call back method comes with a default implementation
of showing a message box that proves the command is actually invoked.

Let’s keep the default implementation for now and try to test the application. We can later on add business logic to open the file in windows explorer.
Step 5: Test Custom Command with Default implementation
One may wonder that how to test the default implementation. Just compile and run the application. As soon as the application is run via F5, a new window will be launched that is similar to Visual Studio as shown below.

Note that we are creating an extension for Visual Studio, so ideally it should be tested in Visual Studio itself, on how it should look and how it should work. A new Visual Studio instance is launched to test the command. Note that this instance of Visual
Studio is called Experimental Instance. As the name suggests, this is for testing our implementation basically checking how the things will work and look like.
In the launched experimental instance, add a new project like we add in normal Visual Studio. Note that all the features in this experimental instance can be configurable and switched to On and Off on need basis. We can cover the details in my third article
when we discuss Visual Studio Isolated Shell.

To be simple, choose a new console application, and name it of our choice, name it «Sample»

When the project is added to solution explorer, we see a common project structure. Remember our functionality was to add a command to the selected file in Visual Studio solution explorer. Now we can test our implementation, just right-click on any file and
we can see the «Open in File Explorer» command in a new group in the context menu as shown in following image. The text comes from the text that we defined for our command in VSCT file.

Before we click on the command, place a breakpoint on MenuItemCallback method in the command file. So when the command is clicked, we can see the
menuItemCallback method is invoked.

Since this method contains the code to show a message box, just press F5 and we see a message box with a defined title as shown in the following image.

This proves that our command works, and we just need to put right logic here.
Step 6: Add actual implementation
So now, this is the time to add our actual implementation. We already know the place, just need to code. For actual implementation, added a new folder to the project and named it Utilities and added a class to that folder and named it
LocateFile.cs with the following implementation:
using System.Collections.Generic;
using System.IO;
using System.Linq;
using System.Runtime.CompilerServices;
using System.Runtime.InteropServices;
using System.Runtime.InteropServices.ComTypes;

namespace LocateFolder.Utilities
{
    internal static class LocateFile
    {
        private static Guid IID_IShellFolder = typeof(IShellFolder).GUID;
        private static int pointerSize = Marshal.SizeOf(typeof(IntPtr));

        public static void FileOrFolder(string path, bool edit = false)
        {
            if (path == null)
            {
                throw new ArgumentNullException("path");
            }
            IntPtr pidlFolder = PathToAbsolutePIDL(path);
            try
            {
                SHOpenFolderAndSelectItems(pidlFolder, null, edit);
            }
            finally
            {
                NativeMethods.ILFree(pidlFolder);
            }
        }

        public static void FilesOrFolders(IEnumerable<FileSystemInfo> paths)
        {
            if (paths == null)
            {
                throw new ArgumentNullException("paths");
            }
            if (paths.Count<FileSystemInfo>() != 0)
            {
                foreach (
                    IGrouping<string, FileSystemInfo> grouping in
                    from p in paths group p by Path.GetDirectoryName(p.FullName))
                {
                    FilesOrFolders(Path.GetDirectoryName(grouping.First<FileSystemInfo>().FullName),
                        (from fsi in grouping select fsi.Name).ToList<string>());
                }
            }
        }

        public static void FilesOrFolders(IEnumerable<string> paths)
        {
            FilesOrFolders(PathToFileSystemInfo(paths));
        }

        public static void FilesOrFolders(params string[] paths)
        {
            FilesOrFolders((IEnumerable<string>)paths);
        }

        public static void FilesOrFolders(string parentDirectory, ICollection<string> filenames)
        {
            if (filenames == null)
            {
                throw new ArgumentNullException("filenames");
            }
            if (filenames.Count != 0)
            {
                IntPtr pidl = PathToAbsolutePIDL(parentDirectory);
                try
                {
                    IShellFolder parentFolder = PIDLToShellFolder(pidl);
                    List<IntPtr> list = new List<IntPtr>(filenames.Count);
                    foreach (string str in filenames)
                    {
                        list.Add(GetShellFolderChildrenRelativePIDL(parentFolder, str));
                    }
                    try
                    {
                        SHOpenFolderAndSelectItems(pidl, list.ToArray(), false);
                    }
                    finally
                    {
                        using (List<IntPtr>.Enumerator enumerator2 = list.GetEnumerator())
                        {
                            while (enumerator2.MoveNext())
                            {
                                NativeMethods.ILFree(enumerator2.Current);
                            }
                        }
                    }
                }
                finally
                {
                    NativeMethods.ILFree(pidl);
                }
            }
        }

        private static IntPtr GetShellFolderChildrenRelativePIDL(IShellFolder parentFolder, string displayName)
        {
            uint num;
            IntPtr ptr;
            NativeMethods.CreateBindCtx();
            parentFolder.ParseDisplayName(IntPtr.Zero, null, displayName, out num, out ptr, 0);
            return ptr;
        }

        private static IntPtr PathToAbsolutePIDL(string path) =>
            GetShellFolderChildrenRelativePIDL(NativeMethods.SHGetDesktopFolder(), path);

        private static IEnumerable<FileSystemInfo> PathToFileSystemInfo(IEnumerable<string> paths)
        {
            foreach (string iteratorVariable0 in paths)
            {
                string path = iteratorVariable0;
                if (path.EndsWith(Path.DirectorySeparatorChar.ToString()) ||
                    path.EndsWith(Path.AltDirectorySeparatorChar.ToString()))
                {
                    path = path.Remove(path.Length - 1);
                }
                if (Directory.Exists(path))
                {
                    yield return new DirectoryInfo(path);
                }
                else
                {
                    if (!File.Exists(path))
                    {
                        throw new FileNotFoundException("The specified file or folder doesn't exists : " + path, path);
                    }
                    yield return new FileInfo(path);
                }
            }
        }

        private static IShellFolder PIDLToShellFolder(IntPtr pidl) =>
            PIDLToShellFolder(NativeMethods.SHGetDesktopFolder(), pidl);

        private static IShellFolder PIDLToShellFolder(IShellFolder parent, IntPtr pidl)
        {
            IShellFolder folder;
            Marshal.ThrowExceptionForHR(parent.BindToObject(pidl, null, ref IID_IShellFolder, out folder));
            return folder;
        }

        private static void SHOpenFolderAndSelectItems(IntPtr pidlFolder, IntPtr[] apidl, bool edit)
        {
            NativeMethods.SHOpenFolderAndSelectItems(pidlFolder, apidl, edit ? 1 : 0);
        }


        [ComImport, Guid("000214F2-0000-0000-C000-000000000046"), InterfaceType(ComInterfaceType.InterfaceIsIUnknown)]
        internal interface IEnumIDList
        {
            [PreserveSig, MethodImpl(MethodImplOptions.InternalCall, MethodCodeType = MethodCodeType.Runtime)]
            int Next(uint celt, IntPtr rgelt, out uint pceltFetched);

            [PreserveSig, MethodImpl(MethodImplOptions.InternalCall, MethodCodeType = MethodCodeType.Runtime)]
            int Skip([In] uint celt);

            [PreserveSig, MethodImpl(MethodImplOptions.InternalCall, MethodCodeType = MethodCodeType.Runtime)]
            int Reset();

            [PreserveSig, MethodImpl(MethodImplOptions.InternalCall, MethodCodeType = MethodCodeType.Runtime)]
            int Clone([MarshalAs(UnmanagedType.Interface)] out IEnumIDList ppenum);
        }

        [ComImport, Guid("000214E6-0000-0000-C000-000000000046"), InterfaceType(ComInterfaceType.InterfaceIsIUnknown),
         ComConversionLoss]
        internal interface IShellFolder
        {
            [MethodImpl(MethodImplOptions.InternalCall, MethodCodeType = MethodCodeType.Runtime)]
            void ParseDisplayName(IntPtr hwnd, [In, MarshalAs(UnmanagedType.Interface)] IBindCtx pbc,
                [In, MarshalAs(UnmanagedType.LPWStr)] string pszDisplayName, out uint pchEaten, out IntPtr ppidl,
                [In, Out] ref uint pdwAttributes);

            [PreserveSig, MethodImpl(MethodImplOptions.InternalCall, MethodCodeType = MethodCodeType.Runtime)]
            int EnumObjects([In] IntPtr hwnd, [In] SHCONT grfFlags,
                [MarshalAs(UnmanagedType.Interface)] out IEnumIDList ppenumIDList);

            [PreserveSig, MethodImpl(MethodImplOptions.InternalCall, MethodCodeType = MethodCodeType.Runtime)]
            int BindToObject([In] IntPtr pidl, [In, MarshalAs(UnmanagedType.Interface)] IBindCtx pbc, [In] ref Guid riid,
                [MarshalAs(UnmanagedType.Interface)] out IShellFolder ppv);

            [MethodImpl(MethodImplOptions.InternalCall, MethodCodeType = MethodCodeType.Runtime)]
            void BindToStorage([In] ref IntPtr pidl, [In, MarshalAs(UnmanagedType.Interface)] IBindCtx pbc,
                [In] ref Guid riid,
                out IntPtr ppv);

            [MethodImpl(MethodImplOptions.InternalCall, MethodCodeType = MethodCodeType.Runtime)]
            void CompareIDs([In] IntPtr lParam, [In] ref IntPtr pidl1, [In] ref IntPtr pidl2);

            [MethodImpl(MethodImplOptions.InternalCall, MethodCodeType = MethodCodeType.Runtime)]
            void CreateViewObject([In] IntPtr hwndOwner, [In] ref Guid riid, out IntPtr ppv);

            [MethodImpl(MethodImplOptions.InternalCall, MethodCodeType = MethodCodeType.Runtime)]
            void GetAttributesOf([In] uint cidl, [In] IntPtr apidl, [In, Out] ref uint rgfInOut);

            [MethodImpl(MethodImplOptions.InternalCall, MethodCodeType = MethodCodeType.Runtime)]
            void GetUIObjectOf([In] IntPtr hwndOwner, [In] uint cidl, [In] IntPtr apidl, [In] ref Guid riid,
                [In, Out] ref uint rgfReserved, out IntPtr ppv);

            [MethodImpl(MethodImplOptions.InternalCall, MethodCodeType = MethodCodeType.Runtime)]
            void GetDisplayNameOf([In] ref IntPtr pidl, [In] uint uFlags, out IntPtr pName);

            [MethodImpl(MethodImplOptions.InternalCall, MethodCodeType = MethodCodeType.Runtime)]
            void SetNameOf([In] IntPtr hwnd, [In] ref IntPtr pidl, [In, MarshalAs(UnmanagedType.LPWStr)] string pszName,
                [In] uint uFlags, [Out] IntPtr ppidlOut);
        }

        private class NativeMethods
        {
            private static readonly int pointerSize = Marshal.SizeOf(typeof(IntPtr));

            public static IBindCtx CreateBindCtx()
            {
                IBindCtx ctx;
                Marshal.ThrowExceptionForHR(CreateBindCtx_(0, out ctx));
                return ctx;
            }

            [DllImport("ole32.dll", EntryPoint = "CreateBindCtx")]
            public static extern int CreateBindCtx_(int reserved, out IBindCtx ppbc);

            [DllImport("shell32.dll", CharSet = CharSet.Unicode)]
            public static extern IntPtr ILCreateFromPath([In, MarshalAs(UnmanagedType.LPWStr)] string pszPath);

            [DllImport("shell32.dll")]
            public static extern void ILFree([In] IntPtr pidl);

            public static IShellFolder SHGetDesktopFolder()
            {
                IShellFolder folder;
                Marshal.ThrowExceptionForHR(SHGetDesktopFolder_(out folder));
                return folder;
            }

            [DllImport("shell32.dll", EntryPoint = "SHGetDesktopFolder", CharSet = CharSet.Unicode, SetLastError = true)
            ]
            private static extern int SHGetDesktopFolder_(
                [MarshalAs(UnmanagedType.Interface)] out IShellFolder ppshf);

            public static void SHOpenFolderAndSelectItems(IntPtr pidlFolder, IntPtr[] apidl, int dwFlags)
            {
                uint cidl = (apidl != null) ? ((uint)apidl.Length) : 0;
                Marshal.ThrowExceptionForHR(SHOpenFolderAndSelectItems_(pidlFolder, cidl, apidl, dwFlags));
            }

            [DllImport("shell32.dll", EntryPoint = "SHOpenFolderAndSelectItems")]
            private static extern int SHOpenFolderAndSelectItems_([In] IntPtr pidlFolder, uint cidl,
                [In, Optional, MarshalAs(UnmanagedType.LPArray)] IntPtr[] apidl, int dwFlags);
        }

        [Flags]
        internal enum SHCONT : ushort
        {
            SHCONTF_CHECKING_FOR_CHILDREN = 0x10,
            SHCONTF_ENABLE_ASYNC = 0x8000,
            SHCONTF_FASTITEMS = 0x2000,
            SHCONTF_FLATLIST = 0x4000,
            SHCONTF_FOLDERS = 0x20,
            SHCONTF_INCLUDEHIDDEN = 0x80,
            SHCONTF_INIT_ON_FIRST_NEXT = 0x100,
            SHCONTF_NAVIGATION_ENUM = 0x1000,
            SHCONTF_NETPRINTERSRCH = 0x200,
            SHCONTF_NONFOLDERS = 0x40,
            SHCONTF_SHAREABLE = 0x400,
            SHCONTF_STORAGE = 0x800
        }
    }
}
This class contains the business logic, primarily methods that take file path as a parameter and work with shell to open this file in explorer. I’ll not go into the details of this class, but focus more on how we can invoke this functionality.
Now in the MenuItemCallBack method put the following code to invoke the method of our utility class:
private void MenuItemCallback(object sender, EventArgs e)
     {
         var selectedItems = ((UIHierarchy)((DTE2)this.ServiceProvider.GetService(typeof(DTE))).Windows.Item("{3AE79031-E1BC-11D0-8F78-00A0C9110057}").Object).SelectedItems as object[];
         if (selectedItems != null)
         {
             LocateFile.FilesOrFolders((IEnumerable<string>)(from t in selectedItems
                                                                         where (t as UIHierarchyItem)?.Object is ProjectItem
                                                                         select ((ProjectItem)((UIHierarchyItem)t).Object).FileNames[1]));
         }
     }</string>
This method now first fetches all the selected items using DTE object. With DTE objects we can do all the transactions and manipulations in Visual Studio components. Read more about the power of DTE objects
here.
After getting the selected items, we invoke the FilesOrFolders method of the utility class and pass file path as a parameter. Job done. Now again launch the experimental instance and check the functionality.
Step 7: Test actual implementation
Launch experimental instance, add a new or existing project and right click on any file and invoke the command.

As soon as we invoke the command, we see the folder is opened in windows explorer with that file selected as shown below.

This functionality also works for the linked files in Visual Studio. Let’s check that. Add a new item in the project opened in experimental instance and add a file as a link as shown in the following image.

We only need to select «Add as Link» while adding the file. This file would be then be shown in Visual Studio with a different icon showing that this is a linked file. Now select the actual Visual Studio file and the linked file in Visual Studio and invoke
the command now.

When the command is invoked, we can see two folders opened with both the files selected at their own location.

Not only this, since we have created this extension, in the Extensions and Updates in this experimental instance, we can search for this extension and we get that installed in ourVisual Studio as shown in following image.

Step 7: Optimizing the package
Our job is nearly done, but there are some more important things that we need to take care of. We need to make this package more appealing, add some image/icons to the extension and optimize the project structure to make it more readable and understandable.
Remember when we started this tutorial, We downloaded and installed VS Extensibility Tools? VS Extensibility Tools provide some useful features that we can really leverage. For example, it allows us to export all the available images in Visual Studio. We
can use these images to make our icon and default image for the extension. To start with, in Visual Studio, where our code was written, go to «Tools->Export Image Moniker…»

A window will be opened to search for the image we need to choose. Search for «Open,» and we’ll get the same image as shown in the context menu of project to open the project in windows explorer.

We’ll use this image only for our extension. Give it a size 16*16 and click Export, and save that in our Resources folder of the project. Replace the already existing LocateFolderCommand.png file from this file and give this new exported file the same name.
Since in the vsct file, it was defined that the prior image sprint has to be used with first icon, so we always got to see 1X beside the custom command text, but we need a good looking meaningful image now, so we exported this «open in explorer» image.

Now go to .vsct file and in the Bitmaps first delete all images name in the list except bmpPic1 from the usedList and in the GuidSymbol, delete all IDsymbol except bmpPic1 as shown in below image. We do not need to change the href in Bitmap node because
we replaced existing image with the newly exported image with the same name. We did this because we are not using that old default image sprite, but we are using now our newly exported image.

In that case the LocateFolderCommandPackage.vsct file would look like as shown below,
<?xml version="1.0" encoding="utf-8"?>
<CommandTable xmlns="http://schemas.microsoft.com/VisualStudio/2005-10-18/CommandTable" xmlns:xs="http://www.w3.org/2001/XMLSchema">

  <Extern href="stdidcmd.h"/>
  <Extern href="vsshlids.h"/>
  <Commands package="guidLocateFolderCommandPackage">
    <Groups>
      <Group guid="guidLocateFolderCommandPackageCmdSet" id="MyMenuGroup" priority="0x0200">
        <Parent guid="guidSHLMainMenu" id="IDM_VS_CTXT_ITEMNODE"/>
      </Group>
    </Groups>
    <Buttons>
      <Button guid="guidLocateFolderCommandPackageCmdSet" id="LocateFolderCommandId" priority="0x0100" type="Button">
        <Parent guid="guidLocateFolderCommandPackageCmdSet" id="MyMenuGroup" />
        <Icon guid="guidImages" id="bmpPic1" />
        <Strings>
          <ButtonText>Open in File Explorer</ButtonText>
        </Strings>
      </Button>
    </Buttons>
    <Bitmaps>
      <Bitmap guid="guidImages" href="ResourcesLocateFolderCommand.png" usedList="bmpPic1"/>
    </Bitmaps>
  </Commands>
  <Symbols>
    <GuidSymbol name="guidLocateFolderCommandPackage" value="{a7836cc5-740b-4d5a-8a94-dc9bbc4f7db1}" />
    <GuidSymbol name="guidLocateFolderCommandPackageCmdSet" value="{031046af-15f9-44ab-9b2a-3f6cad1a89e3}">
      <IDSymbol name="MyMenuGroup" value="0x1020" />
      <IDSymbol name="LocateFolderCommandId" value="0x0100" />
    </GuidSymbol>
    <GuidSymbol name="guidImages" value="{8ac8d2e1-5ef5-4ad7-8aa6-84da2268566a}" >
      <IDSymbol name="bmpPic1" value="1" />
    </GuidSymbol>
  </Symbols>
</CommandTable>
The next step is to set extension image and a preview image that will be shown for the extension in Visual Studio gallery and Visual Studio market place. These images will represent the extension everywhere.
So follow the same routine of exporting image from Image Monikor. Note that we can also use our own custom images for all the image/icon related operations.
Open the image moniker like explained earlier and search for LocateAll, then export two images, one for icon (90 X 90)

and one for preview (175 X 175).

Export both the images with the name Icon.png and Preview.png respectively in the Resources folder. Then in the solution explorer, include those two images in the project as shown in below image.

Now in the source.extension.vsixmanifest file, set the Icon and Preview images to the same exported images as shown in following image.

Step 8: Test final package
Again, it’s time to test the implementation with new Images and icons. So compile the project and press F5, experimental instance would launch. Add a new or existing project and right click on any project file to see our custom command.

So now we got the icon that was earlier selected from Image Moniker for this custom command. Since we have not touched the functionality, it should work fine as before.
Now go to extensions and updates and search for the installed extension «LocateFolder». We’ll see a beautiful image before our extension, this is the same image with dimensions 90X90 and in the right side panel, we can see the enlarged 175X175 preview image.

Conclusion
This detailed article focused on how a Visual Studio extension could be created.
References
- https://channel9.msdn.com/events/Build/2016/B886
- https://blogs.msdn.microsoft.com/quanto/2009/05/26/what-is-a-vsix
- https://msdn.microsoft.com/en-us/library/dd997148.aspx
Complete Source Code
https://github.com/akhilmittal/LocateFileInWindowsExplorer
Extension at marketplace
https://marketplace.visualstudio.com/items?itemName=vs-publisher-457497.LocateFolder
See Also
- https://msdn.microsoft.com/en-us/library/dd997148.aspx
- https://msdn.microsoft.com/en-us/library/dd885241.aspx
In this article, we are going through the details and benefits of using Visual Studio extensions and also going through creating a Visual Studio 2019 extension to extend the Menu step by step.
Pre-Requisites
- Visual Studio SDK
What are Visual Studio 2019 Extensions?
Visual Studio Extensions are extended customized functionalities that may be added to Visual Studio by any developer.
With a Visual Studio Extension, you may customize everything like,
- Visual Studio editor with new languages, IntelliSense, syntax color, etc..
- Visual Studio menu with new items and actions;
- Visual Studio projects with new templates;
- Visual Studio commands with customized settings;
- And so on… your creativity is your limit.
Read more about Visual Studio Extension here.
Types of Visual Studio Extensions
The most used types of Visual Studio extensions are the ones as follows, which you may be adding new items or overriding the behavior of the existing ones,
- Menu, as explained in this article;
- Command;
- Tools;
- Editor;
- Language;
- Projects;
- User settings;
- Isolated shell;
Read more about Visual Studio Extension types here.
Creating your first Visual Studio 2019 Extension Step by Step
Creating the project
Add a new project of type VSIX Project,

Set your project name as SampleVisualStudioExtension,

This is the project structure created from the template,

Understanding the project structure
Command class
- Has the code for the desired behavior of the functionalities;
- Is initialized by package class;
- Has the property CommandId, which binds the command with the menu item, set by the vsct file inside the Symbols section;
- Has the property CommandSet, which binds the command with the commands menu group, set by the vsct file inside the Symbols section;
- Read more here.

VSCT file
- It is the command table configuration file, which works as a Web.Config for Web Applications projects;
- XML based;
- Has the menu definitions;
- Has the buttons definitions;
- Has the commands definitions;
- Has the images definitions;
- Read more here.

Package class
- Represents the package itself;
- Can handle asynchronous services;
- Initializes the command classes;
- Has the property PackageGuidString, which is the package GUID, set by the vsct file inside the Symbols section;
- Read more here.

Package manifest file
- Has the installation desired behavior for the Visual Studio extension;
- Has the Visual Studio extension description. Such as Extension Name, Author, Description, License, etc..
- Read more here.
Resources folder
- Storage for the resources used in the extension. Such as images, icons, keys, etc..
- The items here are mapped with the vsct file inside the Commands section;
- Read more here.
Implementing a new functionality
Add a new item into your project,

Select the Custom Command item, and set its name as SampleCommand,

Objects created
Class created,
- using System;
- using System.ComponentModel.Design;
- using System.Globalization;
- using System.Threading;
- using System.Threading.Tasks;
- using Microsoft.VisualStudio.Shell;
- using Microsoft.VisualStudio.Shell.Interop;
- using Task = System.Threading.Tasks.Task;
- namespace SampleVisualStudioExtension
- {
- internal sealed class SampleCommand
- {
- public const int CommandId = 0x0100;
- public static readonly Guid CommandSet = new Guid(«f12cb590-7cad-4292-99cb-49d97f71e500»);
- private readonly AsyncPackage package;
- private SampleCommand(AsyncPackage package, OleMenuCommandService commandService)
- {
- this.package = package ?? throw new ArgumentNullException(nameof(package));
- commandService = commandService ?? throw new ArgumentNullException(nameof(commandService));
- var menuCommandID = new CommandID(CommandSet, CommandId);
- var menuItem = new MenuCommand(this.Execute, menuCommandID);
- commandService.AddCommand(menuItem);
- }
- public static SampleCommand Instance
- {
- get;
- private set;
- }
- private Microsoft.VisualStudio.Shell.IAsyncServiceProvider ServiceProvider
- {
- get
- {
- return this.package;
- }
- }
- public static async Task InitializeAsync(AsyncPackage package)
- {
- await ThreadHelper.JoinableTaskFactory.SwitchToMainThreadAsync(package.DisposalToken);
- OleMenuCommandService commandService = await package.GetServiceAsync(typeof(IMenuCommandService)) as OleMenuCommandService;
- Instance = new SampleCommand(package, commandService);
- }
- private void Execute(object sender, EventArgs e)
- {
- ThreadHelper.ThrowIfNotOnUIThread();
- string message = string.Format(CultureInfo.CurrentCulture, «Inside {0}.MenuItemCallback()», this.GetType().FullName);
- string title = «SampleCommand»;
- VsShellUtilities.ShowMessageBox(
- this.package,
- message,
- title,
- OLEMSGICON.OLEMSGICON_INFO,
- OLEMSGBUTTON.OLEMSGBUTTON_OK,
- OLEMSGDEFBUTTON.OLEMSGDEFBUTTON_FIRST);
- }
- }
- }
Vsct file created,
- <?xml version=«1.0» encoding=«utf-8»?>
- <CommandTable xmlns=«http://schemas.microsoft.com/VisualStudio/2005-10-18/CommandTable» xmlns:xs=«http://www.w3.org/2001/XMLSchema»>
- <!—
- This is the file that defines the actual layout and type of the commands.
- It is divided in different sections (e.g. command definition, command
- placement, …), with each defining a specific set of properties.
- See the comment before each section for more details about how to
- use it.
- —>
- <!—
- The VSCT compiler (the tool that translates this file into the binary
- format that VisualStudio will consume) has the ability to run a preprocessor
- on the vsct file; this preprocessor is (usually) the C++ preprocessor, so
- it is possible to define includes and macros with the same syntax used
- in C++ files. Using this ability of the compiler here, we include some files
- defining some of the constants that we will use inside the file.
- —>
- <Extern href=«stdidcmd.h»/>
- <Extern href=«vsshlids.h»/>
- <!—
- The Commands section is where commands, menus, and menu groups are defined.
- This section uses a Guid to identify the package that provides the command defined inside it.
- —>
- <Commands package=«guidSampleVisualStudioExtensionPackage»>
- <!—
- Inside this section we have different sub-sections: one for the menus, another
- for the menu groups, one for the buttons (the actual commands), one for the combos
- and the last one for the bitmaps used. Each element is identified by a command id that
- is a unique pair of guid and numeric identifier; the guid part of the identifier is usually
- called «command set» and is used to group different command inside a logically related
- group; your package should define its own command set in order to avoid collisions
- with command ids defined by other packages.
- —>
- <!—
- In this section you can define new menu groups. A menu group is a container for
- other menus or buttons (commands); from a visual point of view you can see the
- group as the part of a menu contained between two lines. The parent of a group
- must be a menu.
- —>
- <Groups>
- <Group guid=«guidSampleVisualStudioExtensionPackageCmdSet» id=«MyMenuGroup» priority=«0x0600»>
- <Parent guid=«guidSHLMainMenu» id=«IDM_VS_MENU_TOOLS»/>
- </Group>
- </Groups>
- <!—
- This section defines the elements the user can interact with, like a menu command or a button
- or combo box in a toolbar.
- —>
- <Buttons>
- <!—
- To define a menu group you have to specify its ID, the parent menu and its display priority.
- The command is visible and enabled by default. If you need to change the visibility, status, etc, you can use
- the CommandFlag node.
- You can add more than one CommandFlag node e.g.:
- <CommandFlag>DefaultInvisible</CommandFlag>
- <CommandFlag>DynamicVisibility</CommandFlag>
- If you do not want an image next to your command, remove the Icon node />
- —>
- <Button guid=«guidSampleVisualStudioExtensionPackageCmdSet» id=«SampleCommandId» priority=«0x0100» type=«Button»>
- <Parent guid=«guidSampleVisualStudioExtensionPackageCmdSet» id=«MyMenuGroup» />
- <Icon guid=«guidImages» id=«bmpPic1» />
- <Strings>
- <ButtonText>Invoke SampleCommand</ButtonText>
- </Strings>
- </Button>
- </Buttons>
- <Bitmaps>
- <!—
- The bitmap id is defined in a way that is a little bit different from the others:
- the declaration starts with a guid for the bitmap strip, then there is the resource id of the
- bitmap strip containing the bitmaps and then there are the numeric ids of the elements used
- inside a button definition. An important aspect of this declaration is that the element id
- must be the actual index (1-based) of the bitmap inside the bitmap strip.
- —>
- <Bitmap guid=«guidImages» href=«ResourcesSampleCommand.png» usedList=«bmpPic1, bmpPic2, bmpPicSearch, bmpPicX, bmpPicArrows, bmpPicStrikethrough»/>
- </Bitmaps>
- </Commands>
- <Symbols>
- <GuidSymbol name=«guidSampleVisualStudioExtensionPackage» value=«{c86c0c68-5ff5-43af-8a60-54540cbea3e2}» />
- <GuidSymbol name=«guidSampleVisualStudioExtensionPackageCmdSet» value=«{f12cb590-7cad-4292-99cb-49d97f71e500}»>
- <IDSymbol name=«MyMenuGroup» value=«0x1020» />
- <IDSymbol name=«SampleCommandId» value=«0x0100» />
- </GuidSymbol>
- <GuidSymbol name=«guidImages» value=«{9dddc041-b350-494a-9e4b-8b89d67437aa}» >
- <IDSymbol name=«bmpPic1» value=«1» />
- <IDSymbol name=«bmpPic2» value=«2» />
- <IDSymbol name=«bmpPicSearch» value=«3» />
- <IDSymbol name=«bmpPicX» value=«4» />
- <IDSymbol name=«bmpPicArrows» value=«5» />
- <IDSymbol name=«bmpPicStrikethrough» value=«6» />
- </GuidSymbol>
- </Symbols>
- </CommandTable>
Creating your objects
Creating the menu item,
Vsct file
- <Menus>
- <Menu guid=«guidSampleVisualStudioExtensionPackageCmdSet» id=«SampleMenu» priority=«0x700» type=«Menu»>
- <Parent guid=«guidSHLMainMenu»
- id=«IDG_VS_MM_TOOLSADDINS» />
- <Strings>
- <ButtonText>Sample Menu</ButtonText>
- <CommandName>Sample Menu</CommandName>
- </Strings>
- </Menu>
- </Menus>
- <Groups>
- <Group guid=«guidSampleVisualStudioExtensionPackageCmdSet» id=«MyMenuGroup» priority=«0x0600»>
- <Parent guid=«guidSampleVisualStudioExtensionPackageCmdSet» id=«SampleMenu»/>
- </Group>
- </Groups>
- <IDSymbol name=«SampleMenu» value=«0x1021»/>
Customizing menu button text,
Vsct file
- <Button guid=«guidSampleVisualStudioExtensionPackageCmdSet» id=«SampleCommandId» priority=«0x0100» type=«Button»>
- <Parent guid=«guidSampleVisualStudioExtensionPackageCmdSet» id=«MyMenuGroup» />
- <Icon guid=«guidImages» id=«bmpPic1» />
- <Strings>
- <ButtonText>Sample button text.</ButtonText>
- </Strings>
- </Button>
Customizing the output message,
Command Class
- private void Execute(object sender, EventArgs e)
- {
- ThreadHelper.ThrowIfNotOnUIThread();
- string message = string.Format(CultureInfo.CurrentCulture, «Hello World! UTC Time now: {0}», DateTime.UtcNow);
- string title = «Sample title Command»;
- VsShellUtilities.ShowMessageBox(
- this.package,
- message,
- title,
- OLEMSGICON.OLEMSGICON_INFO,
- OLEMSGBUTTON.OLEMSGBUTTON_OK,
- OLEMSGDEFBUTTON.OLEMSGDEFBUTTON_FIRST);
- }
Debugging
Debugging Visual Studio extensions works like debugging any kind of project, as our final product is a Visual Studio extension so when we push F5 it is going to open a new Visual Studio window simulating to have the extension installed as follows:
Push F5
New Visual Studio Window result,

Extension Menu and items

Hitting break points

Publishing
it is free and anyone could publish your own extension at Visual Studio Marketplace.
Microsoft has a very nice tutorial explaining step-by-step on how to publish your Visual Studio extension into Visual Studio Marketplace here.
Congratulations, you have successfully created your first Visual Studio 2019 extension.
- Project on GitHub
External References
- Visual Studio Extensions documentation;
- Download Visual Studio SDK;
- Visual Studio Extensions official website;
- Commands;
- VSCT file documentation;
- Package class documentation;
- Vsix Manifest documentation;
- Resources folder documentation;
- Publishing the extension