This is part of a series of tutorials; the main page can be found here.
The tutorial uses libtcod version 1.6.0 and above.
If you choose to use 1.5.1, you can find the old version here.
If you choose to use 1.5.0, you can find the old version here.
If you are looking for a Python 3 version, see here
Graphics
Setting it up
Ok, now that we got that out of our way let’s get our hands dirty!
Windows
Python
If you haven’t already done so, download and install Python 2.7. Any version of Python 2, from 2.6 and above should be fine, but the latest update (of Python 2, not Python 3) is of course always preferable.
There are reports that for older versions of libtcod on 64-bit Windows (Windows 7) that the 32 bit version is preferable, since the 64 bit version of Python seems to cause problems with libtcod. This was been tested on Windows 10 with libtcod 1.6, and was not reproducible, so it’s up to you.
It might be advisable to go with 32 bit just to keep things simple, and when you’re gone through the tutorial look at switching to 64 bit if it matters to you to do so, and if you do encounter errors specifically related to this, report them on the libtcod bug tracker.
libtcod
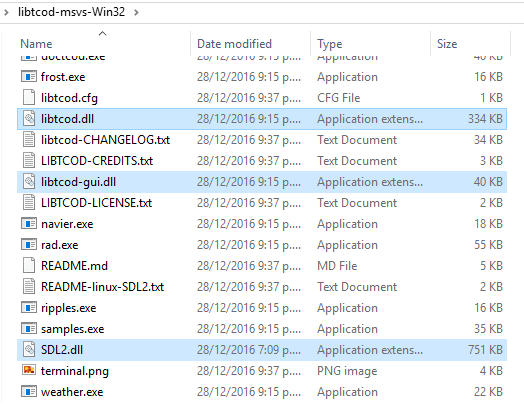
Download the latest release of libtcod 1.6 and extract it somewhere. Be warned that both Python and libtcod must either be both 32 bit, or both 64 bit. If you get dll loading errors, getting this wrong is the most likely cause. libtcod will now (as of 1.6.2 and above) check they are compatible, and tell you if they are not.
Check if libtcod works
libtcod is compiled with the latest official release of Visual Studio. In an ideal world, it should just run, and if you have recently updated games installed from Steam or perhaps even some modern applications, it should. However, some people lack the support for that latest release of Visual Studio, and these steps help update your computer to allow libtcod to be run.
- Within the libtcod release you just extracted, you will see a file called samples.exe.
- Run samples.exe and verify that it appears to work. If it opens a colourful window, then it is now verified as working for you.
- If it just doesn’t start and instead you see a message about vcruntime140.dll being required, then you need to install the correct Visual Studio 2015 runtime.
- Go to the latest Microsoft Visual Studio 2015 runtime download page, and download and install the runtime that matches the Python and libtcod you are using. If you are using 32 bit Python and libtcod, this will be the x86 runtime. If you are using the 64 bit Python and libtcod, this will be the x64 runtime. (Tip: If you think you might switch from 32 bit to 64 bit in the future, hedge your bets and install both runtimes to prevent future problems.)
- Once you’ve installed the correct runtime, run samples.exe and verify that it now appears to work. If it still gives the same message, you didn’t install the correct runtime. If it opens a colourful window, then it is now verified as working for you.
- If it is not verified as working for you, you can open a libtcod bug report on BitBucket.
You’ve verified that libtcod is working? Great! You can move onto the next section.
Your project folder
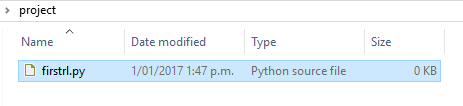
Now create your project’s folder. Inside it, create an empty file with a name of your choice. We’re using firstrl.py. It’ll make the tutorial easier to just use the same name, and you can always rename it later.
From within the libtcod build you downloaded above, select and copy the relevant DLLs.
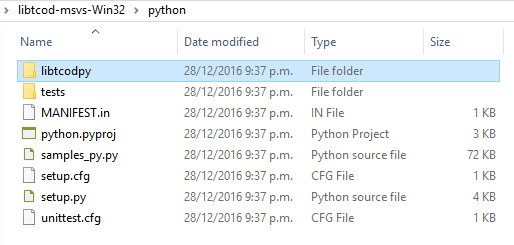
From within the libtcod build you downloaded above, select and copy the libtcodpy folder.
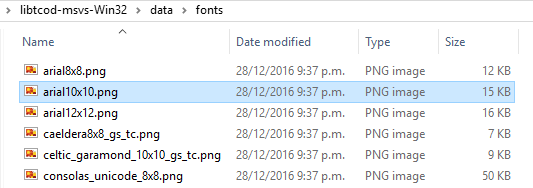
From within the libtcod build you downloaded above, select and copy the arial10x10.png font. If you choose a different one, you’ll need to adjust how you do the tutorial accordingly. It’s simpler to just use the same one as we do, and change it later, if it suits you to do so.
At this point, you should have a folder that looks like this:
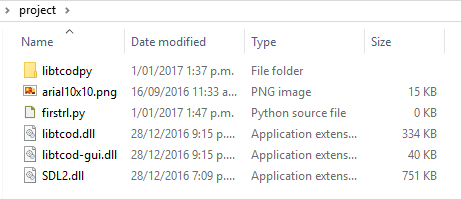
You’re ready to start editing firstrl.py!
Autotools platforms (Linux, MacOS, …)
Python
The tutorial is written for Python 2, so ensure you have it installed and know what it is called.
SDL2
If your OS or OS distribution has a package that can be used for SDL2 development, then the best option is to install it. This will ensure that you can easily update it.
In the event that you cannot find a package, you can compile it yourself as a last resort. To do so, download the supported SDL2 revision, build and install it:
$ curl -o sdl.tar.gz http://hg.libsdl.org/SDL/archive/007dfe83abf8.tar.gz
$ tar -xf sdl.tar.gz
$ cd SDL-007dfe83abf8/
$ mkdir -p build
$ cd build
$ ../configure
$ make
$ sudo make install
This will place the libraries at `/usr/local/lib/` and the development headers at `/usr/local/include/SDL2/`.
libtcod
Download the latest libtcod release and compile it:
$ wget https://bitbucket.org/libtcod/libtcod/downloads/20161228-libtcod-1.6.2.tbz2
$ tar xf 20161228-libtcod-1.6.2.tbz2
$ cd 20161228-libtcod-1.6.2

$ cd build/autotools/
$ autoreconf -i
$ ./configure
$ make
$ cd ../..
Now you should be in the root libtcod directory. You can see the compiled library like:
$ find . -name "libtcod.so"
./build/autotools/.libs/libtcod.so
However, notice this .so is actually a link to this other .so.0.0.0 file in the same directory:
$ readlink ./build/autotools/.libs/libtcod.so
libtcod.so.0.0.0
Your project folder
Now you’re ready to make a directory for your new project, copy the compiled library and links, plus the python library and a font into it:
$ mkdir -p ~/tutorial
$ cp -dr build/autotools/.libs/libtcod.so* python/libtcodpy data/fonts/arial10x10.png ~/tutorial/
$ cd ~/tutorial
You should be able to see something similar to this:
$ ls -lgo
total 1388
-rw-rw-r-- 1   14870 Dec 31 15:57 arial10x10.png
drwxrwxr-x 2    4096 Dec 31 15:57 libtcodpy
lrwxrwxrwx 1      16 Dec 31 15:57 libtcod.so -> libtcod.so.0.0.0
lrwxrwxrwx 1      16 Dec 31 15:57 libtcod.so.0 -> libtcod.so.0.0.0
-rwxrwxr-x 1 1413856 Dec 31 15:57 libtcod.so.0.0.0
Now you’re ready to start.
Choice of code editor
If you’re just starting out with Python, you’ll find that many Python coders just use a simple editor and run their scripts from a console to see any debugging output. Most Python coders don’t feel the need to use a fancy IDE! On Windows, Notepad++ is an excellent bet; most Linux programmers already have an editor of choice. Almost all editors allow you to configure shortcut keys (like F5 for instance) to quickly run the script you’re editing, without having to switch to a console.
See this page if you want to set up a Notepad++ shortcut with a couple of nice features for debugging, or if you tried to roll your own and hit the infamous «module not found» error.
Another quick note, if you’re using IDLE. It doesn’t seem to let libtcod clean up properly on exit, so it crashes when you end a script. This seems to be more of an IDLE problem than a libtcod problem so there’s no fix in sight, for now. Using any of the setups recommended above will work just fine.
Showing the @ on screen
This first part will be a bit of a crash-course. The reason is that you need a few lines of boilerplate code that will initialize and handle the basics of a libtcod window. And though there are many options, we won’t explain them all or this part will really start to drag out. Fortunately the code involved is not as much as in many other libraries!
First we import the library. The name libtcodpy is a bit funky (sorry Jice!) so we’ll rename it to just libtcod.
import libtcodpy as libtcod
Then, a couple of important values. It’s good practice to define special numbers that might get reused. Many people capitalize them to distinguish from variables that may change.
SCREEN_WIDTH = 80
SCREEN_HEIGHT = 50
LIMIT_FPS = 20
Now, something libtcod-specific: we’re going to use a custom font! It’s pretty easy. libtcod comes bundled with a few fonts that are usable right out of the box. Remember however that they can be in different formats, and you’ll need to tell it about this. This one is «grayscale» and using the «tcod layout», most fonts are in this format and thus end with _gs_tc. If you wanna use a font with a different layout or make your own, the docs on the subject are really informative. You can worry about that at a later time though. Notice that the size of a font is automatically detected.
libtcod.console_set_custom_font('arial10x10.png', libtcod.FONT_TYPE_GREYSCALE | libtcod.FONT_LAYOUT_TCOD)
This is probably the most important call, initializing the window. We’re specifying its size, the title (change it now if you want to), and the last parameter tells it if it should be fullscreen or not.
libtcod.console_init_root(SCREEN_WIDTH, SCREEN_HEIGHT, 'python/libtcod tutorial', False)
For a real-time roguelike, you wanna limit the speed of the game (frames-per-second or FPS). If you want it to be turn-based, ignore this line. (This line will simply have no effect if your game is turn-based.)
libtcod.sys_set_fps(LIMIT_FPS)
Now the main loop. It will keep running the logic of your game as long as the window is not closed.
while not libtcod.console_is_window_closed():
For each iteration we’ll want to print something useful to the window. If your game is turn-based each iteration is a turn; if it’s real-time, each one is a frame. Here we’re setting the text color to be white. There’s a good list of colors you can use here, along with some info about mixing them and all that. The zero is the console we’re printing to, in this case the screen; more on that later.
libtcod.console_set_default_foreground(0, libtcod.white)
Don’t forget the indentation at the beginning of the line, it’s extra-important in Python. Make sure you don’t mix tabs with spaces for indentation! This comes up often if you copy-and-paste code from the net, and you’ll see an error telling you something about the indentation (that’s a pretty big clue right there!). Choose one option and stick with it. In this tutorial we’re using the 4-spaces convention, but tabs are easy to work with in many editors so they’re a valid choice too.
Now print a character to the coordinates (1,1). Once more the first zero specifies the console, which is the screen in this case. Can you guess what that character is? No, it doesn’t move yet!
libtcod.console_put_char(0, 1, 1, '@', libtcod.BKGND_NONE)
At the end of the main loop you’ll always need to present the changes to the screen. This is called flushing the console and is done with the following line.
Ta-da! You’re done. Run that code and give yourself a pat on the back!
- Python errors? Using Python 3?
We said above that this tutorial is only for Python 2. So use Python 2, with Python 3 you are on your own. They’re different languages, it won’t just magically work! - On Windows? Getting the «Incompatible architecture» error?
Make sure your Python and libtcod are either BOTH 32 bit, or BOTH 64 bit. - On Windows? Getting the «The specified module could not be found» error?
You didn’t verify that libtcod was working. Go back and do it - Still blocked for other reasons? Check out the problems page.
Note that since we don’t have any input handling code, the game may crash on exit (it won’t process the OS’s requests to close). Oops! Don’t worry though, this problem will go away as soon as we add keyboard support.
Here’s the complete code so far.
Moving around
That was pretty neat, huh? Now we’re going to move around that @ with the keys!
First, we need to keep track of the player’s position. We’ll use these variables for that, and take the opportunity to initialize them to the center of the screen instead of the top-left corner. This can go just before the main loop.
playerx = SCREEN_WIDTH/2
playery = SCREEN_HEIGHT/2
There are functions to check for pressed keys. When that happens, just change the coordinates accordingly. Then, print the @ at those coordinates. We’ll make a separate function to handle the keys.
def handle_keys():
    global playerx, playery

    #movement keys
    if libtcod.console_is_key_pressed(libtcod.KEY_UP):
        playery -= 1

    elif libtcod.console_is_key_pressed(libtcod.KEY_DOWN):
        playery += 1

    elif libtcod.console_is_key_pressed(libtcod.KEY_LEFT):
        playerx -= 1

    elif libtcod.console_is_key_pressed(libtcod.KEY_RIGHT):
        playerx += 1
Done! These are the arrow keys, if you want to use other keys here’s a reference (pay attention to the Python-specific notes).
While we’re at it, why not include keys to toggle fullscreen mode, and exit the game? You can put this at the beginning of the function.
    key = libtcod.console_check_for_keypress()
    if key.vk == libtcod.KEY_ENTER and key.lalt:
        #Alt+Enter: toggle fullscreen
        libtcod.console_set_fullscreen(not libtcod.console_is_fullscreen())

    elif key.vk == libtcod.KEY_ESCAPE:
        return True  #exit game
From now on, we’ll show code for a real-time game with a green background, and code for a turn-based game with a blue background.
Notice a subtle difference here. The console_is_key_pressed function is useful for real-time games, since it checks if a key is pressed with no delays. console_check_for_keypress, on the other hand, treats the key like it’s being typed. So after the first press, it will stop working for a fraction of a second. This is the same behavior you see when you type, otherwise pressing a key would result in you typing 3 or 4 letters! It’s useful for all commands except movement, which you usually want to react as soon as possible with no delays, and continue for as long as you press the movement keys.
Now here’s an important thing: you can use that first line to distinguish between real-time and turn-based gameplay! See, console_check_for_keypress won’t block the game. But if you replace it with this line:
key = libtcod.console_wait_for_keypress(True)
Then the game won’t go on unless the player presses a key. So effectively you have a turn-based game now.
Now, the main loop needs to call this function in order for it to work. If the returned value is True, then we «break» from the main loop, ending the game. The inside of the main loop should now look like this:
    libtcod.console_set_default_foreground(0, libtcod.white)
    libtcod.console_put_char(0, playerx, playery, '@', libtcod.BKGND_NONE)

    libtcod.console_flush()

    #handle keys and exit game if needed
    exit = handle_keys()
    if exit:
        break
The reason why we draw stuff before handling key input is that, in a turn-based game, the first screen is shown before the first key is pressed (otherwise the first screen would be blank).
One more thing! If you try that, you’ll see that moving you leave around a trail of little @’s. That’s not what we want! We need to clear the character at the last position before moving to the new one, this can be done by simply printing a space there. Put this just before exit = handle_keys().
libtcod.console_put_char(0, playerx, playery, ' ', libtcod.BKGND_NONE)
Here’s a rundown of the whole code so far.
Go on to the next part.

Я всегда хотел написать подробное руководство для начинающих о том, как создать roguelike, содержащее как общие, так и более специфические советы. Проведённый в этом году очередной праздник Roguelike Celebration показался мне отличной возможностью наконец-то заставить себя это сделать, поэтому я подготовил получасовой доклад по этой теме.
У меня есть довольно большой опыт — в течение последних семи лет я работал только в этом жанре (Cogmind, Cogmind 7DRL, POLYBOT-7, REXPaint, X@COM), и в течение последних пяти эта работа была моей основной. К тому же, все эти годы я помогал превращению r/RoguelikeDev в крупнейшее сетевое сообщество разработчиков roguelike.
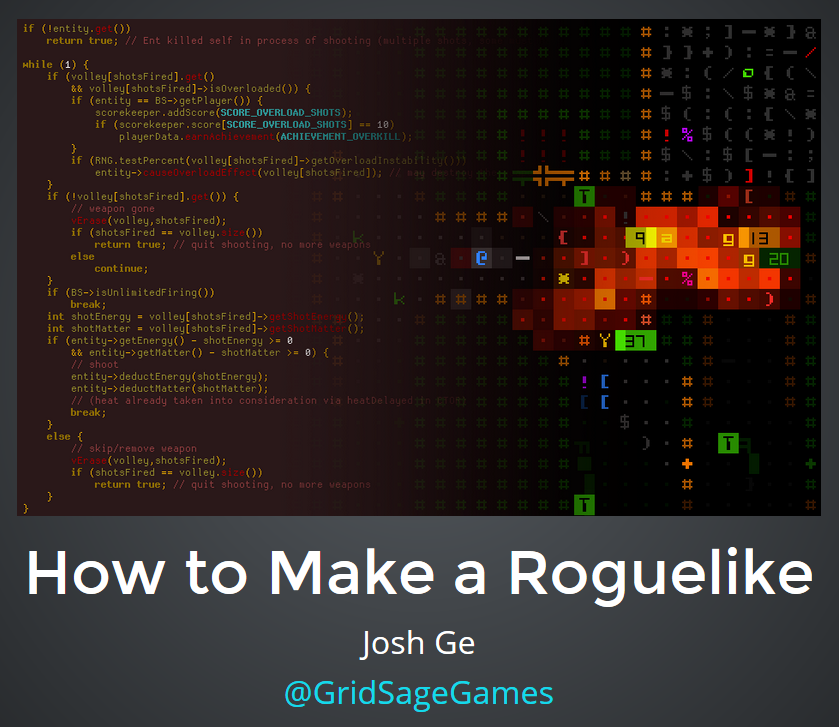
Доклад «Как создать Roguelike» доступен и в форме видео (см. клип ниже). Данная статья является текстовой версией того же доклада для тех, кто предпочитает читаемый формат или захочет повнимательнее разглядеть кучу изображений из доклада.
Введение
Пару лет назад на первом празднике Roguelike Celebration я прочёл доклад, о том, как я стал разработчиком, но сейчас я хочу рассказать о том, как любой может приступить к разработке собственного roguelike. Довольно часто игроки в roguelike хотя бы пробуют заняться их созданием. Мы вдохновляемся играми, в которые играем, и хотим сделать что-то лучшее, что-то иное, или просто что-то своё. Мой доклад совершенно точно не будет являться туториалом, он больше посвящён тому, как начать разработку и общим советам, способным помочь вам на этом пути.
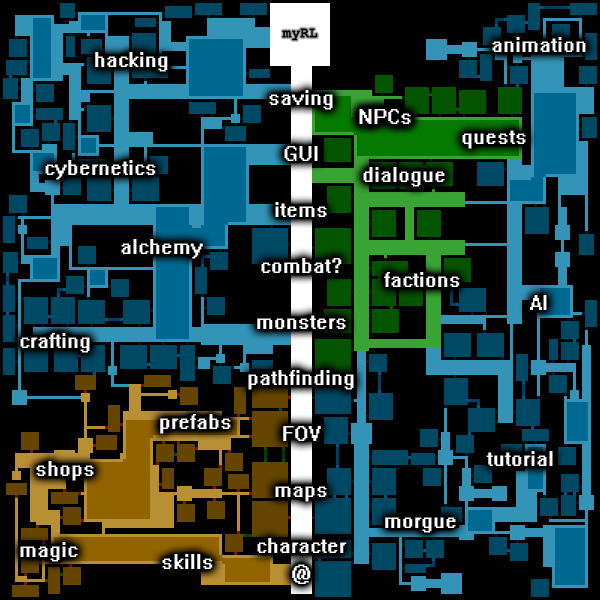
Создание roguelike может быть довольно сложной задачей, похожей на путешествие сквозь заполненные препятствиями подземелья. На показанной ниже схеме внизу изображены вы, приступающие к своему путешествию, а сверху — ваша цель: интересная играбельная игра.
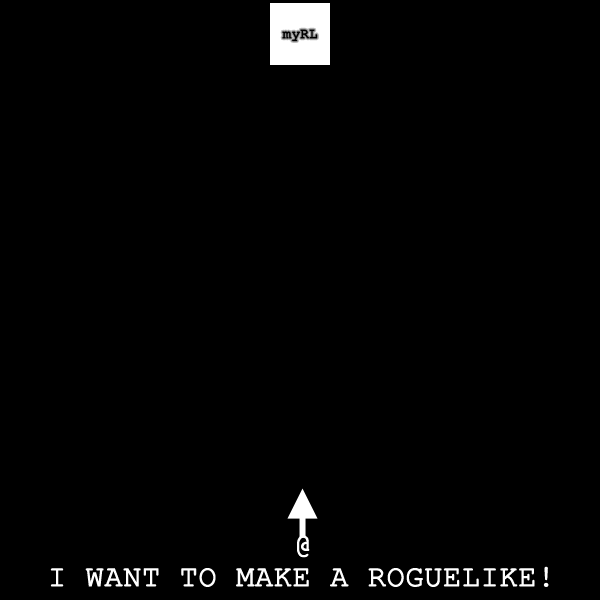
На старт, внимание, @!
Ваш путь запросто может оказаться вот таким, хаотично развиваясь в каждом возможном направлении, пока вы пытаетесь добавить в игру каждую придуманную систему и не имея чёткого общего маршрута:
Непрямое приближение к своей цели. Когда-нибудь… (Это анимация — откройте изображение в отдельном окне, чтобы процесс начался снова.)
Да, вы можете достичь или едва коснуться своей цели, но какой ценой? Возможно, впустую будут потрачены долгие годы. На этом пути вы, скорее всего, упрётесь в слишком много тупиков, потом падёте духом и бросите игру.
На самом деле вам нужен кратчайший путь к цели. Имея базовый план и понимание того, что нужно делать, вы можете начать с твёрдого фундамента и уже потом, когда получите интересное ядро игры, продолжите развивать его в нужную сторону!
Сначала направляйтесь прямиком к цели и начинайте с прочного фундамента. (Это анимация — откройте изображение в отдельном окне, чтобы процесс начался снова.)
В этой статье я в основном буду рассказывать об основах, о том, как путешествовать по подземелью с наибольшими шансами на успех, особенно когда вы только начинаете и полны энтузиазма, но не совсем уверены, куда двигаться.
Содержание:
- Язык
- Масштаб
- Базовая механика
- 7DRL
- Ресурсы
- Приманки
- Советы
Учтите, эта статья рассказывает о том, как нужно начинать создание roguelike, но не говорит о том, как нужно его заканчивать. Здесь вы остаётесь в одиночестве.
Язык
Давайте начнём с первого и самого стандартного вопроса: какой язык использовать.
Ответ прост: любой.
Немного более длинный ответ: это не очень важно. Если вы уже имеете опыт работы с каким-то языком, то это отлично, берите и пользуйтесь им. Язык — это только средство, и для создания roguelike люди уже пользовались почти всеми языками.
Однако нельзя сказать, что если вы начинающий, то нет более простых вариантов, поэтому если вы колеблетесь, я помогу вам советом:
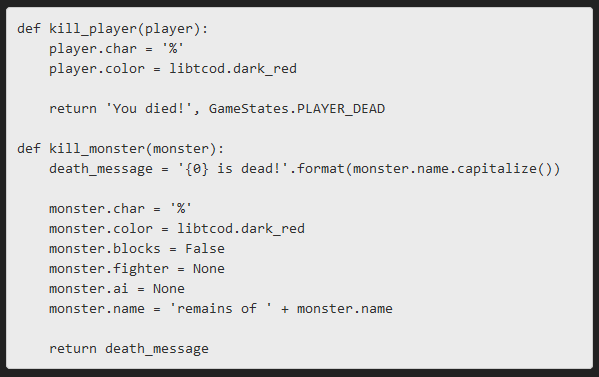
Пример кода на python из туториала по libtcod.
Начинающим разработчикам roguelike часто рекомендуют Python, потому что с ним довольно просто работать. Достаточно посмотреть на этот код. Здесь нет кучи странного синтаксиса, и если даже вы не знаете программирования или Python, то, вероятно, всё равно сможете разобраться, что в нём происходит.
Но не волнуйтесь, его «простота» не является ограничивающим фактором — в Python вы всё равно можете создавать замечательные вещи.
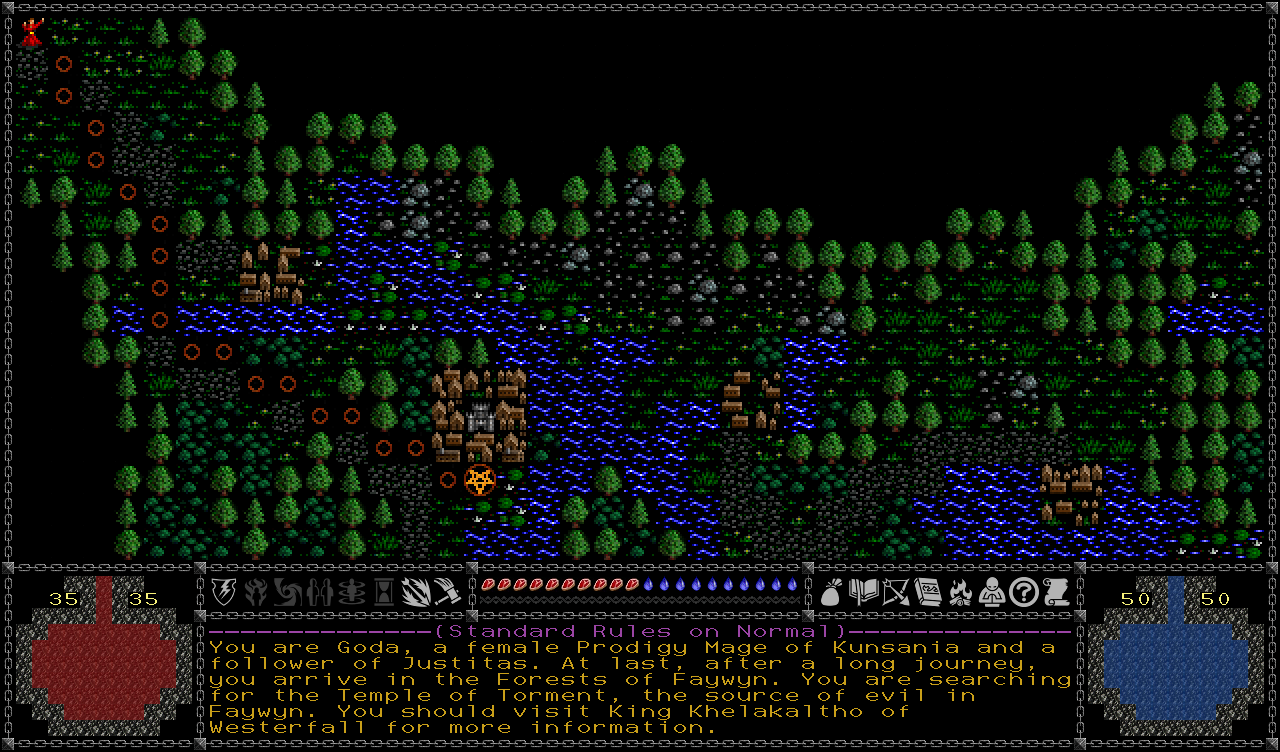
Ultima Ratio Regum написан на Python. Это красивый массивный проект с открытым миром, который ещё не завершён, но уже невероятно впечатляет.
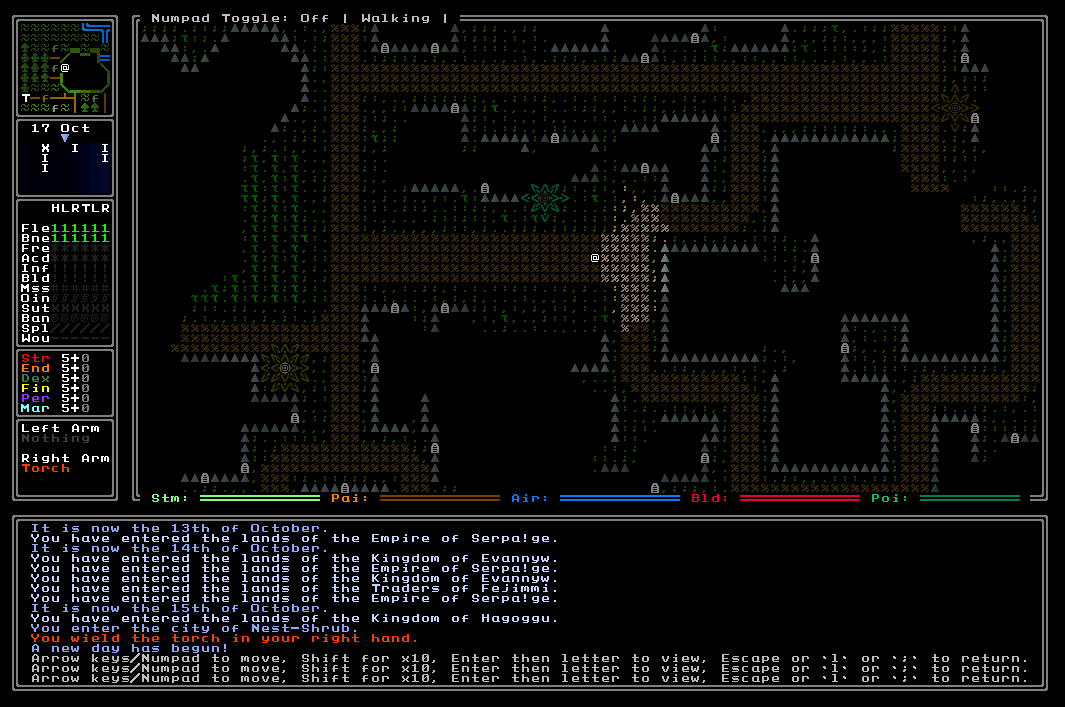
Temple of Torment — это ещё один объёмный и завершённый фэнтезийный roguelike, написанный на Python.
Существуют буквально сотни написанных на Python roguelike. То есть если вы начнёте с него, то ваше путешествие будет более лёгким, и позже мы вернёмся к тому, как с него начинать.
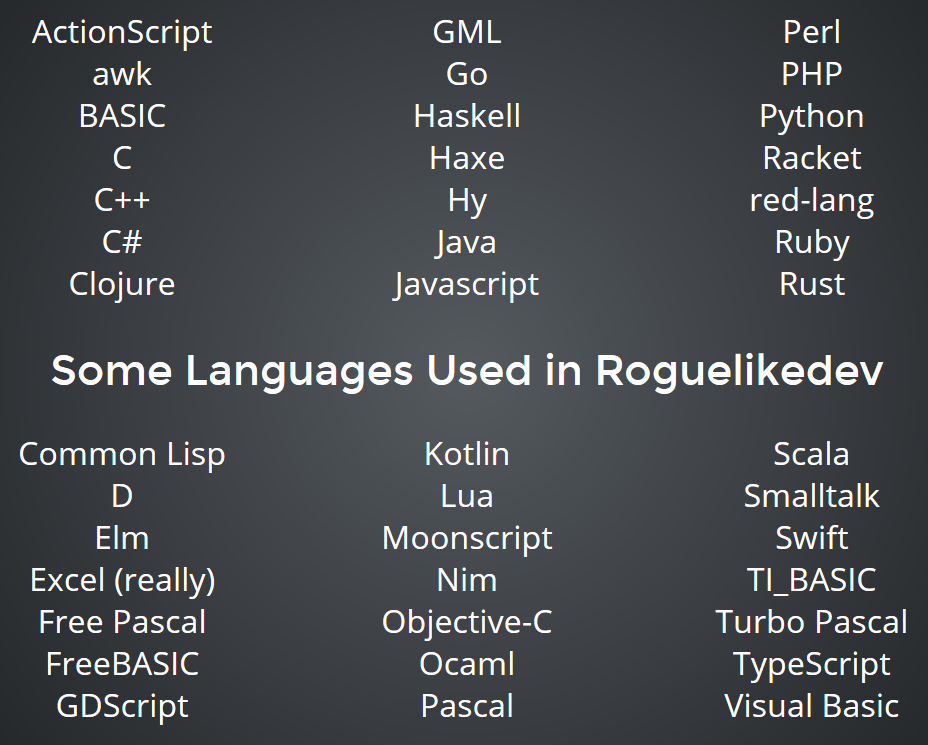
Выборка языков программирования, используемых разработчиками roguelike.
Более сложные языки наподобие C и C++ хороши тем, что они популярны очень давно, то есть вы найдёте по ним множество ресурсов и справочной информации. Я работаю с C++, но пользуюсь я им только потому, что уже был с ним знаком. Я бы не рекомендовал его для новичков, особенно если вы хотите создать roguelike, а не тратить всё своё время на отладку! Вы всё равно найдёте множество других разработчиков, пользующихся Python, поэтому тоже будете иметь доступ к куче ресурсов.
Масштаб
Ещё одна проблема, встающая перед новыми разработчиками: создание «roguelike их мечты». Должно ли это стать вашей первой целью? Почти никогда нет!
Поначалу вы много учитесь, делаете ошибки, которых даже пока не осознаёте, поэтому в первую очередь лучше накопить определённый опыт. Ещё важнее то, что с начала до конца приоритеты разработки игры сильно меняются, поэтому прежде чем браться за крупные серьёзные проекты, лучше будет пройти весь процесс один-два раза. Сохранение малого масштаба — лучший способ завершить проект и продемонстрировать результат своих усилий.
Вернёмся к рассмотренной выше карте разработки. Вот основной путь, на котором вам нужно сосредоточиться:
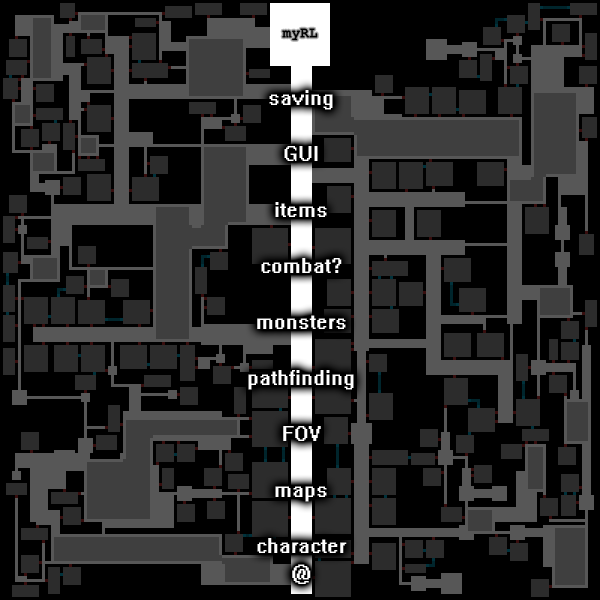
Основной маршрут разработки затрагивает только выборку из необходимых функций (заметьте, что обычно напротив боя («combat») я ставлю вопросительный знак, потому что в roguelike бои не всегда используются!).
Это может быть или завершённой игрой, или надёжным основанием, на котором можно развиваться дальше. Все остальные области могут казаться интересно исследовать, но постарайтесь на ранних этапах не слишком отдаляться от основного пути. Это похоже на игру в roguelike: если вы начнёте с того, что вслепую бегаете по неизвестности, вместо того, чтобы делать необходимое, то если RNG не будет полностью на вашей стороне, вы быстро где-нибудь умрёте. И много раз. Да, так играть тоже интересно, но создание roguelike — это совсем другая история, требующая бОльших вложений времени, поэтому постарайтесь сосредоточиться.
Хорошо то, что строить roguelike можно по кусочкам. По сути, они являются нагромождением систем, которые можно добавлять, если вам кажется, что они поддерживают основное ядро игры.
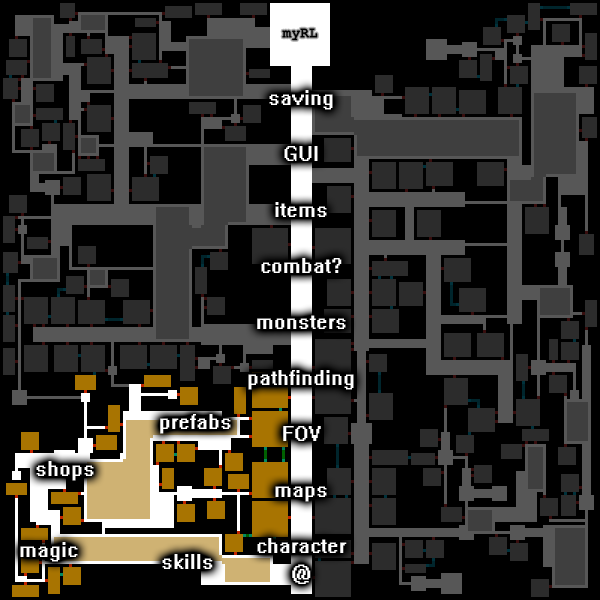
Пристройка к ядру roguelike новых кусков.
После этого можно постоянно расширять игру и продолжать итерации, и если повезёт, получать отзывы игроков.
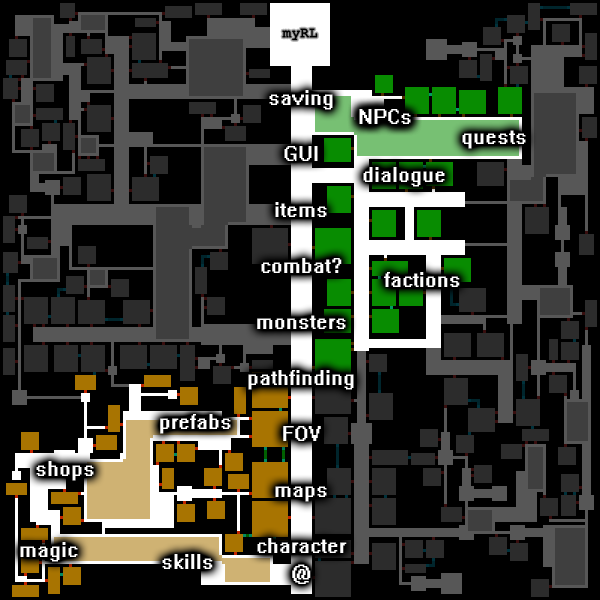
Новые кусочки!
В результате вы приклеите к основе так много кусков, что не заметите, как пройдут десять лет!
o_O
Если взглянуть на проект roguelike в целом, то это пугает, но на самом деле вам нужны только план и настойчивость. Начинать с малого важно, потому что вы будете делать ошибки, и скорее всего потерпите неудачу, если сразу нацелитесь на что-то крупное.
Базовая механика
Так что же действительно требуется небольшой roguelike? Базовая механика. Именно с неё начинается игровой процесс. Нужно, чтобы её можно было объяснить одним предложением, и именно её надо прототипировать первой. Прямиком приступайте к самой интересной части игры.
Каким будет уникальный взгляд игры на жанр roguelike? Если в вашей игре есть только эта механика, будет ли она интересной? Если вы уже думаете о большем, то может ли эта механика служить основой остальной части игры? Задумайтесь о том, чем будет заниматься игрок минута за минутой, скорее всего, это и будет нечто связанное с базовой механикой. Если этот повторяющийся процесс не интересен, то неважно, что вы надстроите поверх него!
Визуализация базовой механики как фундамента дизайна roguelike.
Итак, в этой первоначальной протоигре реализуйте только те внешние элементы, которые необходимы для реализации и тестирования базовой механики. Повторюсь, показанная выше схема и её ответвления могут пугать, но это просто пример того, что возможно. Roguelike может быть очень простой и при этом по-настоящему увлекательной.
Чтобы ещё немного изучить базовую механику, давайте рассмотрим 7DRL.
7DRL
7DRL — это roguelike, созданная за 7 дней. Примерно в марте каждого года проводится мероприятие, на котором множество разработчиков пытается создать собственную roguelike. Это мероприятие проводится уже 14 лет. И это здорово, потому что если вы закончите игру, то совершенно точно найдётся хотя бы несколько людей, которые в неё сыграют и оставят отзывы. Кроме того, существуют судьи, оценивающие игры по различным критериям, однако почти все разработчики считают 7DRL в первую очередь вызовом себе (мероприятие не рассматривается как соревнование).
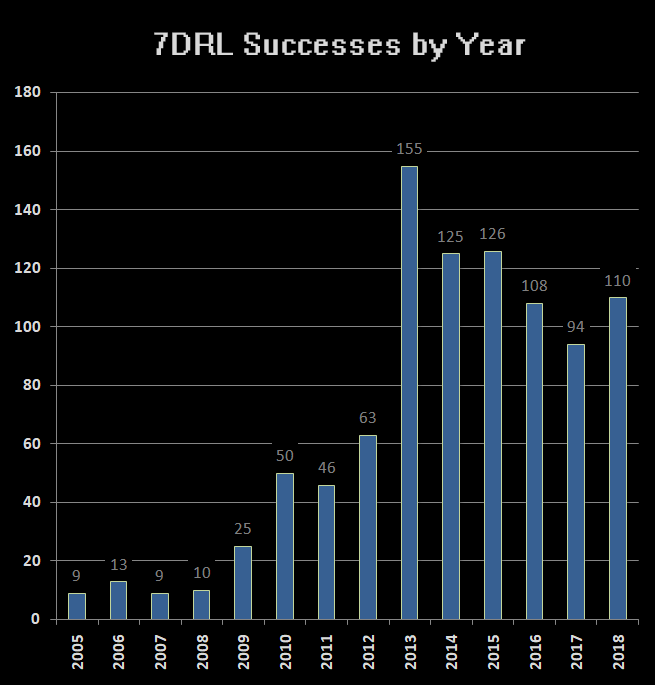
Успехи 7DRL по годам (2005-2018).
Каждый год на этом мероприятии выпускается больше сотни новых roguelike. Это очень увлекательно, и хоть я и не рекомендую создавать 7DRL как первую игру (вам пока не нужна такая нагрузка), будет неплохо поучаствовать, накопив некоторый опыт и разобравшись в том, что же такое roguelike, особенно в технических аспектах, потому что дедлайн очень помогает собраться.
Мероприятия 7DRL — это отличные примеры подхода «начинать с малого и расширяться по необходимости после того, как вы убедились, что базовая механика выглядит хорошо». То есть на 7DRL по сути создаются хорошие прототипы, и во многом мероприятия экспериментальны по своей природе. Каждый год мы видим множество отличных инновационных идей!
Давайте рассмотрим несколько примеров…

Knight (7DRL 2014)
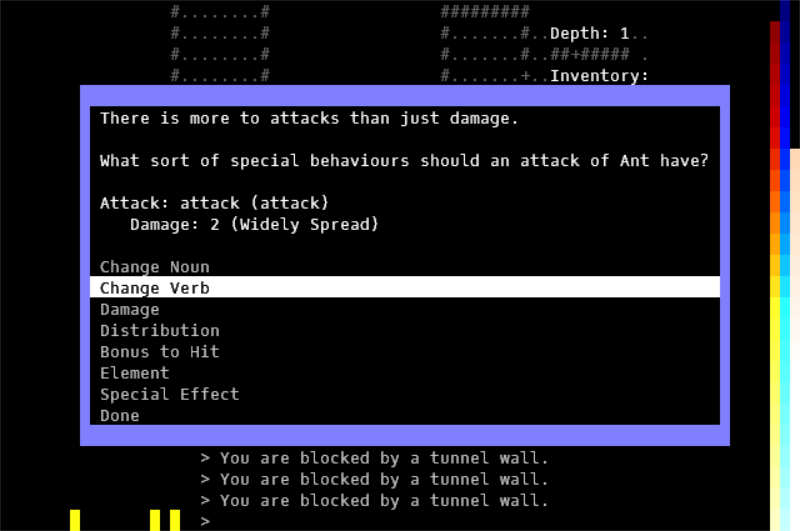
Самое главное в Knight — управление инерцией персонажа. Игрок большую часть времени сидит на лошади, небольшой голубой блок примерно в центре — это область, в котором вы можете двигаться, только по одному пространству за ход, и именно там вы окажетесь в следующий ход. Игрок может только ускоряться, поворачивать и замедляться, то есть ему нужно планировать направление атак на движущихся врагов, чтобы обезглавить их своим мечом, проезжая рядом.
A Roguelike Where You Dodge Projectiles (7DRL 2016)
Мне нравится, что в этом 7DRL базовая механика изложена прямо в названии («Roguelike, в которой нужно избегать снарядов», скачать можно здесь). Персонаж игрока — корабль в космосе, и хоть вы автоматически атакуете врагов в пределах своей области действия, выстреливаемые врагами снаряды летят очень медленно. Вы можете видеть, где они окажутся в следующем ходу, и должны маневрировать так, чтобы и продолжать их атаковать, и избегать попадания в свой корабль.
Seven Day Band (7DRL 2015)
В Seven Day Band вы создаёте собственную roguelike в процессе игры. Блуждая по миру, вы встречаетесь с новыми, неизвестными врагами и объектами и должны давать им имена и способности при первой встрече, или когда они станут для вас важны. («Band» в названии обозначает создание собственной игры в стиле Angband.)
Broken Bottle (7DRL 2011)
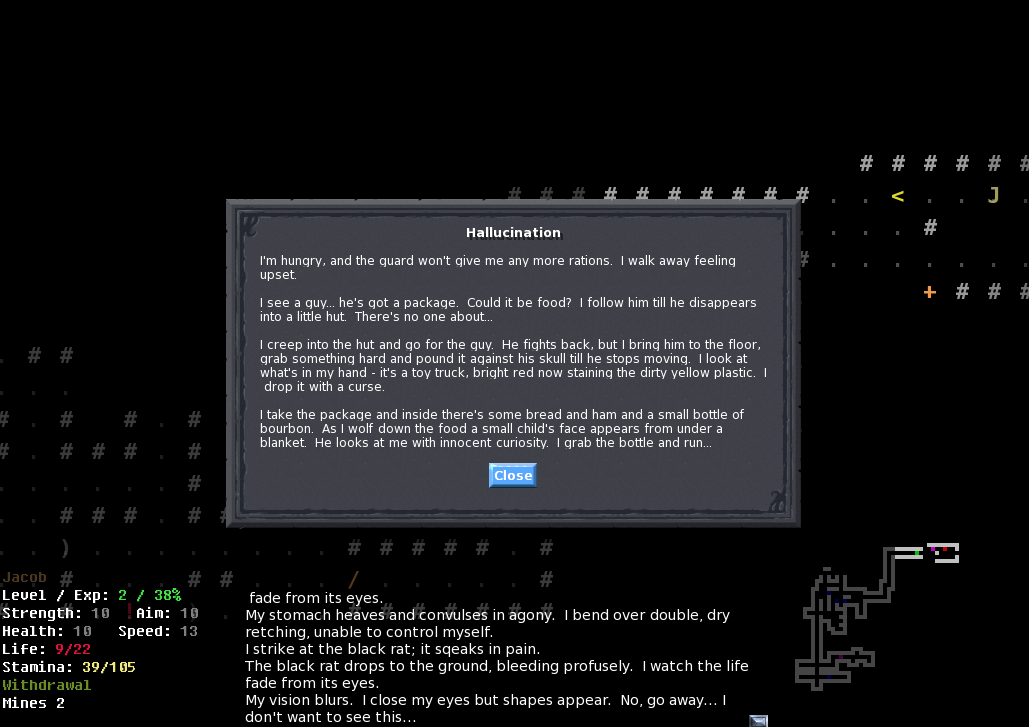
В Broken Bottle вы играете за алкоголика в постапокалиптическом мире. Хорошо это или плохо, но основная часть игрового процесса связана с потреблением алкоголя. (Игра сильно сосредоточена на сюжете.)
Drakefire Chasm (7DRL 2012)
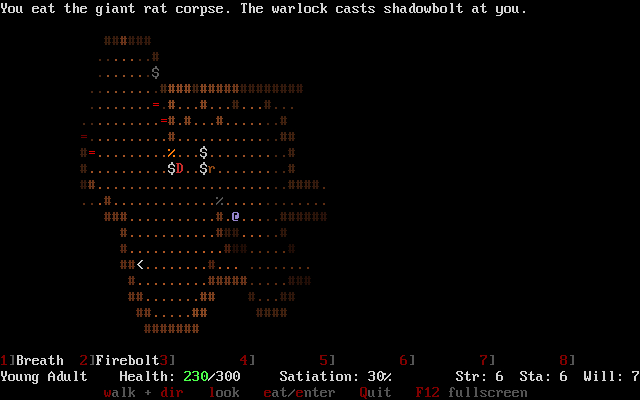
В Drakefire Chasm вы управляете молодым драконом, сражающимся в пещерах, заполненных монстрами, приключенцами и другими драконами. В игре нет предметов, вы просто апгрейдите способности дракона и поедаете врагов, чтобы расти и развиваться. Время от времени для игры выпускаются обновления.
Golden Krone Hotel (7DRL 2014)
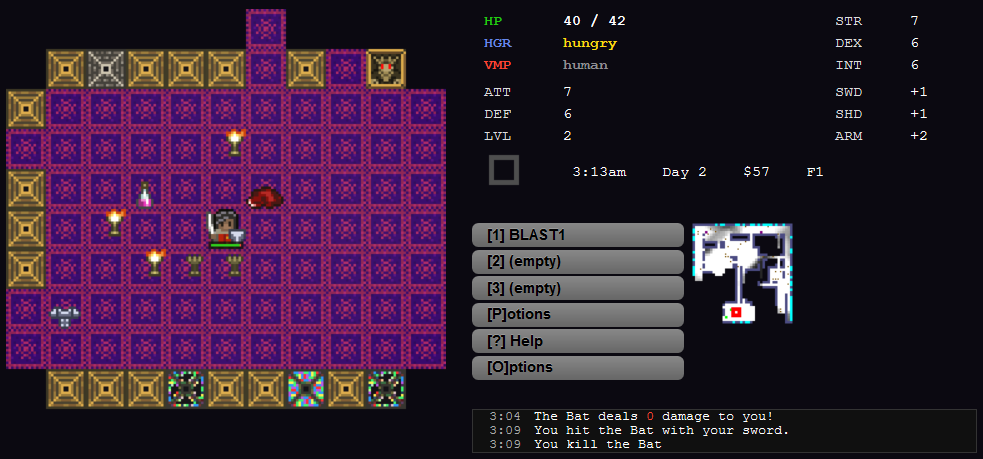
В Golden Krone Hotel вы пользуетесь преимуществами разных способностей вампирской и человеческой форм персонажа, в том числе и взаимодействием с динамическим светом. Эта игра со временем превратилась в серьёзную коммерческую roguelike, и после выпуска год назад хорошо показала себя в Steam.

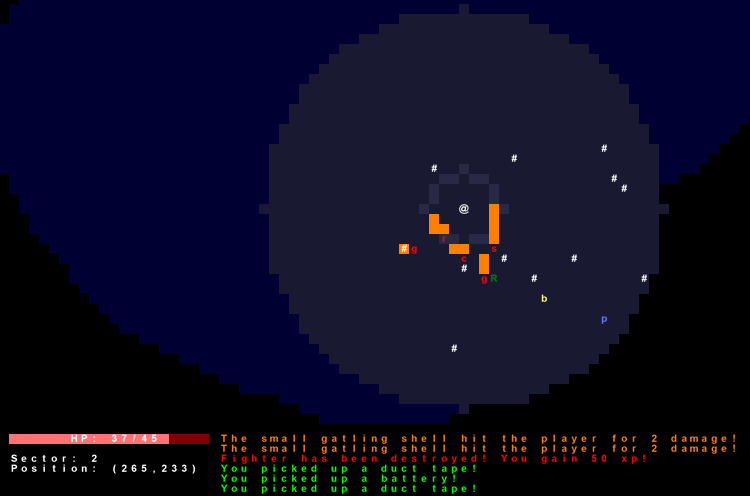
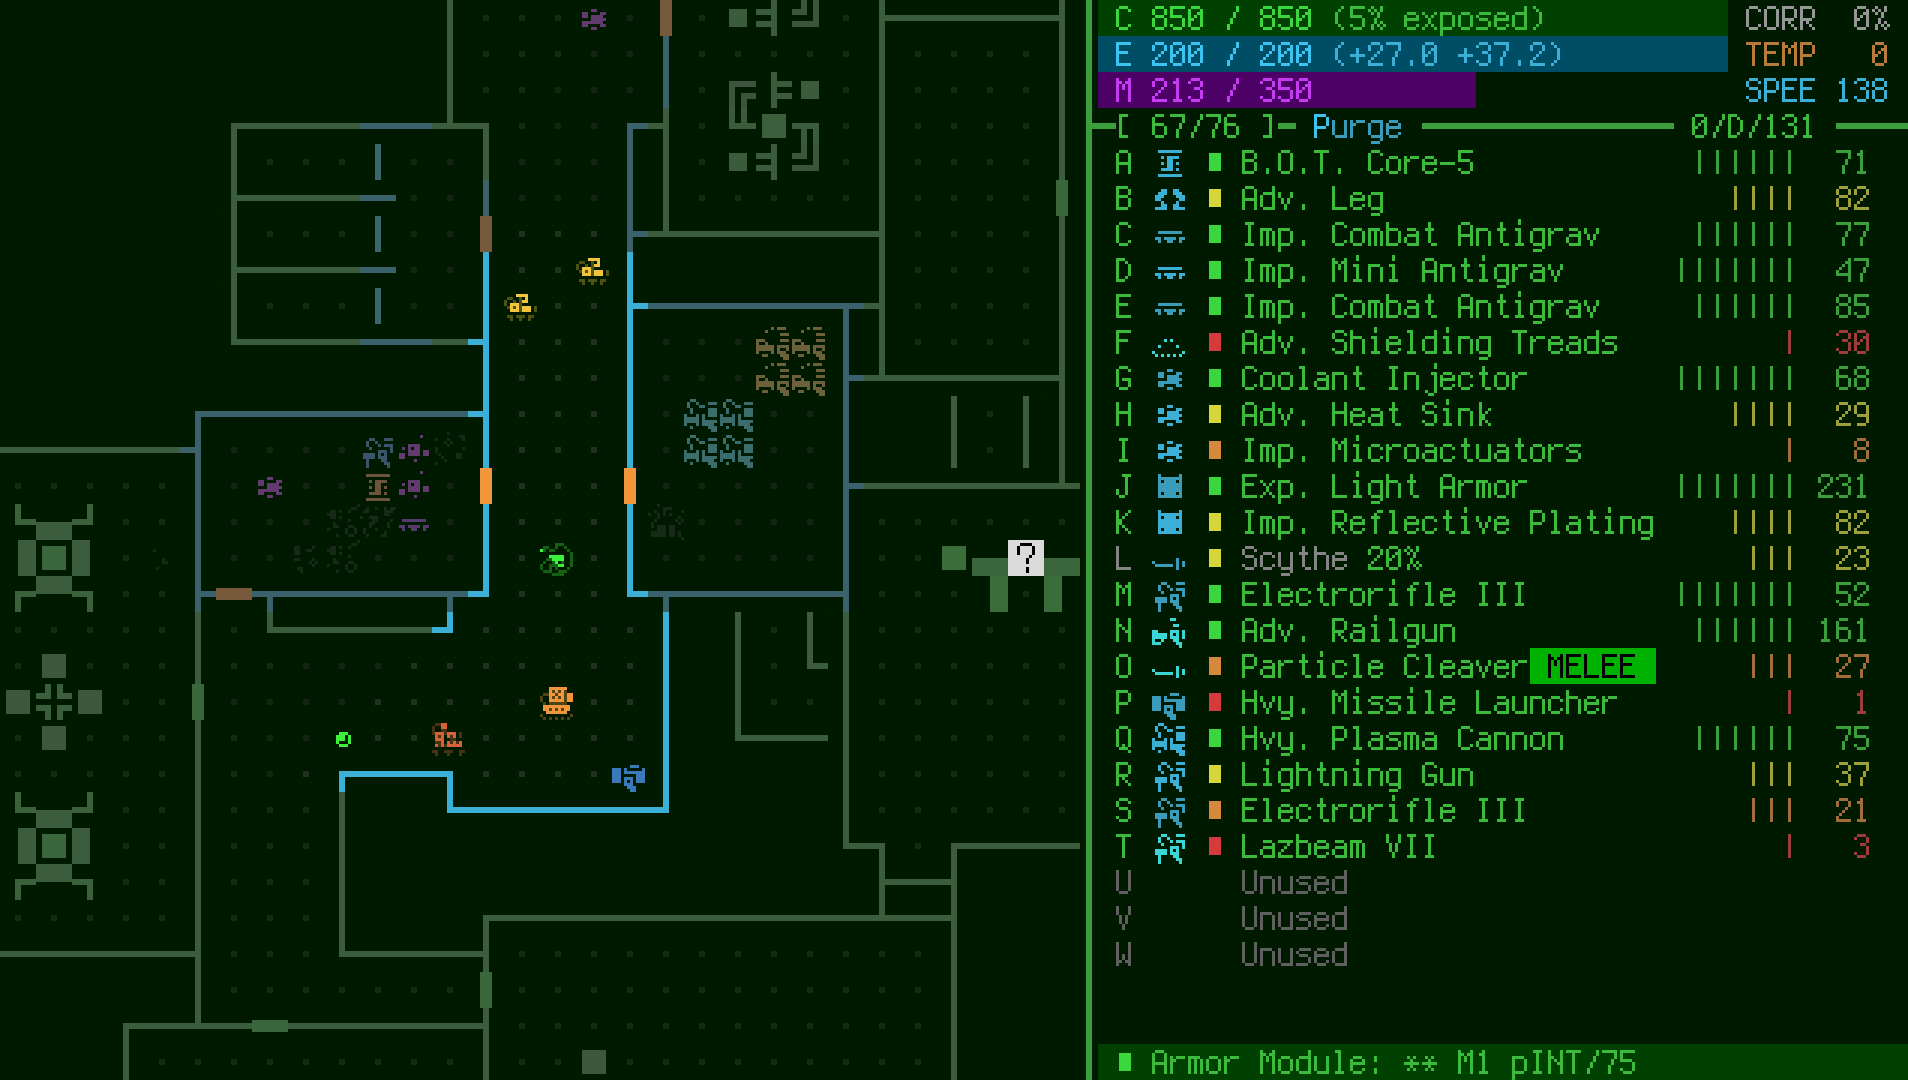
Cogmind 7DRL (2012)
Это моя первоначальная Cogmind 7DRL, в которой игрок управляет роботом, создающим себя с нуля, используя части других роботов. Предметы разрушаются чрезвычайно быстро, поэтому игроку приходится часто себя отстраивать заново. Эта игра позже тоже стала гораздо более крупным коммерческим проектом. Я никак не ожидал, что мой небольшой эксперимент на 7DRL шесть лет назад превратиться в работу, но очень рад, что поучаствовал в мероприятии, ведь оно доказало интересность базовой механики.
POLYBOT-7 (7DRL 2018)
В этом году для 7DRL я создал POLYBOT-7, который в чём-то похож на Cogmind, но играется совершенно иначе, потому что базовая механика сильно изменена. Игрок больше не выбирает, какие части прикрепить к роботу, теперь они притягиваются автоматически и он не может от них избавиться. Детали удаляются только в случае их уничтожения. Изначально я планировал, что игра станет Cogmind в меньшем масштабе, но с приближением 7DRL начал ощущать, что такую игру создавать не стоит — у неё должна быть действительно уникальная привлекательная черта, совершенно новая базовая механика. Она оказалась довольно интересной и стала хорошей причиной для создания множества дополнительных механик, поддерживающих новый тип геймплея (сравнение есть здесь; также я написал объёмный постмортем, описывающий процесс его разработки от начала до конца).
Итак, хоть у этих игр очевидно есть несколько систем, довольно очевидно, в чём заключается их базовая механика, и вместе со многими другими 7DRL они благодаря этому сильно выделяются из толпы.
Примеры не с 7DRL
Давайте также рассмотрим несколько примеров, не связанных с 7DRL. На создание этих игр ушли годы, они содержат кучи систем и контента, но мы можем увидеть. что они вращаются вокруг базовых механик.
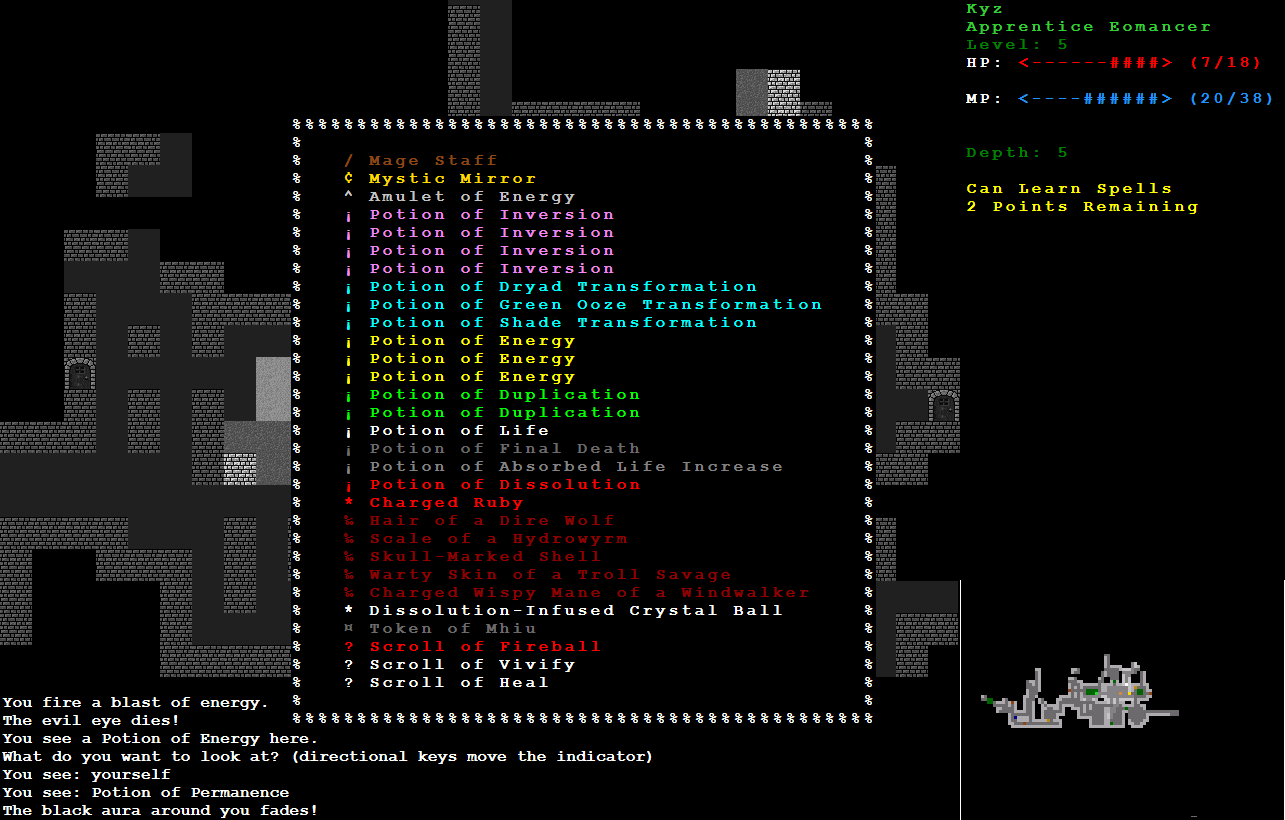
Mage Guild
Существует Mage Guild, в которой есть потрясающая система алхимии, позволяющая игроку смешать любые два предмета, будь то зелья, останки монстров или что-то ещё, и получать всевозможные новые предметы и эффекты.
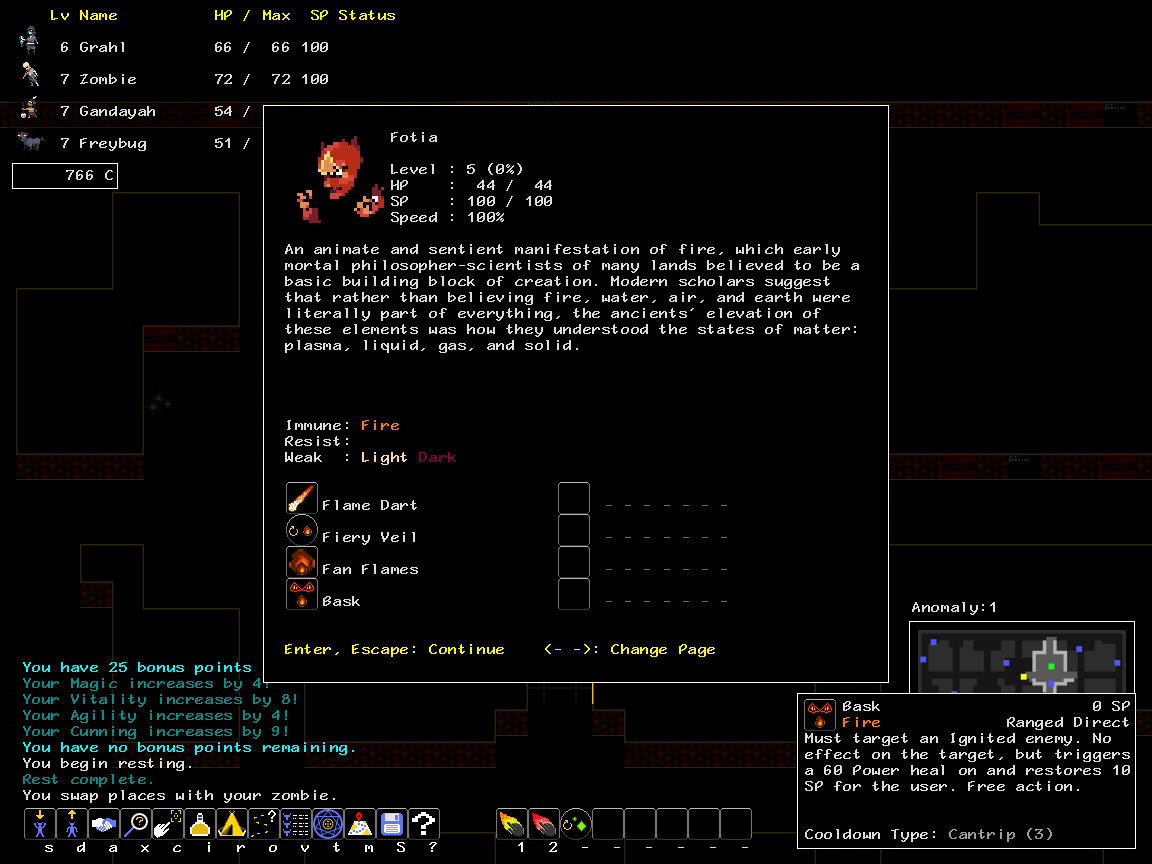
Demon
В Demon игрок нанимает множество разнообразных демонов, автономно следующих за ним, и тренирует их.
The Ground Gives Way
Есть The Ground Gives Way, в которой присутствует развитие полностью на основе предметов.
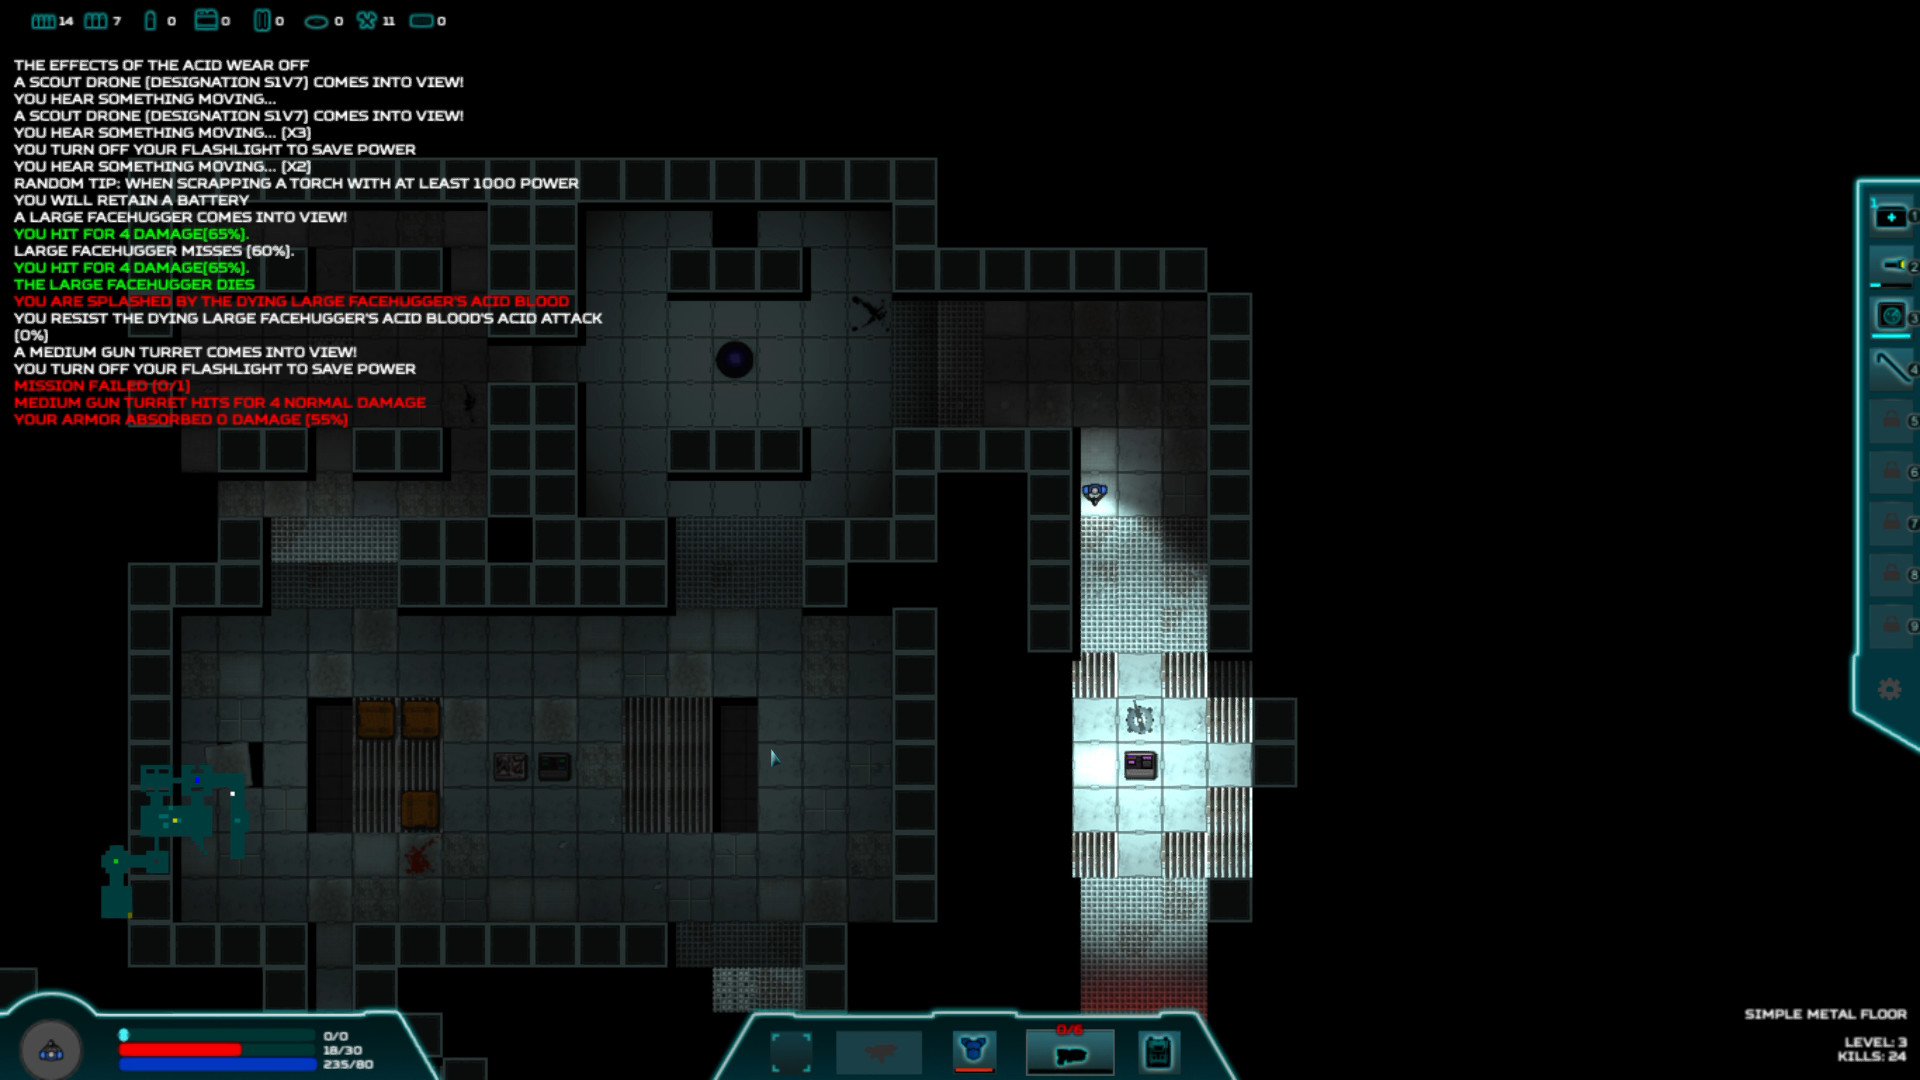
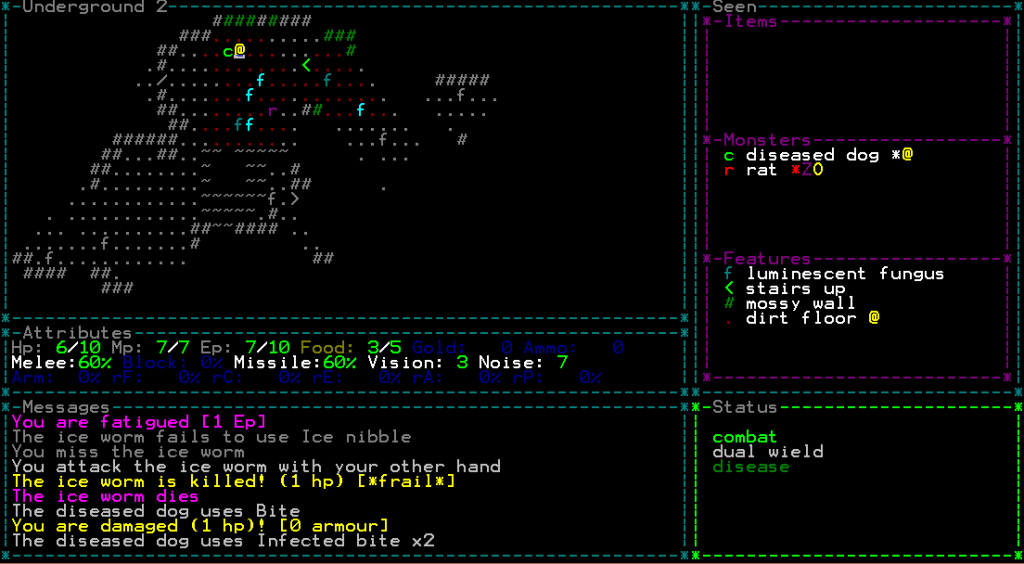
Xenomarine
Xenomarine построена на механике дальнего боя и учёта направления взгляда — не во многих roguelike такое есть.
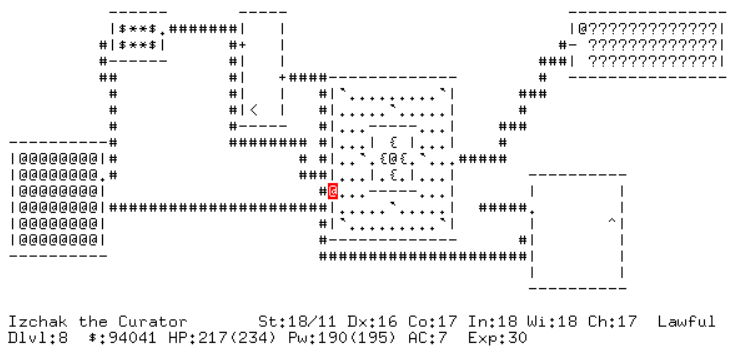
NetHack
Один из разработчиков NetHack однажды сказал мне, что базовая механика NetHack заключается в следующем: «если кажется, что что-то можно сделать, то скорее всего это можно сделать». (Это почти похоже на антибазовую механику, такой пример не стоит брать новому разработчику, но именно так и есть.)
Источники
Одна из самых важных вещей, к которым вам нужен доступ для разработки roguelike — это информация. В неё входит изучение основ, получение ответов на вопросы, изучение в дальнейшем более сложных тем, или просто пища для размышлений.
Ваши сложности могут быть уникальными по сравнению с другими разработчиками, потому что у каждого есть свой набор навыков и индивидуальность, но вы можете воспользоваться онлайн-ресурсами и помощью друзей, чтобы преодолеть эти препятствия. Хоть над вашим проектом кроме вас скорее всего никто работать не будет, люди могут при необходимости дать вам совет. Но вам нужно просить о помощи! Чтобы понять это, у меня ушло слишком много времени, и мой первоначальный прогресс был довольно медленным, потому что я никогда не общался с людьми. Поэтому должен вам сказать, что окружающие могут оказать вам огромную помощь!
Давайте рассмотрим наиболее полезные ресурсы…
r/RoguelikeDev
Сабреддит RoguelikeDev — это самая крупная группа активных разработчиков roguelike во вселенной. У нас собралось очень гостеприимное и готовое помочь сообщество, а хорошо организованная боковая панель содержит ссылки на множество полезных ресурсов.

r/RoguelikeDev и его информативная боковая панель.
Среди этих ресурсов есть туториалы по различных языкам и библиотекам, а в группе есть пользователи, уже использовавшие их и способные помочь вам ответить на свои вопросы.
Выше я упоминал, что стоит начинать разработку с Python, и проще всего это сделать с помощью библиотеки «libtcod», по которой у нас есть туториал (на самом деле, их много).
![]()
Логотип libtcod
Как и большинство игровых библиотек, libtcod берёт на себя работу с основными аспектами, такими как окно игры, поддержка мыши и клавиатуры, растровые шрифты, палитры и манипуляции цветами. Однако кроме этого она выполняет множество сложных задач, специфичных для roguelike, таких как генерация карты, FOV (область видимости) и поиск пути.
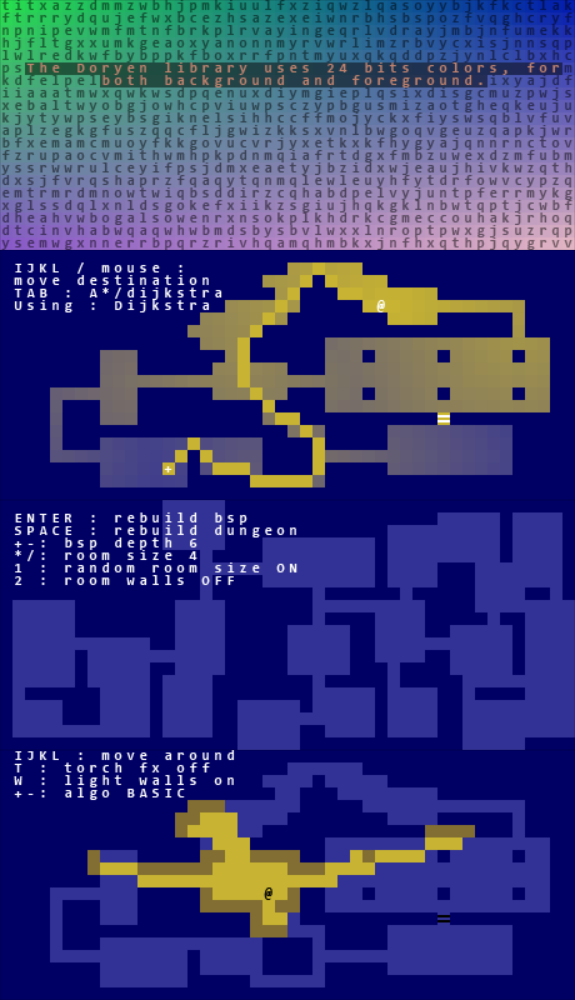
Примеры функций, используемые в интерактивном демо libtcod.
Описанные выше Ultima Ratio Regum и Temple of Torment начались как игры, созданные с помощью этого туториала, и постепенно выросли в уникальные проекты. libtcod великолепна, для неё уже десять лет выпускаются обновления.
Ещё один способ начать обучение — поучаствовать в летнем мероприятии «кодируем вместе» r/RoguelikeDev. Если вам нужна дополнительная мотивация и помощь в пути, то вместе с другими разработчиками вы будете следовать шагам туториала libtcod.
Логотип летнего «кодируем вместе» r/RoguelikeDev
Пока мы выполняли туториал пару лет, и интерес по-прежнему был высок, в каждом году участвовало примерно по 100 человек. Строго говоря, для участия даже необязательно использовать libtcod или Python — многие люди используют другие языки и движутся вместе с нами в своей собственной roguelike или похожих туториалах.
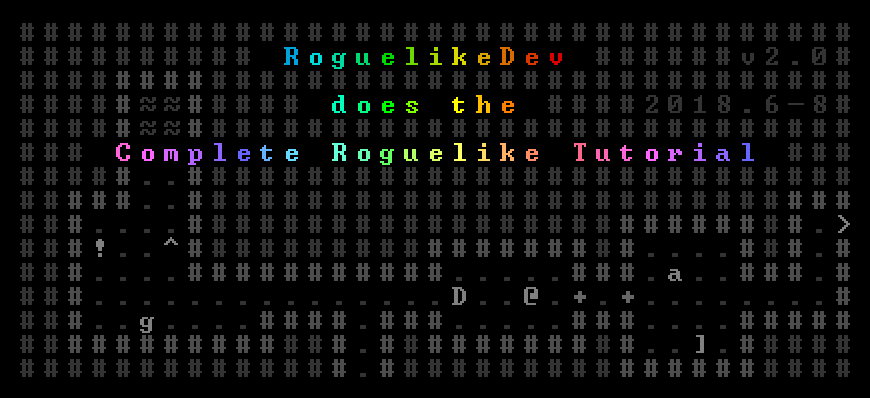
Через два месяца у вас будет своя играбельная roguelike! Вот некоторые из игр, вышедшие после мероприятия за последнюю пару лет:
Примеры проектов летнего мероприятия r/RoguelikeDev «кодируем вместе».
Это на самом деле очень хорошее прохождение, по сути, оно даёт вам все необходимые технические знания для создания функциональной roguelike, а уж потом вы можете заняться тем, что подскажет вам воображение.
Также в RoguelikeDev есть сборники FAQ, объясняющие различные аспекты разработки, чтобы вы поняли, как подходить к решению различных задач. Мы ответили уже на довольно много вопросов.
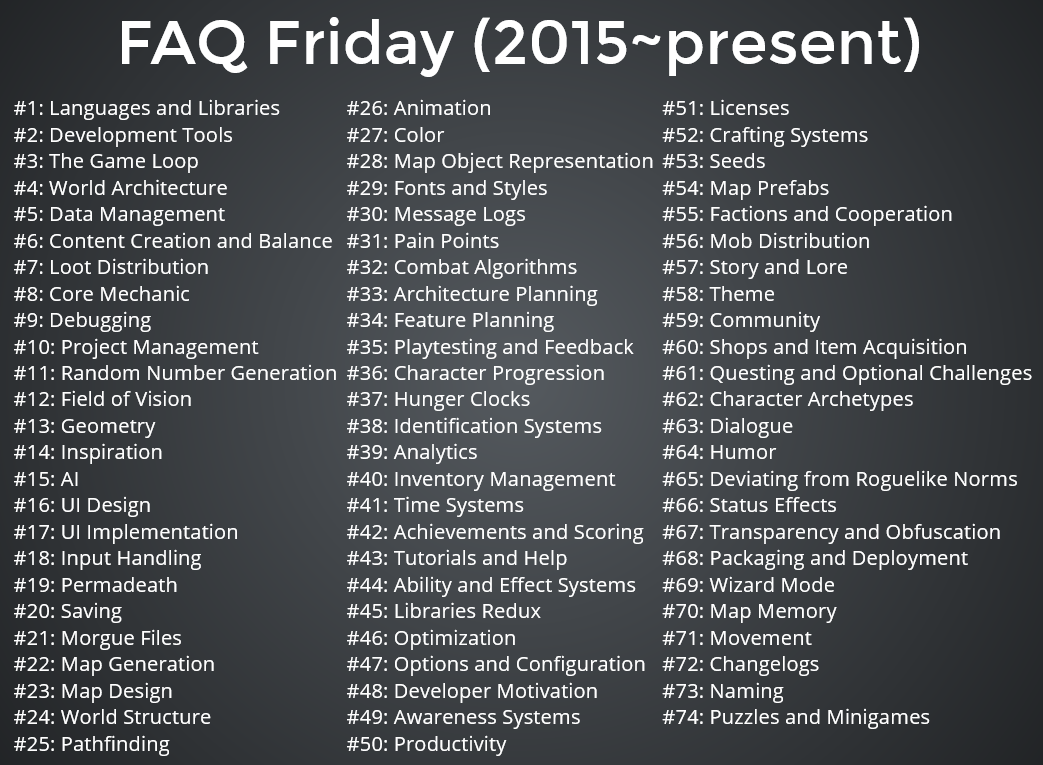
Темы пятничных FAQ, номера с 1 по 74
Также сюда включены метатемы, например планирование и мотивация, такие подробности, как обычно применяемые системы, дизайн и всё остальное! За долгие годы свой вклад в FAQ сообщества сделали довольно много разработчиков, в том числе и авторов хорошо известных roguelike.
Обычно в сабреддите постоянно есть куча разработчиков, многие из которых разрабатывают долговременные хобби-проекты. Они компетентны и готовы вам помочь. Также у нас есть Discord для помощи и обсуждений в реальном времени. (Этот сервер мы делим с сабреддитом r/Roguelikes, поэтому в других его каналах вы всегда найдёте множество людей, играющих во всевозможные roguelike и обсуждающих их.)
RogueBasin
Много лет назад Сантьяго Запата создал отличный веб-сайт, о котором вы могли слышать: RogueBasin. Здесь можно найти целый раздел со статьями, посвящёнными разработке.
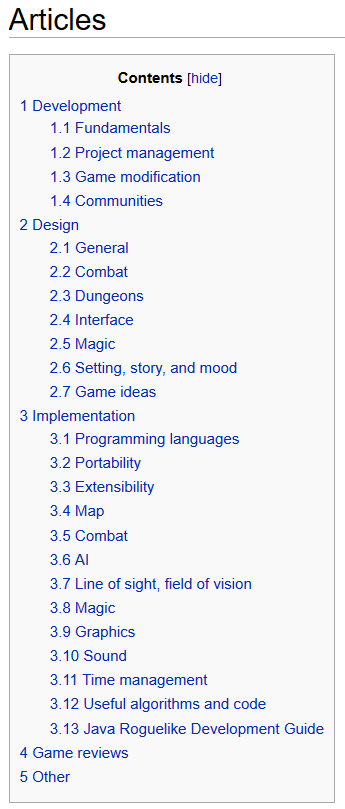
Содержание раздела статьей RogueBasin.
Там довольно много статей (показанный выше список — это всего лишь общее содержание!). Хоть некоторым статьям уже много лет, большинство из них не утратило своей актуальности. Именно отсюда я начал свой путь много лет назад, статьи показались мне и вдохновляющими, и просвещающими. (А также немного поначалу пугающими, но не забывайте, что roguelike разрабатываются по кусочкам — делайте за раз только один шаг!)
Roguelike Radio
Дэррен Грей, Эндрю Дулл, Марк Джонсон и другие ведут подкаст Roguelike Radio.
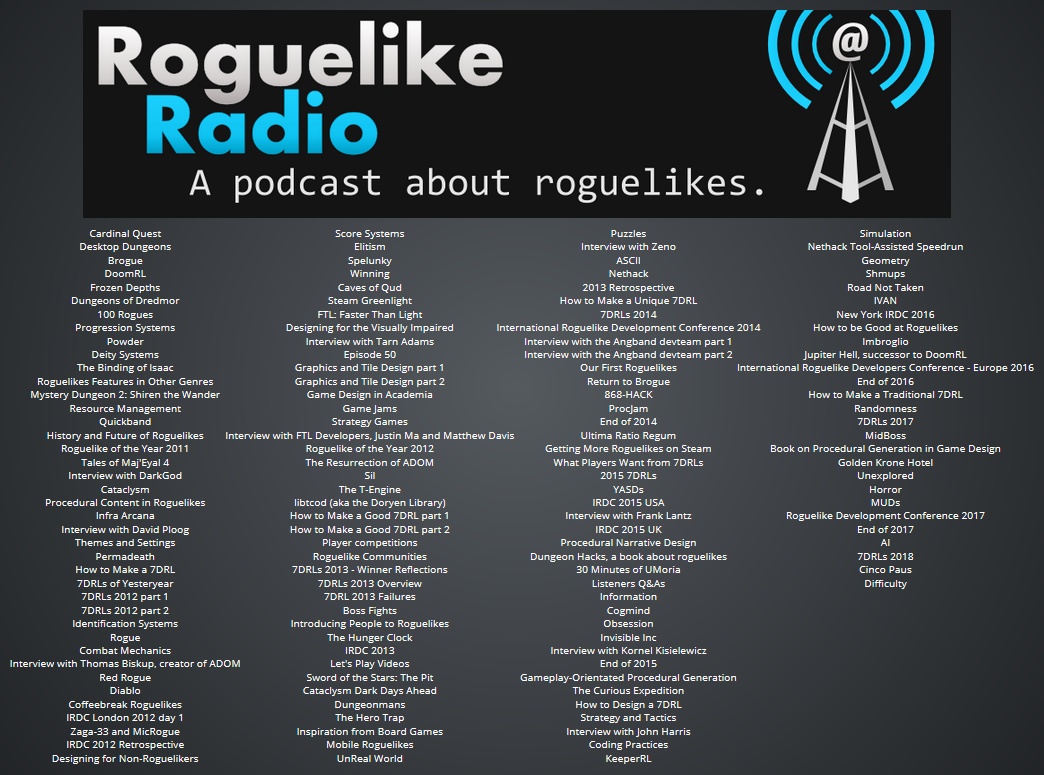
Список тем Roguelike Radio (2011-2018).
Прослушайте все эти темы! В них также содержатся интервью с большим количеством разработчиков roguelike. Даже я участвую в двух или трёх, в том числе и там, где я говорю, что Cogmind, возможно, будет завершён в 2016 году или около того (Ха-ха-ха) (Скоро наступит 2019, но не требуйте от меня невозможного — всё больше игроков находит его и я постоянно добавляю в проект новый контент и функции, просто потому что могу.)
Также вы увидите, что во множестве подкастов рассказывается о 7DRL, которое является довольно важным для сообщества мероприятием.
Итак, мы получили довольно большой объём знаний, но при разработке игр в целом существует ещё одна важная сторона — ресурсы…
Ресурсы
Вот наши ресурсы:
Ресурсы при разработке Roguelike
Если серьёзно, то символы ASCII во многих случаях — это чудесное решение, и они очень упрощают добавление нового контента. При правильном сочетании цветов переднего плана и фона можно создать по-настоящему красивые игры.
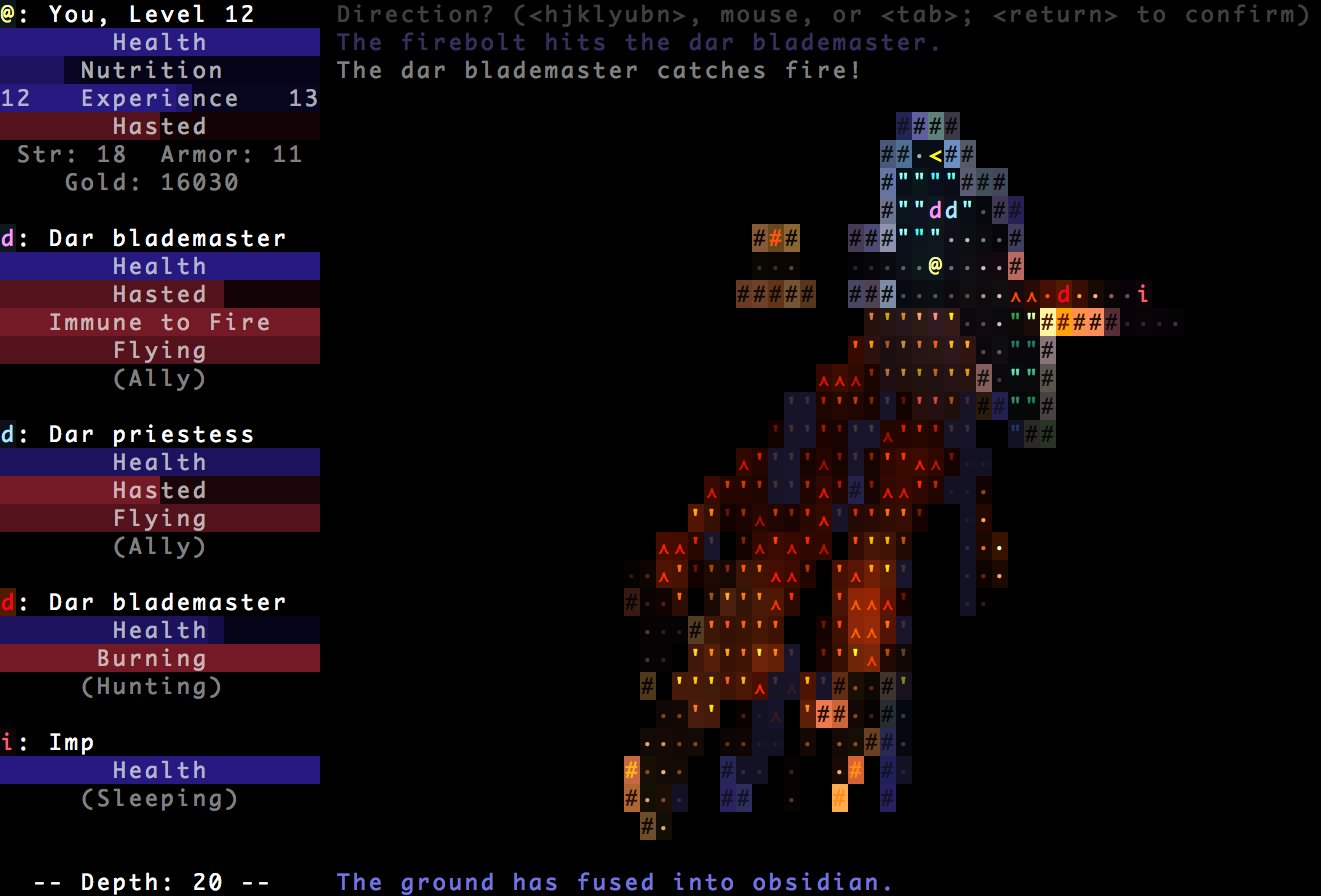
Brogue!
Если вы знакомы с roguelike, то могли уже узнать Brogue, но за долгие годы я собрал большую коллекцию вдохновляющих ASCII-скриншотов, и хочу поделиться ею, чтобы вы осознали возможности:
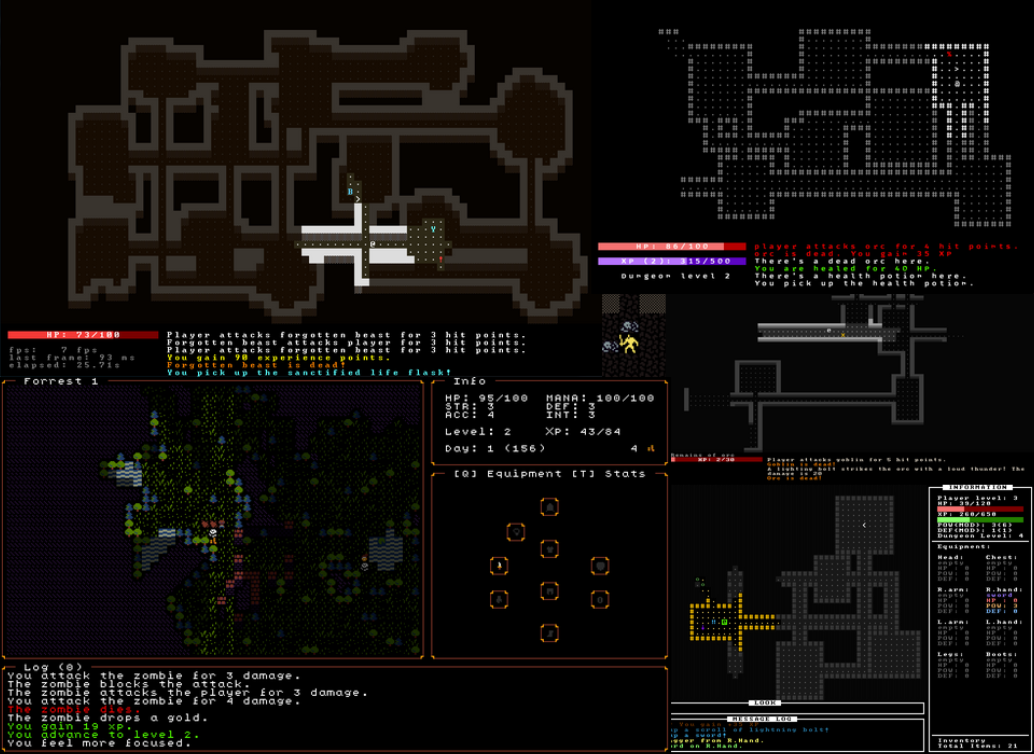
22 изображений из различных ASCII-roguelike. (И чтобы пресечь неизбежные вопросы: названия этих проектов можно найти здесь.)
Вариативность просто поражает — огромное пространство для реализации уникальных стилей!
При работе с монохромными тайлсетами в формате ASCII или с ASCII-подобным, вы можете использовать мой редактор REXPaint (бонус — к тому он интегрируется с libtcod!). Для меня он стал совершенно незаменимым инструментом, и его использует довольно много других разработчиков для таких вещей, как создание дизайна интерфейса, карт и графики.
![]()
Логотип REXPaint, частичный интерфейс и примеры изображений (учтите, что в записи слишком много цветов и gif искажает палитру).
Тайлсеты
Разумеется, если вы хотите, чтобы в вашу игру сыграло больше людей, или если это поможет вам с проектом, существуют красивые тайлсеты, которые можно использовать хотя бы в качестве временной замены графики. Многие из них бесплатны, или продаются по доступной цене. В боковой панели r/RoguelikeDev есть ссылки на множество тайлсетов.
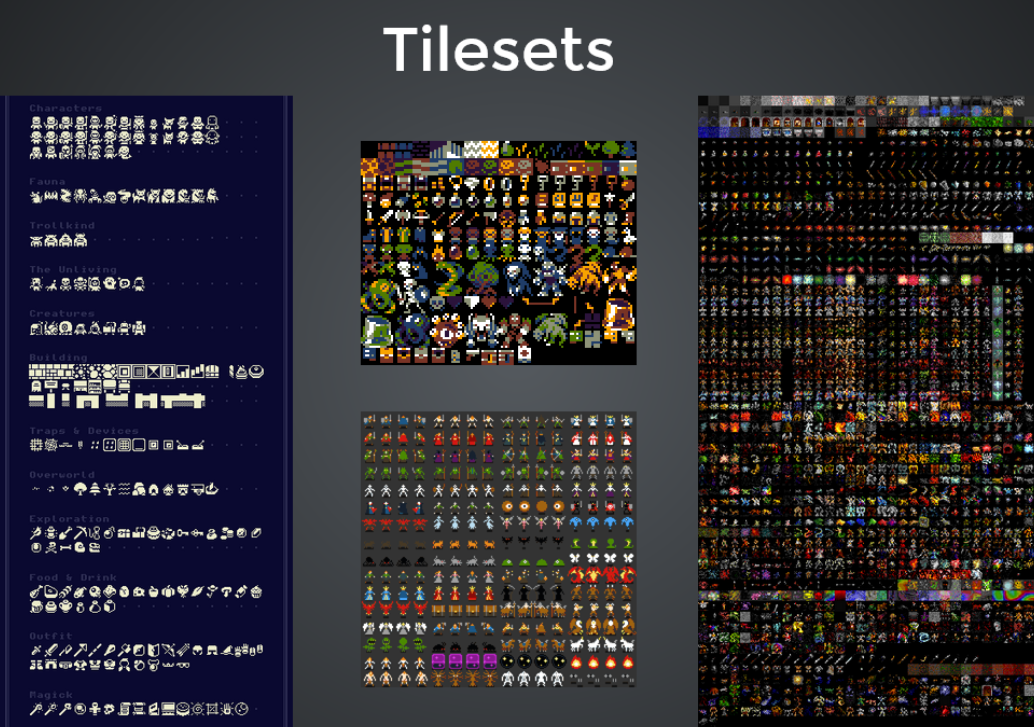
Примеры 2D-тайлсетов для roguelike.
Некоторым людям тайлсеты помогают стимулировать воображение, если оно необходимо в разработке. Кстати, вы могли видеть некоторые из этих тайлов в других roguelike, и это один из их недостатков (графический стиль не будет ассоциироваться именно с вашим проектом), но красивая бесплатная/недорогая графика бесценна для инди-разработчиков.
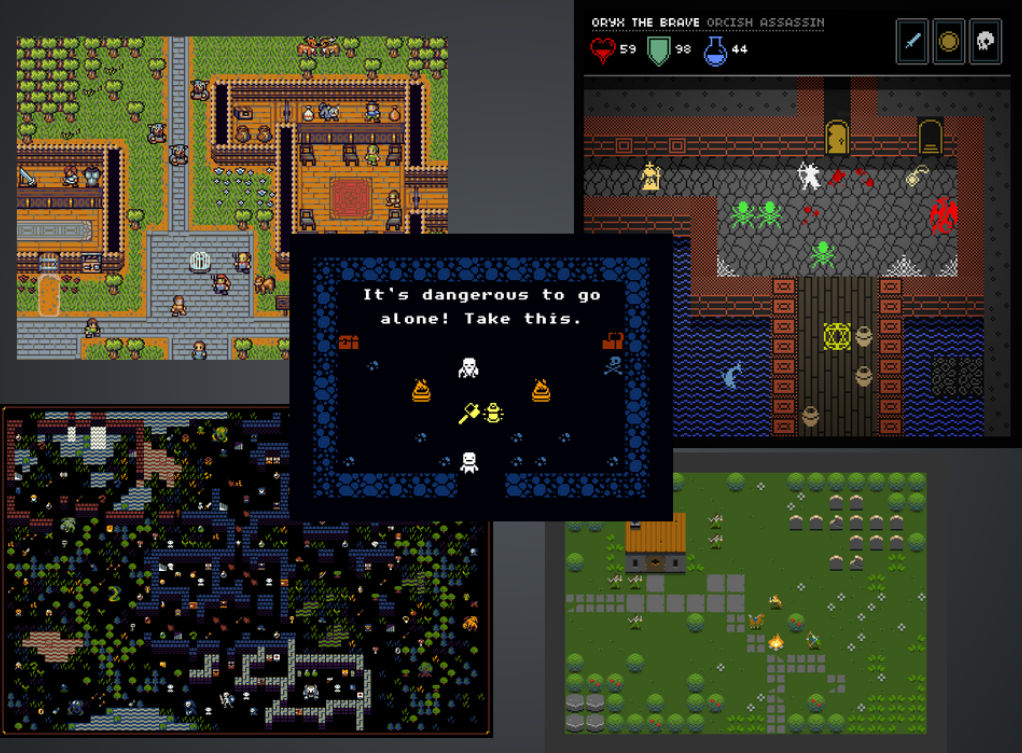
Демо тайлсетов для roguelike.
Хорошие отправные точки
В этом последнем разделе я хотел бы рассказать о том, с чего начинать сам процесс разработки и на чём нужно сосредоточиться. Вам может быть достаточно просто перемещать по экрану маленькую @ и сражаться с другими буквами, или пойти немного дальше, в надежде, что другим людям игра понравится так же, как и вам.
Конечно, вам понадобится какая-нибудь «приманка», чтобы привлечь первоначальное внимание людей, но эта приманка может принимать различные формы…
Мы уже говорили о наличии базовой механики, которая является одной из простейших приманок, потому что она непосредственно привязана к самому геймплею, а в roguelike в первую очередь важен именно геймплей. Все эти permadeath не будут не стоить ничего, если игра не обладает реиграбельностью.
Обычно игры этого жанра не могут похвастаться потрясающими графикой и звуком, однако появляется всё больше roguelike, направившихся в эту сторону, и это замечательно, ведь так они привлекают в жанр больше людей. Поэтому это полезная приманка.
Но я хочу подчеркнуть важность темы, которая является отличной приманкой, но её преимущества используются редко.
Тема
Существуют сотни фэнтезийных бродилок по подземельям (fantasy dungeon crawler), поэтому если вы хотите, чтобы ваш проект выделялся из толпы, то стоит выбрать любую уникальную тему, которая не является fantasy dungeon crawler.

Мозговой штурм возможных тем для roguelike.
Roguelike обычно базируются на хорошем/интересном геймплее, однако наличие уникальной темы не только делает уникальным весь геймплей, но и даёт источник, из которого можно получать совершенно новые механики. (Уникальная тема практически вынуждает вас пойти таким путём.) В частности, исторические и мифологические темы предоставляют огромный объём материала для исследований и экспериментов. Похоже, людям всегда хотелось больше научно-фантастических roguelike, чем у нас есть. Несмотря на её широту, это довольно неисследованная группа тем, особенно по сравнению с объёмом научно-фантастического контента в других жанрах.
За последние годы появилось несколько действительно уникальных тем.
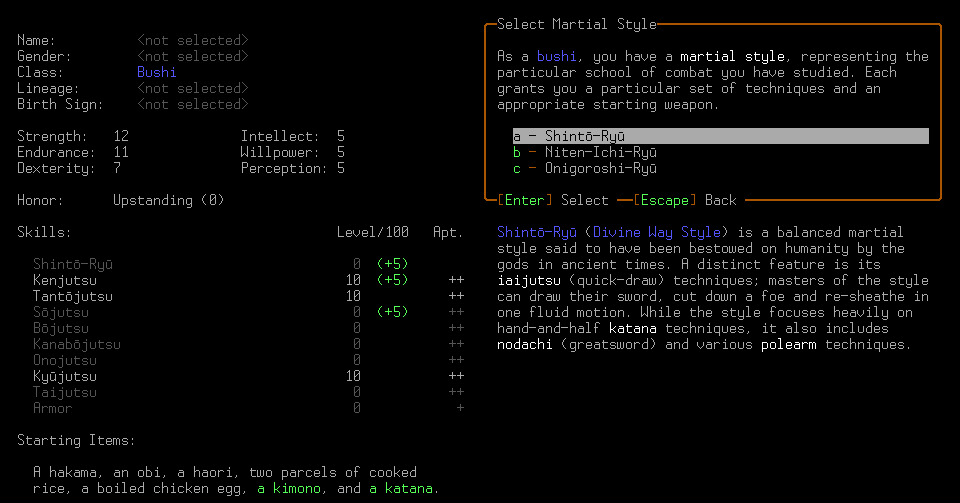
MakaiRL — это отличный концепт, основанный на японской мифологии и исторической фэнтези. Хотел бы я в неё поиграть!
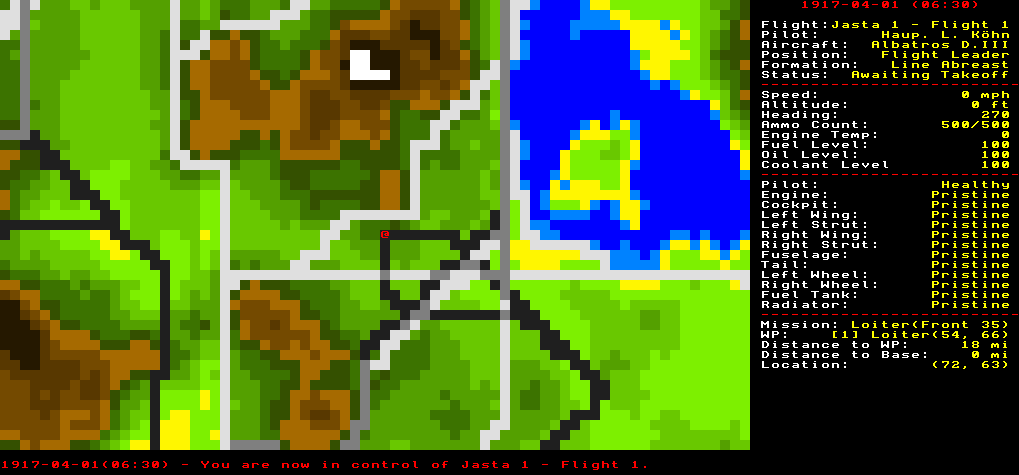
Skies of Bloody April — это roguelike, посвящённый самолётным дуэлям Первой мировой войны.
Такие темы обращают на себя внимание, особенно когда достигнут полностью играбельного состояния (оба показанных выше примера находятся на ранней стадии разработки).
Примером уже завершённой игры является Lone Spelunker, где игрок исследует естественные и иногда опасные чудеса подземных пещер.

Lone Spelunker
Среди тем, спрос на которые ещё не удовлетворён, в сообществе roguelike довольно часто упоминаются пираты. Существует одна игра, Pirate Rogue, одна из самых популярных тем в сабреддите Roguelikes.
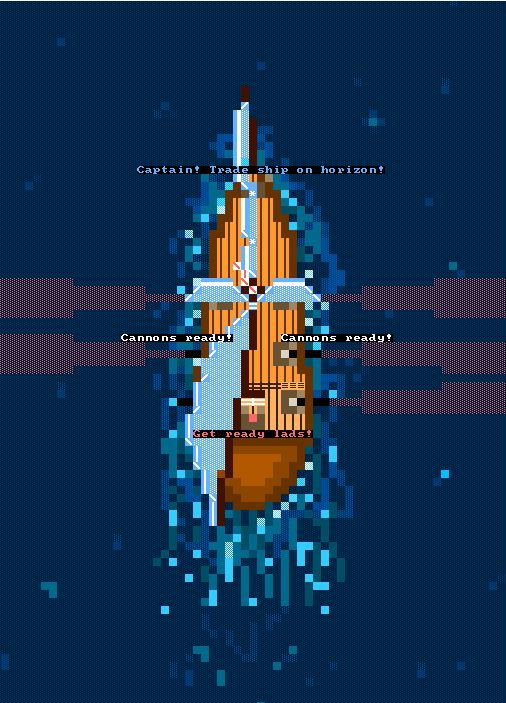
Концепт-арт Pirate Rogue.
Но Pirate Rogue — это просто концепт, который разработчик прототипировали, после чего приостановил проект, потому что осознал, что для создания игры его мечты ему немного не хватает опыта. Однако спрос на эту тему очевидно не удовлетворён.
Кроме того, постоянно всплывают просьбы о супергероях и киберпанке. Кто-нибудь, займитесь ими.
В сабреддите RoguelikeDev появляется множество отличных историй, а также потрясающих проектов, как новых, так и с долговременных. Но в особенности я хотел бы поделиться одной историей, которую я считаю очень вдохновляющей — историю Armoured Commander.
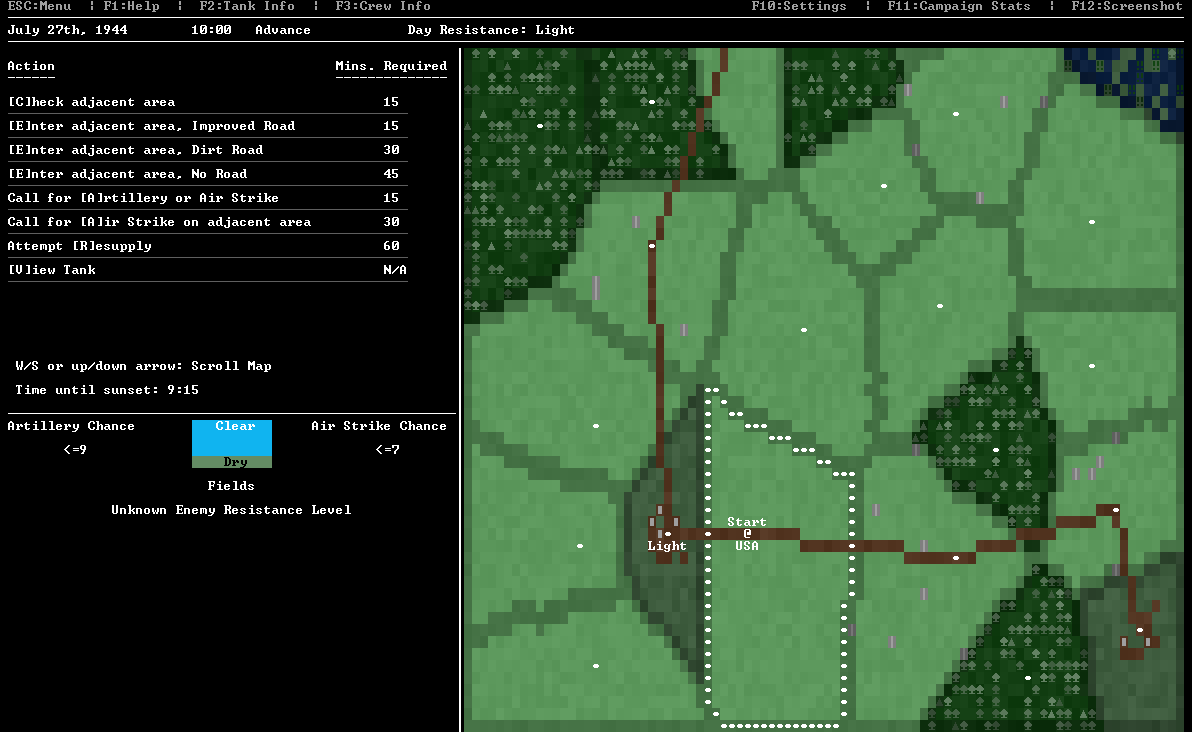
Armoured Commander
Игрок управляет одним танком Второй мировой войны, внутри которого он может командовать несколькими членами экипажа в наземных кампаниях. Разработчик игры Грегори Скотт начинал этот проект, имея небольшой опыт программирования, и занялся им в процессе изучения туториала libtcod.
Год спустя игра была завершена и её обзор сделал Rock, Paper, Shotgun.

Armoured Commander в Rock, Paper, Shotgun.
Вот пример того, как не имея опыта в разработке игр, можно за один год создать игру, появившуюся на популярнейшем игровом сайте. Разумеется, в таких вещах не обойтись без удачи, но наличие уникальной темы и её продвижение гарантирует, что об игре узнает больше людей.
Поэтому выберите уникальную тему и реализуйте её. Так вы заинтересуете больше людей, что в свою очередь поддержит вашу мотивацию.
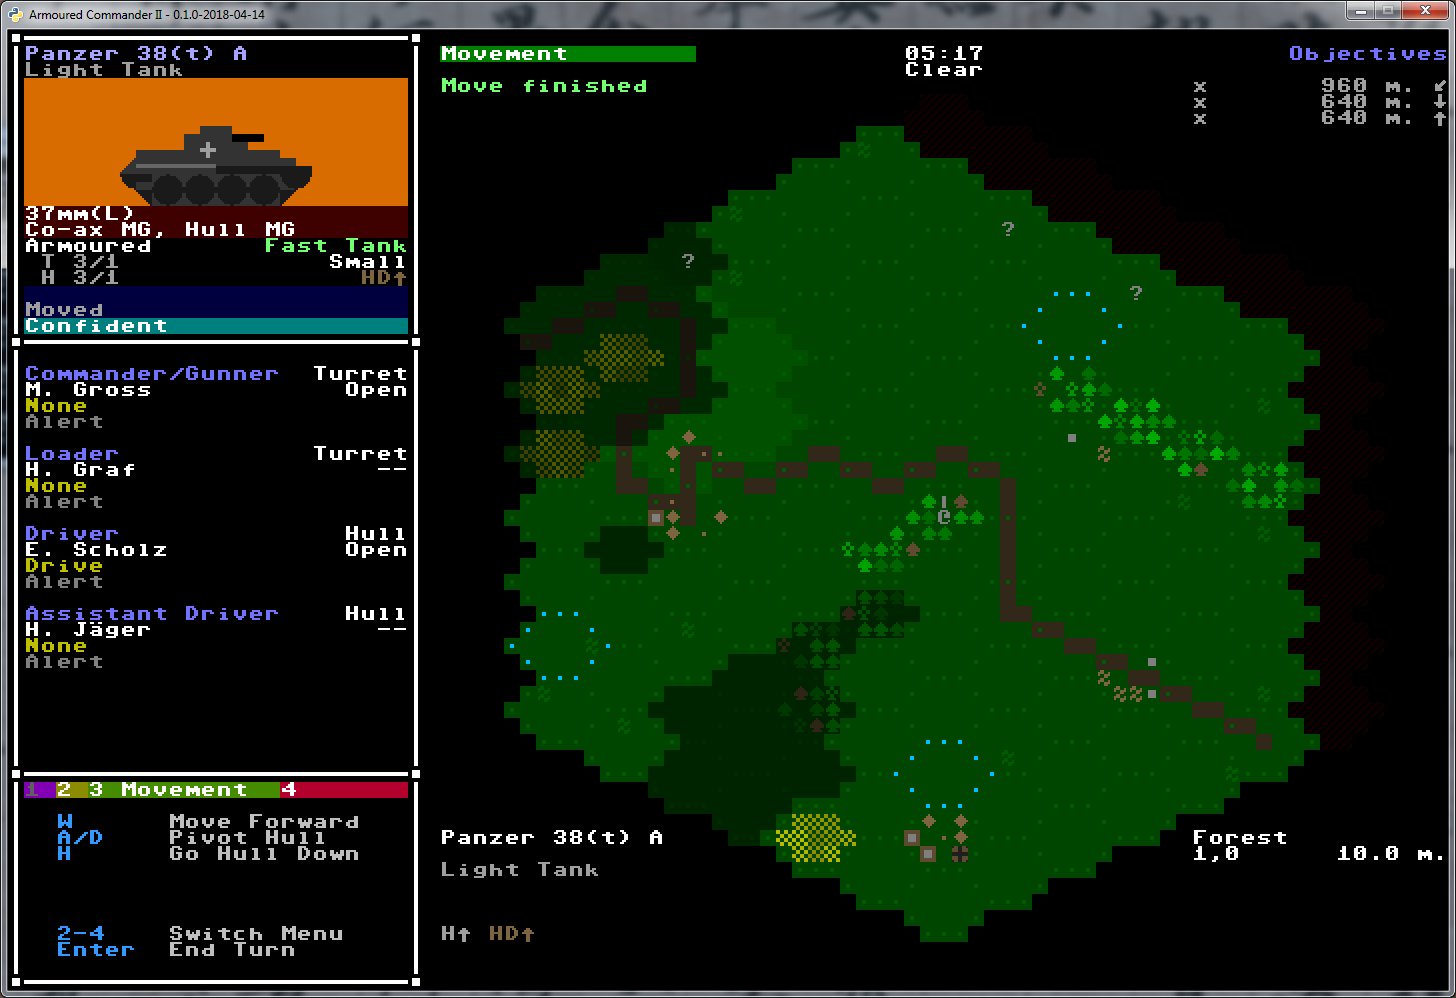
Сейчас Грегори работает над сиквелом: ArmCom 2.
Помните, что ваша игра необязательно должна быть только roguelike. Здесь я немного покощунствую, сказав, что не стоит ограничиваться определениями. Часто мы видим людей, придумывающих идею игры, которую они хотят создать, но слишком беспокоящихся о том, все ли сочтут её roguelike. На самом деле это неважно, потому что есть столько же жанров, сколько и игроков! Если игра целостна и следует вашему собственному плану, то вы идёте верным путём. (Но не волнуйтесь, в сабреддите Roguelikes всё равно еженедельно будут возникать споры, является ли ваша игра roguelike xD)
XRL
Теперь совершим разворот на 180 градусов. Можно выбрать другой подход, который имеет собственные преимущества — XRL. Такие игры основаны на уже существующих франшизах, и экономят вам много усилий по планированию и дизайну, которые можно направить на создание игры, потому что чаще всего на многие вопросы есть готовый ответ. Максимум, что вам нужно сделать — адаптировать их под формулы roguelike. Работая над XRL, вы можете сосредоточиться на реализации и других основах, не экспериментируя с чем-то новым.
Этот путь выбирает множество разработчиков. Какое-то время назад я создал список примеров XRL на RogueBasin. Все описываемые ниже roguelike основаны на уже существующей интеллектуальной собственности (IP).

Неполный список XRL.
Лично я считаю, что это хороший способ начать разработку первой игры.
Вероятно, самой знаменитой XRL является DoomRL. После получения письма-предупреждения от Zenimax за использование торговой марки теперь она официально называется просто DRL.
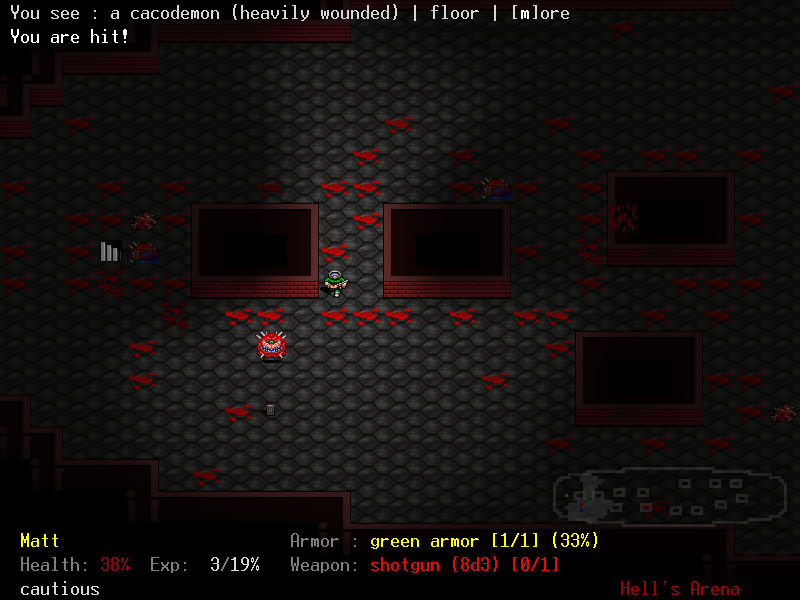
DoomRL / DRL
Примечание: учтите, что нужно быть аккуратными с особо любящими судебные тяжбы компаниями, например Nintendo (крайне не рекомендую браться за roguelike по Pokemon!), но в целом roguelike — очень нишевый жанр, незаметный для правообладателей, так что для хобби-проекта XRL вполне подойдёт. Только те, которые получают значительную известность, могут вызывать проблемы, но к этому моменту вы или можете ребрендировать игру своим собственным контентом, или будете обладать достаточным опытом, чтобы начать всё с нуля. Обычно XRL являются короткоживущими мелкомасштабными учебными проектами, однако множество XRL находится в разработке уже долгое время. (Как бы то ни было, забудьте о любых попытках заработать на чужой интеллектуальной собственности!)
Сейчас разработчик DoomRL Корнел Киселевич активно работает над преемником DoomRL под названием Jupiter Hell. Отличный пример того, как с помощью XRL можно собрать огромную базу фанатов, а затем использовать их поддержку для создания ещё более масштабной коммерческой roguelike.
Ещё раньше Корнел создал две другие XRL: AliensRL (одна из первых roguelike, в которые я играл) и DiabloRL.
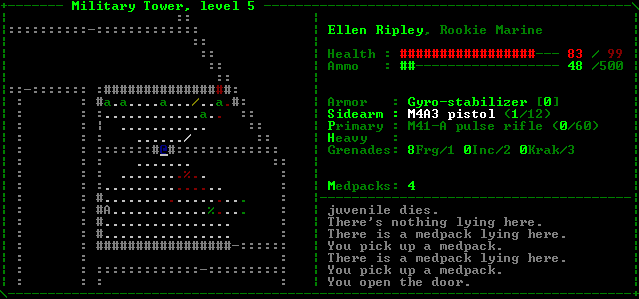
AliensRL

DiabloRL
Продуктивный разработчик roguelike Slashie создал roguelike на основе Castlevania, Metroid, Zelda, Star Wars, Megaman, и вероятно ещё десятка франшиз, о которых нам не рассказывал 
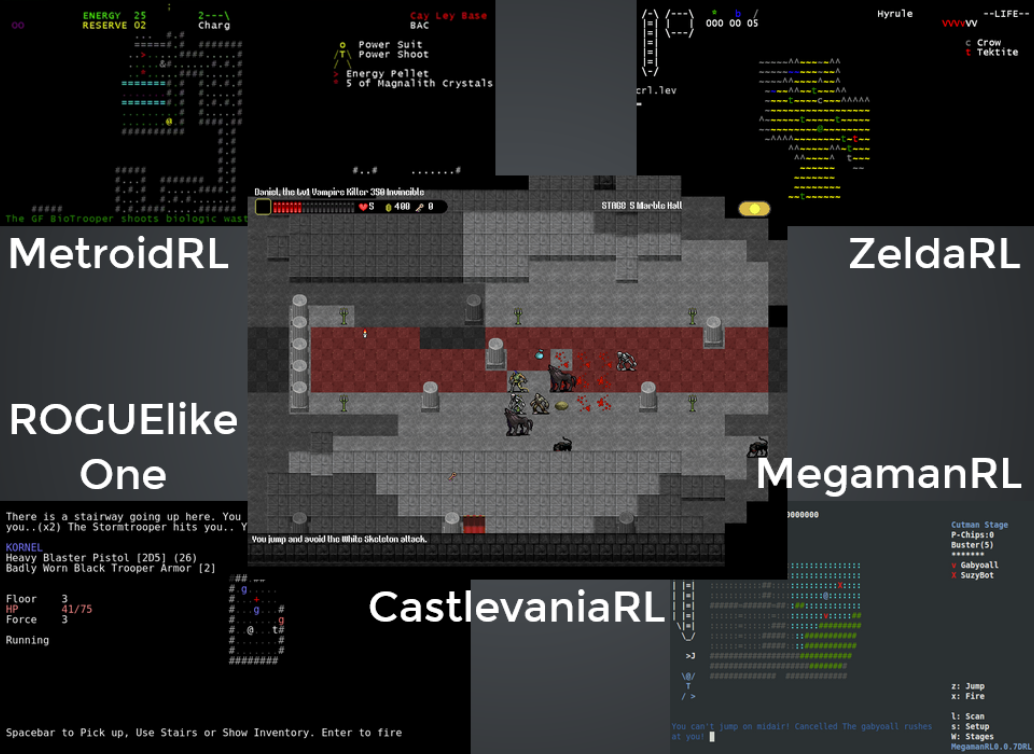
Коллекция XRL Slashie.
Даже мой собственный полу-roguelike проект XCOMRL относится к этой категории. Он основан на первой UFO Defense, и начинался с IP и механик, которые были мне хорошо знакомы и любимы мной.
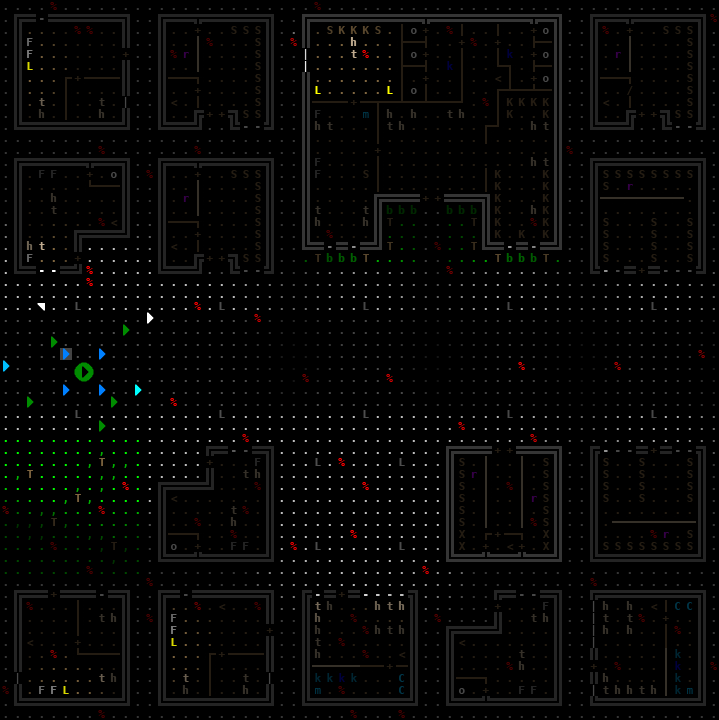
X@COM
На этом фундаменте я мог развиваться дальше и добавлять множество своих механик и контента, экспериментируя поверх прочного основания.
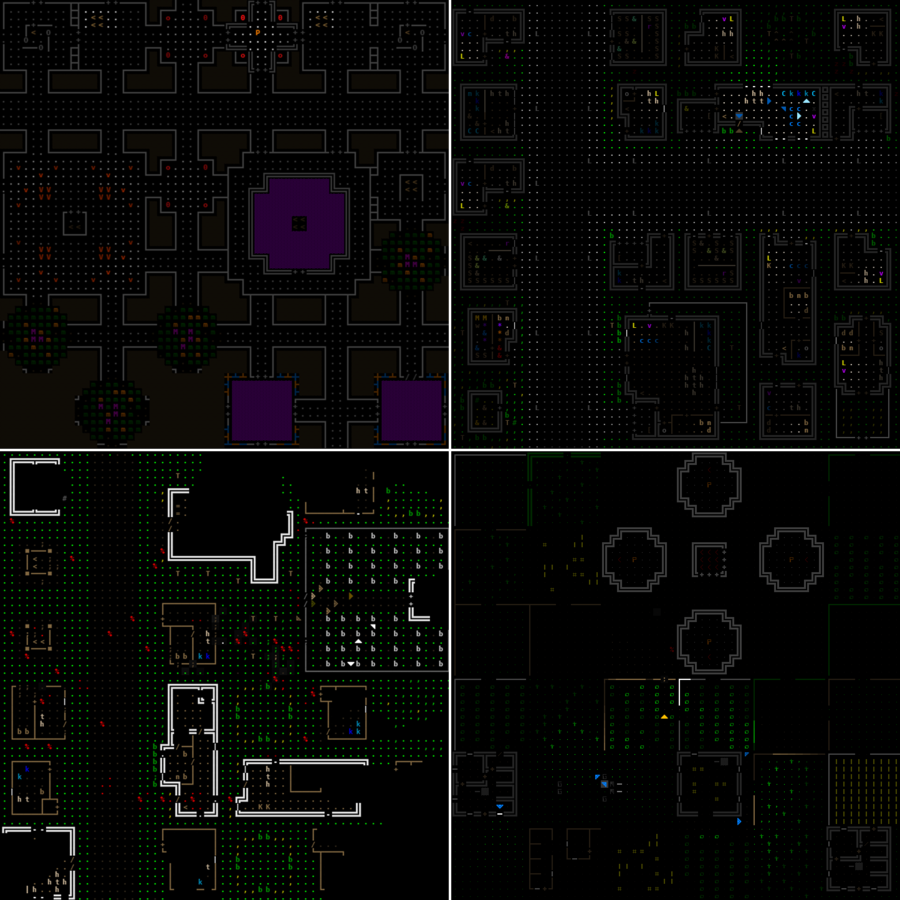
Модифицированные карты X@COM, часть из которых является переходом во вселенную, совершенно отличающуюся от X-Com.
Ещё одно серьёзное преимущество XRL заключается в том, что у вас сразу же появляются фанаты — другие люди, которым нравятся roguelike и выбранная вами IP. И это очень помогает мотивации, потому что всегда найдутся поддерживающие вас люди. Множество моих сторонников сегодня — это те же люди, которые следили за моей работой над X@COM.
Советы на долгую перспективу
Вот несколько советов, которые помогут вам не сдаваться в работе над долгим проектом…
Выпускайте релизы сразу и часто
«Быстрые и частые релизы» — мантра разработки roguelike. Вам нужно быстро достичь минимально играбельного состояния игры, то есть собрать прототип. Благодаря этому вам, скорее всего, удастся получить хорошую обратную связь, которая очень полезна на перспективу.
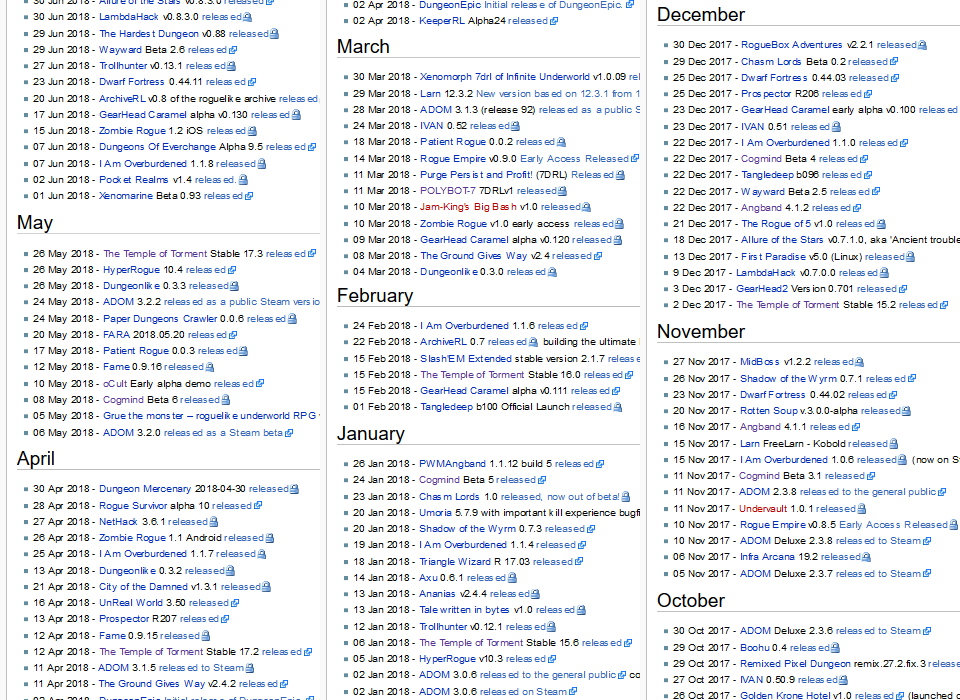
История объявления релизов на RogueBasin.
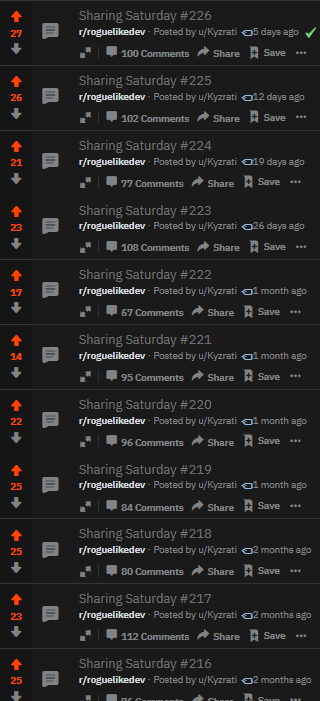
Sharing Saturday
Даже до первого релиза, имея только концепт, или уже после него, попробуйте поучаствовать в наших еженедельных совместных постах в сабреддите RoguelikeDev.
Для некоторых это хороший способ самодисциплины, а также отличная возможность поделиться имеющимся. Можете в буквальном смысле просто написать о том, что на этой неделе вас завалило работой и вы почти ничего не сделали, а в процессе общения найти друзей, у которых те же проблемы. Или можете рассказать о крутой новой функции, которую вы добавили или обдумываете. Или поделиться забавными багами. Да на самом деле можно делать что угодно! Это отличное сообщество.
Приходите и делитесь с нами!
Ведите блог
Кроме Sharing Saturday, неплохо также сосредоточить всю информацию о разработке вашего проекта в одном месте. В доступном всем месте. На самом деле блогинг имеет множество преимуществ; вот список самых важных:
- он позволяет привести мысли в порядок
- изучить свою работу под другим углом
- документировать процесс
- создать полезные справочные материалы на перспективу
- получить обратную связь
- построить сообщество вокруг проекта
Я уже какое-то время занимаюсь этим и нахожу блог невероятно полезным. Ниже представлен список тем, которые я раскрывал в своём блоге на протяжении нескольких лет:

Пять лет блогинга Grid Sage Games.
Возможно, там вы найдёте полезную информацию, которая дожидается вас
Важна доступность
Доступность — это важно. Традиционно это не относилось к roguelike, но сегодня, если приложить усилия, мы можем достучаться до гораздо большей аудитории. Под усилиями я подразумеваю достаточную документацию, туториал, полную поддержку мыши, тайлсет и т.д…
Чтобы понять, насколько ценными могут быть поддержка мыши и тайлсет, посмотрите на статистику игроков из Cogmind:
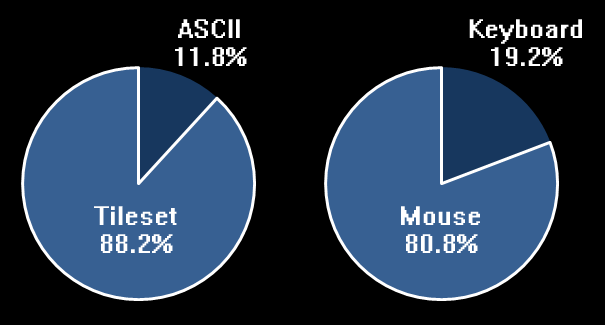
Предпочтения игроков в Cogmind: преимущество у мыши и тайлов!
Учтите, что некоторые аспекты доступности игры необходимо учесть в дизайне с самого начала, но для первого roguelike этим заниматься не стоит. Достаточно начать с ASCII и клавиатурного управления.
Начало
Это конец моей статьи и начало вашей отличной новой roguelike.
Приступайте!
Итак, я решил сделать игру-рогалик(RPG) на Python практически с нуля! Решение принято после того, как я обшарил весь интернет в поисках open-source проекта или мануала, на котором можно основать свою игру. Нашлись либо огромные проекты с миллионом файлов и кода, либо еле-рабочие игры, где можно только ходить по карте. В этом блоге я, шаг за шагом, создам полноценную игру: с вещами, инвентарем, NPC, монстрами и прочими элементами любой нормальной RPG-игры.
Нам понадобятся:
- Python 3
- PyGame (pip install pygame)
- Скачать и разархивировать архив
Начнём с простейшей PyGame-игры, с минимальными функциями рисования карты и ходьбы:
MinimalPyGame.zip — скачайте этот .zip-файл разархивируйте куда угодно.
Там всего 1 каталог и 3 файла:
- /assets/ каталог → картинки с тайлами, объектами и персонажами.
- /utils.py → функции разрезания картинок на отдельные объекты и кадры для анимаций.
- /models.py → классы для работы игры.
- /roguelike.py → сама игра, с минимальным простеньким кодом.
Эта игра сделана под Python 2.7, но мы будем работать с Python 3 версией, поэтому для начала, исправим две строки в файле utils.py:
except pygame.error, message:

except pygame.error as message:
Найдите все строки, соответствующие первой строке в указанном выше блоке кода. Замените все эти строки на нижний вариант, который выделен чёрным фоном.
Всё, после замены запятой на as, игра будет запускаться под Python 3 без ошибок.
Далее в уроках, внутри блоков кода, я таким же образом буду выделять чёрным фоном те строки, которые нужно добавить или изменить.
Краткое описание работы кода игры:
В самом начале файла roguelike.py мы видим две матрицы клеток для карты игры:
tileData → это стены, которые непроходимы для персонажа(являются коллизиями). Стены находятся в тех клетках, где указано ‘W’.
decorationData → декораций, на данный момент там есть только «ceiling» — «потолок». Позиции декораций в матрице клеток обозначены символами ‘c’.
Пустые клетки обозначены пробелом ‘ ‘ → это пол, по которому ходит персонаж.
Далее идет функция
def loadTextures():
...
В этой функции загружаются картинки из каталога /assets/ и режутся на тайлы(клетки) с указанным размером в пикселях. Например, множество тайлов для пола помещается в список floorTextures[], путем вырезания квадратиков 16×16 пикселей из tileset-картинки ‘assets/floor.png‘
Потом функция
def loadLevel(tileData, decorationData, outputLevel):
...
В этой функции создаются объекты классов(объявленных в models.py) при помощи матриц decorationData[y][x] и tileData[y][x], описанных ранее. Причем для заполнения поля клеточек(тайлов) игры, каждый раз используются случайные тайлы, выбранные из картинок-asset’ов при помощи функции choice(…), которая выбирает случайный тайл из созданного ранее множества.
Ну а затем главная функция
def main():
...
В которой устанавливается размер окна игры, заголовок, и начинается главный бесконечный цикл игры
while True:
...
Каждый раз выполнения этого цикла — это кадр игры.
Первая строка clock.tick(24) делает так, чтобы FPS(количество кадров в секунду) было не более 24 в секунду.
Затем проверяются нажатые кнопки на клавиатуре (K_RIGHT, K_LEFT, K_DOWN, K_ESCAPE…), чтобы менять координаты персонажа на каждом кадре бесконечного цикла, делая возможным перемещение персонажа стрелками на клаве.
Далее идет цикл, проходящий по всем координатам x,y игровой карты
for y in range(0, 16):
    for x in range(0, 16):
...
в нём функция screen.blit(…) накладывает картинку персонажа, а также созданные тайлы для игровой карты на поверхность screen(класс pygame.Surface). Всё это завершается функцией pygame.display.flip(), которая наконец выводит созданную поверхность screen в окно игры на текущем кадре.
В существующем коде уже реализованы коллизии(столкновения) персонажа со стенами, но криво… В будущих уроках мы это исправим.
Вносим первые изменения в игру.
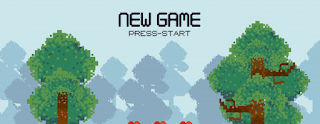
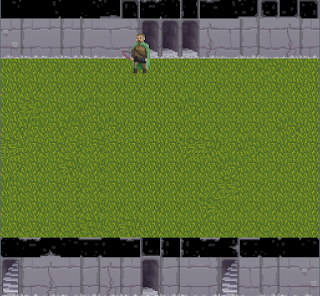
Для начала изменим внешний вид персонажа, сменив противного зеленого гоблина на лучника в плаще. Для этого в файле roguelike.py меняем ‘goblin’ на ‘ranger’
...

from models import Level, Tile, Entity

playerType = 'ranger'
gameScale = 2
tileData = [

...
В оригинальном архиве игры уже есть заранее готовые картинки с spritesheet’ами персонажей в каталоге /assets: cleric.png, orc.png, skeleton.png, warrior.png, wizard.png и др.
Существующий код сам подцепит нужный файл /assets/rogue.png, и у нас появится лучник вместо зеленого гоблина.
Теперь сменим унылый серый пол на зеленую траву. Tileset-картинка для тайлов пола, которая режется на тайлы функцией loadSpritesheet(…), называется ‘assets/floor.png’. Чтобы сменить пол на траву, нужно перерисовать эту картинку, что я уже заранее сделал в Фотошопе.
Переименуйте её в floor.png и положите в /assets/ игры, заменив существующий файл с таким же именем. В результате серый пол сменится на траву.
Ну и напоследок, уберем нелепый черный столб внизу экрана игры, который образован выделенными ниже символами ‘W’ и ‘c’ в массивах decorationData и tileData:
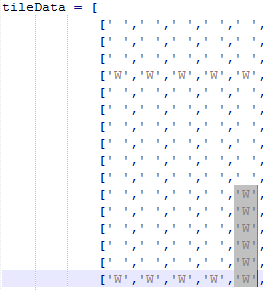
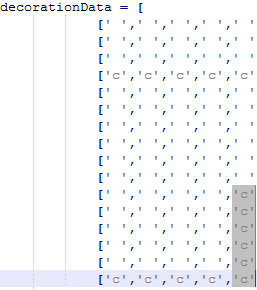
заменяем ‘W’ и ‘c’, поставив на их места пробелы ‘ ‘
В результате должен получиться лучник на траве, который может ходить стрелками на клавиатуре. И карта без чёрного столба слева внизу:
Посмотреть и скачать отдельные файлы этого урока можно в Github-каталоге.
Архив .zip со всеми рабочими файлами: LESSON-1.BEGIN.zip
Если что-то не ясно, пишите и спрашивайте в комментариях к посту в Блоге или в Discord, постараюсь всем ответить.
Комментарии в этом Блоге без регистрации, можно писать анонимно.
Welcome to the Complete Roguelike Tutorial!
About this tutorial
The goal of this tutorial is to have a one-stop-shop for most of the info you need on how to build a Roguelike game from scratch. We hope you find it useful! We’ll start with some quick Q&A. If you already know about Python, SDL2, pydl2, pysdl2e and/or is only interested in the implementation you can skip to Complete Roguelike Tutorial — Part 1.
Why Python?
Most people familiar with this language will tell you it’s fun! Python aims to be simple but powerful, and very accessible to beginners. This tutorial would probably be much harder without it. We insist that you install/use Python 3.x and go through at least the first parts of the Python Tutorial. This tutorial will be much easier if you’ve experimented with the language first. Remember that the Python Library Reference is your friend – the standard library has everything you might need and when programming you should be ready to search it for help on any unknown function you might encounter.
If you choose to use earlier versions of Python 3, you may encounter problems you need to overcome. File an issue_ about it and we’ll work to fix tutorial or pysd2le.
If you choose to use Python 2, however, be aware this tutorial is not compatible with it, and there are no plans to support it.
Why SDL2?
Simple DirectMedia Layer is a cross-platform development library designed to provide low level access to audio, keyboard, mouse, joystick, and graphics hardware via OpenGL and Direct3D. It is used by video playback software, emulators, and popular games including Valve‘s award winning catalog and many Humble Bundle games.
SDL officially supports Windows, Mac OS X, Linux, iOS, and Android. Support for other platforms may be found in the source code.
SDL is written in C, works natively with C++, and there are bindings available for several other languages, including C# and Python.
SDL 2.0 is distributed under the zlib license. This license allows you to use SDL `freely in any software`_.
SDL is extensively used in the industry in both large and small projects: MobyGames listed 141 games using SDL in 2017; the SDL website itself listed around 700 games in 2012; important commercial examples are Angry Birds or `Unreal Tournament`_; Open Source examples are OpenTTD, The Battle for Wesnoth or Freeciv; the PC game Homeworld was ported to the Pandora handheld and Jagged Alliance 2 to Android via SDL; applications like the emulators DOSBox_, VisualBoyAdvance and ZSNES all use SDL; the Source Engine (on its Linux and Mac versions) and the CryEngine uses SDL.
A common misconception is that SDL is a game engine, but this is not true. However, the library is well-suited for building an engine on top of it. PySDL2 is a python wrapper for it, with much added functionalities. PySDL2e extends it, adding even functionalities that we will require to build our roguelike.
What are PySDL2 and PySDL2e?
PySDL2 is a wrapper around the SDL2 library. It has no licensing restrictions, nor does it rely on C code, but uses ctypes instead (considering that ctypes is part of Python’s standard library, all you need is a python installation and SDL2 runtime binaries.
Note
In this tutorial we’re using SDL2 version 2.0.5.
Other versions could work, but this tutorial do not guarantee compatibility with other versions — you’re on your own for it.
PySDL2e is built on top of PySDL2, providing some extra functionalities that will make our journey through this tutorial a smooth one.
Complete Roguelike Tutorial — Part 0
Python
If you haven’t already done so, download and install Python 3.5. Any version of Python 3.x up to 3.5.x should be fine, but its not guaranteed to work.
PySDL2e is currently not working with Python 3.6.
It is advisable to go with those versions for compatibility’s sake.
PySDL2
The easiest way to install PySDL2 is using pip:
python -m pip install https://github.com/LukeMS/py-sdl2/archive/master.zip
If you would like another form of installation you can look for it at PySDL2e instrunctions,
SDL2
Download the latest release of SDL2 and extract it somewhere. Be warned that both Python and SDL2 must either be both 32 bit, or both 64 bit. If you get dll loading errors, getting this wrong is the most likely cause.
See this page on PySDL2 documentation and choose a way to make you library visible for PySDL2e.
Choice of code editor
If you’re just starting out with Python, you’ll find that many Python coders just use a simple editor and run their scripts from a console to see any debugging output. Most Python coders don’t feel the need to use a fancy IDE! On Windows, Notepad++ is an excellent bet; most Linux programmers already have an editor of choice. Almost all editors allow you to configure shortcut keys (like F5 for instance) to quickly run the script you’re editing, without having to switch to a console.
Complete Roguelike Tutorial — Part 1
Setting up your project
Create your project’s folder. Inside it, create an empty files named ‘’rl.py’‘. It’ll make the tutorial easier to just use the same names for now, and you can always rename it later.
+-roguelike-tutorial/
  |
  +-rl.py
If you chose to keep the SDL2 library at the project folder, it should now look like this:
+-roguelike-tutorial/
  |
  +-rl.py
  |
  +-SDL2-2.0.5.dll or libSDL2-2.0.5.so
Making sure everything is running
Let’s test PySDL2e’s scene manager and an empty scene. This is just an example, when we implement our own scene we’kk go into more details.
"""Shows a blank (green) scene."""

from sdl2.ext import manager


# the window's background color (RGBA, from 0-255)
WINDOW_COLOR = (0, 255, 0, 255)


if __name__ == '__main__':
    m = manager.Manager(window_color=WINDOW_COLOR)
    m.set_scene(manager.SceneBase)
    m.run()
If it runs and looks green, we’re ready to start!
Showing the @ on screen
Our game is going to be based on PySDL2e’s scene manager.
A scene manager keeps track of the scenes in a game, allowing us to switch between them. It provides a centralized place to load and unload the scenes, keeping track of which one is active and handling the unloading of inactive scenes.
Some possible scenes for a simple game would be: a title scene (or main menu scene); an options scene; a game scene; etc.
First we import the the sdl2.ext.manager module. It contains the Manager and a basic scene (SceneBase) which we will subclass. Our new scene class will be named SceneRogueLike. At its initialization we’ll create the sprite (stored as the attribute at) and move it a little.
"""A roguelike implementation."""

import sdl2
from sdl2.ext import manager


class SceneRogueLike(manager.SceneBase):
    """A roguelike game scene."""

    def __init__(self, **kwargs):
        """Initialization."""
        # create a character using the factory
        self.at = self.factory.get_char_sprite("@")
        # change its position
        self.at.move_ip(self.width // 2, self.height // 2)
To create the sprite we used an instance of sdl2.ext.sprite.SpriteFactory that both the Manager and class SceneBase carries at the attribute factory, for our convenience.
Nothing will be show on the screen, however, until we create our on_update function on the scene. It is the function intended to contain the graphical logic we write. One line of code inside the function should do the trick:
    def on_update(self):
        """Graphical logic."""
        # render it
        self.spriterenderer.render(sprites=self.at)
To render the sprite we’ve used an instance of sdl2.ext.sprite.SpriteRenderSystem that the Manager creates at its initialization. As we’ve seen with the factory, both the Manager and the SceneBase keep it as an attribute.
After instantiating :class:Manager, we pass it our new :class:SceneRoguelike and tell it to run:
if __name__ == '__main__':
    m = manager.Manager()
    m.set_scene(SceneRogueLike)
    m.run()
Ta-da! You’re done. Run that code and see our “@” at the screen. It doesn’t move yet, but we’re getting there.
The source of what we’ve done so far can be found here.
Moving around
That was pretty neat, huh? Now we’re going to move around that @ with the keys!
We’ll create the SceneRogueLike.on_key_release function. At each loop the Manager dispatches events to the active scene, and we’re going to catch some of those:
    def on_key_release(self, event, sym, mod):
        """Called on keyboard input, when a key is **released**."""
        k = self.manager.tile_size
        if sym == sdl2.SDLK_ESCAPE:
            self.quit()
        elif sym == sdl2.SDLK_DOWN:
            self.at.move_ip(0, k)
        elif sym == sdl2.SDLK_UP:
            self.at.move_ip(0, -k)
        elif sym == sdl2.SDLK_RIGHT:
            self.at.move_ip(k, 0)
        elif sym == sdl2.SDLK_LEFT:
            self.at.move_ip(-k, 0)
Done! We having a responsive @.
Complete Roguelike Tutorial — Part 2
Off-screen consoles
-------------------

There's one small thing we need to get out of the way before we can continue. Notice that the drawing functions we called (console_set_default_foreground and console_put_char) have their first argument set to 0, meaning that they draw on the root console. This is the buffer that is shown directly on screen.
It can be useful, however, to have other buffers to store the results of drawing functions without automatically showing them to the player. This is akin to drawing surfaces or buffers in other graphics libraries; but instead of pixels they store characters and colors so you can modify them at will. Some uses of these off-screen consoles include semi-transparency or fading effects and composing GUI panels by blitting them to different portions of the root console. We're going to draw on an off-screen console from now on. The main reason is that not doing so would mean that later on you can't compose different GUI panels as easily, or add certain effects.
First, create a new off-screen console, which for now will occupy the whole screen, but this can be changed later. We'll use a simple name like con because it will be used a lot! You can put this in the initialization, right after console_init_root.

>>>   con = libtcod.console_new(SCREEN_WIDTH, SCREEN_HEIGHT)

Now change the first argument of console_put_char (there are 2 calls to this function) and console_set_default_foreground, from 0 to con. They're now drawing on the new console.
Finally, just before console_flush(), blit the contents of the new console to the root console, to display them. The parameters may look a bit mysterious at first, but they're just saying that the source rectangle has its top-left corner at coordinates (0, 0) and is the same size as the screen; the destination coordinates are (0, 0) as well. Check the documentation on the console_blit function for more details.

>>> libtcod.console_blit(con, 0, 0, SCREEN_WIDTH, SCREEN_HEIGHT, 0, 0, 0)

That was a lot of talk for so little code and no visible change! The next section will surely be much more interesting, as we'll introduce our first dummy NPC among other things. Remember to check back the above documentation page when you get to coding your GUI.
Generalizing
Now that we have the @ walking around, it would be a good idea to step back and think a bit about the design. Dealing directly with the sdl2.ext.sprite.Sprite as our player worked so far, but it can quickly get out of control when you’re defining things such as HP, bonuses, and inventory. We’re going to take the opportunity to generalize a bit.
Now, there can be such a thing as over-generalization, but we’ll try not to fall in that trap. What we’re going to do is define the player as a GameObject, by creating that class. It will act as a container for components and a interface to the sprite (now a component itself).
The neat thing is that the player will just be one instance of the GameObject class – it’s general enough that you can re-use it to define items on the floor, monsters, doors, stairs; anything representable by a character on the screen. Here’s the class, with the initialization, and two common methods move, and render. The code for rendering looks like the one we used on SceneRogueLike, with a few changes.
class GameObject(object):
    """Generic game object.

    It can represent the player, a monster, an item, the stairs, etc.
    """

    def __init__(self, scene, x, y, char, color=None, alpha=None):
        """Initialization.

        Args:
            scene (manager.SceneBase): the game scene.
            x (int): horizontal grid-relative position
            y (int): vertical grid-relative position
            char (str): string of one character to be rendered
            color (tuple): 3 rgb color int values between 0 and 255
            alpha (int): integer between 0 and 255

        Attributes:
           sprite (sdl2.ext.sprite.Sprite): the drawn sprite
        """
        self.scene = scene
        self.sprite = scene.factory.get_char_sprite(
            char, alpha_mod=alpha, color_mod=color)
        self.char = char

        # perform a move to set up the initial position
        tile_size = self.scene.manager.tile_size
        self.sprite.move_ip(x * tile_size, y * tile_size)

    def move(self, dx, dy):
        """Move by the given amount.

        Args:
            dx (int): horizontal grid-relative distance
            dy (int): vertical grid-relative distance
        """
        tile_size = self.scene.manager.tile_size
        self.sprite.move_ip(dx * tile_size, dy * tile_size)

    def render(self):
        """Render the sprite to the buffer."""
        self.sprite.set_alpha_mod()
        self.sprite.set_color_mod()
        self.scene.spriterenderer.render(self.sprite)
Now we create the player as GameObject instead of a Sprite. We’ll also add it to a list that will hold all objects that are in the game. While we’re at it we’ll add a yellow ‘@’ that represents a non-playing character, like in an RPG, just to test it out!
Here is our updated SceneRogueLike.__init__ function:
    def __init__(self, **kwargs):
        """Initialization."""
        # create a character using the factory
        self.player = GameObject(self, 8, 8, '@', (255, 255, 255, 255))
        npc = GameObject(self, 4, 4, '@', (255, 255, 0, 255))
        self.objects = [self.player, npc]
And here is our modified SceneRogueLike.on_update function:
    def on_update(self):
        """Graphical logic."""
        # render it
        [obj.render() for obj in self.objects]
You can see the whole source code of our game below, if you want, or jump to Complete Roguelike Tutorial — Part 3.
Source code up to this part
"""A roguelike implementation."""

import sdl2
from sdl2.ext import manager


class SceneRogueLike(manager.SceneBase):
    """A roguelike game scene."""

    def __init__(self, **kwargs):
        """Initialization."""
        # create a character using the factory
        self.player = GameObject(self, 8, 8, '@', (255, 255, 255, 255))
        npc = GameObject(self, 4, 4, '@', (255, 255, 0, 255))
        self.objects = [self.player, npc]

    def on_update(self):
        """Graphical logic."""
        # render it
        [obj.render() for obj in self.objects]

    def on_key_release(self, event, sym, mod):
        """Called on keyboard input, when a key is **released**."""
        if sym == sdl2.SDLK_ESCAPE:
            self.quit()
        elif sym == sdl2.SDLK_DOWN:
            self.player.move(0, 1)
        elif sym == sdl2.SDLK_UP:
            self.player.move(0, -1)
        elif sym == sdl2.SDLK_RIGHT:
            self.player.move(1, 0)
        elif sym == sdl2.SDLK_LEFT:
            self.player.move(-1, 0)


class GameObject(object):
    """Generic game object.

    It can represent the player, a monster, an item, the stairs, etc.
    """

    def __init__(self, scene, x, y, char, color=None, alpha=None):
        """Initialization.

        Args:
            scene (manager.SceneBase): the game scene.
            x (int): horizontal grid-relative position
            y (int): vertical grid-relative position
            char (str): string of one character to be rendered
            color (tuple): 3 rgb color int values between 0 and 255
            alpha (int): integer between 0 and 255

        Attributes:
           sprite (sdl2.ext.sprite.Sprite): the drawn sprite
        """
        self.scene = scene
        self.sprite = scene.factory.get_char_sprite(
            char, alpha_mod=alpha, color_mod=color)
        self.char = char

        # perform a move to set up the initial position
        tile_size = self.scene.manager.tile_size
        self.sprite.move_ip(x * tile_size, y * tile_size)

    def move(self, dx, dy):
        """Move by the given amount.

        Args:
            dx (int): horizontal grid-relative distance
            dy (int): vertical grid-relative distance
        """
        tile_size = self.scene.manager.tile_size
        self.sprite.move_ip(dx * tile_size, dy * tile_size)

    def render(self):
        """Render the sprite to the buffer."""
        self.sprite.set_alpha_mod()
        self.sprite.set_color_mod()
        self.scene.spriterenderer.render(self.sprite)


if __name__ == '__main__':
    m = manager.Manager()
    m.set_scene(SceneRogueLike)
    m.run()
Complete Roguelike Tutorial — Part 3
The Map
Just like how you generalized the concept of the player object, you’ll now do the same thing with the dungeon map. After testing a few types I’ve concluded that nested lists provide good performance for the operations we’re going to need to do over the map. So, internally, our Map will store things as nested lists, but we’re going to create a small interface to act over it.
We’ll use a
We’ll start by defining its size at the top of the file. We’ll try to make this as configurable as possible, this should suffice for now!
Содержание
- 1 Глава 1: Графика
- 1.1 Подготовка
- 1.2 Выбор редактора кода
- 1.3 Showing the @ on screen
- 1.4 Moving around
Глава 1: Графика
Подготовка
Итак, пришло время закатать рукава и взяться на работу! Если вы ещё не скачали и установили Python 2.7 (более старая 2.6 тоже сойдёт), то сделайте это. На других версиях тоже можно работать, но скорее всего вы столкнётесь с конфликтами в коде (хотя их и не должно быть слишком много). (Примечание для пользователей Windows 7 x64: устанавливайте 32-битную версию, так как, по-видимому, 64-битный Python не дружит с libtcod). Затем скачайте libtcod (версия 1.5.1rc1) и распакуйте его куда-нибудь. Если вы пользователь Windows, то выбирайте версию для MinGW, так как версия для Visual Studio не работает в связке с Python.
Создайте папку для проекта. И в ней создайте пустой файл с любым именем, на ваш вкус, например, firstrl.py. Простейший способ использовать libtcod это скопировать следующие файлы в папку с проектом:
- libtcodpy.py
- libtcod-mingw.dll на Windows, libtcod.so на Linux
- SDL.dll на Windows, SDLlib.so на Linux
- Любой шрифт из папки datafonts. Мы возьмём arial10x10.png.
Выбор редактора кода
Если вы только начали своё знакомство с Python, то знайте, что множество Python-программистов пользуются простейшими редакторами и запускают свои скрипты через консоль, чтобы видеть отладочную информацию. У них и в мыслях нет перейти на крутую IDE! Для Windows наилучший выбор это Notepad++. Большинство Linux-программистов уже пользуются каким-то редактором. Почти все эти программы позволяют настроить клавиши быстрого доступа (вроде клавиши F5), чтобы быстро запускать скрипты, не переключаясь на консоль.
Если вы хотите создать ярлык для Notepad++ с парой полезных штук для отладки или вы что-то пробовали и получили известную ошибку «module not found», то прочитайте этот совет.
И ещё одно короткое замечание для тех, кто пользуется IDLE. По всей видимости, она некорректно завершает работу libtcod, вылетая по окончании работы скрипта. Думаю, это скорее проблема IDLE, чем libtcod, поэтому на данный момент решения нет. Воспользуйтесь любым из приведённых выше советов, они прекрасно работают.
Showing the @ on screen
This first part will be a bit of a crash-course. The reason is that you need a few lines of boilerplate code that will initialize and handle the basics of a libtcod window. And though there are many options, we won’t explain them all or this part will really start to drag out. Fortunately the code involved is not as much as in many other libraries!
First we import the library. The name libtcodpy is a bit funky (sorry Jice!) so we’ll rename it to just libtcod.
<source lang=»python»>import libtcodpy as libtcod</source>
Then, a couple of important values. It’s good practice to define special numbers that might get reused. Many people capitalize them to distinguish from variables that may change.
<source lang=»python»>SCREEN_WIDTH = 80
SCREEN_HEIGHT = 50
LIMIT_FPS = 20</source>
Now, something libtcod-specific: we’re going to use a custom font! It’s pretty easy. libtcod comes bundled with a few fonts that are usable right out of the box. Remember however that they can be in different formats, and you’ll need to tell it about this. This one is «grayscale» and using the «tcod layout», most fonts are in this format and thus end with _gs_tc. If you wanna use a font with a different layout or make your own, the docs on the subject are really informative. You can worry about that at a later time though. Notice that the size of a font is automatically detected.
<source lang=»python»>libtcod.console_set_custom_font(‘arial10x10.png’, libtcod.FONT_TYPE_GREYSCALE | libtcod.FONT_LAYOUT_TCOD)</source>
This is probably the most important call, initializing the window. We’re specifying its size, the title (change it now if you want to), and the last parameter tells it if it should be fullscreen or not.
<source lang=»python»>libtcod.console_init_root(SCREEN_WIDTH, SCREEN_HEIGHT, ‘python/libtcod tutorial’, False)</source>
For a real-time roguelike, you wanna limit the speed of the game (frames-per-second or FPS). If you want it to be turn-based, ignore this line. (This line will simply have no effect if your game is turn-based.)
<source lang=»python»>libtcod.sys_set_fps(LIMIT_FPS)</source>
Now the main loop. It will keep running the logic of your game as long as the window is not closed.
<source lang=»python»>while not libtcod.console_is_window_closed():</source>
For each iteration we’ll want to print something useful to the window. If your game is turn-based each iteration is a turn; if it’s real-time, each one is a frame. Here we’re setting the text color to be white. There’s a good list of colors you can use here, along with some info about mixing them and all that. The zero is the console we’re printing to, in this case the screen; more on that later.
<source lang=»python»> libtcod.console_set_foreground_color(0, libtcod.white)</source>
Don’t forget the indentation at the beginning of the line, it’s extra-important in Python. Make sure you don’t mix tabs with spaces for indentation! This comes up often if you copy-and-paste code from the net, and you’ll see an error telling you something about the indentation (that’s a pretty big clue right there!). Choose one option and stick with it. In this tutorial we’re using the 4-spaces convention, but tabs are easy to work with in many editors so they’re a valid choice too.
Now print a string, left-aligned, to the coordinates (1,1). Once more the first zero specifies the console, which is the screen in this case. Can you guess what that string is? No, it doesn’t move yet!
<source lang=»python»> libtcod.console_print_left(0, 1, 1, libtcod.BKGND_NONE, ‘@’)</source>
At the end of the main loop you’ll always need to present the changes to the screen. This is called flushing the console and is done with the following line.
<source lang=»python»> libtcod.console_flush()</source>
Ta-da! You’re done. Run that code and give yourself a pat on the back!
Note that since we don’t have any input handling code, the game may crash on exit (it won’t process the OS’s requests to close). Oops! Don’t worry though, this problem will go away as soon as we add keyboard support.
Here’s the complete code so far.
Moving around
That was pretty neat, huh? Now we’re going to move around that @ with the keys!
First, we need to keep track of the player’s position. We’ll use these variables for that, and take the opportunity to initialize them to the center of the screen instead of the top-left corner. This can go just before the main loop.
<source lang=»python»>playerx = SCREEN_WIDTH/2
playery = SCREEN_HEIGHT/2</source>
There are functions to check for pressed keys. When that happens, just change the coordinates accordingly. Then, print the @ at those coordinates. We’ll make a separate function to handle the keys.
<source lang=»python»>def handle_keys():
   global playerx, playery

   #movement keys
   if libtcod.console_is_key_pressed(libtcod.KEY_UP):
       playery -= 1

   elif libtcod.console_is_key_pressed(libtcod.KEY_DOWN):
       playery += 1

   elif libtcod.console_is_key_pressed(libtcod.KEY_LEFT):
       playerx -= 1

   elif libtcod.console_is_key_pressed(libtcod.KEY_RIGHT):
       playerx += 1</source>
Done! These are the arrow keys, if you want to use other keys here’s a reference (pay attention to the Python-specific notes).
While we’re at it, why not include keys to toggle fullscreen mode, and exit the game? You can put this at the beginning of the function.
<source lang=»python»>
   key = libtcod.console_check_for_keypress()
   if key.vk == libtcod.KEY_ENTER and key.lalt:
       #Alt+Enter: toggle fullscreen
       libtcod.console_set_fullscreen(not libtcod.console_is_fullscreen())

   elif key.vk == libtcod.KEY_ESCAPE:
       return True  #exit game</source>
From now on, we’ll show code for a real-time game with a green background, and code for a turn-based game with a blue background.
Notice a subtle difference here. The console_is_key_pressed function is useful for real-time games, since it checks if a key is pressed with no delays. console_check_for_keypress, on the other hand, treats the key like it’s being typed. So after the first press, it will stop working for a fraction of a second. This is the same behavior you see when you type, otherwise pressing a key would result in you typing 3 or 4 letters! It’s useful for all commands except movement, which you usually want to react as soon as possible with no delays, and continue for as long as you press the movement keys.
Now here’s an important thing: you can use that first line to distinguish between real-time and turn-based gameplay! See, console_check_for_keypress won’t block the game. But if you replace it with this line:
<source lang=»python»> key = libtcod.console_wait_for_keypress(True)</source>
Then the game won’t go on unless the player presses a key. So effectively you have a turn-based game now.
Now, the main loop needs to call this function in order for it to work. If the returned value is True, then we «break» from the main loop, ending the game. The inside of the main loop should now look like this:
<source lang=»python»>
   libtcod.console_set_foreground_color(0, libtcod.white)
   libtcod.console_print_left(0, playerx, playery, libtcod.BKGND_NONE, '@')

   libtcod.console_flush()

   #handle keys and exit game if needed
   exit = handle_keys()
   if exit:
       break</source>
The reason why we draw stuff before handling key input is that, in a turn-based game, the first screen is shown before the first key is pressed (otherwise the first screen would be blank).
One more thing! If you try that, you’ll see that moving you leave around a trail of little @’s. That’s not what we want! We need to clear the character at the last position before moving to the new one, this can be done by simply printing a space there. Put this just before exit = handle_keys().
<source lang=»python»> libtcod.console_print_left(0, playerx, playery, libtcod.BKGND_NONE, ‘ ‘)</source>
Here’s a rundown of the whole code so far.
Go on to the next part.
UPDATE, 1/20/2010: There is a newer libtcod and Python tutorial aimed at beginners at the Roguebasin wiki. What follows is a less comprehensive approach. If you follow this series of posts here you’ll find many detours and returns, which may be educational, but if you want a good tutorial I recommend the above link.
The original post:
I’ve known about the libtcod roguelike library for a while, mainly through the Python port in development by Kyle Stewart. However that project seemed to be in stasis. Then just a week or so ago I looked at libtcod again, because of some beautiful roguelikes that are using the C/C++ version of the library.

Pretty amazing, no? And that’s all textmode!
So it turns out, in the meantime the developer jice created a Python wrapper and some Python samples to go with it. From there it was quite easy to use the samples as a base for a simple ‘get your @ on the screen moving around’ demo.

I know for some people a lot of the fun of programming roguelikes is doing everything yourself — the console, the input and output routines, and so on. It’s not that I don’t find that fun — just that I’m bunk at programming, and I’d rather learn and make some progress with the actual game. As I go I do find myself learning more about the nitty-gritty programming details. It’s a combination of active learning and some sort of bottom-up osmosis I guess.
So let’s create a roguelike in Python with libtcod.
The first thing to do is download the libtcod library and python module (one download, choosing your platform). Of course, you’ll need Python as well if you don’t have it. Remember, if you’re on Windows, set your PATH environment variable to include the Python directory.
The total download for me was about 4 1/2 MB, so I copied out files to create a minimal directory of about 2 MB. You can lose the docs, samples, and miscellaneous .PNGs (but not the terminal.png, as that’s the default font — you don’t need it, but it makes things simpler to start).
You’ll notice that much of this demo is straight from samples_py.py, so if you’re feeling like you want to make a go of it yourself, make your own basic demo from samples_py — you can do it! If you’d rather listen to me blather on, please continue. The full listing is at the bottom, but first I’ll explain as I go.
Create a Python file and put it in your minimal libtcod directory. Let’s start from the top.
#!/usr/bin/python

'''
libtcod python tutorial
This code modifies samples_py.py from libtcod 1.4.1. It shows a '@'
walking around with a source of light giving simple FOV.
It's in the public domain.
'''

#############################################
# imports
#############################################

import os

import libtcodpy as libtcod
Import the os module, as we’ll use it to create the path for our font file later; import libtcod, naming it whatever you like, but for simplicity’s sake I’ll call it libtcod.
The rest of the code is in four main parts: global constants and variables, the drawing routine, the update routine, and the main loop. For each cycle of the main loop, the code runs the drawing and update routines once, using the global constants and changing the global variables in the process.
First, though, there’s one utility function I created to make things easier:
#############################################
# utility functions
#############################################

def get_key(key):
    if key.vk == libtcod.KEY_CHAR:
        return chr(key.c)
    else:
        return key.vk
get_key is a simple function I wrote to make handling keyboard input a little easier. The properties key.vk and key.c are from libtcod’s TCOD_key_t structure — you can read up on them in the ‘Console emulator’ chapter of the documentation.
Unlike some game libraries I’ve used, in libtcod there is not a symbol for something like KEY_h, the keyboard character ‘h’. However there are symbols for keyboard keys like the up arrow (KEY_UP), or the ‘7’ on the number pad (KEY_KP7).
This means that if you want to test for a key in your code that is a printable character, such as ‘h’, you need to use its ASCII code, not a unique libtcod symbol — with, for example, something like ord(‘h’) instead of KEY_h. It’s simpler for me to just think of letters and other printable characters as the characters themselves, as a string like ‘h’, though, so I wrote get_key to let me use simple strings whenever I’m working with keyboard input. You’ll see what I mean in a moment.
Next define some constants:
#############################################
# global constants and variables
#############################################

window_width = 46
window_height = 20

first = True
fov_px = 20
fov_py = 10
fov_recompute = True
fov_map = None
fov_colors =    {
                'dark wall' : libtcod.Color(0, 0, 100),
                'light wall' : libtcod.Color(130, 110, 50),
                'dark ground' : libtcod.Color(50, 50, 150),
                'light ground' : libtcod.Color(200, 180, 50)
                }
fov_init = False
fov_radius = 4

move_controls = {
                'i' : (0, -1), 	# up
		'k' : (0, 1), 	# down
		'j' : (-1, 0),	# left
		'l' : (1, 0),	# right
                libtcod.KEY_UP : (0, -1), # example of alternate key
                libtcod.KEY_KP8 : (0, -1) # example of alternate key
		}
Don’t worry too much about what these mean right now, just notice a couple of things.
First, fov_colors defines the colors of different types of cells (that is, tiles) on our map. If you look at samples_py.py you’ll see cell colors are defined differently, as individual constants instead. I used a Python dictionary type here for two reasons. In my mind it makes the constants themselves easier to read, and it simplifies the code where the constants are used. If you compare the code in this demo to the samples_py.py field-of-view demo you’ll see what I mean. This way of doing it may not be to your taste, so this would be a good spot to compare this demo and the library’s demo to see which you prefer.
Second, move_controls defines which keys do what in the demo (where movement is the only thing going on, so that’s all we’re concerned with). Again, this is different from samples_py — samples_py uses an if/elif control structure to define what keys do what (in fact, it deals with cell colors in a similar way). What I like about using a dictionary like this is it makes changing keyboard commands very easy; rather than editing a long if structure, I change the entries in the dictionary instead.
There’s one more constant to define — the map. I just copied this from samples_py. A hardcoded map is easy to work with. This would be the entry point for a generated map.
smap = ['##############################################',
        '#######################      #################',
        '#####################    #     ###############',
        '######################  ###        ###########',
        '##################      #####             ####',
        '################       ########    ###### ####',
        '###############      #################### ####',
        '################    ######                  ##',
        '########   #######  ######   #     #     #  ##',
        '########   ######      ###                  ##',
        '########                                    ##',
        '####       ######      ###   #     #     #  ##',
        '#### ###   ########## ####                  ##',
        '#### ###   ##########   ###########=##########',
        '#### ##################   #####          #####',
        '#### ###             #### #####          #####',
        '####           #     ####                #####',
        '########       #     #### #####          #####',
        '########       #####      ####################',
        '##############################################',
        ]
Next comes the code that draws the map and its contents to the console.
#############################################
# drawing
#############################################

def draw(first):
	global fov_px, fov_py, fov_map
	global fov_init, fov_recompute, smap

	if first:
		libtcod.console_clear(0)
		libtcod.console_set_foreground_color(0, libtcod.white)
		libtcod.console_print_left(0, 1, 1, libtcod.BKGND_NONE,
				       "IJKL : move aroundn")
		libtcod.console_set_foreground_color(0, libtcod.black)
		libtcod.console_put_char(0, fov_px, fov_py, '@',
					 libtcod.BKGND_NONE)

		for y in range(window_height):
		    for x in range(window_width):
			if smap[y][x] == '=':
			    libtcod.console_put_char(0, x, y,
						     libtcod.CHAR_DHLINE,
						     libtcod.BKGND_NONE)
You’ll notice I’m using global variables in these functions — it’s a simple way to do it for this demo, but not necessarily how you’ll want to do it for a complete game.
In the first if structure we test if first is true. Then the code draws the first characters that we see — some simple instructions that appear on the console, the ‘@’ (that’s you), and the ‘=’ characters, representing windows in the map display (look at the smap array above). All of these libtcod functions are described in the libtcod documentation, so give that a look as you follow along. You’ll notice that first it sets the foreground color to white — this is so it draws the instructions in white. Then it changes the foreground color to black for the rest of the drawing. This routine only needs to run once, which is why it’s controlled by the test of first.
Now we want to do two things in the drawing routine — draw the rest of the map, and test if we need to recalculate the player’s field-of-view. We recalculate when the player moves.
	if not fov_init:
		fov_init = True
		fov_map = libtcod.map_new(window_width, window_height)
		for y in range(window_height):
		    for x in range(window_width):
			if smap[y][x] == ' ':
			    libtcod.map_set_properties(fov_map, x, y, True, True)
			elif smap[y][x] == '=':
			    libtcod.map_set_properties(fov_map, x, y, True, False)

	if fov_recompute:
		fov_recompute = False
		libtcod.map_compute_fov(fov_map, fov_px, fov_py, fov_radius, True)
You can think of fov_init as a checkbox. If it’s False, the program hasn’t been run yet and the checkbox isn’t checked. Once we do run the program, the code puts a check in the checkbox (setting fov_init to True) and draws the rest of the map to the console. Note that the code only draws the entire map once, when the game begins. In the future, we only need to draw those parts of the map that have changed. This is a simple technique common to most games.
The code also tests fov_recompute to see if it should recalculate the field-of-view of our player. Look map_compute_fov up in the documentation to see what all its arguments mean.
After the field-of-view is computed (or not — in that case, it remains the same as before), the code needs to draw the cells affected by the fov. We have four types of cells here, dark walls, light walls, dark ground, and light ground — the entries in our fov_colors dictionary above. Here is the code:
	for y in range(window_height):
		for x in range(window_width):
                    affect, cell = 'dark', 'ground'
		    if libtcod.map_is_in_fov(fov_map, x, y): affect = 'light'
		    if (smap[y][x] == '#'): cell = 'wall'
                    color = fov_colors['%s %s' % (affect, cell)]
                    libtcod.console_set_back(0, x, y, color, libtcod.BKGND_SET)
Again we loop through each cell of the smap. The first thing the code does is set the variables affect and cell to ‘dark’ and ‘ground’ respectively. Then if the cell is within the field-of-view, it sets the affect variable to ‘light’ instead, and similarly if the cell is a wall. Finally, it creates a variable called color that is the entry in the fov_colors dictionary corresponding to the key ‘affect cell‘. The code uses that color variable to set the background color of the cell.
If we wanted to add a different color — say, making the windows pink when in the fov — we would just need to add a test to find ‘=’ characters, and in that test change the ‘cell‘ to ‘window’ appropriately. Then, define ‘light window’ in the fov_colors dictionary as pink, and define its counterpart — perhaps ‘dark window’.
What I like about this method, as I described above, is it avoids a long if/else structure to do the same thing.
The drawing routine is complete; now on to the update function.
#############################################
# game state update
#############################################

def update(key):
    global fov_py, fov_px, fov_recompute, smap

    key = get_key(key)
    if key in move_controls:
            dx, dy = move_controls[key]
            if smap[fov_py+dy][fov_px+dx] == ' ':
                    libtcod.console_put_char(0, fov_px, fov_py, ' ',
                                                 libtcod.BKGND_NONE)
                    fov_px = fov_px + dx
                    fov_py = fov_py + dy
                    libtcod.console_put_char(0, fov_px, fov_py, '@',
                                                 libtcod.BKGND_NONE)
                    fov_recompute = True
This update function is quite simple, as all it’s doing is updating the position of the player if they move. You’ll notice the libtcod drawing function console_put_char does the main work, drawing over the map cells if the player moves. It’s here that I use the get_key function defined above to set the value of the key variable. The key variable will be either a special libtcod symbol, or a string, depending on what key the player presses on the keyboard. Look again at get_key to see what that function returns if you need to.
An important note
If you look again at move_controls defined above in the global constants section, you’ll notice that pressing an up key sets (dx, dy) as (0, -1) — in effect, reducing the value of fov_py (fov_py is the y-point from where we do the field-of-view calculation, and not incidentally where the @ character is drawn too). If you’re not familiar with the SDL library (which libtcod uses under the hood) it might seem strange to reduce the y value as you go upward, but it’s simply because SDL defines the (0,0) x,y coordinate position to be in the upper left corner of whatever you’re drawing to. Conversely, if you were to use a library such as OpenGL, you would increase the y value as you go up, as in OpenGL the (0,0) position is in the lower left corner of the display.
If the player does move, the code will need to recompute the field-of-view on the next cycle of the game loop.
That’s it for the update function — now for the main loop.
#############################################
# initialization and main loop
#############################################

font = os.path.join('fonts', 'arial12x12.png')
libtcod.console_set_custom_font(font, libtcod.FONT_LAYOUT_TCOD | libtcod.FONT_TYPE_GREYSCALE)

libtcod.console_init_root(window_width, window_height, 'Python Tutorial', False)

while not libtcod.console_is_window_closed():
    draw(first)
    libtcod.console_flush()
    key = libtcod.console_wait_for_keypress(True)
    update(key)
    if key.vk == libtcod.KEY_ESCAPE:
        break
There’s not much to it. One thing we do first, before creating the console with console_init_root, is set a custom font. This is why I imported the os module earlier, as the font is located in a fonts directory located inside the working directory.
The game loop itself just draws to the console, waits for a key press, then calls the update function. If the player presses the escape key the game exits. This is a classic turn-based game loop, but libtcod also supports real-time game loops, and you can read more about that in the documentation.
So that’s everything! A functional roguelike demo in Python in 173 lines of code. Remember, much of this code is directly from the samples_py.py file included with the download — there’s a lot more to learn there, and on the libtcod site as well. I’m hoping to expand on this demo as I create a functional game, so any feedback (on my hacky code or this hacky tutorial!) would be terrific. Thanks for reading.
Here’s the complete listing:
#!/usr/bin/python

'''
libtcod python tutorial
This code modifies samples_py.py from libtcod 1.4.1. It shows a '@'
walking around with a source of light giving simple FOV.
It's in the public domain.
'''

#############################################
# imports
#############################################

import os

import libtcodpy as libtcod

#############################################
# utility functions
#############################################

def get_key(key):
    if key.vk == libtcod.KEY_CHAR:
        return chr(key.c)
    else:
        return key.vk

#############################################
# global constants and variables
#############################################

window_width = 46
window_height = 20

first = True
fov_px = 9
fov_py = 10
fov_recompute = True
fov_map = None
fov_colors =    {
                'dark wall' : libtcod.Color(0, 0, 100),
                'light wall' : libtcod.Color(130, 110, 50),
                'dark ground' : libtcod.Color(50, 50, 150),
                'light ground' : libtcod.Color(200, 180, 50)
                }
fov_init = False
fov_radius = 4

do =    {
        'up'    : (0, -1),
        'down'  : (0, 1),
        'right' : (1, 0),
        'left'  : (-1, 0)
        }

keys =  {
        'i' :                   do['up'],
        'k' :                   do['down'],
        'j' :                   do['left'],
        'l' :                   do['right'],
        libtcod.KEY_UP :        do['up'],
        libtcod.KEY_KP8 :       do['up']
        }

smap = ['##############################################',
        '#######################      #################',
        '#####################    #     ###############',
        '######################  ###        ###########',
        '##################      #####             ####',
        '################       ########    ###### ####',
        '###############      #################### ####',
        '################    ######                  ##',
        '########   #######  ######   #     #     #  ##',
        '########   ######      ###                  ##',
        '########                                    ##',
        '####       ######      ###   #     #     #  ##',
        '#### ###   ########## ####                  ##',
        '#### ###   ##########   ###########=##########',
        '#### ##################   #####          #####',
        '#### ###             #### #####          #####',
        '####           #     ####                #####',
        '########       #     #### #####          #####',
        '########       #####      ####################',
        '##############################################',
        ]

#############################################
# drawing
#############################################

def draw():
	global fov_px, fov_py, fov_map, first
	global fov_init, fov_recompute, smap

	if first:
                first = False
		libtcod.console_clear(0)
		libtcod.console_set_foreground_color(0, libtcod.white)
		libtcod.console_print_left(0, 1, 1, libtcod.BKGND_NONE,
				       "IJKL : move around")
		libtcod.console_set_foreground_color(0, libtcod.black)
		libtcod.console_put_char(0, fov_px, fov_py, '@',
					 libtcod.BKGND_NONE)

		for y in range(window_height):
		    for x in range(window_width):
			if smap[y][x] == '=':
			    libtcod.console_put_char(0, x, y,
						     libtcod.CHAR_DHLINE,
						     libtcod.BKGND_NONE)

	if not fov_init:
		fov_init = True
		fov_map = libtcod.map_new(window_width, window_height)
		for y in range(window_height):
		    for x in range(window_width):
			if smap[y][x] == ' ':
			    libtcod.map_set_properties(fov_map, x, y, True, True)
			elif smap[y][x] == '=':
			    libtcod.map_set_properties(fov_map, x, y, True, False)

	if fov_recompute:
		fov_recompute = False
		libtcod.map_compute_fov(fov_map, fov_px, fov_py, fov_radius, True)

	for y in range(window_height):
		for x in range(window_width):
                    affect, cell = 'dark', 'ground'
		    if libtcod.map_is_in_fov(fov_map, x, y): affect = 'light'
		    if (smap[y][x] == '#'): cell = 'wall'
                    color = fov_colors['%s %s' % (affect, cell)]
                    libtcod.console_set_back(0, x, y, color, libtcod.BKGND_SET)

#############################################
# game state update
#############################################

def update(key):
    global fov_py, fov_px, fov_recompute, smap

    key = get_key(key)
    if key in keys:
            dx, dy = keys[key]
            if smap[fov_py+dy][fov_px+dx] == ' ':
                    libtcod.console_put_char(0, fov_px, fov_py, ' ',
                                                 libtcod.BKGND_NONE)
                    fov_px = fov_px + dx
                    fov_py = fov_py + dy
                    libtcod.console_put_char(0, fov_px, fov_py, '@',
                                                 libtcod.BKGND_NONE)
                    fov_recompute = True

#############################################
# initialization and main loop
#############################################

font = os.path.join('fonts', 'arial12x12.png')
libtcod.console_set_custom_font(font, libtcod.FONT_LAYOUT_TCOD | libtcod.FONT_TYPE_GREYSCALE)

libtcod.console_init_root(window_width, window_height, 'Python Tutorial', False)

while not libtcod.console_is_window_closed():
    draw()
    libtcod.console_flush()
    key = libtcod.console_wait_for_keypress(True)
    update(key)
    if key.vk == libtcod.KEY_ESCAPE:
        break
- RoguelikeDev Does The Complete Roguelike Tutorial
- Version 2022
-
- Directory of participants
- Version 2021
-
- Directory of participants
- Version 2020
-
- Directory of participants
- Version 2019
-
- Directory of participants
- Version 2018
-
- Directory of participants
- Version 2017
-
- Directory of participants
RoguelikeDev Does The Complete Roguelike Tutorial
Version 2022
On June 28th, 2022, r/roguelikedev began its 6th annual summer code-along series to both ease beginners into roguelike development and help maintain motivation through the multi-week tutorial. Read more about it in the announcement.
Logo
Complete archives of the event:
- Week 1 — Parts 0 & 1: Setting up Python and libtcod, drawing an
@, and moving around - Week 2 — Parts 2 & 3: The object system and generating your first map
- Week 3 — Parts 4 & 5: Field of view, placing enemies, and attacking
- Week 4 — Parts 6 & 7: Combat damage and building the interface
- Week 5 — Parts 8 & 9: Items, inventory and ranged targeting
- Week 6 — Parts 10 & 11: Save/load and leveling up
- Week 7 — Parts 12 & 13: Monster/item progression and equipment
- Week 8: Sharing your game
- Summary
Although the 2022 event is over, the tutorial is still available along with plenty of reference repos for different languages and libraries below, and you can also find help here at r/roguelikedev and on the Discord server.
Directory of participants
Repo links are in bold for those projects which are confirmed to have completed the tutorial. (If you’d like to update any of your info, feel free to PM /u/Kyzrati with the relevant changes.)
| Dev | Language(s) | Libraries etc. | Links/Screenshots |
|---|---|---|---|
| /u/bodiddlie | Typescript | ROT.js | repo with tutorial — screen 1 |
| /u/ChizaruuGCO | C# | Unity | repo with video tutorial series |
| /u/clockworkmartian | Zig | libtcod | repo including converted tutorial for Zig |
| /u/HexDecimal | C++17 | libtcod | repo (engine following the old C++ tutorial) — album |
| /u/Samelinux | C | — | repo with implementation notes — screen 1 |
| /u/redblobgames | Typescript | — | repo with implementation notes |
| /u/Bubbly_Knee_2433 | Python 3 | libtcod | repo — screen 1, 2 |
| /u/caliskor | GML | Game Maker Studio 2 | repo |
| /u/candyleader | Python 3 | libtcod | repo |
| /u/codyebberson | Typescript | WGLT | repo |
| /u/cordinc | Javascript | — | repo |
| /u/Cylog | C | SDL2, stb | repo |
| /u/deathm00n | Python 3 | libtcod | repo |
| /u/EmuInteresting8880 | Python 3 | libtcod | repo |
| /u/Fleurboards | Python 3 | libtcod | repo |
| /u/Gogodinosaur | C# | Unity | repo — screen 1 |
| /u/haveric | Javascript | — | repo |
| /u/JasonSantilli | Javascript | ROT.js | repo |
| /u/JD557 | Scala | Minart | repo |
| /u/jneda | Lua | PICO-8 | repo |
| /u/KCEHOBYTE | C++ | FTXUI | repo |
| /u/knaveightt | Python 3 | libtcod | repo |
| /u/lagdotcom | RLscript | — | repo — screen 1 |
| /u/littlesnorrboy | Rust | — | repo |
| /u/luismars | C# | Blazor | repo |
| /u/LukeMootoo | Javascript | — | repo |
| /u/makraiz | Python 3 | libtcod | repo |
| /u/makraiz | Rust | Bevy | repo |
| /u/old_chmee | Python 3 | libtcod | repo — album |
| /u/programmer_ow | C | libtcod, flecs | repo |
| /u/reuben-john | Rust | bracket-lib | repo |
| /u/revokon | Java | AsciiPanel | repo |
| /u/ScooberyDoobery | F# | Garnet | repo |
| /u/snowball_dev | GDScript | Godot 4 | repo |
| /u/Southy__ | Java | AsciiPanel | repo |
| /u/SupremeChlorophyll | PuzzleScript | — | repo |
| /u/tagg1080 | C | SDL2 | repo |
| /u/UnidenFighting | Rust | Bevy | repo |
| /u/WorksOnMyMachiine | Python 3 | libtcod | repo |
| /u/WorksOnMyMachiine | Rust | Bevy | repo |
| /u/WorksOnMyMachiine | Typescript | WGLT | repo |
| /u/ZPanic0 | C# | RetroBlit | repo |
| /u/Zuburg | Python 3 | libtcod | repo |
(You’ll find many more participants in the threads, though they have no public repo/links.)
Version 2021
On June 29th, 2021, r/roguelikedev began its 5th annual summer code-along series to both ease beginners into roguelike development and help maintain motivation through the multi-week tutorial. Read more about it in the announcement.
Logo
Complete archives of the event:
- Week 1 — Parts 0 & 1: Setting up Python and libtcod, drawing an
@, and moving around - Week 2 — Parts 2 & 3: The object system and generating your first map
- Week 3 — Parts 4 & 5: Field of view, placing enemies, and attacking
- Week 4 — Parts 6 & 7: Combat damage and building the interface
- Week 5 — Parts 8 & 9: Items, inventory and ranged targeting
- Week 6 — Parts 10 & 11: Save/load and leveling up
- Week 7 — Parts 12 & 13: Monster/item progression and equipment
- Week 8: Sharing your game
- Summary
Although the 2021 event is over, the tutorial is still available along with plenty of reference repos for different languages and libraries below, and you can also find help here at r/roguelikedev and on the Discord server.
Directory of participants
Repo links are in bold for those projects which are confirmed to have completed the tutorial. (If you’d like to update any of your info, feel free to PM /u/Kyzrati with the relevant changes.)
| Dev | Language(s) | Libraries etc. | Links/Screenshots |
|---|---|---|---|
| /u/anaseto | Go | Gruid | Gruid Go tutorial* |
| /u/davesmith00000 | Scala | Indigo | repo with Scala-Indigo tutorial — screen 1 |
| /u/HexDecimal | Python 3 | libtcod | 2021 refactored tutorial |
| /u/KaizarNike | GDScript | Godot | repo with dev logs — screen 1 |
| /u/latenightworkers | Rust | bracket-lib | repo with vlog |
| /u/Mangachh | C# | Godot | repo with blog |
| /u/redblobgames | Typescript | — | repo with implementation notes |
| /u/rentheunclean | Rust | bracket-lib | repo with implementation notes |
| /u/0xc0ba17 | Rust | GameLisp | repo — screen 1 |
| /u/_andy_andy_andy_ | Typescript | ROT.js, ape-ecs | repo |
| /u/aga_acrobatic | Typescript | Phaser | repo |
| /u/AgentMania | GDScript | Godot | repo |
| /u/avinashv | Rust | bracket-lib | repo |
| /u/billturner | Python 3 | libtcod | repo |
| /u/Bleu-Bell | Java | libGDX | repo |
| /u/brusbilis | Go, Javascript | — | repo |
| /u/candyleader | Rust | bracket-lib | repo |
| /u/CarnivalTears | Python 3 | libtcod | repo |
| /u/DerTraveler | Ruby | DragonRuby | repo — screen 1 |
| /u/dieEisdiele | Python 3 | libtcod | repo |
| /u/EdSwordsmith | Rust | bracket-lib | repo |
| /u/em_barked | Python 3 | libtcod, pyglet | repo |
| /u/EmergencySpy | Rust | Bevy | repo — album |
| /u/EmperorPenguin18 | Python 3 | libtcod | repo |
| /u/ender1200 | Python 3 | libtcod | repo |
| /u/Gix | C | libtcod | repo — screen 1 |
| /u/FadedStarlight | C | GLFW | repo |
| /u/furfoxsnakes | C# | SadConsole, GoRogue | repo |
| /u/haughsee | Python 3 | libtcod | repo |
| /u/haveric | Javascript | Three.js | repo — album |
| /u/iamgabrielma | Python 3 | libtcod | repo |
| /u/j0ono0 | Python 3 | libtcod | repo |
| /u/JamesGecko | Typescript | ROT.js, PixiJS | repo |
| /u/Jarlish | Rust | bracket-lib | repo |
| /u/jjatria | Perl | libtcod, Game::Entities | repo |
| /u/jmlemmer | Python 3 | libtcod | repo |
| /u/jordimaister | Go | Ebiten | repo — album |
| /u/Kehvarl | Common Lisp | BearLibTerminal | repo |
| /u/kevio17 | Python 3 | libtcod | repo |
| /u/lagdotcom | WASM | — | repo — screen 1 |
| /u/Larront | Python 3 | libtcod | repo — album |
| /u/menguanito | Python 3 | libtcod | repo |
| /u/mrhthepie | Lua | PICO-8 | repo |
| /u/mifuyne | Python 3 | libtcod | repo |
| /u/nigel_tc | Python 3 | libtcod | repo |
| /u/NotManyIdeasDev | C++ | EnTT | repo |
| /u/Notnasiul | Python 3 | PyGame | repo — screen 1 |
| /u/NSD_Brad | C++ | libtcod, SDL2 | repo |
| /u/pnjeffries | C# | Unity | repo — screen 1 |
| /u/renauddmarshall | Lua | Defold Engine | repo |
| /u/revokon | C++ | libtcod, EnTT | repo |
| /u/RivalRoman | Python 3 | libtcod | repo — screen 1 |
| /u/ScooberyDoobery | Rust | bracket-lib, SDL2 | repo |
| /u/Shidima | Rust | — | repo |
| /u/SirSchmandbube | Rust | bracket-lib | repo |
| /u/Skyhighatrist | C# | Unity | repo |
| /u/Spectre1208 | Python 3 | libtcod | repo |
| /u/soulbaklava | Python 3 | libtcod | repo |
| /u/squizm | GML | Game Maker Studio 2 | repo |
| /u/SupremeChlorophyll | Python 3 | libtcod | repo |
| /u/TeamRamrod | C# | SadConsole, GoRogue | repo — screen 1 |
| /u/TechniMan | Python 3 | libtcod | repo |
| /u/Thorinori | Lua | Love2D | repo |
| /u/usami33 | GDScript | Godot | repo — screen 1, 2 |
| /u/virtuoso_rotins | Python 3 | libtcod | repo |
| /u/WhereTheRedfernCodes | Python 3 | libtcod | repo |
| /u/Zach_Attakk | Python 3 | libtcod | repo |
(You’ll find many more participants in the threads, though they have no public repo/links.)
Version 2020
On June 16th, 2020, r/roguelikedev began its 4th annual summer code-along series to both ease beginners into roguelike development and help maintain motivation through the multi-week tutorial. Read more about it in the announcement. libtcod has continued to receive updates by /u/HexDecimal, and /u/TStand90, creator of the most recent version of the tutorial, has once again updated it this year.
Logo
Complete archives of the event:
- Week 1 — Parts 0 & 1: Setting up Python and libtcod, drawing an
@, and moving around - Week 2 — Parts 2 & 3: The object system and generating your first map
- Week 3 — Parts 4 & 5: Field of view, placing enemies, and attacking
- Week 4 — Parts 6 & 7: Combat damage and building the interface
- Week 5 — Parts 8 & 9: Items, inventory and ranged targeting
- Week 6 — Parts 10 & 11: Save/load and leveling up
- Week 7 — Parts 12 & 13: Monster/item progression and equipment
- Week 8: Sharing your game
- Summary
Although the 2020 event is over, the tutorial is still available along with plenty of reference repos for different languages and libraries below, and you can also find help here at r/roguelikedev and on the Discord server.
Directory of participants
Repo links are in bold for those projects which are confirmed to have completed the tutorial. (If you’d like to update any of your info, feel free to PM /u/Kyzrati with the relevant changes.)
| Dev | Language(s) | Libraries etc. | Links/Screenshots |
|---|---|---|---|
| /u/TStand90 | Python 3 | libtcod | main tutorial author working on an updated tutorial alongside the event |
| /u/Obj3ctDisoriented | C++ | BearLibTerminal | repo with C++/BearLibTerminal tutorial — screen 1 |
| /u/Obj3ctDisoriented | Swift | swiftlibTCOD | repo with swiftlibTCOD tutorial |
| /u/stevebox | Rust | chargrid | repo with chargrid tutorial* |
| /u/Captain_Kittenface | Javascript | HTML Canvas, Node.js, Webpack | repo with Javascript tutorial |
| /u/Ombarus | Python 3 | libtcod | repo with video walkthrough |
| /u/redblobgames | Javascript | ROT.js | repo with implementation notes — screen 1, 2 |
| /u/acss | GDScript | Godot | repo — screen 1 |
| /u/Adrijaned | Linux x86_64 assembly | — | repo |
| /u/alphaconverter | Python 3 | libtcod | repo — screen 1 |
| /u/azdcf | Rust | tcod-rs | repo |
| /u/brusbilis | Go | BearLibTerminal | repo |
| /u/candyleader | Lua | PICO-8 | repo |
| /u/candyleader | Rust | — | repo |
| /u/candyleader | Python 3 | libtcod | repo |
| /u/Commonguy356 | Python 3 | libtcod | repo |
| /u/ConstableBrew | Javascript | ROT.js | repo |
| /u/creatron | Python 3 | libtcod | repo |
| /u/EmergencySpy | C# | Unity | repo |
| /u/enc_cat | Rust | Cursive | repo — screen 1 |
| /u/endperform | Python 3 | libtcod | repo |
| /u/IrishWilly | Dart | Flutter | repo |
| /u/FratmanBootcake | C++ | SDL2 | repo — album |
| /u/furfoxsnakes | C# | Godot, GoRogue | repo |
| /u/gigsim | Python 3 | libtcod | repo |
| /u/grammatiker | TypeScript | — | repo |
| /u/GreatSnowman | Python 3 | libtcod | repo |
| /u/haveric | Javascript | Phaser, Node.js | repo — album |
| /u/JDad67 | Swift | SpriteKit | repo |
| /u/julebarn | Python 3 | libtcod | repo |
| /u/kairumagames | GDScript | Godot | repo |
| /u/KarbonKitty | C# | RogueSheep | repo — album |
| /u/Koumakan | Python 3 | libtcod | repo |
| /u/lagdotcom | TypeScript | — | repo |
| /u/lagdotcom | Forth | — | repo |
| /u/lysergician | Kotlin | Zircon | repo |
| /u/Maugrift | C# | SadConsole, GoRogue | repo |
| /u/MentalistPhun | Python 3 | libtcod | repo |
| /u/MrSmith33 | Vox | SDL2 | repo |
| /u/offlebagg1ns | Python 3 | libtcod | repo |
| /u/patrl | Haskell | SDL2, apecs | repo |
| /u/ReferentiallyMe | Clojure | JavaFX | repo |
| /u/revokon | Java | Zircon | repo |
| /u/rjhelms | Python 3 | libtcod | repo |
| /u/RocketNumberNine | GDScript | Godot | repo |
| /u/ScarletCrusader0 | Python 3 | libtcod | repo |
| /u/shindakun | Lua | PICO-8 | repo |
| /u/Silvernocte | Python 3 | libtcod | repo |
| /u/Sir_Anonyeemous | Python 3 | libtcod | repo |
| /u/squizm | GML | Game Maker Studio 2 | repo |
| /u/Stegozaurus | Python 3 | libtcod | repo |
| /u/theq629 | Rust | RLTK | repo — screen 1 |
| /u/underww | C++ | SDL2, WASM | repo |
| /u/usami33 | Python 3 | Python Arcade Library | repo — screens 1, 2 |
| /u/viewtifulRafa | Rust | RLTK | repo |
| /u/wahlstrand | Go | tcell | repo |
| /u/wakyct | Chicken Scheme | SDL2 | repo |
| /u/Zach_Attakk | Python 3 | libtcod, PyGame | repo |
| /u/zachuk | Java | (scratch) | repo |
| /u/Zirael07 | D | libtcod | repo |
(You’ll find many more participants in the threads, though they have no public repo/links.)
Version 2019
On June 18th, 2019, r/roguelikedev began a summer code-along series to both ease beginners into roguelike development and help maintain motivation through the multi-week tutorial. Read more about it in the announcement. This is our third year in a row! The tutorial from last year was updated a bit yet again, and the main library, libtcod, has been expanded a good bit since last year as well. (Come back next year for more!)
Logo
Complete archives of the event:
- Week 1 — Parts 0 & 1: Setting up Python and libtcod, drawing an
@, and moving around - Week 2 — Parts 2 & 3: The object system and generating your first map
- Week 3 — Parts 4 & 5: Field of view, placing enemies, and attacking
- Week 4 — Parts 6 & 7: Combat damage and building the interface
- Week 5 — Parts 8 & 9: Items, inventory and ranged targeting
- Week 6 — Parts 10 & 11: Save/load and leveling up
- Week 7 — Parts 12 & 13: Monster/item progression and equipment
- Week 8: Sharing your game
- Summary
Although the 2019 event is over, the tutorial is still available along with plenty of reference repos for different languages and libraries below, and you can also find help here at r/roguelikedev and on the Discord server.
Directory of participants
Links are in bold for those projects which are confirmed to have completed the tutorial. (If you’d like to update any of your info, feel free to PM /u/Kyzrati with the relevant changes.)
| Dev | Language(s) | Libraries etc. | Links/Screenshots |
|---|---|---|---|
| (forkable empty project by /u/aaron_ds) | Python 3 | libtcod | repo |
| /u/maetl | Javascript | (scratch) | repo with Javascript tutorial |
| /u/nicksmaddog | Common Lisp | BearLibTerminal | repo with Common Lisp tutorial |
| /u/1d55d2efbafa9d | Rust | libtcod | repo |
| /u/AgentMania | — | Construct 3 | repo — gallery |
| /u/amuletofyendor | F# | SadConsole | repo |
| /u/Arctic_Pheenix | Rust | libtcod | repo |
| /u/ashopov | Javascript | Phaser | repo |
| /u/Azhain | C# | Monogame | YouTube |
| /u/azureglows | Python 3 | libtcod | repo |
| /u/Beidah | Rust | libtcod, specs | repo |
| /u/billturner | Python 3 | libtcod | repo |
| /u/Brynath | Python 3 | libtcod | repo, blog |
| /u/Captain_Tralfaz | Python 3 | libtcod | repo |
| /u/chromakeypancake | Python 3 | libtcod | repo |
| /u/codyebberson | Typescript | WGLT | repo |
| /u/clamytoe | Python 3 | libtcod | repo |
| /u/ClutchPedal | Python 3 | libtcod | repo |
| /u/CowFu | Python 3 | libtcod | repo |
| /u/dadishere | Python 3 | libtcod | repo |
| /u/dafu | C# | Unity, RetroBlit | repo — screen 1 |
| /u/DarwinGiles777 | Python 3 | libtcod | repo |
| /u/dbpc | C# | SadConsole | repo |
| /u/dimberton | C++ | BearLibTerminal | repo |
| /u/diomedet | Python 3 | libtcod, numpy | repo |
| /u/elnej | Rust | (scratch) | repo |
| /u/Elronnd | C | BearLibTerminal, curses | repo |
| /u/endperform | Go | Termloop | repo |
| /u/EsotericRogue | Python 3 | libtcod, Kivy | repo, YouTube |
| /u/fadenpendler | Python 3 | BearLibTerminal, ClubSandwich | repo |
| /u/jeansquantch | Ruby | BearLibTerminal | repo |
| /u/FoxFields_ | R | Shiny | repo |
| /u/gawwo | C# | Unity | repo |
| /u/-gim- | Lua | Love2D | repo — gallery |
| /u/gLeviRodriguez | Rust | libtcod | repo |
| /u/godescalc | Python 3 | libtcod | repo |
| /u/Harionago | Python 3 | libtcod | repo |
| /u/HexDecimal | Python 3 | python-tcod, numpy | repo (active maintainer of libtocd, libtocdpy, python-tcod, python-tdl) |
| /u/HeWhoWritesCode | Pascal | (custom) | repo |
| /u/hufflepuff_valkyrie | Python 3 | libtcod | repo |
| /u/iamgabrielma | C# | Unity | repo, blog — screen 1 |
| /u/inthane | Python 3 | libtcod | repo |
| /u/itsnotxhad | Python 3 | libtcod | repo, blog |
| /u/Jalexander39 | Lua | Love2D, rotLove | repo |
| /u/Jbone359 | Python 3 | libtcod | repo |
| /u/KarbonKitty | Typescript | ROT.js | repo |
| /u/kinglslbob | Python 3 | libtcod | repo |
| /u/Marthusz | Python 3 | libtcod | repo |
| /u/mattpwest | Python 3 | libtcod | repo — screen 1 |
| /u/muvoksi | C++ | libtcod | repo |
| /u/nilamo | Python 3 | libtcod | repo |
| /u/Nzen_ | Java | (scratch) | repo |
| /u/__Oref__ | Python 3 | libtcod | repo, blog |
| /u/patrl | Haskell | SDL2, apecs | repo |
| /u/PhreakPhR | Python 3 | libtcod | repo |
| /u/phxrocker | Python 3 | libtcod | repo |
| /u/pkzeroh | Python 3 | libtcod | repo |
| /u/PTrefall | C# | Unity, Fluid HTN | repo |
| /u/question-23 | C# | SadConsole | repo |
| /u/Quistnix | Python 3 | libtcod | repo — screen 1 |
| /u/Ratfink23 | Python 3 | libtcod | repo |
| /u/ReferentiallyMe | Clojure | Quil | repo |
| /u/Reflex27 | Javascript | ROT.js | blog |
| /u/RichardWizdan | GML | Game Maker Studio 2 | repo |
| /u/ryosen | Python 3 | libtcod | repo |
| /u/sectorad | Lua | BearLibTerminal, rotLove | repo |
| /u/Skaruts | Nim | libtcod | repo |
| /u/spicebo1 | Rust | libtcod | repo |
| /u/swish014 | C# | (scratch) | repo |
| /u/tehw1n | C# | Unity | repo — screen 1, 2 |
| /u/thebracket | Rust | (custom) | repo — screen 1, 2 |
| /u/theoldestnoob | Python 3 | libtcod | repo — screen 1 |
| /u/TheseusInABottle | Python 3 | libtcod | repo |
| /u/Thunderducky | Typescript | (scratch) | repo |
| /u/TorvaldtheMad | Rust | libtcod | repo |
| /u/tpseven | PureScript | (scratch) | repo — screen 1 |
| /u/TStand90 | Python 3 | BearLibTerminal, libtcod | repo (author of revised libtcod tutorial) |
| /u/usami33 | Python 3 | libtcod | repo |
| /u/V1carium | Python 3 | libtcod | repo |
| /u/VedVid | Pony | BearLibTerminal | repo |
| /u/Vertixico | Java | AsciiPanel | repo |
| /u/waz4life | Python 3 | libtcod | repo |
| /u/veoviscool12 | Python 3 | libtcod | repo |
| /u/VikingSchism | Python 3 | libtcod | repo |
| /u/Viol53 | Python 3 | libtcod | repo |
| /u/week77 | Java | AsciiPanel | repo |
| /u/zachuk | Java | (scratch) | repo |
| /u/Zireael07 | Javascript | (scratch) | repo |
| /u/Zireael07 | Rust | (scratch) | repo — screen 1 |
| /u/zwilf | Python 3 | libtcod | repo |
(You’ll find yet more participants in the threads, though they have no public repo/links.)
Version 2018
On June 19th, 2018, r/roguelikedev began a summer code-along series to both ease beginners into roguelike development and help maintain motivation through the multi-week tutorial. Read more about it in the initial announcement. The previous year’s event was really successful and lots of people were interested in trying again, or joining us for the first time, so here we go again! We’ve switched to Python 3 and a newer tutorial for 2018. (Update 2019: The tutorial referenced last year has moved to here.)
Logo
Complete archives of the event:
- Week 1 — Parts 0 & 1: Setting up Python and libtcod, drawing an
@, and moving around - Week 2 — Parts 2 & 3: The object system and generating your first map
- Week 3 — Parts 4 & 5: Field of view, placing enemies, and attacking
- Week 4 — Parts 6 & 7: Combat damage and building the interface
- Week 5 — Parts 8 & 9: Items, inventory and ranged targeting
- Week 6 — Parts 10 & 11: Save/load and leveling up
- Week 7 — Parts 12 & 13: Monster/item progression and equipment
- Week 8: Sharing your game
- Summary
Although the 2018 event is over, the tutorial is still available along with plenty of reference repos for different languages and libraries below, and you can also find help here at r/roguelikedev and on the Discord server.
Once again the dev-along was pretty popular, so I can imagine we’ll hold this even again next year!
Directory of participants
Links are in bold for those projects which are confirmed to have completed the tutorial. (If you’d like to update any of your info, feel free to PM /u/Kyzrati with the relevant changes.)
| Dev | Language(s) | Libraries etc. | Links/Screenshots |
|---|---|---|---|
| (forkable empty project by /u/aaron_ds) | Python 3 | libtcod | repo |
| /u/TStand90 | Python 3 | libtcod | main tutorial author |
| /u/EsotericRogue | Python 3 | libtcod | repo with streamed tutorial |
| /u/Larkenx | Kotlin | KTerminal | repo with Kotlin tutorial |
| /u/Lokathor | Rust | dwarf-term | repo with Rust tutorial |
| /u/Sh4rPEYE | Racket | 2hdtp/universe | repo with Racket tutorial |
| /u/Aganthor | Python 3 | libtcod | repo |
| /u/Blundering_Beluga | Ruby | BearLibTerminal | repo — screen 1 / 2 / 3 / 4 / 5 / 6 / 7 / 8 |
| /u/brianbruggeman | Python 3 | tdl | repo |
| /u/chrisdian_dev | Python 3 | libtcod | repo — screen 1 / 2 / 3 / 4 |
| /u/cld | Python 3 | libtcod | repo |
| /u/cliffsdover | GDScript | Godot | repo |
| /u/CrocodileSpacePope | Rust | libtcod | repo |
| /u/DerekB52 | Kotlin | libGDX | repo |
| /u/DerreckValentine | C# | Unity | repo — screen 1 |
| /u/devonps | Python | libtcod | repo |
| /u/domtorr | C# | Unity | repo |
| /u/DontEatSoapDudley | C++ | libtcod | repo |
| /u/dystheria | C++ | libtcod | repo |
| /u/Fulk0 | Python 3 | libtcod | repo |
| /u/hagerty9009 | C++ | libtcod | repo |
| /u/haveric | Javascript | — | repo — screen 1 / 2 / 3 / 4 |
| /u/haveric | Python 3 | libtcod | repo |
| /u/Inkwalker | ? | Unity | repo |
| /u/HexDecimal | Python 3 | python-tcod, numpy | repo (active maintainer of libtocd, libtocdpy, python-tcod, python-tdl) |
| /u/jack_is_online | C# | RLNET | repo |
| /u/JackBister | TypeScript | ROT.js | repo |
| /u/jpelgrims | awk | — | repo |
| /u/Kehvarl | Python 3 | libtcod | repo |
| /u/level27geek | Lua | Love2D, rotLove | repo |
| /u/masterofvillainy | Python 3 | PyGame | screen 1 |
| /u/Maugrift | Python 3 | libtcod | repo — itch.io download |
| /u/okiedad | Python 3 | libtcod | repo |
| /u/Rakaneth | Javascript | ROT.js | repo |
| /u/resty-daze | Lua | Love2D | repo |
| /u/Rinneeeee | Python 3 | libtcod | repo |
| /u/rspencer01 | Python 3 | libtcod | screen 1 / 2 / 3 / 4 |
| /u/Seeveen | Rust | tcod-rs, Specs | repo |
| /u/ShotShadow | Swift | SpriteKit | repo |
| /u/SickWillie | C++ | SDL2 | repo — screen 1 / 2 / 3 / 4 / 5 / 6 |
| /u/Taco_Chop | Python 3 | libtcod | repo |
| /u/toptea | Python 3 | libtcod-cffi, numpy, esper | repo — screen 1 / 2 / 3 / 4 |
| /u/VedVid | Go | BearLibTerminal | repo |
| /u/VedVid | Lua | BearLibTerminal | repo |
| /u/_velocicat | Java | AsciiPanel | repo |
| /u/vsrz | Python 3 | libtcod | repo |
| /u/_wolfenswan | Python 3 | tdl | repo |
| /u/zekins | Python 3 | libtcod | repo |
| /u/Zireael07 | Haxe | HaxeFlixel | repo — screen 1 |
(You’ll find yet more participants in the threads, though they have no public repo.)
Version 2017
On June 20th, 2017, r/roguelikedev began a summer code-along series to both ease beginners into roguelike development and help maintain motivation through the multi-week tutorial. Read more about it in the initial announcement.
Logo
Complete archives of the event:
- Week 1 — Part 0: Setting up Python
- Week 2 — Part 1: Graphics and Part 2: The Object and the Map
- Week 3 — Part 3: The Dungeon
- Week 4 — Part 4: Field-of-view and Exploration and Part 5: Preparing for Combat
- Week 5 — Part 6: Going Berserk! and Part 7: The GUI
- Week 6 — Part 8: Items and Inventory and Part 9: Spells and Ranged Combat
- Week 7 — Part 10: Main Menu and Saving
- Week 8 — Part 11: Dungeon Levels and Character Progression and Part 12: Monster and Item Progression
- Week 9 — Part 13: Adventure Gear
- Week 10 — Sharing Your Game!
- Summary
Although the 2017 event is over, the tutorial is still available along with plenty of reference repos for different languages and libraries below, and you can also find help here at r/roguelikedev and on the Discord server.
Also, it was so popular we might just do it again next year 
Directory of participants
Links are in bold for those projects which are confirmed to have completed the tutorial. (If you’d like to update any of your info, feel free to PM /u/Kyzrati with the relevant changes.)
| Dev | Language(s) | Libraries etc. | Links/Screenshots |
|---|---|---|---|
| (forkable empty project by /u/aaron_ds) | Python 2 | libtcod | repo |
| /u/AetherGrey / /u/TStand90 | Python 3 | libtcod | revising original tutorial for Python 3 — repo |
| albenzo | OCaml | — | repo |
| /u/astynahs | Haskell | Brick, Vty | repo |
| /u/athros | Lua | PICO-8 | repo |
| /u/Aukustus | C# | BearLibTerminal | repo — screen 1 |
| /u/Bathmoon | Python 3 | tdl | repo |
| /u/beaver_of_time | Python 3 | libtcod | repo — screen 1 / 2 / 3 |
| /u/between2spaces | Javascript | ROT.js, ES2015 | repo |
| /u/Chronophilia | Javascript | ROT.js | demo |
| dmiller113 | Elm | — | repo |
| /u/Daealis | Python 2 | libtcod | repo |
| /u/Emmsii | Java | AsciiPanel | repo — itch.io Download — screen 1 / 2 / 3 / 4 / 5 / 6 / 7 |
| /u/eruonna | Javascript | ROT.js | repo |
| /u/Fajita_Monologues | Python 3 | BearLibTerminal, ClubSandwich | repo |
| /u/GraySentinel | Python 3 | BearLibTerminal, tdl | repo — screen 1 |
| /u/Hobblton | Java | VTerminal, VNameGenerator, VRadio | repo |
| /u/Jeraman | Go | BearLibTerminal | repo |
| /u/johnsbro | Javascript | ROT.js, Electron | repo |
| /u/komiblanka | Python 3 | tdl | repo |
| /u/LadyDanaee | Python 3 | libtcod | repo |
| /u/level27geek | Python 2 | libtcod, PyGame | repo — screen 1 |
| /u/Lokathor | Haskell | — | repo |
| /u/Lunarex | Lua | Love2D | repo |
| /u/LyndsySimon | Nim | BearLibTerminal | repo |
| /u/M123Miller | C# | Unity | repo |
| /u/mapimopi | Ruby | BearLibTerminal | repo |
| /u/MEaster | Rust | tcodrs | repo |
| /u/Melwute | Rust | tcodrs | repo |
| /u/MykeMcG | Python 3 | libtcod | repo — screen 1 |
| /u/Mystal | Rust | tcodrs | repo |
| /u/nekosune | Python 3 | tdl | repo |
| /u/NoahTheDuke | Python 3 | BearLibTerminal | repo |
| /u/onekanban | Javascript | ROT.js | repo |
| /u/Orreryo | Moonscript | Love2D | repo |
| /u/PhantomTicTacs | Java | AsciiPanel | repo |
| /u/quasiChaos | Python 2 | libtcod | repo |
| /u/rex64 | Python 3 | tdl | repo |
| /u/rubxcubedude | C++ | freeglut | repo |
| /u/Scautura | Python 3 | BearLibTerminal, LibTCod-CFFI | repo |
| /u/Scautura | C# | BearLibTerminal, RogueSharp | repo |
| /u/sepiida21 | C# | BearLibTerminal, RogueSharp | repo |
| /u/SirPrefect | Python 3 | tdl | repo |
| /u/stevelosh | Common Lisp | BearLibTerminal | repo |
| /u/usrTaken | Python 2, 3 | Libtcod | repo — screen 1 |
| /u/VedVid | Go | BearLibTerminal | repo |
| /u/wazoocakes | Javascript | ROT.js, React, Electron | repo |
| /u/_wolfenswan | Python 3 | tdl | repo — screen 1, 2, 3, 4 |
| /u/WrogueOne | Python 3 | tdl | repo |
| /u/XtraRed | Python 3 | tdl | repo |
| /u/Zireal07 | Python 2 | BearLibTerminal | repo — screen 1 |
(You’ll find yet more participants in the threads, though they have no public repo.)