- Назад
- Обзор: Express Nodejs
- Далее
Эта вторая статья в нашем учебнике Express показывает, как создать каркас проекта веб-сайта, который позже можно будет заполнить с помощью путей сайта, шаблонов представлений и обращений к базе данных.
| Необходимые знания: | Установить среду разработки Node. Просмотреть учебник Express. |
|---|---|
| Задача: | Научиться запускать свои проекты используя Express Application Generator. |
Обзор
В этой статье показано, как создать каркас сайта с помощью средства Express Application Generator. Каркас затем можно будет заполнить с помощью путей сайта, шаблонов/представлений и обращений к базе данных. Мы используем это средство для создания основы нашего сайта Local Library. К основе будет добавлен код, необходимый сайту. Создание каркаса чрезвычайно просто — требуется только вызвать генератор в командной строке, указав имя нового проекта, дополнительно можно указать также движок шаблона сайта и генератор CSS.
Далее показано, как вызвать генератор приложений, и даётся небольшое пояснение различных вариантов представлений и CSS. Мы поясним структуру каркаса веб-сайта. В конце мы покажем, как запустить веб-сайт, чтобы убедиться, что он работает.
Примечание: Express Application Generator — не единственный генератор Express-приложений, и созданный проект —не единственный жизнеспособный способ организации ваших файлов и каталогов. Однако созданный сайт имеет модульную структуру, которую легко понять и расширить. О минимальном Express приложении смотрите Hello world example в документации Express.
Применение генератора приложений
Вы уже должны были установить express-generator, читая статью установка среды разработки Node. Напомним, что генератор установлен с помощью менеджера пакетов NPM, при выполнении команды:
npm install express-generator -g
express-generator имеет ряд параметров, которые можно увидеть, выполнив команду express —help (или express -h):
> express --help

  Usage: express [options] [dir]

  Options:

    -h, --help           output usage information (информация по применению)
        --version        output the version number (номер версии express)
    -e, --ejs            add ejs engine support (добавить поддержку движка ejs)
        --pug            add pug engine support (добавить поддержку движка pug)
        --hbs            add handlebars engine support (добавить поддержку движка handlebar)
    -H, --hogan          add hogan.js engine support (добавить поддержку движка hogan.js)
    -v, --view <engine>  add view <engine> support (ejs|hbs|hjs|jade|pug|twig|vash) (defaults to jade)
                         (добавить поддержку движков представлений. По умолчанию - jade)
    -c, --css <engine>   add stylesheet <engine> support (less|stylus|compass|sass) (defaults to plain css)
                         (добавить поддержку движков стилей, по умолчанию - простой CSS)
        --git            add .gitignore (добавить поддержку .gitignore)
    -f, --force          force on non-empty directory (работать в каталоге с файлами)
Команда express создаст проект в текущем каталоге с использованием (устаревшего) движка представления Jade и обычного CSS. Если указать express name, проект будет создан в подкаталоге name текущего каталога.
Можно выбрать движок представления (шаблон), используя --view параметр --css позволяет выбрать движок для создания CSS.
Примечание: Другие опции (--hogan, --ejs, --hbs и пр.) для выбора шаблонизатора устарели. Используйте --view (или -v)!
Какой движок представлений следует использовать?
Express-generator даёт возможность сконфигурировать несколько популярных движков, включая EJS, Hbs, Pug (Jade), Twig, и Vash, но по умолчанию выбран Jade. Экспресс сразу после установки может поддерживать большое количество и других шаблонизаторов.
Примечание: При желании использовать шаблонизатор, который не поддерживается генератором, просмотрите документацию Using template engines with Express и документацию для нужного шаблонизатора.
Как правило, следует выбрать шаблонизатор, который имеет всю необходимую вам функциональность и обеспечивает вам высокую производительность — так же, как вы выбираете любой другой компонент! Некоторые критерии для сравнения шаблонизаторов:
- Время до получения результата — если ваша команда уже имела дело с шаблонизатором, то, скорее всего, продуктивнее будет использовать этот шаблонизатор. Если нет, тогда следует учесть все относительные сложности изучения кандидатов в шаблонизаторы.
- Популярность и активность — проверьте популярность движка, возможно, у него есть активное сообщество. Очень важно иметь поддержку для движка, если у вас возникнут проблемы в течении жизни веб-сайта.
- Стиль — некоторые шаблонизаторы используют особую разметку для отображения вставленного контента внутри «обычного» HTML, а другие строят HTML, используя специальный синтаксис (например, используя отступы или блочные имена).
- Производительность и время интерпретации.
- Особенности — следует выбирать движок с учётом таких особенностей:
- Наследование макета: позволяет определить базовый шаблон и затем наследовать только те части, которые отличаются для конкретной страницы. Это, как правило, лучший подход, чем создание шаблонов путём включения нескольких необходимых компонентов или создания шаблона с нуля каждый раз.
- Поддержка «Include»: позволяет создавать шаблоны, включая другие шаблоны.
- Краткий синтаксис управления переменными и циклами.
- Возможность фильтровать значения переменных на уровне шаблона (например, делать переменные в верхнем регистре или форматировать значение даты).
- Возможность создавать выходные форматы, отличные от HTML (например, JSON или XML).
- Поддержка асинхронных операций и потоковой передачи.
- Возможность использования как на клиенте, так и на сервере. Возможность применения движка шаблона на клиенте позволяет обслуживать данные и выполнять все действия или их большую часть на стороне клиента.
Примечание: В интернете множество ресурсов, которые помогут сравнить различные варианты!
Для этого проекта мы используем шаблонизатор Pug (в прошлом назывался Jade) — один из популярнейших Express/JavaScript шаблонизаторов, который поддерживается в Express-generator «из коробки».
Какие шаблонизаторы CSS следует использовать?
Express Application Generator позволяет создавать проекты, настроенные для применения шаблонизаторов CSS: LESS, SASS, Compass, Stylus.
Примечание: простой CSS имеет некоторые ограничения, затрудняющие выполнение задач. Шаблонизаторы CSS позволяют использовать более эффективный подход для создании таблиц стилей CSS, но требуют компиляции файлов таблиц стилей в стандартный CSS для применения в браузере.
Как и в случае с шаблонизаторами сайта, следует применять шаблонизатор, обеспечивающий высокую производительность работы. В этом проекте мы используем обычный CSS (по умолчанию), поскольку простота наших требований к CSS не оправдает применение чего-то более сложного.
Какую базу данных следует использовать?
Сгенерированный код не использует и не содержит в себе какой-либо базы данных. Express может использовать любой движок базы данных, который поддерживается Node (Express не предъявляет каких-либо особых требований к базе данных).
Мы обсудим взаимодействие с базой данных в следующей статье.
Создание проекта
Разрабатывая пример — приложение Local Library, мы построим проект с именем express-locallibrary-tutorial. Используем библиотеку шаблонов Pug, а движок CSS применять не будем.
Выберем место для нового проекта — каталог express-locallibrary-tutorial — и выполним команду:
express express-locallibrary-tutorial --view=pug
Будет создан каталог express-locallibrary-tutorial и выведен список созданных внутри каталога проектных файлов.
   create : express-locallibrary-tutorial
   create : express-locallibrary-tutorial/package.json
   create : express-locallibrary-tutorial/app.js
   create : express-locallibrary-tutorial/public/images
   create : express-locallibrary-tutorial/public
   create : express-locallibrary-tutorial/public/stylesheets
   create : express-locallibrary-tutorial/public/stylesheets/style.css
   create : express-locallibrary-tutorial/public/javascripts
   create : express-locallibrary-tutorial/routes
   create : express-locallibrary-tutorial/routes/index.js
   create : express-locallibrary-tutorial/routes/users.js
   create : express-locallibrary-tutorial/views
   create : express-locallibrary-tutorial/views/index.pug
   create : express-locallibrary-tutorial/views/layout.pug
   create : express-locallibrary-tutorial/views/error.pug
   create : express-locallibrary-tutorial/bin
   create : express-locallibrary-tutorial/bin/www

   install dependencies:
     > cd express-locallibrary-tutorial && npm install

   run the app:
     > SET DEBUG=express-locallibrary-tutorial:* & npm start
После списка файлов генератор выведет инструкции для установки зависимостей (указанных в файле package.json) и запуска приложения (инструкции предназначены для Windows; для Linux/Mac OS X они могут слегка отличаться).
Запускаем каркас сайта
Сейчас у нас есть готовый каркас проекта. Сайт пока ничего не делает, но его стоит запустить, чтобы убедиться в его работоспособности.
- Прежде всего установим зависимости (команда
installзапросит все пакеты зависимостей, указанные в файле package.json).cd express-locallibrary-tutorial npm install - Затем запустим приложение.
- В Windows используйте команду:
SET DEBUG=express-locallibrary-tutorial:* & npm start - В Mac OS X или Linux используйте команду:
DEBUG=express-locallibrary-tutorial:* npm start
- В Windows используйте команду:
- Откроем http://localhost:3000/ в браузере. Мы должны увидеть такую страницу:
У нас получилось веб-приложение на базе Express, работающее по адресу localhost:3000.
Примечание: Можно также запустить приложение командой npm start. Переменная DEBUG, указанная в примере, включает логирование в консоль для дальнейшей отладки. Так, при посещении страницы веб-приложения, вы увидите похожий вывод в консоль:
>SET DEBUG=express-locallibrary-tutorial:* & npm start

> express-locallibrary-tutorial@0.0.0 start D:express-locallibrary-tutorial
> node ./bin/www

  express-locallibrary-tutorial:server Listening on port 3000 +0ms
GET / 200 288.474 ms - 170
GET /stylesheets/style.css 200 5.799 ms - 111
GET /favicon.ico 404 34.134 ms - 1335
Обеспечиваем
перезапуск сервера при изменении файлов
Любые изменения, внесённые на веб-сайт Express, не будут отображаться до перезапуска сервера. Остановка (Ctrl-C) и перезапуск сервера каждый раз после внесения изменений быстро становится раздражающей, поэтому стоит автоматизировать перезапуск.
Одно из самых простых средств для этого —
nodemon. Его обычно устанавливают глобально (так как это «инструмент»), но сейчас мы установим его и будем применять локально как зависимость разработки, так что любые разработчики проекта получат его автоматически при установке приложения. Выполним следующую команду (предполагаем, что мы находимся в корневом каталоге):
npm install --save-dev nodemon
Если вы предпочитаете установить nodemon глобально, не только для этого проекта, надо выполнить команду
npm install -g nodemon
В файле package.json проекта появится новый раздел с этой зависимостью (на вашей машине номер версии nodemon может быть другим) :
  "devDependencies": {
    "nodemon": "^1.11.0"
  }
Поскольку nodemon не установлен глобально, его нельзя запустить из командной строки (пока мы не добавим его в путь), но его можно вызвать из сценария NPM, так как NPM знает все об установленных пакетах. Раздел scripts в файле package.json исходно будет содержать одну строку, которая начинается с "start". Обновите его, поставив запятую в конце строки, и добавьте строку "devstart", показанную ниже:
  "scripts": {
    "start": "node ./bin/www",
    "devstart": "nodemon ./bin/www"
  },
Теперь можно запустить сервер почти так же, как и ранее, но командой npm run devstart:
- В Windows:
SET DEBUG=express-locallibrary-tutorial:* & npm run devstart
- Для macOS или Linux:
DEBUG=express-locallibrary-tutorial:* npm run devstart
Примечание: Сейчас после изменения любого файла проекта сервер будет перезапускаться (или можно самостоятельно перезапустить его, введя rs в командной строке). Вам всё равно придётся обновить страницу в браузере .
Теперь мы должны выполнять команду «npm run <scriptname>» а не просто npm start, поскольку «start», это, по сути, команда NPM, сопоставленная сценарию в файле package.json. Можно заменить команду в сценарии «start», но, так как мы хотим использовать nodemon только во время разработки, разумно создать новую команду сценария.
Созданный проект
Давайте посмотрим на созданный проект.
Структура каталогов
После установки зависимостей проект имеет такую структуру файлов (файлы — это элементы без префикса»/»). Файл package.json определяет имя файла с приложением, сценарии запуска, зависимости и др. Сценарий запуска задаёт точку входа приложения, у нас — файл JavaScript /bin/www. Этот файл настраивает некоторые обработчики ошибок приложения, а затем загружает app.js для выполнения остальной работы. Пути приложения хранятся в отдельных модулях каталога routes/. Шаблоны хранятся в каталоге /views.
/express-locallibrary-tutorial
    app.js
    /bin
        www
    package.json
    /node_modules
        [about 4,500 subdirectories and files]
    /public
        /images
        /javascripts
        /stylesheets
            style.css
    /routes
        index.js
        users.js
    /views
        error.pug
        index.pug
        layout.pug
Далее файлы описаны более подробно.
package.json
Файл package.json указывает зависимости приложения и содержит другие данные:
{
  "name": "express-locallibrary-tutorial",
  "version": "0.0.0",
  "private": true,
  "scripts": {
    "start": "node ./bin/www",
    "devstart": "nodemon ./bin/www"
  },
  "dependencies": {
    "body-parser": "~1.15.2",
    "cookie-parser": "~1.4.3",
    "debug": "~2.2.0",
    "express": "~4.14.0",
    "morgan": "~1.7.0",
    "pug": "~2.0.0-beta6",
    "serve-favicon": "~2.3.0"
  },
  "devDependencies": {
    "nodemon": "^1.11.0"
  }
}
Зависимости включают пакет express и пакет для выбранного движка представления (pug). Кроме того, указаны пакеты, полезные во многих веб-приложениях:
- body-parser: — анализирует часть тела входящего запроса HTTP и облегчает извлечение из него различных частей. Например, мы можно читать
POST-параметры. - cookie-parser: разбирает заголовок и заполняет
req.cookies(по сути, даёт удобный метод для доступа к информации cookie). - debug: небольшой отладчик, работающий по образцу методики отладки ядра node.
- morgan: средство логирования запросов HTTP для node.
- serve-favicon: средство обработки favicon (значка, используемого для представления сайта на вкладках браузера, закладках и т. д).
Раздел «scripts» определяет скрипт» start», выполняемый при запуске сервера командой npm start. Можно видеть, что самом деле выполняется команда node ./bin/www. Кроме того, определяется script «devstart«, который вызывается командой npm run devstart. Запускается тот же файл ./bin/www ,но командой nodemon вместо node.
"scripts": {
    "start": "node ./bin/www",
    "devstart": "nodemon ./bin/www"
  },
Файл www
Файл /bin/www – это входная точка приложения. Сначала в файле создаётся объект основного приложения, расположенного в app.js — выполняется app= require(./app).
#!/usr/bin/env node

/**
 * Module dependencies.
 */

var app = require('../app');
Примечание: require() — это глобальная функция node для импорта модулей в текущий файл. Для модуля app.js указан относительный путь, а расширение файла по умолчанию (.js) опущено.
Оставшаяся часть кода настраивает порт сервера node для HTTP (определён в переменной среды или 3000, если не определён), и начинает обработку и протоколирование соединений и ошибок сервера. Сейчас вам не требуется дополнительных сведений о коде (все в этом файле шаблонно), но, при желании, его можно посмотреть.
Файл app.js
Этот файл создаёт объект приложения express (с именем app, по соглашению), настраивает приложение и промежуточное ПО, а затем экспортирует приложение из модуля. В приведённом ниже коде показаны только те части файла, которые создают и экспортируют объект приложения:
var express = require('express');
var app = express();
...
module.exports = app;
Именно этот экспортированный объект использован в рассмотренном ранее файле www.
Рассмотрим детали файла app.js. Сначала при помощи require(…) выполняется импорт некоторых полезных библиотек node: express, serve-favicon, morgan, cookie-parse, body-parser (они ранее были загружены для нашего приложения командой npm install), а также path из основной библиотеки node (применяется для разбора путей каталогов и файлов).
var express = require('express');
var path = require('path');
var favicon = require('serve-favicon');
var logger = require('morgan');
var cookieParser = require('cookie-parser');
var bodyParser = require('body-parser');
Затем require запрашивает модули из каталога путей route. Эти модули и файлы содержат код для обработки конкретного набора соответствующих путей (URL маршрутов). Если мы расширим каркас приложения, например, чтобы получить список книг библиотеки, нам следует добавить новый файл для обработки пути, связанного с книгами.
var index = require('./routes/index');
var users = require('./routes/users');
Примечание: Здесь мы только импортируем модули. В действительности эти пути ещё не используются — это произойдёт в файле несколько позже.
Далее, импортированные модули express применяются для создания объекта app, который потом устанавливает движки-шаблоны представления. Установка движков состоит их двух частей. В первой мы задаём значение ‘view’, указывая папку, в которой будут размещаться шаблоны (у нас это /views). Во второй мы задаём значение движка ‘view engine’, указывая на библиотеку шаблона (у нас — «pug»).
var app = express();

// view engine setup
app.set('views', path.join(__dirname, 'views'));
app.set('view engine', 'pug');
Следующие строки вызывают app.use(…), чтобы добавить промежуточные (middleware) библиотеки в цепочку обработки запросов. Кроме сторонних библиотек, импортированных ранее, используем библиотеку Express.static, что позволит обрабатывать статические файлы из папки /public корня проекта.
// uncomment after placing your favicon in /public
//app.use(favicon(path.join(__dirname, 'public', 'favicon.ico')));
app.use(logger('dev'));
app.use(bodyParser.json());
app.use(bodyParser.urlencoded({ extended: false }));
app.use(cookieParser());
app.use(express.static(path.join(__dirname, 'public')));
Теперь, когда промежуточные библиотеки настроены, мы добавляем (импортированный ранее) код обработки путей в цепочку обработки запросов. Импортированный код будет задавать отдельные пути для разных частей сайта:
app.use('/', index);
app.use('/users', users);
Примечание: . пути, указанные выше (‘/’ и ‘/users') рассматриваются как префиксы путей, определённых в импортированных файлах. Так, например, если импортированный модуль users определяет путь для /profile, для доступа следует указать /users/profile. Мы поговорим подробнее о путях в последующей статье.
Последняя в файле промежуточная библиотека добавляет методы обработки ошибок и ответов 404 от HTTP.
// catch 404 and forward to error handler
app.use(function(req, res, next) {
  var err = new Error('Not Found');
  err.status = 404;
  next(err);
});

// error handler
app.use(function(err, req, res, next) {
  // set locals, only providing error in development
  res.locals.message = err.message;
  res.locals.error = req.app.get('env') === 'development' ? err : {};

  // render the error page
  res.status(err.status || 500);
  res.render('error');
});
Объект app приложения Express теперь полностью настроен. Остался последний шаг — добавить его к экспортируемым элементам модуля (это позволит импортировать его в файле /bin/www).
Пути (Routes)
Файл путей /routes/users.js приведён ниже (файлы путей имеют сходную структуру, поэтому нет необходимости приводить также index.js). Сначала загружается модуль Express, затем он используется для получения объекта express.Router. После этого для этого объекта задаётся путь, и, наконец, объект-роутер экспортируется из модуля (именно это позволяет импортировать файл в app.js):.
var express = require('express');
var router = express.Router();

/* GET users listing. */
router.get('/', function(req, res, next) {
  res.send('respond with a resource');
});

module.exports = router;
Путь определяет колбэк-функцию, которая будет вызвана, когда обнаружится HTTP GET-запрос корректного вида. Образец для сопоставления пути задаётся при импорте модуля — (‘/users‘) плюс что-то, определяемое в этом файле (‘/‘). Иными словами, этот путь будет использован, когда получен URL-запрос /users/.
Примечание: запустите сервер и задайте в браузере URL http://localhost:3000/users/. Вы должны увидеть сообщение: ‘respond with a resource’.
Стоит отметить, что колбэк-функция имеет третий аргумент — ‘next‘, т. е. является не простой колбэк-функцией, а колбэк-функцией промежуточного модуля. Пока третий аргумент не используется, но будет полезен в дальнейшем, если мы захотим создать несколько обработчиков пути '/'.
Представления (шаблоны)
Файлы преставлений (шаблонов) хранятся в каталоге /views (это указано в app.js) и имеют расширение** .pug. Метод Response.render() выполняет указанный шаблон, передавая объекту значение именованной переменной, и затем посылает результат как ответ. В коде из /routes/index.js (приводится ниже) можно увидеть, что роут отвечает, используя шаблон «index» с переданным значением переменной «title» из шаблона.
/* GET home page. */
router.get('/', function(req, res) {
  res.render('index', { title: 'Express' });
});
Шаблон для пути ‘/’ приведён ниже (файл index.pug). О синтаксисе мы поговорим позже. Сейчас важно знать, что переменная title со значением ‘Express’ помещена в определённое место шаблона.
extends layout

block content
  h1= title
  p Welcome to #{title}
Мини-тест
Создайте новый путь в /routes/users.js, чтобы выводить текст «You’re so cool» или «Ну, вы крутой!» по URL /users/cool/. Проверьте его, запустив сервер и посетив в браузере http://localhost:3000/users/cool/.
Итоги
Сейчас создан каркас проекта Local Library. Мы проверили, что он запускается с использованием Node. Но главное, что вы поняли структуру проекта, и знаете, где и как добавить пути и представления для нашей локальной библиотеки.
Далее мы изменим каркас, чтобы он работал как библиотечный веб-сайт
Смотрите также

This tutorial will show you how to convert a static website that uses HTML, CSS and JavaScript (JS) to a dynamic one using MongoDB, Express, Static HTML, CSS, JS, and Node.js.
Our tech stack will be similar to the popular MEAN/MERN stack (MongoDB, Express, Angular or React, and NodeJS). But instead of using Angular or React, we will use a templating engine called EJS (Embedded JavaScript.)
Other popular templating engines include Handlebars, Pug, and Nunjucks.
Afterwards, we will deploy our Node.js web app to DigitalOcean and cover domain names, SSL, reverse proxies, and process managers.
Learning a templating language can be easier than a JS framework. You can just write HTML, and it lets you insert the same piece of code in multiple locations (called partials) or pass server-side variables to be displayed on the front-end (such as a username).
Table of Contents
- Developing Your First Node.js Web App
- Installing Node.js
- Testing The Install
- Creating Your First Server
- Next Steps
- Templating Basics
- Passing Server-Side Data to the Front-End
- Deploying Your First Node.js Web App
- Setting Up DigitalOcean
- Connecting To Your Droplet
- Deploying Your Node.js Web App
- Configuring Your Domain Name
- Removing the Port Number From Your URL
- Running the App on Boot (Setting Up A Process Manager)
Developing Your First Node.js Web App
Installing Node.js
First, make sure you’ve installed Node.js on your local machine or VPS hosting provider. If you haven’t installed it, go to the Node.js website to do so.
With Node.js, you can write server-side code using a special form of JavaScript so you can use an already familiar language.
The Node.js installer comes bundled with the package manager NPM. NPM is a repository for Node Modules, reusable pieces of code that can extend the functionality of your server. It’s similar to a plugin repository, and Node Modules can be thought of as code snippets or libraries (depending on how large they are).
Windows Users: Need to add Node and NPM to their PATH so they can call them easily on the command line. For more in-depth instructions, see my guide here.
Testing the Install
To test that the installation has worked correctly, open a terminal window, and type node -v and npm -v. If the resulting message starts with a v and is followed by some numbers (indicating a version), then the installation has been successful. Now you’re ready to create your first server.
Creating Your First Server
Once you have created a static website, the first step in creating a Node.js app is to create an Express web server.
First, move all your website’s static files (HTML, CSS, JS, images, etc.) into a folder called public and create a file called server.js in the root directory of your website folder. In the server.js file type:
// Load Node modules
var express = require('express');
// Initialise Express
var app = express();
// Render static files
app.use(express.static('public'));
// Port website will run on
app.listen(8080);
Then in the terminal, type: npm init. Press enter to accept the default parameters for all the following options, but make sure the entry point is server.js.
Finally, type: npm start and then go to the IP Address of your VPS host, or localhost:8080/index.html (or the name of one of your webpages) in the browser. The Express server you just created should now be serving your website’s static files.
Next Steps
Moving forward, we will discuss how to convert your static files to dynamic ones using the EJS templating engine. Then we’ll look at how to copy repeated code using partials and inject server-side variables to the front-end.
Templating Basics
Installing EJS
The first step to use EJS is to install it. A simple npm install ejs --save will do the trick. The --save parameter saves the module to the package.json file.
This makes it so anyone who clones the git repo (or otherwise downloads the site’s files) can install all the required Node modules for the project (called dependencies) using the npm install command instead. Then they don’t have to type npm install (module name) for however many modules they need.
Converting Static Pages to EJS Files
Next, you need to convert your static HTML files into dynamic EJS ones and set up your folder structure in the way EJS expects.
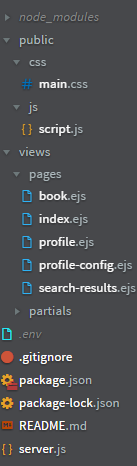
In the root directory of your website, create a folder called views. Inside that folder create two sub-folders called pages and partials. Move all your HTML files into the pages sub-folder and rename the .html file extensions to .ejs.
Your folder structure should look similar to the picture below.
Reusing Code — Creating Your First EJS Partial
When creating static sites, there’s often code that you repeat on every page such as the head (where the meta tags are located), header, and footer sections.
It’s inconvenient to change them on every page (especially on larger sites) if alterations are needed. But if you use EJS partials then you won’t have to. Editing one template (partial) file will update the code on every page that the file is included in.
We’ll take a typical part of a website to be templated, the header, as an example. Create a new file called header.ejs in the partials folder. Copy and paste all the code between the <header></header> tags on one of your EJS pages into it.
Finally, on all pages with a header delete the code between the <header></header> tags (the same code you copied to the header.ejs partial file) and replace it with <% include('../partials/header') %>. Now, you’ve created your first EJS partial. Repeat the process for any other repetitive pieces of code such as the head and footer sections.
Small Tip: If you find it hard to differentiate between your pages and partials since they have the same .ejs file extension, it can be helpful to put an underscore _ in front of the names of partials (so _ header.ejs). This is a naming convention that some developers use that can be helpful.
Rendering EJS Pages
Now we get to the exciting part: making the server render the EJS pages and partials so you can see them on the front-end.
server.js Example
// Load Node modules
var express = require('express');
const ejs = require('ejs');
// Initialise Express
var app = express();
// Render static files
app.use(express.static('public'));
// Set the view engine to ejs
app.set('view engine', 'ejs');
// Port website will run on
app.listen(8080);

// *** GET Routes - display pages ***
// Root Route
app.get('/', function (req, res) {
    res.render('pages/index');
});
First, we need to add the EJS Node module to our server. So, in the server.js file (see example above), add const ejs = require('ejs');.
Second, we need to tell our Express server to use EJS so add app.set('view engine', 'ejs');.
Now, we need to configure routes. Routes tell the server what to do when a user goes to a certain URL in your website such as http://testapp.com/login.
There are two types of routes, GET and POST. GET routes display pages and POST routes upload data from the front-end to the server (usually via a form) typically before a page is rendered and the uploaded data is somehow used.
Since we only want to display our EJS pages, we will just use GET routes. Add them after the app.listen(8080) line in server.js. For the index page, the route will be:
// *** GET Routes - display pages ***
// Root Route
app.get('/', function (req, res) {
    res.render('pages/index');
});
The ‘/’ specifies the URL of the website the code will activate on, the req stands for request and res for response. So, the response returned when going to http://testapp.com is rendering (displaying to the browser) the pages/index.ejs page. Add similar routes for your other EJS pages.
Passing Server-Side Data to the Frontend
The main attraction of templating, apart from reusing code, is that you can pass server-side variables to the front-end. Either a single variable like the current user’s username, or an array, like the details of every registered user.
However, the real strength of passing server-side variables becomes apparent when using APIs or databases.
For a basic example, the below code will display «Louise» in the h2 tag of the index page:
server.js
// Route Route
app.get('/', function (req, res) {
    var name = "Louise";
    // Render index page
    res.render('pages/index', {
        // EJS variable and server-side variable
        name: name
    });
});
The first name is the name of the EJS variable (the name for displaying it on the front-end), and the second is the variable that contains the data you want to send. (They don’t have to be identical.)
index.ejs
<h2>My name is <%= name %></h2>
For a simple array, you can use this example instead, which will create a p tag for every name in the listnames variable:
server.js
// Route Route
app.get('/', function (req, res) {
    var listnames = ["Louise", "Sadie", "Erik", "Raph", "Gina"];
    // Render index page
    res.render('pages/index', {
        // EJS variable and server-side variable
        listnames: listnames
    });
});
index.ejs
<% listnames.forEach(function(name) { %>
        <p><%= name %></p>
        <% }); %>
Congratulations. You’ve finished developing your first Node.js web app. In the next part, we will see how we can make it live (deploy it) on the web so you can show it off.
Deploying Your First Node.js Web App
There are many hosting platforms you can use to deploy your Node.js web apps such as Section, Heroku, Vultr, Linode, Google Cloud Platform and Amazon Web Services.
In this walk-through, we will be using DigitalOcean to deploy our Node.js app.
Setting up DigitalOcean
First, create an account on the DigitalOcean platform. There are discount codes available to add free credit to your account such as the code available in the Github Student Developer Pack. Be aware that you can only redeem one code per account.
Second, you need to create a droplet. A droplet is a VPS (Virtual Private Server.) It’s similar to a Linux VM which is hosted on a server farm somewhere.
Once you’ve logged into your account, go to droplets under the Manage heading and click create and then droplets.
You can leave most of the settings as the default but change the plan to the basic $5 a month which contains enough resources for your app. You can scale this up later if needed.
Also, choose the datacenter closest to the target audience of your app and change the authentication to password. While password authentication is less secure (SSH Keys is recommended), it’s much easier to set up. So, for demonstration purposes, we’ll use this method.
All that’s left now is to pick a name (hostname) and click Create Droplet.
Connecting to your Droplet
Shortly afterward, you’ll receive an email containing the username and password of your droplet which you’ll use to login.
Back on the DigitalOcean website, under droplets, click the name of your newly created droplet, and then click on Console. This will open a new tab that will let you control your droplet.
Alternatively, you can use any SSH client with the IP address and user credentials contained in the email.
On your first login, since you used password authentication, it will prompt you to set a new password. A great way to generate secure passwords and store them is a password manager like LastPass.
Deploying Your Node.js Web App
First, you’ll need to copy the code for your web app to your droplet. If you’re using source control such as Git, then it’s as simple as installing git using apt-get install git -y and then using the git clone command git clone (link to your repository), adding the link to your repository at the end.
Second, you’ll need to install Node. Type:
curl -sL https://deb.nodesource.com/setup_14.x | sudo -E bash -
sudo apt-get install -y nodejs
Third, you’ll need to navigate to the folder containing your web app. Type ls and then enter to view all the folders in your current working directory (location). This will look like the image below:

Type cd and then the name of the folder that appears. Type ls again and you should see the files in your web app’s root directory.
Next, you’ll need to install the node modules (dependencies) for your web app. If you installed all your modules with -save at the end, which saves them to the package.json file, then just type npm install and press enter.
If not, when you run npm start an error will appear with module not found. Type npm install (module name) and press enter and then try running npm start again. Repeat the process until the error disappears.
If you need to install MongoDB (if you’ve created a MongoDB database), then follow these instructions.
Finally, type npm start to start your web app. Now that your web app is running, in a new browser tab, type the IP Address of your droplet (found in the email that DigitalOcean sent when you created the droplet) followed by a colon and the port your app runs on. For example, 167.172.54.51:8080.
If you’re using an Express web server (which if you followed my getting started with Node.js guide, you did), you’ll find the port number located in the app.listen() line inside the server.js file. For example, app.listen(8080) which is a common port used.
Congratulations, your first Node.js web app should be displayed in your web browser which is running on your DigitalOcean droplet.
Configuring Your Domain Name
You typed in an IP Address and port number to view your web app but, wouldn’t you prefer a custom domain name like yourapp.com?
Assuming you’ve already bought a domain, the first step is to add a DNS record so your domain name will resolve to the IP address of your DigitalOcean droplet. A DNS record tells your browser what to do when they load your domain. In this case, it should go to the IP address of your droplet.
If you’ve not bought a domain, domain registrars like Namecheap sell domain names and often other services such as email and static/CMS hosting, though there are benefits to going with a dedicated hosting and email provider.
Netlify offers hosting for static sites and SiteGround for CMS websites. Office365 and GSuite are the kings of custom email providers. See my guide for Setting Up a Professional Email to read a comparison of Office365 and GSuite.

Login to your domain registrar and go to the advanced DNS settings of your domain. For example, on Namecheap, it’s the Advanced DNS tab on the Manage Domain screen.

You want to add a new record as follows: the type should be set to A, the host should be either @ or blank (depending on your provider), and the value should be the IP Address of your droplet. Repeat the process for the host www which will do the same for the www version of your domain.
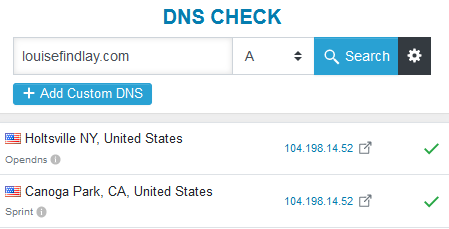
It can take up to 24-48hrs for the changes to process, but it’s usually between 15 minutes to an hour. A quick way to check when it’s done is to go to DNSChecker. Type in your domain name and make sure the type is set to A. When the result comes back as the IP Address of your droplet, then you’ve connected your domain successfully.
The final test is to type your domain name followed by a colon and then the port number (e.g. yourdomain.com:8080). You should now see your web app loading.
Removing the Port Number from your URL
Now that you’ve got a cool domain name hooked up to your web app, you’ll probably want to remove that pesky port number.
We can do this by setting up what’s called a reverse proxy. A reverse proxy will tell your droplet when a user goes to yourdomain.com, it should serve the site at yourdomain.com:8080. We will use the popular reverse proxy Nginx to do so.
The first step is to install Nginx. Type the following to update your package list (so you can get the latest version) and install Nginx:
sudo apt-get update
sudo apt-get install nginx
Since DigitalOcean droplets are created with a firewall enabled, you’ll have to allow Nginx through it so it can work properly. sudo ufw allow 'Nginx Full' will do this.
To check the installation has gone smoothly, go to the http version of your domain name e.g. http://yourdomain.com. If you see a Welcome to Nginx landing page, then it’s been successful.
The second step is to secure your reverse proxy. Currently going to https://yourdomain.com won’t work. That’s because we haven’t configured SSL yet, and we need to install a package called Certbot to do so.
To install Certbot, type the following to ensure you get the latest version:
sudo add-apt-repository ppa:certbot/certbot
sudo apt-get install python-certbot-nginx
Next, you need to add your domain to Nginx so Certbot can generate a certificate to the correct domain. Open the configuration file using sudo nano /etc/nginx/sites-available/default and replace the underscores in the server_name line to your domain. For example, server_name yourdomain.com www.yourdomain.com;. Save the file and exit by typing CTRL+x, y and then enter.
To test that there are no errors in the file, type sudo nginx -t and if there’s none, type sudo systemctl reload nginx to reload Nginx so it will use the updated configuration.
Now we just need to generate the SSL certificate. sudo certbot --nginx -d yourdomain.com -d www.yourdomain.com will start the process. You should choose option 2 for the redirect process because it will forward anyone trying to access the insecure version of your site (http) to the secure (https) version instead.
To test this, go to https://yourdomain.com and you should see the Nginx Welcome screen again.
Finally, we’re onto the last step, adding the Nginx configuration for your web app. For demonstration purposes, we’ll just modify the default one instead of creating a new one specifically for your web app. If you need to host several web apps on one droplet, you’d need to add a new configuration for each site.
Type: sudo nano /etc/nginx/sites-available/default to edit the default configuration file.
You need to change the server_name parameter to the name of your domain. For example: yourdomain.com. Under location /, proxy_pass should be changed to http://localhost:(port name). The ssl_certificate_key should be modified: /etc/letsencrypt/live/(domain name)/privkey.pem. Finally, add the code block below to the end of the file and then type CTRL+X, and then y to exit.
server {
    if ($host = auroraspotter.space) {
        return 301 https://$host$request_uri;
    } # managed by Certbot
        listen 80 default_server;
        listen [::]:80 default_server;
        server_name auroraspotter.space;
    return 404; # managed by Certbot
Here’s a complete example of what it should look like. Note: the server_name should be the name of your domain.
server {
        root /var/www/html;
        index index.html index.htm index.nginx-debian.html;
        server_name auroraspotter.space;

location / {
       proxy_set_header X-Real-IP $remote_addr;
       proxy_set_header X-Forwarded-For $proxy_add_x_forwarded_for;
       proxy_set_header X-NginX-Proxy true;
       proxy_pass http://localhost:8080;
       proxy_set_header Host $http_host;
       proxy_cache_bypass $http_upgrade;
       proxy_redirect off;
 }
    listen [::]:443 ssl ipv6only=on; # managed by Certbot
    listen 443 ssl; # managed by Certbot
    ssl_certificate /etc/letsencrypt/live/auroraspotter.space/fullchain.pem; # managed by Certbot
    ssl_certificate_key /etc/letsencrypt/live/auroraspotter.space/privkey.pem; # managed by Certbot
    include /etc/letsencrypt/options-ssl-nginx.conf; # managed by Certbot
    ssl_dhparam /etc/letsencrypt/ssl-dhparams.pem; # managed by Certbot
}
server {
    if ($host = auroraspotter.space) {
        return 301 https://$host$request_uri;
    } # managed by Certbot

        listen 80 default_server;
        listen [::]:80 default_server;

        server_name auroraspotter.space;
    return 404; # managed by Certbot
To test that there are no errors in the file, type sudo nginx -t. If there’s none, type sudo systemctl reload nginx to reload Nginx so it will use the updated configuration.
Finally, you should be able to go to yourdomain.com and your web app will be running.
Running the App on Boot (Setting up a Process Manager)
You’ve hooked your domain name up to your droplet and configured Nginx to serve your web app, but how do you keep it running all the time especially after restarting your droplet?
That’s where a process manager comes in. It will manage your Node.js web app, log any errors, and start/stop it as needed. We will be using the process manager called PM2.
The first step is to install PM2 using sudo npm install pm2@latest -g. Next, to run it on boot, run pm2 startup systemd. It should say to setup the startup script, copy and paste the following command which will be sudo env PATH=$PATH:/usr/bin /usr/lib/node_modules/pm2/bin/pm2 startup systemd -u (username) --hp /home/(username).
If you’re using the default login that DigitalOcean provided, this will be root. Type this into the terminal and press enter. If it says command successfully executed (like below) then it has worked.
[ 'systemctl enable pm2-root' ]
[PM2] Writing init configuration in /etc/systemd/system/pm2-root.service
[PM2] Making script booting at startup...
[PM2] [-] Executing: systemctl enable pm2-root...
[PM2] [v] Command successfully executed.
Using the cd command, navigate to the folder of your web app. Then type pm2 start server.js. This will start the web app using pm2. Afterward, type pm2 save which will save it to be started on boot. If it says successfully saved, then it’s been saved correctly.
[PM2] Saving current process list...
[PM2] Successfully saved in /root/.pm2/dump.pm2
Finally, type sudo systemctl start pm2-(username).
Try restarting your droplet by typing reboot and after a few minutes, go to yourdomain.com. Your web app should be up and running like normal.
If you’re looking to build on the skills you’ve learned in this tutorial, I suggest using EJS templating to work with APIs and databases.
Learn to code for free. freeCodeCamp’s open source curriculum has helped more than 40,000 people get jobs as developers. Get started
This tutorial will show you how to convert a static website that uses HTML, CSS and JavaScript (JS) to a dynamic one using MongoDB, Express, Static HTML, CSS, JS, and Node.js.
Our tech stack will be similar to the popular MEAN/MERN stack (MongoDB, Express, Angular or React, and NodeJS). But instead of using Angular or React, we will use a templating engine called EJS (Embedded JavaScript.)
Other popular templating engines include Handlebars, Pug, and Nunjucks.
Afterwards, we will deploy our Node.js web app to DigitalOcean and cover domain names, SSL, reverse proxies, and process managers.
Learning a templating language can be easier than a JS framework. You can just write HTML, and it lets you insert the same piece of code in multiple locations (called partials) or pass server-side variables to be displayed on the front-end (such as a username).
Table of Contents
- Developing Your First Node.js Web App
- Installing Node.js
- Testing The Install
- Creating Your First Server
- Next Steps
- Templating Basics
- Passing Server-Side Data to the Front-End
- Deploying Your First Node.js Web App
- Setting Up DigitalOcean
- Connecting To Your Droplet
- Deploying Your Node.js Web App
- Configuring Your Domain Name
- Removing the Port Number From Your URL
- Running the App on Boot (Setting Up A Process Manager)
Developing Your First Node.js Web App
Installing Node.js
First, make sure you’ve installed Node.js on your local machine or VPS hosting provider. If you haven’t installed it, go to the Node.js website to do so.
With Node.js, you can write server-side code using a special form of JavaScript so you can use an already familiar language.
The Node.js installer comes bundled with the package manager NPM. NPM is a repository for Node Modules, reusable pieces of code that can extend the functionality of your server. It’s similar to a plugin repository, and Node Modules can be thought of as code snippets or libraries (depending on how large they are).
Windows Users: Need to add Node and NPM to their PATH so they can call them easily on the command line. For more in-depth instructions, see my guide here.
Testing the Install
To test that the installation has worked correctly, open a terminal window, and type node -v and npm -v. If the resulting message starts with a v and is followed by some numbers (indicating a version), then the installation has been successful. Now you’re ready to create your first server.
Creating Your First Server
Once you have created a static website, the first step in creating a Node.js app is to create an Express web server.
First, move all your website’s static files (HTML, CSS, JS, images, etc.) into a folder called public and create a file called server.js in the root directory of your website folder. In the server.js file type:
// Load Node modules
var express = require('express');
// Initialise Express
var app = express();
// Render static files
app.use(express.static('public'));
// Port website will run on
app.listen(8080);
Then in the terminal, type: npm init. Press enter to accept the default parameters for all the following options, but make sure the entry point is server.js.
Finally, type: npm start and then go to the IP Address of your VPS host, or localhost:8080/index.html (or the name of one of your webpages) in the browser. The Express server you just created should now be serving your website’s static files.
Next Steps
Moving forward, we will discuss how to convert your static files to dynamic ones using the EJS templating engine. Then we’ll look at how to copy repeated code using partials and inject server-side variables to the front-end.
Templating Basics
Installing EJS
The first step to use EJS is to install it. A simple npm install ejs --save will do the trick. The --save parameter saves the module to the package.json file.
This makes it so anyone who clones the git repo (or otherwise downloads the site’s files) can install all the required Node modules for the project (called dependencies) using the npm install command instead. Then they don’t have to type npm install (module name) for however many modules they need.
Converting Static Pages to EJS Files
Next, you need to convert your static HTML files into dynamic EJS ones and set up your folder structure in the way EJS expects.
In the root directory of your website, create a folder called views. Inside that folder create two sub-folders called pages and partials. Move all your HTML files into the pages sub-folder and rename the .html file extensions to .ejs.
Your folder structure should look similar to the picture below.
Reusing Code — Creating Your First EJS Partial
When creating static sites, there’s often code that you repeat on every page such as the head (where the meta tags are located), header, and footer sections.
It’s inconvenient to change them on every page (especially on larger sites) if alterations are needed. But if you use EJS partials then you won’t have to. Editing one template (partial) file will update the code on every page that the file is included in.
We’ll take a typical part of a website to be templated, the header, as an example. Create a new file called header.ejs in the partials folder. Copy and paste all the code between the <header></header> tags on one of your EJS pages into it.
Finally, on all pages with a header delete the code between the <header></header> tags (the same code you copied to the header.ejs partial file) and replace it with <% include('../partials/header') %>. Now, you’ve created your first EJS partial. Repeat the process for any other repetitive pieces of code such as the head and footer sections.
Small Tip: If you find it hard to differentiate between your pages and partials since they have the same .ejs file extension, it can be helpful to put an underscore _ in front of the names of partials (so _ header.ejs). This is a naming convention that some developers use that can be helpful.
Rendering EJS Pages
Now we get to the exciting part: making the server render the EJS pages and partials so you can see them on the front-end.
server.js Example
// Load Node modules
var express = require('express');
const ejs = require('ejs');
// Initialise Express
var app = express();
// Render static files
app.use(express.static('public'));
// Set the view engine to ejs
app.set('view engine', 'ejs');
// Port website will run on
app.listen(8080);

// *** GET Routes - display pages ***
// Root Route
app.get('/', function (req, res) {
    res.render('pages/index');
});
First, we need to add the EJS Node module to our server. So, in the server.js file (see example above), add const ejs = require('ejs');.
Second, we need to tell our Express server to use EJS so add app.set('view engine', 'ejs');.
Now, we need to configure routes. Routes tell the server what to do when a user goes to a certain URL in your website such as http://testapp.com/login.
There are two types of routes, GET and POST. GET routes display pages and POST routes upload data from the front-end to the server (usually via a form) typically before a page is rendered and the uploaded data is somehow used.
Since we only want to display our EJS pages, we will just use GET routes. Add them after the app.listen(8080) line in server.js. For the index page, the route will be:
// *** GET Routes - display pages ***
// Root Route
app.get('/', function (req, res) {
    res.render('pages/index');
});
The ‘/’ specifies the URL of the website the code will activate on, the req stands for request and res for response. So, the response returned when going to http://testapp.com is rendering (displaying to the browser) the pages/index.ejs page. Add similar routes for your other EJS pages.
Passing Server-Side Data to the Frontend
The main attraction of templating, apart from reusing code, is that you can pass server-side variables to the front-end. Either a single variable like the current user’s username, or an array, like the details of every registered user.
However, the real strength of passing server-side variables becomes apparent when using APIs or databases.
For a basic example, the below code will display «Louise» in the h2 tag of the index page:
server.js
// Route Route
app.get('/', function (req, res) {
    var name = "Louise";
    // Render index page
    res.render('pages/index', {
        // EJS variable and server-side variable
        name: name
    });
});
The first name is the name of the EJS variable (the name for displaying it on the front-end), and the second is the variable that contains the data you want to send. (They don’t have to be identical.)
index.ejs
<h2>My name is <%= name %></h2>
For a simple array, you can use this example instead, which will create a p tag for every name in the listnames variable:
server.js
// Route Route
app.get('/', function (req, res) {
    var listnames = ["Louise", "Sadie", "Erik", "Raph", "Gina"];
    // Render index page
    res.render('pages/index', {
        // EJS variable and server-side variable
        listnames: listnames
    });
});
index.ejs
<% listnames.forEach(function(name) { %>
        <p><%= name %></p>
        <% }); %>
Congratulations. You’ve finished developing your first Node.js web app. In the next part, we will see how we can make it live (deploy it) on the web so you can show it off.
Deploying Your First Node.js Web App
There are many hosting platforms you can use to deploy your Node.js web apps such as Section, Heroku, Vultr, Linode, Google Cloud Platform and Amazon Web Services.
In this walk-through, we will be using DigitalOcean to deploy our Node.js app.
Setting up DigitalOcean
First, create an account on the DigitalOcean platform. There are discount codes available to add free credit to your account such as the code available in the Github Student Developer Pack. Be aware that you can only redeem one code per account.
Second, you need to create a droplet. A droplet is a VPS (Virtual Private Server.) It’s similar to a Linux VM which is hosted on a server farm somewhere.
Once you’ve logged into your account, go to droplets under the Manage heading and click create and then droplets.
You can leave most of the settings as the default but change the plan to the basic $5 a month which contains enough resources for your app. You can scale this up later if needed.
Also, choose the datacenter closest to the target audience of your app and change the authentication to password. While password authentication is less secure (SSH Keys is recommended), it’s much easier to set up. So, for demonstration purposes, we’ll use this method.
All that’s left now is to pick a name (hostname) and click Create Droplet.
Connecting to your Droplet
Shortly afterward, you’ll receive an email containing the username and password of your droplet which you’ll use to login.
Back on the DigitalOcean website, under droplets, click the name of your newly created droplet, and then click on Console. This will open a new tab that will let you control your droplet.
Alternatively, you can use any SSH client with the IP address and user credentials contained in the email.
On your first login, since you used password authentication, it will prompt you to set a new password. A great way to generate secure passwords and store them is a password manager like LastPass.
Deploying Your Node.js Web App
First, you’ll need to copy the code for your web app to your droplet. If you’re using source control such as Git, then it’s as simple as installing git using apt-get install git -y and then using the git clone command git clone (link to your repository), adding the link to your repository at the end.
Second, you’ll need to install Node. Type:
curl -sL https://deb.nodesource.com/setup_14.x | sudo -E bash -
sudo apt-get install -y nodejs
Third, you’ll need to navigate to the folder containing your web app. Type ls and then enter to view all the folders in your current working directory (location). This will look like the image below:
Type cd and then the name of the folder that appears. Type ls again and you should see the files in your web app’s root directory.
Next, you’ll need to install the node modules (dependencies) for your web app. If you installed all your modules with -save at the end, which saves them to the package.json file, then just type npm install and press enter.
If not, when you run npm start an error will appear with module not found. Type npm install (module name) and press enter and then try running npm start again. Repeat the process until the error disappears.
If you need to install MongoDB (if you’ve created a MongoDB database), then follow these instructions.
Finally, type npm start to start your web app. Now that your web app is running, in a new browser tab, type the IP Address of your droplet (found in the email that DigitalOcean sent when you created the droplet) followed by a colon and the port your app runs on. For example, 167.172.54.51:8080.
If you’re using an Express web server (which if you followed my getting started with Node.js guide, you did), you’ll find the port number located in the app.listen() line inside the server.js file. For example, app.listen(8080) which is a common port used.
Congratulations, your first Node.js web app should be displayed in your web browser which is running on your DigitalOcean droplet.
Configuring Your Domain Name
You typed in an IP Address and port number to view your web app but, wouldn’t you prefer a custom domain name like yourapp.com?
Assuming you’ve already bought a domain, the first step is to add a DNS record so your domain name will resolve to the IP address of your DigitalOcean droplet. A DNS record tells your browser what to do when they load your domain. In this case, it should go to the IP address of your droplet.
If you’ve not bought a domain, domain registrars like Namecheap sell domain names and often other services such as email and static/CMS hosting, though there are benefits to going with a dedicated hosting and email provider.
Netlify offers hosting for static sites and SiteGround for CMS websites. Office365 and GSuite are the kings of custom email providers. See my guide for Setting Up a Professional Email to read a comparison of Office365 and GSuite.
Login to your domain registrar and go to the advanced DNS settings of your domain. For example, on Namecheap, it’s the Advanced DNS tab on the Manage Domain screen.
You want to add a new record as follows: the type should be set to A, the host should be either @ or blank (depending on your provider), and the value should be the IP Address of your droplet. Repeat the process for the host www which will do the same for the www version of your domain.
It can take up to 24-48hrs for the changes to process, but it’s usually between 15 minutes to an hour. A quick way to check when it’s done is to go to DNSChecker. Type in your domain name and make sure the type is set to A. When the result comes back as the IP Address of your droplet, then you’ve connected your domain successfully.
The final test is to type your domain name followed by a colon and then the port number (e.g. yourdomain.com:8080). You should now see your web app loading.
Removing the Port Number from your URL
Now that you’ve got a cool domain name hooked up to your web app, you’ll probably want to remove that pesky port number.
We can do this by setting up what’s called a reverse proxy. A reverse proxy will tell your droplet when a user goes to yourdomain.com, it should serve the site at yourdomain.com:8080. We will use the popular reverse proxy Nginx to do so.
The first step is to install Nginx. Type the following to update your package list (so you can get the latest version) and install Nginx:
sudo apt-get update
sudo apt-get install nginx
Since DigitalOcean droplets are created with a firewall enabled, you’ll have to allow Nginx through it so it can work properly. sudo ufw allow 'Nginx Full' will do this.
To check the installation has gone smoothly, go to the http version of your domain name e.g. http://yourdomain.com. If you see a Welcome to Nginx landing page, then it’s been successful.
The second step is to secure your reverse proxy. Currently going to https://yourdomain.com won’t work. That’s because we haven’t configured SSL yet, and we need to install a package called Certbot to do so.
To install Certbot, type the following to ensure you get the latest version:
sudo add-apt-repository ppa:certbot/certbot
sudo apt-get install python-certbot-nginx
Next, you need to add your domain to Nginx so Certbot can generate a certificate to the correct domain. Open the configuration file using sudo nano /etc/nginx/sites-available/default and replace the underscores in the server_name line to your domain. For example, server_name yourdomain.com www.yourdomain.com;. Save the file and exit by typing CTRL+x, y and then enter.
To test that there are no errors in the file, type sudo nginx -t and if there’s none, type sudo systemctl reload nginx to reload Nginx so it will use the updated configuration.
Now we just need to generate the SSL certificate. sudo certbot --nginx -d yourdomain.com -d www.yourdomain.com will start the process. You should choose option 2 for the redirect process because it will forward anyone trying to access the insecure version of your site (http) to the secure (https) version instead.
To test this, go to https://yourdomain.com and you should see the Nginx Welcome screen again.
Finally, we’re onto the last step, adding the Nginx configuration for your web app. For demonstration purposes, we’ll just modify the default one instead of creating a new one specifically for your web app. If you need to host several web apps on one droplet, you’d need to add a new configuration for each site.
Type: sudo nano /etc/nginx/sites-available/default to edit the default configuration file.
You need to change the server_name parameter to the name of your domain. For example: yourdomain.com. Under location /, proxy_pass should be changed to http://localhost:(port name). The ssl_certificate_key should be modified: /etc/letsencrypt/live/(domain name)/privkey.pem. Finally, add the code block below to the end of the file and then type CTRL+X, and then y to exit.
server {
    if ($host = auroraspotter.space) {
        return 301 https://$host$request_uri;
    } # managed by Certbot
        listen 80 default_server;
        listen [::]:80 default_server;
        server_name auroraspotter.space;
    return 404; # managed by Certbot
Here’s a complete example of what it should look like. Note: the server_name should be the name of your domain.
server {
        root /var/www/html;
        index index.html index.htm index.nginx-debian.html;
        server_name auroraspotter.space;

location / {
       proxy_set_header X-Real-IP $remote_addr;
       proxy_set_header X-Forwarded-For $proxy_add_x_forwarded_for;
       proxy_set_header X-NginX-Proxy true;
       proxy_pass http://localhost:8080;
       proxy_set_header Host $http_host;
       proxy_cache_bypass $http_upgrade;
       proxy_redirect off;
 }
    listen [::]:443 ssl ipv6only=on; # managed by Certbot
    listen 443 ssl; # managed by Certbot
    ssl_certificate /etc/letsencrypt/live/auroraspotter.space/fullchain.pem; # managed by Certbot
    ssl_certificate_key /etc/letsencrypt/live/auroraspotter.space/privkey.pem; # managed by Certbot
    include /etc/letsencrypt/options-ssl-nginx.conf; # managed by Certbot
    ssl_dhparam /etc/letsencrypt/ssl-dhparams.pem; # managed by Certbot
}
server {
    if ($host = auroraspotter.space) {
        return 301 https://$host$request_uri;
    } # managed by Certbot

        listen 80 default_server;
        listen [::]:80 default_server;

        server_name auroraspotter.space;
    return 404; # managed by Certbot
To test that there are no errors in the file, type sudo nginx -t. If there’s none, type sudo systemctl reload nginx to reload Nginx so it will use the updated configuration.
Finally, you should be able to go to yourdomain.com and your web app will be running.
Running the App on Boot (Setting up a Process Manager)
You’ve hooked your domain name up to your droplet and configured Nginx to serve your web app, but how do you keep it running all the time especially after restarting your droplet?
That’s where a process manager comes in. It will manage your Node.js web app, log any errors, and start/stop it as needed. We will be using the process manager called PM2.
The first step is to install PM2 using sudo npm install pm2@latest -g. Next, to run it on boot, run pm2 startup systemd. It should say to setup the startup script, copy and paste the following command which will be sudo env PATH=$PATH:/usr/bin /usr/lib/node_modules/pm2/bin/pm2 startup systemd -u (username) --hp /home/(username).
If you’re using the default login that DigitalOcean provided, this will be root. Type this into the terminal and press enter. If it says command successfully executed (like below) then it has worked.
[ 'systemctl enable pm2-root' ]
[PM2] Writing init configuration in /etc/systemd/system/pm2-root.service
[PM2] Making script booting at startup...
[PM2] [-] Executing: systemctl enable pm2-root...
[PM2] [v] Command successfully executed.
Using the cd command, navigate to the folder of your web app. Then type pm2 start server.js. This will start the web app using pm2. Afterward, type pm2 save which will save it to be started on boot. If it says successfully saved, then it’s been saved correctly.
[PM2] Saving current process list...
[PM2] Successfully saved in /root/.pm2/dump.pm2
Finally, type sudo systemctl start pm2-(username).
Try restarting your droplet by typing reboot and after a few minutes, go to yourdomain.com. Your web app should be up and running like normal.
If you’re looking to build on the skills you’ve learned in this tutorial, I suggest using EJS templating to work with APIs and databases.
Learn to code for free. freeCodeCamp’s open source curriculum has helped more than 40,000 people get jobs as developers. Get started
Have you ever visited a website and waited several minutes for the webpage or photos to load? Or maybe you received a message stating that the website is overcrowded.

A slow website isn’t just annoying but it can cost companies thousands of dollars when users leave them for other services or if they have to continuously invest in servers and CPUs. This is where Node.js comes to the rescue.
Node.js is a scalable platform that allows engineers to build fast systems that execute asynchronously. This means that it can process many tasks at a time. Other systems must wait for one request to be complete before it processes another. Meanwhile, Node.js server can process a request as it waits for a response from the database. This increases the website speed time significantly.
In this article, we will share how to get started with building a Node.js website and share some amazing website examples as well.
Before we walk through the steps of building a website with Node.js, let’s jump right into defining it.
What is Node.js?
Node.js (also called node) is an open-source framework. It’s completely free and used by many developers. By definition, it is a server-side platform built on Google Chrome’s JavaScript V8 Engine. This engine takes your JavaScript code and converts it into a faster machine code. So, having some JavaScript knowledge is beneficial when building a Node.js website.
Node.js came into existence when the original developers of JavaScript extended it from running only in the browser to running now on your machine as a standalone application. The benefits you can gain from using Node.js are nearly endless. Here are a few:
Benefits of Node.js
- Node.js has a very fast code execution, thanks to Google Chrome’s V8 JavaScript Engine.
- Node.js is asynchronous (non-blocking), meaning that instead of waiting for returned data, the serve moves to the next call.
- Node.js never buffers any data instead it outputs the data in chunks.
- Node.js is single-threaded and highly scalable, meaning that it can provide service to a much larger number of requests than traditional servers.
With all its advantages, Node.js now plays a critical role in many high-profile companies such as Microsoft, PayPal, Uber, eBay, and many more.
Installing Node.js
To install Node.js to your machine, you will need a text editor to download the package. Node.js comes along with its own package manager called Node Package Manager or npm. Follow the steps below to get started.
1. Visit the NodeJS website.
2. Download the package suitable for your OS.
3. Follow the prompts to complete the installation process.
To verify installation or check your package version, open your terminal and run the following command:
 node -v
npm -v
As a result, you should see your node and npm version displayed. The latest version at the time of this article is Node.js v16.16.0 and npm v8.11.0.
Take a look at this great video for a detailed description of how to get started with your own Node project.
9 Amazing Node.js Website Examples
A Node.js website should have a clean design and be easy to navigate. Here we will discuss some of the top websites that are built with Node.js. Let’s get started.
1. LinkedIn
LinkedIn is a social networking platform suited for career-driven individuals. LinkedIn switched to Node.js in 2011 and was able to optimize its mobile app, scale, and cut down on server resources.
2. eBay
eBay is an e-commerce platform that is free to use for buyers. Node.js has helped its website produce great speed and simplicity.
3. PayPal
PayPal is a well-known fintech company. The company has been using Node.js to build the consumer-facing side of its web application.
4. Netflix
Netflix is a large global video streaming platform. They used Node.js to achieve lightweight, modular and fast applications. As a result, it reduced its app startup time by 70%.
5. GoDaddy
Go Daddy is a publicly-traded internet domain registrar and web hosting provider. It chose Node.js to deploy new features immediately, write unit and integration tests easily, and build quality applications.
6. Groupon

Groupon is a global e-commerce marketplace connecting users with local merchants. They were able to increase their website speed by 50% and serve much higher traffic thanks to Node.js.
7. Uber
Uber is an online transportation platform. It prefers Node.js because it processes information quickly, errors can be addressed on the fly, and it’s constantly evolving.
8. NASA

NASA is responsible for the research and exploration of space-related matters for the US government. It uses a feature of Node.js called microservices, giving NASA the ability to move its enterprise to the cloud.
9. Walmart
Walmart is a large popular retail company. It relies on Node.js framework for its UIs as it strives to be an online retail leader.
Why choose Node.js?
In this article, we defined Node.js and shared some of the most prominent Node.js website examples. For many companies, Node.js was able to solve various business tasks and reduce overall costs. Choosing Node.js for your next project comes with the benefits of improving user experience, fast development speed, and a reduced loading time for your website. If you are planning to create an application with a broad target audience and a large number of queries, then Node.js is an excellent choice.

For most of my career as a Web Developer, I worked on the frontend of websites and applications consuming APIs made by other people. Recently, I decided to learn Node.js properly and do some server-side programming as well.
I decided to write this introductory tutorial for anyone who is interested in learning Node after realising that it’s not so easy to read the documentation and figure out how to go about building stuff with Node.
I believe this tutorial will be particularly helpful if you already have some experience with JavaScript on the frontend.
Prerequisites
If you know JavaScript but you have never done any server-side programming before, this tutorial for you. Before you continue though, you need to have Node.js and npm installed.
You can search the web for instructions on how to install Node.js and npm for your preferred platform or visit the Node.js website (npm comes with Node). The versions I used while building this project are as follows:
- Node.js v9.3.0
- npm v5.8.0
You can view the version of Node and npm you have installed by running the following commands in your terminal:
I believe the code will still work even if you’re on an older version of Node, but if you have any trouble completing the tutorial, try upgrading to the versions I used to see if it fixes your problem.
What we’ll be building
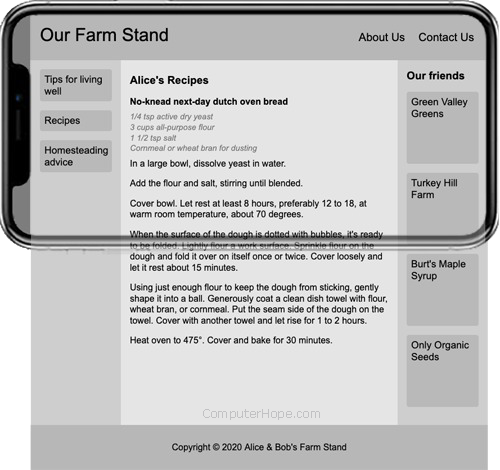
I’ll take you through how to build a simple website with Node.js, Express and Pug. The website will have a homepage and a few other pages which we’ll be able to navigate to.
Checkout the live website here.
Getting started
Download the starter files from Github, then run the following command from the root of the downloaded folder to install the project dependencies.
I’ve chosen to provide these starter files so you don’t run the risk of running into bugs as a result of using a different version of a package from the one I used. Don’t worry, I’ll explain what each dependency does as we go along.
Now open up server.js in the root directory and type in the following code:
const express = require('express');
const app = express();
We start by importing Express which is the web server framework we are using. The express() function is a top-level function exported by the express module.
Next, we need to set up the website to run on port 7000. You can choose another port if 7000 is in use on your machine.
const server = app.listen(7000, () => {
  console.log(`Express running → PORT ${server.address().port}`);
});
You can start the web server by running node server.js from the root of your project folder.
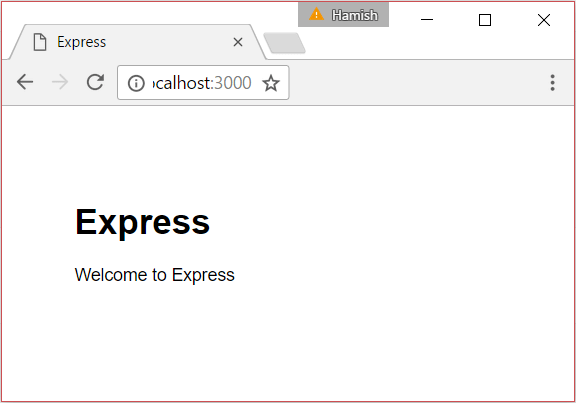
If you open http://localhost:7000 in your browser, you will see an error message that says “Cannot GET /”. This is because we have not defined a root route for our website so let’s go ahead and do just that.
Add the following code before the server variable declaration in server.js:
app.get('/', (req, res) => {
  res.send('Hello World!');
});
The code above specifies that when a GET request is made to the root of our website, the callback function we specified within the get() method will be invoked. In this case, we are sending the text “Hello World!” back to the browser.
Now you need to restart your server before the changes take effect. Doing this every time you make a change in your code can become incredibly tedious, but I’ll show you how to get around that in the next section.
For now, stop the Node process in your terminal using Ctrl-C and start it again with node server.js then refresh your browser. You should see the text “Hello World!” on the page.

Setup Nodemon to auto restart Node.js application server
There are several tools you can use to auto restart your Node server after every change so you don’t have to deal with that. My preferred tool is Nodemon which has worked really well for me in my projects.
If you look at the package.json file, you will see that nodemon is listed under the devDependencies, so you can start using it right away.
Change the start script in package.json to the following:
{
  "scripts": {
    "start": "npx nodemon server.js"
  }
}
Kill the node process and run npm start. Now the web server will be restarted automatically everytime you make a change.
Rendering HTML in the Browser
Instead of just sending text to the browser when someone hits a route, we can send some HTML as most websites do. We can author the HTML files by hand and specify what file to send to the browser once a GET request hits a route, but it’s almost always better to use a template engine to generate HTML files on the fly.
A template engine allows you to define templates for your application and replace the variables in the template with actual values at runtime while transforming the template to an actual HTML file which is then sent to the client.
There are several template engines you can use with Express. Pug, Mustache, and EJS are some of the most popular ones. I’ll be using Pug here because I’m comfortable with the syntax but you can do the tutorial in another templating engine if you wish.
I’ve already included the pug package in our project dependencies so we can go ahead and use it in express.
Add the following code to your server.js file below the app variable. This tells express that we are using pug as our template engine.
app.set('view engine', 'pug');Express expects that our template files be kept in a folder called views. Create this folder in the root of your project directory then create a file called index.pug in the views folder and paste the following code therein:
Now change the line in your server.js file that says res.send('Hello World!') to res.render('index'). This tells express to render the index template that we just created. You don’t need to put the .pug extension at the end.
If you refresh your browser, you should see the words “Hello Pug!” on the page. If you inspect the text using your browser’s developer tools, you should see that the code you wrote in index.pug was transformed into regular HTML.
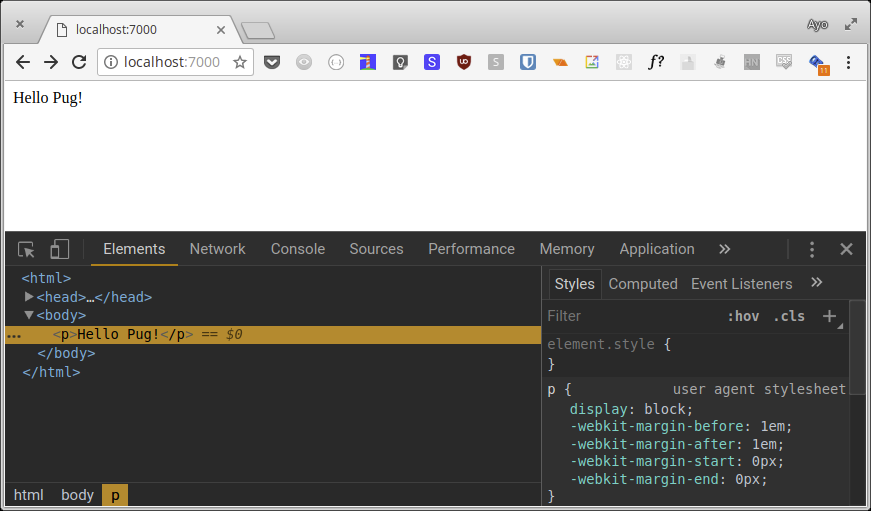
Pug basics
The first thing to know is that Pug relies on indentation to describe the structure of the template and there are no closing tags.
Here’s the basic syntax for Pug that you need to understand to complete this tutorial along with the HTML equivalent in a comment below the Pug code.
You have your element, a space and the contents just like we’ve done above:
p Hello Pug!

// <p>Hello Pug!</p>
You can put an element’s content on its own line like this to achieve the same result:
p
  | Hello Pug!

// <p>Hello Pug!</p>
If you want to nest elements, you need to indent it by one level:
div
  p Hello Pug!
  button Click Me

// <div>
//   <p>Hello Pug!</p>
//   <button>Click Me</button>
// </div>
You can use classes and ids on your elements like this:
div.container
  p#hello Hello Pug!
  button.btn.btn-blue Click Me

// <div class="container">
//   <p id="hello">Hello Pug!</p>
//   <button class="btn btn-blue">Click Me</button>
// </div>
And here’s how you use HTML attributes:
img(src="fish.png" alt="A big fish")

// <img src="fish.png" alt="A big fish">
Passing variables in Pug
You can pass information from your route to your template by passing an object when you render the template like this:
res.render('index', {
  name: 'Ayo'
});
And in your template file, you can reference it like this:
p Hello my name is #{name}

// <p>Hello my name is Ayo</p>
If you want to use a variable in an attribute, you have to do it using ES2015 template literals:
img(src=`${name}.jpg` alt=`This is ${name}`)

// <img src="Ayo.jpg" alt="This is Ayo">
Let’s create a website
We can demonstrate the power of Pug and Express by building a simple website.
First, create a default.pug file in the views directory and paste in the following content. This file acts as a sort of boilerplate for our other templates.
doctype html
html
  head
    title #{title}
    link(rel='stylesheet', href='/css/style.css')
    meta(name="viewport" content="width=device-width, initial-scale=1")
  body
    main
      block header
        header.header
          h1 #{title}
      block content
The block keyword allows us to extend a template through inheritance. When extending a template, you can define custom content for any block in the parent template.
Here’s an example of how that works. In the index.pug file, type in the following:
extends default

block content
  div.container
The default template expects a title variable, so we need to pass that in when rendering any template that extends it.
res.render('index', {
  title: 'Homepage'
});
Refresh your browser to see the changes.

Working with static content
We need to tell express where static files (such as stylesheets, fonts or images) for our website are placed so that it knows how to serve them correctly.
Change your server.js file to look like this:
// ...
app.set('view engine', 'pug');

// serve static files from the `public` folder
app.use(express.static(__dirname + '/public'));
// ...
If you refresh your browser, the styles referenced in default.pug should kick in.
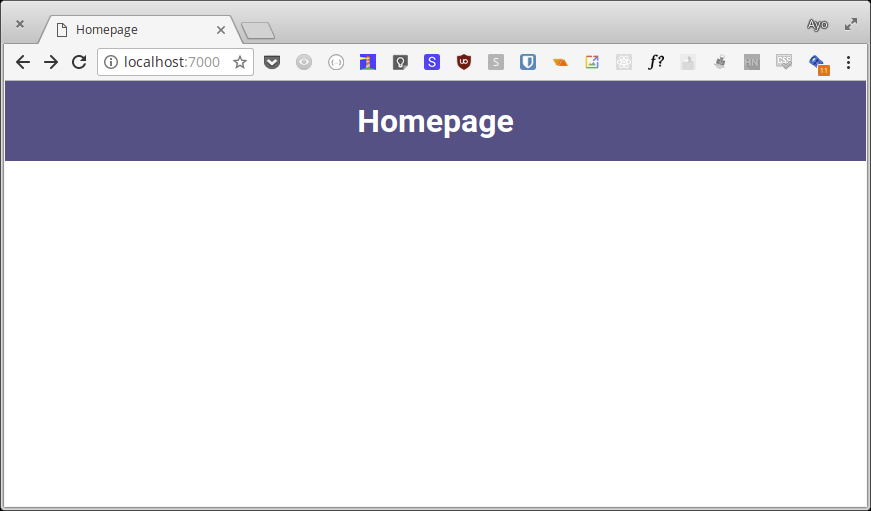
Working with JSON data
In the root folder, there is a people.json file which we are going to use to construct the website’s pages. If you inspect it, you will see a profiles key which is an array that contains a few objects each representing a person’s profile.
In a real world application, you will likely fetch this data from a database somewhere, but this method should serve to illustrate the concept well.
Let’s construct the website homepage. We need to pass the json data to our index template and render a card for each person defined within.
Change your server.js file to look like this:
const express = require('express');
const people = require('./people.json');

const app = express();

app.set('view engine', 'pug');

app.use(express.static(__dirname + '/public'));

app.get('/', (req, res) => {
  res.render('index', {
    title: 'Homepage',
    people: people.profiles
  });
});

const server = app.listen(7000, () => {
  console.log(`Express running → PORT ${server.address().port}`);
});
Here, we store a reference to the people.json file in the people variable. Next we pass the profiles array to the index template as the people key.
Now change your index.pug file to look like this:
extends default

block content
  div.container
    each person in people
      div.person
        div.person-image(style=`background: url('/images/${person.imgSrc}') top center
        no-repeat; background-size: cover;`)
        h2.person-name
          | #{person.firstname} #{person.lastname}
        a(href=`/profile?id=${person.id}`)
          | View Profile
The each keyword in pug allows us to iterate over arrays and objects. Each object in the people array can be accessed under the person key for each iteration and we use that to construct a card for each person on the homepage.
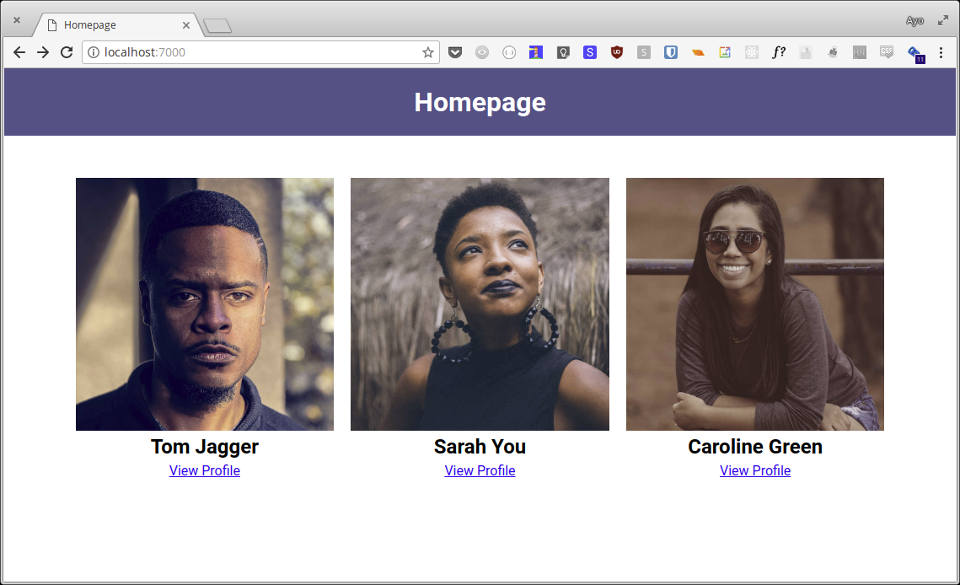
There is a link at the bottom of each person which should go to their respective profiles. But when you click it, you get an error message that says “cannot GET /profile”.

Let’s fix that by creating a new route for /profile. In server.js, add the following code under the root route:
app.get('/profile', (req, res) => {
  res.send(req.query.id);
});
Once you hit a person’s profile, it should send the person’s id back to the browser. In Express, you can access URL query parameters under req.query.
Let’s create a new template file that will be rendered once someone hits the profile route. Go ahead and create profile.pug in the views folder, and add the following content:
extends default

block header

block content
  div.profile
    div.profile-image(style=`background: url('/images/${person.imgSrc}') top center
    no-repeat; background-size: cover;`)
    div.profile-details
      h1.profile-name
        | #{person.firstname} #{person.lastname}
      h2.profile-tagline
        | #{person.tagline}
      p.profile-bio
        | #{person.bio}
      a.button.button-twitter(href=`${person.twitter}`)
        | Follow me on Twitter
Here, we are extending the default template again, and overriding the header block defined within with an empty block because we don’t want the default header content to show on this page.
In the content block, I’ve added the necessary markup for each profile. As you can see, this template expects us to pass the object that describes each person so let’s go ahead and do just that.
Change the /profile route to look like this:
app.get('/profile', (req, res) => {
  const person = people.profiles.find(p => p.id === req.query.id);
  res.render('profile', {
    title: `About ${person.firstname} ${person.lastname}`,
    person,
  });
});
First we use the array find() method to extract the first object whose id property matches the one recieved in the query parameters. Then we pass this object to the profile template.
The result is that each person’s profile can be viewed by clicking their respective profile links on the homepage.
That concludes my tutorial. I hope it has helped you learn the basics of Node.js, Express and Pug, and how you can use it to build simple websites. You can grab the complete code in this Github repo.
Thanks for reading.
- #nodejs
- #javascript
- #express
- #pug
СКАЧАТЬ ИСХОДНЫЕ КОДЫ
В данной статье мы создадим полноценный сайт с контрольной панелью для управления контентом. Как вы можете догадаться, в итоговой версии проекта будет очень много различных файлов. Я писал данный мануал шаг за шагом, параллельно занимаясь разработкой. Весь исходный код доступен на GitHub, и я рекомендую вам пользоваться им в процессе работы.
- Введение
- Настройка
- FastDelivery
- Конфигурация
- Тестирование
- База данных
- MVC
- Модель (Model)
- Вид (View)
- Контроллер (Controller)
- Сайт FastDelivery
- Контрольная панель
- Защита административной панели
- Управление контентом
- Лицевая часть (Front-End)
- Развертывание
- Заключение
- Исходный код
Express это один из лучших фреймворков для Node. У него отличная поддержка со стороны разработчиков и множество возможностей. По Express имеется много информации в интернете, раскрывающей азы работы с ним. В этой статье я хочу копнуть немного глубже основ и поделиться своим опытом создания полноценного веб-сайта.
В целом, речь пойдет не только об Express – в работе используются и другие хорошие инструменты, находящиеся в арсенале Node-разработчика.
Предполагается, что вы знакомы с Node.js, имеете установленную копию на своем компьютере и определенный опыт разработки.
Сердцем Express является Connect. Это связующий фреймворк, содержащий много полезных вещей. Если вы не понимаете что из себя представляет связующий фреймворк (middleware framework), то взгляните на небольшой пример:
var connect = require('connect'),
    http = require('http');

var app = connect()
    .use(function(req, res, next) {
        console.log("Это мой первый Middleware Framework");
        next();
    })
    .use(function(req, res, next) {
        console.log("Это мой второй Middleware Framework");
        next();
    })
    .use(function(req, res, next) {
        console.log("Конец");
        res.end("Hello World!");
    });

http.createServer(app).listen(3000);
Middleware (промежуточное ПО) это функция, которая принимает запросы от объектов и отвечает на них. Каждое middleware может ответить, используя соответствующий объект или передать управление следующему middleware, используя функцию next().
В примере выше, при удалении вызова метода next() во втором middleware, строка «Hello World!» никогда не будет передана браузеру. Так, в общих чертах, работает Express.
В составе фреймворка имеется несколько предопределенных middleware, что, несомненно, экономит время. Например, парсер Body, поддерживающий типы application/json, application/x-www-form-urlencoded и multipart/form-data, который обрабатывает тело запроса. Или парсер Cookie, обрабатывающий заголовки cookie и populatesreq.cookies с помощью объекта, ассоциированного с именем cookie.
Express дополняет Connect и добавляет в него новую функциональность, делающую разработку более удобной, например, функцию логики маршрутизации. Ниже дан пример управления запросом GET:
app.get('/hello.txt', function(req, res){
    var body = 'Hello World!';
    res.setHeader('Content-Type', 'text/plain');
    res.setHeader('Content-Length', body.length);
    res.end(body);
});
Есть два способа настройки Express. Первый – размещение файла package.json и запуск установки через пакетный менеджер npm.
{
    "name": "MyWebSite",
    "description": "My website",
    "version": "0.0.1",
    "dependencies": {
        "express": "3.x"
    }
}
Код фреймворка будет размещен папке node_modules, и вы сможете создать копию. Однако я предпочитаю альтернативный вариант – использование командной строки. Для этого нужно запустить команду npm install -g express. После чего, Express будет готов к работе. Для проверки запустите:
express --sessions --css less --hogan app
После чего Express создаст скелет предварительно сконфигурированного приложения. Вот список управляющих команд для команды express:
Пример использования: express [список параметров]
Параметры:
-h, —help вывод справки по параметрам;
-V, —version вывод номера версии;
-s, —sessions активация поддержки сессий;
-e, —ejs активация поддержки движка ejs (по умолчанию для Jade);
-J, —jshtml активация поддержки движка jshtml (по умолчанию для Jade);
-H, —hogan активация поддержки движка hogan.js;
-c, —css активация поддержки стилей (Less|Stylus) (по умолчанию для Plain CSS);
-f, —force принудительные непустые директории.
Как видите, команд не так уж и много, но этого хватает. Обычно я использую CSS-препроцессоры less и hogan для шаблонизации.
В нашем примере, нам также понадобится поддержка сессий, в чем поможет аргумент —sessions. Когда команда, приведенная в листинге выше, выполнится, структура папок нашего проекта будет такой:
/public
    /images
    /javascripts
    /stylesheets
/routes
    /index.js
    /user.js
/views
    /index.hjs
/app.js
/package.json
Если вы откроете файл package.json, то увидите, что все необходимые зависимости были добавлены, хотя они еще не были установлены. Чтобы сделать это, просто запустите установку через npm, и появится папка node_modules.
Я осознал, что метод, описанный выше, не всегда уместен. Возможно, вы захотите поместить свои обработчики маршрутов в другую папку или нужно будет сделать что-то еще. Но, как вы поймете из следующих нескольких глав, я внесу изменения в сгенерированные структуры, что достаточно легко сделать. Так что просто думайте о команде express как о шаблонизаторе.
Для этой статьи, я разработал простой сайт вымышленной компании FastDelivery. Вот скриншот, демонстрирующий законченный дизайн:

В конце статьи, у нас получится полноценное веб-приложение, с контрольной панелью. Основная идея, заключается в том, чтобы каждой частью нашего сайта можно было управлять по отдельности.
Шаблон был создан в Photoshop и оформлен в файлах CSS (less) и HTML (hogan). Я не буду показывать процесс создания шаблона, так как это не относится к теме нашей статьи. После создания шаблона, структура файлов нашего проекта должна быть следующей:
/public
    /images (несколько изображений, экспортированных из Photoshop)
    /javascripts
    /stylesheets
        /home.less
        /inner.less
        /style.css
        /style.less (импорт home.less и inner.less)
/routes
    /index.js
/views
    /index.hjs (домашняя страница)
    /inner.hjs (шаблон всех страниц сайта)
/app.js
/package.json
Мы собираемся администрировать следующие элементы сайта:
- Главная (баннер в центре – заголовок и текст);
- Блог (добавление, удаление и редактирование статей);
- Услуги;
- Карьера;
- Контакты.
До написания кода нам нужно сделать несколько вещей. Представим, что наш маленький сайт должен быть развернут в трех разных местах – на локальном, тестовом и производственном серверах. Конечно, для каждого из них настройки будут различаться и нужно реализовать достаточно гибкий механизм.
Как известно, каждый скрипт node.js запускается в виде консольной программы. Поэтому мы легко можем указать аргументы, которые будут определять текущую среду. Я оформил этот код в виде отдельного модуля, чтобы позже протестировать. Вот содержание файла /config/index.js:
var config = {
    local: {
        mode: 'local',
        port: 3000
    },
    staging: {
        mode: 'staging',
        port: 4000
    },
    production: {
        mode: 'production',
        port: 5000
    }
}
module.exports = function(mode) {
    return config[mode || process.argv[2] || 'local'] || config.local;
}
Пока что тут у нас всего две настройки – mode и port. Как можно догадаться, наше приложение использует разные порты для разных серверов. По этой причине, нам нужно изменить точку входа на сайт в файле app.js.
...
var config = require('./config')();
...
http.createServer(app).listen(config.port, function(){
    console.log('Express server listening on port ' + config.port);
});
Для переключения между конфигурациями, просто добавьте тип сервера в конец команды. Например:
Вот что произойдет:
Express server listening on port 4000
Теперь, все наши настройки находятся в одном месте и ими легко управлять.
Я большой приверженец подхода test-driven development (разработка через тестирование). Я попытаюсь рассказать обо всех основных классах, используемых в данной статье. Разумеется, тестирование абсолютно всего сделает статью неимоверно большой, и по этой причине я этого делать не буду.
Но в целом, у вас должно сложиться понимание, как это делается при создании собственных приложений. Одним из моих самых любимых фреймворков для тестирования является jasmine. Он также доступен для установки через npm:
npm install -g jasmine-node
Давайте создадим папку, в которой будут располагаться наши тесты. Первое, что мы собираемся проверить, это наш скрипт с конфигурацией. Spec-файлы должны оканчиваться на .spec.js, поэтому наш мы назовем config.spec.js.
describe("Конфигурация для", function() {
    it("локального сервера", function(next) {
        var config = require('../config')();
        expect(config.mode).toBe('local');
        next();
    });
    it("тестового сервера", function(next) {
        var config = require('../config')('staging');
        expect(config.mode).toBe('staging');
        next();
    });
    it("производственного сервера", function(next) {
        var config = require('../config')('production');
        expect(config.mode).toBe('production');
        next();
    });
});
Запускаем jasmine-node ./tests и видим следующую картину:
Finished in 0.008 seconds
3 tests, 6 assertions, 0 failures, 0 skipped
Итак, я сначала создал конфигурацию, а потом провел её тест. Это не слишком близко к подходу «разработка через тестирование», но далее, я буду более строго его придерживаться.
Очень рекомендуется уделить достаточное время тестированию. Нет ничего лучше, чем хорошо протестированное приложение.
Пару лет назад я понял нечто важное, что может помочь вам создавать более совершенные программы. Каждый раз, когда вы начинаете писать новый класс, модуль или любой другой логически законченный кусок кода, спросите себя: Как я могу его протестировать?
Ответ на этот вопрос поможет вам писать код более эффективно, создавать более качественные API и грамотно располагать части программы по отдельным блокам. Вы не сможете написать тест для кода, запутанного как спагетти. Например, в конфигурационном файле выше (/config/index.js), я добавил возможность передавать режим в конструктор модуля.
Вы, возможно, будете удивлены, почему я сделал так, когда изначально предполагалось получать режим через аргументы командной строки. Все просто — мне надо провести тестирование.
Представим, что месяцем позже мне нужно будет проверить что-нибудь в конфигурации для производственного сервера, но скрипт node запускается с параметрами командной строки. Я вряд ли смогу вспомнить все настройки. Поэтому, отход от первоначальной идеи поможет в будущем избежать проблем.
После того, как мы создали динамический сайт, необходимо сохранить данные в базе. Для примера в данной статье, я буду использовать базу данных mongodb. Mongo это документо-ориентированная СУБД без поддержки SQL. Инструкции по её установке можно найти здесь.
Так как я использую Windows, то мне понадобятся инструкции по установке для Windows. После окончания установки, запустите демон MongoDB, который по-умолчанию слушает порт 27017. Теоретически, мы можем подключиться к этому порту и взаимодействовать с сервером mongodb.
Чтобы сделать это из node-скрипта, нам понадобится модуль/драйвер mongodb. Если вы скачаете исходные файлы к этой статье, то этот модуль в них уже включен в файле package.json. В противном случае, просто добавьте «mongodb»: «1.3.10» в список зависимостей и запустите установку через npm.
Далее, мы напишем тест, проверяющий запущен ли сервер mongodb, который будет располагаться в файле ./tests/mongodb.spec.js:
describe("MongoDB", function() {
    it("сервер запущен", function(next) {
        var MongoClient = require('mongodb').MongoClient;
        MongoClient.connect('mongodb://127.0.0.1:27017/fastdelivery', function(err, db) {
            expect(err).toBe(null);
            next();
        });
    });
});
Callback-вызов в методе .connect клиента mongodb, посылает объект db. Мы будем использовать его позже для управления нашими данными. Это означает, что мы должны получать доступ к этим данным внутри нашей модели.
Создавать новый объект MongoClient каждый раз, когда нам нужно сделать запрос к базе данных это не самая лучшая идея. Вот почему я переместил запуск сервера Express в callback-вызов внутрь функции connect:
MongoClient.connect('mongodb://127.0.0.1:27017/fastdelivery', function(err, db) {
    if(err) {
        console.log('Извините, но сервер mongo db не запущен.');
    } else {
        var attachDB = function(req, res, next) {
            req.db = db;
            next();
        };
        http.createServer(app).listen(config.port, function(){
            console.log('Сервер Express слушает порт' + config.port);
        });
    }
});
Даже лучше, что вместо параметров командной строки мы использовали конфигурационный файл. Мы поместили туда имя хоста и номер порта mongodb, а затем изменили URL-адрес в функции connect на:
'mongodb://' + config.mongo.host + ':' + config.mongo.port + '/fastdelivery'
Обратите особое внимание на middleware под названием attachDB, которое я добавил сразу после вызова функции http.createServer.
Спасибо выбору в пользу конфигурационного файла, благодаря которому мы можем заполнить свойство .db для запрашиваемого объекта. Хорошая новость в том, что мы можем присоединить несколько функций при определении маршрута.
Например:
app.get('/', attachDB, function(req, res, next) {
    ...
})
Этим кодом, Express заранее вызывает функцию attachDB, чтобы запустить наш обработчик маршрута. После того, как это случилось, объект request получит значение свойства .db, которое мы сможем использовать для доступа к базе данных.
Скорее всего, вы знакомы с MVC. Задача состоит в применении этой схемы к Express. Более или менее, это вопрос интерпретации. В следующих нескольких главах, я создам модули, которые будут взаимодействовать по схеме: модель-представление-контроллер.
Модель управляет данными в нашем приложении. Она должна иметь доступ к объекту db, который возвращается MongoClient. Наша модель также должна иметь метод для расширения этого объекта, потому что, возможно, мы захотим создать различные типы моделей.
Например, мы можем создать модель BlogModel или ContactsModel. Поэтому нужно создать новый spec-файл: /tests/base.model.spec.js, для тестирования двух этих будущих моделей. Помните, что определяя этот функционал ДО начала реализации в виде кода, мы гарантируем, что наш модуль будет делать только то, что от него ожидается.
var Model = require("../models/Base"),
    dbMockup = {};
describe("Модели", function() {
    it("должны создавать новые модели", function(next) {
        var model = new Model(dbMockup);
        expect(model.db).toBeDefined();
        expect(model.extend).toBeDefined();
        next();
    });
    it("быть расширяемыми", function(next) {
        var model = new Model(dbMockup);
        var OtherTypeOfModel = model.extend({
            myCustomModelMethod: function() { }
        });
        var model2 = new OtherTypeOfModel(dbMockup);
        expect(model2.db).toBeDefined();
        expect(model2.myCustomModelMethod).toBeDefined();
        next();
    })
});
Вместо реального объекта db, я решил передать объект mockup. Это сделано потому, что позже, я, возможно, захочу сделать специфический тест, в зависимости от информации, поступающей из базы данных. Будет проще определить эти данные вручную.
Реализация расширенного метода немного более хитрая, потому что нам нужно изменить прототип module.exports, но сохранить оригинальный конструктор. Благодаря тому, что мы ранее написали хороший тест, который подтверждает работоспособность нашего кода. Код, представленный выше, будет выглядеть так:
module.exports = function(db) {
    this.db = db;
};
module.exports.prototype = {
    extend: function(properties) {
        var Child = module.exports;
        Child.prototype = module.exports.prototype;
        for(var key in properties) {
            Child.prototype[key] = properties[key];
        }
        return Child;
    },
    setDB: function(db) {
        this.db = db;
    },
    collection: function() {
        if(this._collection) return this._collection;
        return this._collection = this.db.collection('fastdelivery-content');
    }
}
Вот два наших helper-метода: первый инициализирует объект db, а второй получает collection из базы данных.
Вид отображает информацию на экране. По сути, вид это класс, который посылает ответ браузеру. Express предоставляет удобный способ сделать это:
res.render('index', { title: 'Express' });
Объект response является оберткой (wrapper), которая имеет хороший API, делающий нашу жизнь проще. Однако я предпочитаю создать модуль, который будет инкапсулировать данный функционал. Сменим стандартную папку для видов на templates и создадим новый вид, который будет базовым классом (base view class).
Это маленькое изменение влечет за собой еще одно — нам нужно уведомить Express о том, что файлы нашего шаблона теперь размещены в другой папке:
app.set('views', __dirname + '/templates/');
Итак, для начала я определю то, что мне нужно, напишу тест, после чего, создам реализацию. Нам нужен модуль, который должен удовлетворять следующим требованиям:
- Его конструктор должен получать объект response и имя шаблона;
- Он должен иметь метод render, который выводит объект data;
- Он должен быть расширяемым.
Вы возможно удивлены тем, что я расширил класс View. Не проще ли просто вызвать метод response.render? На практике возникают случаи, когда вам нужно послать другой заголовок или определенным образом манипулировать объектом response. Например, имеются такие данные JSON:
var data = {"developer": "Krasimir Tsonev"};
response.contentType('application/json');
response.send(JSON.stringify(data));
Вместо того чтобы делать это каждый раз, намного проще иметь классы HTMLView и JSONView. Или даже класс XMLView для отсылки XML-данных браузеру. Особенно это полезно, когда вы создаете большой сайт – у вас есть шаблоны и вам не нужно много раз копировать-вставлять один и тот же код.
Вот spec для /views/Base.js:
var View = require("../views/Base");
describe("Base view", function() {
    it("создает и отображает новый вид", function(next) {
        var responseMockup = {
            render: function(template, data) {
                expect(data.myProperty).toBe('value');
                expect(template).toBe('template-file');
                next();
            }
        }
        var v = new View(responseMockup, 'template-file');
        v.render({myProperty: 'value'});
    });
    it("должна быть расширяемой", function(next) {
        var v = new View();
        var OtherView = v.extend({
            render: function(data) {
                expect(data.prop).toBe('yes');
                next();
            }
        });
        var otherViewInstance = new OtherView();
        expect(otherViewInstance.render).toBeDefined();
        otherViewInstance.render({prop: 'yes'});
    });
});
Чтобы протестировать вывод, мне пришлось создать объект mockup. В данном случае, я создал объект, который имитирует Express’овский объект response. Во второй части теста, я создал другой класс View, который наследует модель Base и применяет кастомный метод render. Вот это класс — /views/Base.js.
module.exports = function(response, template) {
    this.response = response;
    this.template = template;
};
module.exports.prototype = {
    extend: function(properties) {
        var Child = module.exports;
        Child.prototype = module.exports.prototype;
        for(var key in properties) {
            Child.prototype[key] = properties[key];
        }
        return Child;
    },
    render: function(data) {
        if(this.response && this.template) {
            this.response.render(this.template, data);
        }
    }
}
Теперь у нас есть три spec’а в папке tests и, если мы запустим команду jasmine-node ./tests, результат будет следующим:
Finished in 0.009 seconds
7 tests, 18 assertions, 0 failures, 0 skipped
Помните маршруты (routes) и как мы их определили?
app.get('/', routes.index);
Символ ‘/’, в примере выше, это и есть контроллер. Это middleware-функция, которая принимает request, response и next.
exports.index = function(req, res, next) {
    res.render('index', { title: 'Express' });
};
В примере выше показано, как должен выглядеть ваш контроллер, в контексте Express. Команда express создает папку с именем routes, но в нашем случае, лучше назвать её controllers. Поэтому я переименовал её таким образом, чтобы отразить используемую нами схему MVC.
Так как создаваемое нами приложение является достаточно серьезным, будет мудрым решением создать класс base, который затем может быть расширен. Если нам когда-нибудь понадобиться передать некоторую функциональность другим контроллерам, то этот класс сослужит нам большую пользу. И снова, я сначала напишу тест, так что давайте определимся, что нам нужно от класса:
- Он должен иметь метод nextend, который принимает объект и возвращает новый дочерний экземпляр;
- Дочерний экземпляр должен иметь метод run, являющийся старой middleware-функцией;
- Класс должен содержать в себе свойство name, которое идентифицирует контроллер;
- Мы должны иметь возможность создавать независимые объекты, основанные на этом классе.
Не такие уж большие возможности, но ведь мы сможем добавить новую функциональность позже. Тест будет выглядеть следующим образом:
var BaseController = require("../controllers/Base");
describe("Base controller", function() {
    it("должен иметь метод extend, который возвращает дочерний экземпляр", function(next) {
        expect(BaseController.extend).toBeDefined();
        var child = BaseController.extend({ name: "my child controller" });
        expect(child.run).toBeDefined();
        expect(child.name).toBe("my child controller");
        next();
    });
    it("должен уметь создавать различные дочерние экземпляры", function(next) {
        var childA = BaseController.extend({ name: "child A", customProperty: 'value' });
        var childB = BaseController.extend({ name: "child B" });
        expect(childA.name).not.toBe(childB.name);
        expect(childB.customProperty).not.toBeDefined();
        next();
    });
});
А вот реализация /controllers/Base.js:
var _ = require("underscore");
module.exports = {
    name: "base",
    extend: function(child) {
        return _.extend({}, this, child);
    },
    run: function(req, res, next) {

    }
}
Разумеется, каждый дочерний класс должен определять собственный метод run, который имеет собственную логику.
Отлично, теперь у нас есть достаточный набор классов для реализации архитектуры MVC. Также мы создали тест к каждому модулю. Мы готовы продолжить создание сайта вымышленной компании FastDelivery. Представим, что сайт разделен на две части – лицевая (front-end) и административная (back-end).
Лицевая будет использоваться для отображения пользователям информации, имеющейся в базе данных. Административная панель же будет использоваться для управления этими данными. Начнем с административной (контрольной) панели.
Для начала, давайте создадим простой контроллер, который будет обслуживать административную страницу и находиться в файле ./controllers/Admin.js:
var BaseController = require("./Base"),
    View = require("../views/Base");
module.exports = BaseController.extend({
    name: "Admin",
    run: function(req, res, next) {
        var v = new View(res, 'admin');
        v.render({
            title: 'Административная панель',
            content: 'Добро пожаловать в административную панель'
        });
    }
});
Используя заранее написанные базовые классы для контроллеров и видов, мы легко можем создать точку входа в административную панель. Класс View принимает имя файла шаблона. Согласно коду, приведенному выше, файл должен быть назван admin.hjs и расположен в папке /templates/. Его содержимое должно быть следующим:
<!DOCTYPE html>
<html>
    <head>
        <title>{{ title }}</title>
        <link rel='stylesheet' href='/stylesheets/style.css' />
    </head>
    <body>
        <div class="container">
            <h1>{{ content }}</h1>
        </div>
    </body>
</html>
Чтобы статья не увеличивалась в объеме, я не буду выкладывать каждый отдельный шаблон вида. Вы можете просмотреть их исходный код на GitHub.
Чтобы сделать контроллер видимым, нам нужно добавить в него маршрут в файле app.js:
var Admin = require('./controllers/Admin');
...
var attachDB = function(req, res, next) {
    req.db = db;
    next();
};
...
app.all('/admin*', attachDB, function(req, res, next) {
    Admin.run(req, res, next);
});
Заметьте, что мы не посылаем метод Admin.run напрямую в middleware, чтобы не нарушить контекст. Если мы сделаем так:
app.all('/admin*', Admin.run);
То слово this в административном модуле будет вести в другое место.
Каждая страница, начинающаяся с /admin должна быть защищена. Для этого, нам нужно использовать middleware, встроенное в Express, под названием Sessions. Этот инструмент просто прикрепляет объект к запросу названному session. Теперь нам нужно изменить контроллер нашей административной панели таким образом, чтобы он делал две вещи:
- Проверял, доступна ли сессия. Если нет, то отобразить форму логина;
- Принимал данные, посланные через форму логина и авторизовывал пользователя при совпадении логина и пароля.
Вот небольшая helper-функция, которую мы можем использовать, чтобы реализовать это:
authorize: function(req) {
    return (
        req.session &&
        req.session.fastdelivery &&
        req.session.fastdelivery === true
    ) || (
        req.body &&
        req.body.username === this.username &&
        req.body.password === this.password
    );
}
В этом листинге сначала идет выражение, которое пробует распознать пользователя через объект session. Далее, мы проверяем, была ли отправлена форма. Если да, то данные из формы становятся доступны через объект request.body,который заполняется при помощи middleware bodyParser. Наконец, мы проверяем имя пользователя и пароль.
А теперь, реализуем метод контроллера run, который использует наш новый хелпер. Если пользователь авторизован, то отображаем административную панель, иначе – панель логина:
run: function(req, res, next) {
    if(this.authorize(req)) {
        req.session.fastdelivery = true;
        req.session.save(function(err) {
            var v = new View(res, 'admin');
            v.render({
                title: 'Административная панель',
                content: 'Добро пожаловать в административную панель'
            });
        });
    } else {
        var v = new View(res, 'admin-login');
        v.render({
            title: 'Пожалуйста, представьтесь'
        });
    }
}
Как я пояснил выше, у нас есть много объектов, которые нужно администрировать. Чтобы упростить этот процесс, давайте оставим все данные в одной коллекции. Каждая запись будет иметь название, произвольный текст, картинку и свойство type.
Свойство type будет определять владельца данной записи. Например, для страницы «Контакты» будет нужна только одна запись type: ‘contacts’, в то время как страница «Блог» потребует большее количество записей. Поэтому, нам нужно три новых страницы для добавления, редактирования и вывода записей.
Но перед тем как мы приступим непосредственно к реализации новых шаблонов, стилей и функционала контроллера, нам нужно написать класс нашей модели, которая располагается между сервером MongoDB и приложением, и предоставляет API.
// /models/ContentModel.js

var Model = require("./Base"),
    crypto = require("crypto"),
    model = new Model();
var ContentModel = model.extend({
    insert: function(data, callback) {
        data.ID = crypto.randomBytes(20).toString('hex');
        this.collection().insert(data, {}, callback || function(){ });
    },
    update: function(data, callback) {
        this.collection().update({ID: data.ID}, data, {}, callback || function(){ });
    },
    getlist: function(callback, query) {
        this.collection().find(query || {}).toArray(callback);
    },
    remove: function(ID, callback) {
        this.collection().findAndModify({ID: ID}, [], {}, {remove: true}, callback);
    }
});
module.exports = ContentModel;
Модель берет на себя ответственность за генерацию уникального ID для каждой записи. Это потом понадобится нам для обновления информации.
Если мы хотим добавить новую запись на страницу «Контакты», то просто делаем следующее:
var model = new (require("../models/ContentModel"));
model.insert({
    title: "Контакты",
    text: "...",
    type: "contacts"
});
Итак, у нас есть отличный API для управления данными в нашей коллекции mongodb. Теперь мы готовы к созданию пользовательского интерфейса для имеющейся функциональности. Для этого нужно будет немного изменить контроллер административной панели.
Для упрощения задачи я решил совместить список добавленных записей и форму для их добавления/редактирования. Как вы можете увидеть на скриншоте ниже, левая часть страницы зарезервирована под список, а правая – под форму.

Расположив все на одной странице, мы сможем сфокусироваться на реализации вывода страницы и других специфических вещах, например, данных пересылаемых в шаблон. По этой причине, я создал несколько helper-функций, объединенных между собой вот так:
var self = this;
...
var v = new View(res, 'admin');
self.del(req, function() {
    self.form(req, res, function(formMarkup) {
        self.list(function(listMarkup) {
            v.render({
                title: 'Административная панель',
                content: 'Добро пожаловать в административную панель',
                list: listMarkup,
                form: formMarkup
            });
        });
    });
});
Наша административная панель выглядит очень угловато, но работает именно так, как задумывалось. Первая helper-функция это метод del, который проверяет текущие параметры GET и, если находит строку action=delete&id=[id записи], то удаляет данные из коллекции.
Вторая функция называется form и отвечает в основном за отображение формы в правой части страницы. Она проверяет, отправлена ли форма, и обновляет/создает записи в базе данных. В конце, метод list выбирает информацию и подготавливает HTML-таблицу, которая будет послана шаблону. Реализацию трех этих хелперов можно найти здесь.
В статье же, я решил показать функцию, которая управляет загрузкой файла:
handleFileUpload: function(req) {
    if(!req.files || !req.files.picture || !req.files.picture.name) {
        return req.body.currentPicture || '';
    }
    var data = fs.readFileSync(req.files.picture.path);
    var fileName = req.files.picture.name;
    var uid = crypto.randomBytes(10).toString('hex');
    var dir = __dirname + "/../public/wp-content/uploads/" + uid;
    fs.mkdirSync(dir, '0777');
    fs.writeFileSync(dir + "/" + fileName, data);
    return '/wp-content/uploads/' + uid + "/" + fileName;
}
Если файл отправлен, то свойство .files объекта request заполняется данными. В нашем случае, у нас есть следующий HTML-элемент:
<input type="file" name="picture" />
Это значит, что мы можем получить доступ к отправленным данным через req.files.picture. В коде, приведенном выше, req.files.picture.path используется, чтобы получить необработанное содержимое файла.
Позже, в те же данные записывается новый каталог и в конце возвращается URL-адрес. Все эти операции синхронны, но очень полезно использовать асинхронные версии readFileSync, mkdirSync и writeFileSync.
Самая сложная часть работы выполнена. Административная панель работает и у нас есть класс ContentModel, который дает доступ к информации, сохраненной в базе данных. Теперь нам нужно реализовать контроллеры фронт-энда и привязать их к сохраненному содержимому.
Ниже представлен контроллер для домашней страницы — /controllers/Home.js:
module.exports = BaseController.extend({
    name: "Домашняя страница",
    content: null,
    run: function(req, res, next) {
        model.setDB(req.db);
        var self = this;
        this.getContent(function() {
            var v = new View(res, 'home');
            v.render(self.content);
        })
    },
    getContent: function(callback) {
        var self = this;
        this.content = {};
        model.getlist(function(err, records) {
            ... здесь идет сохранение данных в объект content
            model.getlist(function(err, records) {
                ... здесь идет сохранение данных в объект content
                callback();
            }, { type: 'blog' });
        }, { type: 'home' });
    }
});
Домашняя страница требует одной записи типа home и четырех типа blog. После создания контроллера, нам нужно добавить маршрут в файл app.js:
app.all('/', attachDB, function(req, res, next) {
    Home.run(req, res, next);
});
И вновь, мы добавляем объект db к request. Это практически то же самое, что мы делали для административной панели.
Остальные страницы для нашего фронт-энда (клиентской части) идентичны: все они имеют контроллер, который извлекает данные с помощью класса модели и определяет маршрут. Есть пару моментов, которые я бы хотел пояснить. Первый касается страницы «Блог».
Она должна уметь отображать не только все статьи, но и каждую из них по отдельности. Поэтому, мы должны зарегистрировать два маршрута:
app.all('/blog/:id', attachDB, function(req, res, next) {
    Blog.runArticle(req, res, next);
});
app.all('/blog', attachDB, function(req, res, next) {
    Blog.run(req, res, next);
});
Обе функции используют один и тот же контроллер Blog, но вызывают метод run по-разному. Обратите внимание на строку /blog/:id. Этот маршрут будет совпадать с URL-адресами вида /blog/4e3455635b4a6f6dccfaa1e50ee71f1cde75222b, а длинная хеш-функция будет доступна через req.params.id. Другими словами, мы можем определить динамические параметры.
В данном случае, это ID записи. После получения этой информации, мы можем создать уникальную страницу для каждой статьи.
Вторым интересным моментом является то, каким образом я создал страницы «Услуги», «Карьера» и «Контакты». Ясно, что они используют только одну запись из базы данных. Если нам нужно создать разные контроллеры для каждой страницы, то необходимо скопировать/вставить тот же код и изменить поле type.
Это оптимальный способ, когда имеется только один контроллер, который принимает значение type в методе run. Итак, вот маршруты:
app.all('/services', attachDB, function(req, res, next) {
    Page.run('services', req, res, next);
});
app.all('/careers', attachDB, function(req, res, next) {
    Page.run('careers', req, res, next);
});
app.all('/contacts', attachDB, function(req, res, next) {
    Page.run('contacts', req, res, next);
});
А вот как будет выглядеть контроллер:
module.exports = BaseController.extend({
    name: "Page",
    content: null,
    run: function(type, req, res, next) {
        model.setDB(req.db);
        var self = this;
        this.getContent(type, function() {
            var v = new View(res, 'inner');
            v.render(self.content);
        });
    },
    getContent: function(type, callback) {
        var self = this;
        this.content = {}
        model.getlist(function(err, records) {
            if(records.length > 0) {
                self.content = records[0];
            }
            callback();
        }, { type: type });
    }
});
Процедура развертывания сайта на базе Express аналогична, развертыванию любого другого Node.js-приложения:
- Перемещение файлов на сервер;
- Остановка процесса node (если он запущен);
- Запуск команды npm install для установки новых зависимостей;
- Запуск node.
Надо понимать, что Node это достаточно молодая платформа, и не все может работать, как ожидается, но улучшения делаются постоянно. Например, CLI-инструмент forever гарантирует, что ваше Node.js-приложение будет запущено вечно. Это делается командой:
Я использую это на всех своих серверах. Это отличный инструмент, решающий множество проблем. Если вы запускаете свою программу с помощью node yourapp.js, то после неожиданного завершения её работы, сервер упадет. Forever, просто перезапускает приложение в этом случае.
Я не системный администратор, но у меня есть желание поделиться своим опытом интеграции node-приложений с Apache и Nginx, потому что я считаю, что это часть рабочего процесса и помогает развитию программного обеспечения в принципе.
Как вы знаете, Apache нормально работает на 80 порту, а это означает, что если вы перейдете по адресу http://localhost или http://localhost:80, то увидите страницу Apache-сервера. Чаще всего, ваш node-скрипт слушает другой порт.
Поэтому, вам нужно добавить виртуальный хост, который будет принимать запросы и направлять их на нужный порт. Представим, что я хочу расположить созданный нами сайт, на своем локальном Apache-сервере по адресу expresscompletewebsite.dev. Для этого, первым делом нужно добавить наш домен в файл hosts:
127.0.0.1 expresscompletewebsite.dev
После чего, надо отредактировать файл httpd-vhosts.conf, расположенный в папке с конфигурационными файлами Apache, добавив в него:
# expresscompletewebsite.dev
<VirtualHost *:80>
    ServerName expresscompletewebsite.dev
    ServerAlias www.expresscompletewebsite.dev
    ProxyRequests off
    <Proxy *>
        Order deny,allow
        Allow from all
    </Proxy>
    <Location />
        ProxyPass http://localhost:3000/
        ProxyPassReverse http://localhost:3000/
    </Location>
</VirtualHost>
Сервер все еще посылает запросы на порт 80, но перенаправляет их на порт 3000, где их слушает node.
Настройка Nginx проще и, честно говоря, он лучше подходит для Nodejs-приложений. Первым шагом все также нужно добавить наш домен в файл hosts. После чего, просто создайте новый файл в папке /sites-enabled в директории с установленным Nginx. Содержимое файла должно выглядеть следующим образом:
server {
    listen 80;
    server_name expresscompletewebsite.dev
    location / {
        proxy_pass http://127.0.0.1:3000;
        proxy_set_header Host $http_host;
    }
}
Вы не сможете запустить Apache и Nginx с настройками hosts-файлов, приведенными выше, потому что они требуют порт 80. Также, если вы системный администратор, то, скорее всего, захотите поэкспериментировать с настройками для улучшения производительности. Но повторюсь, я не эксперт в этой области.
Express это замечательный фреймворк, который хорошо подходит для того, чтобы начать создавать свои веб-приложения. И, как вы могли заметить, результат будет зависеть от того, каким образом вы построите его, и что будете использовать при создании.
Express упрощает решение рутинных задач, он предоставляет отличное middleware и, в то же время, оставляет реализацию ответственных частей кода разработчику.
Исходные коды для данной статьи доступны на GitHub. Используйте их и экспериментируйте.
Вот краткая инструкция по запуску сайта:
- Скачайте исходные коды;
- Перейдите в папку app;
- Запустите npm install;
- Запустите демон mongodb;
- Запустите команду node app.js.
Updated: 08/31/2020 by
This example creates a website using Node.js to provide logical website behavior. Using the Express.js framework, the website is implemented as a web application, with logical routing to other sections of the website.
The HTML and CSS is based on our responsive website design using CSS Grid and Flexbox. The HTML is refactored as a template, so layout code can be reused when adding new pages.
Install Node
Node.js, also called Node, is a runtime environment for writing server-side applications in JavaScript.
Note
If Node is already installed on your computer, you can skip this section and proceed to make a new Express app.
Download the Node installer from the official Node.js downloads website. Choose the LTS (long term support) version for your operating system.
Windows and macOS
Open and run the Node installer (.msi on Windows, .pkg on macOS).
On Windows, at the installation screen labeled Tools for Native Modules, check the box Automatically install the necessary tools.
Linux
On Linux systems, you can install Node using your package manager, install the compiled binaries manually, or build Node from source. For detailed information, refer to the official Node.js installation wiki.
All operating systems
When installation is complete, open a terminal or command prompt window. Run the following command to update npm, the Node package manager. The -g (global) switch specifies that the software is installed system-wide, not only the current Node app.
Windows
npm install -g npm
Linux and macOS
sudo npm install -g npm
Finally, use npm to globally install the express-generator application.
Windows
npm install -g express-generator
Linux and macOS
sudo npm install -g express-generator
Make a new Express app
In a terminal or command prompt window, generate a new Express.js app. In our example, the app name is myapp, and the view engine is specified as pug.
express myapp --view="pug"
Change directory to the new Express app.
cd myapp
In the Express app directory, use npm install to download and install the required dependencies, as listed in the package.json file.
npm install
If any security updates are available for the installed dependencies, a notification is displayed.
found 1 low severity vulnerability
  run `npm audit fix` to fix them, or `npm audit` for details
If so, apply the security updates.
npm audit fix
Install nodemon
In the Express app directory, install nodemon. The option —save-dev indicates that nodemon is a development dependency. It is not used in the application itself, but is a tool used during development.
npm install --save-dev nodemon
Add a development startup script
A development startup script provides a way to start your web application with options that help you develop the app, such as verbose error messages.
In a text editor, open the file package.json in the app directory. This JSON file specifies the dependencies used by your Node app. Additionally, it contains named startup scripts that start the application in different ways.
In package.json, locate the «scripts» entry. By default, it contains only one script («start»).
  "scripts": {
    "start": "node ./bin/www"
  },
Add a new line that defines a script devstart as follows.
Linux and macOS
  "scripts": {
    "start": "node ./bin/www",
    "devstart": "DEBUG=myapp:* nodemon ./bin/www"
  },
Windows
  "scripts": {
    "start": "node ./bin/www",
    "devstart": "SET DEBUG=myapp:* & nodemon ./bin/www"
  },
These scripts («start» and «devstart») can be executed by running the command npm run scriptname.
The command npm run devstart starts the app with two additional development features enabled.
- The DEBUG environment variable is set, specifying that the console log and error pages, such as HTTP 404, display additional information, like a stack trace.
- In addition, nodemon monitors certain important website files. If you modify these files, such as redesigning a page or modifying static content, nodemon automatically restarts the server to reflect the changes.
Start the web server in development mode.
npm run devstart
Tip
If the Windows Firewall blocks the web server application, click Allow Access.
Preview the web app
When the application is running, your computer acts as a web server, serving HTTP on port 3000.
To preview the website, open a web browser to the address localhost:3000.
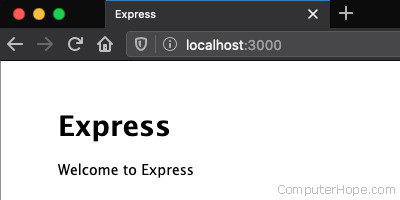
Any device connected to your local network can view the application at address ipaddress:3000, where ipaddress is the local IP address of the computer running the app.
To preview the website on a mobile device, connect its Wi-Fi to your local network, and open the address in a browser.
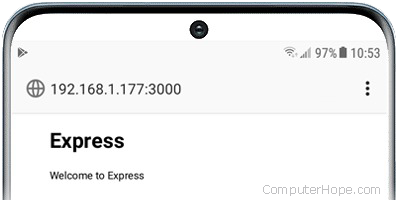
HTML templates
Our example uses the CSS, JavaScript, and HTML from the how to create a responsive website using CSS Grid and Flexbox. The CSS and JavaScript are used verbatim. The HTML is refactored to a templating language.
Using a templating language, the layout code is written only once, and inherited by other pages.
The software that converts a template to its final format is called a template processor. In the context of HTML, a template processor is called a view engine.
Express.js supports several view engines, including Pug.
Overview of Pug
The Pug language describes HTML documents, in a way that provides benefits and additional features. Pug files are rendered to HTML when the user requests them.
Pug’s language syntax removes the need for tags to be closed, or enclosed in brackets. It also supports inherited templates, iteration, conditionals, and JavaScript evaluation.
Example HTML to Pug conversion
These are the first few lines of the HTML from the how to create a responsive website using CSS Grid and Flexbox.
<!DOCTYPE html>
<html lang="en">
  <head>
    <meta name="viewport" content="width=device-width, initial-scale=1">
    <meta charset="utf-8">
    <title>Title</title>
    <link rel="stylesheet" href="index.css">
    <script src="index.js"></script>
  </head>
  <body>
    <div id="menu">
      <section id="menuitems">
        <div class="menubutton">
          <h1 onclick="menuToggle('hide')" class="menubutton">☰</h1>
In Pug, the same HTML can be written like this.
doctype html
html
  head
    meta(name="viewport" content="width=device-width, initial-scale=1")
    meta(charset="utf-8")
 title Title
    link(rel="stylesheet", href="index.css")
    script(src="index.js")
  body
    #menu
      section#menuitems
        .menubutton
          h1.menubutton(onclick="menuToggle('hide')") ☰
Element tags are written without brackets. Child elements are indented. The level of indentation determines the scope of an element, so closing tags are not necessary.
The «id» and «class» CSS selectors can be written as element#id, element.class, element#id.class, etc. If no element is specified, the element is assumed to be a div. For example, <div class=»foo»> in HTML can be written as .foo in Pug.
After the element name and its selectors, attributes can be specified in parentheses, as a comma-delimited list. For example:
HTML
<div class="button" onmouseover="glow()" onclick="start()">
Pug
.button(onmouseover="glow()", onclick="start()")
Listing multiple elements in one line
If the element is followed by a colon (:), it can be followed by a child element on the same line. The following two sections of Pug produce the same HTML output.
a(href="/home")
  p Home
a(href="/home"): p Home
Both of the above are rendered to the following HTML.
<a href="/home"><p>Home</p></a>
Evaluating JavaScript
If the element is followed by an equals sign (=), everything that follows on that line is interpreted as buffered code. The code is evaluated as JavaScript, and the output is «buffered» (included as the element’s content). In its simplest form, buffered code can be the name of a variable, passed by the application.
For example, the app router for the home page, index.js, passes the variable title with the value «Our Farm Stand» to the method express.Router(), which passes it to Pug. When Pug renders layout.pug, the following line:
title= pagetitle
…is interpreted as:
title Our Farm Stand
…which is rendered as the following HTML:
<title>Our Farm Stand</title>
Template inheritance
Pug documents can inherit other Pug documents using the keywords extends and block.
For example, you can create a basic website layout, layout.pug, with shared elements of the page.
doctype html
html
  head
 title Page Title
  body
    p Content
    block foo
The block foo statement says «insert a block of content here, named foo, specified in another Pug document that inherits this template.»
Documents that inherit layout.pug must begin with the statement extends layout, and contain a block foo statement at the top indentation level (at the beginning of a new line). The children of this «block foo» statement are inserted in the template at the location of the corresponding block.
A Pug document can inherit layout.pug like the following.
extends layout
block foo
  p This is the home page.
When the document is rendered, the Pug engine loads the file layout.pug. The line block foo in layout.pug is replaced with p This is the home page.
Overview of the default Express app
The default structure of the Express app is listed here, with descriptions of each file and directory.
myapp/                  (Contains the entire Express app)
├─ app.js               The core logic of the Express app.
├─ bin/                 (Contains the app's executable scripts)
│  └─ www               A wrapper that runs app.js.
├─ node_modules/        (Contains dependencies installed by npm)
├─ package-lock.json    JSON manifest of installed dependencies.
├─ package.json         JSON of dependencies and config specific to your app.
├─ public/              (Files downloaded by the user's web browser)
│  ├─ images/           (Contains client-accessible image files)
│  ├─ javascripts/      (Contains client-accessible JavaScript files)
│  └─ stylesheets/      (Contains client-accessible CSS)
│     └─ style.css      The site's CSS stylesheet.
├─ routes/              (Contains logic for individual site routes)
│  ├─ index.js          Logic of the "index" route (/).
│  └─ users.js          Logic of the "users" route (/users).
└─ views/               (Contains HTML templates)
   ├─ error.pug         View displayed for error pages, such as HTML 404.
   ├─ index.pug         View displayed for the site root (/).
   └─ layout.pug        View template of layout shared by all pages.
Core functionality of the website is defined in app.js. Routes are named and specified in this file.
A route is a page or section of the site with a unique path in the URL, such as www.example.com/search, www.example.com/login, etc. These routes are named, and associated with route logic scripts, in app.js.
Route logic scripts are stored in the routes folder. When a user requests a route, its route logic script processes the HTTP request data and sends a response.
The views folder contains the HTML templates, called views, which are processed by the view engine (Pug).
Implementation: JavaScript, CSS, and Pug
The following code implements the Express web app.
App file structure
myapp/
├─ app.js               App core logic
├─ bin/
│  └─ www
├─ node_modules/
├─ package-lock.json
├─ package.json
├─ public/
│  ├─ images/
│  ├─ javascripts/
│  │  └─ menu.js        Implements menu toggle
│  └─ stylesheets/
│     └─ style.css      Stylesheet
├─ routes/
│  ├─ about.js          Logic for route /about
│  ├─ advice.js         Logic for route /advice
│  ├─ contact.js        Logic for route /contact
│  ├─ index.js          Logic for route /
│  ├─ recipes.js        Logic for route /recipes
│  ├─ tips.js           Logic for route /tips
│  └─ users.js          Not used, can be deleted
└─ views/
   ├─ about.pug         View for route /about
   ├─ advice.pug        View for route /advice
   ├─ contact.pug       View for route /contact
   ├─ error.pug
   ├─ index.pug         View for route /
   ├─ layout.pug        View template shared by all pages
   ├─ recipes.pug       View for route /recipes
   └─ tips.pug          View for route /tips
blue = modified, green = new, red = not used
myapp/app.js
The core app logic is essentially the same as the default Express app, with additional routes defined. The «users» route is removed.
// core dependencies
var createError = require('http-errors');
var express = require('express');
var path = require('path');
var cookieParser = require('cookie-parser');
var logger = require('morgan');
// create route objectsvar indexRouter = require('./routes/index');var aboutRouter = require('./routes/about');var contactRouter = require('./routes/contact');var tipsRouter = require('./routes/tips');var recipesRouter = require('./routes/recipes');var adviceRouter = require('./routes/advice');
// the app object
var app = express();
// view engine setup
app.set('views', path.join(__dirname, 'views'));
app.set('view engine', 'pug');
// app config
app.use(logger('dev'));
app.use(express.json());
app.use(express.urlencoded({ extended: false }));
app.use(cookieParser());
app.use(express.static(path.join(__dirname, 'public')));
// tell the app to use these routesapp.use('/', indexRouter);app.use('/about', aboutRouter);app.use('/contact', contactRouter);app.use('/tips', tipsRouter);app.use('/recipes', recipesRouter);app.use('/advice', adviceRouter);
// catch 404 and forward to error handler
app.use(function(req, res, next) {
  next(createError(404));
});
// error handler
app.use(function(err, req, res, next) {
  // set locals, only providing error in development
  res.locals.message = err.message;
  res.locals.error = req.app.get('env') === 'development' ? err : {};
  // render the error page
  res.status(err.status || 500);
  res.render('error');
});
// expose this app to scripts that require it, i.e. myapp/bin/www
module.exports = app;
myapp/routes/layout.pug
The layout.pug file contains the core layout of the page, which is shared by every page on the site. It contains everything required to display a page, except for the mainbody content (block mainbody).
doctype html
html
  head
 title= pagetitle
    meta(charset="utf-8")
    meta(name="viewport" content="width=device-width, initial-scale=1")
    script(src="/javascripts/menu.js")
    link(rel="stylesheet", href="/stylesheets/style.css")
  body
    #menu
      section#menuitems
        .menubutton
          h1.menubutton(onclick="menuToggle('hide')") ☰
        a(href="/")
          h3.menuhead Our Farm Stand
        a(href="/tips")
          h3.sectrule Tips for living well
        a(href="/recipes")
          h3 Recipes
        a(href="/advice")
          h3 Homesteading advice
        a(href="/about")
          h3.sectrule About Us
        a(href="/contact")
          h3 Contact Us
    #container
      #header
        a(href="/")
          h1.logo Our Farm Stand
        .headspace
        h1.menubutton(onclick="menuToggle('show')") ☰
        h1.placeholder ☰
        h2.navitem
          a(href="/about")
            .clickable-area About Us
        h2.navitem
          a(href="/contact")
            .clickable-area Contact Us
      #panel.left
        section#sections
          .sectionlink
            a(href="/tips")
              .clickable-area Tips for living well
          .sectionlink
            a(href="/recipes")
              .clickable-area Recipes
          .sectionlink
            a(href="/advice")
              .clickable-area Homesteading advice
      block mainbody
      #panel.right
        h3 Our friends
        section#partners.tall
          .partnerlink
            a(href="/")
              .clickable-area Green Valley Greens
          .partnerlink
            a(href="/")
              .clickable-area Turkey Hill Farm
          .partnerlink
            a(href="/")
              .clickable-area Burt's Maple Syrup
          .partnerlink
            a(href="/")
              .clickable-area Only Organic Seeds
      #footer
        p Copyright © 2020 Alice & Bob's Farm Stand
myapp/views/index.pug
The index.pug file extends layout.pug, and contains mainbody content for the route /.
extends layout
block mainbody
  #mainbody
    section.mainbodyitems
      h3 Announcements
      section.announcements
        .announceitem
          h4.title Open for business
          p.date Jan. 15
          p Renovations of our new storefront are complete, and we're open for business.
      h3 Items for sale
      section.forsaleitems
        table
          tr
            th Item
            th Description
            th Price
            th.qty Qty
          tr
            td Milk
            td Good source of calcium.
            td.price $2
              span.perunit  / half gal.
            td.qty 3
          tr
            td Eggs
            td Great for breakfast and baking.
            td.price $4
              span.perunit  / doz.
            td.qty 6
          tr
            td Whole chicken
            td Perfect for roasting.
            td.price $5
              span.perunit  / lb.
            td.qty 4
      h3 Upcoming events
      section
        .eventitem
          h4.title Cider Fest
          p.date October 20, 2pm–6pm
          p Celebrate the season with fresh-pressed cider from our orchards.
        .eventitem
          h4.title Bread baking workshop
          p.date December 13, 9am–noon
          p Learn how to create and cultivate a sourdough starter.
      h3 Message of the day
      section
        .motditem
          p Eat better food. Support your local farm stand.
        h3#partners.wide Our friends
        section#partners.wide
          .partnerlink.wide
            a(href="")
              .clickable-area Green Valley Greens
          .partnerlink.wide
            a(href="")
              .clickable-area Turkey Hill Farm
          .partnerlink.wide
            a(href="/")
              .clickable-area Burt's Maple Syrup
          .partnerlink.wide
            a(href="")
              .clickable-area Only Organic Seeds
        .bodyspace
myapp/routes/index.js
The file index.js contains logic for the route /.
var express = require('express');
var router = express.Router();
router.get('/', function(req, res, next) {
  res.render('index', { pagetitle: 'Our Farm Stand' });
});
module.exports = router;
The file menu.js contains the JavaScript from the Grid and Flexbox example. It implements the menu toggle function.
function menuToggle(state) {
  var ele = document.getElementById('menu');
  switch(state) {
    case 'show':
      ele.style.opacity=1;
      ele.style.color='rgb(96, 96, 96)';
      ele.style.visibility='visible';
      ele.style.transition='visibility 0s, opacity 0.3s';
      break;
    case 'hide':
      ele.style.opacity=0;
      ele.style.color='black';
      ele.style.visibility='hidden';
      ele.style.transition='visibility 0.3s, opacity 0.3s';
      break;
  }
}
myapp/public/stylesheets/style.css
The file style.css contains the CSS from the Grid and Flexbox example.
/* element styles */
* {
  margin: 0;     /* by default, all elements (selector *) have no margin */
}
html {
  width: 100%;                    /* 100% width of parent (root) element */
  height: 100vh;                              /* 100% height of viewport */
  background: rgb(0, 0, 0, 0.1);                            /* 10% black */
  font-size: 1.0em;                                /* our root font size */
  font-family: Arial, Helvetica, sans-serif;             /* default font */
}
body {
  min-height: 100%;
}
section {
  padding: 0.5rem;
  flex-grow: 1;         /* in a flexbox, sections expand along flex axis */
}
h1 {                                           /* Website name in header */
  font-size: 2.0rem;
  font-weight: normal;
}
h2 {                                                   /* About, Contact */
  font-size: 1.25rem;
}
h3 {                                                 /* Section headings */
  font-size: 1.2rem;
  padding: 0.5rem;
}
h4 {                                               /* Section item title */
  font-weight: normal;
  padding: 0.5rem;
}
p {                                                 /* Section item body */
  padding: 0.5rem;
}
a:link, a:visited {            /* anchor links, and visited anchor links */
  color: black;
  text-decoration: none;                            /* disable underline */
}
a:hover {                                 /* when anchor link is hovered */
  color: rgb(25, 25, 25);
}
a:active {                                /* when anchor link is clicked */
  color: rgb(96, 96, 96);
}
/* component styles */
#container {
  display: grid;
  height: 100vh;
  grid-template-columns:
    [left] 10rem auto 10rem [right];
  grid-template-rows:
    [top] 5rem auto 5rem [bottom];     /* header height fits its content */
  grid-template-areas:
    "head head head"
    "panleft mainbody panright"
    "foot foot foot";
}
#header {
  grid-area: head;                    /* corresponds to name in template */
  background: rgb(0, 0, 0, 0.2);                            /* 20% black */
  display: flex;
  flex-direction: row;
  justify-content: space-between;
  align-items: baseline;  /* site name and nav item text aligns baseline */
  padding: 1.0rem;
}
#panel {                                       /* for element id="panel" */
  display: flex;                     /* this element is a flexbox parent */
  flex-direction: column;          /* its child elements flex vertically */
  padding: 0.5rem;
  background: rgb(0, 0, 0, 0.1);                            /* 10% black */
}
#panel.left {                 /* for element id="panel" and class="left" */
  grid-area: panleft;                  /* this element fills a grid area */
}
#panel.right {
  grid-area: panright;
}
#footer {
  grid-area: foot;
  display: flex;                     /* this element is a flexbox parent */
  flex-direction: column;          /* its child elements flex vertically */
  justify-content: center;           /* horizontal center footer content */
  align-items: center;                 /* vertical center footer content */
  padding: 0.5rem;
  background: rgb(0, 0, 0, 0.2);
}
#mainbody {                                 /* for element id="mainbody" */
  display: flex;                     /* this element is a flexbox parent */
  flex-direction: column;          /* its child elements flex vertically */
  grid-area: mainbody;
  justify-self: center;          /* fixed-width mainbody always centered */
  width: 100%;
  min-width: 22.5rem;            /* mainbody width can't go < 22.5rem */
}
div#panel,
div#mainbody {                               /* extra space under header */
  padding-top: 0.5rem;
}
#partners, #sections {     /* for element id="partners" or id="sections" */
  display: flex;                     /* this element is a flexbox parent */
  flex-direction: row;           /* its child elements flex horizontally */
  flex-wrap: wrap;           /* its child elements can wrap to next line */
  align-content: flex-start;       /* child elements start in upper left */
}
#partners.wide {           /* for element id="partners" and class="wide" */
  display: none;              /* by default, do not display this element */
}
#menu {
  position: absolute;      /* menu position unaffected by other elements */
  right: 0;                       /* zero pixels from the right boundary */
  background: rgb(239, 239, 239);
  border: 0.15rem solid rgb(0, 0, 0, 0.4);
  visibility: hidden;        /* visibility property supports transitions */
  opacity: 0;      /* opacity + visibility transition = menu fade effect */
  z-index: 1;              /* ensure menu appears over all other content */
}
#menuitems {               /* menu is implemented as a flexbox container */
  display: flex;
  flex-direction: column;
  padding: 1rem;
}
#menuitems h3 {
  border-top: 0.15rem solid rgb(0, 0, 0, 0.1);  /* light horizontal rule */
}
#menuitems .sectrule {
  border-color: rgb(0, 0, 0, 0.25);            /* darker horizontal rule */
}
#menuitems .menuhead {
  border-top: none;
}
#menuitems h3:hover {
  background-color: rgb(0, 0, 0, 0.1);     /* gray of rollover menuitems */
}
.menubutton {
  text-align: right;
  cursor: pointer;            /* indicates it can be clicked like a link */
  user-select: none;            /* user cannot select the button as text */
}
#menuitems .alignright {
  text-align: right;            /* right-aligned menu item text (unused) */
}
#header h1.menubutton {
  display: none;        /* in default view (landscape), hide menu button */
  border: 0.15rem solid rgb(0, 0, 0, 0);   /* (invisible) alignment shim */
}
#header .placeholder {    /* this invisible button is rendered when menu */
  color: rgb(0, 0, 0, 0); /* button is hidden, so header height matches. */
  user-select: none;       /* user can't select text of invisible button */
}
.sectionlink, .partnerlink {
  border-radius: 0.25rem;     /* give this element a slight rounded edge */
  font-weight: normal;
  font-size: 1.1rem;
  padding: 0.5rem;
  width: 7rem;                            /* fixed width for these items */
  margin-bottom: 1rem;                  /* slight margin for readability */
  background: rgb(0, 0, 0, 0.1);
}
.sectionlink:hover, .partnerlink:hover {
  background-color: rgb(0, 0, 0, 0.065);   /* brighten bg on mouse hover */
}
.partnerlink {
  height: 7rem;        /* partner elements are additionally fixed height */
}
.partnerlink.wide {
  margin: 0.5rem 1rem 0.5rem 0;      /* margins for spacing if they wrap */
}
.clickable-area {      /* use whenever a clickable area excludes margins */
  height: 100%;                 /* clickable area spans height of parent */
}
.eventitem, .announceitem, .motditem {
  margin-bottom: 0.5rem;                /* slight margin for readability */
}
.title {                                    /* e.g., "Open for business" */
  font-style: italic;
  font-weight: normal;
  font-size: 1.1rem;
}
.date, .ingredient {                                         /* e.g., January 1, 2021 */
  font-style: italic;
  font-size: 0.9rem;
  padding: 0 0 0.01rem 0.5rem;
  color: rgb(0, 0, 0, 0.5);
}
.navitem {                                             /* About, Contact */
  font-weight: normal;
  padding: 0 0.5rem 0 1rem;
}
.headspace, .panspace, .footspace, .bodyspace {
  flex-grow: 1;      /* these elements expand on flex axis to fill space */
}
/* table styles ("items for sale") */
table {
  border-collapse: collapse;               /* pixel-adjacent table cells */
  width: 100%;
  margin-bottom: 1rem;
}
th {
  text-align: left;
}
tr {
  margin: 4rem 0 0 0;
  border-bottom: 0.15rem solid rgb(0, 0, 0, 0.2);     /* horizontal rule */
}
td, th {
  padding: 0.5rem;
  vertical-align: top;
}
td.price {
  white-space: nowrap;        /* white space in price does not wrap line */
}
td.qty, th.qty {
  text-align: center;
}
span.perunit {
  opacity: 0.5;
}
/* responsive styles applied in portrait mode */
@media screen and (max-width: 45rem) {      /* if viewport width < 45rem */
  #panel.left {
    grid-column-end: left;         /* panel grid area shrinks to nothing */
  }
  #panel.right {
    grid-column-start: right;      /* panel grid area shrinks to nothing */
  }
  #partners.tall {
    display: none;  /* hide partners in panel (overwrites display: flex) */
  }
  #partners.wide {
    display: flex;   /* show partners in body (overwrites display: none) */
  }
  #panel,                                 /* these disappear from layout */
  #header .placeholder,
  .navitem {
    display: none;
  }
  #mainbody {
    grid-column-start: left;         /* mainbody now starts at left edge */
    grid-column-end: right;           /* mainbody now ends at right edge */
  }
  #header h1.menubutton {              /* display the header menu button */
    display: inline;                         /* overwrites display: none */
  }
}
Secondary routes
The following files contain the logic for secondary routes — About, Advice, Contact, etc.
myapp/routes/about.js
var express = require('express');
var router = express.Router();
router.get('/', function(req, res, next) {
  res.render('about', { pagetitle: 'About Us' });
});
module.exports = router;
myapp/routes/advice.js
var express = require('express');
var router = express.Router();
router.get('/', function(req, res, next) {
  res.render('advice', { pagetitle: 'Homesteading Advice' });
});
module.exports = router;
myapp/routes/contact.js
var express = require('express');
var router = express.Router();
router.get('/', function(req, res, next) {
  res.render('contact', { pagetitle: 'Contact Us' });
});
module.exports = router;
myapp/routes/recipes.js
var express = require('express');
var router = express.Router();
router.get('/', function(req, res, next) {
  res.render('recipes', { pagetitle: 'Recipes' });
});
module.exports = router;
myapp/routes/tips.js
var express = require('express');
var router = express.Router();
router.get('/', function(req, res, next) {
  res.render('tips', { pagetitle: 'Tips For Living Well' });
});
module.exports = router;
Secondary views
The following views inherit layout.pug.
myapp/views/about.pug
extends layout
block mainbody
  #mainbody
    section#mainbodyitems
      p Alice & Bob have been operating their farm stand since 1992.
myapp/views/advice.pug
extends layout
block mainbody
  #mainbody
    section#mainbodyitems
      h3 Homesteading Advice
      p Never, ever stand behind a heifer.
myapp/views/contact.pug
extends layout
block mainbody
  #mainbody
    section#mainbodyitems
      h3 Alice & Bob
      p 1344 Chattanooga Way
      p Homestead, VT 05401
      p (802) 555-5555
myapp/views/recipes.pug
extends layout
block mainbody
  #mainbody
    section#mainbodyitems
      h3 Alice's Recipes
      p
        b No-knead next-day dutch oven bread
      p.ingredient 1/4 tsp active dry yeast
      p.ingredient 3 cups all-purpose flour
      p.ingredient 1 1/2 tsp salt
      p.ingredient Cornmeal or wheat bran for dusting
      p In a large bowl, dissolve yeast in water.
      p Add the flour and salt, stirring until blended.
      p Cover bowl. Let rest at least 8 hours, preferably 12 to 18, at warm room temperature, about 70 degrees.
      p When the surface of the dough is dotted with bubbles, it's ready to be folded. Lightly flour a work surface. Sprinkle flour on the dough and fold it over on itself once or twice. Cover loosely and let it rest about 15 minutes.
      p Using just enough flour to keep the dough from sticking, gently shape it into a ball. Generously coat a clean dish towel with flour, wheat bran, or cornmeal. Put the seam side of the dough on the towel. Cover with another towel and let rise for 1 to 2 hours.
      p Heat oven to 475°. Cover and bake for 30 minutes.
myapp/views/tips.pug
extends layout
block mainbody
  #mainbody
    section#mainbodyitems
      h3 Alice's Tips
      p Always rise before the sun.
      p Never use fake maple syrup.
      p If the bear is black, be loud, attack.
      p If the bear is brown, play dead, lie down.
Appearance
In portrait mode, secondary routes are accessed in the menu.
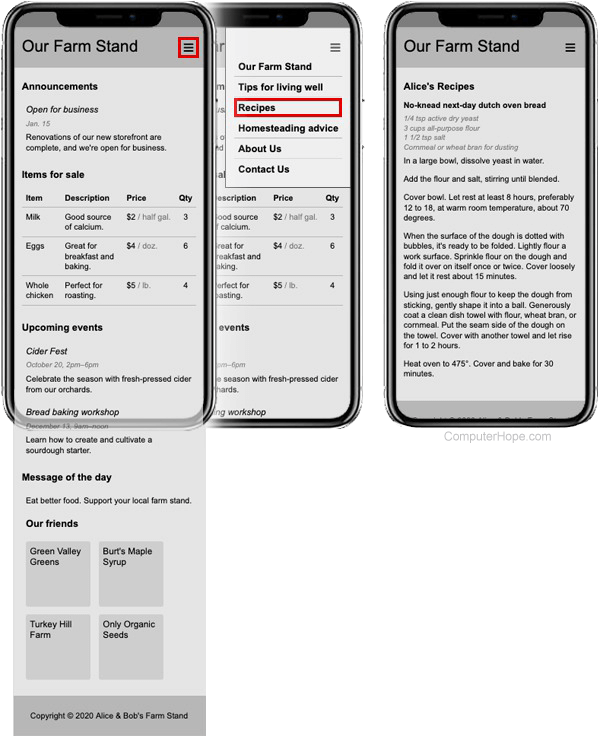
In landscape mode, they’re accessible from the header and left panel.