- Назад
- Обзор: Django
- Далее
Это вторая статья из нашего руководства по Django, которая показывает, как можно создать «скелет» сайта, как фундамент, на котором можно строить всё остальное: настройки, ссылки, модели, контроллеры и представления.
| Необходимо: | Настройка окружения. Прочитать первую статью руководства по Django. |
|---|---|
| Цель: | Научиться использовать инструменты Django для создания новых веб-сайтов. |
Обзор
Эта статья показывает, как можно создать «скелет»(прототип) сайта, который затем можно расширить при помощи различных настроек, url адресов, моделей, представлений, и шаблонов (эти темы будут объясняться в последующих статьях).
Алгоритм следующий:
- Использовать
django-adminдля создания папки проекта, шаблонов остальных файлов, и скрипта для управления проектом (manage.py). - Использовать manage.py *для создания одного или нескольких *приложений.
**Примечание:**Сайт может состоять из одной или нескольких различных частей, например: основная часть, блог, вики, раздел загрузок, и так далее. Философия Django подталкивает разработчиков создавать эти части, как разные приложения, которые, если понадобится, могут быть использованы повторно в других проектах.
- Зарегистрировать в настройках эти приложения, чтобы использовать их в проекте.
- Настроить маршруты url адресов для каждого из приложений.
Для Сайта местной библиотеки папка сайта и проекта будет называться locallibrary, и у нас будет одно приложение с названием catalog. Верхняя структура проекта будет следующей:
locallibrary/         # Папка сайта
    manage.py         # Скрипт для управления проектов (создан manage.py)
    locallibrary/     # Папка сайта/проекта (создана manage.py)
    catalog/          # Папка приложения (также создана manage.py)
Следующие разделы статьи разложат по полочкам этапы создания «скелета», и покажут вам, как можно проверить сделанные изменения. В конце статьи мы обсудим некоторые другие настройки сайта, которые можно назначить на этом этапе.
Создание проекта
Для начала откройте командную строку/терминал, перейдите в ту папку, куда вы хотите поместить проект Django(лучше в папке профиля пользователя C:Usersuser_name, при запуске командной строки используется именно эта директория), и создайте папку для вашего нового сайта (в данном случае: locallibrary). Затем войдите в эту папку, используя команду cd:
mkdir locallibrary
cd locallibrary
Создайте новую папку, используя команду django-admin startproject как в примере ниже, и затем зайдите в созданную папку.
  django-admin startproject locallibrary .
cd locallibrary
Команда django-admin создаст файловую структуру, как в примере ниже:
locallibrary/
    manage.py
    locallibrary/
        settings.py
        urls.py
        wsgi.py
Подпапка проекта locallibrary это ключевая директория нашего проекта:
- settings.py содержит в себе все настройки проекта. Здесь мы регистрируем приложения, задаём размещение статичных файлов, настройки базы данных и так далее.
- urls.py задаёт ассоциации url адресов с представлениями. Несмотря на то, что этот файл может содержать все настройки url, обычно его делят на части, по одной на приложение, как будет показано далее.
- wsgi.py используется для налаживания связи между вашим Django приложением и веб-сервером. Вы можете воспринимать его, как утилиту.
Скрипт manage.py используется для создания приложений, работы с базами данных и для запуска отладочного сервера.
Создание приложения Каталог
Выполнив предыдущие шаги, запустите следующую команду для создания приложения catalog, который будет размещён внутри папки locallibrary (команду необходимо выполнять из папки, в которой находится manage.py):
python3 manage.py startapp catalog
Примечание: приведённая выше команда справедлива для GNU Linux/Mac OS. На Windows команда должна иметь вид: py -3 manage.py startapp catalog
Если вы работаете под Windows, заменяйте команду python3 на py -3 в этой и следующих статьях.
Эта команда создаст новую папку и наполнит её файлами различных частей приложения (выделенные полужирным ниже). Большинство файлов названы, исходя из их назначения (например контроллеры(views) должны находится во views.py, модели в models.py, тесты в tests.py, настройки административной части в admin.py, регистрация приложения в apps.py) и уже содержат некоторый шаблонный код для работы с вышеназванными объектами.
Обновлённая директория должна выглядеть следующим образом:
locallibrary/
    manage.py
    locallibrary/
    catalog/
        admin.py
        apps.py
        models.py
        tests.py
        views.py
        __init__.py
        migrations/
Кроме перечисленных выше файлов были созданы:
- Папка migrations используется, чтобы хранить»миграции» — файлы, которые позволяют вам автоматически обновлять базу данных по мере изменения моделей.
- __init__.py — пустой файл для того, чтобы Django и Python распознавали папку как Python модуль и позволяет нам использовать его объекты внутри других частей проекта.
Примечание: Заметили, что некоторых файлов не хватает? В то время, как там нашли себе место файлы для контроллеров(views) и моделей(models), файлов для настройки url соотносителя, шаблонов, и статичных файлов создано не было. Далее мы покажем, как их создать (они не обязательны для каждого сайта, но нужны в данном примере).
Регистрация папки с приложением
После создания приложения, нам нужно зарегистрировать его в проекте, чтобы различные утилиты затрагивали его своим действием (например при добавлении моделей в базу данных). Приложения регистрируются добавлением их названий в список INSTALLED_APPS в настройках проекта(который, как мы помним, называется settings.py).
Откройте файл locallibrary/locallibrary/settings.py и найдите в нём список INSTALLED_APPS . Затем добавьте новую строку в конец списка, как показано полужирным ниже.
INSTALLED_APPS = [
    'django.contrib.admin',
    'django.contrib.auth',
    'django.contrib.contenttypes',
    'django.contrib.sessions',
    'django.contrib.messages',
    'django.contrib.staticfiles',
    'catalog.apps.CatalogConfig',
]
Новая строка указывает на файл конфигурации приложения (CatalogConfig), который был создан в /locallibrary/catalog/apps.py , когда вы создали приложение.
Примечание: Легко заметить, что в INSTALLED_APPS уже подключено большое количество приложений (и объектов MIDDLEWARE, ниже в файле конфигурации). Они добавляют поддержку админ-панели Django и, как следствие, огромное количество функциональности (включая сессии, аутентификацию и прочее).
Настройка базы данных
На этом шаге обычно указывают базу данных для будущего проекта — имеет смысл использовать для разработки и размещённого в Сети одну и ту же базу данных, по возможности, чтобы исключить различия в поведении. Про различные варианты вы можете прочитать в документации Django в разделе Базы данных.
Мы будем использовать базу данных SQLite для этого проекта, потому что не предполагаем большое количество одновременных запросов на неё, а ещё потому, что для её настройки совсем не надо ничего делать! Вы можете видеть, что база данных уже настроена в settings.py (подробная информация указана ниже):
DATABASES = {
    'default': {
        'ENGINE': 'django.db.backends.sqlite3',
        'NAME': os.path.join(BASE_DIR, 'db.sqlite3'),
    }
}
Так как мы используем SQLite, то нам не нужно ничего делать.
Давайте продолжим!
Другие настройки проекта
Файл settings.py так же применяется и для некоторых других настроек, но на данном шаге имеет смысл поменять разве что TIME_ZONE — это значение должно быть представлено строкой, указанной в списке часовых поясов tz (колонка TZ в таблице, в строке временной зоны, которая вам нужна). Измените TIME_ZONE на одну из строк из таблицы, которая отвечает вашему часовому поясу. Например:
TIME_ZONE = 'Europe/Moscow'
В файле присутствует две настройки, которые не нужно менять сейчас, но о назначении которых следует знать:
SECRET_KEY. Это секретный ключ, который используется Django для поддержки безопасности сайта. Если вы раскроете этот ключ в процессе разработки кому-либо, то необходимо будет его сменить (возможно считать его с какого-либо файла на сервере или переменной окружения) когда будете размещать проект на сервер.DEBUG. Включает подробные сообщения об ошибках, вместо стандартных HTTP статусов ответов. Должно быть изменено наFalseна сервере, так как эта информация очень много расскажет взломщикам.
Подключение URL-адреса
При создании сайта, был создан файл сопоставления URL (urls.py) в корне проекта. Хотя можно использовать его для обработки всех URL адресов, более целесообразно подключать отдельные файлы сопоставлений для каждого приложения.
Откройте locallibrary/locallibrary/urls.py и обратите внимание на закомментированный текст, который объясняет суть происходящего.
"""
locallibrary URL Configuration

The `urlpatterns` list routes URLs to views. For more information please see:
    https://docs.djangoproject.com/en/1.10/topics/http/urls/
Examples:
Function views
    1. Add an import:  from my_app import views
    2. Add a URL to urlpatterns:  url(r'^$', views.home, name='home')
Class-based views
    1. Add an import:  from other_app.views import Home
    2. Add a URL to urlpatterns:  url(r'^$', Home.as_view(), name='home')
Including another URLconf
    1. Import the include() function: from django.conf.urls import url, include
    2. Add a URL to urlpatterns:  url(r'^blog/', include('blog.urls'))
"""
from django.urls import path
from django.contrib import admin


urlpatterns = [
    path('admin/', admin.site.urls),
]
URL соотношения хранятся в переменной urlpatterns, которая является списком функций path(). Каждая path() функция или ассоциирует шаблон URL_ с контроллером(views) или же его с другим таким списком (во втором случае, первый URL становится «базовым» для других, которые определяются в дочернем списке). Список urlpatterns инициализирует список функции, которая, например, соотносит _admin/ с модулем admin.site.urls , который содержит собственный файл-соотноситель.
Добавьте строчки, приведённые ниже в низ файла urls.py , чтобы добавить новый элемент в список urlpatterns. Этот элемент содержит url() который направляет запросы с URL catalog/ к модулю catalog.urls (файл с относительным путём /catalog/urls.py).
# Используйте include() чтобы добавлять URL из каталога приложения
from django.urls import include
from django.urls import path
urlpatterns += [
     path('catalog/', include('catalog.urls')),
]
Теперь давайте перенаправим корневой URL нашего сайта (например 127.0.0.1:8000) на URL 127.0.0.1:8000/catalog/; это единственное приложение, которое мы собираемся использовать, поэтому это вполне разумно. Чтобы это использовать, нам понадобится специальная функция (RedirectView), которая принимает первым параметром новый относительный URL на который следует перенаправлять (/catalog/) когда указанный в функции url() адрес соотносится с адресом запроса (корневой URL, в данном случае).
Добавьте следующие строчки, тоже в конец файла:
# Добавьте URL соотношения, чтобы перенаправить запросы с корневого URL, на URL приложения
from django.views.generic import RedirectView
urlpatterns += [
    path('', RedirectView.as_view(url='/catalog/', permanent=True)),
]
Django не размещает статические файлы(CSS, JavaScript, и изображения) по умолчанию, но это было бы крайне полезно на этапе разработки нашего сайта. В самом конце нашего URL соотносителя, можно включить размещение статических файлов.
Добавьте последнюю часть в конец файла:
# Используйте static() чтобы добавить соотношения для статических файлов
# Только на период разработки
from django.conf import settings
from django.conf.urls.static import static

urlpatterns += static(settings.STATIC_URL, document_root=settings.STATIC_ROOT)
Примечание: Существуют различные способы дополнения списка urlpatterns (в примере мы просто добавляли объект, используя оператор += чтобы чётко разделить изначальный и дописанный код). Вместо этого, мы могли бы добавить соотношения внутрь определения переменной:
urlpatterns = [   path('admin/', admin.site.urls),
path('catalog/', include('catalog.urls')),path('',
RedirectView.as_view(url='/catalog/', permanent=True)), ] +
static(settings.STATIC_URL, document_root=settings.STATIC_ROOT)
Кроме того, мы добавили import вниз файла (from django.urls import include) ,чтобы видеть, что мы добавили, но обычно все инструкции import добавляются в верхнюю часть файла.
Напоследок, создайте файл urls.py внутри папки catalog, и добавьте следующий код, чтобы определить (пустой) urlpatterns. Сюда мы будем добавлять наши URL соотношения, по мере разработки сайта.
from django.urls import path
from . import views


urlpatterns = [

]
Тестирование работы скелета
На этом, мы создали прототип сайта. Пока сайт ничего не умеет делать, но стоит запустить его, чтобы убедиться, что мы ничего не сломали.
До этого, нам предстоит впервые запустить миграцию базы данных. Это обновит нашу базу данных и добавит туда необходимые модели (и уберёт некоторые предупреждения, которые были бы показаны при попытке запуска).
Запуск миграций базы данных
Django использует Объектный Соотноситель Связей (ORM) чтобы соотносить определения моделей в Django приложении со структурами данных, которые используются базой данных. Когда мы меняем наши модели, Django отслеживает изменения и может создать файлы миграций (в папке /locallibrary/catalog/migrations/) чтобы применить соответствующие структуры данных к базе, чтобы та соответствовала модели.
При создании сайта, Django автоматически добавил несколько моделей, чтобы мы могли их использовать в админ-панели (о которой мы поговорим позже). Выполните следующие команды, чтобы создать нужные таблицы в базе данных, соответствующие этим моделям (убедитесь, что вы находитесь в папке с manage.py):
python3 manage.py makemigrations
python3 manage.py migrate
Предупреждение: Необходимо выполнять команды выше каждый раз, когда вы меняете модели таким образом, что структура таблицы изменится(включая добавления и удаления как отдельных полей, так и целых моделей).
Команда makemigrations создаёт (но не применяет) миграции для всех приложений, которые установлены в ваш проект (вы так же можете указать в конце имя конкретного приложения, чтобы создать миграции только для него). Это даёт вам возможность проверить код перед тем, как их применить — когда вы станете хорошо разбираться в Django, то сможете даже менять их!
Команда migrate применяет созданные миграции к базе (Django отслеживает, какие миграции были созданы для данной базы).
Примечание: Посмотрите раздел Миграции в документации Django чтобы получить информацию о менее распространённых командах для управления миграциями.
Запуск сайта
Во время разработки, вы можете проверить свой сайт, разместив его на встроенном отладочном сервере, и просмотрев его в своём браузере.
Примечание: Отладочный веб-сервер не настолько функционален и производителен, для постоянного размещения , но это самый простой способ запустить свой сайт на Django и проверить его на наличие ошибок. По умолчанию, он разместит сайт на вашем компьютере (http://127.0.0.1:8000/), но вы так же можете указать различные компьютеры в вашей сети для этой цели. Для получения большего количества информации загляните в раздел django-admin и manage.py: отладочный сервер документации Django.
Запустите веб-сервер, используя команду runserver (в той же папке, что и manage.py):
python3 manage.py runserver

 Performing system checks...

 System check identified no issues (0 silenced).
 September 22, 2016 - 16:11:26
 Django version 1.10, using settings 'locallibrary.settings'
 Starting development server at http://127.0.0.1:8000/
 Quit the server with CTRL-BREAK.
Когда сервер запустится, вы сможете посетить сайт по адресу http://127.0.0.1:8000/ в вашем веб-браузере. Вы должны увидеть страницу с ошибкой, навроде этой:
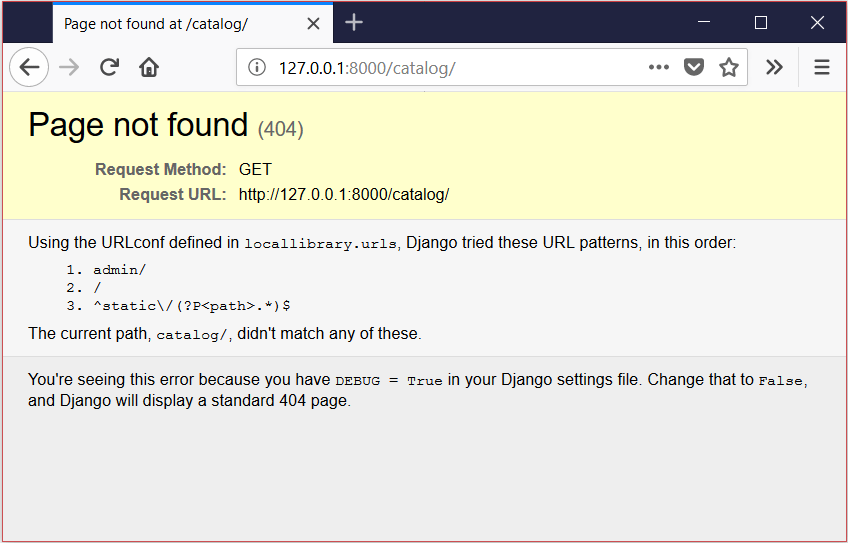
Не волнуйтесь! Эта страница должна появиться и сообщить нам, что мы ещё не настроили ни одной страницы в модуле catalogs.urls (на который мы были перенаправлены запросили корневой URL сайта).
Примечание: Показанная выше страница открывает нам одно из замечательных свойств Django — автоматические отчёты об ошибках. На экране с ошибкой отображается множество полезной информации, когда страница не найдена, или ошибка была вызвана кодом. В данном случае, мы видим, что запрошенный URL не соответствует ни одному шаблону (из указанных). Подобные отчёты будут выключены при DEBUG=False (когда мы разместим приложение в Сеть), в этом случае будет показана менее информативная, но более дружелюбная к пользователю страница(которую вам надо будет создать — прим. переводчика).
На данном этапе, мы поняли, что Django работает должным образом!
Примечание: вам следует перезапускать миграцию и заново тестировать сайт, после того как вы делаете важные изменения. Поверьте, это не займёт много времени!
Домашнее задание
Папка catalog/ содержит файлы контроллеров(views), моделей(models), и других частей приложения. Просмотрите эти файлы.
Как было написано выше, URL соотноситель для админ-панели был подключён в файле urls.py. Войдите в административную часть и посмотрите, что произойдёт (вы можете найти URL из соотношения выше).
Подводя итоги
Теперь вы создали полноценный скелет веб-приложения, который теперь вы можете расширить url соотносителями, контроллерами(views) и моделями(models).
Теперь скелет Сайта местной библиотеки сделан и запущен, теперь самое время начать писать код, который научит сайт делать то, что он должен делать.
Также посмотрите эти статьи
- Пишем своё первое приложение на Django — часть 1 (документация Django)
- Приложения (документация Django). содержит информацию о настройке приложений.
- Назад
- Обзор: Django
- Далее
Writing your first Django app, part 1
Let’s learn by example.
Throughout this tutorial, we’ll walk you through the creation of a basic
poll application.
It’ll consist of two parts:
- A public site that lets people view polls and vote in them.
- An admin site that lets you add, change, and delete polls.
We’ll assume you have Django installed already. You can
tell Django is installed and which version by running the following command
in a shell prompt (indicated by the $ prefix):
/
$ python -m django --version
...> py -m django --version
If Django is installed, you should see the version of your installation. If it
isn’t, you’ll get an error telling “No module named django”.
This tutorial is written for Django 4.1, which supports Python 3.8 and
later. If the Django version doesn’t match, you can refer to the tutorial for
your version of Django by using the version switcher at the bottom right corner
of this page, or update Django to the newest version. If you’re using an older
version of Python, check What Python version can I use with Django? to find a compatible
version of Django.
See How to install Django for advice on how to remove
older versions of Django and install a newer one.
Where to get help:
If you’re having trouble going through this tutorial, please head over to
the Getting Help section of the FAQ.
Creating a project
If this is your first time using Django, you’ll have to take care of some
initial setup. Namely, you’ll need to auto-generate some code that establishes a
Django project – a collection of settings for an instance of Django,
including database configuration, Django-specific options and
application-specific settings.
From the command line, cd into a directory where you’d like to store your
code, then run the following command:
/
$ django-admin startproject mysite
...> django-admin startproject mysite
This will create a mysite directory in your current directory. If it didn’t
work, see Problems running django-admin.
Note
You’ll need to avoid naming projects after built-in Python or Django
components. In particular, this means you should avoid using names like
django (which will conflict with Django itself) or test (which
conflicts with a built-in Python package).
Where should this code live?
If your background is in plain old PHP (with no use of modern frameworks),
you’re probably used to putting code under the web server’s document root
(in a place such as /var/www). With Django, you don’t do that. It’s
not a good idea to put any of this Python code within your web server’s
document root, because it risks the possibility that people may be able
to view your code over the web. That’s not good for security.
Put your code in some directory outside of the document root, such as
/home/mycode.
Let’s look at what startproject created:
mysite/
    manage.py
    mysite/
        __init__.py
        settings.py
        urls.py
        asgi.py
        wsgi.py
These files are:
- The outer
mysite/root directory is a container for your project. Its
name doesn’t matter to Django; you can rename it to anything you like. manage.py: A command-line utility that lets you interact with this
Django project in various ways. You can read all the details about
manage.pyin django-admin and manage.py.- The inner
mysite/directory is the actual Python package for your
project. Its name is the Python package name you’ll need to use to import
anything inside it (e.g.mysite.urls). mysite/__init__.py: An empty file that tells Python that this
directory should be considered a Python package. If you’re a Python beginner,
read more about packages in the official Python docs.mysite/settings.py: Settings/configuration for this Django
project. Django settings will tell you all about how settings
work.mysite/urls.py: The URL declarations for this Django project; a
“table of contents” of your Django-powered site. You can read more about
URLs in URL dispatcher.mysite/asgi.py: An entry-point for ASGI-compatible web servers to
serve your project. See How to deploy with ASGI for more details.mysite/wsgi.py: An entry-point for WSGI-compatible web servers to
serve your project. See How to deploy with WSGI for more details.
The development server
Let’s verify your Django project works. Change into the outer mysite directory, if
you haven’t already, and run the following commands:
/
$ python manage.py runserver
...> py manage.py runserver
You’ll see the following output on the command line:
Performing system checks...

System check identified no issues (0 silenced).

You have unapplied migrations; your app may not work properly until they are applied.
Run 'python manage.py migrate' to apply them.

February 16, 2023 - 15:50:53
Django version 4.1, using settings 'mysite.settings'
Starting development server at http://127.0.0.1:8000/
Quit the server with CONTROL-C.
Note
Ignore the warning about unapplied database migrations for now; we’ll deal
with the database shortly.
You’ve started the Django development server, a lightweight web server written
purely in Python. We’ve included this with Django so you can develop things
rapidly, without having to deal with configuring a production server – such as
Apache – until you’re ready for production.
Now’s a good time to note: don’t use this server in anything resembling a
production environment. It’s intended only for use while developing. (We’re in
the business of making web frameworks, not web servers.)
Now that the server’s running, visit http://127.0.0.1:8000/ with your web
browser. You’ll see a “Congratulations!” page, with a rocket taking off.
It worked!
Changing the port
By default, the runserver command starts the development server
on the internal IP at port 8000.
If you want to change the server’s port, pass
it as a command-line argument. For instance, this command starts the server
on port 8080:
/
$ python manage.py runserver 8080
...> py manage.py runserver 8080
If you want to change the server’s IP, pass it along with the port. For
example, to listen on all available public IPs (which is useful if you are
running Vagrant or want to show off your work on other computers on the
network), use:
/
$ python manage.py runserver 0.0.0.0:8000
...> py manage.py runserver 0.0.0.0:8000
Full docs for the development server can be found in the
runserver reference.
Automatic reloading of runserver
The development server automatically reloads Python code for each request
as needed. You don’t need to restart the server for code changes to take
effect. However, some actions like adding files don’t trigger a restart,
so you’ll have to restart the server in these cases.
Creating the Polls app
Now that your environment – a “project” – is set up, you’re set to start
doing work.
Each application you write in Django consists of a Python package that follows
a certain convention. Django comes with a utility that automatically generates
the basic directory structure of an app, so you can focus on writing code
rather than creating directories.
Projects vs. apps
What’s the difference between a project and an app? An app is a web
application that does something – e.g., a blog system, a database of
public records or a small poll app. A project is a collection of
configuration and apps for a particular website. A project can contain
multiple apps. An app can be in multiple projects.
Your apps can live anywhere on your Python path. In
this tutorial, we’ll create our poll app in the same directory as your
manage.py file so that it can be imported as its own top-level module,
rather than a submodule of mysite.
To create your app, make sure you’re in the same directory as manage.py
and type this command:
/
$ python manage.py startapp polls
...> py manage.py startapp polls
That’ll create a directory polls, which is laid out like this:
polls/
    __init__.py
    admin.py
    apps.py
    migrations/
        __init__.py
    models.py
    tests.py
    views.py
This directory structure will house the poll application.
Write your first view
Let’s write the first view. Open the file polls/views.py
and put the following Python code in it:
polls/views.py
from django.http import HttpResponse


def index(request):
    return HttpResponse("Hello, world. You're at the polls index.")
This is the simplest view possible in Django. To call the view, we need to map
it to a URL — and for this we need a URLconf.
To create a URLconf in the polls directory, create a file called urls.py.
Your app directory should now look like:
polls/
    __init__.py
    admin.py
    apps.py
    migrations/
        __init__.py
    models.py
    tests.py
    urls.py
    views.py
In the polls/urls.py file include the following code:
polls/urls.py
from django.urls import path

from . import views

urlpatterns = [
    path('', views.index, name='index'),
]
The next step is to point the root URLconf at the polls.urls module. In
mysite/urls.py, add an import for django.urls.include and insert an
include() in the urlpatterns list, so you have:
mysite/urls.py
from django.contrib import admin
from django.urls import include, path

urlpatterns = [
    path('polls/', include('polls.urls')),
    path('admin/', admin.site.urls),
]
The include() function allows referencing other URLconfs.
Whenever Django encounters include(), it chops off whatever
part of the URL matched up to that point and sends the remaining string to the
included URLconf for further processing.
The idea behind include() is to make it easy to
plug-and-play URLs. Since polls are in their own URLconf
(polls/urls.py), they can be placed under “/polls/”, or under
“/fun_polls/”, or under “/content/polls/”, or any other path root, and the
app will still work.
When to use include()
You should always use include() when you include other URL patterns.
admin.site.urls is the only exception to this.
You have now wired an index view into the URLconf. Verify it’s working with
the following command:
/
$ python manage.py runserver
...> py manage.py runserver
Go to http://localhost:8000/polls/ in your browser, and you should see the
text “Hello, world. You’re at the polls index.”, which you defined in the
index view.
Page not found?
If you get an error page here, check that you’re going to
http://localhost:8000/polls/ and not http://localhost:8000/.
The path() function is passed four arguments, two required:
route and view, and two optional: kwargs, and name.
At this point, it’s worth reviewing what these arguments are for.
path() argument: route
route is a string that contains a URL pattern. When processing a request,
Django starts at the first pattern in urlpatterns and makes its way down
the list, comparing the requested URL against each pattern until it finds one
that matches.
Patterns don’t search GET and POST parameters, or the domain name. For example,
in a request to https://www.example.com/myapp/, the URLconf will look for
myapp/. In a request to https://www.example.com/myapp/?page=3, the
URLconf will also look for myapp/.
path() argument: view
When Django finds a matching pattern, it calls the specified view function with
an HttpRequest object as the first argument and any
“captured” values from the route as keyword arguments. We’ll give an example
of this in a bit.
path() argument: kwargs
Arbitrary keyword arguments can be passed in a dictionary to the target view. We
aren’t going to use this feature of Django in the tutorial.
path() argument: name
Naming your URL lets you refer to it unambiguously from elsewhere in Django,
especially from within templates. This powerful feature allows you to make
global changes to the URL patterns of your project while only touching a single
file.
When you’re comfortable with the basic request and response flow, read
part 2 of this tutorial to start working with the
database.
В данном уроке мы создадим, протестируем и опробуем приложение Pages, у которого будет своя домашняя страница, а также страница с описанием проекта. Мы изучим классовые представления и шаблоны Django, что являются своеобразными кирпичиками в составе более сложных приложений.
Содержание статьи
- Начальная настройка приложения в Django
- Шаблоны в Django
- Классовые представления в Django
- Настройка URL для приложений в Django
- Создание новой страницы «О нас» в Django
- Расширяем возможности шаблона в Django
- Пишем тесты для Django приложений
- Работа с Git и GitHub
- Локальный веб-сервер или Продакшн?
- Запускаем сайт на Django через Heroku
- Дополнительные файлы приложения Django
- Размещение Django сайта на Heroku
Начальная настройка приложения Django включает следующие этапы:
- создание директории для кода;
- установка Django в новом виртуальном окружении;
- создание нового проекта в Django;
- создание нового приложения
pages; - обновление файла
settings.py.
Будучи в командной строке, убедитесь, что вы сейчас не находитесь в действующем виртуальном окружении. Если перед знаком доллара ($) есть текст в скобках, значит, окружение активно. Выполните команду exit и деактивируйте его.
Есть вопросы по Python?
На нашем форуме вы можете задать любой вопрос и получить ответ от всего нашего сообщества!
Telegram Чат & Канал
Вступите в наш дружный чат по Python и начните общение с единомышленниками! Станьте частью большого сообщества!
Паблик VK
Одно из самых больших сообществ по Python в социальной сети ВК. Видео уроки и книги для вас!
Создаем новую директорию под названием pages на рабочем столе или в любом другом месте. Главное, чтобы папка была легко доступной и не пересекалась с другими проектами.
В заново открытой командной строке наберите следующее:
|
$ cd ~/Desktop $ mkdir pages && cd pages $ pipenv install django==3.0.* $ pipenv shell (pages) $ django—admin startproject pages_project . (pages) $ python manage.py startapp pages |
Откройте в вашем текстовом редакторе файл settings.py. В самом низу списка проектов INSTALLED_APPS добавьте приложение pages:
|
# pages_project/settings.py INSTALLED_APPS = [ ‘django.contrib.admin’, ‘django.contrib.auth’, ‘django.contrib.contenttypes’, ‘django.contrib.sessions’, ‘django.contrib.messages’, ‘django.contrib.staticfiles’, ‘pages.apps.PagesConfig’, # новое ] |
Запускаем локальный сервер при помощи команды runserver:
|
(pages) $ python manage.py runserver |
Затем переходим на http://127.0.0.1:8000/.
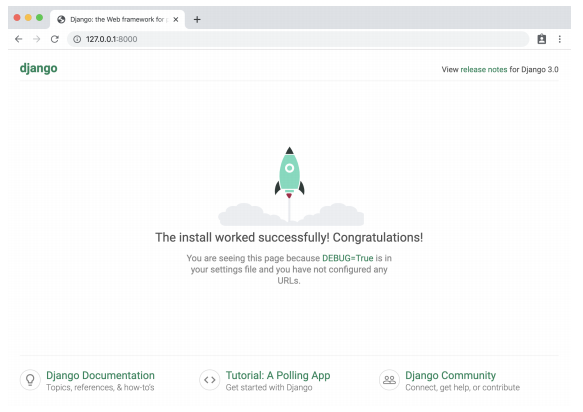
Приветственная страница Django
Шаблоны в Django
Каждый веб-фреймворк нуждается в удобном способе генерации файлов HTML. В Django за это отвечают шаблоны: индивидуальные файлы HTML, которые связаны между собой и включают базовые логические операции.
Вспомним, что в предыдущей уроке на сайте «Hello, World» фраза была вписана сразу в код файла views.py как строка игнорируя какие либо HTML шаблоны. Технически это работает, но масштабируется не очень хорошо. Предпочтительнее будет связать представление (View) с шаблоном (Template), таким образом отделяя информацию из каждого.
В данном уроке мы научимся использовать шаблоны для создания домашней страницы и страницы с описанием проекта. В дальнейшем можно будет использовать шаблоны при создании сайтов с сотнями, тысячами и даже миллионами страниц, используя при этом минимальное количество кода.
Для начала нужно определить, где поместить шаблоны внутри структуры проекта Django. Есть два варианта. По умолчанию загрузчик шаблонов Django осмотрит каждое приложение, выискивая связанные шаблоны. Тем не менее, структура остается несколько запутанной: каждое приложение нуждается в новой директории templates, другой директории с таким же названием, как и у приложения, а также в файле шаблона.
Следовательно, рассматривая приложение pages, Django будет ожидать следующую структуру:
|
└── pages ├── templates ├── pages ├── home.html |
Отсюда следует, что нам нужно будет создать новую директорию templates, новую директорию с названием приложения pages и сам шаблон под названием home.html.
Зачем использовать этот, казалось бы, репетативный подход? Короткий ответ заключается в том, что загрузчик шаблонов Django должен наверняка найти подходящий шаблон! Что случится, если имеются два различных файла
home.htmlв пределах двух различных приложений? Использование данной структуры гарантирует, что конфликтов подобного рода не произойдет.
Существует еще один подход к решению вопроса — это создание одной директории templates на уровне проекта и размещение там всех шаблонов. Сделав небольшие поправки в файле settings.py, можно указать Django, чтобы в поисках верного шаблона он рассматривал также эту новую директорию. Именно этот подход мы сейчас используем.
Первым делом покинем запущенный веб-сервер, применив комбинацию CTRL+C. Затем создадим директорию под названием templates и файл HTML под названием home.html.
|
(pages) $ mkdir templates (pages) $ touch templates/home.html |
После этого нам нужно обновить файл settings.py и указать Django место новой директории templates. Это изменение находятся в одну строчку в настройках 'DIRS' под TEMPLATES.
|
# pages_project/settings.py TEMPLATES = [ { ... ‘DIRS’: [os.path.join(BASE_DIR, ‘templates’)], # new ... }, ] |
Затем для файла home.html добавляем обычный H1 заголовок.
|
<!— templates/home.html —> <h1>Homepage</h1> |
Вот и все, шаблон готов! Следующим шагом будет конфигурация нашего URL и файлов представления (views.py).
Классовые представления в Django
Ранние версии Django поддерживали только функциональные представления (они же представления на основе функции), однако разработчики довольно быстро поняли, что им приходится повторять из раза в раз один и тот же паттерн. Писать представление, которое составляет список всех объектов в модели. Писать представление, которое показывает только один детализированный элемент модели. И так далее.
Функциональные представления-генерики были введены для того чтобы избавить разработчиков от этих монотонных паттернов. Однако расширить возможности имеющихся представлений или изменить их должным образом оказалось не так уж просто. В результате в Django появились классовые представления-генерики, которые были легкими в использовании и давали возможность приспосабливать имеющиеся представления под нужны наиболее часто встречающихся случаев.
Классы являются фундаментальной частью Python. В нашем представлении для отображения шаблона мы используем встроенный TemplateView. Обновим файл pages/views.py.
|
# pages/views.py from django.views.generic import TemplateView class HomePageView(TemplateView): template_name = ‘home.html’ |
Стоит отметить, что был применен стиль CamelCase для представления HomePageView, так как теперь он стал классом. Названия классов, в отличие от названий функций, всегда должны быть написаны с большой буквы. TemplateView уже содержит все логические операции, необходимые для отображения нашего шаблона, осталось только уточнить название шаблона.
Настройка URL для приложений в Django
На последнем этапе необходимо обновить URLConfs. Обновления требуется делать в двух местах. Первым делом обновляем файл самого проекта pages_project/urls.py, чтобы отметить наше приложение pages, а затем внутри приложения pages мы связываем представления (View) с URL-адресами.
Начнем с файла pages_project/urls.py.
|
# pages_project/urls.py from django.contrib import admin from django.urls import path, include # новое urlpatterns = [ path(‘admin/’, admin.site.urls), path(», include(‘pages.urls’)), # новое ] |
Данный код вам уже знаком. На второй строке мы добавляем include, что нужно для указания существующего URL-адреса для приложения pages. Затем создаем на уровне приложений файл urls.py.
|
(pages) $ touch pages/urls.py |
И затем добавляем следующий код.
|
# pages/urls.py from django.urls import path from .views import HomePageView urlpatterns = [ path(», HomePageView.as_view(), name=‘home’), ] |
Данный паттерн практически полностью идентичен тому, что мы использовали в прошлом уроке, однако есть одно важное отличие: во время использования классовых представлений в конце названия представления добавляется as_view().
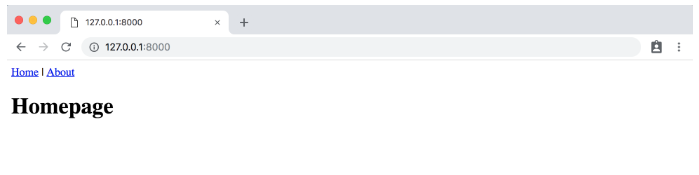
Вот и все! Теперь запустите веб-сервер через python manage.py runserver, а затем откройте http://127.0.0.1:8000/. Должна открыться новая домашняя страница.
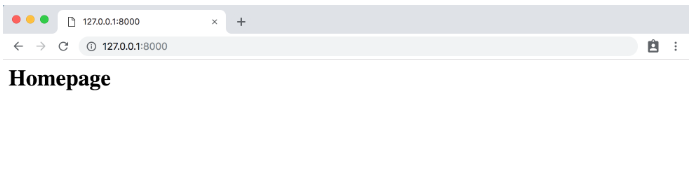
Домашняя страница
Создание новой страницы «О нас» в Django
Процесс добавления страницы «О нас» очень похож на то, что мы только что сделали. Создадим новый файл шаблона, новое представление, а также новый адрес URL.
Закрываем веб-сервер через комбинацию CTRL+C и создаем новый шаблон под названием about.html.
|
(pages) $ touch templates/about.html |
Затем добавляем короткий HTML заголовок.
|
<!— templates/about.html —> <h1>About page</h1> |
Создаем новое представление для страницы.
|
# pages/views.py from django.views.generic import TemplateView class HomePageView(TemplateView): template_name = ‘home.html’ class AboutPageView(TemplateView): # новое template_name = ‘about.html’ |
Далее связываем его с URL в about/.
|
# pages/urls.py from django.urls import path from .views import HomePageView, AboutPageView # новое urlpatterns = [ path(‘about/’, AboutPageView.as_view(), name=‘about’), # новое path(», HomePageView.as_view(), name=‘home’), ] |
Запускаем сервер при помощи python manage.py runserver.
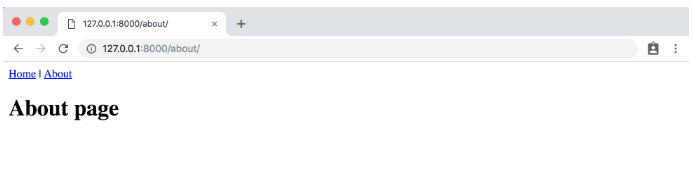
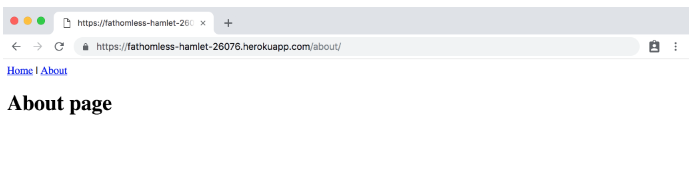
В браузере переходим по адресу http://127.0.0.1:8000/about. У вас должна появиться новая страница — «About page».
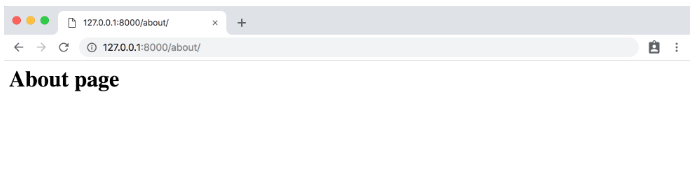
Страница «О Нас»
Расширяем возможности шаблона в Django
Главная сила шаблонов в их способности расширяться. Если задуматься, то на большинстве сайтов есть содержимое, которое повторяется на каждой странице (заголовки, футеры и так далее). Для разработчиков было бы здорово иметь одно установленное место для кода заголовка, которое бы передавалось по наследству каждому шаблону.
Это возможно! Создадим HTML-файл base.html, у которого будет заголовок с ссылками на две созданные нами страницы. Название для файла можно выбрать любое, в данной случае base.html просто стало традицией. Теперь закрываем веб-сервер CTRL+C и затем создаем новый файл.
|
(pages) $ touch templates/base.html |
В Django, шаблонный язык для добавления ссылок и базовых логических операций минимален. Ознакомиться со встроенным списком шаблонных тегов можно в официальной документации. Шаблонные теги оформляются так {% something %}, где «something» сам по себе является тегом. Вы даже можете создать собственные шаблонные теги.
Для добавления URL-ссылок в проект мы можем использовать встроенный шаблонный тег url, который присваивает себе имя URL паттерна в качестве аргумента. Помните, как мы добавляли опциональные URL названия двум адресам в pages/urls.py? Это было сделано именно по этой причине. Тег url использует эти названия для автоматического создания ссылок.
URL путь для нашей домашней страницы был назван home, поэтому для настройки ссылки к ней мы будем использовать: {% url 'home' %}.
|
<!— templates/base.html —> <header> <a href=«{% url ‘home’ %}»>Home</a> | <a href=«{% url ‘about’ %}»>About</a> </header> {% block content %} {% endblock content %} |
Внизу мы добавляем тег-блок под названием content. При наследовании, блоки могут быть переписаны дочерними шаблонами. Закрывающему тегу можно дать название endblock — просто напишите {% endblock %}. Это может стать хорошей подсказкой при ориентировке в крупных файлах шаблонов.
Обновим файлы home.html и about.html для расширения шаблона base.html. Это значит, что мы будем заново использовать код из одного шаблона в другой. Язык шаблонов в Django поставляется вместе с методом extends, который мы сейчас используем.
|
<!— templates/home.html —> {% extends ‘base.html’ %} {% block content %} <h1>Homepage</h1> {% endblock content %} |
и
|
<!— templates/about.html —> {% extends ‘base.html’ %} {% block content %} <h1>About page</h1> {% endblock content %} |
Запускаем сервер с python manage.py runserver и открываем страницы http://127.0.0.1:8000/ и http://127.0.0.1:8000/about вновь. Как видите, на обоих страницах появились заголовки.
Неплохо, правда?
Домашняя страница с заголовком
 Страница «About» с заголовком
С шаблонами можно осуществить множество операций. Обычно создается файл base.html, а затем в проекте добавляются дополнительные шаблоны которые расширяют базовый файл.
Пишем тесты для Django приложений
Наконец-то мы добрались до тестов. Хотя в приложениях это является базовым концептом, очень важно, чтобы добавление тестов в Django вошло у вас в привычку. Цитируя Джейкоба Каплан-Мосса, одного из создателей Django: «Непротестированный код можно считать сломанным«.
Написание тестов важно, так как это автоматизирует процесс подтверждения того, что код работает должным образом. В приложении, подобном этому, вы сами можете увидеть, что домашняя страница и страница с описанием проекта на месте и содержат все необходимые данные. Однако с ростом нашего проекта, будет увеличиваться и количество веб-страниц, поэтому идея самостоятельной проверки сотен или даже тысяч страниц не представляется возможной.
Кроме того, когда мы делаем определенные изменения в коде — добавляем новый функционал, изменяем существующий, удаляем неиспользуемые элементы сайта — мы должны быть уверены в том, что все оставшиеся аспекты сайта по-прежнему работают должным образом. Автоматические тесты действуют таким образом, что компьютер каждый раз будет проверять работоспособность проекта, отталкиваясь от единожды написанного ранее правильного кода. К счастью, в Django есть встроенные инструменты для написания и запуска тестов.
|
# pages/tests.py from django.test import SimpleTestCase class SimpleTests(SimpleTestCase): def test_home_page_status_code(self): response = self.client.get(‘/’) self.assertEqual(response.status_code, 200) def test_about_page_status_code(self): response = self.client.get(‘/about/’) self.assertEqual(response.status_code, 200) |
База данных нам пока не нужна, поэтому сейчас можно использовать простой SimpleTestCase. При наличии базы данных нужно обратиться к TestCase. Затем проводится проверка, в результате которой у каждой страницы должен быть код состояния 200 — это успешный ответ на стандартный HTTP запрос. Таким образом, становится понятно, что запрашиваемая страница действительно существует, но при этом не раскрывается ее содержимое.
Для запуска теста остановите веб-сервер, использовав комбинацию CTRL+C, а затем наберите в командной строке python manage.py test:
|
(pages) $ python manage.py test Creating test database for alias ‘default’... System check identified no issues (0 silenced). .. ——————————————————————————————————— Ran 2 tests in 0.014s OK Destroying test database for alias ‘default’... |
Все успешно! В будущем мы будем использовать более сложные тесты, особенно это важно при работе с базами данных.
А пока, важно привыкнуть к использованию тестов при каждом добавлении нового аспекта в существующий проект Django.
Работа с Git и GitHub
Пришло время зафиксировать изменения с git и загрузить данные на GitHub. Начнем с инициализации нашей директории.
Используйте git status для просмотра изменений в коде, а затем git add -A для их добавления. Теперь мы можем добавить первый коммит.
|
(pages) $ git status (pages) $ git add —A (pages) $ git commit —m ‘initial commit’ |
На GitHub создаем новое хранилище. Назовем его pages-app. Не забудьте отметить тип «Private», а затем нажмите кнопку «Create repository».
На следующей страницы пролистайте вниз до фразы «…or push an existing repository from the command line». Скопируйте текст и вставьте две команды в терминале.
Все должно выглядеть, так как указано ниже, только вместо wsvincent в качестве имени пользователя будет указано ваше никнейм на GitHub.
|
(pages) $ git remote add origin https://github.com/wsvincent/pages—app.git (pages) $ git push —u origin master |
Локальный веб-сервер или Продакшн?
До этого момента, для запуска приложения Pages локально на компьютере мы использовали внутренний веб-сервер Django. Однако локальным адресом нельзя ни с кем поделиться. Для того чтобы запустить сайт в Интернете, сделав его доступным для всех, необходимо разместить код на внешнем сервере. Данный процесс получил английское название продакшн, под которым понимается процесс эксплуатации программы реальными людьми через интернет. Локальные данные доступны только на компьютере разработчика, а продакшн-код находятся на внешнем сервере и становятся доступными для всех.
Существует великое множество серверов. Мы будем использовать Heroku. Для небольших проектов его можно использовать бесплатно, а несложный процесс размещения кода позволил Heroku завоевать большую популярность.
Запускаем сайт на Django через Heroku
Можете бесплатно зарегистрироваться на сайте Heroku. После подтверждения электронной почты вы будете перенаправлены на главную страницу.
Главная страница Heroku
Теперь необходимо установить Heroku Command Line Interface (CLI), необходимый для работы с командной строкой. Нам нужно установить Heroku глабально — таким образом он будет. Откройте новую вкладку командной строки при помощи комбинации CTRL+T, которая подходит как для Mac, так и для Windows.
Работая на Mac, в новой вкладке при помощи Homebrew установите Heroku:
|
$ brew install heroku/brew/heroku |
Пользователям Windows нужно выбрать 32-битную или 64-битную версию установщика на странице загрузки Heroku CLI. Для пользователей Linux на сайте Heroku предусмотрены специальные инструкции для установки.
Установка Heroku на Ubuntu
|
sudo snap install —classic heroku |
После завершения установки можете закрыть используемую вкладку и вернуться к главной вкладке с активным виртуальным окружением pages.
Наберите команду heroku login, после чего используйте только что установленные адрес электронной почты и пароль для Heroku.
|
(pages) $ heroku login Enter your Heroku credentials: Email: will@wsvincent.com Password: ********************************* Logged in as will@wsvincent.com |
Дополнительные файлы Django-приложения
Перед размещением кода на Heroku, нам понадобится сделать четыре изменения в нашем проекте Pages:
- обновить
Pipfile.lock; - создать новый файл
Procfile; - установить на нашем веб-сервере
Gunicorn; - изменить строчку в файле
settings.py.
Внутри уже существующего файла Pipfile уточним используемую версию Python — в нашем случае 3.8. Для этого добавим в нижней части файла следующие две строчки.
Pipfile
|
[requires] python_version = «3.8» |
Далее запускаем pipenv lock для генерации подходящего Pipfile.lock.
В действительности, в поисках информации о виртуальном окружении, Heroku заглядывает внутрь нашего Pipfile.lock. По этой причине здесь нам пришлось добавить настройку версии языка программирования.
Затем создаем Procfile, который является специфическим файлом конфигурации для Heroku.
Откройте Procfile при помощи текстового редактора и добавьте следующее:
|
web: gunicorn pages_project.wsgi —log—file — |
Это говорит о том, что нам надо использовать Gunicorn, что является сервером, подходящем для продакшена, в то время как собственный сервер Django работает только в локальном окружении. Устанавливаем gunicorn при помощи Pipenv.
|
(pages) $ pipenv install gunicorn==19.9.0 |
Конфигурация для веб-сервера находится в файле wsgi.py, который Django автоматически создает для каждого нового проекта. Он находится в основной папке нашего проекта. Поскольку наш проект называется pages_project, сам файл находится в pages_project/wsgi.py.
Последний шаг — небольшое изменение в файле settings.py. Прокрутите вниз до части ALLOWED_HOSTS и добавьте '*'. Результат должен получиться следующим:
|
# pages_project/settings.py ALLOWED_HOSTS = [‘*’] |
Параметр ALLOWED_HOSTS показывает, какие имена хостов/доменов наш сайт на Django может использовать. Это мера безопасности для предотвращения атак, которые возможны даже при, казалось бы, безопасных конфигурациях веб-сервера.
Однако мы использовали знак звездочки *, а это значит, что все домены являются приемлемыми. На сайте продакшн-уровня вместо этого вам пришлось бы составить ясный список допустимых доменов.
Для проверки изменений мы выполним команду git status, добавляем новые файлы и затем коммитим их:
|
(pages) $ git status (pages) $ git add —A (pages) $ git commit —m «New updates for Heroku deployment» |
Теперь мы можем разместить код на GitHub, создав онлайн копию наших изменений в коде.
|
(pages) $ git push —u origin master |
Размещение Django сайта на Heroku
Последний шаг — это фактическое размещение кода на Heroku. Если вы раньше настраивали сервер, вы будете поражены тем, как сильно Heroku упрощает данный процесс.
Весь процесс будет состоять из следующих этапов:
- создайте новое приложение на Heroku и вставьте в него наш код;
- настройте взаимодействие с git, то есть так называемый «hook» для Heroku;
- настройте приложение на игнорирование статических файлов;
- для активации приложения в онлайн режим, запустите сервер Heroku;
- посетите приложение, перейдя по предоставленному Heroku URL адресу.
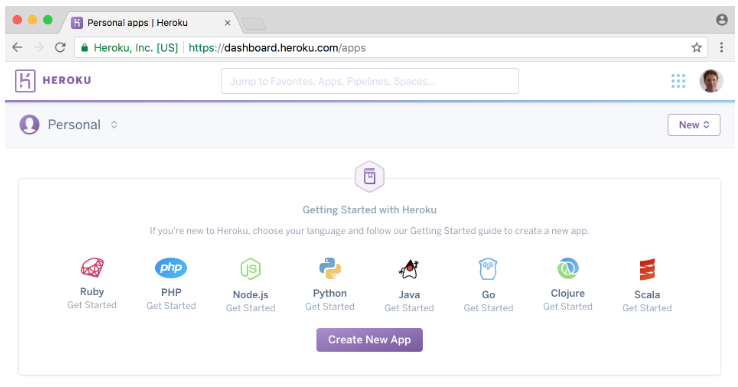
В качестве первого шага можем создать новое приложение Heroku. Для этого в командной строке наберите heroku create. Heroku создаст случайное имя для нашего приложения, в моем случае это fathomless-hamlet-26076. Ваше название будет другим.
|
(pages) $ heroku create Creating app... done, ⬢ fathomless—hamlet—26076 https://fathomless—hamlet—26076.herokuapp.com/ | https://git.heroku.com/fathomless—hamlet—26076.git |
На данный момент нам остается только настроить Heroku. Для этого укажем Heroku проигнорировать статические файлы вроде CSS и JavaScript, которые Django по умолчанию попытается исправить под себя. Выполним следующую команду:
|
(pages) $ heroku config:set DISABLE_COLLECTSTATIC=1 |
Теперь можем разместить код на Heroku.
|
(pages) $ git push heroku master |
Если бы мы только что набрали git push origin master, то код был бы загружен в GitHub, а не в Heroku. Добавление слова heroku в команду позволяет отправить код на Heroku. Первые несколько раз это может сбивать с толку.
Наконец, нам нужно запустить в онлайн наше Heroku приложение. Поскольку трафик веб-сайтов растет, они нуждаются в дополнительных услугах от Heroku. Однако для нашего основного примера мы можем использовать самый низкий уровень web=1, который является бесплатным.
Введите следующую команду.
|
(pages) $ heroku ps:scale web=1 |
Все готово! Последним шагом станет подтверждение того, что наше приложение действительно запущено и работает в режиме онлайн. Если вы выполните команду heroku open, ваш браузер откроет новую вкладку с URL адресом вашего приложения:
Наш адрес https://fathomless-hamlet-26076.herokuapp.com/. Вы можете убедиться в этом, вот появившаяся домашняя страница:
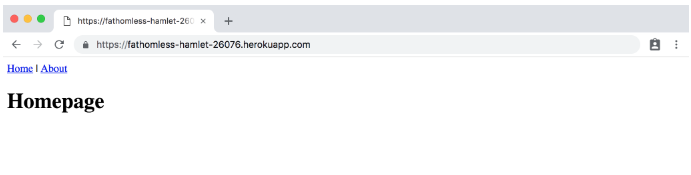
Домашняя страница на Heroku
Страница «About» также открылась должным образом:
Страница «About» на Heroku
Вам нет нужды разлогиниваться или покидать свое приложение в Heroku. Оно будет работать само по себе на этом бесплатном уровне.
Заключение
Поздравляю с созданием и размещением своего первого Django проекта в интернете! Мы использовали шаблоны, классовые представления, изучили URLConfs подробнее, добавили базовые тесты и использовали Heroku для публикации нашего сайта.

Являюсь администратором нескольких порталов по обучению языков программирования Python, Golang и Kotlin. В составе небольшой команды единомышленников, мы занимаемся популяризацией языков программирования на русскоязычную аудиторию. Большая часть статей была адаптирована нами на русский язык и распространяется бесплатно.
E-mail: vasile.buldumac@ati.utm.md
Образование
Universitatea Tehnică a Moldovei (utm.md)
- 2014 — 2018 Технический Университет Молдовы, ИТ-Инженер. Тема дипломной работы «Автоматизация покупки и продажи криптовалюты используя технический анализ»
- 2018 — 2020 Технический Университет Молдовы, Магистр, Магистерская диссертация «Идентификация человека в киберпространстве по фотографии лица»
Напишем простое веб-приложение на Django.
Джанго — это Open Source фреймворк для создания веб-приложений различной сложности на Python. Одним из его основных преимуществ является то, что вам нужно позаботиться только о логике будущего веб-приложения, остальное сделает Django.
Мы создадим приложение, у которого будет панель администратора и возможность загружать загадки, а у пользователей, соответственно, возможность отвечать на них. Во время разработки будут использоваться Python 3.4.3 и Django 1.9.1.
- Устанавливаем Django
- Создаём проект
Устанавливаем Django
Делается это очень просто, в командной строке нужно написать: pip install Django==1.9.1.
Создаём проект
Если вы правильно установили Django, то после запуска django-admin --version вы увидите текущую версию фреймворка. Теперь создадим проект. Это можно сделать следующим образом: django-admin startproject django_example.
Как только создание проекта будет завершено, взглянем на директорию нашего проекта:
- django_example/__init__.py — пустой файл, который говорит Python, что данная директория должна восприниматься в качестве пакета.
- django_example/settings.py содержит конфигурацию нашего проекта.
- django_example/urls.py — здесь объявляются URL.
- django_example/wsgi.py — с помощью него приложение может работать с веб-сервером по протоколу WSGI.
- manage.py позволяет взаимодействовать с проектом.
Теперь пришло время запустить наше приложение. Для этого в командной строке нужно написать python manage.py runserver. После этого в адресной строке браузера нужно написать: http://127.0.0.1:8000/. Если вы увидели «You have unapplied migrations; your app may not work properly until they are applied.», то не волнуйтесь, мы вернемся к этому чуть позже.
Пишем веб-приложение на Django
Определим различие между проектом и приложением. Приложение — это программа, которая что-то делает, а проект — это группа приложений.
Итак, приступим к созданию приложения. Это делается следующим образом: python manage.py startapp riddles.
Как только создано веб-приложение, напишем вид, по правилам Джанго все виды должны храниться в файле views.py.
riddles/views.py
from django.http import HttpResponse


def index(request):
    return HttpResponse("Hello, World!")
Теперь, чтобы привязать наш вид к URL, создадим файл urls.py.
riddles/urls.py
from django.conf.urls import url

from . import views

app_name = 'riddles'

urlpatterns = [
    url(r'^$', views.index, name='index'),
]
В urls.py мы должны написать следующее:
django_example/urls.py
from django.conf.urls import include, url
from django.contrib import admin

urlpatterns = [
    url(r'^riddles/', include('riddles.urls')),
    url(r'^admin/', admin.site.urls),
]
Теперь, если мы запустим наше приложение http://127.0.0.1:8000/riddles/, мы увидим «Hello, World!».
Установка базы данных
По умолчанию в Django используется SQLite, если она вас не устраивает, то вы можете ознакомиться с нашей статьей, в которой мы рассказываем, как безболезненно перейти с SQLite на MySQL.
Теперь откроем django_example/settings.py и взглянем на переменную INSTALLED_APPS, она хранит все приложения, которые активны в текущем проекте. По умолчанию она содержит:
- django.contrib.admin — админка, скоро мы ей воспользуемся.
- django.contrib.auth — система аутентификации.
- django.contrib.contenttypes — фреймворк для content types.
- django.contrib.sessions — сессионный фреймворк.
- django.contrib.messages — фреймворк для отправки сообщений.
- django.contrib.staticfiles — фреймворк для работы со статичными файлами.
Некоторые из этих приложений используют базы данных, но они еще не установлены, поэтому мы и видели «You have unapplied migrations; your app may not work properly until they are applied.». Поправить это можно следующим образом: python manage.py migrate. Вы должны увидеть следующее:
Operations to perform:
  Apply all migrations: admin, sessions, auth, contenttypes
Running migrations:
  Rendering model states... DONE
  Applying contenttypes.0001_initial... OK
  Applying auth.0001_initial... OK
  Applying admin.0001_initial... OK
  Applying admin.0002_logentry_remove_auto_add... OK
  Applying contenttypes.0002_remove_content_type_name... OK
  Applying auth.0002_alter_permission_name_max_length... OK
  Applying auth.0003_alter_user_email_max_length... OK
  Applying auth.0004_alter_user_username_opts... OK
  Applying auth.0005_alter_user_last_login_null... OK
  Applying auth.0006_require_contenttypes_0002... OK
  Applying auth.0007_alter_validators_add_error_messages... OK
  Applying sessions.0001_initial... OK
Теперь создадим нашу модель. Для начала создадим Riddle и Option. В Riddle будет содержаться загадка, в Option — один из возможных ответов на нее.
riddles/models.py
from django.db import models


class Riddle(models.Model):
    riddle_text = models.CharField(max_length=255)
    pub_date = models.DateTimeField('date published')


class Option(models.Model):
    riddle = models.ForeignKey(Riddle, on_delete=models.CASCADE)
    text = models.CharField(max_length=255)
    correct = models.BooleanField(default=False)
Данная модель обеспечивает Django информацией, необходимой для создания схемы базы данных и database-access API для доступа к объектам. Теперь нам нужно привязать наше приложение к нашему проекту, делается это следующим образом:
django_example/settings.py
INSTALLED_APPS = [
    'riddles.apps.RiddlesConfig',
    'django.contrib.admin',
    'django.contrib.auth',
    'django.contrib.contenttypes',
    'django.contrib.sessions',
    'django.contrib.messages',
    'django.contrib.staticfiles',
]
После этого нужно сделать миграцию: python manage.py makemigrations riddles. Вы должны увидеть следующее:
Migrations for 'riddles':
  0001_initial.py:
    - Create model Option
    - Create model Riddle
    - Add field riddle to option
Так мы говорим Django, что в моделях были сделаны некоторые изменения, и их нужно сохранить в качестве миграции.
Проверить, что сделает миграция, можно так: python manage.py sqlmigrate riddles 0001 (0001 — версия миграции, которую мы хотим проверить). На выходе мы получим:
BEGIN;
--
-- Create model Option
--
CREATE TABLE "riddles_option" ("id" integer NOT NULL PRIMARY KEY AUTOINCREMENT, "text" varchar(255) NOT NULL, "correct" bool NOT NULL);
--
-- Create model Riddle
--
CREATE TABLE "riddles_riddle" ("id" integer NOT NULL PRIMARY KEY AUTOINCREMENT, "riddle_text" varchar(255) NOT NULL, "pub_date" datetime NOT NULL);
--
-- Add field riddle to option
--
ALTER TABLE "riddles_option" RENAME TO "riddles_option__old";
CREATE TABLE "riddles_option" ("id" integer NOT NULL PRIMARY KEY AUTOINCREMENT, "text" varchar(255) NOT NULL, "correct" bool NOT NULL, "riddle_id" integer NOT NULL REFERENCES "riddles_riddle" ("id"));
INSERT INTO "riddles_option" ("riddle_id", "id", "text", "correct") SELECT NULL, "id", "text", "correct" FROM "riddles_option__old";
DROP TABLE "riddles_option__old";
CREATE INDEX "riddles_option_a7c97949" ON "riddles_option" ("riddle_id");

COMMIT;
Заметьте, что команда sqlmigrate нужна только для проверки, каждый раз ее запускать необязательно.
Теперь мы можем начать пользоваться панелью администратора. Но для этого нам нужен пользователь. Создать его можно следующим образом: python manage.py createsuperuser. После этого запускаем сервер, если он не запущен, и переходим на http://127.0.0.1:8000/admin/. Вы увидите следующее:
Теперь дадим админу возможность изменять наши модели. Делается это так:
riddles/admin.py
from django.contrib import admin

from .models import Option, Riddle

admin.site.register(Riddle)
admin.site.register(Option)
Вот что получится в итоге:
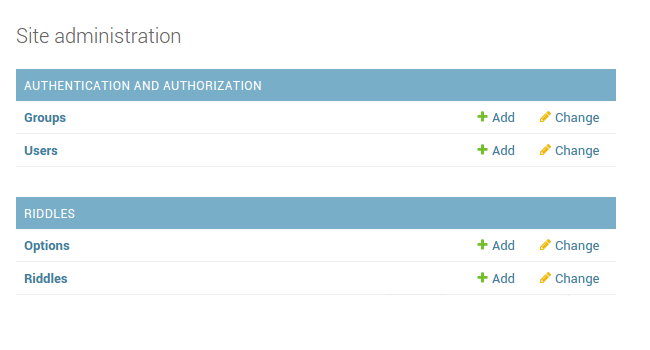
Возьмите небольшую паузу и поиграйтесь с панелью администратора. Вы будете приятно удивлены тем, что умеет Джанго.
Главная страница
Что нам нужно для создания главной страницы?
- Templates: скелет нашей страницы.
- Views: функция на Python для отображения контента.
Начнем с шаблонов. Создадим папку templates внутри папки riddle, а в ней создадим index.html.
riddles/templates/index.html
<h1>Available Riddles</h1>

{% if message %}
    <p><strong>{{ message }}</strong></p>
{% endif %}

{% if latest_riddles %}

    <ul>
        {% for riddle in latest_riddles %}
            <li>
                <a href="/riddles/{{ riddle.id }}/">
                    {{ riddle.riddle_text }}
                </a>
            </li>
        {% endfor %}
    </ul>

{% else %}
    <p>No riddles are available right now.</p>
{% endif %}
Теперь создадим макет для ответов:
riddles/templates/answer.html
<h1>{{ riddle.riddle_text }}</h1>

{% if error_message %}
    <p>
        <strong>{{ error_message }}</strong>
    </p>
{% endif %}

<form action="answer' riddle.id %}" method="post">
    {% csrf_token %}
    {% for option in riddle.option_set.all %}
        <input type="radio" name="option" id="option{{ forloop.counter }}" value="{{ option.id }}" />
        <label for="option{{ forloop.counter }}">{{ option.text }}</label><br>
    {% endfor %}
    <input type="submit" value="Answer" />
</form>
Здесь мы используем csrf_token, он нужен для защиты от межсайтовой подделки запроса, каждая внутренняя форма должна его использовать. Теперь напишем виды для рендеринга наших шаблонов:
riddles/views.py
from django.http.response import HttpResponse
from django.shortcuts import get_object_or_404, render

from .models import Riddle, Option


def index(request):
    return render(request, "index.html", {"latest_riddles": Riddle.objects.order_by('-pub_date')[:5]})


def detail(request, riddle_id):
    return render(request, "answer.html", {"riddle": get_object_or_404(Riddle, pk=riddle_id)})


def answer(request, riddle_id):
    riddle = get_object_or_404(Riddle, pk=riddle_id)
    try:
        option = riddle.option_set.get(pk=request.POST['option'])
    except (KeyError, Option.DoesNotExist):
        return render(request, 'answer.html', {'riddle': riddle, 'error_message': 'Option does not exist'})
    else:
        if option.correct:
            return render(request, "index.html", {"latest_riddles": Riddle.objects.order_by('-pub_date')[:5], "message": "Nice! Choose another one!"})
        else:
            return render(request, 'answer.html', {'riddle': riddle, 'error_message': 'Wrong Answer!'})
Давайте пройдемся по каждой функции веб-приложения на Django отдельно:
- index: Index использует функцию
render. На вход она получает HttpRequest, местонахождение шаблона и его содержимое, а возвращает HttpResponse с окончательным html. - detail: Detail делает практически то же самое, но только функция
get_object_or_404возвращает HttpResponse404, если нужный объект не был найден. - answer: Answer ищет предоставленную загадку (и возвращает 404, если она не найдена) и проверяет правильность ответа.
Теперь добавим наши функции в urls.py:
riddles/urls.py
from django.conf.urls import url

from . import views

app_name = 'riddles'

urlpatterns = [
    url(r'^$', views.index, name='index'),
    url(r'^(?P[0-9]+)/$', views.detail, name='detail'),
    url(r'^(?P[0-9]+)/answer/$', views.answer, name='answer')
]
Стили
Для начала создадим директорию static, а в ней создадим файл main.css.
riddles/static/main.css
body{
    margin:40px auto;
    max-width:650px;
    line-height:1.6;
    font-size:18px;
    color:#444;
    padding:0 10px;
}
h1,h2,h3{
    line-height:1.2;
    text-align: center;
}
a {
    color: blue;
}

form {
    margin: 0 auto;
    padding: 1em;
    border: 1px solid #CCC;
    border-radius: 1em;
}
form div + div {
    margin-top: 1em;
}
label {
    display: inline-block;
    text-align: center;
    width: 40%;
}
input {
    font: 1em sans-serif;
    -moz-box-sizing: border-box;
    box-sizing: border-box;
    border: 1px solid #999;
    width: 50%;
}
input:focus {
    border-color: #000;
}
p, div.button {
    text-align: center;
}

p.error-message {
    color: lightcoral;
}
Немного изменим наши шаблоны:
riddles/templates/index.html
{% load staticfiles %}

<link rel="stylesheet" type="text/css" href="{% static 'main.css' %}" />

<h1>Available Riddles</h1>

{% if message %}
    <p><strong>{{ message }}</strong></p>
{% endif %}

{% if latest_riddles %}

    <ul>
        {% for riddle in latest_riddles %}
            <li>
                <a href="/riddles/{{ riddle.id }}/">
                    {{ riddle.riddle_text }}
                </a>
            </li>
        {% endfor %}
    </ul>

{% else %}
    <p>No riddles are available right now.</p>
{% endif %}
riddles/templates/answer.html
{% load staticfiles %}

<link rel="stylesheet" type="text/css" href="{% static 'main.css' %}" />

<h1>{{ riddle.riddle_text }}</h1>

{% if error_message %}
    <p>
        <strong>{{ error_message }}</strong>
    </p>
{% endif %}

<form action="answer' riddle.id %}" method="post">
    {% csrf_token %}
    {% for option in riddle.option_set.all %}
        <input type="radio" name="option" id="option{{ forloop.counter }}" value="{{ option.id }}" />
        <label for="option{{ forloop.counter }}">{{ option.text }}</label><br>
    {% endfor %}
    <input type="submit" value="Answer" />
</form>
Первая строка загружает статические файлы, потом мы используем {% static '#' %}, где # — путь к вашему файлу. Аналогичная процедура проводится и для JavaScript.
Теперь вы можете создавать свои веб-приложения на Django. В качестве подсказки на старте работы с фреймворком воспользуйтесь одной из наших шпаргалок по Python.
Исходный код нашего приложения можно скачать по этой ссылке.
Если этот веб-проект на Django показался сложным, попробуйте пройти двухчасовой видеокурс. На нём вы пошагово создадите 3 веб-приложения: сокращатель ссылок, ToDo List и словарь английских слов.
Перевод статьи «Python Django Tutorial»
Современные веб-сайты, требующие сложного взаимодействия с пользователем, создаются с использованием специальных фронтенд-фреймворков, таких как React, Vue.js и другие. Каждый из них имеет свои плюсы и минусы. Вам приходится учитывать скорость разработки с применением выбранного фреймворка, стоимость хостинга, SEO-оптимизацию, различия в синтаксисе и, в некоторых случаях, дублирование бизнес-логики.
Создавая сайт на Django, вы можете получить не менее впечатляющие результаты, чем при работе с JS-фреймворками. При этом Django не столь сложен, требует меньше кода и меньше времени на разработку.
В этой статье мы вам расскажем, как за 20 минут создать несложный сайт на Django.
Реализовать необходимые нам функции можно при помощи нескольких технологий (на выбор). Например, можно воспользоваться Sockpuppet, Reaction или Unicorn. Для обеспечения интерактивности приложения без применения пользовательского JavaScript мы применим Unicorn.
Прежде чем начать
Чтобы следовать этому руководству, вам необходимо:
- Базовое понимание веб-фреймворка Django.
- Практическое знание Docker.
Настройка и обзор проекта
Вот краткий обзор приложения, которое мы будем сейчас создавать:
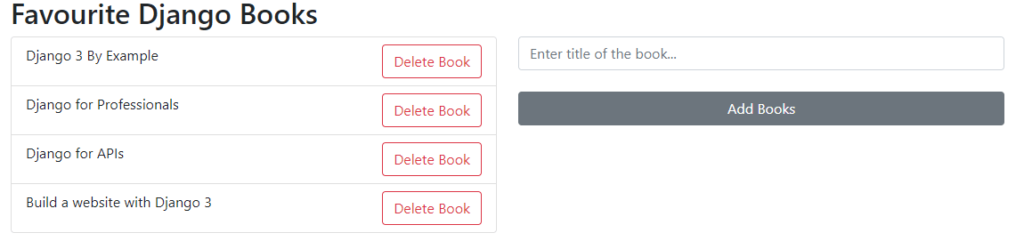
В этом приложении вы можете добавлять и удалять новую книгу, не обновляя страницу. Такой же функционал доступен в одностраничных приложениях.
Для начала клонируйте ветку base из репозитория django-reactive:
$ git clone https://github.com/Samuel-2626/django-reactive --branch base --single-branch
$ cd django-reactive
Мы будем использовать Docker, чтобы упростить настройку и запуск Django с зависимостями. Из корня проекта создайте образы и раскрутите контейнеры Docker:
$ docker-compose up -d --build
Затем примените миграции, создайте суперпользователя и запустите сервер разработки:
$ docker-compose exec web python manage.py migrate
$ docker-compose exec web python manage.py createsuperuser
$ docker-compose exec web python manage.py run server
Обратите внимание на модель Book в файле books/models.py. Код должен выглядеть следующим образом:
from django.db import models
class Book(models.Model):
    title = models.CharField(max_length=200)
    def __str__(self):
        return self.title
[django_ad_block]
Работа с Unicorn
Unicorn – это компонентный фреймворк, прогрессивно улучшающий стандартное представление Django. Он динамически обновляет DOM с помощью вызовов AJAX в фоновом режиме.
Добавьте Unicorn к вашим установленным приложениям:
INSTALLED_APPS = [
    'django.contrib.admin',
    'django.contrib.auth',
    'django.contrib.contenttypes',
    'django.contrib.sessions',
    'django.contrib.messages',
    'django.contrib.staticfiles',
    # Third-party
    "django_unicorn", # new
]
Далее обновите файл urls.py вашего проекта следующим образом:
from django.urls import path, include
path("unicorn/", include("django_unicorn.urls")), # new
Как это работает?
Unicorn– это библиотека с открытым исходным кодом, улучшающая стандартное представление Django. Благодаря этому первоначальная визуализация компонента выполняется быстро и отлично подходит для SEO.- Затем
Unicornпривязывается к указанным элементам и при необходимости автоматически выполняет вызовы AJAX. - Наконец,
Unicornдинамически обновляет DOM.
URL проекта, views и template
В этом разделе мы будем настраивать URL-адреса, вьюшки (views) и шаблоны (template) нашего проекта.
Для начала обновите файл urls.py следующим образом:
path("", views.index), # new
Далее обновите файл views.py, добавив в него следующий код:
def index(request):
    return render(request, "index.html", {})
Наконец, обновите файл index.html:
{% load unicorn %}

<!DOCTYPE html>
<html>
  <head>
    <meta charset="utf-8" />
    <meta name="viewport" content="width=device-width, initial-scale=1" />
    <title>Django Books</title>

    <link
      href="https://cdn.jsdelivr.net/npm/bootstrap@5.0.2/dist/css/bootstrap.min.css"
      rel="stylesheet"
      integrity="sha384-EVSTQN3/azprG1Anm3QDgpJLIm9Nao0Yz1ztcQTwFspd3yD65VohhpuuCOmLASjC"
      crossorigin="anonymous"
    />
    {% unicorn_scripts %}
  </head>
  <body>
    {% csrf_token %}
    <div class="container">
      <h2>Favourite Django Books</h2>

      {% unicorn 'book' %}
    </div>
  </body>
</html>
Логика работы
- Мы создали базовый шаблон Django для своего проекта, связав
viewsиurlsвместе. - Обратите внимание, что
Unicornнужно загрузить в верхней части HTML-шаблона Django. - Мы также добавили
unicorn_scriptsиcrsf_tokenв шаблон Django HTML.
Как написано в документации Unicorn, библиотека следует лучшим практикам Django и, следовательно, требует установки CRSF-токена на любой странице, являющейся компонентом. Это гарантирует, что никакие некорректные сообщения AJAX не будут выполнены.
Также Unicorn имеет концепцию компонентов. Это позволяет обращаться к набору интерактивных функций, которые могут быть помещены в шаблон. Например, мы добавили компонент book в файл index.html.
Добавление и удаление книг
В этом разделе мы реализуем функцию добавления и удаления книг без обновления браузера с помощью Unicorn.
Шаг 1
В корне вашего проекта создайте новые папки (unicorn и components) и новый файл с именем book.py.
Шаг 2
В папке unicorn, которую вы создали ранее, создайте еще одну папку с именем templates, внутри нее — папку с именем unicorn и, наконец, внутри этой папки создайте файл с именем book.html. (У вас должен получиться путь unicorn/templates/unicorn/book.html).
Шаг 3
Внутрь book.html добавьте следующий код:
<div class="row">
  <div class="col-md-6">
    <section>
      <ul class="list-group">
        {% for book in books %}
        <li class="list-group-item">
          {{ book.title }}
          <button
            class="btn btn-outline-danger"
            style="float: right;"
            unicorn:click="delete_book('{{ book.id }}')"
          >
            Delete Book
          </button>
        </li>
        {% empty %}
        <p>Database Empty | Add your favourite Django book</p>
        {% endfor %}
      </ul>
    </section>
  </div>
  <div class="col-md-6">
    <form>
      <input
        type="text"
        class="form-control"
        placeholder="Enter title of the book..."
        unicorn:model.defer="title"
      />
      <br />
      <button
        class="btn btn-secondary"
        style="min-width: 100%;"
        unicorn:click.prevent="add_book"
      >
        Add Books
      </button>
    </form>
  </div>
</div>
Что здесь происходит?
Внутри компонента у нас есть доступ к обычному синтаксису Django.
Обратите внимание на элемент input. Всё знакомо, за исключением атрибута unicorn: model. Он указывает, какое поле в вашем внутреннем компоненте будет привязано к этому вводу. В этом случае имя поля будет title.
Примечание. unicorn: model – это магия, которая связывает входные данные с компонентом бэкенда.
Обратите внимание на кнопку «Add Books» с атрибутом unicorn:click. Этот атрибут указывает Unicorn привязать бэкенд-метод add_book к событию браузера click.
Точно так же кнопка «Delete Book» указывает Unicorn привязать бэкенд-метод delete_book. Кроме того, мы также передали идентификатор книги в функцию delete_book, чтобы однозначно идентифицировать каждую книгу.
Чтобы предотвратить появление обновлений при каждом входе, вы можете добавить модификатор lazy или defer в конец unicorn:model.
Атрибуты, используемые в шаблонах компонентов, обычно начинаются с unicorn:, но также поддерживается шорткат u:. Обратите внимание, что свойства компонента могут быть многих типов, включая str, int, list, dictionary, decimal и Django Model.
Наконец, Unicorn требуется один корневой элемент, охватывающий весь шаблон компонента.
Шаг 4
Внутри book.py добавьте следующий код:
from django_unicorn.components import UnicornView
from books.models import Book
class BookView(UnicornView):
    title: str = ""
    books = Book.objects.none()
    def hydrate(self):
        self.books = Book.objects.all()
    def add_book(self):
        if self.title != "":
            book = Book(title=self.title)
            book.save()
        self.title = ""
    def delete_book(self, id):
        try:
            book = Book.objects.get(id=id)
            book.delete()
        except:
            pass
Объяснение логики кода
- Мы импортируем
UnicornView, внутренний подклассTemplateView. Следовательно, процесс перехода от стандартногоviewна основе классов должен быть простым. - При создании экземпляра компонента для получения последних книг из базы данных вызывается метод
hydrate. Таким образом поддерживается актуальность информации. - Метод
add_bookсоздает новую модель book из title, сохраняет ее в базе данных, а затем очищает title. - Метод
delete_bookудаляет книгу, соответствующую идентификатору.
Пройдя все описанные шаги, перейдите по адресу http://127.0.0.1:8080/, чтобы убедиться, что приложение работает должным образом. Вы должны увидеть следующее:

Попробуйте добавить или удалить свои любимые книги по Django.
Заключение
Мы разобрали, как создать сайт на Django за 20 минут. Мы создали реактивное веб-приложение с полным стеком на Django, без какого-либо JavaScript. Также мы использовали Unicorn, чтобы иметь возможность добавлять и удалять книги, не обновляя страницу.
Вы можете скачать полный код здесь.
Успехов в написании кода!
Перевод статьи «Full-Stack Reactive Website in Django (No JavaScript)».
Python Django is a web framework that allows to quickly create efficient web pages. Django is also called batteries included framework because it provides built-in features such as Django Admin Interface, default database – SQLite3, etc. When you’re building a website, you always need a similar set of components: a way to handle user authentication (signing up, signing in, signing out), a management panel for your website, forms, a way to upload files, etc. Django gives you ready-made components to use.
Why Django Framework?
- Excellent documentation and high scalability.
- Used by Top MNCs and Companies, such as Instagram, Disqus, Spotify, Youtube, Bitbucket, Dropbox, etc. and the list is never-ending.
- Easiest Framework to learn, rapid development, and Batteries fully included. Django is a rapid web development framework that can be used to develop fully fleshed web applications in a short period of time.
- The last but not least reason to learn Django is Python, Python has a huge library and features such as Web Scrapping, Machine Learning, Image Processing, Scientific Computing, etc. One can integrate all this with web applications and do lots and lots of advanced stuff.
Django Architecture
Django is based on MVT (Model-View-Template) architecture which has the following three parts –
- Model: The model is going to act as the interface of your data. It is responsible for maintaining data. It is the logical data structure behind the entire application and is represented by a database (generally relational databases such as MySql, Postgres).
- View: The View is the user interface that you see in your browser when you render a website. It is represented by HTML/CSS/Javascript and Jinja files.
- Template: A template consists of static parts of the desired HTML output as well as some special syntax describing how dynamic content will be inserted. To check more, visit – Django Templates
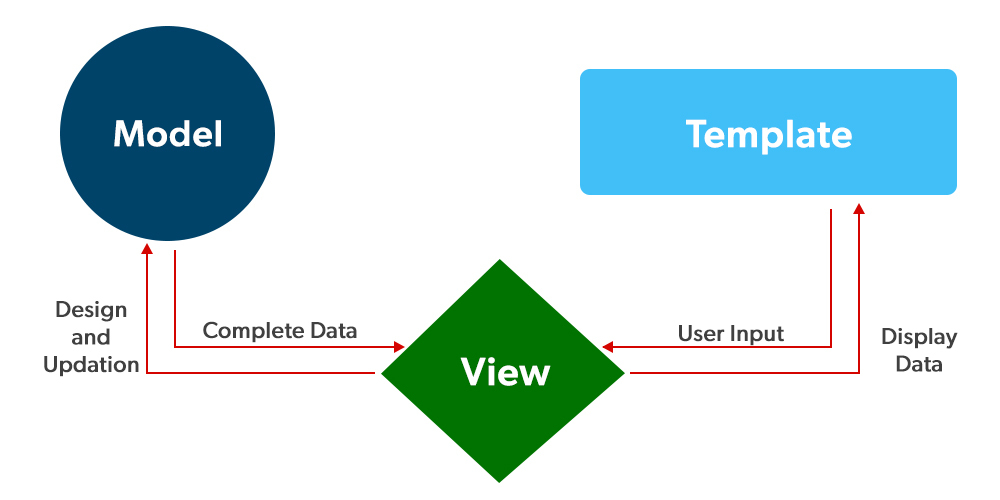
For more information, refer to Django Project MVT Structure
Setting up the Virtual Environment
Most of the time when you’ll be working on some Django projects, you’ll find that each project may need a different version of Django. This problem may arise when you install Django in a global or default environment. To overcome this problem we will use virtual environments in Python. This enables us to create multiple different Django environments on a single computer. To create a virtual environment type the below command in the terminal.
python3 -m venv ./name
Here the name suggests the name of the virtual environment. Let’s create our virtual environment with the name as venv only. So the command to create it will be –
python3 -m venv ./venv
After running the above command you will see a folder named venv with the following sub-directories.
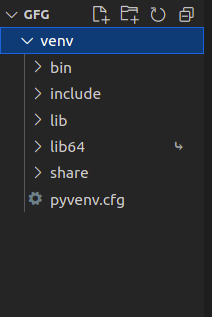
After creating the virtual environment let’s activate it. To activate it type the below command in the terminal.
source ./venv/bin/activate
In the above command ./ is used to tell the current working directory.
Note: If you have your virtual environment set up in another location and your terminal opened up in another location, then provide the location to the venv folder i.e. our virtual environment folder.
After you run the above command you should see (venv) at the starting of every line of your terminal as shown in the below image.
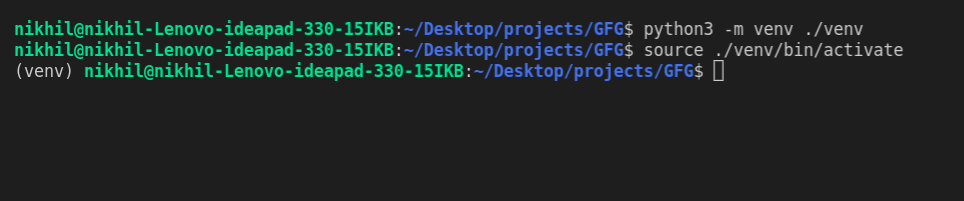
Installing Django
We can install Django using the pip command. To install this type the below command in the terminal.
pip install django
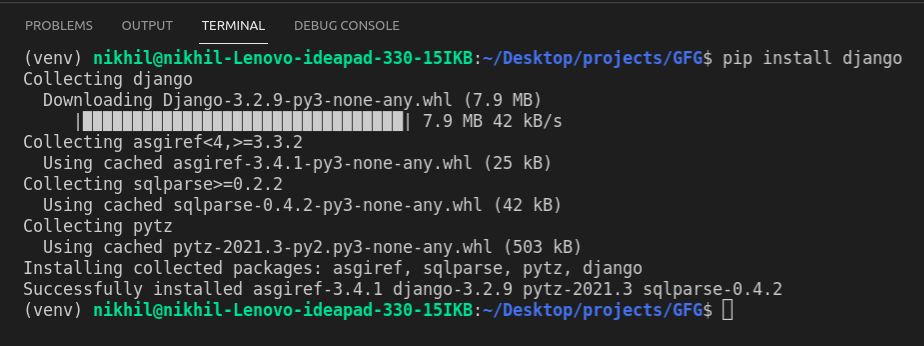
For more information, refer to Django Introduction and Installation
Starting the project
- To initiate a project of Django on Your PC, open Terminal and Enter the following command
django-admin startproject projectName
- A New Folder with the name projectName will be created. To enter in the project using the terminal enter command
cd projectName
- Now let’s run the server and see everything is working fine or not. To run the server type the below command in the terminal.
python manage.py runserver
After running the server go to http://127.0.0.1:8000/ and you’ll see something like this –
For more information, refer to How to Create a Basic Project using MVT in Django ?
Project Structure
A Django Project when initialized contains basic files by default such as manage.py, view.py, etc. A simple project structure is enough to create a single-page application. Here are the major files and their explanations. Inside the geeks_site folder ( project folder ) there will be the following files-
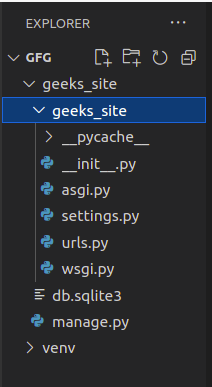
Let’s discuss these files in detail –
manage.py: This file is used to interact with your project via the command line(start the server, sync the database… etc). For getting the full list of commands that can be executed by manage.py type this code in the command window-
python manage.py help
- _init_.py: It is a python package. It is invoked when the package or a module in the package is imported. We usually use this to execute package initialization code, for example for the initialization of package-level data.
- settings.py: As the name indicates it contains all the website settings. In this file, we register any applications we create, the location of our static files, database configuration details, etc.
- urls.py: In this file, we store all links of the project and functions to call.
- wsgi.py: This file is used in deploying the project in WSGI. It is used to help your Django application communicate with the webserver.
Creating an app
Django is famous for its unique and fully managed app structure. For every functionality, an app can be created like a completely independent module. For example, if you are creating a Blog, Separate modules should be created for Comments, Posts, Login/Logout, etc. In Django, these modules are known as apps. There is a different app for each task. Benefits of using Django apps –
- Django apps are reusable i.e. a Django app can be used with multiple projects.
- We have loosely coupled i.e. almost independent components
- Multiple developers can work on different components
- Debugging and code organization are easy. Django has an excellent debugger tool.
- It has in-built features like admin pages etc, which reduces the effort of building the same from scratch
Django provides some pre-installed apps for users. To see pre-installed apps, navigate to projectName –> projectName –> settings.py. In your settings.py file, you will find INSTALLED_APPS. Apps listed in INSTALLED_APPS are provided by Django for the developer’s comfort.
Python3
INSTALLED_APPS = [
'django.contrib.admin',
'django.contrib.auth',
'django.contrib.contenttypes',
'django.contrib.sessions',
'django.contrib.messages',
'django.contrib.staticfiles',
]
We can also create our own custom apps. To create a basic app in your Django project you need to go to the directory containing manage.py and from there enter the command :
python manage.py startapp projectApp
Now let’s create an app called gfg_site_app, so the command to create the app would be –
python manage.py startapp gfg_site_app
Now you can see your directory structure as under :

To consider the app in your project you need to specify your project name in the INSTALLED_APPS list as follows in settings.py:
Python3
INSTALLED_APPS = [
'django.contrib.admin',
'django.contrib.auth',
'django.contrib.contenttypes',
'django.contrib.sessions',
'django.contrib.messages',
'django.contrib.staticfiles',
'gfg_site_app.apps.GfgSiteAppConfig',
]
For more information, refer to How to Create an App in Django ?
Django Views
A view function is a Python function that takes a Web request and returns a Web response. This response can be the HTML contents of a Web page, or a redirect, or a 404 error, or an XML document, or an image, anything that a web browser can display. Django views are part of the user interface — they usually render the HTML/CSS/Javascript in your Template files into what you see in your browser when you render a web page.
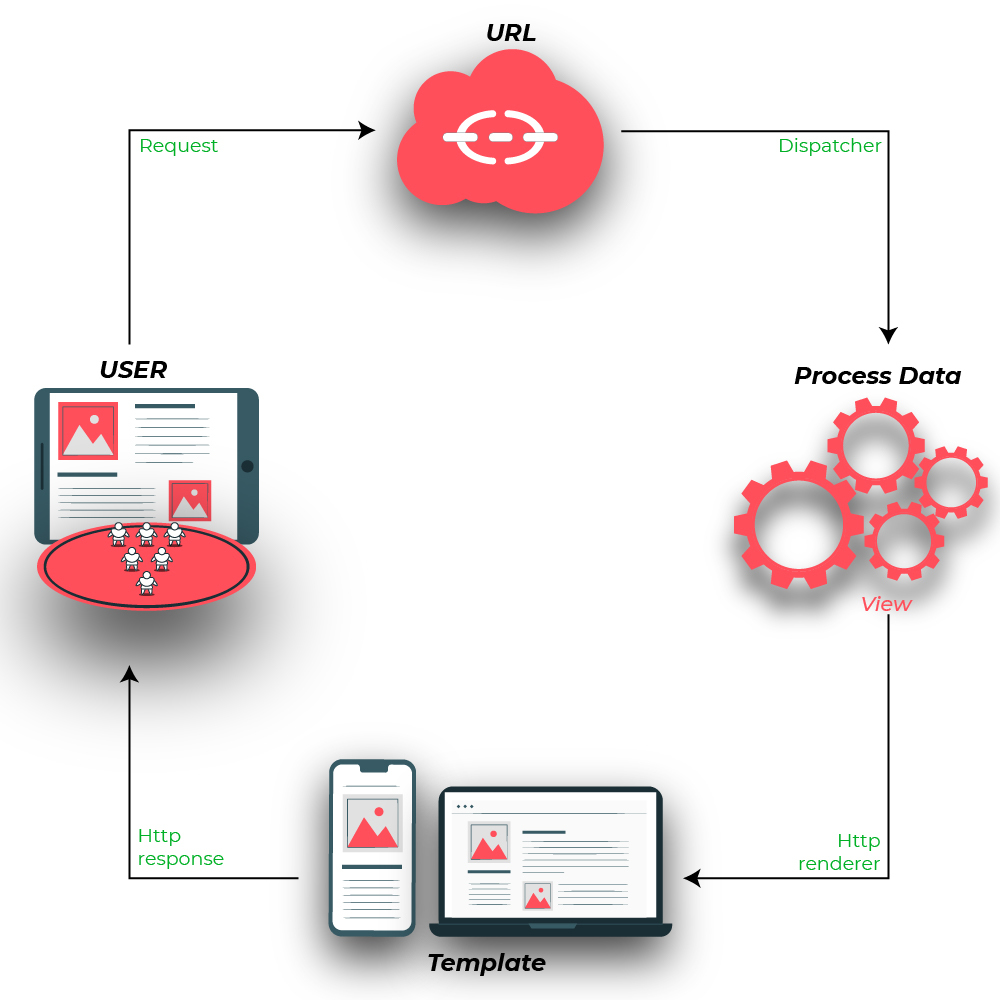
Example: Creating View Function
Python3
from django.http import HttpResponse
def geeks_view(request):
return HttpResponse("<h1>Welcome to GeeksforGeeks</h1>")
Let’s step through this code one line at a time:
- First, we import the class HttpResponse from the django.http module, along with Python’s datetime library.
- Next, we define a function called geeks_view. This is the view function. Each view function takes an HttpRequest object as its first parameter, which is typically named request.
- The view returns an HttpResponse object that contains the generated response. Each view function is responsible for returning an HttpResponse object.
Note: For more info on HttpRequest and HttpResponse visit – Django Request and Response cycle – HttpRequest and HttpResponse Objects
The above Function will render the text Welcome to GeeksforGeeks as h1 on the page. Now the question that may be arising is at what URL this function will be called and how will we handle such URLs. Don’t worry we will handle URL in the section but in this section let us continue with the Django views only.
Types of Views
Django views are divided into two major categories:-
- Function-Based Views
- Class-Based Views

Function-Based Views
Function-based views are writer using a function in python which receives as an argument HttpRequest object and returns an HttpResponse Object. Function-based views are generally divided into 4 basic strategies, i.e., CRUD (Create, Retrieve, Update, Delete). CRUD is the base of any framework one is using for development.
Refer to the below articles to get more information on Function-Based views –
- Django CRUD (Create, Retrieve, Update, Delete) Function Based Views
- Create View
- List View
- Detail View
- Update View
- Delete View
Class-Based Views
Class-based views provide an alternative way to implement views as Python objects instead of functions. They do not replace function-based views, but have certain differences and advantages when compared to function-based views:
- Organization of code related to specific HTTP methods (GET, POST, etc.) can be addressed by separate methods instead of conditional branching.
- Object-oriented techniques such as mixins (multiple inheritances) can be used to factor code into reusable components.
Refer to the below articles to get more information on Class-Based views –
- Class Based Generic Views Django (Create, Retrieve, Update, Delete)
- Createview
- ListView
- DetailView
- UpdateView
- DeleteView
- FormView
Django URL Patterns
In Django, each view needs to be mapped to a corresponding URL pattern. This is done via a Python module called URLConf(URL configuration). Every URLConf module must contain a variable urlpatterns which is a set of URL patterns to be matched against the requested URL. These patterns will be checked in sequence until the first match is found. Then the view corresponding to the first match is invoked. If no URL pattern matches, Django invokes an appropriate error handling view.
Now if we see our project we have created an app called gfg_site, the Python module to be used as URLConf is the value of ROOT_URLCONF in gfg_site/settings.py. By default this is set to ‘gfg_site.urls’. Every URLConf module must contain a variable urlpatterns which is a set of URL patterns to be matched against the requested URL. These patterns will be checked in sequence, until the first match is found. Then the view corresponding to the first match is invoked. If no URL pattern matches, Django invokes an appropriate error handling view.
URL patterns
Here’s a sample code for gfg_site/urls.py:
Python3
from django.urls import path
from . import views
urlpatterns = [
path('', views.geeks_view, name='geeks_view'),
]
Including other URLConf modules
It is a good practice to have a URLConf module for every app in Django. This module needs to be included in the root URLConf module as follows:
Python3
from django.contrib import admin
from django.urls import path, include
urlpatterns = [
path('admin/', admin.site.urls),
path('', include('gfg_site_app.urls'))
]
Now if head towards http://127.0.0.1:8000/ then our site will be –
In the above example, include statement will look into the URLpatterns list in the gfg_site_app/urls.py And then it will look into all the paths defined in the url.py file and will call the respective views function.
Till now we have seen how to show HTML on our website. Now let’s suppose we want to use some kind of relational database that, let’s say SQLite for our site and we want to create a table in this database and want to link this database to our website. Don’t worry we will discuss this in the next section.
Django Models
To tackle the above-said problem Django provides something called Django Models.
A Django model is the built-in feature that Django uses to create tables, their fields, and various constraints. In short, Django Models is the SQL of Database one uses with Django. SQL (Structured Query Language) is complex and involves a lot of different queries for creating, deleting, updating, or any other stuff related to the database. Django models simplify the tasks and organize tables into models. Generally, each model maps to a single database table.
This section revolves around how one can use Django models to store data in the database conveniently. Moreover, we can use the admin panel of Django to create, update, delete or retrieve fields of a model and various similar operations. Django models provide simplicity, consistency, version control, and advanced metadata handling. Basics of a model include –
- Each model is a Python class that subclasses django.db.models.Model.
- Each attribute of the model represents a database field.
- With all of this, Django gives you an automatically-generated database-access API; see Making queries.
Syntax:
from django.db import models
class ModelName(models.Model):
       field_name = models.Field(**options)
Example:
Python3
from django.db import models
from datetime import datetime
class GeeksModel(models.Model):
title = models.CharField(max_length=200)
description = models.TextField()
created_on = models.DateTimeField(default=datetime.now)
image = models.ImageField(upload_to="images/%Y/%m/%d")
def __str__(self) -> str:
return self.title
Whenever we create a Model, Delete a Model, or update anything in any of models.py of our project. We need to run two commands makemigrations and migrate. makemigrations basically generates the SQL commands for preinstalled apps (which can be viewed in installed apps in settings.py) and your newly created app’s model which you add in installed apps whereas migrate executes those SQL commands in the database file.
So when we run,
Python manage.py makemigrations
SQL Query to create above Model as a Table is created and
Python manage.py migrate
creates the table in the database.
Now we have created a model we can perform various operations such as creating a Row for the table or in terms of Django Creating an instance of Model. To know more visit – Django Basic App Model – Makemigrations and Migrate.
Now let’s see how to add data to our newly created SQLite table.
Django CRUD – Inserting, Updating, and Deleting Data
Django lets us interact with its database models, i.e. add, delete, modify and query objects, using a database-abstraction API called ORM(Object Relational Mapper). We can access the Django ORM by running the following command inside our project directory.
python manage.py shell
Adding objects
To create an object of model Album and save it into the database, we need to write the following command:
Python3
from gfg_site_app.models import GeeksModel
obj = GeeksModel(title="GeeksforGeeks",
description="GFG is a portal for computer science students")
obj.save()
Retrieving objects
To retrieve all the objects of a model, we write the following command:
Python3
Output:
<QuerySet [<GeeksModel: GeeksforGeeks>]>
Modifying existing objects
We can modify an existing object as follows:
Python3
obj = GeeksModel.objects.get(id=1)
obj.title = "GFG"
obj.save()
GeeksModel.objects.all()
Output:
<QuerySet [<GeeksModel: GFG>]>
Deleting objects
To delete a single object, we need to write the following commands:
Python3
obj = GeeksModel.objects.get(id=1)
obj.delete()
GeeksModel.objects.all()
Output:
(1, {'gfg_site_app.GeeksModel': 1})
<QuerySet []>
Refer to the below articles to get more information about Django Models –
- Django Models
- ORM – Inserting, Updating & Deleting Data
- Basic App Model – Makemigrations and Migrate
- model data types and fields list
- Add the slug field inside Django Model
- Intermediate fields in Django
- Uploading images in Django
- Change Object Display Name using __str__ function – Django Models
- Built-in Field Validations – Django Models
- Custom Field Validations in Django Models
- How to use Django Field Choices ?
- Overriding the save method – Django Models
Uploading Images in Django
When defining the models we used the ImageField for uploading images and we wrote the upload_to parameter as upload_to=”images/%Y/%m/%d”) because this will create a directory data structure of the format image>>year>>month>>date so that tracking images may become easier.
Before uploading the image we need to write the below code in the setting.py file.
Python3
MEDIA_ROOT = BASE_DIR/'media'
MEDIA_URL = '/media/'
- MEDIA_ROOT is for server path to store files in the computer.
- MEDIA_URL is the reference URL for browser to access the files over Http
In the urls.py we should edit the configuration like this
from django.conf import settings
from django.conf.urls.static import static
if settings.DEBUG:
       urlpatterns += static(settings.MEDIA_URL,
                             document_root=settings.MEDIA_ROOT)
Let’s see how to upload data into the model using Django Admin Interface.
Render a model in Django Admin Interface
To render a model in Django admin, we need to modify app/admin.py. Go to admin.py in geeks_site_app and enter the following code. Import the corresponding model from models.py and register it to the admin interface.
Python3
from django.contrib import admin
from .models import GeeksModel
admin.site.register(GeeksModel,)
Now let’s create a superuser for our project that can have access to the admin area of our site. To create a super user type the below command –
python manage.py createsuperuser
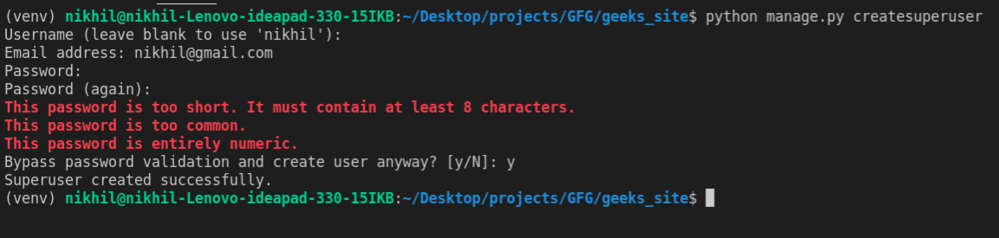
Now go to http://127.0.0.1:8000/admin on the browser to access the admin interface panel.
Give the username and password created for superuser and then the admin dashboard will open and there we will be able to see our Geeks models that we just created.
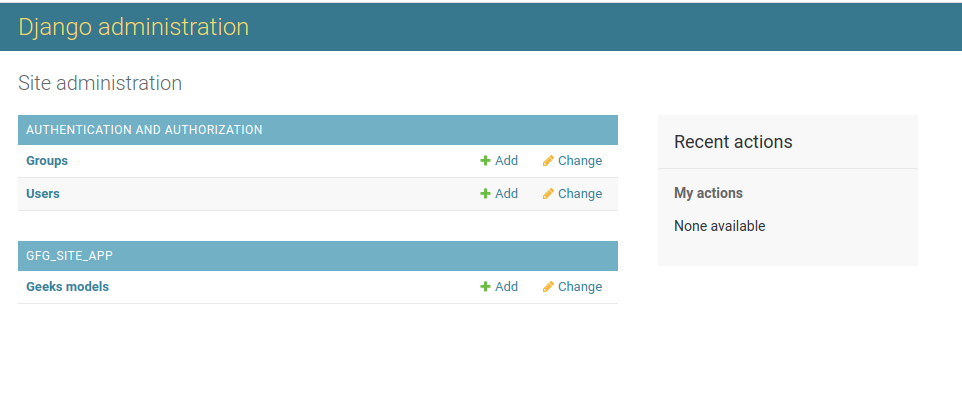
Note: For more information refer to Render Model in Django Admin Interface.
Now let’s see how to enter data using the admin dashboard. Now clicking on the Geeks Model we will see something like this –
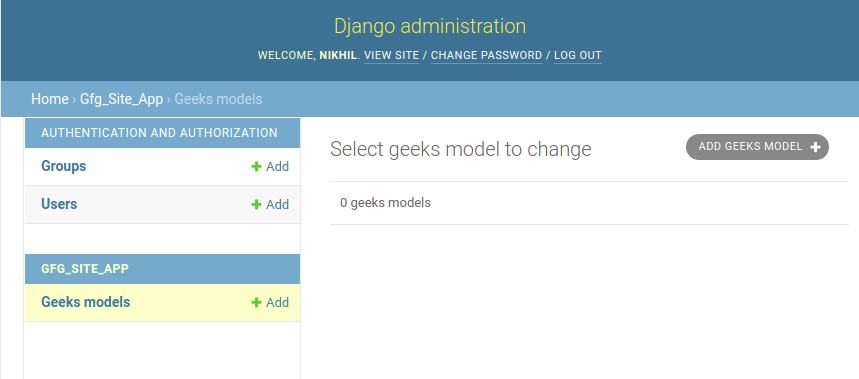
We can click on the Add Geeks Model button on the right top corner and then we will be able to see the fields for adding data. See the below image –
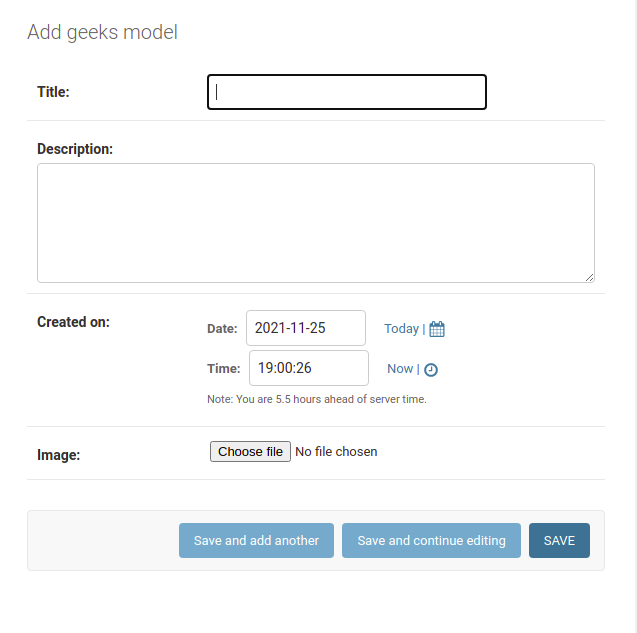
After adding the required data and the image field we will see something like this on our admin dashboard –
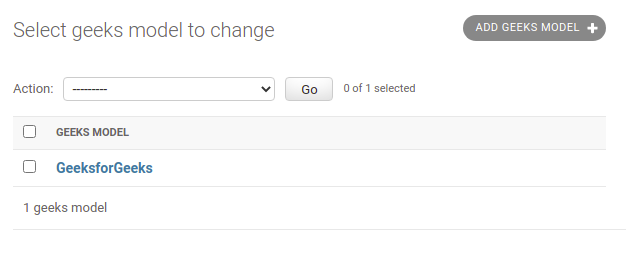
You can also see the media folder in your code editor –
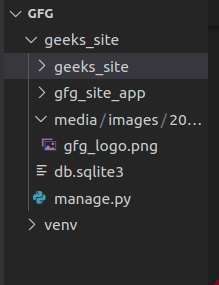
Connecting Django to different Database
Django comes built-in with the SQLite database. We can also see this in the DATABASES dictionary in our settings.py file.
Python3
DATABASES = {
'default': {
'ENGINE': 'django.db.backends.sqlite3',
'NAME': BASE_DIR / 'db.sqlite3',
}
}
If you want to change this to another database you can change the above dictionary. Let’s suppose we want to change this database to PostgreSQL. Assuming the required dependencies are installed and the PostgreSQL is set up then the DATABASES dictionary will look like –
Python3
DATABASES = {
'default': {
'ENGINE': 'django.db.backends.postgresql',
'NAME': ‘<database_name>’,
'USER': '<database_username>',
'PASSWORD': '<password>',
'HOST': '<database_hostname_or_ip>',
'PORT': '<database_port>',
}
}
Refer to the below articles to get more information about connecting Django to different databases –
- How to use PostgreSQL Database in Django?
- Connect Django Project to MongoDB using Django
Django Templates
Templates are the third and most important part of Django’s MVT Structure. A template in Django is basically written in HTML, CSS, and Javascript in a .html file. Django framework efficiently handles and generates dynamically HTML web pages that are visible to the end-user. Django mainly functions with a backend so, in order to provide a frontend and provide a layout to our website, we use templates. There are two methods of adding the template to our website depending on our needs.
- We can use a single template directory which will be spread over the entire project.
- For each app of our project, we can create a different template directory.
For our current project, we will create a single template directory that will be spread over the entire project for simplicity. App-level templates are generally used in big projects or in case we want to provide a different layout to each component of our webpage.
Configuration
Django Templates can be configured in app_name/settings.py,
Python3
TEMPLATES = [
{
'BACKEND': 'django.template.backends.django.DjangoTemplates',
'DIRS': [],
'APP_DIRS': True,
'OPTIONS': {
'context_processors': [
'django.template.context_processors.debug',
'django.template.context_processors.request',
'django.contrib.auth.context_processors.auth',
'django.contrib.messages.context_processors.messages',
],
},
},
]
Now let’s create a template directory and add that directory in the above configuration. After creating the templates folder our directory should look like this –
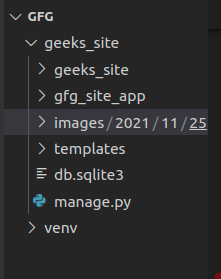
Let’s add the location of this directory in our templates dictionary.
Python3
TEMPLATES = [
{
'BACKEND': 'django.template.backends.django.DjangoTemplates',
'DIRS': [BASE_DIR/"templates"],
'APP_DIRS': True,
'OPTIONS': {
'context_processors': [
'django.template.context_processors.debug',
'django.template.context_processors.request',
'django.contrib.auth.context_processors.auth',
'django.contrib.messages.context_processors.messages',
],
},
},
]
After adding the location of the template directory we will create a simple HTML file and name it as index.html and then we will render this file from our view function.
HTML file:
HTML
<!DOCTYPE html>
<html lang="en">
<head>
<meta charset="UTF-8">
<meta name="viewport" content="width=device-width, initial-scale=1.0">
<meta http-equiv="X-UA-Compatible" content="ie=edge">
<title>Homepage</title>
</head>
<body>
<h1>Welcome to Geeksforgeeks</h1>
</body>
</html>
To render this HTML on our site we need to use the render function from the django.shortcuts. Below is the updated view function.
views.py
Python3
from django.shortcuts import render
def geeks_view(request):
return render(request, "index.html")
If we head to our website we will see the HTML data on our site as –
The Django Templates not only show static data but also the data from different databases connected to the application through a context dictionary. Let’s see this with an example. We will try to render the content of our database dynamically to our website.
First, let’s update our views.py file. In this file we will get our data from our database and then pass this database as a dictionary to our HTML file.
views.py
Python3
from django.shortcuts import render
from .models import GeeksModel
def geeks_view(request):
content = GeeksModel.objects.all()
context = {
'content': content
}
return render(request, "index.html", context=context)
index.html
HTML
<!DOCTYPE html>
<html lang="en">
<head>
<meta charset="UTF-8">
<meta name="viewport" content="width=device-width, initial-scale=1.0">
<meta http-equiv="X-UA-Compatible" content="ie=edge">
<title>Homepage</title>
</head>
<body>
{% for data in content %}
<h2>{{data.title}}</h2>
<img src="{{ data.image.url }}" alt="">
<p><strong>Description:</strong>{{data.description}}</p>
<p><strong>Created On:</strong>{{data.created_on}}</p>
{% endfor %}
</body>
</html>
Our website now looks like this –
Now if we add more data to our site then that data will also be shown to our site without making any changes to our HTML or views.py. Let’s add some data and then see if it works or not.
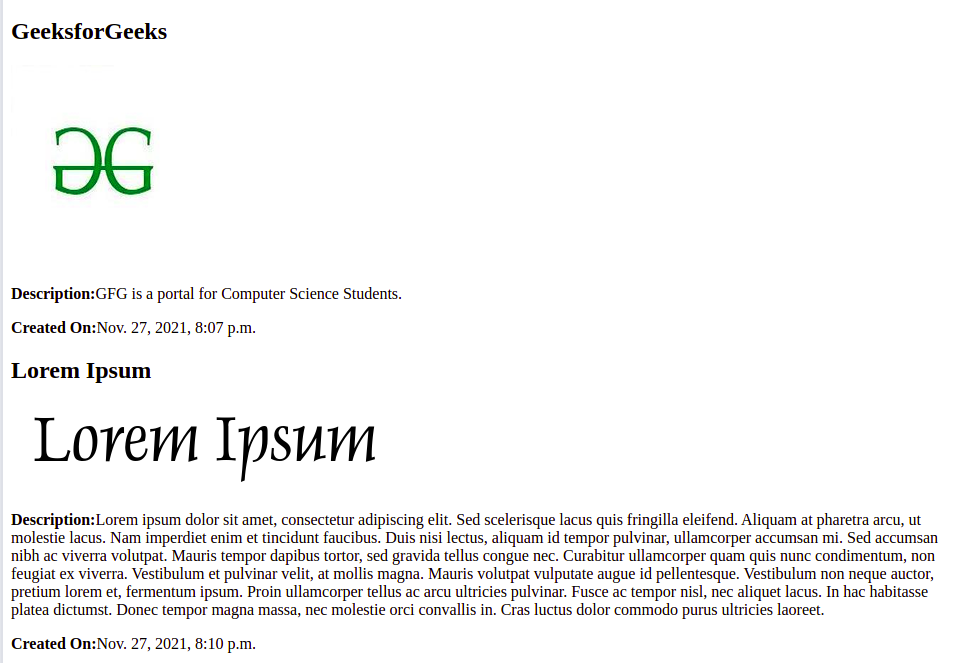
Django template language
This is one of the most important facilities provided by Django Templates. A Django template is a text document or a Python string marked-up using the Django template language. Some constructs are recognized and interpreted by the template engine. The main ones are variables and tags. As we used for the loop in the above example, we used it as a tag. similarly, we can use various other conditions such as if, else, if-else, empty, etc. The main characteristics of Django Template language are Variables, Tags, Filters, and Comments.
Variables
Variables output a value from the context, which is a dict-like object mapping keys to values. The context object we sent from the view can be accessed in the template using variables of Django Template.
Syntax
{{ variable_name }}
Tags
Tags provide arbitrary logic in the rendering process. For example, a tag can output content, serve as a control structure e.g. an “if” statement or a “for” loop, grab content from a database, or even enable access to other template tags.
Syntax
{% tag_name %}
Filters
Django Template Engine provides filters that are used to transform the values of variables and tag arguments. We have already discussed major Django Template Tags. Tags can’t modify the value of a variable whereas filters can be used for incrementing the value of a variable or modifying it to one’s own need.
Syntax
{{ variable_name | filter_name }}
Comments
Template ignores everything between {% comment %} and {% end comment %}. An optional note may be inserted in the first tag. For example, this is useful when commenting out code for documenting why the code was disabled.
Syntax
{% comment 'comment_name' %}
{% endcomment %}
Template Inheritance
The most powerful and thus the most complex part of Django’s template engine is template inheritance. Template inheritance allows you to build a base “skeleton” template that contains all the common elements of your site and defines blocks that child templates can override. extends tag is used for the inheritance of templates in Django. One needs to repeat the same code again and again. Using extends we can inherit templates as well as variables.
Syntax
{% extends 'template_name.html' %}
Example: Assume the following directory structure:
dir1/
   template.html
   base2.html
   my/
       base3.html
base1.html
In template.html, the following paths would be valid:
HTML
{% extends "./base2.html" %}
{% extends "../base1.html" %}
{% extends "./my/base3.html" %}
Refer to the below articles to get more information about Django Templates –
- Boolean Operators
- for loop
- if – Django Templates
- Template Inheritance
Django Forms
When one creates a Form class, the most important part is defining the fields of the form. Each field has custom validation logic, along with a few other hooks. Forms are basically used for taking input from the user in some manner and using that information for logical operations on databases. For example, Registering a user by taking input as his name, email, password, etc. Django maps the fields defined in Django forms into HTML input fields. Django handles three distinct parts of the work involved in forms:
- preparing and restructuring data to make it ready for rendering
- creating HTML forms for the data
- receiving and processing submitted forms and data from the client

Note: All types of work done by Django forms can be done with advanced HTML stuff, but Django makes it easier and efficient especially the validation part. Once you get hold of Django forms you will just forget about HTML forms.
Creating Django Forms
Creating a form in Django is completely similar to creating a model, one needs to specify what fields would exist in the form and of what type. For example, to input, a registration form one might need First Name (CharField), Roll Number (IntegerField), and so on.
To create a Django form, first create a forms.py inside the app folder.
Python3
from django import forms
class GeeksForm(forms.Form):
title = forms.CharField(max_length=200)
description = forms.CharField(widget=forms.Textarea)
image = forms.ImageField()
Let’s create a different view function for handling forms and we will map this view function to a different URL. In the above created views.py file import the GeeksForm from the forms.py and create the below function.
views.py
Python3
from .forms import GeeksForm
def geeks_form(request):
context = {}
context['form'] = GeeksForm
return render(request, "form.html", context=context)
Map this function to a different URL let’s say we will map this function to the http://127.0.0.1:8000/add/. To do this go to urls.py file of the app and another path for above URL.
urls.py
Python3
from django.urls import path
from . import views
urlpatterns = [
path('', views.geeks_view, name='geeks_view'),
path('add/', views.geeks_form, name="geeks_form")
]
Django form fields have several built-in methods to ease the work of the developer but sometimes one needs to implement things manually for customizing User Interface(UI). A form comes with 3 in-built methods that can be used to render Django form fields.
- {{ form.as_table }} will render them as table cells wrapped in <tr> tags
- {{ form.as_p }} will render them wrapped in <p> tags
- {{ form.as_ul }} will render them wrapped in <li> tags
Now let’s make the form.html for rendering our form.
HTML
<form action="" method="POST">
{% csrf_token %}
{{form.as_p}}
<input type="submit" value="submit">
</form>
After doing this save all the files and go to http://127.0.0.1:8000/add/ to see the form we created. It should look like this –
We can also see that our form is validated automatically. We cannot submit an empty form.
Create Django Form from Models
Django ModelForm is a class that is used to directly convert a model into a Django form. To create a form directly for our model, dive into forms.py and Enter the following –
Python3
from django import forms
from .models import GeeksModel
class GeeksForm(forms.ModelForm):
class Meta:
model = GeeksModel
fields = ['title', 'description', 'image']
Now visit http://127.0.0.1:8000/add/ you will see the same form as above but with less code.
Both the Django forms we created are similar but the only difference is the save() method. Every ModelForm has a save() method which saves the database object from the data bound to the form. In simpler words we will be able to save the data to our database using the ModelForm only. For this change the view method as follow –
views.py
Python3
def geeks_form(request):
if request.method == 'POST':
form = GeeksForm(request.POST, request.FILES)
if form.is_valid():
form.save()
return redirect("geeks_view")
else:
return redirect("geeks_form")
else:
context = {}
context['form'] = GeeksForm
return render(request, "form.html", context=context)
Note: Add enctype= multipart/form-data to our <form> element in our template tag. If we don’t have this then our request.FILES will always be empty and our form will not validate.
Let’s add some data with our form and see if its get saved in our database or not.
After hitting submit the form gets saved automatically to database. We can verify it from the above GIF.
Refer to the below articles to get more information about Django Forms –
- Django Forms
- How to create a form using Django Forms ?
- Render HTML Forms (GET & POST) in Django
- Django Form Fields
- form field custom widgets
- Initial form data – Django Forms
- ModelForm – Create form from Models
- Render Form Fields Manually
- Django Formsets
- Django ModelFormSets
More on Django
- Handling Ajax request in Django
- User groups with Custom permissions in Django
- Django Admin Interface
- Extending and customizing django-allauth
- Django – Dealing with warnings
- Sessions framework using django
- Django Sign Up and login with confirmation Email
- How to add Pagination in Django Project?
- How to Deploy Django project on PythonAnywhere?
Django Projects
- Google authentication and Fetching mails from scratch
- ToDo webapp using Django
- Django News App
- Weather app using Django
- Django project to create a Comments System
- Integrating Facebook Comments Plugin in Django Project
- Translator App Project using Django
- Creating a Basic E-commerce Website for Displaying Products
Python Django is a web framework that allows to quickly create efficient web pages. Django is also called batteries included framework because it provides built-in features such as Django Admin Interface, default database – SQLite3, etc. When you’re building a website, you always need a similar set of components: a way to handle user authentication (signing up, signing in, signing out), a management panel for your website, forms, a way to upload files, etc. Django gives you ready-made components to use.
Why Django Framework?
- Excellent documentation and high scalability.
- Used by Top MNCs and Companies, such as Instagram, Disqus, Spotify, Youtube, Bitbucket, Dropbox, etc. and the list is never-ending.
- Easiest Framework to learn, rapid development, and Batteries fully included. Django is a rapid web development framework that can be used to develop fully fleshed web applications in a short period of time.
- The last but not least reason to learn Django is Python, Python has a huge library and features such as Web Scrapping, Machine Learning, Image Processing, Scientific Computing, etc. One can integrate all this with web applications and do lots and lots of advanced stuff.
Django Architecture
Django is based on MVT (Model-View-Template) architecture which has the following three parts –
- Model: The model is going to act as the interface of your data. It is responsible for maintaining data. It is the logical data structure behind the entire application and is represented by a database (generally relational databases such as MySql, Postgres).
- View: The View is the user interface that you see in your browser when you render a website. It is represented by HTML/CSS/Javascript and Jinja files.
- Template: A template consists of static parts of the desired HTML output as well as some special syntax describing how dynamic content will be inserted. To check more, visit – Django Templates
For more information, refer to Django Project MVT Structure
Setting up the Virtual Environment
Most of the time when you’ll be working on some Django projects, you’ll find that each project may need a different version of Django. This problem may arise when you install Django in a global or default environment. To overcome this problem we will use virtual environments in Python. This enables us to create multiple different Django environments on a single computer. To create a virtual environment type the below command in the terminal.
python3 -m venv ./name
Here the name suggests the name of the virtual environment. Let’s create our virtual environment with the name as venv only. So the command to create it will be –
python3 -m venv ./venv
After running the above command you will see a folder named venv with the following sub-directories.
After creating the virtual environment let’s activate it. To activate it type the below command in the terminal.
source ./venv/bin/activate
In the above command ./ is used to tell the current working directory.
Note: If you have your virtual environment set up in another location and your terminal opened up in another location, then provide the location to the venv folder i.e. our virtual environment folder.
After you run the above command you should see (venv) at the starting of every line of your terminal as shown in the below image.
Installing Django
We can install Django using the pip command. To install this type the below command in the terminal.
pip install django
For more information, refer to Django Introduction and Installation
Starting the project
- To initiate a project of Django on Your PC, open Terminal and Enter the following command
django-admin startproject projectName
- A New Folder with the name projectName will be created. To enter in the project using the terminal enter command
cd projectName
- Now let’s run the server and see everything is working fine or not. To run the server type the below command in the terminal.
python manage.py runserver
After running the server go to http://127.0.0.1:8000/ and you’ll see something like this –
For more information, refer to How to Create a Basic Project using MVT in Django ?
Project Structure
A Django Project when initialized contains basic files by default such as manage.py, view.py, etc. A simple project structure is enough to create a single-page application. Here are the major files and their explanations. Inside the geeks_site folder ( project folder ) there will be the following files-
Let’s discuss these files in detail –
manage.py: This file is used to interact with your project via the command line(start the server, sync the database… etc). For getting the full list of commands that can be executed by manage.py type this code in the command window-
python manage.py help
- _init_.py: It is a python package. It is invoked when the package or a module in the package is imported. We usually use this to execute package initialization code, for example for the initialization of package-level data.
- settings.py: As the name indicates it contains all the website settings. In this file, we register any applications we create, the location of our static files, database configuration details, etc.
- urls.py: In this file, we store all links of the project and functions to call.
- wsgi.py: This file is used in deploying the project in WSGI. It is used to help your Django application communicate with the webserver.
Creating an app
Django is famous for its unique and fully managed app structure. For every functionality, an app can be created like a completely independent module. For example, if you are creating a Blog, Separate modules should be created for Comments, Posts, Login/Logout, etc. In Django, these modules are known as apps. There is a different app for each task. Benefits of using Django apps –
- Django apps are reusable i.e. a Django app can be used with multiple projects.
- We have loosely coupled i.e. almost independent components
- Multiple developers can work on different components
- Debugging and code organization are easy. Django has an excellent debugger tool.
- It has in-built features like admin pages etc, which reduces the effort of building the same from scratch
Django provides some pre-installed apps for users. To see pre-installed apps, navigate to projectName –> projectName –> settings.py. In your settings.py file, you will find INSTALLED_APPS. Apps listed in INSTALLED_APPS are provided by Django for the developer’s comfort.
Python3
INSTALLED_APPS = [
'django.contrib.admin',
'django.contrib.auth',
'django.contrib.contenttypes',
'django.contrib.sessions',
'django.contrib.messages',
'django.contrib.staticfiles',
]
We can also create our own custom apps. To create a basic app in your Django project you need to go to the directory containing manage.py and from there enter the command :
python manage.py startapp projectApp
Now let’s create an app called gfg_site_app, so the command to create the app would be –
python manage.py startapp gfg_site_app
Now you can see your directory structure as under :
To consider the app in your project you need to specify your project name in the INSTALLED_APPS list as follows in settings.py:
Python3
INSTALLED_APPS = [
'django.contrib.admin',
'django.contrib.auth',
'django.contrib.contenttypes',
'django.contrib.sessions',
'django.contrib.messages',
'django.contrib.staticfiles',
'gfg_site_app.apps.GfgSiteAppConfig',
]
For more information, refer to How to Create an App in Django ?
Django Views
A view function is a Python function that takes a Web request and returns a Web response. This response can be the HTML contents of a Web page, or a redirect, or a 404 error, or an XML document, or an image, anything that a web browser can display. Django views are part of the user interface — they usually render the HTML/CSS/Javascript in your Template files into what you see in your browser when you render a web page.
Example: Creating View Function
Python3
from django.http import HttpResponse
def geeks_view(request):
return HttpResponse("<h1>Welcome to GeeksforGeeks</h1>")
Let’s step through this code one line at a time:
- First, we import the class HttpResponse from the django.http module, along with Python’s datetime library.
- Next, we define a function called geeks_view. This is the view function. Each view function takes an HttpRequest object as its first parameter, which is typically named request.
- The view returns an HttpResponse object that contains the generated response. Each view function is responsible for returning an HttpResponse object.
Note: For more info on HttpRequest and HttpResponse visit – Django Request and Response cycle – HttpRequest and HttpResponse Objects
The above Function will render the text Welcome to GeeksforGeeks as h1 on the page. Now the question that may be arising is at what URL this function will be called and how will we handle such URLs. Don’t worry we will handle URL in the section but in this section let us continue with the Django views only.
Types of Views
Django views are divided into two major categories:-
- Function-Based Views
- Class-Based Views
Function-Based Views
Function-based views are writer using a function in python which receives as an argument HttpRequest object and returns an HttpResponse Object. Function-based views are generally divided into 4 basic strategies, i.e., CRUD (Create, Retrieve, Update, Delete). CRUD is the base of any framework one is using for development.
Refer to the below articles to get more information on Function-Based views –
- Django CRUD (Create, Retrieve, Update, Delete) Function Based Views
- Create View
- List View
- Detail View
- Update View
- Delete View
Class-Based Views
Class-based views provide an alternative way to implement views as Python objects instead of functions. They do not replace function-based views, but have certain differences and advantages when compared to function-based views:
- Organization of code related to specific HTTP methods (GET, POST, etc.) can be addressed by separate methods instead of conditional branching.
- Object-oriented techniques such as mixins (multiple inheritances) can be used to factor code into reusable components.
Refer to the below articles to get more information on Class-Based views –
- Class Based Generic Views Django (Create, Retrieve, Update, Delete)
- Createview
- ListView
- DetailView
- UpdateView
- DeleteView
- FormView
Django URL Patterns
In Django, each view needs to be mapped to a corresponding URL pattern. This is done via a Python module called URLConf(URL configuration). Every URLConf module must contain a variable urlpatterns which is a set of URL patterns to be matched against the requested URL. These patterns will be checked in sequence until the first match is found. Then the view corresponding to the first match is invoked. If no URL pattern matches, Django invokes an appropriate error handling view.
Now if we see our project we have created an app called gfg_site, the Python module to be used as URLConf is the value of ROOT_URLCONF in gfg_site/settings.py. By default this is set to ‘gfg_site.urls’. Every URLConf module must contain a variable urlpatterns which is a set of URL patterns to be matched against the requested URL. These patterns will be checked in sequence, until the first match is found. Then the view corresponding to the first match is invoked. If no URL pattern matches, Django invokes an appropriate error handling view.
URL patterns
Here’s a sample code for gfg_site/urls.py:
Python3
from django.urls import path
from . import views
urlpatterns = [
path('', views.geeks_view, name='geeks_view'),
]
Including other URLConf modules
It is a good practice to have a URLConf module for every app in Django. This module needs to be included in the root URLConf module as follows:
Python3
from django.contrib import admin
from django.urls import path, include
urlpatterns = [
path('admin/', admin.site.urls),
path('', include('gfg_site_app.urls'))
]
Now if head towards http://127.0.0.1:8000/ then our site will be –
In the above example, include statement will look into the URLpatterns list in the gfg_site_app/urls.py And then it will look into all the paths defined in the url.py file and will call the respective views function.
Till now we have seen how to show HTML on our website. Now let’s suppose we want to use some kind of relational database that, let’s say SQLite for our site and we want to create a table in this database and want to link this database to our website. Don’t worry we will discuss this in the next section.
Django Models
To tackle the above-said problem Django provides something called Django Models.
A Django model is the built-in feature that Django uses to create tables, their fields, and various constraints. In short, Django Models is the SQL of Database one uses with Django. SQL (Structured Query Language) is complex and involves a lot of different queries for creating, deleting, updating, or any other stuff related to the database. Django models simplify the tasks and organize tables into models. Generally, each model maps to a single database table.
This section revolves around how one can use Django models to store data in the database conveniently. Moreover, we can use the admin panel of Django to create, update, delete or retrieve fields of a model and various similar operations. Django models provide simplicity, consistency, version control, and advanced metadata handling. Basics of a model include –
- Each model is a Python class that subclasses django.db.models.Model.
- Each attribute of the model represents a database field.
- With all of this, Django gives you an automatically-generated database-access API; see Making queries.
Syntax:
from django.db import models
class ModelName(models.Model):
       field_name = models.Field(**options)
Example:
Python3
from django.db import models
from datetime import datetime
class GeeksModel(models.Model):
title = models.CharField(max_length=200)
description = models.TextField()
created_on = models.DateTimeField(default=datetime.now)
image = models.ImageField(upload_to="images/%Y/%m/%d")
def __str__(self) -> str:
return self.title
Whenever we create a Model, Delete a Model, or update anything in any of models.py of our project. We need to run two commands makemigrations and migrate. makemigrations basically generates the SQL commands for preinstalled apps (which can be viewed in installed apps in settings.py) and your newly created app’s model which you add in installed apps whereas migrate executes those SQL commands in the database file.
So when we run,
Python manage.py makemigrations
SQL Query to create above Model as a Table is created and
Python manage.py migrate
creates the table in the database.
Now we have created a model we can perform various operations such as creating a Row for the table or in terms of Django Creating an instance of Model. To know more visit – Django Basic App Model – Makemigrations and Migrate.
Now let’s see how to add data to our newly created SQLite table.
Django CRUD – Inserting, Updating, and Deleting Data
Django lets us interact with its database models, i.e. add, delete, modify and query objects, using a database-abstraction API called ORM(Object Relational Mapper). We can access the Django ORM by running the following command inside our project directory.
python manage.py shell
Adding objects
To create an object of model Album and save it into the database, we need to write the following command:
Python3
from gfg_site_app.models import GeeksModel
obj = GeeksModel(title="GeeksforGeeks",
description="GFG is a portal for computer science students")
obj.save()
Retrieving objects
To retrieve all the objects of a model, we write the following command:
Python3
Output:
<QuerySet [<GeeksModel: GeeksforGeeks>]>
Modifying existing objects
We can modify an existing object as follows:
Python3
obj = GeeksModel.objects.get(id=1)
obj.title = "GFG"
obj.save()
GeeksModel.objects.all()
Output:
<QuerySet [<GeeksModel: GFG>]>
Deleting objects
To delete a single object, we need to write the following commands:
Python3
obj = GeeksModel.objects.get(id=1)
obj.delete()
GeeksModel.objects.all()
Output:
(1, {'gfg_site_app.GeeksModel': 1})
<QuerySet []>
Refer to the below articles to get more information about Django Models –
- Django Models
- ORM – Inserting, Updating & Deleting Data
- Basic App Model – Makemigrations and Migrate
- model data types and fields list
- Add the slug field inside Django Model
- Intermediate fields in Django
- Uploading images in Django
- Change Object Display Name using __str__ function – Django Models
- Built-in Field Validations – Django Models
- Custom Field Validations in Django Models
- How to use Django Field Choices ?
- Overriding the save method – Django Models
Uploading Images in Django
When defining the models we used the ImageField for uploading images and we wrote the upload_to parameter as upload_to=”images/%Y/%m/%d”) because this will create a directory data structure of the format image>>year>>month>>date so that tracking images may become easier.
Before uploading the image we need to write the below code in the setting.py file.
Python3
MEDIA_ROOT = BASE_DIR/'media'
MEDIA_URL = '/media/'
- MEDIA_ROOT is for server path to store files in the computer.
- MEDIA_URL is the reference URL for browser to access the files over Http
In the urls.py we should edit the configuration like this
from django.conf import settings
from django.conf.urls.static import static
if settings.DEBUG:
       urlpatterns += static(settings.MEDIA_URL,
                             document_root=settings.MEDIA_ROOT)
Let’s see how to upload data into the model using Django Admin Interface.
Render a model in Django Admin Interface
To render a model in Django admin, we need to modify app/admin.py. Go to admin.py in geeks_site_app and enter the following code. Import the corresponding model from models.py and register it to the admin interface.
Python3
from django.contrib import admin
from .models import GeeksModel
admin.site.register(GeeksModel,)
Now let’s create a superuser for our project that can have access to the admin area of our site. To create a super user type the below command –
python manage.py createsuperuser
Now go to http://127.0.0.1:8000/admin on the browser to access the admin interface panel.
Give the username and password created for superuser and then the admin dashboard will open and there we will be able to see our Geeks models that we just created.
Note: For more information refer to Render Model in Django Admin Interface.
Now let’s see how to enter data using the admin dashboard. Now clicking on the Geeks Model we will see something like this –
We can click on the Add Geeks Model button on the right top corner and then we will be able to see the fields for adding data. See the below image –
After adding the required data and the image field we will see something like this on our admin dashboard –
You can also see the media folder in your code editor –
Connecting Django to different Database
Django comes built-in with the SQLite database. We can also see this in the DATABASES dictionary in our settings.py file.
Python3
DATABASES = {
'default': {
'ENGINE': 'django.db.backends.sqlite3',
'NAME': BASE_DIR / 'db.sqlite3',
}
}
If you want to change this to another database you can change the above dictionary. Let’s suppose we want to change this database to PostgreSQL. Assuming the required dependencies are installed and the PostgreSQL is set up then the DATABASES dictionary will look like –
Python3
DATABASES = {
'default': {
'ENGINE': 'django.db.backends.postgresql',
'NAME': ‘<database_name>’,
'USER': '<database_username>',
'PASSWORD': '<password>',
'HOST': '<database_hostname_or_ip>',
'PORT': '<database_port>',
}
}
Refer to the below articles to get more information about connecting Django to different databases –
- How to use PostgreSQL Database in Django?
- Connect Django Project to MongoDB using Django
Django Templates
Templates are the third and most important part of Django’s MVT Structure. A template in Django is basically written in HTML, CSS, and Javascript in a .html file. Django framework efficiently handles and generates dynamically HTML web pages that are visible to the end-user. Django mainly functions with a backend so, in order to provide a frontend and provide a layout to our website, we use templates. There are two methods of adding the template to our website depending on our needs.
- We can use a single template directory which will be spread over the entire project.
- For each app of our project, we can create a different template directory.
For our current project, we will create a single template directory that will be spread over the entire project for simplicity. App-level templates are generally used in big projects or in case we want to provide a different layout to each component of our webpage.
Configuration
Django Templates can be configured in app_name/settings.py,
Python3
TEMPLATES = [
{
'BACKEND': 'django.template.backends.django.DjangoTemplates',
'DIRS': [],
'APP_DIRS': True,
'OPTIONS': {
'context_processors': [
'django.template.context_processors.debug',
'django.template.context_processors.request',
'django.contrib.auth.context_processors.auth',
'django.contrib.messages.context_processors.messages',
],
},
},
]
Now let’s create a template directory and add that directory in the above configuration. After creating the templates folder our directory should look like this –
Let’s add the location of this directory in our templates dictionary.
Python3
TEMPLATES = [
{
'BACKEND': 'django.template.backends.django.DjangoTemplates',
'DIRS': [BASE_DIR/"templates"],
'APP_DIRS': True,
'OPTIONS': {
'context_processors': [
'django.template.context_processors.debug',
'django.template.context_processors.request',
'django.contrib.auth.context_processors.auth',
'django.contrib.messages.context_processors.messages',
],
},
},
]
After adding the location of the template directory we will create a simple HTML file and name it as index.html and then we will render this file from our view function.
HTML file:
HTML
<!DOCTYPE html>
<html lang="en">
<head>
<meta charset="UTF-8">
<meta name="viewport" content="width=device-width, initial-scale=1.0">
<meta http-equiv="X-UA-Compatible" content="ie=edge">
<title>Homepage</title>
</head>
<body>
<h1>Welcome to Geeksforgeeks</h1>
</body>
</html>
To render this HTML on our site we need to use the render function from the django.shortcuts. Below is the updated view function.
views.py
Python3
from django.shortcuts import render
def geeks_view(request):
return render(request, "index.html")
If we head to our website we will see the HTML data on our site as –
The Django Templates not only show static data but also the data from different databases connected to the application through a context dictionary. Let’s see this with an example. We will try to render the content of our database dynamically to our website.
First, let’s update our views.py file. In this file we will get our data from our database and then pass this database as a dictionary to our HTML file.
views.py
Python3
from django.shortcuts import render
from .models import GeeksModel
def geeks_view(request):
content = GeeksModel.objects.all()
context = {
'content': content
}
return render(request, "index.html", context=context)
index.html
HTML
<!DOCTYPE html>
<html lang="en">
<head>
<meta charset="UTF-8">
<meta name="viewport" content="width=device-width, initial-scale=1.0">
<meta http-equiv="X-UA-Compatible" content="ie=edge">
<title>Homepage</title>
</head>
<body>
{% for data in content %}
<h2>{{data.title}}</h2>
<img src="{{ data.image.url }}" alt="">
<p><strong>Description:</strong>{{data.description}}</p>
<p><strong>Created On:</strong>{{data.created_on}}</p>
{% endfor %}
</body>
</html>
Our website now looks like this –
Now if we add more data to our site then that data will also be shown to our site without making any changes to our HTML or views.py. Let’s add some data and then see if it works or not.
Django template language
This is one of the most important facilities provided by Django Templates. A Django template is a text document or a Python string marked-up using the Django template language. Some constructs are recognized and interpreted by the template engine. The main ones are variables and tags. As we used for the loop in the above example, we used it as a tag. similarly, we can use various other conditions such as if, else, if-else, empty, etc. The main characteristics of Django Template language are Variables, Tags, Filters, and Comments.
Variables
Variables output a value from the context, which is a dict-like object mapping keys to values. The context object we sent from the view can be accessed in the template using variables of Django Template.
Syntax
{{ variable_name }}
Tags
Tags provide arbitrary logic in the rendering process. For example, a tag can output content, serve as a control structure e.g. an “if” statement or a “for” loop, grab content from a database, or even enable access to other template tags.
Syntax
{% tag_name %}
Filters
Django Template Engine provides filters that are used to transform the values of variables and tag arguments. We have already discussed major Django Template Tags. Tags can’t modify the value of a variable whereas filters can be used for incrementing the value of a variable or modifying it to one’s own need.
Syntax
{{ variable_name | filter_name }}
Comments
Template ignores everything between {% comment %} and {% end comment %}. An optional note may be inserted in the first tag. For example, this is useful when commenting out code for documenting why the code was disabled.
Syntax
{% comment 'comment_name' %}
{% endcomment %}
Template Inheritance
The most powerful and thus the most complex part of Django’s template engine is template inheritance. Template inheritance allows you to build a base “skeleton” template that contains all the common elements of your site and defines blocks that child templates can override. extends tag is used for the inheritance of templates in Django. One needs to repeat the same code again and again. Using extends we can inherit templates as well as variables.
Syntax
{% extends 'template_name.html' %}
Example: Assume the following directory structure:
dir1/
   template.html
   base2.html
   my/
       base3.html
base1.html
In template.html, the following paths would be valid:
HTML
{% extends "./base2.html" %}
{% extends "../base1.html" %}
{% extends "./my/base3.html" %}
Refer to the below articles to get more information about Django Templates –
- Boolean Operators
- for loop
- if – Django Templates
- Template Inheritance
Django Forms
When one creates a Form class, the most important part is defining the fields of the form. Each field has custom validation logic, along with a few other hooks. Forms are basically used for taking input from the user in some manner and using that information for logical operations on databases. For example, Registering a user by taking input as his name, email, password, etc. Django maps the fields defined in Django forms into HTML input fields. Django handles three distinct parts of the work involved in forms:
- preparing and restructuring data to make it ready for rendering
- creating HTML forms for the data
- receiving and processing submitted forms and data from the client
Note: All types of work done by Django forms can be done with advanced HTML stuff, but Django makes it easier and efficient especially the validation part. Once you get hold of Django forms you will just forget about HTML forms.
Creating Django Forms
Creating a form in Django is completely similar to creating a model, one needs to specify what fields would exist in the form and of what type. For example, to input, a registration form one might need First Name (CharField), Roll Number (IntegerField), and so on.
To create a Django form, first create a forms.py inside the app folder.
Python3
from django import forms
class GeeksForm(forms.Form):
title = forms.CharField(max_length=200)
description = forms.CharField(widget=forms.Textarea)
image = forms.ImageField()
Let’s create a different view function for handling forms and we will map this view function to a different URL. In the above created views.py file import the GeeksForm from the forms.py and create the below function.
views.py
Python3
from .forms import GeeksForm
def geeks_form(request):
context = {}
context['form'] = GeeksForm
return render(request, "form.html", context=context)
Map this function to a different URL let’s say we will map this function to the http://127.0.0.1:8000/add/. To do this go to urls.py file of the app and another path for above URL.
urls.py
Python3
from django.urls import path
from . import views
urlpatterns = [
path('', views.geeks_view, name='geeks_view'),
path('add/', views.geeks_form, name="geeks_form")
]
Django form fields have several built-in methods to ease the work of the developer but sometimes one needs to implement things manually for customizing User Interface(UI). A form comes with 3 in-built methods that can be used to render Django form fields.
- {{ form.as_table }} will render them as table cells wrapped in <tr> tags
- {{ form.as_p }} will render them wrapped in <p> tags
- {{ form.as_ul }} will render them wrapped in <li> tags
Now let’s make the form.html for rendering our form.
HTML
<form action="" method="POST">
{% csrf_token %}
{{form.as_p}}
<input type="submit" value="submit">
</form>
After doing this save all the files and go to http://127.0.0.1:8000/add/ to see the form we created. It should look like this –
We can also see that our form is validated automatically. We cannot submit an empty form.
Create Django Form from Models
Django ModelForm is a class that is used to directly convert a model into a Django form. To create a form directly for our model, dive into forms.py and Enter the following –
Python3
from django import forms
from .models import GeeksModel
class GeeksForm(forms.ModelForm):
class Meta:
model = GeeksModel
fields = ['title', 'description', 'image']
Now visit http://127.0.0.1:8000/add/ you will see the same form as above but with less code.
Both the Django forms we created are similar but the only difference is the save() method. Every ModelForm has a save() method which saves the database object from the data bound to the form. In simpler words we will be able to save the data to our database using the ModelForm only. For this change the view method as follow –
views.py
Python3
def geeks_form(request):
if request.method == 'POST':
form = GeeksForm(request.POST, request.FILES)
if form.is_valid():
form.save()
return redirect("geeks_view")
else:
return redirect("geeks_form")
else:
context = {}
context['form'] = GeeksForm
return render(request, "form.html", context=context)
Note: Add enctype= multipart/form-data to our <form> element in our template tag. If we don’t have this then our request.FILES will always be empty and our form will not validate.
Let’s add some data with our form and see if its get saved in our database or not.
After hitting submit the form gets saved automatically to database. We can verify it from the above GIF.
Refer to the below articles to get more information about Django Forms –
- Django Forms
- How to create a form using Django Forms ?
- Render HTML Forms (GET & POST) in Django
- Django Form Fields
- form field custom widgets
- Initial form data – Django Forms
- ModelForm – Create form from Models
- Render Form Fields Manually
- Django Formsets
- Django ModelFormSets
More on Django
- Handling Ajax request in Django
- User groups with Custom permissions in Django
- Django Admin Interface
- Extending and customizing django-allauth
- Django – Dealing with warnings
- Sessions framework using django
- Django Sign Up and login with confirmation Email
- How to add Pagination in Django Project?
- How to Deploy Django project on PythonAnywhere?
Django Projects
- Google authentication and Fetching mails from scratch
- ToDo webapp using Django
- Django News App
- Weather app using Django
- Django project to create a Comments System
- Integrating Facebook Comments Plugin in Django Project
- Translator App Project using Django
- Creating a Basic E-commerce Website for Displaying Products