10. Tutorial: Shooting game
In this chapter we will build a shooting game together, step by step.
The Python we will use is: conditionals, loops, lists and functions.
10.1. Step 1: Decide what Actors you will need
Our game will need these Actors, so we must create images for all of
them and save them as .png files in the images folder.
|
variable name |
image file name |
image size |
|---|---|---|
|
player |
player.png |
64×64 |
|
background |
background.png |
600×800 |
|
enemies (list) |
enemy.png |
64×64 |
|
bullets (list) |
bullet.png |
16×16 |
|
bombs (list) |
bomb.png |
16×16 |
The player and background variables will contain Actors. The
others are lists which we initialize to the empty list []. Actors
will be appended to the lists later.
Program 10.1 Shooter game part 1 of 4
1 2 3 4 5 6 7 8 9 10 11 12 13 14 15 16 |
import random WIDTH = 600 HEIGHT = 800 MAX_BULLETS = 3 level = 1 lives = 3 score = 0 background = Actor("background") player = Actor("player", (200, 580)) enemies = [] bullets = [] bombs = [] |
10.2. Step 2: Draw your Actors
Every Pygame game needs an draw() function, and it should draw all
the Actors we created above.
Program 10.2 Shooter game part 2 of 4
1 2 3 4 5 6 7 8 9 10 11 12 |
def draw(): screen.clear() background.draw() player.draw() for enemy in enemies: enemy.draw() for bullet in bullets: bullet.draw() for bomb in bombs: bomb.draw() draw_text() |
10.3. Step 3: Move your Actors
Every Pygame game needs an update() function to move the Actors,
check for collisions, etc.
Program 10.3 Shooter game part 3 of 4
def update(delta): move_player() move_bullets() move_enemies() create_bombs() move_bombs() check_for_end_of_level() |
Exercise
Create the png image files (player.png, background.png, bullet.png, bomb.png, enemy.png). Type in program Program 10.1, Program 10.2 and Program 10.3 into a single file. Save the file. Why doesn’t it run?
10.4. Step 4: Define your functions
Python cannot call a function that has not yet been defined. Therefore
we must at least provide empty, dummy versions of our functions that
don’t do anything so we can fill them in later. However Python cannot
define a completely empty function — it must contain at least one line.
Therefore we use the pass keyword to create a line that doesn’t do
anything.
Program 10.4 Shooter game part 4 of 4
1 2 3 4 5 6 7 8 9 10 11 12 13 14 15 16 17 18 19 20 21 |
def move_player(): pass def move_enemies(): pass def move_bullets(): pass def create_bombs(): pass def move_bombs(): pass def check_for_end_of_level(): pass def draw_text(): pass |
Exercise
Add listing Program 10.4 to the end of the file. Verify the game now runs and you can see the player at the bottom of the screen. (He can’t move yet.)
10.5. Create enemies
Add this new function to the end of the program, and then call it
immediately. It uses a loop within a loop to create enemy Actors and put
them in the enemies list. The reason we put this in a function is we
will need to call it again at the start of each level.
def create_enemies():
    for x in range(0, 600, 60):
        for y in range(0, 200, 60):
            enemy = Actor("enemy", (x, y))
            enemy.vx = level * 2
            enemies.append(enemy)


create_enemies()
10.6. Move the player
Replace the move_player() dummy function definition with this.
Remember there can only be one function with a given name. There
cannot be two «move_player()« function definitions.
def move_player():
    if keyboard.right:
        player.x = player.x + 5
    if keyboard.left:
        player.x = player.x - 5
    if player.x > WIDTH:
        player.x = WIDTH
    if player.x < 0:
        player.x = 0
10.7. Move the enemies
Replace the move_enemies() dummy function definition with this:
def move_enemies():
    global score
    for enemy in enemies:
        enemy.x = enemy.x + enemy.vx
        if enemy.x > WIDTH or enemy.x < 0:
            enemy.vx = -enemy.vx
            animate(enemy, duration=0.1, y=enemy.y + 60)
        for bullet in bullets:
            if bullet.colliderect(enemy):
                enemies.remove(enemy)
                bullets.remove(bullet)
                score = score + 1
        if enemy.colliderect(player):
            exit()
10.8. Draw text on the screen
Replace the draw_text() dummy function definition with this:
def draw_text():
    screen.draw.text("Level " + str(level), (0, 0), color="red")
    screen.draw.text("Score " + str(score), (100, 0), color="red")
    screen.draw.text("Lives " + str(lives), (200, 0), color="red")
10.9. Player bullets
Add this new function to the end of the program. Pygame will call it for
us automatically when a key is pressed.
def on_key_down(key):
    if key == keys.SPACE and len(bullets) < MAX_BULLETS:
        bullet = Actor("bullet", pos=(player.x, player.y))
        bullets.append(bullet)
Replace the move_bullets() dummy function definition with this:
def move_bullets():
    for bullet in bullets:
        bullet.y = bullet.y - 6
        if bullet.y < 0:
            bullets.remove(bullet)
10.10. Enemy bombs
Replace the create_bombs() dummy function definition with this:
def create_bombs():
    if random.randint(0, 100 - level * 6) == 0:
        enemy = random.choice(enemies)
        bomb = Actor("bomb", enemy.pos)
        bombs.append(bomb)
Replace the move_bombs() dummy function definition with this:
def move_bombs():
    global lives
    for bomb in bombs:
        bomb.y = bomb.y + 10
        if bomb.colliderect(player):
            bombs.remove(bomb)
            lives = lives - 1
            if lives == 0:
                exit()
10.11. Check for end of level
Replace the check_for_end_of_level() dummy function definition with
this:
def check_for_end_of_level():
    global level
    if len(enemies) == 0:
        level = level + 1
        create_enemies()
10.12. Ideas for extension
-
Draw an explosion image and create an explosion Actor every time an
alien dies. -
Make the explosion Actor disappear after a short time.
-
Draw several explosion images, put them in a list and make the Actor
animate displaying each of them in order. -
The player can only fire 3 bullets at a time. Create a powerup that
allows him to fire additional bullets. -
Add music and sound effects.
В этой серии уроков будет создана полноценная игру с помощью Python и Pygame. Это будет особенно интересно начинающим программистам, которые уже знакомы с основами языка и хотят углубить знания, а также узнать, что лежит в основе создания игр.
Перед стартом
Если вы еще не знакомы с pygame, вернитесь и закончите первый урок в водной части «Библиотека Pygame / Часть 1. Введение». Дальше будет использоваться программа pygame template.py, которая была создана в том уроке, как основа для этого.
В этой серии мы будем работать над игрой в жанре «Shmup» или «Shoot ’em up» (или, если еще проще, «Стрелялка»). Игрок будет пилотом маленького космического корабля, который пытается выжить среди метеоритов и прочих предметов, летящих на него.
Для начала нужно сохранить файл pygame template.py с новым именем. Таким образом вы сможете использовать этот шаблон в будущем для других игр. Можно назвать файл просто как shmup.py.
В первую очередь, необходимо отредактировать настройки, добавив некоторые значения в игру:
WIDTH = 480
HEIGHT = 600
FPS = 60
Игра будет выполнена в «портретном режиме» — это значит, что высота окна больше, чем его ширина. Игра будет экшеном, поэтому важно задать высокое значение кадров в секунду. В таком случае спрайты будут двигаться максимально плавно. 60 — идеальное значение.
Спрайт игрока
Первое, что необходимо добавить — спрайт, который олицетворяет собой игрока. В итоге это будет космический корабль, но на начальных этапах можно просто игнорировать графику и использовать прямоугольники вместо спрайтов. Важно добиться того, чтобы они отображались на экране и двигались так, как требуется. Заменить их потом артами не составит труда.
Это начало спрайта игрока:
class Player(pygame.sprite.Sprite):
    def __init__(self):
        pygame.sprite.Sprite.__init__(self)
        self.image = pygame.Surface((50, 40))
        self.image.fill(GREEN)
        self.rect = self.image.get_rect()
        self.rect.centerx = WIDTH / 2
        self.rect.bottom = HEIGHT - 10
        self.speedx = 0
Для игрока выбран размер 50х40 пикселей. Он будет находится по центру в нижней части экрана. Также есть свойство speedx, которое будет отслеживать, с какой скоростью двигается игрок по оси x (со стороны в сторону). Если вы не до конца понимаете, как это все работает, вернитесь к уроку «Работа со спрайтами».
Метод update() спрайта запускается в каждом кадре. Он будет перемещать спрайт с конкретной скоростью:
    def update(self):
        self.rect.x += self.speedx
Теперь нужно показать спрайт, чтобы убедиться, что он отображается на экране:
all_sprites = pygame.sprite.Group()
player = Player()
all_sprites.add(player)
Не забывайте, что каждый созданный спрайт должен быть добавлен в группу all_sprites, так чтобы он обновлялся и прорисовывался на экране.
Движение/управление
Управлять в этой игре нужно будет с помощью клавиатуры, поэтому игрок должен будет двигаться при нажатии кнопок Влево или Вправо (это могут быть a или d).
Когда речь заходит об использовании кнопок в игре, есть выбор, а это значит, что речь идет о Событиях:
1 вариант: в этой очереди событий можно определить два события (по одному для каждой кнопки), каждое из которых будет менять скорость игрока, соответственно:
    for event in pygame.event.get():
        if event.type == pygame.KEYDOWN:
            if event.key == pygame.K_LEFT:
                player.speedx = -8
            if event.key == pygame.K_RIGHT:
                player.speedx = 8
Проблема с этим методом в том, что после нажатия кнопки Игрок двигается, но не останавливается. Нужно также добавить два события KEYUP, которые будут возвращать скорость к значению 0.
2 вариант: установить скорость спрайта по умолчанию на значение 0, за исключением случаев, когда нажимаются кнопки Влево или Вправо. В результате движение будет более плавным, а код проще.
def update(self):
        self.speedx = 0
        keystate = pygame.key.get_pressed()
        if keystate[pygame.K_LEFT]:
            self.speedx = -8
        if keystate[pygame.K_RIGHT]:
            self.speedx = 8
        self.rect.x += self.speedx
Этот код устанавливает скорость speedx на значении 0 для каждого кадра, а затем проверяет, не нажата ли кнопка. pygame.key.get_pressed() возвращает словарь со всеми клавишами клавиатуры и значениями True или False, которые указывают на то, нажата ли какая-то из них. Если одна из кнопок нажимается, скорость меняется соответственно.
В пределах экрана
Наконец, нужно сделать так, чтобы спрайт не пропадал с экрана. Для этого нужно добавить этот код к update() игрока:
        if self.rect.right > WIDTH:
            self.rect.right = WIDTH
        if self.rect.left < 0:
            self.rect.left = 0
Теперь если rect попробует двигаться за пределы экрана, он остановится. Второй вариант — телепортировать спрайт с одного края экрана ко второму, когда он туда доберется. Но в этой игре предпочтительнее тормозить игрока.
Итог
Вот весь код этого шага:
# Игра Shmup - 1 часть
# Cпрайт игрока и управление
import pygame
import random

WIDTH = 480
HEIGHT = 600
FPS = 60

# Задаем цвета
WHITE = (255, 255, 255)
BLACK = (0, 0, 0)
RED = (255, 0, 0)
GREEN = (0, 255, 0)
BLUE = (0, 0, 255)
YELLOW = (255, 255, 0)

# Создаем игру и окно
pygame.init()
pygame.mixer.init()
screen = pygame.display.set_mode((WIDTH, HEIGHT))
pygame.display.set_caption("Shmup!")
clock = pygame.time.Clock()

class Player(pygame.sprite.Sprite):
    def __init__(self):
        pygame.sprite.Sprite.__init__(self)
        self.image = pygame.Surface((50, 40))
        self.image.fill(GREEN)
        self.rect = self.image.get_rect()
        self.rect.centerx = WIDTH / 2
        self.rect.bottom = HEIGHT - 10
        self.speedx = 0

    def update(self):
        self.speedx = 0
        keystate = pygame.key.get_pressed()
        if keystate[pygame.K_LEFT]:
            self.speedx = -8
        if keystate[pygame.K_RIGHT]:
            self.speedx = 8
        self.rect.x += self.speedx
        if self.rect.right > WIDTH:
            self.rect.right = WIDTH
        if self.rect.left < 0:
            self.rect.left = 0

all_sprites = pygame.sprite.Group()
player = Player()
all_sprites.add(player)

# Цикл игры
running = True
while running:
    # Держим цикл на правильной скорости
    clock.tick(FPS)
    # Ввод процесса (события)
    for event in pygame.event.get():
        # проверка для закрытия окна
        if event.type == pygame.QUIT:
            running = False

    # Обновление
    all_sprites.update()

    # Рендеринг
    screen.fill(BLACK)
    all_sprites.draw(screen)
    # После отрисовки всего, переворачиваем экран
    pygame.display.flip()

pygame.quit()
В следующем уроке в игру будут добавлены спрайты врагов, от которых игрок будет уклоняться.
Обучение с трудоустройством

We all know the importance of the pygame library in terms of game development. We know that Pygame is a collection of Python modules for making video games. It is a collection of computer graphics and sound libraries for the Python programming language. Pygame is well suited to the development of client-side applications that may be packaged as a standalone executable.
In our last article, we have covered the basics of the pygame library and did two projects. Therefore, in this article Balloon Shooter Game using Python PyGame, we are going to develop a fully working and full-fledged Ballon Shooter game. So, therefore, let’s get started and develop another project that will surely help you to brush up on your concepts.
- What the game is all about?
- What we will use?
- Game Rules to keep in mind:
- Code flow:
- Getting started:
- Importing pygame, random, sys, and math :
- Pygame library initialization:
- Declaring the required variables
- Declaring variables that store color codes:
- Defining balloon class:
- Class definition:
- A function that moves the balloon:
- Logic to show the balloon on screen:
- To check if the balloon is busted or not:
- Function to reset balloons:
- Show balloon location using pointer() function
- Display the score:
- To close the game:
- To keep track of the events:
- Call to game() function:
- Complete code for Balloon Shooter Game using Python
- Output:
- EndNote:
What the game is all about?
The simple plot in this game is that there will be balloons moving all over the screen. The player will have a target like an arrow and with the help of a mouse, the player has to bust those moving ballons. There will be a counter for busted balloons and on busting each moving balloon successfully, the busting score will increase.
What we will use?
For the development of the Balloon Shooter Game using Python PyGame, we will use various pygame modules to add different functionalities to the game. We have to code for continuous movement of balloons, a shooting functionality, and updating the score every time the balloon is busted. All these functions can be done using various modules like draw, mouse, render, etc.
For the balloon’s color and shape, we will make use of the draw module that provides various functions for shapes like ellipses, circles, etc. Therefore, in order to interact with the system and above all, to add functionality like quit game and resume the game, we will use the sys module and add functionality that is based on random events we will use the random library. Apart from these libraries, we will also use the math module.
Now that we know the basic libraries and modules that we will use for the development of this game, let’s get started with some rules of the games and the flow of the code.
Game Rules to keep in mind:
- It should be a single-player game.
- The game should be able to keep track of the total number of ballons busted.
Code flow:
- Importing pygame, random, sys, and math
- Pygame library initialization
- Declaring the required variables
- Declaring variables that store color codes
- Defining balloon class
- Show balloon location using pointer() function
- Display the score
- To close the game
- Function to keep track of the events
- Call to game() function
- Complete code for Balloon Shooter Game using Python
Getting started:
Importing pygame, random, sys, and math :
The very first task we will do in developing the Balloon Shooter Game using Python PyGame is importing all the required libraries and modules for this project.
import pygame
import sys
import random
from math import *
Pygame library initialization:
Now after importing, we will initialize the pygame library.
pygame.init()Explanation:
All imported pygame modules are initialized via pygame.init(). If a module fails, no exceptions will be thrown, but the overall number of successful and unsuccessful inits will be returned as a tuple. Individual modules can be individually initialized, however, pygame.init() initializes all imported pygame modules, which provides a convenient method to get things started. Individual module init() routines will throw exceptions if they fail.
Declaring the required variables
Now after importing, we will declare all the variables that we will use in the development of this project.
width = 700
height = 600

display = pygame.display.set_mode((width, height))
pygame.display.set_caption("CopyAssignment - Balloon Shooter Game")
clock = pygame.time.Clock()

margin = 100
lowerBound = 100

score = 0
Explanation:
Line 1 & 2: The width and height variable will be used to set the size of the display screen
On-Line 3: display basically stores the pygame screen that is shown using the set_mode() function.
Line 4: This line sets the name of the screen to “CopyAssignment – Balloon Shooter Game”. This is done using the set_display function that is used to give the screen a name.
Line 5: Keeps track of time.
On-Line 6 & 7: Stores the margin value
Line 8: Keeps track of the score. This value is updated as the player bust the balloons.
Declaring variables that store color codes:
These variables store the color code in RBG form
white = (230, 230, 230)
lightBlue = (4, 27, 96)
red = (231, 76, 60)
lightGreen = (25, 111, 61)
darkGray = (40, 55, 71)
darkBlue = (64, 178, 239)
green = (35, 155, 86)
yellow = (244, 208, 63)
blue = (46, 134, 193)
purple = (155, 89, 182)
orange = (243, 156, 18)

font = pygame.font.SysFont("Arial", 25)
Explanation:
Line 1 & 11: Variable declaration with values.
Line 12: This font variable holds the font that is used to display the number of balloons busted. This is done using the SysFont() function from the font module that takes in the name of the font and the size of the font.
Defining balloon class:
Now comes the actual coding for the game. First of all, we will define a class and in that class, we will write the logic for functions that can do the following functions:
- A function that moves the balloon
- A function to show the balloon on screen
- To check if the balloon is busted or not:
- Function to reset balloons
Class definition:
class Balloon:
    def __init__(self, speed):
        self.a = random.randint(30, 40)
        self.b = self.a + random.randint(0, 10)
        self.x = random.randrange(margin, width - self.a - margin)
        self.y = height - lowerBound
        self.angle = 90
        self.speed = -speed
        self.proPool= [-1, -1, -1, 0, 0, 0, 0, 1, 1, 1]
        self.length = random.randint(50, 100)
        self.color = random.choice([red, green, purple, orange, yellow, blue])
Explanation:
In this class named Balloon, we have used the __init()__ function to assign the value for speed. We have used the self parameter as a reference to the current class to access variables. We have used to access variables that help to set the angle of the balloon, speed, etc.
The last line, self.color holds the list of different colors that will be selected on a random basis and will set the color of the ballon to that selected color.
A function that moves the balloon:
def move(self):
        direct = random.choice(self.proPool)

        if direct == -1:
            self.angle += -10
        elif direct == 0:
            self.angle += 0
        else:
            self.angle += 10

        self.y += self.speed*sin(radians(self.angle))
        self.x += self.speed*cos(radians(self.angle))

        if (self.x + self.a > width) or (self.x < 0):
            if self.y > height/5:
                self.x -= self.speed*cos(radians(self.angle))
            else:
                self.reset()
        if self.y + self.b < 0 or self.y > height + 30:
            self.reset()
Explanation:
This function holds the logic for the movement of the balloons. We have used the proPool which is a list of 0,1 and -1. On a random basis, any element is selected, and then using the conditionals the angle is set.
The angle of the movement of the balloon is set using the sin function from the math module. angle is passed as a parameter that is set to 90.
Logic to show the balloon on screen:
def show(self):
        pygame.draw.line(display, darkBlue, (self.x + self.a/2, self.y + self.b), (self.x + self.a/2, self.y + self.b + self.length))
        pygame.draw.ellipse(display, self.color, (self.x, self.y, self.a, self.b))
        pygame.draw.ellipse(display, self.color, (self.x + self.a/2 - 5, self.y + self.b - 3, 10, 10))
Explanation:
This function is responsible for displaying the balloons on the screen. The balloon tails are drawn using the line function. And the balloon is drawn using the ellipse function with display, color, and the position passed as parameters.
To check if the balloon is busted or not:
    def burst(self):
        global score
        pos = pygame.mouse.get_pos()

        if isonBalloon(self.x, self.y, self.a, self.b, pos):
            score += 1
            self.reset()
Explanation:
The above code check if the balloon is busted or not. global is a keyword used to set the variable as global.
the pos variable takes the cursor position and then using conditionals this position is compared with the position of the balloon using the isonBalloon() function. The basic logic is that if the position of the cursor and balloon is matched and a MOUSEBUTTONDOWN event occurs then there should be an increase in score. And so If the position matches then the value in the score variable is increased by 1.
Function to reset balloons:
    def reset(self):
        self.a = random.randint(30, 40)
        self.b = self.a + random.randint(0, 10)
        self.x = random.randrange(margin, width - self.a - margin)
        self.y = height - lowerBound
        self.angle = 90
        self.speed -= 0.002
        self.proPool = [-1, -1, -1, 0, 0, 0, 0, 1, 1, 1]
        self.length = random.randint(50, 100)
        self.color = random.choice([red, green, purple, orange, yellow, blue])
Explanation:
This actually resets the balloon’s position. When the balloons are busted and when the score is increased, the reset() function is called
balloons = []
noBalloon = 10
for i in range(noBalloon):
    obj = Balloon(random.choice([1, 1, 2, 2, 2, 2, 3, 3, 3, 4]))
    balloons.append(obj)

def isonBalloon(x, y, a, b, pos):
    if (x < pos[0] < x + a) and (y < pos[1] < y + b):
        return True
    else:
        return False
Show balloon location using pointer() function
def pointer():
    pos = pygame.mouse.get_pos()
    r = 25
    l = 20
    color = lightGreen
    for i in range(noBalloon):
        if isonBalloon(balloons[i].x, balloons[i].y, balloons[i].a, balloons[i].b, pos):
            color = red
    pygame.draw.ellipse(display, color, (pos[0] - r/2, pos[1] - r/2, r, r), 4)
    pygame.draw.line(display, color, (pos[0], pos[1] - l/2), (pos[0], pos[1] - l), 4)
    pygame.draw.line(display, color, (pos[0] + l/2, pos[1]), (pos[0] + l, pos[1]), 4)
    pygame.draw.line(display, color, (pos[0], pos[1] + l/2), (pos[0], pos[1] + l), 4)
    pygame.draw.line(display, color, (pos[0] - l/2, pos[1]), (pos[0] - l, pos[1]), 4)

def lowerPlatform():
    pygame.draw.rect(display, darkGray, (0, height - lowerBound, width, lowerBound))
Explanation:
This function is responsible for showing the location of balloons on the display screen. At first, we initialized variable pos() that gets the position of the mouse cursor and declared variables l, r, and color.
We then used a for loop that runs in the range of 10. And as the loop runs the balloons that are made of a line and two ellipses are displayed continuously. Their position is decided using the pos, l, and r variables.
In the last line, we defined a function named lowerPlatform() that will display a dark grey colored rectangle at the bottom of the screen on white the score will be displayed.
Display the score:
def showScore():
    scoreText = font.render("Balloons Bursted : " + str(score), True, white)
    display.blit(scoreText, (150, height - lowerBound + 50))
Explanation:
This function’s main logic is to keep the track of the score. The text “Balloons Bursted” is displayed using the render() function and is displayed in white color.
To close the game:
def close():
    pygame.quit()
    sys.exit()
Explanation:
Whenever the user wants to quit the game, the function close() is called and this function contains:
pygame.quit: This actually runs that code whose main purpose is to deactivate the pygame library
sys.exit(): This is used in order to simply close the program without creating any dialogue box.
To keep track of the events:
def game():
    global score
    loop = True

    while loop:
        for event in pygame.event.get():
            if event.type == pygame.QUIT:
                close()
            if event.type == pygame.KEYDOWN:
                if event.key == pygame.K_q:
                    close()
                if event.key == pygame.K_r:
                    score = 0
                    game()

            if event.type == pygame.MOUSEBUTTONDOWN:
                for i in range(noBalloon):
                    balloons[i].burst()

        display.fill(lightBlue)

        for i in range(noBalloon):
            balloons[i].show()

        pointer()

        for i in range(noBalloon):
            balloons[i].move()


        lowerPlatform()
        showScore()
        pygame.display.update()
        clock.tick(60)
Explanation:
This is the main function of this code and here we have used a while loop in order to compare the events that are happening during the game and take steps accordingly.
We used event.type() to compare the events. If the player wants to quit then the QUIT event takes place. If the player tries to bust the balloons then the MOUSEBUTTONDOWN event takes place.
We used a fill function of the display module to fill the colour of the screen. In the end, we called two functions lowerPlatform() which will display a rectangle and showScore() which will show the scores on that rectangle.
Call to game() function:
game()Explanation:
This is simply a call to the game() function because in order to start the game the call to this function is important
Complete code for Balloon Shooter Game using Python
import pygame
import sys
import random
from math import *

pygame.init()

width = 700
height = 600

display = pygame.display.set_mode((width, height))
pygame.display.set_caption("CopyAssignment - Balloon Shooter Game")
clock = pygame.time.Clock()

margin = 100
lowerBound = 100

score = 0

white = (230, 230, 230)
lightBlue = (4, 27, 96)
red = (231, 76, 60)
lightGreen = (25, 111, 61)
darkGray = (40, 55, 71)
darkBlue = (64, 178, 239)
green = (35, 155, 86)
yellow = (244, 208, 63)
blue = (46, 134, 193)
purple = (155, 89, 182)
orange = (243, 156, 18)

font = pygame.font.SysFont("Arial", 25)

class Balloon:
    def __init__(self, speed):
        self.a = random.randint(30, 40)
        self.b = self.a + random.randint(0, 10)
        self.x = random.randrange(margin, width - self.a - margin)
        self.y = height - lowerBound
        self.angle = 90
        self.speed = -speed
        self.proPool= [-1, -1, -1, 0, 0, 0, 0, 1, 1, 1]
        self.length = random.randint(50, 100)
        self.color = random.choice([red, green, purple, orange, yellow, blue])

    def move(self):
        direct = random.choice(self.proPool)

        if direct == -1:
            self.angle += -10
        elif direct == 0:
            self.angle += 0
        else:
            self.angle += 10

        self.y += self.speed*sin(radians(self.angle))
        self.x += self.speed*cos(radians(self.angle))

        if (self.x + self.a > width) or (self.x < 0):
            if self.y > height/5:
                self.x -= self.speed*cos(radians(self.angle))
            else:
                self.reset()
        if self.y + self.b < 0 or self.y > height + 30:
            self.reset()

    def show(self):
        pygame.draw.line(display, darkBlue, (self.x + self.a/2, self.y + self.b), (self.x + self.a/2, self.y + self.b + self.length))
        pygame.draw.ellipse(display, self.color, (self.x, self.y, self.a, self.b))
        pygame.draw.ellipse(display, self.color, (self.x + self.a/2 - 5, self.y + self.b - 3, 10, 10))

    def burst(self):
        global score
        pos = pygame.mouse.get_pos()

        if isonBalloon(self.x, self.y, self.a, self.b, pos):
            score += 1
            self.reset()

    def reset(self):
        self.a = random.randint(30, 40)
        self.b = self.a + random.randint(0, 10)
        self.x = random.randrange(margin, width - self.a - margin)
        self.y = height - lowerBound
        self.angle = 90
        self.speed -= 0.002
        self.proPool = [-1, -1, -1, 0, 0, 0, 0, 1, 1, 1]
        self.length = random.randint(50, 100)
        self.color = random.choice([red, green, purple, orange, yellow, blue])

balloons = []
noBalloon = 10
for i in range(noBalloon):
    obj = Balloon(random.choice([1, 1, 2, 2, 2, 2, 3, 3, 3, 4]))
    balloons.append(obj)

def isonBalloon(x, y, a, b, pos):
    if (x < pos[0] < x + a) and (y < pos[1] < y + b):
        return True
    else:
        return False

def pointer():
    pos = pygame.mouse.get_pos()
    r = 25
    l = 20
    color = lightGreen
    for i in range(noBalloon):
        if isonBalloon(balloons[i].x, balloons[i].y, balloons[i].a, balloons[i].b, pos):
            color = red
    pygame.draw.ellipse(display, color, (pos[0] - r/2, pos[1] - r/2, r, r), 4)
    pygame.draw.line(display, color, (pos[0], pos[1] - l/2), (pos[0], pos[1] - l), 4)
    pygame.draw.line(display, color, (pos[0] + l/2, pos[1]), (pos[0] + l, pos[1]), 4)
    pygame.draw.line(display, color, (pos[0], pos[1] + l/2), (pos[0], pos[1] + l), 4)
    pygame.draw.line(display, color, (pos[0] - l/2, pos[1]), (pos[0] - l, pos[1]), 4)

def lowerPlatform():
    pygame.draw.rect(display, darkGray, (0, height - lowerBound, width, lowerBound))

def showScore():
    scoreText = font.render("Balloons Bursted : " + str(score), True, white)
    display.blit(scoreText, (150, height - lowerBound + 50))

def close():
    pygame.quit()
    sys.exit()

def game():
    global score
    loop = True

    while loop:
        for event in pygame.event.get():
            if event.type == pygame.QUIT:
                close()
            if event.type == pygame.KEYDOWN:
                if event.key == pygame.K_q:
                    close()
                if event.key == pygame.K_r:
                    score = 0
                    game()

            if event.type == pygame.MOUSEBUTTONDOWN:
                for i in range(noBalloon):
                    balloons[i].burst()

        display.fill(lightBlue)

        for i in range(noBalloon):
            balloons[i].show()

        pointer()

        for i in range(noBalloon):
            balloons[i].move()


        lowerPlatform()
        showScore()
        pygame.display.update()
        clock.tick(60)

game()
Output:

Video output
EndNote:
We hope this article on Balloon Shooter Game using Python PyGame was helpful and was full of learnings for our readers. So finally, we are done with the coding for this game. We added many functionalities to this game from our end but now is your time to add some more and make this game extra amazing. Use different modules of the pygame library to add other features like sound, image, etc. And also try making this game for two players, if possible. But all in all, try something new.
Pygame community also accepts and showcases the projects developed by the programmer on their official website. Check out here: Pygame official projects showcase
Thank you for visiting our website.
Also Read:
Tags-> class 12th python project, class 12th python programming, GUI python project, game in python, ballon shooter game in python pygame, ballon shooter game using pygame python.
Alright, this may be something where you need/desire/end up with multiple reviews — since changing this from it’s current (procedural) style to OOP is (very) unlikely to be something someone new to OOP gets right first time.
But, there are certain aspects of this code that could be made better even in a procedural style — so I’ll start with these…
Decomposition
Decomposition, or «functional decomposition» is important in all structured programming paradigms (which includes both OOP and procedural programming).
One of the most elementary steps in this process is to construct your programs using modularity and hierarchies.
Structurally, using different scopes for different things is important in creating conceptually seperated ‘modules’.
For example, in your program the variable purple (a color, obviously), is in the same scope as the variable vodka (in image for a power-up item). Logically speaking, an image and a color do not belong in the same place — they should be separated (into ‘modules‘, of some logical nature).
For example, instead of:
black = [0, 0, 0]
white = [255, 255, 255]
red = [255, 0, 0]
orange = [255, 102, 0]
yellow = [255, 255, 0]
green = [0, 255, 0]
blue = [0, 0, 255]
purple = [128, 0, 128]
(which are ALL in the __main__ scope,) you could have used a dictionary (Python’s dict) data structure, like this:
colors={
    "black" : [0, 0, 0],
    "white" : [255, 255, 255],
    "red" : [255, 0, 0],
    "orange" : [255, 102, 0],
    "yellow" : [255, 255, 0],
    "green" : [0, 255, 0],
    "blue" : [0, 0, 255],
    "purple" : [128, 0, 128]
}
This would mean, instead of using yellow, you would now use colors["yellow"]. This not only helps you structure your program’s code, but also makes it clearer what something is. This is probably not a big deal for «yellow», but when scrolling through and seeing vodka, rather than images["vodka"], it can create confusion.
Note: in an object oriented design, you may wish to decompose these to a class or subclass rather than using a dictionary.
This same decomposition concept could also be used in your twenty lines of sprite loading!
Don’t Repeat Yourself (DRY)
Some of your code, for example the following block of sprite definitions, is VERY repetitive…
gameover = loadSprite('images/gameover.png', screen_w, screen_h)
background = loadSprite('images/background.png', screen_w, screen_h)
menu = loadSprite('images/menu.png', screen_w, screen_h)

item = loadSprite('images/item.png', block_s, block_s)
vodka = loadSprite('images/powerup.png', block_s, block_s)
wall = loadSprite('images/wall.png', block_s, block_s)

leadup = loadSprite('images/leadup.png', block_s, block_s)
leaddown = loadSprite('images/leaddown.png', block_s, block_s)
leadright = loadSprite('images/leadright.png', block_s, block_s)
leadleft = loadSprite('images/leadleft.png', block_s, block_s)

enemyup = loadSprite('images/enemyup.png', block_s, block_s)
enemydown = loadSprite('images/enemydown.png', block_s, block_s)
enemyright = loadSprite('images/enemyright.png', block_s, block_s)
enemyleft = loadSprite('images/enemyleft.png', block_s, block_s)

bulletup = loadSprite('images/bulletup.png', block_s, block_s)
bulletdown = loadSprite('images/bulletdown.png', block_s, block_s)
bulletright = loadSprite('images/bulletright.png', block_s, block_s)
bulletleft = loadSprite('images/bulletleft.png', block_s, block_s)
Generally, any time your have many lines like this that are largely the same, you’re better off using some sort of loop to construct a data structure to contain them. For example:
img_dir = "images/"
screens = {
    "gameover" : 'gameover.png',
    "background" : 'background.png',
    "menu" : 'menu.png'
}
for screen in screens.keys():
    screens[screen]=loadSprite(img_dir+screens[screen], screen_w, screen_h)

sprites = {
    "item" : 'item.png', "vodka" : 'powerup.png', "wall" : 'wall.png',
    "leadup" : 'leadup.png', "leaddown" : 'leaddown.png', "leadright" : 'leadright.png', "leadleft" : 'leadleft.png',
    "enemyup" : 'enemyup.png', "enemydown" : 'enemydown.png', "enemyright" : 'enemyright.png', "enemyleft" : 'enemyleft.png',
    "bulletup" : 'bulletup.png', "bulletdown" : 'bulletdown.png', "bulletright" : 'bulletright.png', "bulletleft" : 'bulletleft.png'
}
for sprite in sprites.keys():
    sprites[sprite]=loadSprite(img_dir+sprites[sprite], block_s, block_s)
This has several advantages;
-
Each thing is specified once. Imagine if you moved our images to
imgs/rather thanimages/— this way you need only change 1 variable (img_dir) on 1 line (rather than editing 20 lines). -
You change the name/signature of the
loadSpritefunction. 2 lines to edit rather than 20, etc.
It is fairly apparent that your game world is using square tiles, thus the x and y of the sprites (as oppose to the screens, such as ‘background»
You may also wish to alter your loadSprite function from:
def loadSprite(path, x, y):
    return pygame.transform.scale((pygame.image.load(path).convert_alpha()),(x,y))
to something which either uses default arguments (x and y defaulting to block_s), or which allows either a tile size (square) OR x and Y (rectangle) to be supplied. For example:
 def loadSprite(path, x, y=None):
    return pygame.transform.scale((pygame.image.load(path).convert_alpha()),(x,x if y is None else y))
On to the OOP!
Your program currently has a number (7, actually) of global variables:
FPSclockblock_sscreen_wscreen_hscreenfont
(That is, excluding the 8 colors and 18 sprites that I already mentioned).
These pretty much ALL belong in some sort of class. Probably named something like Game, World, Engine, etc. This would provide a place for all of the data (variables) and behavior (functions, called methods once they’re in a class) of the game itself.
Using the hierarchies idea from the decomposition concept, this Game class could hierarchically contain (i.e. be the parent of,) the sprites (or images) and colors data structures created earlier.
The line pygame.init() would go into the constructor, rather than being in the main program body.
Each of the 3 global functions; message, loadMap, and mainLoop could then be made into methods of that class.
Note: the playMusic and loadSprite global functions may or may not be promoted to methods. They seem to me more like helper functions for PyGame, rather than explicit behaviors of your Game/World.
Your main()… monster?
This function is 153 lines of code, with a cyclomatic complexity of around 54!
I really don’t even want to begin on it until the program structure (everything else I’ve talked about) is improved.
However, I will just say that you CLEARLY need decomposition here! Methods should always have a complexity less than 7, so this function would need to be decomposed into around 8 other (smaller) functions. Although, from scanning over it and looking at all your loop conditions (like while True, etc) I think you can probably made it less complex.
As I said at the start of this answer, this may be something where you need/desire/end up with multiple reviews. You can refactor your code and post another question with the new (OOP structured) version (then put a comment on this question pointing to it, etc).
Subscribe to Tech With Tim!
In this tutorial we are going to be implementing projectiles.
Projectile Class
The first thing we are going to do is create a projectile class.
class projectile(object):
    def __init__(self,x,y,radius,color,facing):
        self.x = x
        self.y = y
        self.radius = radius
        self.color = color
        self.facing = facing
        self.vel = 8 * facing

    def draw(self,win):
        pygame.draw.circle(win, self.color, (self.x,self.y), self.radius)
Modifying the Player Class
Because we are going to be shooting bullets left or right we need to ensure our character is always facing left or right. This required modifying the player.draw method and adding another attribute of standing to our player.
class player(object):
    def __init__(self,x,y,width,height):
        self.x = x
        self.y = y
        self.width = width
        self.height = height
        self.vel = 5
        self.isJump = False
        self.left = False
        self.right = False
        self.walkCount = 0
        self.jumpCount = 10
        self.standing = True

    def draw(self, win):
        if self.walkCount + 1 >= 27:
            self.walkCount = 0

        if not(self.standing):
            if self.left:
                win.blit(walkLeft[self.walkCount//3], (self.x,self.y))
                self.walkCount += 1
            elif self.right:
                win.blit(walkRight[self.walkCount//3], (self.x,self.y))
                self.walkCount +=1
        else:
            if self.right:
                win.blit(walkRight[0], (self.x, self.y))
            else:
                win.blit(walkLeft[0], (self.x, self.y))
Modifying the Main Loop
We also need to modify our main loop to ensure our character is always facing left or right.
man = player(200, 410, 64,64)
run = True
while run:
    clock.tick(27)

    for event in pygame.event.get():
        if event.type == pygame.QUIT:
            run = False

    keys = pygame.key.get_pressed()

    if keys[pygame.K_LEFT] and man.x > man.vel:
        man.x -= man.vel
        man.left = True
        man.right = False
        man.standing = False # NEW
    elif keys[pygame.K_RIGHT] and man.x < 500 - man.width - man.vel:
        man.x += man.vel
        man.right = True
        man.left = False
        man.standing = False # NEW
    else:
        main.standing = True # NEW (removed two lines)
        man.walkCount = 0

    if not(man.isJump):
        if keys[pygame.K_UP]:
            man.isJump = True
            man.right = False
            man.left = False
            man.walkCount = 0
    else:
        if man.jumpCount >= -10:
            neg = 1
            if man.jumpCount < 0:
                neg = -1
            man.y -= (man.jumpCount ** 2) * 0.5 * neg
            man.jumpCount -= 1
        else:
            man.isJump = False
            man.jumpCount = 10

    redrawGameWindow()
Setting up The Projectiles
The first step is to create a list which will store all of our bullet objects.
bullets = [] # This goes right above the while loop
Now we are going to add a for loop into our main loop that will move our bullets and remove them if they have left the screen.
# Goes inside the while loop

for bullet in bullets:
    if bullet.x < 500 and bullet.x > 0:
        bullet.x += bullet.vel  # Moves the bullet by its vel
    else:
        bullets.pop(bullets.index(bullet))  # This will remove the bullet if it is off the screen
Shooting the Bullet
We are first going to change our jump key to be the up arrow (just change pygame.K_SPACE to pygame.K_UP). Then we are going to create a new if statement that will check if the space bar is clicked. If it is we will create a new bullet, give it a velocity and start moving it.
# Goes inside the while loop, under keys = ...
if keys[pygame.K_SPACE]:
    if man.left:
        facing = -1
    else:
        facing = 1

    if len(bullets) < 5:  # This will make sure we cannot exceed 5 bullets on the screen at once
        bullets.append(projectile(round(man.x+man.width//2), round(man.y + man.height//2), 6, (0,0,0), facing))
# This will create a bullet starting at the middle of the character
And the last thing to do is to draw our bullets inside redrawGameWindow().
def redrawGameWindow():
    win.blit(bg, (0,0))
    man.draw(win)
    for bullet in bullets:
        bullet.draw(win)

    pygame.display.update()
Full Code
The full code should look like this.
import pygame
pygame.init()

win = pygame.display.set_mode((500,480))

pygame.display.set_caption("First Game")

walkRight = [pygame.image.load('R1.png'), pygame.image.load('R2.png'), pygame.image.load('R3.png'), pygame.image.load('R4.png'), pygame.image.load('R5.png'), pygame.image.load('R6.png'), pygame.image.load('R7.png'), pygame.image.load('R8.png'), pygame.image.load('R9.png')]
walkLeft = [pygame.image.load('L1.png'), pygame.image.load('L2.png'), pygame.image.load('L3.png'), pygame.image.load('L4.png'), pygame.image.load('L5.png'), pygame.image.load('L6.png'), pygame.image.load('L7.png'), pygame.image.load('L8.png'), pygame.image.load('L9.png')]
bg = pygame.image.load('bg.jpg')
char = pygame.image.load('standing.png')

clock = pygame.time.Clock()


class player(object):
    def __init__(self,x,y,width,height):
        self.x = x
        self.y = y
        self.width = width
        self.height = height
        self.vel = 5
        self.isJump = False
        self.left = False
        self.right = False
        self.walkCount = 0
        self.jumpCount = 10
        self.standing = True

    def draw(self, win):
        if self.walkCount + 1 >= 27:
            self.walkCount = 0

        if not(self.standing):
            if self.left:
                win.blit(walkLeft[self.walkCount//3], (self.x,self.y))
                self.walkCount += 1
            elif self.right:
                win.blit(walkRight[self.walkCount//3], (self.x,self.y))
                self.walkCount +=1
        else:
            if self.right:
                win.blit(walkRight[0], (self.x, self.y))
            else:
                win.blit(walkLeft[0], (self.x, self.y))


class projectile(object):
    def __init__(self,x,y,radius,color,facing):
        self.x = x
        self.y = y
        self.radius = radius
        self.color = color
        self.facing = facing
        self.vel = 8 * facing

    def draw(self,win):
        pygame.draw.circle(win, self.color, (self.x,self.y), self.radius)


def redrawGameWindow():
    win.blit(bg, (0,0))
    man.draw(win)
    for bullet in bullets:
        bullet.draw(win)

    pygame.display.update()


#mainloop
man = player(200, 410, 64,64)
bullets = []
run = True
while run:
    clock.tick(27)

    for event in pygame.event.get():
        if event.type == pygame.QUIT:
            run = False

    for bullet in bullets:
        if bullet.x < 500 and bullet.x > 0:
            bullet.x += bullet.vel
        else:
            bullets.pop(bullets.index(bullet))

    keys = pygame.key.get_pressed()

    if keys[pygame.K_SPACE]:
        if man.left:
            facing = -1
        else:
            facing = 1

        if len(bullets) < 5:
            bullets.append(projectile(round(man.x + man.width //2), round(man.y + man.height//2), 6, (0,0,0), facing))

    if keys[pygame.K_LEFT] and man.x > man.vel:
        man.x -= man.vel
        man.left = True
        man.right = False
        man.standing = False
    elif keys[pygame.K_RIGHT] and man.x < 500 - man.width - man.vel:
        man.x += man.vel
        man.right = True
        man.left = False
        man.standing = False
    else:
        man.standing = True
        man.walkCount = 0

    if not(man.isJump):
        if keys[pygame.K_UP]:
            man.isJump = True
            man.right = False
            man.left = False
            man.walkCount = 0
    else:
        if man.jumpCount >= -10:
            neg = 1
            if man.jumpCount < 0:
                neg = -1
            man.y -= (man.jumpCount ** 2) * 0.5 * neg
            man.jumpCount -= 1
        else:
            man.isJump = False
            man.jumpCount = 10

    redrawGameWindow()

pygame.quit()
Jul 15, 2021
3 min read
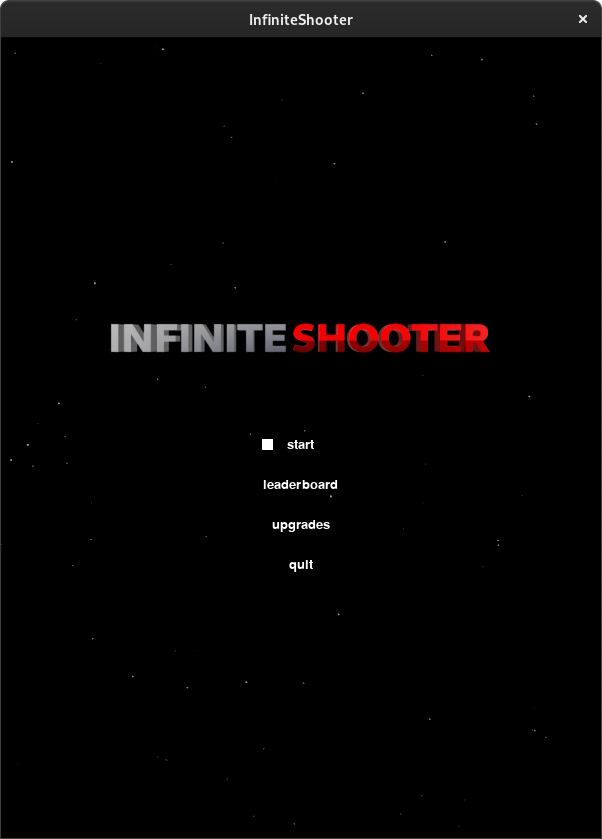
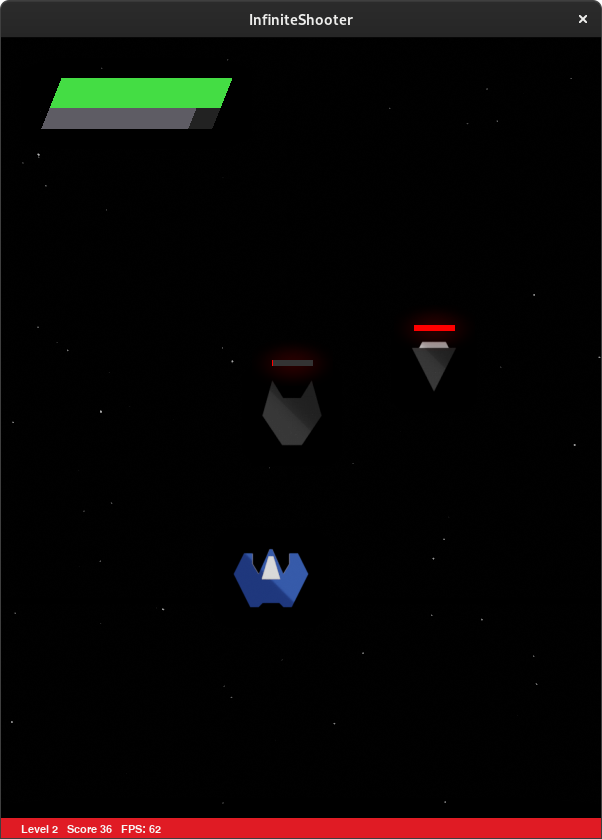
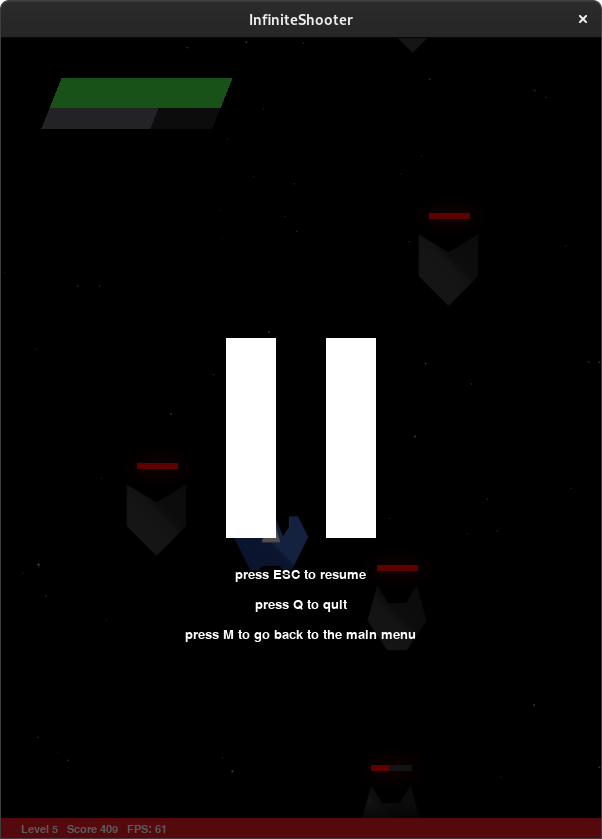
InfiniteShooter
A shooter game written in Python with PyGame.
Installation
- Install Python and
pip. It’s shipped by default in Fedora. - Install PyGame from
pip. To do this, open up a terminal (yes, even on Windows!) and runpip install pygame. - Clone this repository to a tempoary directory. I typically would go
cd /tmp; git clone https://github.com/pastthepixels/InfiniteShooter; cd InfiniteShooteron my Fedora system cd(change directory) to theInfiniteShootersubfolder- Installation:
5a. On GNU/Linux systems, run./install.shfrom a terminal.
5b. On Windows systems, run./install.ps1(a PowerShell script). It should be noted that this simply copies InfiniteShooter to your home directory, and it does not create a shortcut.
NOTE: Technical details for step 5b: The installation script copies a template
.desktopfile to~/.local/share/applicationsand then replaces a filler for the base path of InfiniteShooter for the actual path it was installed to. If I publish this game to, say, Steam (which I want to do in the near future), all installation stuff will be mitigated so you can just play InfiniteShooter without worrying about all this.
Uninstallation
GNU/Linux
cdto~/.infiniteshooteror/usr/share/infiniteshooterdepending on if you installed InfiniteShooter system-wide.- Run
./uninstall.sh.
Windows
- Go to your home folder. On Windows it looks something like this:
C:/Users/$YOURNAME/ - Change directory to
InfiniteShooter. - Run
./uninstall.ps1, a PowerShell script.
Hardware/software requirements
Minimum hardware: I tested this generally on an Intel Pentium processor. Unfortunately, since I don’t know which, I can only garuntee that it works within this range. I’m guessing since there are many performance optimizations and that there is no heavy rendering going on that you can run this on any Pentium, but beware.
Tested hardware: AMD Ryzen 5 3500U with mobile graphics (Lenovo ThinkPad E595)
Recommended hardware: The very best you can muster. I don’t know, RTX or something. But there’s a GPU shortage right now so yeah.
Recommended OS: GNU/Linux
Tested OS: Fedora 34
Notes
- A cautionary tale: I have made a manual keyboard-focused GUI for this game. In the future, you should just use
pygame_gui—pip install pygame_gui. It’s FLOSS and it’s on pygame’s site. - Also you can’t get those sweet GTK4 rounded corners or even a dark title bar because blah blah blah SDL garbage.
- EDIT: Scratch that last part about dark themes, I just did this:
xprop -f _GTK_THEME_VARIANT 8u -set _GTK_THEME_VARIANT "dark" -name "InfiniteShooter"
Contributing
You actually want to contribute to InfiniteShooter? It’ll be great to have you!
Only thing is I only have experience to create repositories to store my software and I’ve never had any experience with contributing with others!
If you have any idea on how this works, please contact me (my address is somewhere in my GitHub profile) and let me know!
Table of contents
What is this? —> This is a way to naviagate
./InfiniteShooter/game.py. Simply hit Ctrl + F and type inloc:followed by the location number to reach different locations. I hope this can be simplified in the future through the use of some kind of bookmarking.
| Location # | Title |
|---|---|
| loc:0.5 | Upgrades |
| loc:1 | Setting and Resetting The Game |
| loc:2 | Functions to Make Scene Things |
| loc:3 | Functions to Blow Up Scene Things |
| loc:4 | Just GUI Things |
| loc:5 | Updates and Checks |
| loc:6 | The Challenge |
| loc:7 | Pausing, resuming, initialization, and main menus |
| loc:8 | Music |
GitHub
https://github.com/pastthepixels/InfiniteShooter

John was the first writer to have joined pythonawesome.com. He has since then inculcated very effective writing and reviewing culture at pythonawesome which rivals have found impossible to imitate.
Previous Post
Work with JSON files in a Pythonically effective way
Next Post
Constructing maps of intellectual influence from publication data

Hey, what is up to people, in this post I gonna share with you a Space shooter game project with complete source code with complete resources. Using this project you will get some ideas and level up your python learning skills or you can add this python project to your resume or portfolio.
Before sharing the code make sure you have installed the required modules. which is required in order to run the game otherwise you will face an error.
random – For generating random numbers. for the occurrence of enemies and other stuff in the game randomly.
os – To command operating system (os) using python.
pygame – To build 2D games in Python. pygame is the most popular python package to build games on python
Library Installation
python is known for his libraries collection. I mean there is also most libraries or python packages for everything all you need to do is just write an import line and boom the python file containing 1000 lines of codes available for you and which makes developer’s work easy.
Before getting started with code we need to install the necessary required module or library. By default random and sys come preinstalled in python. we need to install pygame. For that, you need to write the following command in your terminal or command prompt.
pip install pygameMake sure you have installed python with pip added to the path environment variable.
if you didn’t get then read this article, Make Super Mario Game using Python. in this post I have explained how to install python properly and how you can fix pip isn’t recognized error which is common among beginners.
Resources and Source code
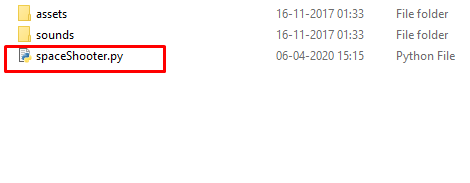
now you need to download the resources, like image assets and audio for the game. Click Here To Download.once the zip file has been downloaded make sure you extract it. This zip file contains images, audio and a .py file where space shooter game code is written in python.
Setup and running
once the zip file has been downloaded. extract it and run the spaceShooter.py file to run the program. To run the code just double tap on it or open it with python IDLE which comes as default python ide when you install python on your computer.
Make sure you have followed the steps properly and installed the required modules or libraries otherwise you will face an error.
Also, don’t forget to check out , Flappy bird game using python – python project
credits: https://github.com/tasdikrahman/spaceShooter