by Didin J. on Oct 24, 2021

In this tutorial, we will show you how to create a web simple web browser in Java using Apache Netbeans IDE. This time, we will use Java Desktop using Swing Framework. This desktop application is a cross-platform application that can run on Microsoft Windows, Mac OS, Linux, etc.
This tutorial is divided into several steps:
- Step #1: Create a New Java Application
- Step #2: Add Required Swing Components
- Step #3: Make a Simple Web Browser Working
- Step #4: Run and Test the Java Web Browser
The flow of this simple web browser is very simple. There’s a JFrame that contains JTextField, JEditorPane, JButton, and JPanel. The JTextField is used to enter the web address. JButton is used to refresh the web browser. JEditorPane is used to display the web page found after entering the web address. JPanel uses to align other components’ positions or layouts.
We assume that you have downloaded and installed Apache Netbeans 12.4 and JDK 11. So, we can start this tutorial as per the steps above.
You can watch the video tutorial on our YouTube channel here.
Step #1: Create a New Java Application
To create a new Java application (Desktop Application), just start the Apache Netbeans 12.4.

Click File -> New Project in the menu or click the box with the plus icon in the toolbar.

Expand the Java with Ant in the categories then choose Java Application in the Projects then click the next button.

Fill the project name (ours: «MySimpleWebBrowser»), leave Project Location and Project Folder as defaults, uncheck the «User Dedicated Folder for Storing Libraries» checkbox, check «Create Main Class checkbox, and change the package name (ours: «com.djamware.MySimpleWebBrowser») then click the Finish button.

Now, we have a Java application created with a single main Java file inside the package.
Step #2: Add Required Swing Components
All required Swing components will be put in the JFrame. For that, create a new JFrame by right-clicking the Project name -> New -> JFrameForm.

The new Frame Form dialog will look like this.

Fill the name (ours: BrowserFrame), leave Project and Location as defaults, choose the package (ours: com.djamware), leave other fields as defaults then click the Finish button.

Resize the JFrame by drag the bottom right of Frame to fit the window. Drag and drop a Panel from the Palette pane to the top left corner of the JFrame.

Expand the JPanel to fill the JFrame vertically.

In the Properties pane -> Properties, find border properties then click the ellipsis button.

In the JPanel — border dialog, choose the Etched Border then click the OK button. Find the vertical size then set the value to 60. Make sure the Horizontal Resizable is checked. Switch to the Properties pane -> Code then change Variable Name to «topPanel».
Next, drag and drop again the Panel then resize to fit the rest of the Frame area and make the border as the previous Panel. Change the Variable Name to «bottomPanel». So the whole JPanel in the JFrame looks like this.

Next, drag and drop the Button component in the palette pane to the left side inside the topPanel. Change the Variable Name to «refreshButton» and change the text to «Refresh».
Next, drag and drop the Text Field from the palette pane to the topPanel right after the refresh button. Change the Variable Name to «addressField» and change the text to «Enter website address».
Next, drag and drop the Editor Pane from the palette pane to the bottomPanel. Resize the editor pane to fit the bottomPanel. Change the Variable Name to «browserPane». So, the whole JFrame look like this.

Step #3: Make a Simple Web Browser Working
To make the simple web browser work, we need to write some codes inside the JFrame class. For that, switch the Design to Source mode in the BrowserForm pane.

Add a method to set the web page to browserPane and the web address text to addressField that is wrapped by the try-catch block.
    private void enterWebsite(String text) {
        try {
            browserPane.setPage(text);
            addressField.setText(text);
        } catch (IOException e) {
            JOptionPane.showMessageDialog(null, "Invalid URL!");
        }
    }
The IOException that is caught will throw the message dialog if the URL from addressField is invalid.
Next, inside the BrowserForm method, add this event handler or action for addressField, browserPane, and refreshButton.
    public BrowserForm() {
        initComponents();

        addressField.addActionListener((ActionEvent event) -> {
            enterWebsite(event.getActionCommand());
        });

        browserPane.addHyperlinkListener((HyperlinkEvent event) -> {
            if (event.getEventType() == HyperlinkEvent.EventType.ACTIVATED) {
                enterWebsite(event.getURL().toString());
            }
        });

        refreshButton.addActionListener((ActionEvent event) -> {
            enterWebsite(addressField.getText());
        });
    }
We are using HyperlinkEvent to catch the typed URL from the addressField then transform it as a page to the browserPane. HyperlinkEvent is used to notify interested parties that something has happened with respect to a hypertext link.
Step #4: Run and Test the Java Web Browser
Before running this Java application, right-click the project name in the Project pane then choose properties.

From the Categories choose Run and change the Main Class to «com.djamware.BrowserForm» by clicking the browse button then choosing that class. Click the OK button.
Next, run this Java application by clicking the play button in the toolbar. Here is what a simple web browser looks like.

Replace the Enter website address text with the valid URL then click Enter key. As you can see above, the website that you enter might not seem as expected because this is just a basic web browser which not compatible with modern web technologies.
That it’s, How To Create A Web Browser In Java using Netbeans. You can get the full source codes from our GitHub.
That just the basic. If you need more deep learning about Java and Spring Framework you can take the following cheap course:
Thanks!
В этом уроке:
— пишем простой браузер
На прошлом уроке мы увидели, что если вызвать Intent с action = ACTION_VIEW и data = Uri-объект с http-адресом, то запускается браузер и отображает содержимое страницы по этому http-адресу. Мы можем самостоятельно сделать простейший браузер, который будет реагировать на такой Intent и просто отобразит страницу. Для этого надо настроить Intent Filter и использовать компонент WebView.
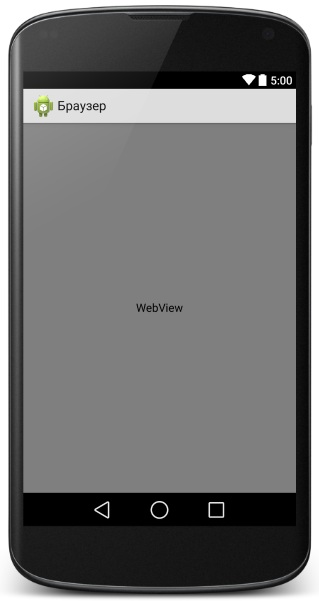
На первом экране приложения у нас будет кнопка, отправляющая Intent. На втором экране будет WebView.
Создадим проект:
Project name: P0321_SimpleBrowser
Build Target: Android 2.3.3
Application name: SimpleBrowser
Package name: ru.startandroid.develop.p0321simplebrowser
Create Activity: MainActivity
Рисуем main.xml
<?xml version="1.0" encoding="utf-8"?>
<LinearLayout
    xmlns:android="http://schemas.android.com/apk/res/android"
    android:layout_width="fill_parent"
    android:layout_height="fill_parent"
    android:orientation="vertical">
        <Button
            android:id="@+id/btnWeb"
            android:layout_width="wrap_content"
            android:layout_height="wrap_content"
            android:text="web">
        </Button>
</LinearLayout>
На экране просто кнопка
Кодим MainActivity.java:
package ru.startandroid.develop.p0321simplebrowser;

import android.app.Activity;
import android.content.Intent;
import android.net.Uri;
import android.os.Bundle;
import android.view.View;
import android.view.View.OnClickListener;

public class MainActivity extends Activity {
  /** Called when the activity is first created. */
  @Override
  public void onCreate(Bundle savedInstanceState) {
    super.onCreate(savedInstanceState);
    setContentView(R.layout.main);

    (findViewById(R.id.btnWeb)).setOnClickListener(new OnClickListener() {
      @Override
      public void onClick(View v) {
        startActivity(new Intent(Intent.ACTION_VIEW, Uri.parse("http://www.ya.ru")));
      }
    });
  }
}
Код немного непривычен. Обратите внимание я нигде не описываю объект класса Button. Метод findViewById возвращает View, и это View поддерживает метод setOnClickListener, который я вызываю. А в методе setOnClickListener я создаю объект, реализующий интерфейс OnClickListener и в нем пишу код в onClick. Также я создаю объект Intent не отдельно, а прямо в методе startActivity. Кода меньше получилось, чем обычно. Может быть вам подойдет такой вариант.
Итак, мы по нажатию на кнопку запускаем Intent, который означает, что мы хотим просмотреть сайт http://www.ya.ru.
Создадим второе Activity. Сначала layout-файл browser.xml:
<?xml version="1.0" encoding="utf-8"?>
<LinearLayout
    xmlns:android="http://schemas.android.com/apk/res/android"
    android:layout_width="match_parent"
    android:layout_height="match_parent"
    android:orientation="vertical">
        <WebView
            android:id="@+id/webView"
            android:layout_width="match_parent"
            android:layout_height="match_parent">
        </WebView>
</LinearLayout>
На экране компонент WebView.
Создаем BrowserActivity.java:
package ru.startandroid.develop.p0321simplebrowser;

import android.app.Activity;
import android.net.Uri;
import android.os.Bundle;
import android.webkit.WebView;

public class BrowserActivity extends Activity {

  @Override
  protected void onCreate(Bundle savedInstanceState) {
    super.onCreate(savedInstanceState);
    setContentView(R.layout.browser);

    WebView webView = (WebView) findViewById(R.id.webView);
    webView.setWebViewClient(new WebViewClient());
    Uri data = getIntent().getData();
    webView.loadUrl(data.toString());
  }
}
Определяем WebView, читаем data из Intent и передаем строку в WebView.
Теперь пропишем Activity в манифесте. К нему нам надо будет добавить Intent Filter, в нем указать action = ACTION_VIEW. А для data мы видим несколько параметров, используем Scheme = http.

Это значит, что Uri объект в Intent должен содержать http-адрес.
Не забываем про Category = Default. Label для BrowserActivity укажите, например, MyBrowser.
Также в манифесте надо добавить Uses Permission = android.permission.INTERNET на вкладке Permissions. Чтобы система дала приложению доступ в интернет.

Все сохраним и запустим приложение. Жмем кнопку и видим выбор: система предлагает нам на выбор системный браузер и наш, только что сделанный. Т.е. Intent c запросом на просмотр http-адреса нашел в системе два Activity, которые в своих Intent Filter заявили, что умеют отображать http-адреса.

Выбираем наше MyBrowser и видим страницу.

Мы увидели, что Activity в наших приложениях могут обрабатывать не только наши придуманные action, но и системные. И, тем самым, создавать альтернативу системным приложениям.
Но, как вы понимаете, мы запросто могли в нашем Activity не использовать WebView и не показывать страницу. Можно было использовать TextView и в нем просто отобразить в виде текста адрес из data. Или накодить http-запрос, который скачал бы эту страницу и отобразил ее html-содержимое. Мы могли вообще забить на http-адрес и показать какую-нибудь картинку левую или просто темный экран.
Т.е. для Activity можно создать Intent Filter, который будет сообщать системе, что приложение умеет что-то, но, при этом, внутри Activity будет какая-нибудь ерунда. Это уже вопросы программерской этики, здравого смысла и адекватности )
Полный код манифест-файла:
<?xml version="1.0" encoding="utf-8"?>
<manifest xmlns:android="http://schemas.android.com/apk/res/android" package="ru.startandroid.develop.p0321simplebrowser" android:versionCode="1" android:versionName="1.0">
        <uses-sdk android:minSdkVersion="10"></uses-sdk>
        <uses-permission android:name="android.permission.INTERNET"></uses-permission>
        <application android:icon="@drawable/ic_launcher" android:label="@string/app_name">
                <activity android:label="@string/app_name" android:name=".MainActivity">
                        <intent-filter>
                                <action android:name="android.intent.action.MAIN"></action>
                                <category android:name="android.intent.category.LAUNCHER"></category>
                        </intent-filter>
                </activity>
                <activity android:label="MyBrowser" android:name="BrowserActivity">
                        <intent-filter>
                                <action android:name="android.intent.action.VIEW"></action>
                                <data android:scheme="http"></data>
                                <category android:name="android.intent.category.DEFAULT"></category>
                        </intent-filter>
                </activity>
        </application>
</manifest>
На следующем уроке:
— хранение данных с помощью Preferences
Присоединяйтесь к нам в Telegram:
— в канале StartAndroid публикуются ссылки на новые статьи с сайта startandroid.ru и интересные материалы с хабра, medium.com и т.п.
— в чатах решаем возникающие вопросы и проблемы по различным темам: Android, Compose, Kotlin, RxJava, Dagger, Тестирование, Performance
— ну и если просто хочется поговорить с коллегами по разработке, то есть чат Флудильня
Android позволяет создать собственное окно для просмотра веб-страниц или даже создать свой клон браузера при помощи элемента WebView. Сам элемент использует движок WebKit и имеет множество свойств и методов. Мы ограничимся базовым примером создания приложения, с помощью которого сможем просматривать страницы в интернете. В последних версиях используется движок от Chromium, но большой разницы в этом нет для простых задач.
Создадим новый проект MyBrowser и сразу заменим код в файле разметки res/layout/activity_main.xml:
<?xml version="1.0" encoding="utf-8"?>
<WebView
    android:id="@+id/webView"
    xmlns:android="http://schemas.android.com/apk/res/android"
    android:layout_width="match_parent"
    android:layout_height="match_parent"/>
Теперь откроем файл активности MainActivity.java и объявим компонент WebView, а также инициализируем его — включим поддержку JavaScript и укажем страницу для загрузки.
// Kotlin
class MainActivity : AppCompatActivity() {

    private lateinit var webView: WebView

    override fun onCreate(savedInstanceState: Bundle?) {
        super.onCreate(savedInstanceState)

        setContentView(R.layout.activity_main)

        webView = findViewById(R.id.webView)
        webView.webViewClient = MyWebViewClient()
        // включаем поддержку JavaScript
        webView.getSettings().setJavaScriptEnabled(true)
        // указываем страницу загрузки
        webView.loadUrl("http://developer.alexanderklimov.ru/android")
    }
}

// Java
private WebView webView;

public void onCreate(Bundle savedInstanceState) {
    super.onCreate(savedInstanceState);

    setContentView(R.layout.activity_main);

    webView = findViewById(R.id.webView);
    // включаем поддержку JavaScript
    webView.getSettings().setJavaScriptEnabled(true);
    // указываем страницу загрузки
    webView.loadUrl("http://developer.alexanderklimov.ru/android");
}
Так как приложение будет использовать интернет, необходимо установить разрешение на доступ к интернету в файле-манифесте.
<uses-permission android:name="android.permission.INTERNET" />
Там же в манифесте модифицируем строчку для экрана, удалив заголовок из нашего приложения (выделено жирным):
<activity android:name=".HelloWebViewActivity"
    android:label="@string/app_name"
    android:theme="@style/Theme.AppCompat.NoActionBar">
Запустим приложение. В нашем распоряжении появился простейший вьювер веб-страниц, но с одним недостатком. Если вы щёлкнете на любой ссылке, то у вас автоматически запустится браузер по умолчанию и новая страница отобразится уже там. Точнее так было раньше. На новых устройствах при запуске приложения сразу открывается браузер.

Чтобы решить данную проблему и открывать ссылки в своей программе, нужно переопределить класс WebViewClient и позволить нашему приложению обрабатывать ссылки. Добавим в коде вложенный класс:
// Kotlin
private class MyWebViewClient : WebViewClient() {
    @TargetApi(Build.VERSION_CODES.N)
    override fun shouldOverrideUrlLoading(view: WebView, request: WebResourceRequest): Boolean {
        view.loadUrl(request.url.toString())
        return true
    }

    // Для старых устройств
    override fun shouldOverrideUrlLoading(view: WebView, url: String): Boolean {
        view.loadUrl(url)
        return true
    }
}

// Java
private class MyWebViewClient extends WebViewClient {
    @TargetApi(Build.VERSION_CODES.N)
    @Override
    public boolean shouldOverrideUrlLoading(WebView view, WebResourceRequest request) {
        view.loadUrl(request.getUrl().toString());
        return true;
    }

    // Для старых устройств
    @Override
    public boolean shouldOverrideUrlLoading(WebView view, String url) {
        view.loadUrl(url);
        return true;
    }
}
Затем в методе onCreate() определим экземпляр MyWebViewClient. Он может находиться в любом месте после инициализации объекта WebView:
// Kotlin
webView.webViewClient = MyWebViewClient()

// Java
webView.setWebViewClient(new MyWebViewClient());
Теперь в нашем приложении создан WebViewClient, который позволяет загружать любой указанный URL, выбранный в WebView, в сам контейнер WebView, а не запускать браузер. За данную функциональность отвечает метод shouldOverrideUrlLoading(WebView, String), в котором мы указываем текущий WebView и нужный URL. Возвращаемое значение true говорит о том, что мы не нуждаемся в запуске стороннего браузера, а самостоятельно загрузим контент по ссылке. В версии API 24 добавили перегруженную версию метода, учитывайте это обстоятельство.
Повторно запустите программу и убедитесь, что ссылки загружаются теперь в самом приложении. Но теперь возникла ещё одна проблема. Мы не можем вернуться к предыдущей странице. Если мы нажмём на кнопку «BACK» (Назад) на устройстве, то просто закроем своё приложение. Для решения новой проблемы нам необходимо обрабатывать нажатие кнопки «BACK». Добавляем новый метод:
// Kotlin
override fun onBackPressed() {
    if (webView.canGoBack()) {
        webView.goBack()
    } else {
        super.onBackPressed()
    }
}

// Java
@Override
public void onBackPressed() {
    if(webView.canGoBack()) {
        webView.goBack();
    } else {
        super.onBackPressed();
    }
}
Мы должны проверить, что WebView поддерживает навигацию на предыдущую страницу. Если условие верно, тогда вызывается метод goBack(), который возвращает нас на предыдущую страницу на один шаг назад. Если таких страниц набралось несколько, то мы можем последовательно вернуться к самой первой странице. При этом метод всегда будет возвращать значение true. Когда мы вернёмся на самую первую страницу, с которой начали путешествие по интернету, то вернётся значение false и обработкой нажатия кнопки BACK займётся уже сама система, которая закроет экран приложения.
Запустите приложение ещё раз. У вас появился свой собственный веб-браузер, позволяющий ходить по ссылкам и возвращаться на предыдущую страницу. Изучив документацию, вы можете оснастить приложение и другим вкусными плюшками для своего браузера.

Если вам нужно часть ссылок, ведущих на ваш сайт открывать в браузере, а локальные ссылки открывать в приложении, то применяйте условие с разными возвращаемыми значениями.
public class MyWebViewClient extends WebViewClient {

    @Override
    public boolean shouldOverrideUrlLoading(WebView view, String url) {
        if(Uri.parse(url).getHost().endsWith("developer.alexanderklimov.ru")) {
            return false;
        }

        Intent intent = new Intent(Intent.ACTION_VIEW, Uri.parse(url));
        view.getContext().startActivity(intent);
        return true;
    }
}
Универсальный метод, который все локальные ссылки откроет в приложении, остальные в браузере (меняем одну строчку):
public class MyAppWebViewClient extends WebViewClient {
    @Override
    public boolean shouldOverrideUrlLoading(WebView view, String url) {
        if(Uri.parse(url).getHost().length() == 0) {
            return false;
        }

        Intent intent = new Intent(Intent.ACTION_VIEW, Uri.parse(url));
        view.getContext().startActivity(intent);
        return true;
    }

}
А сейчас немного усложним пример, чтобы у пользователя появилась альтернатива стандартным браузерам.
Чтобы было понятнее, переделаем пример следующим образом. Создайте две активности. На первой активности разместите кнопку для перехода на вторую активность, а на второй активности разместите компонент WebView.
В манифесте прописываем у второй активности фильтр.
<activity
    android:name=".SecondActivity"
    android:label="@string/title_activity_second" >
    <intent-filter>
        <action android:name="android.intent.action.VIEW" />
        <action android:name="ru.alexanderklimov.Browser" />
        <category android:name="android.intent.category.DEFAULT" />
        <data android:scheme="http" />
    </intent-filter>
</activity>
Код для кнопки для перехода на вторую активность.
public void onClick(View view) {
    Intent intent = new
            Intent("ru.alexanderklimov.Browser");
    intent.setData(Uri.parse("http://developer.alexanderklimov.ru/android/"));
    startActivity(intent);
}
Мы создали собственное намерение с указанием фильтра и предоставили данные — адрес сайта.
Вторая активность должна принять данные:
package ru.alexanderklimov.testapplication;

import android.net.Uri;
import android.support.v7.app.AppCompatActivity;
import android.os.Bundle;
import android.webkit.WebView;
import android.webkit.WebViewClient;

public class SecondActivity extends AppCompatActivity {

    @Override
    protected void onCreate(Bundle savedInstanceState) {
        super.onCreate(savedInstanceState);
        setContentView(R.layout.activity_second);

        Uri url = getIntent().getData();
        WebView webView = findViewById(R.id.webView);
        webView.setWebViewClient(new Callback());
        webView.loadUrl(url.toString());
    }

    private class Callback extends WebViewClient {
        @Override
        public boolean shouldOverrideUrlLoading
                (WebView view, String url) {
            return(false);
        }
    }
}
В фильтре для второй активности мы указали два действия.
<action android:name="android.intent.action.VIEW" />
<action android:name="ru.alexanderklimov.Browser" />
Это означает, что любые активности (читай, приложения) могут вызвать вашу активность с мини-браузером по такому же принципу. Запустите в студии в отдельном окне любой старый проект или создайте новый и добавьте в него кнопку и пропишите тот же код, который мы использовали для щелчка кнопки.
Запустите второе приложение (первое приложение можно закрыть) и нажмите на кнопку. У вас запустится не первое приложение с начальным экраном, а сразу вторая активность с мини-браузером. Таким образом, любое приложение может запустить браузер, не зная имени класса вашей активности, а используя только строку «ru.alexanderklimov.Browser», передаваемую в Intent. При этом ваша активность с браузером должна иметь категорию по умолчанию и данные. Напомню:
<category android:name="android.intent.category.DEFAULT" />
<data android:scheme="http" />
Вы можете представить свою строку в виде строковой константы и сообщить всем потенциальным пользователям вашего браузера, как они могут запустить его у себя. Но в Android уже есть такая готовая константа ACTION_VIEW, которая по справке документации представляет собой следующее:
public static final java.lang.String ACTION_VIEW = "android.intent.action.VIEW";
Перепишем код для кнопки у второго приложения
Intent(android.content.Intent.ACTION_VIEW,
Uri.parse("http://developer.alexanderklimov.ru/android/"));
startActivity(intent);
Что произойдёт на этот раз? Мы помним, что у нас прописано два действия, включая и android.intent.action.VIEW. А значит наше первое приложение с браузером тоже должно распознавать эту команду, когда какое-то приложение у пользователя использует этот код. На эмуляторе как минимум есть одна такая программа «Browser», и теперь к ней добавилась наша вторая активность из первого приложения. На экране появится выбор из двух приложений.

А если удалить все альтернативные браузеры и оставить только вашу программу, то и выбора не будет. Ваш браузер станет основным. И если какое-то приложение захочет запустить веб-страницу указанным способом, то откроется ваша программа.
Небольшое замечание. Если заменить последнюю строчку на такую:
startActivity(Intent.createChooser(intent, "Мяу..."));
То в окне выбора программы вместо верхней строки «Open with» или её локального перевода появится ваша строка. Но не это главное. Если по каким-то причинам на устройстве не окажется ни одного браузера, то данный вариант кода не вызовет краха приложения, в отличие от первоначального варианта. Поэтому используйте предложенный вариант ради надёжности.
Относительно недавно увидел новый способ открытия ссылок вне браузера. Необходимо использовать флаг FLAG_ACTIVITY_REQUIRE_NON_BROWSER.
val url = "http://developer.alexanderklimov.ru"
val intent = Intent(ACTION_VIEW, Uri.parse(url)).apply{
    flag = FLAG_ACTIVITY_NEW_TASK or FLAG_ACTIVITY_REQUIRE_NON_BROWSER
}
Дополнительное чтение
WebView
Обсуждение статьи на форуме.
Реклама
Submitted by mehfuza on Sunday, September 8, 2013 — 18:16.
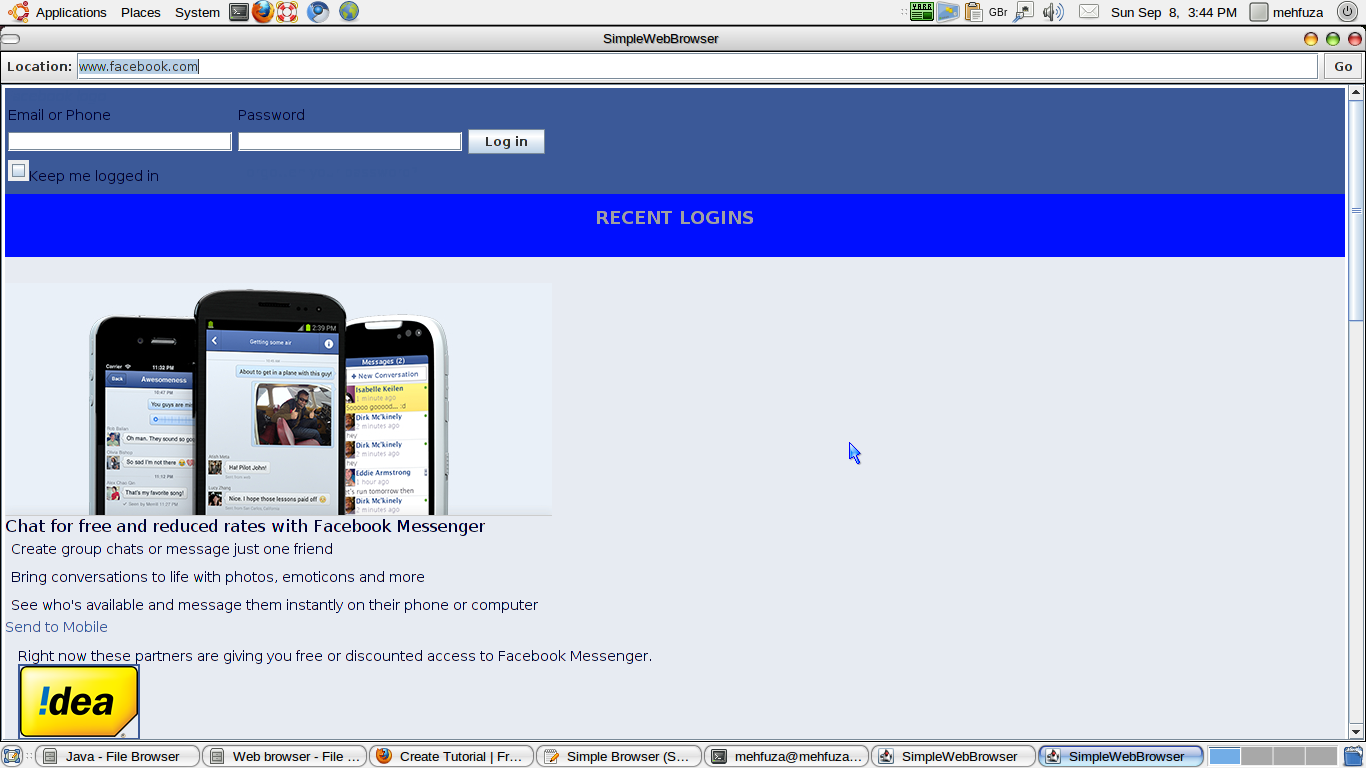
In this tutorial we will see how to create a simple web browser. It contains an address bar where a user can type the address and a go button which when clicked loads the web page. For displaying the web pages we require JEditor Pane and HyperlinkListener is required to respond when the user clicks on a link in the document. Following are the steps for creating the web browser.
Step 1: Defining the constructor of the class
The main class extends the JPanel. First we will set it’s background color and layout as a Border Layout ans set border for it as follows.
setBackground(Color.BLACK);
Scroll Pane is added to the edit pane and hyperlink listener is registered with this class. Edit Pane is placed in the center of the panel.
editPane.setEditable(false);
editPane.addHyperlinkListener(new LinkListener());
Next a toolbar is created and added to the north of the panel. A label, text field for location input and go button are added to this tool bar. Action Listener is added to the go button and location input field to load the url.
toolbar.setFloatable(false);
locationInput = new JTextField("www.sourcecodester.com", 40); //home page
locationInput.addActionListener(goListener);
goButton.addActionListener(goListener);
toolbar.add( new JLabel(" Location: "));
toolbar.add(locationInput);
toolbar.addSeparator(new Dimension(5,0)); //after 5 pixel of space the go button is added
toolbar.add(goButton);
Step 2: Implementing Hyperlink Listener
Hyperlink Listener contains a single function as hyperlinkUpdate() which is defined as follows. If hyperlink is clicked then URL of that hyperlink is loaded in the edit pane by calling loadURL() method.
loadURL(evt.getURL());
}
Step 3: Defining loadURL() method
It loads the document at the specified URL into the edit pane. try catch block is used to handle errors if occurred any while changing the contents of the edit pane. JEditPane’s setPage() method is used to set the edit pane’s content.
private void loadURL(URL url) {
try {
editPane.setPage(url);
}
editPane.setContentType("text/plain");
editPane.setText( "Sorry, the requested document was not foundn"
+"or cannot be displayed.nnError:" + e);
}
}
Step 4: ActionListener for Go button and Location input field
Here the location input field’s data is stored in a string variable and checked whether its format is wrong or right. If the format is correct then URL is created and loadURL() method is called to load that URL else suitable message is displayed.
public void actionPerformed(ActionEvent evt) {
try {
String location = locationInput.getText().trim(); //gets the text and removes the spaces
if (location.length() == 0) //empty URL
if (! location.contains("://")) // "://" if it not present in the string
location = "http://" + location;
url = new URL(location); //create url from string
}
JOptionPane.showMessageDialog(SimpleWebBrowser.this,
"The Location input box does notnccontain a legal URL.");
return;
}
loadURL(url);
locationInput.selectAll();
locationInput.requestFocus();
}
Step 5: main() for defining different properties of frame
A frame is created and object of the main class(SimpleWebBrowser) is set as content of the frame as it is a panel. Location of the frame is centered using Toolkit as follows.
public static void main(String[] args) {
JFrame window = new JFrame("SimpleWebBrowser"); // Title of web browser
SimpleWebBrowser content = new SimpleWebBrowser();
window.setContentPane(content);
window.setSize(600,500);
Dimension screenSize = Toolkit.getDefaultToolkit().getScreenSize();
window.setLocation( (screenSize.width - window.getWidth())/2, (screenSize.height - window.getHeight())/2 );//center the frame
window.setDefaultCloseOperation( JFrame.EXIT_ON_CLOSE );
window.setVisible(true);
}
- 5114 views
Is it possible to use Java to build a web browser like Internet Explorer that will open all the web pages and display all the contents?
![]()
asked Jun 17, 2010 at 19:00
![]()
The only valid answer to that question is:
Yes, it’s possible to use Java to build a web browser.
However, a web browser is an exceptionally complex piece of software. Even Google, when building its Google Chrome browser, used existing technology to do it, rather than inventing their own browser from scratch.
If your goal is anything other than building and marketing your own browser, you may want to reconsider what exactly you want to accomplish, in order to find a more direct approach.
answered Jun 17, 2010 at 19:02
![]()
VoteyDiscipleVoteyDisciple
37k5 gold badges95 silver badges96 bronze badges
4
I advise you to take a look at the Lobo Browser project, an open-source java-written web browser. Take a look at the source and see how they did it.
answered Jun 17, 2010 at 19:04
![]()
luvieereluvieere
36.9k18 gold badges125 silver badges179 bronze badges
1
Yes, it is possible. JWebPane is a work in progress migration of Webkit. It is supposed to be included in JDK7 but I wouldn’t hold my breath.
JWebPane browser = new JWebPane();
new JFrame("Browser").add(browser);
browser.load(someURL);
![]()
answered Jun 17, 2010 at 21:11
![]()
OscarRyzOscarRyz
195k112 gold badges381 silver badges566 bronze badges
4
Yes, it’s possible, and here’s what you would need to start looking at.
First, search for an HTML renderer in Java. An example would be JWebEngine. You can start by manually downloading HTML pages and verifying that you can view them.
Second, you need to handle the networking piece. Read a tutorial on sockets, or use an HTTP Client such as the Apache HTTPClient project.
Edit:
Just to add one more thought, you should be honest with yourself about why you would work on this project. If it’s to rebuild IE, FF, that is unrealistic. However, what you might get out of it is learning what the major issues are with browser development, and that may be worthwhile.
answered Jun 17, 2010 at 19:06
![]()
James KingsberyJames Kingsbery
7,1982 gold badges40 silver badges67 bronze badges
1
Take a look at the JEditorPane class. It can be used to render HTML pages and could form the basis of a simple browser.
answered Jun 17, 2010 at 19:29
![]()
AdamskiAdamski
53.6k14 gold badges112 silver badges152 bronze badges
Yes. One of the projects in Java After Hours shows you how to build a simple web browser. It’s not nearly as full-featured as IE or Firefox of course (it’s only one chapter in the book), but it will show you how to get started.
answered Jun 21, 2010 at 12:45
![]()
Bill the LizardBill the Lizard
395k208 gold badges561 silver badges876 bronze badges
0
The hardest thing will be the rendering component. Java7 will include JWebPane, that internally uses WebKit. Here you can find some screenshots.
answered Jun 17, 2010 at 21:05
![]()
gimenetegimenete
2,6291 gold badge20 silver badges16 bronze badges
0
I develop this browser for my college project may be this helpful for you
My Button is open source java web browser.
Develop for school and college projects and learning purpose.
Download source code extract .zip file and copy “mybutton” folder from “parsermybutton” to C:
Import project “omtMyButton” in eclipse.
Require Java 6.
Download .exe and source code :
https://sourceforge.net/projects/omtmybutton/files/
answered Mar 31, 2012 at 7:42
![]()
Dhiral PandyaDhiral Pandya
10.1k4 gold badges46 silver badges47 bronze badges
Мы уже начали полноценно обеспечивать себя личным софтом, вспомните наши чудесные калькулятор и конвертер. И в этом уроке мы научимся создавать простой браузер, с помощью которого будет бороздить просторы интернета. Согласитесь, серфить сеть на своем собственном браузере — это в разы приятнее чем делать это на Opera или Chrome (вряд ли удобнее, но приятнее :)). Создаем новый проект, названия традиционно выбирайте сами. Лично я вообще не создаю каждый раз все с нуля, а просто открываю, что есть, и зачищаю весь код до исходного состояния Blank Activity. Делайте, как вам удобней.
Итак, кратко очертим объем и специфику последующей работы. Нам нужно создать элемент <WebView>, в котором будет все происходить, написать код, создающий наш личный Веб-обозреватель, обустроить его базовыми функциями, прописать разрешение на использование Internet нашим приложением в файле манифеста, и написать обработчик нажатия аппаратной кнопки «Назад» на устройстве (то есть, что будет происходить в нашем браузере при нажатии на эту кнопку).
Начнем. Открываем файл activity_main.xml. Создаем там один единственный элемент <WebView>, которого нам вполне достаточно для реализации веб-обозревателя:
<?xml version="1.0" encoding="utf-8"?>
<WebView xmlns:android="http://schemas.android.com/apk/res/android"
 android:layout_height="match_parent"
 android:layout_width="match_parent"
 android:id="@+id/web"/>
Окно разметки будет выглядеть так:
После этого давайте сразу разберемся с файлом AndroidManifest.xml. Открываем его и добавляем туда две строчки, одна — это разрешение для приложения использовать Интернет, другая — изменение стиля приложения, а точнее сокрытие панели «Title» приложения (панели с заголовком приложения) с той целью, чтобы предоставить окну браузера больше пространства для отображения страниц.
Пишем строку разрешения использовать интернет до открытия тега <application>…</application>:
<uses-permission android:name="android.permission.INTERNET"/>
Теперь добавим к строке настройки нашего Activity команду для скрытия заголовка (нижняя строка, выделенная жирным, это также находиться в AndroidManifest.xml):
 <activity
 android:name=".MainActivity"
 android:label="Браузер"
 android:theme="@android:style/Theme.NoTitleBar">
Теперь переходим к самой важной и ответственной части работы — написанию java кода. Открываем файл MainActivity.java и пишем так следующее (объяснения даны в коде после знаков //, кто не заметил):
package home.myapplication;
import android.app.Activity;
import android.app.AlertDialog;
import android.content.ContentValues;
import android.content.Intent;
import android.database.Cursor;
import android.database.sqlite.SQLiteDatabase;
import android.database.sqlite.SQLiteOpenHelper;
import android.support.v7.app.ActionBarActivity;
import android.os.Bundle;
import android.util.Log;
import android.view.KeyEvent;
import android.view.Menu;
import android.view.MenuItem;
import android.view.View;
import android.webkit.WebView;
import android.webkit.WebViewClient;
import android.widget.Button;
import android.widget.EditText;
import android.widget.RadioButton;
import android.widget.TextView;

public class MainActivity extends Activity {
 // Объявляем переменную типа WebView
 private WebView mWeb;
 // Создаем класс типа Веб-обозреватель (WebViewClient), которому настраиваем
 // по умолчанию разрешение обрабатывать все ссылки внутри этого класса,
 // не обращаясь к сторонним программам:
 private class WebViewer extends WebViewClient {
 @Override
 public boolean shouldOverrideUrlLoading (WebView view, String url)
 {
 view.loadUrl(url);
 return true;
 }
}

 public void onCreate(Bundle savedInstanceState) {
 super.onCreate(savedInstanceState);
 setContentView(R.layout.activity_main);

 // Привязываем объявленную переменную типа WebView к созданному нами
 // элементу WebView в файле activity_main.xml:
 mWeb=(WebView)findViewById(R.id.web);

 // Подключаем для этого элемента поддержку Java скриптов:
 mWeb.getSettings().setJavaScriptEnabled(true);

 // Настраиваем страницу, которая будет загружать при запуске, можете ввести любую:
 mWeb.loadUrl("http://developeroleg.ucoz.ru/");

 // Настраиваем обозреватель для нашего элемента WebView, подключаем созданный нами выше
 // Веб-клиент, с помощью которого будет проходить просмотр страниц:
 mWeb.setWebViewClient(new WebViewer());
}
 // Пишем код обработки нажатия кнопки назад на устройстве, что позволит нам при нажатии
 // на кнопку "Назад" перейти к предыдущей странице, а не просто закрывать приложения.
 // Оно будет закрываться кнопкой "Назад" лишь в том случае, если мы находимся на стартовой
 // странице, которую указали выше:
 @Override
 public void onBackPressed() {
 if (mWeb.canGoBack()) {
 mWeb.goBack();}
 else {
 super.onBackPressed();
 }
}
}
Вот и все! На самом деле все довольно просто и после недолгих трудов у нас есть собственный браузер, конечно он довольно прост и не имеет никаких опций, но для понимания сути создания подобных приложений этого вполне достаточно.
Оригинальная статья вот тут. Мне показалось нужным слепить растерянные по всей странице обрывки кода в плотненькую программку:).
Introduction – Android is one of the most popular operating systems for mobiles. In this article, I will show you how to create a Web Browser Android application using Android Studio.Requirements
Requirements
- Android Studio version (Use anyone)
- Little bit XML and JAVA knowledge.
- Android Emulator (or) Android mobile
- Download link (Android Studio)
- Steps to be followed
Follow these steps to create a web Browser Android application using Android Studio. I have included the source code above.

Web browsers are used to access the contents of a web page, they are software applications for accessing information on the World Wide Web, today we’d be looking at how to create a very simple web browser app with back, forward, refresh (You can do away with the refresh button and use SwipeRefreshLayout), stop and home buttons.
- Tools you’d need
- Android studio
- Internet connection
- Open Android Studio and create a project.
- Permissions
- First we need to add some permissions, we’d be adding the following permissions
- Internet permission
- Access network state permission and
- Access WiFi state permission
- Open AndroidManifest.xml file and add the permissions at the top of the manifest file
These permissions will allow us to use the internet and check the network state (whether the device has an active internet connection or not).
The interface
The interface of our browser app will be very simple as stated earlier, open the activity_main.xml file and add the following codes
MainActivity.java
package com.dude.broser;

import androidx.appcompat.app.AppCompatActivity;

import android.content.Intent;
import android.os.Bundle;
import android.view.View;
import android.webkit.WebView;

public class MainActivity extends AppCompatActivity {

    @Override
    protected void onCreate(Bundle savedInstanceState) {
        super.onCreate(savedInstanceState);
        setContentView(R.layout.activity_main);
    }

    public void LoadWebPage(View v){

        Intent intent = new Intent(this, WebActivity.class);
        startActivity(intent);
    }
}
You’d get some error(s) because you’d need to import the vector assets i used in the code, to do this right click on the res directory → New → Vector Assets, you’ll see a window like the one below
Click on the little dark Android icon, on the next screen, search and select your vector assets, then click OK → OK → Finish, your vector assets will be saved inside your drawable folder, expand your drawable folder to see them.
Hint: Rename the assets to match the ones in the code
If you’ve done everything right, your preview pane should look like this
Lets go add some functionality in Browser App!
The MainActivity file
Before you open the MainActivity.java file, lets enable import on the fly, this will help import the classes automatically when you paste the code i’d be providing you with, click on File → Settings → Editor → General → Auto Import , check the Add unambiguous imports on the fly and click OK.
Now open the MainActivity.java file and add the following codes
WebActivity.java
package com.dude.broser;
import android.os.Bundle;
import android.webkit.WebSettings;
import android.webkit.WebView;
import android.webkit.WebViewClient;

import androidx.appcompat.app.AppCompatActivity;

public class WebActivity extends AppCompatActivity {
    private WebView webView;

    @Override
    protected void onCreate(Bundle savedInstanceState) {
        super.onCreate(savedInstanceState);
        setContentView(R.layout.activity_web);

        webView = (WebView) findViewById(R.id.webview);
        webView.setWebViewClient(new WebViewClient());
        webView.loadUrl("https://www.google.com/");

        WebSettings webSettings = webView.getSettings();
        webSettings.setJavaScriptEnabled(true);
    }

    @Override
    public void onBackPressed() {
        if (webView.canGoBack()) {
            webView.goBack();
        } else {
            super.onBackPressed();
        }
    }
}
You’d get some errors, to fix them change the package name at the top back to that of the project you are working on, then some classes we haven’t created yet will be red and showing some errors, just ignore them for now and proceed, we’d be creating those classes next and the errors should disappear.
The WebViewClient
One of the things the WebViewClient enables us to do is to override Android’s default behavior of opening the links inside our WebView on external applications (other web browsers). We need to override this behavior and set the WebViewClient on our WebView so links open within our WebView/loaded inside our app . We do this by calling the setWebViewClient on the webView, the code for that is already available in the MainActivity.java file above.
Make Quiz App
Now create a new Java class and call it MyWebViewClient and add the following codes
AndroidManifest.xml
<?xml version="1.0" encoding="utf-8"?>
<manifest xmlns:android="http://schemas.android.com/apk/res/android"
    package="com.dude.broser">

    <uses-permission android:name="android.permission.INTERNET"></uses-permission>

    <application
        android:allowBackup="true"
        android:icon="@mipmap/ic_launcher"
        android:label="@string/app_name"
        android:roundIcon="@mipmap/ic_launcher_round"
        android:supportsRtl="true"
        android:theme="@style/AppTheme">
        <activity android:name=".WebActivity"></activity>
        <activity android:name=".MainActivity">
            <intent-filter>
                <action android:name="android.intent.action.MAIN" />

                <category android:name="android.intent.category.LAUNCHER" />
            </intent-filter>
        </activity>
    </application>

</manifest>
Determining the network state ( whether a user’s device has an active internet connection)
Browser app
We want to be able to detect if the user has an active internet connection, if there is internet connection we would load the URL, else we’d let them know something is wrong with their internet connection, for this tutorial i used a toast message to notify the user to check their internet connection, you can design a 404 error page and send the user to the 404 page if there is no internet connection, i’d be using a toast message for this tutorial.
Create a Java class called NetworkState and add the following codes
activity_main.xml
<?xml version="1.0" encoding="utf-8"?>
<RelativeLayout xmlns:android="http://schemas.android.com/apk/res/android"
    xmlns:app="http://schemas.android.com/apk/res-auto"
    xmlns:tools="http://schemas.android.com/tools"
    android:layout_width="match_parent"
    android:layout_height="match_parent"
    tools:context=".MainActivity">

    <Button
        android:id="@+id/button"
        android:layout_width="150dp"
        android:layout_height="150dp"
        android:layout_centerInParent="true"
        android:background="@drawable/round_b"
        android:onClick="LoadWebPage"
        android:text="GO"
        android:textColor="#ffffff"
        android:textSize="30dp" />
</RelativeLayout>
activity_web.xml
<?xml version="1.0" encoding="utf-8"?>
<RelativeLayout xmlns:android="http://schemas.android.com/apk/res/android"
    xmlns:app="http://schemas.android.com/apk/res-auto"
    xmlns:tools="http://schemas.android.com/tools"
    android:layout_width="match_parent"
    android:layout_height="match_parent"
    tools:context=".WebActivity">

    <WebView
        android:layout_width="match_parent"
        android:layout_height="match_parent"
        android:id="@+id/webview"
        android:layout_centerVertical="true"
        android:layout_centerHorizontal="true" />
</RelativeLayout>
build.gradle
apply plugin: 'com.android.application'

android {
    compileSdkVersion 29
    buildToolsVersion "29.0.2"
    defaultConfig {
        applicationId "com.dude.broser"
        minSdkVersion 20
        targetSdkVersion 29
        versionCode 1
        versionName "1.0"
        testInstrumentationRunner "androidx.test.runner.AndroidJUnitRunner"
    }
    buildTypes {
        release {
            minifyEnabled false
            proguardFiles getDefaultProguardFile('proguard-android-optimize.txt'), 'proguard-rules.pro'
        }
    }
}

dependencies {
    implementation fileTree(dir: 'libs', include: ['*.jar'])
    implementation 'androidx.appcompat:appcompat:1.1.0'
    implementation 'androidx.constraintlayout:constraintlayout:1.1.3'
    testImplementation 'junit:junit:4.12'
    androidTestImplementation 'androidx.test:runner:1.2.0'
    androidTestImplementation 'androidx.test.espresso:espresso-core:3.2.0'
}
The connection Available method of this class was used in the MainActivity.java file above to check when the user’s device has an active internet connection and to perform an appropriate action in each state.
And that is all for the SimpleWebBrowser, you can now run your Android project and see it work.
YouTube Video
The project is available here on YouTube
Obviously there are lots of improvements that can still be done to this app, the project is on YouTube, check it out and drop your contribs!.
If you’re ever in need of extra help with your Android app development projects, you can find experienced Android developers on Envato Studio to help you with everything from UI design to creating a native Android app.
Download Source Code
Click below to get the full source code android news application.

Conclusion
We have successfully created a Web Browser Android application using Android Studio.
Cheers!
READ MORE…
Post Views: 664