Тамагочи
Игра на Python Tkinter основаная на одноимённой Японской игре Tamagochi
Что нужно для игры
- Python библиотека requests
- Python библиотека numpy
- Шрифт Impact (Не обязательно, но желательно)
- Энтузиазм
Как играть
Легко!
При первом запуске вам потребовается ввести свой Email для статистики;
Когда вы нажмёте на кнопку SAVE вы сможете закрыть окно и перейти к главному окну;
В поле Name вы должны ввести имя вашего животного;
Когда вы введёте имя питомца, вам нужно выбрать какое животное вы хотите завести.
На выбор: cat (Кот), horse (Лошадь), pig (Свинья), dog (Собака), hen (Курица), turtle (Черепаха), rabbit (Кролик), koala (Коала), elephant (Слон), beagle (Бигль (Собака)), lion (Лев), panda (Панда), penguin (Пингвин), whale (Кит), sheep (Баран);
Потом вы должны нажать на кнопку Ask parents (Попросить родителей);
Поздравляю с новом членом семьи!;
Есть 3 Bar (Полоски), Первая — Еда (Кормить можно на кнопку Feed), Вторая — Health (Здоровье) (Починить (Я сам хотел такой перевод =) ) можно на кнопку Fix), Третья (Нижняя) — Счастье (Если есть фикалии на экране то оно падает);
Горячии клавиши
Q — Quit (Выйти);
E — Eat (Feed) (Покормить);
H — Health (Fix) (Починить);
K — Kill (Убить (Если вы это сделаете из за того что животное вам надоело — я получю ваш IP и приду и побью));
C — Clear (Убрать фикалии);
S — Save (Сохранить);
P — Poop (Покакать);
There are also a lot of interesting ways to put user-defined classes to use that don’t involve data from the internet. Let’s pull all these mechanics together in a slightly more interesting way than we got with the Point class. Remember Tamagotchis, the little electronic pets? As time passed, they would get hungry or bored. You had to clean up after them or they would get sick. And you did it all with a few buttons on the device.
We are going to make a simplified, text-based version of that. In your problem set and in the chapter on Inheritance we will extend this further.
- First, let’s start with a class
Pet. Each instance of the class will be one electronic pet for the user to take care of. Each instance will have a current state, consisting of three instance variables: -
-
hunger, an integer
-
boredom, an integer
-
sounds, a list of strings, each a word that the pet has been taught to say
-
In the __init__ method, hunger and boredom are initialized to random values between 0 and the threshold for being hungry or bored. The sounds instance variable is initialized to be a copy of the class variable with the same name. The reason we make a copy of the list is that we will perform destructive operations (appending new sounds to the list). If we didn’t make a copy, then those destructive operations would affect the list that the class variable points to, and thus teaching a sound to any of the pets would teach it to all instances of the class!
There is a clock_tick method which just increments the boredom and hunger instance variables, simulating the idea that as time passes, the pet gets more bored and hungry.
The __str__ method produces a string representation of the pet’s current state, notably whether it is bored or hungry or whether it is happy. It’s bored if the boredom instance variable is larger than the threshold, which is set as a class variable.
To relieve boredom, the pet owner can either teach the pet a new word, using the teach() method, or interact with the pet, using the hi() method. In response to teach(), the pet adds the new word to its list of words. In response to the hi() method, it prints out one of the words it knows, randomly picking one from its list of known words. Both hi() and teach() cause an invocation of the reduce_boredom() method. It decrements the boredom state by an amount that it reads from the class variable boredom_decrement. The boredom state can never go below 0.
To relieve hunger, we call the feed() method.
Let’s try making a pet and playing with it a little. Add some of your own commands, too, and keep printing p1 to see what the effects are. If you want to directly inspect the state, try printing p1.boredom or p1.hunger.
That’s all great if you want to interact with the pet by writing python code. Let’s make a game that non-programmers can play.
We will use the Listener Loop pattern. At each iteration, we will display a text prompt reminding the user of what commands are available.
The user will have a list of pets, each with a name. The user can issue a command to adopt a new pet, which will create a new instance of Pet. Or the user can interact with an existing pet, with a Greet, Teach, or Feed command.
No matter what the user does, with each command entered, the clock ticks for all their pets. Watch out, if you have too many pets, you won’t be able to keep them all satisfied!
You have attempted of activities on this page
Как добавить картинку в окошко?
На самом деле все просто, достаточно просто добавить Label и задать для него фоновое изображение. Картинку можно утащить отсюда. Вот так…
from tkinter import *

window = Tk()

# открываем картинку luntik.gif, она лежит в одной папке с программой и кладем в переменную luntik_image
luntik_image = PhotoImage(file='luntik.gif')

# создаем текстовое поле и указываем, что туда нужно поместить картинку из переменной luntik_image
Label(window, image=luntik_image).pack()

mainloop()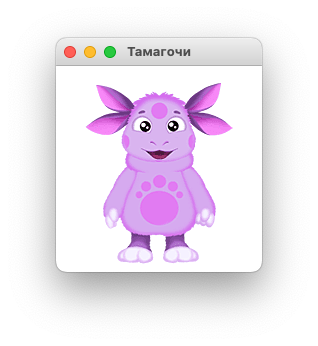
Но есть один нюанс: tkinter не умеет работать с большинством популярных форматов графики, из коробки доступен только gif. Однако эта проблема легко решается установкой стороннего модуля Pillow!
Установка сторонних модулей
Если нам не хватает операций языка Python, а также встроенных модулей (библиотек), наступает тот самый момент, когда пора воспользоваться сторонними модулями.
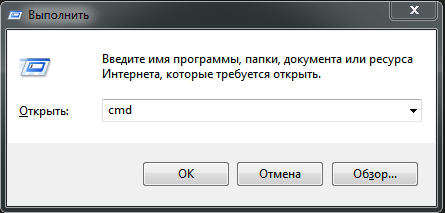
Для установки модулей необходимо использовать программу pip, которая устанавливается на ваш компьютер вместе в питоном. Единственный нюанс, pip работает только через командную строку. Для ее вызова необходимо нажать Win+R, а затем в окне «Выполнить» ввести cmd и нажать Enter.
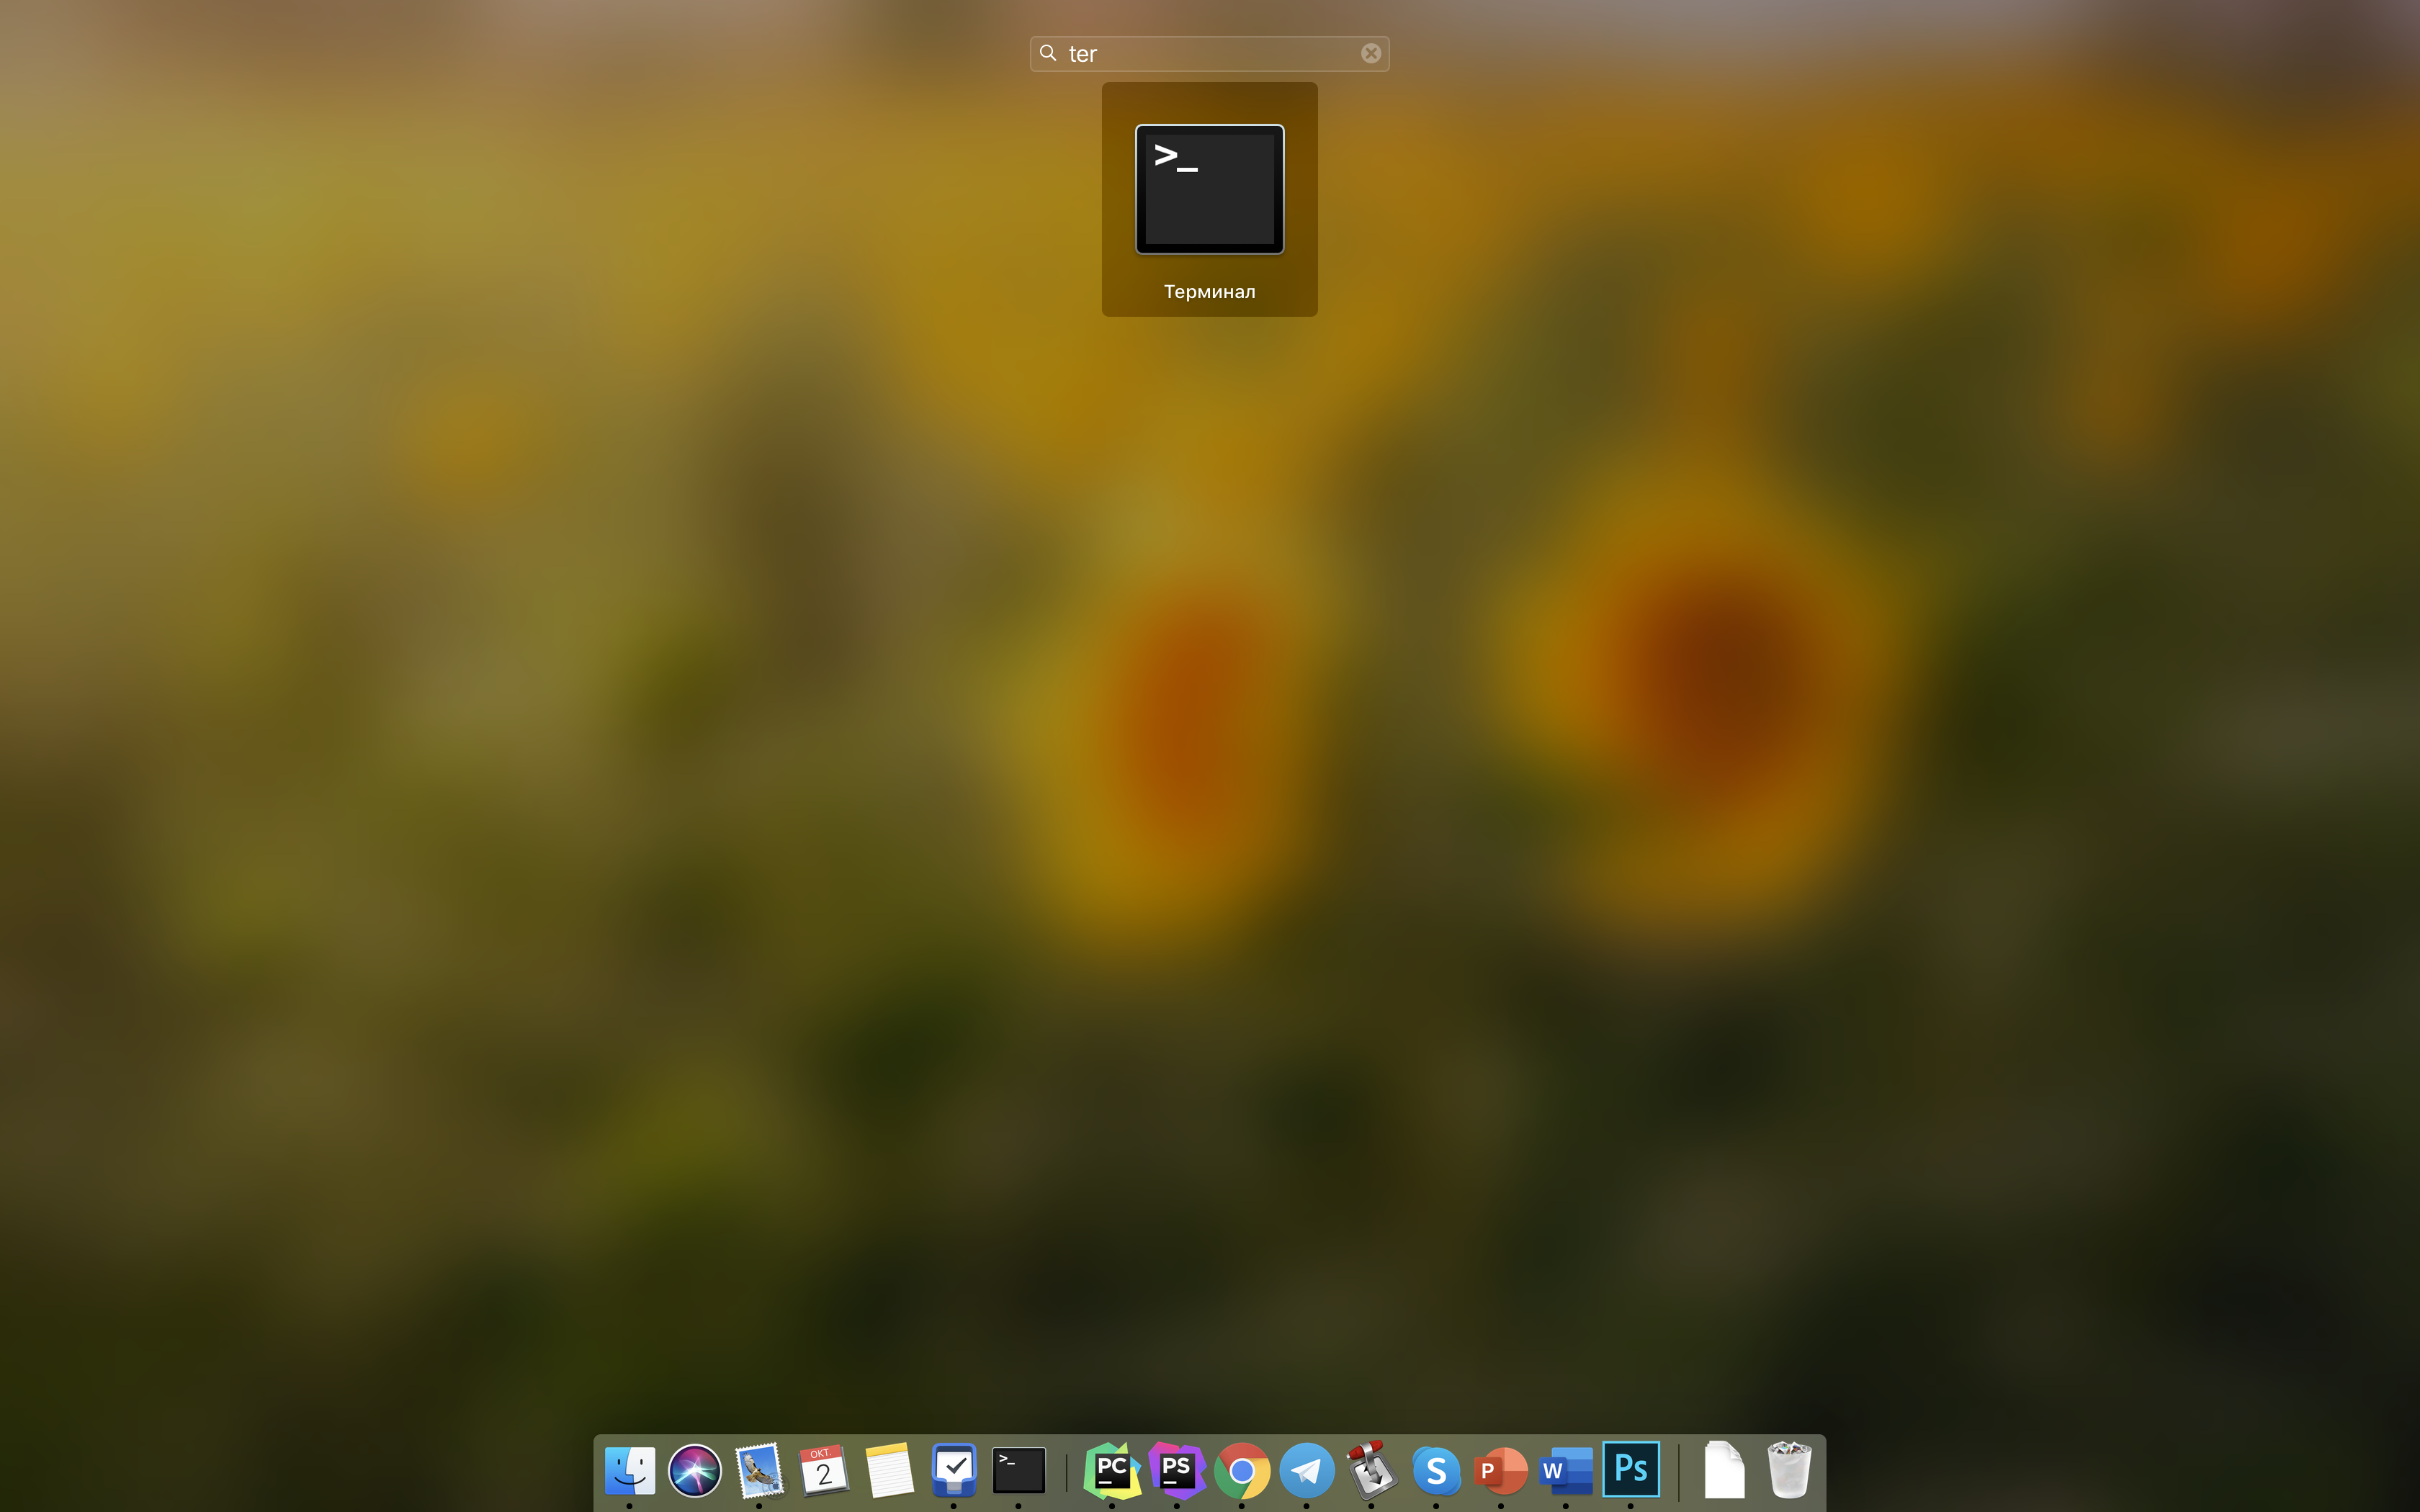
Для Mac вызов командной строки устроен аналогично, только вместо Win+R нужно использоватьл комбинацию Command + пробел, а затем в поле Spotlight ввести terminal.
Чтобы вызвать установщик пакетов, достаточно написать в консоли pip (или pip3, если не работает команда pip) и нажать Enter. Вы увидите что то похоже на…

Если команда
pipне найдена, скорее всего при установке python вы не активировали галочку «Add to PATH».Есть два варианта решения проблемы: переустановить python или добавить путь к питону в PATH вручную.
Добавляя к команде pip различные параметры, мы можем выполнять различные операции. Для начала давайте попробуем вывести список модулей, установленных на вашем компьютере. Для этого в командной строке необходимо ввести pip list, а затем нажать клавишу Enter (клавиша Enter нажимается для любой операции в командной строке).

В ответ мы получим длинный список из двух колонок, как на картинке выше. Слева пишется имя модуля, а справа текущая версия этого модуля. Если хотим посмотреть, установлен ли у нас какой-то конкретный модуль, то нужно ввести pip show <название модуля>. Для примера посмотрим, есть ли у меня модуль pillow, который мы будем будем использовать для работы с графикой.
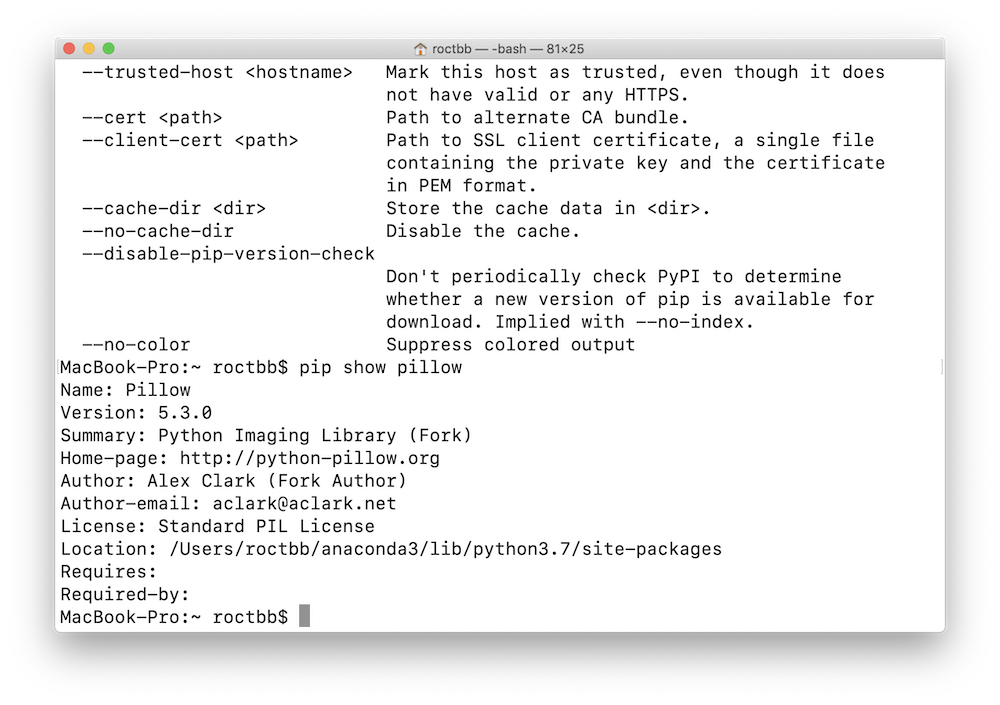
Как видишь, уже есть. Более того, в информации указана версия, автор и прочая информация. Если же модуль не установлен или при вводе названия допущена ошибка, то информация не будет выведена.
Наличие больших и маленьких букв в названии модуля роли не играет. Даже если ввести pip show PiLloW, pip все равно вывел бы информацию о нем.
Если какой-то модуль нам больше не нужен или возникла какая-то неполадка в его работе, то мы можем его удалить, введя pip uninstall <название модуля>.
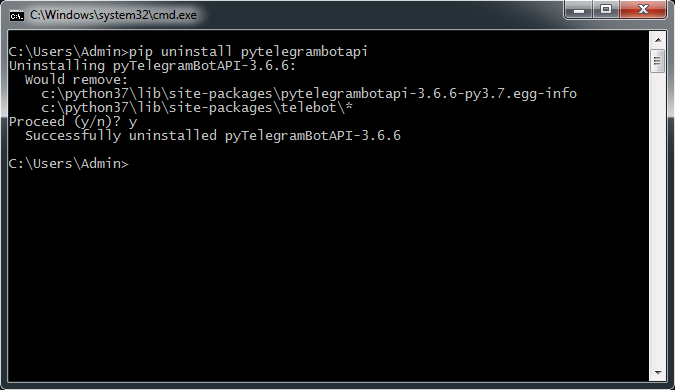
Ничего сложного! А если я хочу обратно его установить, то мне нужно ввести pip install <название модуля>.
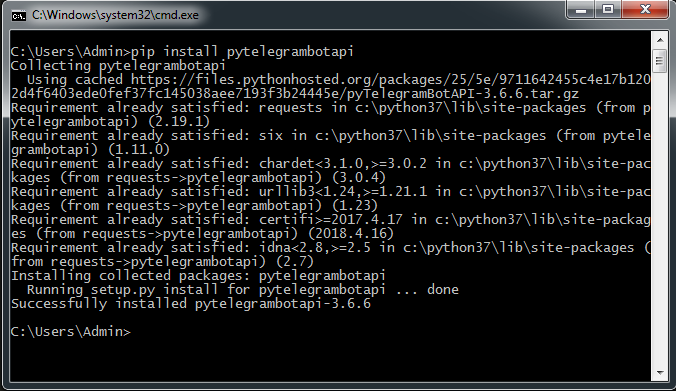
Вот и все. После установки, можно спокойно импортировать модули так же, как это было показано в предыдущих параграфах.
Мы перечислили некоторые самые важные возможности pip, хотя это далеко не полный их перечень. Для более подробного знакомства обратитесь к документации pip.
Поиск подходящих вам модулей можно осуществлять не только на в поисковике (Google, Yandex и т.д.), в качестве базы для поиска можно использовать Pypi, LDF или GitHub. Pypi содержит в себе поисковик, который позволяет отыскать не только модули, но и любые их модификации. После их можно установить либо по называнию pip install <название модулся>, либо скачать файл *.whl, который содержит ваш модуль.
Установка из файла аналогичена установке по названию. Сначала вам нужно вам нужно переместится в папку, где хранится файл *.whl, используя команду cd <путь к вашей папке>, а затем применить команду pip install <название файла.whl>. На LDF хранятся модули в формате *.whl, некоторые из которых уже нельзя найти на Pypi.
Также необходимый модуль можно установить из исходников с помощью команды pip install https://github.com/<логин владельца репозитория>/<название репозитория>/<ветвь.zip>. Так например, мы можем поставить pillow вот такой командой: pip install https://github.com/python-pillow/Pillow/master.zip.
Используем картинки любых форматов и меняем их размер
Итак, удобнее всего открывать картинки с использованием библиотеки для работы с графикой Pillow.
https://pillow.readthedocs.io/
Сперва библиотеку нужно установить. Для этого в консоли нужно выполнить команду:
pip3 install pillowЕсли консоль попросит права администратора, можно установить библиотеку только для своего пользователя.
pip3 install --user pillowПосле этого можно открывать файлы в любых форматах.
from tkinter import *
# импортируем функционал для работы с картинками из pillow, которую мы только что установили
from PIL import Image, ImageTk

window = Tk()

# открываем изображение любого формата и кладем его в переменную image_file
image_file = Image.open("brothers.jpeg")
# "готовим" изображение к размещению в окне и кладем в переменную vp_image
vp_image = ImageTk.PhotoImage(image_file)

# добавляем после и устанавливаем картинку в качестве фона
Label(window, image=vp_image).pack()

mainloop()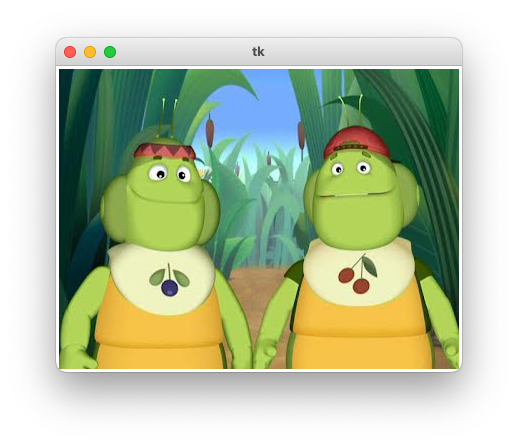
В качестве бонуса — изменить размер картинки теперь можно прямо в коде.
# открываем изображение любого формата и кладем его в переменную image_file
image_file = Image.open("brothers.jpeg")
# меняем размер картинки на 300 на 300 пикселей
image_file = image_file.resize((300, 300), Image.ANTIALIAS)
# "готовим" изображение к размещению в окне и кладем в переменную vp_image
vp_image = ImageTk.PhotoImage(image_file)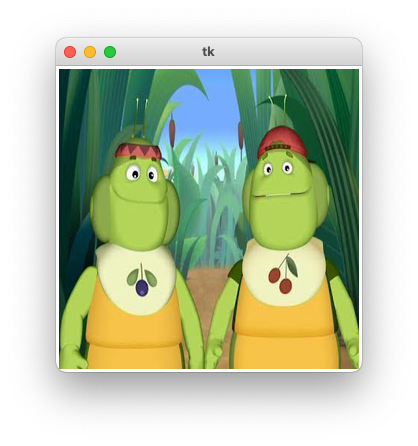
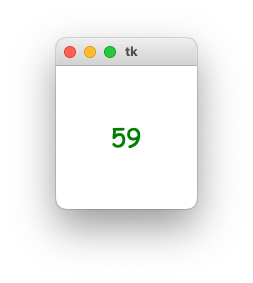
Используем таймер, цвет и размер шрифта
Сейчас наше приложение умеет реагировать только на нажати кнопок, но часто приложениям требуется обновиться самостоятельно. Например, раз в несколько секунд.
Для этого можно попросить tkinter вызвать нашу функцию не после нажатия на кнопку, а просто через несколько миллисекунд или секунд. Делается это с помощью метода after(). В примере ниже попробуем обновлять случайное число раз в секунду.
import random
from tkinter import *

# функция, которая будет обновлять число на экране
def update_number():
    # генерируем и записываем число в текстовое поле
    random_var.set(str(random.randint(1, 100)))
    # просим window вызвать функцию update_number еще раз через секунду (1000 мс)
    window.after(1000, update_number)

window = Tk()

# создаем random_var - посредника для текстового поля
random_var = StringVar()

# создаем текстовое поле и привязываем к нему random_var
# дополнительно указываем шрифт (семейство - Comic Sans MS, 25 - размер) и цвет (fg - foreground color)
# padx и pady (padding x, padding y) в параметрах pack - это отступы от справа/слева и сверху/снизу
Label(window, textvariable=random_var, font=("Comic Sans MS", 25), fg="green").pack(padx=50, pady=50)

# просим window вызвать функцию update_number через секунду (1000 мс)
window.after(1000, update_number)

mainloop()
Программа выше будет раз в секунду менять число на экране.
Анимация
А что если совместить вывод изображений и таймер? Получится анимация!
Единственное, что нам потребуется для этого — научится изменять уже заданную картинку с помощью .configure().
Делается это так:
img1 = ImageTk.PhotoImage(Image.open("face1.jpg"))
img2 = ImageTk.PhotoImage(Image.open("face2.jpg"))

image_label = Label(window, image=img1)
image_label.pack()

# когда хотим поменять картинку - вызываем configure
image_label.configure(image=img2)
Ниже пример простой анимации — лицо меняется каждые 800 мс.
Скачать картинки
from tkinter import *
from PIL import Image, ImageTk
import psutil

# функция, которая будет двигать картинки
def next_img():
    global pic_number

    # если номер был 0 - он станет 1, а если был 1 - станет 0
    pic_number = (pic_number + 1) % 2

    # в зависимости от номера, выбираем нужную картинку
    if pic_number == 0:
        # и устанавливаем ее в image_label
        image_label.configure(image=img1)
    if pic_number == 1:
        image_label.configure(image=img2)

    # через долю секунды - вызываем смену картинки снова
    window.after(800, next_img)

window = Tk()
window.title("FaceIt")

# открываем две картинки и изменяем их размер до 300 пикселей
img1 = ImageTk.PhotoImage(Image.open("face1.jpg").resize((300, 300), Image.ANTIALIAS))
img2 = ImageTk.PhotoImage(Image.open("face2.jpg").resize((300, 300), Image.ANTIALIAS))

# тут будем хранить номер картинки, которую показываем сейчас
pic_number = 0

# чтобы иметь возможность менять картинку, сохраняем поле в переменную image_label
image_label = Label(window, image=img1)
image_label.pack()

# спустя долю секунды просим поменять картинку - запустить функцию next_img
window.after(800, next_img)

mainloop()
Бонус! Как заставить тамагочи жить, даже если программа закрыта?
Можно вычислять состояние питомца исходя из времени прошлого кормления / игры / купания, а это время сохранять в файл. Для простоты давайте использовать отдельные файлы для каждого действия — кормежки / игры и тд. Ниже пример с едой, для остальных — по аналогии.
Как сохранить время действия в файл?
import time

# предположим, мы только что покормили питомца, фиксируем сколько сейчас времени
last_feed_time = time.time()
# открываем файл для записи
with open('last_feed_time.txt', 'w') as file:
    # превращаем время в строку и записываем в файл
    file.write(str(last_feed_time))
Как достать время последнего из файла?
import time

# если файл существует
try:
    # открываем файл для чтения
    with open('last_feed_time.txt', 'r') as file:
        # и считываем время прошлой кормежки
        last_feed_time = int(file.read())
# а если файла нет
except:
    # считаем, что только покормили
    last_feed_time = time.time()
Как вычислить сколько сейчас «жизни» исходя из прошедшего времени?
import time
# это значение нужно взфть из файла, для примера просто возьмем текущее время минус 40 секунд
last_feed_time = time.time() - 40
# максимум "жизни"
max_life = 100
# сколько секунд на одну единицу "жизни"
seconds_for_life_point = 10
# сколько времени прошло с прошлого кормления
elapsed_time = time.time() - last_feed_time
# жизнь не может быть меньше нуля
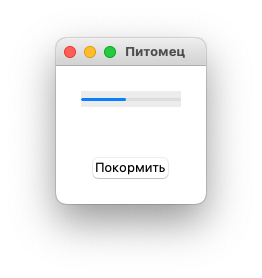
life = max(0, int(max_life - elapsed_time / seconds_for_life_point))Бонус! Прогресс-бар для отображения статуса питомца.
from tkinter.ttk import *
from tkinter import *
from tkinter import messagebox

# Функция для уменьшения жизни каждую секунду
def check_life():
    # узнаем, какая сейчас жизнь из прогресс бара
    current_life = life.get()

    # уменьшаем значение на прогрессбаре
    life.set(current_life - 1)

    # если жизни мало - закрываем приложение
    if current_life <= 1:
        messagebox.showerror(title="Вы проиграли!", message="Зверек умер... :(")
        quit()
    # иначе запускаем функция еще через секунду
    else:
        window.after(1000, check_life)

# функция для кормления
def feed():
    # устанавливаем жизнь на максимум
    life.set(100)

window = Tk()
window.title("Питомец")

# поскольку жизнь - числовая характеристика, вместо StringVar - IntVar
life = IntVar()
life.set(50)

# добавляем прогресс-бар
Progressbar(window, variable=life).pack(padx=25, pady=25)

# добавляем кнопку для увеличения жизни
Button(window, text="Покормить", command=feed).pack(padx=25, pady=25)

# включаем таймер для уменьшения жизни через секунду
window.after(1000, check_life)

mainloop()
I am currently working on a small python project for an undergraduate course in python. The task is to create a Tamagotchi-like program with a GUI. My question is whether my code is Object oriented or not? Here are my classes:
Tamagotchi class
class Tamagotchi(Canvas):

    def __init__(self, radie, x,y):
        super().__init__()
        self.radie = radie
        self.x=x
        self.y=y

        self.createCircle(x, y, radie, fill="black")

    def createCircle(self, x, y, radie, **kwargs):
        circle = self.create_oval(x-radie,y-radie,x+radie,y+radie,**kwargs)
        return circle

    def updateCircle(self,radie, **kwargs):
        self.delete("all")
        self.radie=radie
        self.createCircle(self.x,self.y,self.radie, fill="black")
GUI class
class GUI(Frame):
    def __init__(self):
        super().__init__()
        tamagotchi = Tamagotchi(60,140,125)
        tamagotchi.pack(side=TOP)

        activityList = []

        Style().configure("TButton", padding=(20, 20, 20, 20), font='serif 10')

        sizeLbl = Label(self, text="Storlek: ")
        sizeLbl.grid(row=0, column=3, sticky=N)

        size = Label(self, text = tamagotchi.radie, foreground="red", font=(None, 15))
        size.grid(row=0,column=3, sticky = S)

        sovaButton = Button(self, text="Sova", command = lambda: self.tamagotchiLogic("sova", activityList, tamagotchi, size))
        sovaButton.grid(row=0, column=0)

        tentaButton = Button(self, text="Tenta", command = lambda: self.tamagotchiLogic("tenta", activityList, tamagotchi, size))
        tentaButton.grid(row=0, column=1)

        festaButton = Button(self, text="Festa", command = lambda: self.tamagotchiLogic("festa", activityList, tamagotchi, size))
        festaButton.grid(row=1, column=0)

        pluggaButton = Button(self, text="Plugga", command = lambda: self.tamagotchiLogic("plugga", activityList, tamagotchi, size))
        pluggaButton.grid(row=1, column=1)

        self.centerWindow()

    def centerWindow(self):
        w = 300
        h = 393

        sw = self.master.winfo_screenwidth()
        sh = self.master.winfo_screenheight()

        x = (sw - w) / 2
        y = (sh - h) / 2
        self.master.geometry('%dx%d+%d+%d' % (w, h, x, y))

    def tamagotchiLogic(self, activity, activitylist, tamagotchi, sizeLabel):
        activitylist.append(activity)

        end = len(activitylist)
        actString = ''.join(activitylist[end-3:end])

        print(actString)

        growthCombinations = ["pluggasovatenta", "sovatentafesta"]
        declineCombinations = ["festasovatenta","tentapluggaplugga"]
        boredCombinations = ["festafestafetsa","pluggapluggaplugga","sovasovasova","tentatentatenta"]

        if actString in growthCombinations:
            tamagotchi.updateCircle(tamagotchi.radie*1.05, fill="black")

        elif actString in declineCombinations:
            tamagotchi.updateCircle(tamagotchi.radie*0.95, fill="black")

        elif actString in boredCombinations:
            tamagotchi.updateCircle(tamagotchi.radie*(1/sqrt(2)), fill="black")

        sizeLabel.config(text=round(tamagotchi.radie))
Main
def main():
    root = Tk()

    gui = GUI()
    gui.pack()

    root.mainloop()

if __name__ == '__main__':
    main()
Tamagotchi-challenge
A PyGame implementation of the Tamagotchi challenge
Installation instructions
Make sure to have python3.6 installed with the pip package installer.
This is due to the limitations of pygame, it will fail to install for python3.8.
You may also like to create a virtual environment to run it but it is not necessary.
pip3.6 install -r requirements.txt
Running tests
From the base of the Tamagotchi Challenge directory, you can run
python3.6 setup.py test
This will run all the available unit tests and will make sure the correct packages are accessible.
Running the game
For quick play, you can install the package from pypi
pip3.6 install tamagotchi_tandersen
python3.6 -m tamagotchi_tandersen
Run in console if you have the code
python3.6 setup.py install
python3.6 -m tamagotchi
Docker
Parsing in the display to docker is not available to MacOS due to restrictions on the
sandbox. For linux it is currently under development.
Controls
The user driven interactions with the pet is done through the keyboard.
There is a list of available foods on the bottom right hand corner that
you may cycle through by pressing either the left arrow key or
right arrow key.
The food showing in the box can be feed to the pet by pressing e.
Over-eating can fill the pets stomach and it will alleviate itself.
There are two gauges to view, the health and energy bar, the energy
bar will go redder and the pet will go to sleep. You may pre-empt an
automatic sleep by telling the pet to go to sleep by pressing s. The
health bar is recovered by eating food, and each type of food impacts
the pets health and fullness differently. Beware no health will cause
the pet to pass away.
The pet will age as time progresses, growing older which can be seen
by the change in art. Unfortunately as time goes on, the pet will
pass away and that will finish the game with the player having
successfully raised a pet having not neglected it.
Aim of the game
You should try your best to take care of the pet by feeding it when
it gets hungry and drops health. Beware if it gets tired and goes to
sleep you may find yourself unable to feed your pet. Managing these
along with a limited food set, and other possible hindrances to feeding
your pet are the key to giving your pet the best longevity.
Future development
The game board could be constructed by a factory, that will handle
producing the food inventory, the actor — pet etc.
Unifying food inventory and status bars under UI elements for the
purpose of drawing.
Need to fix up naming with the StatusBarFactory with StatusElement.
An actor factory that can create NPC actors, and extending the Actor
abstract class to include an interaction function that can take in
other actors in the game. From there we can extend to look at state
retained interactions from simple, ‘Nice to see you again’ to a
friendship tracker.
Extending OO design, random chance special food items like a golden apple
could be implemented via decorators. The pet could be a singleton to
ensure only one pet actually exists.
Credit
I did not create any of the pixel art used and was taken from the web. Credit
to those who spent their time creating these pieces of art. These works are
not being used for the purpose of commercial use.
I just want to show you a new video I’ve released on my YouTube channel. It’s about the Tamagotchi game I’ve created, that I wanted to share to everyone. Since this is a programming channel, I have demonstrated in the video how to get the code and run it on Linux. I also talked about what a virtualenv is and how to use it.
Anyway, if you already know what I am talking about and just want to see the source code right away, click here.
Advertisement