Время на прочтение
14 мин
Количество просмотров 77K
Всем доброго!
От нашего стола к вашему…
То есть от нашего курса «Разработчик Python», несмотря на стремительно приближающий Новый год, мы подготовили вам интересный перевод о различных методах тестирования в Python.
Это руководство для тех, кто уже написал классное приложение на Python, но еще не писал для
них тесты.
Тестирование в Python — обширная тема с кучей тонкостей, но не обязательно все усложнять. В несколько простых шагов можно создать простые тесты для приложения, постепенно наращивая сложность на их основе.
В этом руководстве вы узнаете, как создать базовый тест, выполнить его и найти все баги, до того как это сделают пользователи! Вы узнаете о доступных инструментах для написания и выполнения тестов, проверите производительность приложения и даже посмотрите на проблемы безопасности.

Тестирование Кода
Тестировать код можно разными способами. В этом руководстве вы познакомитесь с методами от наиболее простых до продвинутых.
Автоматизированное vs. Ручное Тестирование
Хорошие новости! Скорее всего вы уже сделали тест, но еще не осознали этого. Помните, как вы впервые запустили приложение и воспользовались им? Вы проверили функции и поэкспериментировали с ними? Такой процесс называется исследовательским тестированием, и он является формой ручного тестирования.
Исследовательское тестирование — тестирование, которое проводится без плана. Во время исследовательского тестирования вы исследуете приложение.
Чтобы создать полный список мануальных тестов, достаточно составить перечень всех функций приложения, различных типов ввода, которые оно принимает, и ожидаемые результаты. Теперь, каждый раз когда вы меняете что-то в коде, нужно заново проверять каждый из элементов этого списка.
Звучит безрадостно, верно?
Поэтому нужны автоматические тесты. Автоматическое тестирование — исполнение плана тестирования (части приложения, требующие тестирования, порядок их тестирования и ожидаемые результаты) с помощью скрипта, а не руками человека. В Python уже есть набор инструментов и библиотек, которые помогут создать автоматизированные тесты для вашего приложения. Рассмотрим эти инструменты и библиотеки в нашем туториале.
Модульные Тесты VS. Интеграционные Тесты
Мир тестирования полон терминов, и теперь, зная разницу между ручным и автоматизированным тестированием, опустимся на уровень глубже.
Подумайте, как можно протестировать фары машины? Вы включаете фары (назовем это шагом тестирования), выходите из машины сами или просите друга, чтобы проверить, что фары зажглись (а это — тестовое суждение). Тестирование нескольких компонентов называется интеграционным тестированием.
Подумайте о всех вещах, которые должны правильно работать, чтобы простая задача выдала корректный результат. Эти компоненты похожи на части вашего приложения: все те классы, функции, модули, что вы написали.
Главная сложность интеграционного тестирования возникает, когда интеграционный тест не дает правильный результат. Сложно оценить проблему, не имея возможности изолировать сломанную часть системы. Если фары не зажглись, возможно лампочки сломаны. Или может аккумулятор разряжен? А может проблема в генераторе? Или вообще сбой в компьютере машины?
Современные машины сами оповестят вас о поломке лампочек. Определяется это с помощью модульного теста.
Модульный тест (юнит-тест) — небольшой тест, проверяющий корректность работы отдельного компонента. Модульный тест помогает изолировать поломку и быстрее устранить ее.
Мы поговорили о двух видах тестов:
- Интеграционный тест, проверяющий компоненты системы и их взаимодействие друг с другом;
- Модульный тест, проверяющий отдельный компонент приложения.
- Вы можете создать оба теста на Python. Чтобы написать тест для встроенной функции sum(), нужно сравнить выходные данные sum() с известными значениями.
Например, вот так можно проверить что сумма чисел (1, 2, 3) равна 6:
>>> assert sum([1, 2, 3]) == 6, "Should be 6"
Значения правильные, поэтому в REPL ничего не будет выведено. Если результат sum() некорректный, будет выдана AssertionError с сообщением “Should be 6” (“Должно быть 6”). Проверим оператор утверждения еще раз, но теперь с некорректными значениями, чтобы получить AssertionError:
>>> assert sum([1, 1, 1]) == 6, "Should be 6"
Traceback (most recent call last):
  File "<stdin>", line 1, in <module>
AssertionError: Should be 6
В REPL вы увидете AssertionError, так как значение sum() не равно 6.
Вместо REPL, положите это в новый Python-файл с названием test_sum.py и выполните его снова:
def test_sum():
    assert sum([1, 2, 3]) == 6, "Should be 6"

if __name__ == "__main__":
    test_sum()
    print("Everything passed")
Теперь у вас есть написанный тест-кейс (тестовый случай), утверждение и точка входа (командной строки). Теперь это можно выполнить в командной строке:
$ python test_sum.py
Everything passed
Вы видите успешный результат, “Everything passed” (“Все пройдено”).
sum() в Python принимает на вход любой итерируемый в качестве первого аргумента. Вы проверили список. Попробуем протестировать кортеж. Создадим новый файл с названием test_sum_2.py со следующим кодом:
def test_sum():
    assert sum([1, 2, 3]) == 6, "Should be 6"

def test_sum_tuple():
    assert sum((1, 2, 2)) == 6, "Should be 6"

if __name__ == "__main__":
    test_sum()
    test_sum_tuple()
    print("Everything passed")
Выполнив test_sum_2.py, скрипт выдаст ошибку, так как sum() (1, 2, 2) должен быть равен 5, а не 6. В результате скрипт выдает сообщение об ошибке, строку кода и трейсбек:
$ python test_sum_2.py
Traceback (most recent call last):
  File "test_sum_2.py", line 9, in <module>
    test_sum_tuple()
  File "test_sum_2.py", line 5, in test_sum_tuple
    assert sum((1, 2, 2)) == 6, "Should be 6"
AssertionError: Should be 6
Можно увидеть, как ошибка в коде вызывает ошибку в консоли с информацией, где она произошла, и каким был ожидаемый результат.
Такие тесты подойдут для простой проверки, но что если ошибки есть больше, чем в одном? На помощь приходят исполнители тестов (test runners). Исполнитель тестов — особое приложение, спроектированное для проведение тестов, проверки данных вывода и предоставления инструментов для отладки и диагностики тестов и приложений.
Выбор Исполнителя Тестов
Для Python доступно множество исполнителей тестов. Например, в стандартную библиотеку Python встроен unittest. В этом руководстве, будем использовать тест-кейсы и исполнители тестов unittest. Принципы работы unittest легко адаптируются для других фреймворков. Перечислим самые популярные исполнители тестов:
- unittest;
- nose или nose2;
- pytest.
Важно выбрать исполнитель тестов, соответствующий вашим требованиям и опытности.
unittest
unittest встроен в стандартную библиотеку Python, начиная с версии 2.1. Вы наверняка столкнетесь с ним в коммерческих приложениях Python и проектах с открытым исходным кодом.
В unittest есть тестовый фреймворк и исполнитель тестов. При написании и исполнении тестов нужно соблюдать некоторые важные требования.
unittest требует:
- Помещать тесты в классы, как методы;
- Использовать специальные методы утверждения. Класс TestCase вместо обычного встроенного выражения assert.
Чтобы превратить ранее написанный пример в тест-кейс unittest, необходимо:
- Импортировать unittest из стандартной библиотеки;
- Создать класс под названием
TestSum, который будет наследовать классTestCase; - Сконвертировать тестовые функции в методы, добавив
selfв качестве первого аргумента; - Изменить утверждения, добавив использование
self.assertEqual()метода в классеTestCase; - Изменить точку входа в командной строке на вызов
unittest.main().
Следуя этим шагам, создайте новый файл test_sum_unittest.py со таким кодом:
import unittest


class TestSum(unittest.TestCase):

    def test_sum(self):
        self.assertEqual(sum([1, 2, 3]), 6, "Should be 6")

    def test_sum_tuple(self):
        self.assertEqual(sum((1, 2, 2)), 6, "Should be 6")

if __name__ == '__main__':
    unittest.main()
Выполнив это в командной строке, вы получите одно удачное завершение (обозначенное .) и одно неудачное (обозначенное F):
$ python test_sum_unittest.py
.F
======================================================================
FAIL: test_sum_tuple (__main__.TestSum)
----------------------------------------------------------------------
Traceback (most recent call last):
  File "test_sum_unittest.py", line 9, in test_sum_tuple
    self.assertEqual(sum((1, 2, 2)), 6, "Should be 6")
AssertionError: Should be 6

----------------------------------------------------------------------
Ran 2 tests in 0.001s

FAILED (failures=1)
Таким образом, вы выполнили два теста с помощью исполнителя тестов unittest.
Примечание: Если вы пишете тест-кейсы для Python 2 и 3 — будьте осторожны. В версиях Python 2.7 и ниже unittest называется unittest 2. При импорте из unittest вы получите разные версии с разными функциями в Python 2 и Python 3.
Чтобы узнать больше о unittest’ах почитайте unittest документацию.
nose
Со временем, после написания сотни, а то и тысячи тестов для приложения, становится все сложнее понимать и использовать данные вывода unittest.
nose совместим со всеми тестами, написанными с unittest фреймворком, и может заменить его тестовый исполнитель. Разработка nose, как приложения с открытым исходным кодом, стала тормозиться, и был создан nose2. Если вы начинаете с нуля, рекомендуется использовать именно nose2.
Для начала работы с nose2 нужно установить его из PyPl и запустить в командной строке. nose2 попытается найти все тестовые скрипы с test*.py в названии и все тест-кейсы, унаследованные из unittest.TestCase в вашей текущей директории:
$ pip install nose2
$ python -m nose2
.F
======================================================================
FAIL: test_sum_tuple (__main__.TestSum)
----------------------------------------------------------------------
Traceback (most recent call last):
  File "test_sum_unittest.py", line 9, in test_sum_tuple
    self.assertEqual(sum((1, 2, 2)), 6, "Should be 6")
AssertionError: Should be 6

----------------------------------------------------------------------
Ran 2 tests in 0.001s

FAILED (failures=1)
Так выполняется тест, созданный в test_sum_unittest.py, из исполнителя тестов nose2. nose2 предоставляет множество флагов командной строки для фильтрации исполняемых тестов. Чтобы узнать больше, советуем ознакомиться с документацией Nose 2.
pytest
pytest поддерживает выполнение тест-кейсов unittest. Но настоящее преимущество pytest — его тест-кейсы. Тест-кейсы pytest — серия функций в Python-файле с test_ в начале названия.
Есть в нем и другие полезные функции:
- Поддержка встроенных выражений assert вместо использования специальных self.assert*() методов;
- Поддержка фильтрации тест-кейсов;
- Возможность повторного запуска с последнего проваленного теста;
- Экосистема из сотен плагинов, расширяющих функциональность.
Пример тест-кейса TestSum для pytest будет выглядеть следующим образом:
def test_sum():
    assert sum([1, 2, 3]) == 6, "Should be 6"

def test_sum_tuple():
    assert sum((1, 2, 2)) == 6, "Should be 6"
Вы избавились от TestCase, использования классов и точек входа командной строки.
Больше информации можно найти на Сайте Документации Pytest.
Написание Первого Теста
Объединим все, что мы уже узнали, и вместо встроенной функции sum() протестируем простую реализацию с теми же требованиями.
Создайте новую папку для проекта, внутри которой создайте новую папку с названием my_sum. Внутри my_sum создайте пустой файл с названием _init_.py. Наличие этого файла значит, что папка my_sum может быть импортирована в виде модуля из родительской директории.
Структура папок будет выглядеть так:
project/

│

└── my_sum/

 └── __init__.py
Откройте my_sum/__init__.py и создайте новую функцию с названием sum(), которая берет на вход итерируемые (список, кортеж, множество) и складывает значения.
def sum(arg):
    total = 0
    for val in arg:
        total += val
    return total
В этом примере создается переменная под названием total, перебираются все значения в arg и добавляются к total. Затем, по завершении итерации, результат возвращается.
Где Писать Тест
Начать написание теста можно с создания файла test.py, в котором будет содержаться ваш первый тест-кейс. Для тестирования у файла должна быть возможность импортировать ваше приложение, поэтому положите test.py в папку над пакетом. Дерево каталогов будет выглядеть следующим образом:
project/

│

├── my_sum/

│ └── __init__.py

|

└── test.py
Вы заметите, что по мере добавления новых тестов, ваш файл становится все более громоздким и сложным для поддержки, поэтому советуем создать папку tests/ и разделить тесты на несколько файлов. Убедитесь, что названия всех файлов начинаются с test_, чтобы исполнители тестов понимали, что файлы Python содержат тесты, которые нужно выполнить. На больших проектах тесты делят на несколько директорий в зависимости от их назначения или использования.
Примечание: А что есть ваше приложение представляет собой один скрипт?
Вы можете импортировать любые атрибуты скрипта: классы, функции или переменные, с помощью встроенной функции __import__(). Вместо from my_sum import sum напишите следующее:
target = __import__("my_sum.py")
sum = target.sum
При использовании __import__() вам не придется превращать папку проекта в пакет, и вы сможете указать имя файла. Это полезно, если имя файла конфликтует с названиями стандартных библиотек пакетов. Например, если math.py конфликтует с math модулем.
Как Структурировать Простой Тест
Перед написанием тестов, нужно решить несколько вопросов:
- Что вы хотите протестировать?
- Вы пишете модульный тест или интеграционный тест?
Сейчас вы тестируете sum(). Для него можно проверить разные поведения, например:
- Можно ли суммировать список целых чисел?
- Можно ли суммировать кортеж или множество?
- Можно ли суммировать список чисел с плавающей точкой?
- Что будет, если дать на вход плохое значение: одно целое число или строку?
- Что будет, если одно из значений отрицательное?
Проще всего тестировать список целых чисел. Создайте файл test.py со следующим кодом:
import unittest

from my_sum import sum


class TestSum(unittest.TestCase):
    def test_list_int(self):
        """
        Test that it can sum a list of integers
        """
        data = [1, 2, 3]
        result = sum(data)
        self.assertEqual(result, 6)

if __name__ == '__main__':
    unittest.main()
Код в этом примере:
- Импортирует
sum()из пакетаmy_sum(), который вы создали; - Определяет новый класс тест-кейса под названием TestSum, наследующий
unittest.TestCase; - Определяет тестовый метод
.test_list_int()для тестирования целочисленного списка. Метод.test_list_int()сделает следующее
:
- Объявит переменную
dataсо списком значений(1, 2, 3); - Присвоит значение
my_sum.sum(data)переменнойresult; - Определит, что значение result равно 6 с помощью метода
.assertEqual()наunittest.TestCaseклассе.
- Определяет точку входа командной строки, которая запускает исполнителя теста unittest
.main().
Если вы не знаете, что такое self, или как определяется .assertEqual(), то можете освежить знания по объектно-ориентированному программированию с Python 3 Object-Oriented Programming.
Как Писать Утверждения
Последний шаг в написании теста — проверка соответствия выходных данных известным значениям. Это называют утверждением (assertion). Существует несколько общих рекомендаций по написанию утверждений:
- Проверьте, что тесты повторяемы и запустите их несколько раз, чтобы убедиться, что каждый раз они дают одни и те же результаты;
- Проверьте и подтвердите результаты, которые относятся к вашим входным данным — проверьте, что результат действительно является суммой значений в примере
sum().
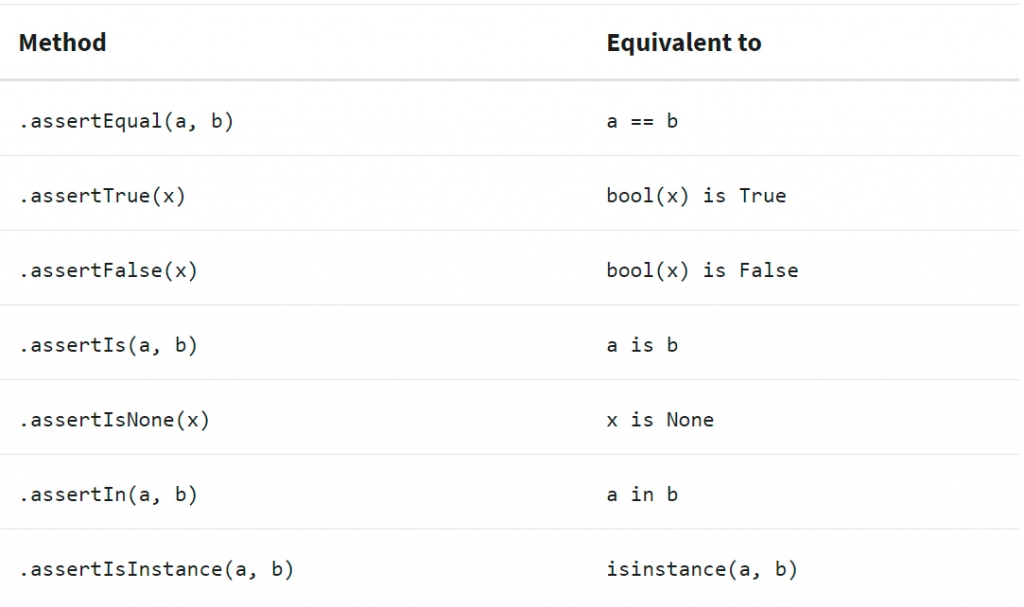
В unittest есть множество методов для подтверждения значений, типов и существования переменных. Вот некоторые из наиболее часто используемых методов:
| Метод | Эквивалент |
|---|---|
| .assertEqual(a, b) | a == b |
| .assertTrue(x) | bool(x) is True |
| .assertFalse(x) | bool(x) is False |
| .assertIs(a, b) | a is b |
| .assertIsNone(x) | x is None |
| .assertIn(a, b) | a in b |
| .assertIsInstance(a, b) | isinstance(a, b) |
У .assertIs(), .assertIsNone(), .assertIn(), and .assertIsInstance() есть противоположные методы, называемые .assertIsNot() и тд.
Побочные эффекты
Писать тесты сложнее, чем просто смотреть на возвращаемое значение функции. Зачастую, выполнение кода меняет другие части окружения: атрибуты класса, файлы файловой системы, значения в базе данных. Это важная часть тестирования, которая называется побочные эффекты. Решите, тестируете ли вы побочный эффект до того, как включить его в список своих утверждений.
Если вы обнаружили, что в блоке кода, который вы хотите протестировать, много побочных эффектов, значит вы нарушаете Принцип Единственной Ответственности. Нарушение принципа единственной ответственности означает, что фрагмент кода делает слишком много вещей и требует рефакторинга. Следование принципу единственной ответственности — отличный способ проектирования кода, для которого не составит труда писать простые повторяемые модульные тесты, и, в конечном счете, создания надежных приложений.
Запуск Первого Теста
Вы создали первый тест и теперь нужно попробовать выполнить его. Понятно, что он будет пройден, но перед созданием более сложных тестов, нужно убедиться, что даже такие тесты выполняются успешно.
Запуск Исполнителей Тестов
Исполнитель тестов — приложение Python, которое выполняет тестовый код, проверяет утверждения и выдает результаты тестирования в консоли. В конец test.py добавьте этот небольшой фрагмент кода:
if __name__ == '__main__':
    unittest.main()
Это точка входа командной строки. Если вы выполните этот скрипт, запустив python test.py в командной строке, он вызовет unittest.main(). Это запускает исполнителя тестов, обнаруживая все классы в этом файле, наследуемые из unittest.TestCase.
Это один из многих способов запуска исполнителя тестов unittest. Если у вас есть единственный тестовый файл с названием test.py, вызов python test.py — отличный способ начать работу.
Другой способ — использовать командную строку unittest. Попробуем:
$ python -m unittest test
Это исполнит тот же самый тестовый модуль (под названием test) через командную строку. Можно добавить дополнительные параметры для изменения выходных данных. Один из них -v для многословности (verbose). Попробуем следующее:
$ python -m unittest -v test
test_list_int (test.TestSum) ... ok

----------------------------------------------------------------------
Ran 1 tests in 0.000s
Мы исполнили один тест из test.py и вывели результаты в консоль. Многословный режим перечислил имена выполненных тестов и результаты каждого из них.
Вместо предоставления имени модуля, содержащего тесты, можно запросить авто-обнаружение при помощи следующего:
$ python -m unittest discover
Эта команда будет искать в текущей директории файлы с test*.py в названии, чтобы протестировать их.
При наличии нескольких тестовых файлов и соблюдении шаблона наименования test*.py, можно передать имя директории при помощи -s флага и названия папки.
$ python -m unittest discover -s tests
unittest запустит все тесты в едином тестовом плане и выдаст результаты.
Наконец, если ваш исходный код находится не в корневом каталоге, а в подкаталоге, например в папке с названием src/, можно с помощью -t флага сообщить unittest, где выполнять тесты, для корректного импорта модулей:
$ python -m unittest discover -s tests -t src
unittest найдет все файлы test*.py в директории src/ внутри tests, а затем выполнит их.
Понимание Результатов Тестирование
Это был очень простой пример, где все прошло успешно, поэтому попробуем понять выходные данные проваленного теста.
sum() должен принимать на вход другие списки числового типа, например дроби.
К началу кода в файле test.py добавьте выражение для импорта типа Fraction из модуля fractions стандартной библиотеки.
from fractions import FractionТеперь добавим тест с утверждением, ожидая некорректное значение. В нашем случае, ожидаем, что сумма ¼, ¼ и ⅖ будет равна 1:
import unittest

from my_sum import sum


class TestSum(unittest.TestCase):
    def test_list_int(self):
        """
        Test that it can sum a list of integers
        """
        data = [1, 2, 3]
        result = sum(data)
        self.assertEqual(result, 6)

    def test_list_fraction(self):
        """
        Test that it can sum a list of fractions
        """
        data = [Fraction(1, 4), Fraction(1, 4), Fraction(2, 5)]
        result = sum(data)
        self.assertEqual(result, 1)

if __name__ == '__main__':
    unittest.main()
Если вы запустите тесты повторно с python -m unittest test, получите следующее:
$ python -m unittest test
F.
======================================================================
FAIL: test_list_fraction (test.TestSum)
----------------------------------------------------------------------
Traceback (most recent call last):
  File "test.py", line 21, in test_list_fraction
    self.assertEqual(result, 1)
AssertionError: Fraction(9, 10) != 1

----------------------------------------------------------------------
Ran 2 tests in 0.001s

FAILED (failures=1)
В этих выходных данных вы видите следующее:
- В первой строке указаны результаты выполнения всех тестов: один проваленный (F), один пройденный (.);
- FAIL показывает некоторые детали проваленного теста:
- Название тестового метода (
test_list_fraction); - Тестовый модуль (
test) и тест-кейс (TestSum); - Трейсбек строки с ошибкой;
- Детали утверждения с ожидаемым результатом (1) и фактическим результатом (Fraction(9, 10))
Помните, можно добавить дополнительную информацию к выходным данным теста с помощью флага -v к команде python -m unittest.
Запуск тестов из PyCharm
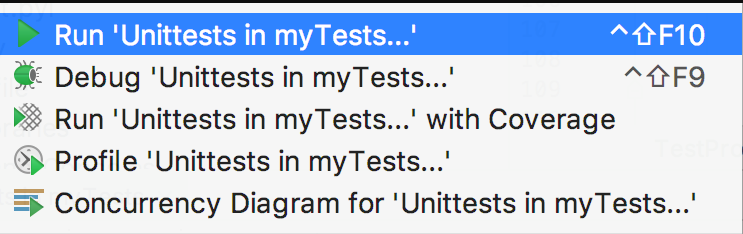
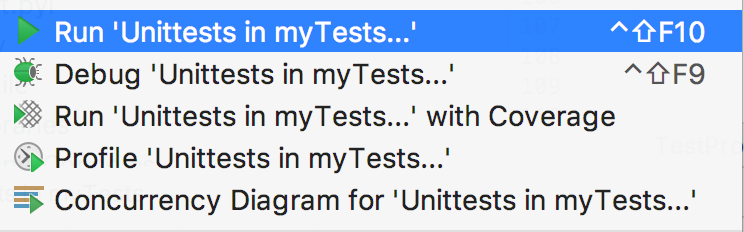
Если вы используете PyCharm IDE, то можете запустить unittest или pytest, выполнив следующие шаги:
- В окне Project tool, выберите директорию tests.
- В контекстном меню выберите команду запуска unittest. Например, ‘Unittests in my Tests…’.
Это выполнит unittest в тестовом окне и выдаст результаты в PyCharm:
Больше информации доступно на сайте PyCharm.
Запуск Тестов из Visual Studio Code
Если вы пользуетесь Microsoft Visual Studio Code IDE, поддержка unittest, nose и pytest уже встроена в плагин Python.
Если он у вас установлен, можно настроить конфигурацию тестов, открыв Command Palette по Ctrl+Shift+P и написав “Python test”. Вы увидите список вариантов:

Выберите Debug All Unit Tests, после чего VSCode отправит запрос для настройки тестового фреймворка. Кликните по шестеренке для выбора исполнителя тестов (unittest) и домашней директории (.).
По завершении настройки, вы увидите статус тестов в нижней части экрана и сможете быстро получить доступ к тестовым логам и повторно запустить тесты, кликнув по иконкам:
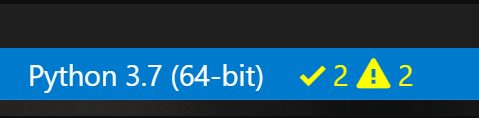
Видим, что тесты выполняются, но некоторые из них провалены.
THE END
В следующей части статьи мы рассмотрим тесты для фреймворков, таких как Django и Flask.
Ждём ваши вопросы и комментарии тут и, как всегда, можно зайти к Станиславу на день открытых дверей.
Вторая часть

Андрей Смирнов
Python-разработчик, эксперт по автоматизации и преподаватель в Школе программистов МШП
Меня зовут Андрей Смирнов, я занимаюсь Python-разработкой, автоматизацией технических процессов и преподаю промышленное программирование в Школе программистов МШП.
Не секрет, что разработчики создают программы, которые рано или поздно становятся очень масштабными (если смотреть на количество строчек кода). А с этим приходит и большая ответственность за качество.
Сейчас расскажу, как unittest и pytest помогут найти ошибки в программах и исключить их в будущем.
Итак, тестирование
Каждый, кто писал первые программы (будь то классический «hello, world» или же калькулятор), всегда запускал тесты, чтобы проверить их работу.
Сам факт запуска — самое первое, незримое касание технологии тестирования в вашей жизни. Рассмотрим его как процесс поиска ошибок на чуть более сложной программе.
Например, вам нужно ввести три числа (a, b, c) и найти корни квадратного уравнения. Для решения пишем код:
from math import sqrt

def square_eq_solver(a, b, c):
   result = []
   discriminant = b * b - 4 * a * c

   if discriminant == 0:
       result.append(-b / (2 * a))
   else:
       result.append((-b + sqrt(discriminant)) / (2 * a))
       result.append((-b - sqrt(discriminant)) / (2 * a))

   return result

def show_result(data):
   if len(data) > 0:
       for index, value in enumerate(data):
           print(f'Корень номер {index+1} равен {value:.02f}')
   else:
       print('Уравнение с заданными параметрами не имеет корней')

def main():
   a, b, c = map(int, input('Пожалуйста, введите три числа через пробел: ').split())
   result = square_eq_solver(a, b, c)
   show_result(result)

if __name__ == '__main__':
   main()
Сразу оговорюсь: любую задачу, какой бы она ни была краткой, я рассматриваю с позиции «когда-нибудь она вырастет и станет очень объёмной». Поэтому всегда стараюсь разделять программу на различные подпрограммы (ввод/обработка/вывод).
Возможно, вы уже заметили ошибку в коде. Однако иногда она может быть скрыта настолько глубоко, что её просто так не обнаружишь. И в таком случае единственный способ вывести ее на свет — протестировать код. Как это сделать?
— зная алгоритм нахождения корней уравнения, определяем наборы входных данных, которые будут переданы на вход программе;
— зная входные данные, можно вручную просчитать, какой ответ должна дать программа;
— запускаем программу и передаем ей на вход исходные данные;
— получаем от нее ответ и сравниваем с тем, который должен быть получен. Если они совпадают — хорошо, идём к следующему набору данных, если нет, сообщаем об ошибке.
Например, для данной задачи можно подобрать следующие тесты:
- 10x**2 = 0 — единственный корень x=0
- 2x**2 + 5x — 3 = 0 — у такого уравнения два корня (x1 = 0.5, x2=-3)
- 10x**2+2 = 0 — у этого уравнения корней нет
Тесты подобрали, что дальше? Правильно, запускаем:
Тест номер 1
> python.exe example.py
Пожалуйста, введите три числа через пробел: 10 0 0
Корень номер 0 равен 0.00

Тест номер 2:
> python.exe example.py
Пожалуйста, введите три числа через пробел:  2 5 -3
Корень номер 1 равен 0.50
Корень номер 2 равен -3.00

Тест номер 3:
> python.exe example.py
Пожалуйста, введите три числа через пробел: 10 0 2
Traceback (most recent call last):
  File "C:PyProjectstprogerexample.py", line 32, in <module>
    main()
  File "C:PyProjectstprogerexample.py", line 27, in main
    result = square_eq_solver(a, b, c)
  File "C:PyProjectstprogerexample.py", line 11, in square_eq_solver
    result.append((-b + sqrt(discriminant)) / (2 * a))
ValueError: math domain error
Упс… В третьем тесте произошла ошибка. Как раз та, которую вы могли заметить в исходном коде программы — не обрабатывался случай с нулевым дискриминантом. В итоге, можно подкорректировать код функции так, чтобы этот вариант обрабатывался правильно:
def square_eq_solver(a, b, c):
   result = []
   discriminant = b * b - 4 * a * c

   if discriminant == 0:
       result.append(-b / (2 * a))
   elif discriminant > 0:  # <--- изменили условие, теперь
                           # при нулевом дискриминанте
                           # не будут вычисляться корни
       result.append((-b + sqrt(discriminant)) / (2 * a))
       result.append((-b - sqrt(discriminant)) / (2 * a))

   return result
Запускаем все тесты повторно и они срабатывают нормально.
Но учтите, чтобы повторно проверить программу, потребуется потратить несколько минут и снова проверить все три варианта входных значений. Если таких вариантов будет много, вызывать их вручную будет очень накладно. И здесь на сцену выходит автоматизированное тестирование.
Программа автоматического тестирования запускается на основе заранее заготовленных входных/выходных данных и программы, которая будет их вызывать. По сути, это программа, тестирующая другие программы. И в рамках экосистемы языка Python есть несколько пакетов, позволяющих автоматизировать процесс тестирования.
Две самые популярные библиотеки — unittest и pytest. Попробуем каждую, чтобы объективно оценить синтаксис.
Начнем с unittest, потому что именно с нее многие знакомятся с миром тестирования. Причина проста: библиотека по умолчанию встроена в стандартную библиотеку языка Python.
Формат кода
По формату написания тестов она сильно напоминает библиотеку JUnit, используемую в языке Java для написания тестов:
- тесты должны быть написаны в классе;
- класс должен быть отнаследован от базового класса unittest.TestCase;
- имена всех функций, являющихся тестами, должны начинаться с ключевого слова test;
- внутри функций должны быть вызовы операторов сравнения (assertX) — именно они будут проверять наши полученные значения на соответствие заявленным.
Пример использования unittest для нашей задачи
import unittest

class SquareEqSolverTestCase(unittest.TestCase):
   def test_no_root(self):
       res = square_eq_solver(10, 0, 2)
       self.assertEqual(len(res), 0)

   def test_single_root(self):
       res = square_eq_solver(10, 0, 0)
       self.assertEqual(len(res), 1)
       self.assertEqual(res, [0])

   def test_multiple_root(self):
       res = square_eq_solver(2, 5, -3)
       self.assertEqual(len(res), 2)
       self.assertEqual(res, [0.5, -3])
Запускается данный код следующей командой
python.exe -m unittest example.py
И в результате на экран будет выведено:
> python.exe -m unittest example.py
...
------------------------------------------------------------------
Ran 3 tests in 0.001s

OK
В случае, если в каком-нибудь из тестов будет обнаружена ошибка, unittest не замедлит о ней сообщить:
> python.exe -m unittest example.py
F..
==================================================================
FAIL: test_multiple_root (hello.SquareEqSolverTestCase)
------------------------------------------------------------------
Traceback (most recent call last):
  File "C:PyProjectstprogerexample.py", line 101, in test_multiple_root
    self.assertEqual(len(res), 3)
AssertionError: 2 != 3
------------------------------------------------------------------
Ran 3 tests in 0.001s

FAILED (failures=1)
Unittest: аргументы “за”
- Является частью стандартной библиотеки языка Python: не нужно устанавливать ничего дополнительно;
- Гибкая структура и условия запуска тестов. Для каждого теста можно назначить теги, в соответствии с которыми будем запускаться либо одна, либо другая группа тестов;
- Быстрая генерация отчетов о проведенном тестировании, как в формате plaintext, так и в формате XML.
Unittest: аргументы “против”
- Для проведения тестирования придётся написать достаточно большое количество кода (по сравнению с другими библиотеками);
- Из-за того, что разработчики вдохновлялись форматом библиотеки JUnit, названия основных функций написаны в стиле camelCase (например setUp и assertEqual);
- В языке python согласно рекомендациям pep8 должен использоваться формат названий snake_case (например set_up и assert_equal).
Pytest
Возможно, наиболее популярный фреймворк с открытым исходным кодом из всех, представленных здесь.
Pytest позволяет провести модульное тестирование (тестирование отдельных компонентов программы), функциональное тестирование (тестирование способности кода удовлетворять бизнес-требования), тестирование API (application programming interface) и многое другое.
Формат кода
Написание тестов здесь намного проще, нежели в unittest. Вам нужно просто написать несколько функций, удовлетворяющих следующим условиям:
- Название функции должно начинаться с ключевого слова test;
- Внутри функции должно проверяться логическое выражение при помощи оператора assert.
Пример использования pytest для нашей задачи:
def test_no_root():
   res = square_eq_solver(10, 0, 2)
   assert len(res) == 0

def test_single_root():
   res = square_eq_solver(10, 0, 0)
   assert len(res) == 1
   assert res == [0]

def test_multiple_root():
   res = square_eq_solver(2, 5, -3)
   assert len(res) == 3
   assert res == [0.5, -3]
Запускается данный код следующей командой
pytest.exe example.py
И в результате на экран будет выведено:
> pytest.exe example.py
======================= test session starts ======================
platform win32 -- Python 3.9.6, pytest-7.1.2, pluggy-1.0.0
rootdir: C:PyProjectstproger
collected 3 items

example.py ...                                              [100%]

======================== 3 passed in 0.03s =======================
В случае ошибки вывод будет несколько больше:
> pytest.exe example.py
======================= test session starts ======================
platform win32 -- Python 3.9.6, pytest-7.1.2, pluggy-1.0.0
rootdir: C:PyProjectstproger
collected 3 items

example.py ..F                                              [100%]

============================ FAILURES ============================
_______________________ test_multiple_root _______________________

    def test_multiple_root():
        res = square_eq_solver(2, 5, -3)
>       assert len(res) == 3
E       assert 2 == 3
E        +  where 2 = len([0.5, -3.0])

example.py:116: AssertionError
===================== short test summary info ====================
FAILED example.py::test_multiple_root - assert 2 == 3

=================== 1 failed, 2 passed in 0.10s ==================
Pytest: аргументы “за”
- Позволяет писать компактные (по сравнению с unittest) наборы тестов;
- В случае возникновения ошибок выводится гораздо больше информации о них;
- Позволяет запускать тесты, написанные для других тестирующих систем;
- Имеет систему плагинов (и сотни этих самых плагинов), расширяющую возможности фреймворка. Примеры таких плагинов: pytest-cov, pytest-django, pytest-bdd;
- Позволяет запускать тесты в параллели (при помощи плагина pytest-xdist).
Pytest: аргументы “против”
- pytest не входит в стандартную библиотеку языка Python. Поэтому его придётся устанавливать отдельно при помощи команды pip install pytest;
- совместимость кода с другими фреймворками отсутствует. Так что, если напишете код под pytest, запустить его при помощи встроенного unittest не получится.
Ну и что лучше?
- Если вам нужно базовое юнит-тестирование и вы знакомы с фреймворками вида xUnit, тогда вам подойдёт unittest.
- Если нужен фреймворк, позволяющий создавать краткие и изящные тесты, реализующие сложную логику проверок, то pytest.
Post Scriptum
Тема контроля качества очень обширна. И даже к написанному мной коду очень легко придраться. Как минимум здесь отсутствует проверка на то, что вводимые данные обязательно должны быть целыми числами. Если ввести любое другое число или даже строку, она обязательно завершится с ошибкой.
Кстати, в этой программе я намеренно оставил ещё одну ошибку (на сей раз уже логическую), связанную с нахождением корня. Напишите в комментариях, с чем она может быть связана, и какой тест поможет её отловить 😉
Пишете код на Python? Будет полезно знать о принципах тестирования Python-кода ваших приложений. Изучайте статью и применяйте навыки в работе.
Многие считают что язык программирования Python − это просто. Такое впечатление складывается после прочитанной книги по Python, статьи или видео-туториала. Возможно, он действительно проще, чем другие технологии, вот только без трудностей не бывает даже тут. Но и их можно избежать, если понять принципы тестирования Python-кода.
Как всё устроено
Сразу к делу. Вот как будет проходить проверка функции sum() (1,2,3) равна шести:
>>> assert sum([1, 2, 3]) == 6, "Should be 6"
Тест не выведет ничего на REPL, так как значения верны. Но если результат sum() неверен, это приведет к ошибке AssertionError и сообщению “Should be 6”.
>>> assert sum([1, 1, 1]) == 6, "Should be 6"
Traceback (most recent call last):
  File "<stdin>", line 1, in <module>
AssertionError: Should be 6
В REPL вы видите AssertionError, потому что результат не соответствует 6. Переместите код в новый файл, названный test_sum.py и выполните снова:
def test_sum():
    assert sum([1, 2, 3]) == 6, "Should be 6"

if __name__ == "__main__":
    test_sum()
    print("Everything passed")
Вы написали пример теста, утверждение и точку входа.
$ python test_sum.py
Everything passed
sum() принимает любое повторяющееся значение в качестве первого аргумента. Вы проверили список, теперь проверьте так же и tuple. Создайте новый файл test_sum_2.py:
def test_sum():
    assert sum([1, 2, 3]) == 6, "Should be 6"

def test_sum_tuple():
    assert sum((1, 2, 2)) == 6, "Should be 6"

if __name__ == "__main__":
    test_sum()
    test_sum_tuple()
    print("Everything passed")
Когда вы выполняете test_sum_2.py, скрипт выдает ошибку, так как sum() от (1,2,2) не равна 6:
$ python test_sum_2.py
Traceback (most recent call last):
  File "test_sum_2.py", line 9, in <module>
    test_sum_tuple()
  File "test_sum_2.py", line 5, in test_sum_tuple
    assert sum((1, 2, 2)) == 6, "Should be 6"
AssertionError: Should be 6
Для более масштабных вещей используют running tests. Это специальные приложения для запуска тестов, проверки вывода и предоставления инструментов для отладки и диагностики тестов и приложений.
Выбор Test Runner
Unittest
Unittest содержит как структуру тестирования Python, так и test runners. У него есть несколько требований:
- Нужно помещать свои тесты в классы как методы.
- Нужно использовать ряд специальных методов утверждения в unittest − TestCase вместо assert.
Для преобразования в unittest:
- Импортируйте его из стандартной библиотеки.
- Создайте класс TestSum, который наследуется от класса TestCase.
- Преобразуйте тестовые функции в методы путем добавления self в качестве первого аргумента.
- Изменить утверждение на использование метода self.assertEqual() в классе TestCase.
- Изменить точку входа в командной строке для вызова unittest.main().
- Создайте test_sum_unittest.py:
import unittest


class TestSum(unittest.TestCase):

    def test_sum(self):
        self.assertEqual(sum([1, 2, 3]), 6, "Should be 6")

    def test_sum_tuple(self):
        self.assertEqual(sum((1, 2, 2)), 6, "Should be 6")

if __name__ == '__main__':
    unittest.main()
$ python test_sum_unittest.py
.F
======================================================================
FAIL: test_sum_tuple (__main__.TestSum)
----------------------------------------------------------------------
Traceback (most recent call last):
  File "test_sum_unittest.py", line 9, in test_sum_tuple
    self.assertEqual(sum((1, 2, 2)), 6, "Should be 6")
AssertionError: Should be 6

----------------------------------------------------------------------
Ran 2 tests in 0.001s

FAILED (failures=1)
Nose
Совместим с любыми тестами, написанными с использованием unittest. Чтобы начать тестирование Python-кода, установите его из PyPl и выполните в командной строке. Он попытается обнаружить все скрипты с именем test*.py, наследующие от unittest.
$ pip install nose2
$ python -m nose2
.F
======================================================================
FAIL: test_sum_tuple (__main__.TestSum)
----------------------------------------------------------------------
Traceback (most recent call last):
  File "test_sum_unittest.py", line 9, in test_sum_tuple
    self.assertEqual(sum((1, 2, 2)), 6, "Should be 6")
AssertionError: Should be 6

----------------------------------------------------------------------
Ran 2 tests in 0.001s

FAILED (failures=1)
Pytest
Pytest также поддерживает выполнение тестов unittest, а его преимущество заключается в написании своих тестов. Они представляют собой ряд функций в файле Python.
Кроме того, он отличается:
- Поддержкой встроенного утверждения assert вместо использования специальных методов self.assert*().
- Возможностью повторного запуска с пропущенного теста.
- Наличием системы дополнительных плагинов.
Написание тестового примера TestSum для pytest будет выглядеть так:
def test_sum():
    assert sum([1, 2, 3]) == 6, "Should be 6"

def test_sum_tuple():
    assert sum((1, 2, 2)) == 6, "Should be 6"
Написание вашего первого теста
Если вы только начали изучать Python с нуля, обязательно затроньте и темы дебага/тестирования. Понимание принципов тестирования Python включает в себя принципы написания собственных тестов. Создайте новую папку проекта и внутри нее, под названием my_sum, еще одну. Внутри my_sum создайте пустой файл с именем __init__.py:
project/
│
└── my_sum/
    └── __init__.py
Откройте my_sum/__init__.py и создайте новую функцию sum(), которая обрабатывает повторения.
def sum(arg):
    total = 0
    for val in arg:
        total += val
    return total
В этом коде создается переменная с именем total, которая повторяет все значения в arg и добавляет их к total.
Где писать тест
Создайте в корне файл test.py, который будет содержать ваш первый тест:
project/
│
├── my_sum/
│   └── __init__.py
|
└── test.py
Как структурировать простой тест?
Прежде чем перейти к написанию тестов, вы должны понять следующее:
- Что вы хотите проверить?
- Вы пишете unit test или integration test?
После убедитесь, что структура теста соответствует следующему порядку:
- Создание структуры ввода.
- Выполнение кода и определение вывода.
- Сравнивание полученного с ожидаемым результатом.
Для этого приложения вы должны проверить sum(). Есть много вариантов поведения функции, которые нужно учитывать:
- Может ли функция суммировать целые числа?
- Может ли она использовать set или tuple?
- Что происходит, когда вы вводите неверное значение, например, переменную или целую строчку?
- Что происходит, когда значение отрицательно?
Начнем с суммы целых чисел.
import unittest

from my_sum import sum


class TestSum(unittest.TestCase):
    def test_list_int(self):
        """
        Test that it can sum a list of integers
        """
        data = [1, 2, 3]
        result = sum(data)
        self.assertEqual(result, 6)

if __name__ == '__main__':
    unittest.main()
Код импортирует sum() из папки my_sum, затем определяет новый класс теста TestSum, наследуемый от unittest, а TestCase определяет тестовый метод .test_list_int() для проверки списка целых чисел.
Метод .test_list_int() будет:
- Описывать переменные списка чисел.
- Назначать результат my_sum.sum(data) для результирующей переменной.
- Проверять, что значение равно шести, используя метод .assertEqual() в классе unittestTestCase.
- Определять точку ввода в командную строку, где выполняется unittest test–runner .main().
Как писать утверждения и проверки assertions
Последним этапом теста является проверка вывода на основе известного ответа. Это называется утверждением − assertion. Есть несколько общих принципов их написания:
- Удостоверьтесь, что тесты могут повторяться.
- Попробуйте проверять результаты, которые относятся к входным данным, например, проверка результата суммы значений в sum().
Unittest поставляется со множеством методов для проверки значений и переменных. Вот некоторые из наиболее используемых:
Проверка Test Runners
if __name__ == '__main__':
    unittest.main()
Это точка входа в командную строку. Она означает, что если вы выполните скрипт самостоятельно, запустив python.test.py в командной строке, он вызовет unittest.main(), после чего запустятся все классы, которые наследуются от unittest.TestCase в этом файле.
$ python -m unittest test
Вы можете предоставить дополнительные опции для изменения вывода. Один из них – “–v”:
$ python -m unittest -v test
test_list_int (test.TestSum) ... ok

----------------------------------------------------------------------
Ran 1 tests in 0.000s
Вместо предоставления имени модуля, содержащего тесты, можно запросить автоматическое обнаружение:
$ python -m unittest discover
Если у вас есть несколько тестов, и вы следуете шаблону test*.py, можно указать имя каталога, используя –s flag:
$ python -m unittest discover -s tests
Если исходный код отсутствует в корне каталога и содержится в подкаталоге, можно сообщить Unittest, где выполнить тесты, чтобы он правильно импортировал модули с –t flag:
$ python -m unittest discover -s tests -t src
Результаты тестирования
sum() должна иметь возможность принимать другие списки числовых типов (дроби).
В верхней части файла test.py добавьте оператор импорта:
from fractions import Fraction
Добавьте тест с утверждением, ожидающим неправильное значение. В этом случае ожидание sum() от (¼, ¼ и ⅖) будет равно 1.
import unittest

from my_sum import sum


class TestSum(unittest.TestCase):
    def test_list_int(self):
        """
        Test that it can sum a list of integers
        """
        data = [1, 2, 3]
        result = sum(data)
        self.assertEqual(result, 6)

    def test_list_fraction(self):
        """
        Test that it can sum a list of fractions
        """
        data = [Fraction(1, 4), Fraction(1, 4), Fraction(2, 5)]
        result = sum(data)
        self.assertEqual(result, 1)

if __name__ == '__main__':
    unittest.main()
Если вы снова выполните тест с python –m unittest test, вы увидите следующее:
$ python -m unittest test
F.
======================================================================
FAIL: test_list_fraction (test.TestSum)
----------------------------------------------------------------------
Traceback (most recent call last):
  File "test.py", line 21, in test_list_fraction
    self.assertEqual(result, 1)
AssertionError: Fraction(9, 10) != 1

----------------------------------------------------------------------
Ran 2 tests in 0.001s

FAILED (failures=1)
Выполнение тестов в PyCharm
Если вы используете PyCharm IDE, вы можете запустить Unittest или pytest, выполнив следующие шаги:
- В окне инструментов проекта выберите каталог тестов
- В контекстном меню выберите команду запуск для Unittest.
Выполнение тестов из кода Visual Studio
Если у вас установлен плагин Python, вы можете настроить конфигурацию своих тестов, открыв командную палитру с помощью Ctrl+Shift+P и набрав «Python test»:
Выберите Debug All Unit Tests. VSCode выдаст подсказку для настройки тестовой среды. Нажмите на шестеренку, чтобы выбрать unittest и домашний каталог.
Тестирование для Django и Flask
Как использовать Django Test Runner
Шаблон startapp в Django создаст файл test.py внутри каталога приложений. Если его нет, создайте:
from django.test import TestCase

class MyTestCase(TestCase):
    # Ваш метод
Основное отличие состоит в том, что наследовать нужно от django.test.TestCase вместо unittest.TestCase. Эти классы имеют один и тот же API, но Django TestCase устанавливает все необходимое для тестирования.
Чтобы выполнить свой тестовый пакет вместо использования unittest в командной строке, используйте метод manage.py:
$ python manage.py test
Если вы нуждаетесь в нескольких тестовых файлах, замените test.py на папку с именем test, поместите внутрь пустой файл с именем __init__.py и создайте файлы test_*.Py. Django обнаружит и выполнит их.
Как использовать unittest и Flask
Flask требует, чтобы приложение было импортировано и установлено в тестовом режиме. Можно создать копию тестового клиента и использовать его для запросов приложения.
Все экземпляры тестового клиента выполняются в методе setUp. В следующем примере my_app − имя приложения.
import my_app
import unittest


class MyTestCase(unittest.TestCase):

    def setUp(self):
        my_app.app.testing = True
        self.app = my_app.app.test_client()

    def test_home(self):
        result = self.app.get('/')
        # Make your assertions
Сложные сценарии тестирования
Сбои
Ранее, когда мы делали список сценариев для проверки sum(), возник вопрос: что происходит при вводе неверного значения? Тест провалится.
Существует способ обработки ожидаемых ошибок. Можно использовать .assertRaises() в качестве контекстного менеджера, а затем выполнить тест внутри блока:
import unittest

from my_sum import sum


class TestSum(unittest.TestCase):
    def test_list_int(self):
        """
        Test that it can sum a list of integers
        """
        data = [1, 2, 3]
        result = sum(data)
        self.assertEqual(result, 6)

    def test_list_fraction(self):
        """
        Test that it can sum a list of fractions
        """
        data = [Fraction(1, 4), Fraction(1, 4), Fraction(2, 5)]
        result = sum(data)
        self.assertEqual(result, 1)

    def test_bad_type(self):
        data = "banana"
        with self.assertRaises(TypeError):
            result = sum(data)

if __name__ == '__main__':
    unittest.main()
Теперь этот тест будет пройден только если sum(data) вызовет TypeError. Позже условие можно будет изменить.
Структура
Существуют и побочные эффекты: они усложняют тестирование, поскольку при каждом выполнении результаты могут разниться.

Спасительные методы:
- Реструктурирование кода.
- Использование способа mocking для методов функции.
- Использование integration test вместо unit test.
Написание integration tests
До этого времени мы занимались в основном unit testing. Двигаемся дальше.
Integration testing – тестирование нескольких компонентов приложения для проверки их совместной работоспособности. Integration testing может требовать разные сценарии работы:
- Вызов HTTP REST API
- Вызов Python API
- Вызов веб–службы
- Запуск командной строки
Каждый из этих типов integration tests может быть записан так же, как и unit test. Существенное отличие состоит в том, что Integration tests проверяют сразу несколько компонентов. Можно разделить тесты на integration и unit − разбить их по папкам:
project/
│
├── my_app/
│   └── __init__.py
│
└── tests/
    |
    ├── unit/
    |   ├── __init__.py
    |   └── test_sum.py
    |
    └── integration/
        ├── __init__.py
        └── test_integration.py
Можно указать путь к тестам:
$ python -m unittest discover -s tests/integration
Тестирование data-driven приложений
Многие integration tests требуют базовые данные, содержащие определенные значения. Например, может потребоваться тест, который проверяет правильность отображения приложения с более чем 100 клиентами в базе данных, написанной на японском.
Хорошим решением будет хранение тестовых данных в отдельной папке под названием «fixtures», чтобы указать, где именно содержится нужная информация.
Вот пример этой структуры, если данные состоят из файлов JSON:
project/
│
├── my_app/
│   └── __init__.py
│
└── tests/
    |
    └── unit/
    |   ├── __init__.py
    |   └── test_sum.py
    |
    └── integration/
        |
        ├── fixtures/
        |   ├── test_basic.json
        |   └── test_complex.json
        |
        ├── __init__.py
        └── test_integration.py
В тесте можно использовать метод .setUp() для загрузки тестовых данных из файла. Помните, что у вас может быть несколько тестов в одном файле Python, и unittest discovery будет выполнять их все. Для каждого набора тестовых данных может быть один тестовый пример:
import unittest


class TestBasic(unittest.TestCase):
    def setUp(self):
        # Load test data
        self.app = App(database='fixtures/test_basic.json')

    def test_customer_count(self):
        self.assertEqual(len(self.app.customers), 100)

    def test_existence_of_customer(self):
        customer = self.app.get_customer(id=10)
        self.assertEqual(customer.name, "Org XYZ")
        self.assertEqual(customer.address, "10 Red Road, Reading")


class TestComplexData(unittest.TestCase):
    def setUp(self):
        # load test data
        self.app = App(database='fixtures/test_complex.json')

    def test_customer_count(self):
        self.assertEqual(len(self.app.customers), 10000)

    def test_existence_of_customer(self):
        customer = self.app.get_customer(id=9999)
        self.assertEqual(customer.name, u"バナナ")
        self.assertEqual(customer.address, "10 Red Road, Akihabara, Tokyo")

if __name__ == '__main__':
    unittest.main()
Тестирование в нескольких средах
До сих пор вы работали только с одной версией Python, используя виртуальную среду с определенным набором зависимостей. Tox − приложение, которое автоматизирует процесс тестирования Python в нескольких средах.
Установка Tox
$ pip install tox
Настройка Tox для ваших нужд
Tox настраивается через файл конфигурации в каталоге проекта. Он содержит следующее:
- Команда запуска для выполнения тестов
- Дополнительные пакеты, необходимые для выполнения
- Разные версии Python для тестирования
Вместо изучения синтаксиса конфигурации Tox, можно начать с использования приложения быстрого запуска:
$ tox-quickstart
Средство конфигурации Tox создаст файл, похожий на следующий в tox.ini:
[tox]
envlist = py27, py36

[testenv]
deps =

commands =
    python -m unittest discover
Прежде чем запустить Tox, нужно создать файл setup.py, который будет содержать порядок установки пакета.
Вместо этого, можно добавить строку в файл tox.ini в заголовке [tox]:
[tox]
envlist = py27, py36
skipsdist=True
Если вы не будете создавать файл setup.py, но ваше приложение зависит от PyPl, вам нужно указать это в нескольких строках в разделе [testenv]. Например, для Django потребуется следующее:
[testenv]
deps = django
Теперь можно запустить Tox и создать две виртуальные среды: одну для Python 2.7 и одну для Python 3.6. Каталог Tox называется .tox/. Внутри него Tox выполнит обнаружение python – m unittest для каждой виртуальной среды.
Этот процесс также можно запустить, вызвав Tox в командной строке. На этом заканчиваем рассказ о принципах тестирования Python-кода.
Заключение
Python сделал тестирование доступным: unittest и собственные методы позволяют качественно тестировать код.
По мере развития навыков, можете постепенно перейти к использованию pytest и других более продвинутых функций.
- Инструменты для анализа кода Python. Часть 1
- Инструменты для анализа кода Python. Часть 2
Лучшие книги по Python:
- 13 лучших книг по Python для начинающих и продолжающих
- ТОП-10 книг по Python: эффективно, емко, доходчиво
Источник: Основы тестирования Python on Realpython
Watch Now This tutorial has a related video course created by the Real Python team. Watch it together with the written tutorial to deepen your understanding: Test-Driven Development With PyTest
This tutorial is for anyone who has written a fantastic application in Python but hasn’t yet written any tests.
Testing in Python is a huge topic and can come with a lot of complexity, but it doesn’t need to be hard. You can get started creating simple tests for your application in a few easy steps and then build on it from there.
In this tutorial, you’ll learn how to create a basic test, execute it, and find the bugs before your users do! You’ll learn about the tools available to write and execute tests, check your application’s performance, and even look for security issues.
Testing Your Code
There are many ways to test your code. In this tutorial, you’ll learn the techniques from the most basic steps and work towards advanced methods.
Automated vs. Manual Testing
The good news is, you’ve probably already created a test without realizing it. Remember when you ran your application and used it for the first time? Did you check the features and experiment using them? That’s known as exploratory testing and is a form of manual testing.
Exploratory testing is a form of testing that is done without a plan. In an exploratory test, you’re just exploring the application.
To have a complete set of manual tests, all you need to do is make a list of all the features your application has, the different types of input it can accept, and the expected results. Now, every time you make a change to your code, you need to go through every single item on that list and check it.
That doesn’t sound like much fun, does it?
This is where automated testing comes in. Automated testing is the execution of your test plan (the parts of your application you want to test, the order in which you want to test them, and the expected responses) by a script instead of a human. Python already comes with a set of tools and libraries to help you create automated tests for your application. We’ll explore those tools and libraries in this tutorial.
Unit Tests vs. Integration Tests
The world of testing has no shortage of terminology, and now that you know the difference between automated and manual testing, it’s time to go a level deeper.
Think of how you might test the lights on a car. You would turn on the lights (known as the test step) and go outside the car or ask a friend to check that the lights are on (known as the test assertion). Testing multiple components is known as integration testing.
Think of all the things that need to work correctly in order for a simple task to give the right result. These components are like the parts to your application, all of those classes, functions, and modules you’ve written.
A major challenge with integration testing is when an integration test doesn’t give the right result. It’s very hard to diagnose the issue without being able to isolate which part of the system is failing. If the lights didn’t turn on, then maybe the bulbs are broken. Is the battery dead? What about the alternator? Is the car’s computer failing?
If you have a fancy modern car, it will tell you when your light bulbs have gone. It does this using a form of unit test.
A unit test is a smaller test, one that checks that a single component operates in the right way. A unit test helps you to isolate what is broken in your application and fix it faster.
You have just seen two types of tests:
- An integration test checks that components in your application operate with each other.
- A unit test checks a small component in your application.
You can write both integration tests and unit tests in Python. To write a unit test for the built-in function sum(), you would check the output of sum() against a known output.
For example, here’s how you check that the sum() of the numbers (1, 2, 3) equals 6:
>>>
>>> assert sum([1, 2, 3]) == 6, "Should be 6"
This will not output anything on the REPL because the values are correct.
If the result from sum() is incorrect, this will fail with an AssertionError and the message "Should be 6". Try an assertion statement again with the wrong values to see an AssertionError:
>>>
>>> assert sum([1, 1, 1]) == 6, "Should be 6"
Traceback (most recent call last):
  File "<stdin>", line 1, in <module>
AssertionError: Should be 6
In the REPL, you are seeing the raised AssertionError because the result of sum() does not match 6.
Instead of testing on the REPL, you’ll want to put this into a new Python file called test_sum.py and execute it again:
def test_sum():
    assert sum([1, 2, 3]) == 6, "Should be 6"

if __name__ == "__main__":
    test_sum()
    print("Everything passed")
Now you have written a test case, an assertion, and an entry point (the command line). You can now execute this at the command line:
$ python test_sum.py
Everything passed
You can see the successful result, Everything passed.
In Python, sum() accepts any iterable as its first argument. You tested with a list. Now test with a tuple as well. Create a new file called test_sum_2.py with the following code:
def test_sum():
    assert sum([1, 2, 3]) == 6, "Should be 6"

def test_sum_tuple():
    assert sum((1, 2, 2)) == 6, "Should be 6"

if __name__ == "__main__":
    test_sum()
    test_sum_tuple()
    print("Everything passed")
When you execute test_sum_2.py, the script will give an error because the sum() of (1, 2, 2) is 5, not 6. The result of the script gives you the error message, the line of code, and the traceback:
$ python test_sum_2.py
Traceback (most recent call last):
  File "test_sum_2.py", line 9, in <module>
    test_sum_tuple()
  File "test_sum_2.py", line 5, in test_sum_tuple
    assert sum((1, 2, 2)) == 6, "Should be 6"
AssertionError: Should be 6
Here you can see how a mistake in your code gives an error on the console with some information on where the error was and what the expected result was.
Writing tests in this way is okay for a simple check, but what if more than one fails? This is where test runners come in. The test runner is a special application designed for running tests, checking the output, and giving you tools for debugging and diagnosing tests and applications.
Choosing a Test Runner
There are many test runners available for Python. The one built into the Python standard library is called unittest. In this tutorial, you will be using unittest test cases and the unittest test runner. The principles of unittest are easily portable to other frameworks. The three most popular test runners are:
unittestnoseornose2pytest
Choosing the best test runner for your requirements and level of experience is important.
unittest
unittest has been built into the Python standard library since version 2.1. You’ll probably see it in commercial Python applications and open-source projects.
unittest contains both a testing framework and a test runner. unittest has some important requirements for writing and executing tests.
unittest requires that:
- You put your tests into classes as methods
- You use a series of special assertion methods in the
unittest.TestCaseclass instead of the built-inassertstatement
To convert the earlier example to a unittest test case, you would have to:
- Import
unittestfrom the standard library - Create a class called
TestSumthat inherits from theTestCaseclass - Convert the test functions into methods by adding
selfas the first argument - Change the assertions to use the
self.assertEqual()method on theTestCaseclass - Change the command-line entry point to call
unittest.main()
Follow those steps by creating a new file test_sum_unittest.py with the following code:
import unittest


class TestSum(unittest.TestCase):

    def test_sum(self):
        self.assertEqual(sum([1, 2, 3]), 6, "Should be 6")

    def test_sum_tuple(self):
        self.assertEqual(sum((1, 2, 2)), 6, "Should be 6")

if __name__ == '__main__':
    unittest.main()
If you execute this at the command line, you’ll see one success (indicated with .) and one failure (indicated with F):
$ python test_sum_unittest.py
.F
======================================================================
FAIL: test_sum_tuple (__main__.TestSum)
----------------------------------------------------------------------
Traceback (most recent call last):
  File "test_sum_unittest.py", line 9, in test_sum_tuple
    self.assertEqual(sum((1, 2, 2)), 6, "Should be 6")
AssertionError: Should be 6

----------------------------------------------------------------------
Ran 2 tests in 0.001s

FAILED (failures=1)
You have just executed two tests using the unittest test runner.
For more information on unittest, you can explore the unittest Documentation.
nose
You may find that over time, as you write hundreds or even thousands of tests for your application, it becomes increasingly hard to understand and use the output from unittest.
nose is compatible with any tests written using the unittest framework and can be used as a drop-in replacement for the unittest test runner. The development of nose as an open-source application fell behind, and a fork called nose2 was created. If you’re starting from scratch, it is recommended that you use nose2 instead of nose.
To get started with nose2, install nose2 from PyPI and execute it on the command line. nose2 will try to discover all test scripts named test*.py and test cases inheriting from unittest.TestCase in your current directory:
$ pip install nose2
$ python -m nose2
.F
======================================================================
FAIL: test_sum_tuple (__main__.TestSum)
----------------------------------------------------------------------
Traceback (most recent call last):
  File "test_sum_unittest.py", line 9, in test_sum_tuple
    self.assertEqual(sum((1, 2, 2)), 6, "Should be 6")
AssertionError: Should be 6

----------------------------------------------------------------------
Ran 2 tests in 0.001s

FAILED (failures=1)
You have just executed the test you created in test_sum_unittest.py from the nose2 test runner. nose2 offers many command-line flags for filtering the tests that you execute. For more information, you can explore the Nose 2 documentation.
pytest
pytest supports execution of unittest test cases. The real advantage of pytest comes by writing pytest test cases. pytest test cases are a series of functions in a Python file starting with the name test_.
pytest has some other great features:
- Support for the built-in
assertstatement instead of using specialself.assert*()methods - Support for filtering for test cases
- Ability to rerun from the last failing test
- An ecosystem of hundreds of plugins to extend the functionality
Writing the TestSum test case example for pytest would look like this:
def test_sum():
    assert sum([1, 2, 3]) == 6, "Should be 6"

def test_sum_tuple():
    assert sum((1, 2, 2)) == 6, "Should be 6"
You have dropped the TestCase, any use of classes, and the command-line entry point.
More information can be found at the Pytest Documentation Website.
Writing Your First Test
Let’s bring together what you’ve learned so far and, instead of testing the built-in sum() function, test a simple implementation of the same requirement.
Create a new project folder and, inside that, create a new folder called my_sum. Inside my_sum, create an empty file called __init__.py. Creating the __init__.py file means that the my_sum folder can be imported as a module from the parent directory.
Your project folder should look like this:
project/
│
└── my_sum/
    └── __init__.py
Open up my_sum/__init__.py and create a new function called sum(), which takes an iterable (a list, tuple, or set) and adds the values together:
def sum(arg):
    total = 0
    for val in arg:
        total += val
    return total
This code example creates a variable called total, iterates over all the values in arg, and adds them to total. It then returns the result once the iterable has been exhausted.
Where to Write the Test
To get started writing tests, you can simply create a file called test.py, which will contain your first test case. Because the file will need to be able to import your application to be able to test it, you want to place test.py above the package folder, so your directory tree will look something like this:
project/
│
├── my_sum/
│   └── __init__.py
|
└── test.py
You’ll find that, as you add more and more tests, your single file will become cluttered and hard to maintain, so you can create a folder called tests/ and split the tests into multiple files. It is convention to ensure each file starts with test_ so all test runners will assume that Python file contains tests to be executed. Some very large projects split tests into more subdirectories based on their purpose or usage.
How to Structure a Simple Test
Before you dive into writing tests, you’ll want to first make a couple of decisions:
- What do you want to test?
- Are you writing a unit test or an integration test?
Then the structure of a test should loosely follow this workflow:
- Create your inputs
- Execute the code being tested, capturing the output
- Compare the output with an expected result
For this application, you’re testing sum(). There are many behaviors in sum() you could check, such as:
- Can it sum a list of whole numbers (integers)?
- Can it sum a tuple or set?
- Can it sum a list of floats?
- What happens when you provide it with a bad value, such as a single integer or a string?
- What happens when one of the values is negative?
The most simple test would be a list of integers. Create a file, test.py with the following Python code:
import unittest

from my_sum import sum


class TestSum(unittest.TestCase):
    def test_list_int(self):
        """
        Test that it can sum a list of integers
        """
        data = [1, 2, 3]
        result = sum(data)
        self.assertEqual(result, 6)

if __name__ == '__main__':
    unittest.main()
This code example:
-
Imports
sum()from themy_sumpackage you created -
Defines a new test case class called
TestSum, which inherits fromunittest.TestCase -
Defines a test method,
.test_list_int(), to test a list of integers. The method.test_list_int()will:- Declare a variable
datawith a list of numbers(1, 2, 3) - Assign the result of
my_sum.sum(data)to aresultvariable - Assert that the value of
resultequals6by using the.assertEqual()method on theunittest.TestCaseclass
- Declare a variable
-
Defines a command-line entry point, which runs the
unittesttest-runner.main()
If you’re unsure what self is or how .assertEqual() is defined, you can brush up on your object-oriented programming with Python 3 Object-Oriented Programming.
How to Write Assertions
The last step of writing a test is to validate the output against a known response. This is known as an assertion. There are some general best practices around how to write assertions:
- Make sure tests are repeatable and run your test multiple times to make sure it gives the same result every time
- Try and assert results that relate to your input data, such as checking that the result is the actual sum of values in the
sum()example
unittest comes with lots of methods to assert on the values, types, and existence of variables. Here are some of the most commonly used methods:
| Method | Equivalent to |
|---|---|
.assertEqual(a, b) |
a == b |
.assertTrue(x) |
bool(x) is True |
.assertFalse(x) |
bool(x) is False |
.assertIs(a, b) |
a is b |
.assertIsNone(x) |
x is None |
.assertIn(a, b) |
a in b |
.assertIsInstance(a, b) |
isinstance(a, b) |
.assertIs(), .assertIsNone(), .assertIn(), and .assertIsInstance() all have opposite methods, named .assertIsNot(), and so forth.
Side Effects
When you’re writing tests, it’s often not as simple as looking at the return value of a function. Often, executing a piece of code will alter other things in the environment, such as the attribute of a class, a file on the filesystem, or a value in a database. These are known as side effects and are an important part of testing. Decide if the side effect is being tested before including it in your list of assertions.
If you find that the unit of code you want to test has lots of side effects, you might be breaking the Single Responsibility Principle. Breaking the Single Responsibility Principle means the piece of code is doing too many things and would be better off being refactored. Following the Single Responsibility Principle is a great way to design code that it is easy to write repeatable and simple unit tests for, and ultimately, reliable applications.
Executing Your First Test
Now that you’ve created the first test, you want to execute it. Sure, you know it’s going to pass, but before you create more complex tests, you should check that you can execute the tests successfully.
Executing Test Runners
The Python application that executes your test code, checks the assertions, and gives you test results in your console is called the test runner.
At the bottom of test.py, you added this small snippet of code:
if __name__ == '__main__':
    unittest.main()
This is a command line entry point. It means that if you execute the script alone by running python test.py at the command line, it will call unittest.main(). This executes the test runner by discovering all classes in this file that inherit from unittest.TestCase.
This is one of many ways to execute the unittest test runner. When you have a single test file named test.py, calling python test.py is a great way to get started.
Another way is using the unittest command line. Try this:
$ python -m unittest test
This will execute the same test module (called test) via the command line.
You can provide additional options to change the output. One of those is -v for verbose. Try that next:
$ python -m unittest -v test
test_list_int (test.TestSum) ... ok

----------------------------------------------------------------------
Ran 1 tests in 0.000s
This executed the one test inside test.py and printed the results to the console. Verbose mode listed the names of the tests it executed first, along with the result of each test.
Instead of providing the name of a module containing tests, you can request an auto-discovery using the following:
$ python -m unittest discover
This will search the current directory for any files named test*.py and attempt to test them.
Once you have multiple test files, as long as you follow the test*.py naming pattern, you can provide the name of the directory instead by using the -s flag and the name of the directory:
$ python -m unittest discover -s tests
unittest will run all tests in a single test plan and give you the results.
Lastly, if your source code is not in the directory root and contained in a subdirectory, for example in a folder called src/, you can tell unittest where to execute the tests so that it can import the modules correctly with the -t flag:
$ python -m unittest discover -s tests -t src
unittest will change to the src/ directory, scan for all test*.py files inside the the tests directory, and execute them.
Understanding Test Output
That was a very simple example where everything passes, so now you’re going to try a failing test and interpret the output.
sum() should be able to accept other lists of numeric types, like fractions.
At the top of the test.py file, add an import statement to import the Fraction type from the fractions module in the standard library:
from fractions import Fraction
Now add a test with an assertion expecting the incorrect value, in this case expecting the sum of 1/4, 1/4, and 2/5 to be 1:
import unittest

from my_sum import sum


class TestSum(unittest.TestCase):
    def test_list_int(self):
        """
        Test that it can sum a list of integers
        """
        data = [1, 2, 3]
        result = sum(data)
        self.assertEqual(result, 6)

    def test_list_fraction(self):
        """
        Test that it can sum a list of fractions
        """
        data = [Fraction(1, 4), Fraction(1, 4), Fraction(2, 5)]
        result = sum(data)
        self.assertEqual(result, 1)

if __name__ == '__main__':
    unittest.main()
If you execute the tests again with python -m unittest test, you should see the following output:
$ python -m unittest test
F.
======================================================================
FAIL: test_list_fraction (test.TestSum)
----------------------------------------------------------------------
Traceback (most recent call last):
  File "test.py", line 21, in test_list_fraction
    self.assertEqual(result, 1)
AssertionError: Fraction(9, 10) != 1

----------------------------------------------------------------------
Ran 2 tests in 0.001s

FAILED (failures=1)
In the output, you’ll see the following information:
-
The first line shows the execution results of all the tests, one failed (
F) and one passed (.). -
The
FAILentry shows some details about the failed test:- The test method name (
test_list_fraction) - The test module (
test) and the test case (TestSum) - A traceback to the failing line
- The details of the assertion with the expected result (
1) and the actual result (Fraction(9, 10))
- The test method name (
Remember, you can add extra information to the test output by adding the -v flag to the python -m unittest command.
Running Your Tests From PyCharm
If you’re using the PyCharm IDE, you can run unittest or pytest by following these steps:
- In the Project tool window, select the
testsdirectory. - On the context menu, choose the run command for
unittest. For example, choose Run ‘Unittests in my Tests…’.
This will execute unittest in a test window and give you the results within PyCharm:

More information is available on the PyCharm Website.
Running Your Tests From Visual Studio Code
If you’re using the Microsoft Visual Studio Code IDE, support for unittest, nose, and pytest execution is built into the Python plugin.
If you have the Python plugin installed, you can set up the configuration of your tests by opening the Command Palette with Ctrl+Shift+P and typing “Python test”. You will see a range of options:

Choose Debug All Unit Tests, and VSCode will then raise a prompt to configure the test framework. Click on the cog to select the test runner (unittest) and the home directory (.).
Once this is set up, you will see the status of your tests at the bottom of the window, and you can quickly access the test logs and run the tests again by clicking on these icons:

This shows the tests are executing, but some of them are failing.
Testing for Web Frameworks Like Django and Flask
If you’re writing tests for a web application using one of the popular frameworks like Django or Flask, there are some important differences in the way you write and run the tests.
Why They’re Different From Other Applications
Think of all the code you’re going to be testing in a web application. The routes, views, and models all require lots of imports and knowledge about the frameworks being used.
This is similar to the car test at the beginning of the tutorial: you have to start up the car’s computer before you can run a simple test like checking the lights.
Django and Flask both make this easy for you by providing a test framework based on unittest. You can continue writing tests in the way you’ve been learning but execute them slightly differently.
How to Use the Django Test Runner
The Django startapp template will have created a tests.py file inside your application directory. If you don’t have that already, you can create it with the following contents:
from django.test import TestCase

class MyTestCase(TestCase):
    # Your test methods
The major difference with the examples so far is that you need to inherit from the django.test.TestCase instead of unittest.TestCase. These classes have the same API, but the Django TestCase class sets up all the required state to test.
To execute your test suite, instead of using unittest at the command line, you use manage.py test:
If you want multiple test files, replace tests.py with a folder called tests, insert an empty file inside called __init__.py, and create your test_*.py files. Django will discover and execute these.
More information is available at the Django Documentation Website.
How to Use unittest and Flask
Flask requires that the app be imported and then set in test mode. You can instantiate a test client and use the test client to make requests to any routes in your application.
All of the test client instantiation is done in the setUp method of your test case. In the following example, my_app is the name of the application. Don’t worry if you don’t know what setUp does. You’ll learn about that in the More Advanced Testing Scenarios section.
The code within your test file should look like this:
import my_app
import unittest


class MyTestCase(unittest.TestCase):

    def setUp(self):
        my_app.app.testing = True
        self.app = my_app.app.test_client()

    def test_home(self):
        result = self.app.get('/')
        # Make your assertions
You can then execute the test cases using the python -m unittest discover command.
More information is available at the Flask Documentation Website.
More Advanced Testing Scenarios
Before you step into creating tests for your application, remember the three basic steps of every test:
- Create your inputs
- Execute the code, capturing the output
- Compare the output with an expected result
It’s not always as easy as creating a static value for the input like a string or a number. Sometimes, your application will require an instance of a class or a context. What do you do then?
The data that you create as an input is known as a fixture. It’s common practice to create fixtures and reuse them.
If you’re running the same test and passing different values each time and expecting the same result, this is known as parameterization.
Handling Expected Failures
Earlier, when you made a list of scenarios to test sum(), a question came up:
What happens when you provide it with a bad value, such as a single integer or a string?
In this case, you would expect sum() to throw an error. When it does throw an error, that would cause the test to fail.
There’s a special way to handle expected errors. You can use .assertRaises() as a context-manager, then inside the with block execute the test steps:
import unittest

from my_sum import sum


class TestSum(unittest.TestCase):
    def test_list_int(self):
        """
        Test that it can sum a list of integers
        """
        data = [1, 2, 3]
        result = sum(data)
        self.assertEqual(result, 6)

    def test_list_fraction(self):
        """
        Test that it can sum a list of fractions
        """
        data = [Fraction(1, 4), Fraction(1, 4), Fraction(2, 5)]
        result = sum(data)
        self.assertEqual(result, 1)

    def test_bad_type(self):
        data = "banana"
        with self.assertRaises(TypeError):
            result = sum(data)

if __name__ == '__main__':
    unittest.main()
This test case will now only pass if sum(data) raises a TypeError. You can replace TypeError with any exception type you choose.
Isolating Behaviors in Your Application
Earlier in the tutorial, you learned what a side effect is. Side effects make unit testing harder since, each time a test is run, it might give a different result, or even worse, one test could impact the state of the application and cause another test to fail!

There are some simple techniques you can use to test parts of your application that have many side effects:
- Refactoring code to follow the Single Responsibility Principle
- Mocking out any method or function calls to remove side effects
- Using integration testing instead of unit testing for this piece of the application
If you’re not familiar with mocking, see Python CLI Testing for some great examples.
Writing Integration Tests
So far, you’ve been learning mainly about unit testing. Unit testing is a great way to build predictable and stable code. But at the end of the day, your application needs to work when it starts!
Integration testing is the testing of multiple components of the application to check that they work together. Integration testing might require acting like a consumer or user of the application by:
- Calling an HTTP REST API
- Calling a Python API
- Calling a web service
- Running a command line
Each of these types of integration tests can be written in the same way as a unit test, following the Input, Execute, and Assert pattern. The most significant difference is that integration tests are checking more components at once and therefore will have more side effects than a unit test. Also, integration tests will require more fixtures to be in place, like a database, a network socket, or a configuration file.
This is why it’s good practice to separate your unit tests and your integration tests. The creation of fixtures required for an integration like a test database and the test cases themselves often take a lot longer to execute than unit tests, so you may only want to run integration tests before you push to production instead of once on every commit.
A simple way to separate unit and integration tests is simply to put them in different folders:
project/
│
├── my_app/
│   └── __init__.py
│
└── tests/
    |
    ├── unit/
    |   ├── __init__.py
    |   └── test_sum.py
    |
    └── integration/
        ├── __init__.py
        └── test_integration.py
There are many ways to execute only a select group of tests. The specify source directory flag, -s, can be added to unittest discover with the path containing the tests:
$ python -m unittest discover -s tests/integration
unittest will have given you the results of all the tests within the tests/integration directory.
Testing Data-Driven Applications
Many integration tests will require backend data like a database to exist with certain values. For example, you might want to have a test that checks that the application displays correctly with more than 100 customers in the database, or the order page works even if the product names are displayed in Japanese.
These types of integration tests will depend on different test fixtures to make sure they are repeatable and predictable.
A good technique to use is to store the test data in a folder within your integration testing folder called fixtures to indicate that it contains test data. Then, within your tests, you can load the data and run the test.
Here’s an example of that structure if the data consisted of JSON files:
project/
│
├── my_app/
│   └── __init__.py
│
└── tests/
    |
    └── unit/
    |   ├── __init__.py
    |   └── test_sum.py
    |
    └── integration/
        |
        ├── fixtures/
        |   ├── test_basic.json
        |   └── test_complex.json
        |
        ├── __init__.py
        └── test_integration.py
Within your test case, you can use the .setUp() method to load the test data from a fixture file in a known path and execute many tests against that test data. Remember you can have multiple test cases in a single Python file, and the unittest discovery will execute both. You can have one test case for each set of test data:
import unittest


class TestBasic(unittest.TestCase):
    def setUp(self):
        # Load test data
        self.app = App(database='fixtures/test_basic.json')

    def test_customer_count(self):
        self.assertEqual(len(self.app.customers), 100)

    def test_existence_of_customer(self):
        customer = self.app.get_customer(id=10)
        self.assertEqual(customer.name, "Org XYZ")
        self.assertEqual(customer.address, "10 Red Road, Reading")


class TestComplexData(unittest.TestCase):
    def setUp(self):
        # load test data
        self.app = App(database='fixtures/test_complex.json')

    def test_customer_count(self):
        self.assertEqual(len(self.app.customers), 10000)

    def test_existence_of_customer(self):
        customer = self.app.get_customer(id=9999)
        self.assertEqual(customer.name, u"バナナ")
        self.assertEqual(customer.address, "10 Red Road, Akihabara, Tokyo")

if __name__ == '__main__':
    unittest.main()
If your application depends on data from a remote location, like a remote API, you’ll want to ensure your tests are repeatable. Having your tests fail because the API is offline or there is a connectivity issue could slow down development. In these types of situations, it is best practice to store remote fixtures locally so they can be recalled and sent to the application.
The requests library has a complimentary package called responses that gives you ways to create response fixtures and save them in your test folders. Find out more on their GitHub Page.
Testing in Multiple Environments
So far, you’ve been testing against a single version of Python using a virtual environment with a specific set of dependencies. You might want to check that your application works on multiple versions of Python, or multiple versions of a package. Tox is an application that automates testing in multiple environments.
Installing Tox
Tox is available on PyPI as a package to install via pip:
Now that you have Tox installed, it needs to be configured.
Configuring Tox for Your Dependencies
Tox is configured via a configuration file in your project directory. The Tox configuration file contains the following:
- The command to run in order to execute tests
- Any additional packages required before executing
- The target Python versions to test against
Instead of having to learn the Tox configuration syntax, you can get a head start by running the quickstart application:
The Tox configuration tool will ask you those questions and create a file similar to the following in tox.ini:
[tox]
envlist = py27, py36

[testenv]
deps =

commands =
    python -m unittest discover
Before you can run Tox, it requires that you have a setup.py file in your application folder containing the steps to install your package. If you don’t have one, you can follow this guide on how to create a setup.py before you continue.
Alternatively, if your project is not for distribution on PyPI, you can skip this requirement by adding the following line in the tox.ini file under the [tox] heading:
[tox]
envlist = py27, py36
skipsdist=True
If you don’t create a setup.py, and your application has some dependencies from PyPI, you’ll need to specify those on a number of lines under the [testenv] section. For example, Django would require the following:
Once you have completed that stage, you’re ready to run the tests.
You can now execute Tox, and it will create two virtual environments: one for Python 2.7 and one for Python 3.6. The Tox directory is called .tox/. Within the .tox/ directory, Tox will execute python -m unittest discover against each virtual environment.
You can run this process by calling Tox at the command line:
Tox will output the results of your tests against each environment. The first time it runs, Tox takes a little bit of time to create the virtual environments, but once it has, the second execution will be a lot faster.
Executing Tox
The output of Tox is quite straightforward. It creates an environment for each version, installs your dependencies, and then runs the test commands.
There are some additional command line options that are great to remember.
Run only a single environment, such as Python 3.6:
Recreate the virtual environments, in case your dependencies have changed or site-packages is corrupt:
Run Tox with less verbose output:
Running Tox with more verbose output:
More information on Tox can be found at the Tox Documentation Website.
Automating the Execution of Your Tests
So far, you have been executing the tests manually by running a command. There are some tools for executing tests automatically when you make changes and commit them to a source-control repository like Git. Automated testing tools are often known as CI/CD tools, which stands for “Continuous Integration/Continuous Deployment.” They can run your tests, compile and publish any applications, and even deploy them into production.
Travis CI is one of many available CI (Continuous Integration) services available.
Travis CI works nicely with Python, and now that you’ve created all these tests, you can automate the execution of them in the cloud! Travis CI is free for any open-source projects on GitHub and GitLab and is available for a charge for private projects.
To get started, login to the website and authenticate with your GitHub or GitLab credentials. Then create a file called .travis.yml with the following contents:
language: python
python:
  - "2.7"
  - "3.7"
install:
  - pip install -r requirements.txt
script:
  - python -m unittest discover
This configuration instructs Travis CI to:
- Test against Python 2.7 and 3.7 (You can replace those versions with any you choose.)
- Install all the packages you list in
requirements.txt(You should remove this section if you don’t have any dependencies.) - Run
python -m unittest discoverto run the tests
Once you have committed and pushed this file, Travis CI will run these commands every time you push to your remote Git repository. You can check out the results on their website.
What’s Next
Now that you’ve learned how to create tests, execute them, include them in your project, and even execute them automatically, there are a few advanced techniques you might find handy as your test library grows.
Introducing Linters Into Your Application
Tox and Travis CI have configuration for a test command. The test command you have been using throughout this tutorial is python -m unittest discover.
You can provide one or many commands in all of these tools, and this option is there to enable you to add more tools that improve the quality of your application.
One such type of application is called a linter. A linter will look at your code and comment on it. It could give you tips about mistakes you’ve made, correct trailing spaces, and even predict bugs you may have introduced.
For more information on linters, read the Python Code Quality tutorial.
Passive Linting With flake8
A popular linter that comments on the style of your code in relation to the PEP 8 specification is flake8.
You can install flake8 using pip:
You can then run flake8 over a single file, a folder, or a pattern:
$ flake8 test.py
test.py:6:1: E302 expected 2 blank lines, found 1
test.py:23:1: E305 expected 2 blank lines after class or function definition, found 1
test.py:24:20: W292 no newline at end of file
You will see a list of errors and warnings for your code that flake8 has found.
flake8 is configurable on the command line or inside a configuration file in your project. If you wanted to ignore certain rules, like E305 shown above, you can set them in the configuration. flake8 will inspect a .flake8 file in the project folder or a setup.cfg file. If you decided to use Tox, you can put the flake8 configuration section inside tox.ini.
This example ignores the .git and __pycache__ directories as well as the E305 rule. Also, it sets the max line length to 90 instead of 80 characters. You will likely find that the default constraint of 79 characters for line-width is very limiting for tests, as they contain long method names, string literals with test values, and other pieces of data that can be longer. It is common to set the line length for tests to up to 120 characters:
[flake8]
ignore = E305
exclude = .git,__pycache__
max-line-length = 90
Alternatively, you can provide these options on the command line:
$ flake8 --ignore E305 --exclude .git,__pycache__ --max-line-length=90
A full list of configuration options is available on the Documentation Website.
You can now add flake8 to your CI configuration. For Travis CI, this would look as follows:
matrix:
  include:
    - python: "2.7"
      script: "flake8"
Travis will read the configuration in .flake8 and fail the build if any linting errors occur. Be sure to add the flake8 dependency to your requirements.txt file.
Aggressive Linting With a Code Formatter
flake8 is a passive linter: it recommends changes, but you have to go and change the code. A more aggressive approach is a code formatter. Code formatters will change your code automatically to meet a collection of style and layout practices.
black is a very unforgiving formatter. It doesn’t have any configuration options, and it has a very specific style. This makes it great as a drop-in tool to put in your test pipeline.
You can install black via pip:
Then to run black at the command line, provide the file or directory you want to format:
Keeping Your Test Code Clean
When writing tests, you may find that you end up copying and pasting code a lot more than you would in regular applications. Tests can be very repetitive at times, but that is by no means a reason to leave your code sloppy and hard to maintain.
Over time, you will develop a lot of technical debt in your test code, and if you have significant changes to your application that require changes to your tests, it can be a more cumbersome task than necessary because of the way you structured them.
Try to follow the DRY principle when writing tests: Don’t Repeat Yourself.
Test fixtures and functions are a great way to produce test code that is easier to maintain. Also, readability counts. Consider deploying a linting tool like flake8 over your test code:
$ flake8 --max-line-length=120 tests/
Testing for Performance Degradation Between Changes
There are many ways to benchmark code in Python. The standard library provides the timeit module, which can time functions a number of times and give you the distribution. This example will execute test() 100 times and print() the output:
def test():
    # ... your code

if __name__ == '__main__':
    import timeit
    print(timeit.timeit("test()", setup="from __main__ import test", number=100))
Another option, if you decided to use pytest as a test runner, is the pytest-benchmark plugin. This provides a pytest fixture called benchmark. You can pass benchmark() any callable, and it will log the timing of the callable to the results of pytest.
You can install pytest-benchmark from PyPI using pip:
$ pip install pytest-benchmark
Then, you can add a test that uses the fixture and passes the callable to be executed:
def test_my_function(benchmark):
    result = benchmark(test)
Execution of pytest will now give you benchmark results:
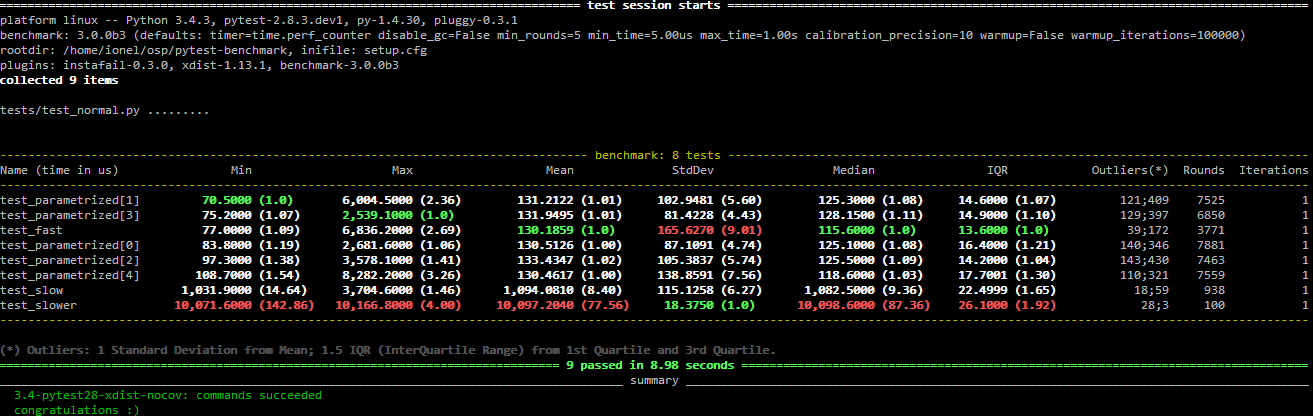
More information is available at the Documentation Website.
Testing for Security Flaws in Your Application
Another test you will want to run on your application is checking for common security mistakes or vulnerabilities.
You can install bandit from PyPI using pip:
You can then pass the name of your application module with the -r flag, and it will give you a summary:
$ bandit -r my_sum
[main]  INFO    profile include tests: None
[main]  INFO    profile exclude tests: None
[main]  INFO    cli include tests: None
[main]  INFO    cli exclude tests: None
[main]  INFO    running on Python 3.5.2
Run started:2018-10-08 00:35:02.669550

Test results:
        No issues identified.

Code scanned:
        Total lines of code: 5
        Total lines skipped (#nosec): 0

Run metrics:
        Total issues (by severity):
                Undefined: 0.0
                Low: 0.0
                Medium: 0.0
                High: 0.0
        Total issues (by confidence):
                Undefined: 0.0
                Low: 0.0
                Medium: 0.0
                High: 0.0
Files skipped (0):
As with flake8, the rules that bandit flags are configurable, and if there are any you wish to ignore, you can add the following section to your setup.cfg file with the options:
[bandit]
exclude: /test
tests: B101,B102,B301
More details are available at the GitHub Website.
Conclusion
Python has made testing accessible by building in the commands and libraries you need to validate that your applications work as designed. Getting started with testing in Python needn’t be complicated: you can use unittest and write small, maintainable methods to validate your code.
As you learn more about testing and your application grows, you can consider switching to one of the other test frameworks, like pytest, and start to leverage more advanced features.
Thank you for reading. I hope you have a bug-free future with Python!
Watch Now This tutorial has a related video course created by the Real Python team. Watch it together with the written tutorial to deepen your understanding: Test-Driven Development With PyTest
Тестирование, это основа серьёзной разработки программного обеспечения. Существует много видов тестирования, но наиболее важный вид, это модульное тестирование. Модульное тестирование даёт уверенность в том, что вы сможете использовать хорошо протестированные блоки в качестве базовых элементов, полагаться на них и использовать при создании программы. Они увеличивают ваш инструментарий из проверенного кода за пределами ваших конструкций и стандартной библиотеки. Кроме того Python предоставляет отличную поддержку для написания модульных тестов.
Действующий пример
Прежде чем погрузиться в принципы, эвристики и руководства, давайте посмотрим репрезентативный модульный тест в действии. Класс SelfDrivingCar это частичное выполнение логики вождения автопилота автомобиля. Главным образом он контролирует скорость автомобиля. Он рспознаёт объекты впереди, ограничение скорости, а также прибытие или нет в пункт назначения.
1 |
class SelfDrivingCar(object): |
2 |
|
3 |
def __init__(self): |
4 |
|
5 |
self.speed = 0 |
6 |
|
7 |
self.destination = None |
8 |
|
9 |
|
10 |
|
11 |
def _accelerate(self): |
12 |
|
13 |
self.speed += 1 |
14 |
|
15 |
|
16 |
|
17 |
def _decelerate(self): |
18 |
|
19 |
if self.speed > 0: |
20 |
|
21 |
self.speed -= 1 |
22 |
|
23 |
|
24 |
|
25 |
def _advance_to_destination(self): |
26 |
|
27 |
distance = self._calculate_distance_to_object_in_front() |
28 |
|
29 |
if distance < 10: |
30 |
|
31 |
self.stop() |
32 |
|
33 |
|
34 |
|
35 |
elif distance < self.speed / 2: |
36 |
|
37 |
self._decelerate() |
38 |
|
39 |
elif self.speed < self._get_speed_limit(): |
40 |
|
41 |
self._accelerate() |
42 |
|
43 |
|
44 |
|
45 |
def _has_arrived(self): |
46 |
|
47 |
pass
|
48 |
|
49 |
|
50 |
|
51 |
def _calculate_distance_to_object_in_front(self): |
52 |
|
53 |
pass
|
54 |
|
55 |
|
56 |
|
57 |
def _get_speed_limit(self): |
58 |
|
59 |
pass
|
60 |
|
61 |
|
62 |
|
63 |
def stop(self): |
64 |
|
65 |
self.speed = 0 |
66 |
|
67 |
|
68 |
|
69 |
def drive(self, destination): |
70 |
|
71 |
self.destination = destination |
72 |
|
73 |
while not self._has_arrived(): |
74 |
|
75 |
self._advance_to_destination() |
76 |
|
77 |
|
78 |
self.stop() |
79 |
|
80 |
def __init__(self): |
81 |
|
82 |
self.speed = 0 |
83 |
|
84 |
self.destination = None |
85 |
|
86 |
|
87 |
|
88 |
def _accelerate(self): |
89 |
|
90 |
self.speed += 1 |
91 |
|
92 |
|
93 |
|
94 |
def _decelerate(self): |
95 |
|
96 |
if self.speed > 0: |
97 |
|
98 |
self.speed -= 1 |
99 |
|
100 |
|
101 |
|
102 |
def _advance_to_destination(self): |
103 |
|
104 |
distance = self._calculate_distance_to_object_in_front() |
105 |
|
106 |
if distance < 10: |
107 |
|
108 |
self.stop() |
109 |
|
110 |
|
111 |
|
112 |
elif distance < self.speed / 2: |
113 |
|
114 |
self._decelerate() |
115 |
|
116 |
elif self.speed < self._get_speed_limit(): |
117 |
|
118 |
self._accelerate() |
119 |
|
120 |
|
121 |
|
122 |
def _has_arrived(self): |
123 |
|
124 |
pass
|
125 |
|
126 |
|
127 |
|
128 |
def _calculate_distance_to_object_in_front(self): |
129 |
|
130 |
pass
|
131 |
|
132 |
|
133 |
|
134 |
def _get_speed_limit(self): |
135 |
|
136 |
pass
|
137 |
|
138 |
|
139 |
|
140 |
def stop(self): |
141 |
|
142 |
self.speed = 0 |
143 |
|
144 |
|
145 |
|
146 |
def drive(self, destination): |
147 |
|
148 |
self.destination = destination |
149 |
|
150 |
while not self._has_arrived(): |
151 |
|
152 |
self._advance_to_destination() |
153 |
|
154 |
self.stop() |
155 |
Вот модульный тест для метода stop() чтобы раззадорить ваш аппетит. Я расскажу подробности позже.
1 |
from unittest import TestCase |
2 |
|
3 |
|
4 |
|
5 |
class SelfDrivingCarTest(TestCase): |
6 |
|
7 |
def setUp(self): |
8 |
|
9 |
self.car = SelfDrivingCar() |
10 |
|
11 |
|
12 |
|
13 |
def test_stop(self): |
14 |
|
15 |
self.car.speed = 5 |
16 |
|
17 |
self.car.stop() |
18 |
|
19 |
# Verify the speed is 0 after stopping
|
20 |
|
21 |
self.assertEqual(0, self.car.speed) |
22 |
|
23 |
|
24 |
|
25 |
# Verify it is Ok to stop again if the car is already stopped
|
26 |
|
27 |
self.car.stop() |
28 |
|
29 |
self.assertEqual(0, self.car.speed) |
Руководство по модульному тестированию
Основные идеи
Написание хороших модульных тестов это тяжелый труд. Написание модульных тестов занимает время. Когда вы меняете код, необходимо изменять тесты. Иногда в вашем тесте будут ошибки. Это означает, что вы должны быть по-настоящему идейным. Польза огромна, даже для небольших проектов, но это не бесплатно.
Будьте дисциплинированы
Вы должны быть дисциплинированным. Будьте последовательным. Убедитесь, что все тесты выполнены. Не отказывайтесь от тестов, только потому что вы «знаете», что код в порядке.
Автоматизируйте
Чтобы помочь вам быть дисциплинированным, необходимо автоматизировать модульные тесты. Тесты должны запускаться автоматически на значимых этапах, таких как проектирование или развертывание. В идеале ваша система управления версиями должна отклонять код, который не прошел все тесты.
Непротестированный код плохой по определению
Если вы не проверили его, вы не сможете сказать, что он работает. Это значит, что вы должны рассматривать его как плохой. Если это критический код, не разворачивайте его в производство.
Пояснения
Что такое модуль?
Модуль в смысле тестирования это файл, содержащий набор определённых функций или класс. Если у вас есть файл с несколькими классами, вы должны написать модульный тест для каждого из них.
Делать TDD или не делать TDD
Тест драйв разработка, это практика, где вы пишете тесты, до того как вы пишете код. Есть несколько преимуществ этого подхода, но я рекомендую отказаться от него, если у вас есть возможность написать тесты позже.
Причина заключается в том, что я проектирую код. Я пишу код, смотрю на него, переписываю, еще раз смотрю и быстро переписываю ещё раз. Написание тестов сначала ограничивает и замедляет меня.
После того, как я сделаю первоначальный дизайн, я сразу напишу тесты, до интеграции со всей системой. Тем не менее, это отличный способ найти себя в создании модульных тестов, и это гарантирует, что весь ваш код будет проверен.
Unittest модуль
Модуль Unittest поставляется со стандартной библиотекой Python. Она предоставляет собой класс под названием TestCase, из которого можно вызвать ваш класс. Затем можно переопределить метод setUp() чтобы подготовить среду до начала тестирования и/или метод класса classSetUp() чтобы подготовить среду для всех тестов (не очищающуюся между разными тестами). Существуют соответствующие методы tearDown() и classTearDown(), которые также можно переопределить.
Ниже приведены соответствующие разделы из нашего класса SelfDrivingCarTest. Я использую только метод setUp(). Я создаю новый экземпляр SelfDrivingCar и сохраняю его в self.car, поэтому он доступен для каждого теста.
1 |
from unittest import TestCase |
2 |
|
3 |
|
4 |
|
5 |
class SelfDrivingCarTest(TestCase): |
6 |
|
7 |
def setUp(self): |
8 |
|
9 |
self.car = SelfDrivingCar() |
Следующий шаг — написать специфические методы теста для тестирования кода внутри теста — в этом случае класс SelfDrivingCar — делает то, что он должен делать. Структура тестового метода довольно обычная:
- Подготовка среды (необязательно).
- Подготовьте ожидаемый результат.
- Вызовите код теста.
- Убедитесь, что фактический результат совпадает с ожидаемым результатом.
Обратите внимание, что результат не должен быть результатом метода. Он может быть изменением состояния класса, сторонним эффектом, например как добавление новой строки в базе данных, записью файла или отправкой сообщения по электронной почте.
Например метод stop() класса SelfDrivingCar не возвращает ничего, но он меняет внутреннее состояние, устанавливая скорость на 0. Метод assertEqual(), предоставляемый базовым классом TestCase используется здесь для проверки, того что вызов stop() работает, как и требуется.
1 |
def test_stop(self): |
2 |
|
3 |
self.car.speed = 5 |
4 |
|
5 |
self.car.stop() |
6 |
|
7 |
# Verify the speed is 0 after stopping
|
8 |
|
9 |
self.assertEqual(0, self.car.speed) |
10 |
|
11 |
|
12 |
|
13 |
# Verify it is Ok to stop again if the car is already stopped
|
14 |
|
15 |
self.car.stop() |
16 |
|
17 |
self.assertEqual(0, self.car.speed) |
Здесь на самом деле два теста. Первый тест, чтобы убедиться, что если скорость автомобиля равна 5 и stop() вызывается, то скорость становится равна 0. И еще один тест, чтобы убедиться, что ничего не случится, если вызвать stop() снова, когда автомобиль уже остановился.
Позже я расскажу о других тестах для дополнительных функциональных возможностей.
Doctest модуль
Doctest модуль очень интерестный. Он позволяет использовать интерактивные примеры в docstring и проверять результаты, включая исключения.
Я не применяют и не рекомендую использовать doctest для крупномасштабных систем. Хорошее тестирование требует много труда. Тест-код обычно намного больше, чем тестируемый код. Docstrings — это не совсем подходящий инструмент для написания комплексных тестов. Хотя они классные Вот как выглядит factorial функция для doc-тестов:
1 |
import math |
2 |
|
3 |
|
4 |
|
5 |
def factorial(n): |
6 |
|
7 |
"""Return the factorial of n, an exact integer >= 0.
|
8 |
|
9 |
|
10 |
|
11 |
If the result is small enough to fit in an int, return an int.
|
12 |
|
13 |
Else return a long.
|
14 |
|
15 |
|
16 |
|
17 |
>>> [factorial(n) for n in range(6)]
|
18 |
|
19 |
[1, 1, 2, 6, 24, 120]
|
20 |
|
21 |
>>> [factorial(long(n)) for n in range(6)]
|
22 |
|
23 |
[1, 1, 2, 6, 24, 120]
|
24 |
|
25 |
>>> factorial(30)
|
26 |
|
27 |
265252859812191058636308480000000L
|
28 |
|
29 |
>>> factorial(30L)
|
30 |
|
31 |
265252859812191058636308480000000L
|
32 |
|
33 |
>>> factorial(-1)
|
34 |
|
35 |
Traceback (most recent call last):
|
36 |
|
37 |
...
|
38 |
|
39 |
ValueError: n must be >= 0
|
40 |
|
41 |
|
42 |
|
43 |
Factorials of floats are OK, but the float must be an exact integer:
|
44 |
|
45 |
>>> factorial(30.1)
|
46 |
|
47 |
Traceback (most recent call last):
|
48 |
|
49 |
...
|
50 |
|
51 |
ValueError: n must be exact integer
|
52 |
|
53 |
>>> factorial(30.0)
|
54 |
|
55 |
265252859812191058636308480000000L
|
56 |
|
57 |
|
58 |
|
59 |
It must also not be ridiculously large:
|
60 |
|
61 |
>>> factorial(1e100)
|
62 |
|
63 |
Traceback (most recent call last):
|
64 |
|
65 |
...
|
66 |
|
67 |
OverflowError: n too large
|
68 |
|
69 |
"""
|
70 |
|
71 |
if not n >= 0: |
72 |
|
73 |
raise ValueError("n must be >= 0") |
74 |
|
75 |
if math.floor(n) != n: |
76 |
|
77 |
raise ValueError("n must be exact integer") |
78 |
|
79 |
if n+1 == n: # catch a value like 1e300 |
80 |
|
81 |
raise OverflowError("n too large") |
82 |
|
83 |
result = 1 |
84 |
|
85 |
factor = 2 |
86 |
|
87 |
while factor <= n: |
88 |
|
89 |
result *= factor |
90 |
|
91 |
factor += 1 |
92 |
|
93 |
return result |
94 |
|
95 |
|
96 |
|
97 |
|
98 |
|
99 |
if __name__ == "__main__": |
100 |
|
101 |
import doctest |
102 |
|
103 |
doctest.testmod() |
Как вы видите, docstring намного больше, чем код функции. Это не улучшает читаемость кода.
Запуск тестов
OK. Вы написали модульные тесты. Для большой системы у вас будет десятки / сотни / тысячи модулей и классов, возможно,размещенных в разных папках. Как вы будете запускаете все тесты?
Модуль unittest дает различные возможности для проведения групповых тестов и их программирования. Проверка Загрузки и Выполнения тестов /Loading and Running Tests. Но самый простой способ — открытие теста. Данный параметр был добавлен только в Python 2.7. В Pre-2.7 вы могли использовать nose, чтобы найти и запустить тесты. У nose есть несколько других преимуществ, таких как запуск тестовых функций без необходимости создания класса для ваших тестовых случаев. Но для целей в этой статьи, давайте придерживаться unittest.
Чтобы найти и запустить тесты на основе unittest, просто введите в командной строке:
python -m unittest discover
Unittest будет проверять все файлы и подкаталоги, запускать все найденные тесты и обеспечит хороший отчет, а также покажет время выполнения. Если вы хотите увидеть, какие тесты выполняются, вы можете добавить флаг -v:
python -m unittest discover -v
Существует несколько флагов, которые управляют операцией:
1 |
python -m unittest -h |
2 |
|
3 |
Usage: python -m unittest [options] [tests] |
4 |
|
5 |
|
6 |
|
7 |
Options: |
8 |
|
9 |
-h, --help Show this message |
10 |
|
11 |
-v, --verbose Verbose output |
12 |
|
13 |
-q, --quiet Minimal output |
14 |
|
15 |
-f, --failfast Stop on first failure |
16 |
|
17 |
-c, --catch Catch control-C and display results |
18 |
|
19 |
-b, --buffer Buffer stdout and stderr during test runs |
20 |
|
21 |
|
22 |
|
23 |
Examples: |
24 |
|
25 |
python -m unittest test_module - run tests from test_module |
26 |
|
27 |
python -m unittest module.TestClass - run tests from module.TestClass |
28 |
|
29 |
python -m unittest module.Class.test_method - run specified test method |
30 |
|
31 |
|
32 |
|
33 |
[tests] can be a list of any number of test modules, classes and test |
34 |
|
35 |
methods. |
36 |
|
37 |
|
38 |
|
39 |
Alternative Usage: python -m unittest discover [options] |
40 |
|
41 |
|
42 |
|
43 |
Options: |
44 |
|
45 |
-v, --verbose Verbose output |
46 |
|
47 |
-f, --failfast Stop on first failure |
48 |
|
49 |
-c, --catch Catch control-C and display results |
50 |
|
51 |
-b, --buffer Buffer stdout and stderr during test runs |
52 |
|
53 |
-s directory Directory to start discovery ('.' default)
|
54 |
|
55 |
-p pattern Pattern to match test files ('test*.py' default)
|
56 |
|
57 |
-t directory Top level directory of project (default to |
58 |
|
59 |
start directory) |
60 |
|
61 |
|
62 |
|
63 |
For test discovery all test modules must be importable from the top |
64 |
|
65 |
level directory of the project. |
Определение степени покрытия кода
Определение степени покрытия кода часто игнорируют. Само понятие означает, сколько кода действительно проверено тестами. Например, если у вас есть функция с инструкцией if-else, и вы проверяете только ветвьif, то вы не знаете, работает ли ветка else или нет. В следующем примере кода функция add() проверяет тип своих аргументов. Если оба являются целыми числами, они просто добавляют их.
Если оба являются строками, то он пытается преобразовать их в целые числа и добавить. В противном случае он вызывает исключение. Функция test_add() проверяет функцию add() с аргументами, которые являются как целыми числами, так и аргументами, которые являются плавающим значением и проверяют правильное поведение в каждом случае. Но степень покрытия теста является незавершенной. В случае, если строковые аргументы были не протестированы. В результате тест проходит успешно, но ошибка в ветке, где аргументы были строками, не были обнаружены (см. «intg»?).
1 |
import unittest |
2 |
|
3 |
|
4 |
|
5 |
def add(a, b): |
6 |
|
7 |
"""This function adds two numbers a, b and returns their sum
|
8 |
|
9 |
|
10 |
|
11 |
a and b may integers
|
12 |
|
13 |
"""
|
14 |
|
15 |
if isinstance(a, int) and isinstance(b, int): |
16 |
|
17 |
return a + b |
18 |
|
19 |
elseif isinstance(a, str) and isinstance(b, str): |
20 |
|
21 |
return int(a) + intg(b) |
22 |
|
23 |
else: |
24 |
|
25 |
raise Exception('Invalid arguments') |
26 |
|
27 |
|
28 |
|
29 |
class Test(unittest.TestCase): |
30 |
|
31 |
def test_add(self): |
32 |
|
33 |
self.assertEqual(5, add(2, 3)) |
34 |
|
35 |
self.assertEqual(15, add(-6, 21)) |
36 |
|
37 |
self.assertRaises(Exception, add, 4.0, 5.0) |
38 |
|
39 |
|
40 |
|
41 |
unittest.main() |
Вот вывод:
1 |
---------------------------------------------------------------------- |
2 |
|
3 |
Ran 1 test in 0.000s |
4 |
|
5 |
|
6 |
|
7 |
OK |
8 |
|
9 |
|
10 |
|
11 |
Process finished with exit code 0 |
Практические Unit Tests
Написание тестов промышленной мощности нелегкая и непростая задача. Есть несколько вещей, которые нужно учитывать и компромиссы, на которые следует пойти.
Разработка тестирования
Если ваш код — это мешанина или набор нелепых строк, где разные уровни абстракции смешиваются друг с другом, и каждый фрагмент кода зависит от другого кода, вам будет трудно его протестировать. Кроме того, всякий раз, когда вы что-то будете менять, вам также придется обновить кучу тестов.
Хорошей новостью является то, что разработка программного обеспечения общего назначения — это именно то, что вам нужно для проверки. В частности, хорошо продуманный модульный код, в котором каждый компонент несет четкую ответственность и взаимодействует с другими компонентами через четко определенные интерфейсы, создаст удобные модульные тесты.
Например, наш класс SelfDrivingCar отвечает за высокоуровневую работу автомобиля: ехать, останавливаться, перемещаться. Он имеет метод calculate_distance_to_object_in_front(), который еще не реализован. Эта функциональность, вероятно, должна быть реализована полностью отдельной подсистемой. Он может включать в себя считывание данных с различных датчиков, взаимодействие с другими автомобилями с помощью самостоятельного управления, целый стек «машинного зрения» для анализа изображений с нескольких камер.
Давайте посмотрим, как это работает на практике. SelfDrivingCar примет аргумент, называемый object_detector, который имеет метод calculate_distance_to_object_in_front(), и он делегирует эту функцию объекту. Теперь нет необходимости в проверке, потому что object_detector отвечает (и должен быть протестирован) за него. Вам по-прежнему нужно, чтобы модуль тестировал то, что вы правильно используете object_detector.
1 |
class SelfDrivingCar(object): |
2 |
|
3 |
def __init__(self, object_detector): |
4 |
|
5 |
self.object_detector |
6 |
|
7 |
self.speed = 0 |
8 |
|
9 |
self.destination = None |
10 |
|
11 |
|
12 |
|
13 |
def _calculate_distance_to_object_in_front(self): |
14 |
|
15 |
return self.object_detector.calculate_distance_to_object_in_front() |
Затраты и выгоды
Количество усилий, которые вы вкладываете в тестирование, должно быть сопоставимо с затратами на неудачу, насколько стабильным является код и насколько легко его можно исправить, если проблемы обнаружены в строке.
Например, наш класс автопилота автомобилей критически важен. Если метод stop() не работает должным образом, наш автомобиль может убить людей, уничтожить имущество и пустить под откос другие автомобили. Если вы создаете автопилот для автомобиль, я подозреваю, предполагаю, что ваши юнит-тесты для метода stop() будут более тщательными, чем мои.
С другой стороны, если одна кнопка в вашем веб-приложении на странице, которая расположена тремя уровнями ниже главной страницы, немного мерцает, когда кто-то ее щелкает, вы можете это исправить, но, вероятно, вы не будете добавлять отдельный модульный тест для этого случая. Данный метод не оправдывает себя экономически.
Мышление тестирования
Мышление тестирования очень важно. Один из принципов, который я использую, состоит в том, что каждый кусок кода имеет как минимум двух пользователей: код, который использует его, и пользователь, который его тестирует. Это простое правило помогает с разработкой и зависимостей. Если вы помните, что вам нужно написать тест для своего кода, вы не добавите много зависимостей, которые трудно восстановить во время тестирования.
Например, предположим, что ваш код должен что-то вычислять. Для этого ему необходимо загрузить данные из базы, прочитать файл конфигурации и динамически обратиться к некоторыми REST API для получения актуальной информации. Все это может потребоваться по разным причинам, но при этом, ели вы разместите всё это в одной функции, это очень затруднит тестирование. Это возможно звучит смешно, но гораздо лучше изначально структурировать ваш код.
Чистые функции
Самым простым кодом для тестирования являются чистые функции. Чистые функции — это функции, которые имеют доступ только к значениям их параметров, не имеют побочных эффектов и возвращают один и тот же результат при вызове с теми же аргументами. Они не изменяют состояние вашей программы, не получают доступа к файловой системе или сети. Их преимуществ слишком много, чтобы их сейчас перечислять.
Почему их легко проверить? Потому что нет необходимости устанавливать специальную среду для их тестирования. Вы просто передаете аргументы и проверяете результат. Вы также знаете, что до тех пор, пока тестируемый код не изменится, ваш тест тоже не должен изменяться.
Сравните его с функцией, которая считывает XML-файл конфигурации. Ваш тест должен будет создать XML-файл и передать его имя файла в тестируемый код. Не трудная задача. Но предположим, что кто-то решил, что XML просто ужасен, и все файлы конфигурации должны находиться в JSON. Они занимаются своим делом и конвертируют все файлы конфигурации в JSON. Они проводят все тесты, включая ваши, и все они успешно завершаются!
Почему? Потому что код не изменился. Он все еще ожидает файл конфигурации XML, и ваш тест по-прежнему создает XML-файл для него. Но при выполнении ваш код получит файл JSON, который он не сможет проанализировать.
Обработка ошибок тестирования
Обработка ошибок — это еще одна вещь, которая важна для тестирования. Она также является частью разработки. Кто несет ответственность за правильность ввода? Каждая функция и метод должны быть понятны. Если это ответственность функции, то она должна проверять вводные данные, но если это ответственность клиента, то функция выполняется, предполагая, что вводные данные правильные. Общая точность системы будет обеспечена путем тестирования для клиента, для того, чтобы убедиться, что он передает правильные данные в вашу функцию.
Как правило, вы хотите проверить ввод в общедоступном интерфейсе, потому что вам не обязательно знаеть, кто будет обращаться к вашему коду. Давайте посмотрим на метод drive() автопилота автомобиля. Этот метод ожидает параметр «destination». Параметр «destination» будет использоваться позже в навигации, но метод «drive» ничего не делает, чтобы мы смогли убедиться в его корректности.
Предположим, что цель должна быть параметрами широты и долготы. Существуют всевозможные тесты, которые можно выполнить, чтобы убедиться, что они действуют(например, определить пункт назначения в середине моря). Для наших целей давайте просто убедимся, что это параметры в диапазоне от 0,0 до 90,0 по широте и от -180,0 до 180,0 по долготе.
Вот обновленный класс SelfDrivingCar. Я просто выполнил некоторые из нереализованных методов, потому что метод drive() вызывает некоторые из этих методов прямо или косвенно.
1 |
class SelfDrivingCar(object): |
2 |
|
3 |
def __init__(self, object_detector): |
4 |
|
5 |
self.object_detector = object_detector |
6 |
|
7 |
self.speed = 0 |
8 |
|
9 |
self.destination = None |
10 |
|
11 |
|
12 |
|
13 |
def _accelerate(self): |
14 |
|
15 |
self.speed += 1 |
16 |
|
17 |
|
18 |
|
19 |
def _decelerate(self): |
20 |
|
21 |
if self.speed > 0: |
22 |
|
23 |
self.speed -= 1 |
24 |
|
25 |
|
26 |
|
27 |
def _advance_to_destination(self): |
28 |
|
29 |
distance = self._calculate_distance_to_object_in_front() |
30 |
|
31 |
if distance < 10: |
32 |
|
33 |
self.stop() |
34 |
|
35 |
|
36 |
|
37 |
elif distance < self.speed / 2: |
38 |
|
39 |
self._decelerate() |
40 |
|
41 |
elif self.speed < self._get_speed_limit(): |
42 |
|
43 |
self._accelerate() |
44 |
|
45 |
|
46 |
|
47 |
def _has_arrived(self): |
48 |
|
49 |
return True |
50 |
|
51 |
|
52 |
|
53 |
def _calculate_distance_to_object_in_front(self): |
54 |
|
55 |
return self.object_detector.calculate_distance_to_object_in_front() |
56 |
|
57 |
|
58 |
|
59 |
def _get_speed_limit(self): |
60 |
|
61 |
return 65 |
62 |
|
63 |
|
64 |
|
65 |
def stop(self): |
66 |
|
67 |
self.speed = 0 |
68 |
|
69 |
|
70 |
|
71 |
def drive(self, destination): |
72 |
|
73 |
self.destination = destination |
74 |
|
75 |
while not self._has_arrived(): |
76 |
|
77 |
self._advance_to_destination() |
78 |
|
79 |
self.stop() |
Чтобы проверить, как обработались ошибки в тесте, я передаю неверные аргументы и думаю, что они должным образом будут отвергнуты. Вы можете сделать это, используя self.assertRaises() метод unittest.TestCase. Этот метод очень удачный, если код под тестированием действительно вызывает исключение.
Давайте посмотрим на это в действии. Метод test_drive() пропускает широту и долготу вне допустимого диапазона и ждет, что метод drive() вызовет исключение.
1 |
from unittest import TestCase |
2 |
|
3 |
from self_driving_car import SelfDrivingCar |
4 |
|
5 |
|
6 |
|
7 |
|
8 |
|
9 |
class MockObjectDetector(object): |
10 |
|
11 |
def calculate_distance_to_object_in_front(self): |
12 |
|
13 |
return 20 |
14 |
|
15 |
|
16 |
|
17 |
|
18 |
|
19 |
class SelfDrivingCarTest(TestCase): |
20 |
|
21 |
def setUp(self): |
22 |
|
23 |
self.car = SelfDrivingCar(MockObjectDetector()) |
24 |
|
25 |
|
26 |
|
27 |
def test_stop(self): |
28 |
|
29 |
self.car.speed = 5 |
30 |
|
31 |
self.car.stop() |
32 |
|
33 |
# Verify the speed is 0 after stopping
|
34 |
|
35 |
self.assertEqual(0, self.car.speed) |
36 |
|
37 |
|
38 |
|
39 |
# Verify it is Ok to stop again if the car is already stopped
|
40 |
|
41 |
self.car.stop() |
42 |
|
43 |
self.assertEqual(0, self.car.speed) |
44 |
|
45 |
|
46 |
|
47 |
def test_drive(self): |
48 |
|
49 |
# Valid destination
|
50 |
|
51 |
self.car.drive((55.0, 66.0)) |
52 |
|
53 |
|
54 |
|
55 |
# Invalid destination wrong range
|
56 |
|
57 |
self.assertRaises(Exception, self.car.drive, (-55.0, 200.0)) |
Тест не выполняется, поскольку метод drive () не проверяет его аргументы на достоверность и не вызывает исключения. Вы получите хороший отчет с полной информацией о том, что не удалось, где и почему.
1 |
python -m unittest discover -v |
2 |
|
3 |
test_drive (untitled.test_self_driving_car.SelfDrivingCarTest) ... FAIL |
4 |
|
5 |
test_stop (untitled.test_self_driving_car.SelfDrivingCarTest) ... ok |
6 |
|
7 |
|
8 |
|
9 |
====================================================================== |
10 |
|
11 |
FAIL: test_drive (untitled.test_self_driving_car.SelfDrivingCarTest) |
12 |
|
13 |
---------------------------------------------------------------------- |
14 |
|
15 |
Traceback (most recent call last): |
16 |
|
17 |
File "/Users/gigi/PycharmProjects/untitled/test_self_driving_car.py", line 29, in test_drive |
18 |
|
19 |
self.assertRaises(Exception, self.car.drive, (-55.0, 200.0)) |
20 |
|
21 |
AssertionError: Exception not raised |
22 |
|
23 |
|
24 |
|
25 |
---------------------------------------------------------------------- |
26 |
|
27 |
Ran 2 tests in 0.000s |
28 |
|
29 |
|
30 |
|
31 |
FAILED (failures=1) |
Чтобы исправить это, давайте обновим метод drive(), чтобы фактически проверить диапазон его аргументов:
1 |
def drive(self, destination): |
2 |
|
3 |
lat, lon = destination |
4 |
|
5 |
if not (0.0 <= lat <= 90.0): |
6 |
|
7 |
raise Exception('Latitude out of range') |
8 |
|
9 |
if not (-180.0 <= lon <= 180.0): |
10 |
|
11 |
raise Exception('Latitude out of range') |
12 |
|
13 |
|
14 |
|
15 |
self.destination = destination |
16 |
|
17 |
while not self._has_arrived(): |
18 |
|
19 |
self._advance_to_destination() |
20 |
|
21 |
self.stop() |
Теперь все тесты проходят.
1 |
python -m unittest discover -v |
2 |
|
3 |
test_drive (untitled.test_self_driving_car.SelfDrivingCarTest) ... ok |
4 |
|
5 |
test_stop (untitled.test_self_driving_car.SelfDrivingCarTest) ... ok |
6 |
|
7 |
|
8 |
|
9 |
---------------------------------------------------------------------- |
10 |
|
11 |
Ran 2 tests in 0.000s |
12 |
|
13 |
|
14 |
|
15 |
OK |
16 |
Тестирование частных методов
Должны ли вы проверять каждую функцию и метод? В частности, следует ли тестировать частные методы, называемые только вашим кодом? Обычный неудовлетворительный ответ: «В зависимости от ситуации».
Я постараюсь помочь вам и рассказать, от чего это зависит. Вы точно знаете, кто называет ваш частный метод — это ваш собственный код. В том случае, если ваши тесты служат для общедоступных методов, которые вызывают ваш частный метод и являются комплексными, которые вы уже полностью протестировали. Но если частный метод очень сложный, вы можете протестировать его отдельно. Решайте сами.
Как организовать ваши модульные тесты
В большой системе не всегда ясно, как провести тесты. Должен ли быть один большой файл со всеми тестами для пакета или отдельный тестовый файл для каждого класса? Должны ли тесты быть в том же файле, что и тестируемый код, или в том же каталоге?
Вот система, которую я использую. Тесты должны быть полностью отделены от тестируемого кода (следовательно, я не использую doctest). В идеале ваш код должен быть в пакете. Тесты для каждого пакета должны находиться в каталоге вашего дочернего узла. В каталоге тестов должен быть один файл для каждого модуля вашего пакета с именем test_<module name>.
Например, если в вашем пакете есть три модуля: module_1.py, module_2.py и module_3.py, вы должны иметь три тестовых файла: test_module_1.py, test_module_2.py и test_module_3.py в каталоге тестов.
Этот подход имеет ряд преимуществ. Это дает определённость уже при просмотре каталогов, сразу видно, что вы не забыли протестировать. Это также помогает сохранять тесты в приемлимых размерах. Предполагая, что ваши модули имеют приемлимый размер, тестовый код для каждого модуля будет в собственном файле, который может быть немного больше, чем тестируемый модуль, но все же удобно размещён в одном файле.
Заключение
Юнит- тесты являются основой качествнного кода. В этом уроке я изучил некоторые принципы и рекомендации для работы с модульным тестированием и объяснил нескольких лучших практик. Чем больше система, которую вы строите, тем более важными становятся модульные тесты. Но одних модульных тестов недостаточно. Другие типы тестов также необходимы для крупномасштабных систем: интеграционные тесты, тесты производительности, тесты нагрузки, тестирование на уязвимость, тесты на прием данных и другие.
Here we’ll learn how to create a basic test, execute it, and find the bugs before your users do! You’ll learn about the tools available to write and execute tests and also see testing terms like automated, manual, unit and integration tests as well.
Automated vs. Manual Testing
| Automated | Manual Testing |
| Test automation software along with testing tools executes the test cases. | Explicitly humans involved in executing the tests step by step, and they may be testing without test scripts. |
| Test cases are written by QA engineers but execution is fully automatic and it is quite faster and will run for n number of different scenarios. | Analysts and QA engineers need to get involved in end-to-end testing and time consuming. |
| In Python, we need to install a package named “unittest”. | In Python, via “White Box Testing”,” Unit Testing”,” Integration Testing” etc., methodologies, Manual testing can be carried out. |
Unit Tests vs. Integration Tests
| Unit Tests | Integration Tests |
| Unit testing works on component by component basis and hence if any small component to be tested, we need to go for unit testing. | Integration testing works on the whole component, we can conclude as many unit tests make integration testing. And also a software is complete if whole integration testing is complete |
| Testing of addition calculation alone in a calculator program for specific set of arguments | Testing of all arithmetic operations like addition, subtraction etc., (whatever present in calculator program) with different set of arguments |
Example for Unit testing:
Python3
def test_sum_numbers():
assert sum([100, 200, 300,400]) == 1000, "Result should be 1000"
def test_sum_tuple_values():
assert sum((100, 200, 200,400)) == 1000, "Result should be 1000"
if __name__ == "__main__":
test_sum_numbers()
test_sum_tuple_values()
print("Checking whether all tests are passed or not")
Output:
Traceback (most recent call last):
 File "....../test_example.py", line 9, in <module>
   test_sum_tuple_values()
 File "...../test_example.py", line 5, in test_sum_tuple_values
   assert sum((100, 200, 200,400)) == 1000, "Result should be 1000"
AssertionError: Result should be 1000
In the above example, We have two methods here and when code is executed, second method throws error as the given values do not produce 1000.
Choosing a Test Runner:
Test Runner is a library or a testing tool which reads the source code that contains unit tests and a bunch of settings which can be executed and produces its output to the console or log files.
There are different Test Runners available in Python. Popular one are
- unittest
- nose or nose2
- pytest
unittest : It is built into the standard python library. import unittest should be the starting line of code for using it. Depends upon the python version, it should differ as later versions of Python supports unittest and earlier versions supported unittest2.
Sample snippet of python code using unittest is given below:
Python3
import unittest
class TestXXXXX(unittest.TestCase):
def test_xxxxxxx(self):
data = [100, 200, 300]
result = sum(data)
self.assertEqual(result, 6000)
if __name__ == '__main__':
unittest.main()
Output:
======================================================================
.F
FAIL: test_xxxxxxx (__main__.TestXXXXX)
----------------------------------------------------------------------
Traceback (most recent call last):
 File "......py", line 8, in test_xxxxxxx
   self.assertEqual(result, 6000)
AssertionError: 600 != 6000
----------------------------------------------------------------------
Ran 1 test in 0.001s
FAILED (failures=1)
nose or nose2: This is an open source application and similar to unittest only.It is compatible with numerous kinds of tests that are written using unittest framework. nose2 is the recent version one, and they are installed by using.
pip install nose2
pytest: It supports unittest test cases execution. It has benefits like supporting built in assert statement, filtering of test cases, returning from last failing test etc
Python3
def test_sum_numbers_using_pytest():
assert sum([700, 900]) == 1600, "Resultant should be 1600"
def test_sum_tuple_using_pytest():
assert sum((700,1900)) == 1600, "Resultant should be 1600"
No need to write the class, command line entry point etc.,
How to Structure a Simple Test:
- For writing a test, need to know what is going to get tested.
- Does it cover unit testing and/or integration testing?
- All kind of necessary inputs (it can range between integer, float, type data types etc., ) and the code for their execution and get the output and compare the output with expected result.
How to Write Assertions:
Assertion is nothing but validating the output against a known response. i.e. in above code, we have passed the list containing 3 values namely 10, 20 and 30, and we know that its multiplication result is 6000. So as a last step in code, we will be writing assertion code and above code comes up with assertEqual and surely it will give the output as 6000 and hence the testcase passes.
unittest has lots of methods to assert on the values, types, and existence of variables.
Let us see few :
.assertEqual(one,two) means one == two (Our above example)
.assertTrue(expr) means boolean(expr) is True
.assertFalse(expr) means boolean(expr) is False
.assertIs(one,two) means one is two
We have opposite methods too like:
 .assertIsNot(one,two) means one is not two.
.assertIsNone(x) vs .assertIsNone(x)
.assertIn(x, y) vs .assertNotIn(x, y)
.assertIsInstance(m, n) vs .assertNotIsInstance(m,n)
Side Effects:
Continuous execution of piece of code has the possibility to alter other things to change like attribute of a class or even a value in the database. So these are need to be decided before doing testing. Refactoring of code needs to be considered to break the side effects and write repeatable and simple unit tests.
Running Tests From PyCharm:
We can run unittest or pytest by following the steps and this is applicable for running all tests in a directory:
- First from project tool window, select the tests directory
- Then, on the context menu, choose “UnitTests in” or “PyTests in “
For individual test,- Via main toolbar by using Run or Debug command
- Via context menu by using Run or Debug by clicking the specific file
Testing for Web Frameworks Like Django and Flask:
Based on unittest, Django and Flask makes things easier, and they have their testing framework:
Django Test Runner: The Django startapp template will have created a tests.py file inside your application directory. If you don’t have that already, you can create it with the following contents:
Python3
from django.test import TestCase
class RequiredTestCases(TestCase):
For executing the test suit, we need to give as:
python manage.py test
Use unittest and Flask : Flask requires that the app be imported in file and then set in test mode. You can instantiate a test client and use the test client to make requests to any routes in your application.
All the test client instantiation is done in the setUp() method of your test case.
Python3
import my_app
import unittest
class FlaskTestCase(unittest.TestCase):
def setUp(self):
my_app.app.testing = True
self.app = my_app.app.test_client()
def test_home(self):
result = self.app.get('/')
Test cases can be executed by using below command (via command line) :
python -m unittest discover
More Advanced Testing Scenarios:
- Fixture is used which is nothing but the data that is created as an input and reusing them.
- Parameterization can be followed which is nothing but running the same test several times by passing different values and expecting the same result.
- Need to cover different scenarios like handling expected failures, writing integration tests, testing in multiple environments etc.
Below example shows how to write test for bad data type:
Python3
import unittest
class TestSumDifferentPatterns(unittest.TestCase):
def test_list_tuple_values(self):
data = (10*2, 200*2)
result = sum(data)
self.assertEqual(result, 600)
def test_bad_data_type(self):
data = "alpha value passed instead of numeric"
with self.assertRaises(TypeError):
result = sum(data)
if __name__ == '__main__':
unittest.main()
Output
.F
======================================================================
FAIL: test_list_tuple_values (__main__.TestSumDifferentPatterns)
----------------------------------------------------------------------
Traceback (most recent call last):
 File "......py", line 10, in test_list_tuple_values
   self.assertEqual(result, 600)
AssertionError: 420 != 600
----------------------------------------------------------------------
Ran 2 tests in 0.001s
FAILED (failures=1)
Automating the Execution of Tests :
Continuous Integration/Continuous Deployment tools are available. They help to run tests, compile, publish and also deploy into production.
https://travis-ci.com/ is one among them which works well with Python and it is an open source project. Login into the site and create.travis.yml with the below contents:
language: python
python:
<Include the versions as 2.7 or 3.7 whichever required>install:
– pip install -r <your requirements file>script:
– python -m unittest discover
Above file instructs “Travis CI” to look into this file and for given Python versions, the test cases are getting tested by installing the necessary packages as given in the requirements file and finally run below command to run the test.
python -m unittest discover
Results are on the website against your credential