Когда-нибудь думали о том, чтобы написать свой BitTorrent-клиент с блекджеком и без рекламы? Пока вы думали, кто-то уже написал. Перевели статью автора клиента Pieces, в которой он рассказывает, как устроен сам протокол и клиент. К слову, проект доступен под лицензией Apache 2, так что вы можете спокойно делать с этим клиентом что угодно.
BitTorrent начал своё существование в 2001 году, когда Брэм Коэн представил первую версию протокола. Большой прорыв произошёл, когда сайты вроде The Pirate Bay принесли ему популярность в качестве средства для загрузки пиратских материалов. Стриминговые сервисы во главе с Netflix, возможно, привели к уменьшению количества людей, скачивающих фильмы через BitTorrent. Тем не менее, BitTorrent по-прежнему используют в разных целях при необходимости распространить большие файлы.
- Facebook использует его для распространения обновлений в своих огромных датацентрах;
- Amazon S3 реализует его для загрузки статических файлов;
- Он все ещё используется для обычной загрузки больших файлов вроде дистрибутивов Linux.
BitTorrent — пиринговый протокол, в котором пиры объединяются с другими пирами для обмена фрагментами данных между собой. Каждый пир одновременно соединяется с несколькими пирами и таким образом скачивает или загружает данные одновременно нескольким пирам. Это здорово с точки зрения ограничения пропускной способности, если сравнивать, например, с загрузкой файла с одного сервера. Также это отлично походит, для того чтобы обеспечить доступность файла, так как место хранения распределено.
В технологии BitTorrent существует файл .torrent, в котором указывается количество фрагментов для данного файла(ов), как пиры должны обмениваться этими фрагментами, а также то, как клиенты могут подтвердить целостность данных.
Далее мы посмотрим на реализацию клиента BitTorrent, и было бы неплохо знать неофициальную спецификацию BitTorrent или хотя бы иметь открытую вкладку с ней. Это, без сомнения, лучший источник информации о протоколе BitTorrent. Официальная спецификация расплывчата, и в ней не хватает определённых деталей, так что лучше использовать именно неофициальную.
Парсим торрент-файл
Первое, что клиент должен сделать, — выяснить, что и откуда он должен скачать. Этот тип информации (метаинформация) хранится в файле .torrent. В метаинформации хранится ряд свойств, которые нам нужны для успешной реализации клиента:
- Имя файла для загрузки;
- Размер файла;
- URL трекера, к которому мы должны подключиться.
Все эти свойства хранятся в бинарном формате Bencode.
Bencode поддерживает четыре типа данных: словари, списки, целые числа и строки — поэтому его легко привести к объекту Python или в формат JSON.
Ниже Bencode описан в расширенной форме Бэкуса-Наура, предоставленной библиотекой Haskell:
<BE>    ::= <DICT> | <LIST> | <INT> | <STR>

<DICT>  ::= "d" 1 * (<STR> <BE>) "e"
<LIST>  ::= "l" 1 * <BE>         "e"
<INT>   ::= "i"     <SNUM>       "e"
<STR>   ::= <NUM> ":" n * <CHAR>; where n equals the <NUM>

<SNUM>  ::= "-" <NUM> / <NUM>
<NUM>   ::= 1 * <DIGIT>
<CHAR>  ::= %
<DIGIT> ::= "0" | "1" | "2" | "3" | "4" | "5" | "6" | "7" | "8" | "9"
В Pieces кодирование и декодирование bencode-данных реализовано в модуле pieces.bencoding.
Вот пара примеров того, как этот модуль преобразует bencode-данные в объекты Python:
>>> from pieces.bencoding import Decoder

# Целочисленное значение начинается с символа 'i', за которым
# следует набор цифр до завершения символом 'e'.
>>> Decoder(b'i123e').decode()
123

# Строковое значение начинается с определения количества
# символов, которое она содержит. Затем через двоеточие
# следует сама строка. Обратите внимание на то, что
# строка возвращается в бинарном формате, а не в Юникоде.
>>> Decoder(b'12:Middle Earth').decode()
b'Middle Earth'

# Список начинается с символа 'l', за которым следует любое количество
# объектов до завершения символом 'e'.
# Как и в Python, список может содержать объекты любого типа.
>>> Decoder(b'l4:spam4:eggsi123ee').decode()
[b'spam', b'eggs', 123]

# Словарь начинается с символа 'd' и завершается символом 'e'.
# Объекты между этими символами должны быть парами строка + объект.
# Порядок важен, поэтому используется OrderedDict
>>> Decoder(b'd3:cow3:moo4:spam4:eggse').decode()
OrderedDict([(b'cow', b'moo'), (b'spam', b'eggs')])
Можно сделать и наоборот — преобразовать Python-объект в bencode-форму:
>>> from collections import OrderedDict
>>> from pieces.bencoding import Encoder

>>> Encoder(123).encode()
b'i123e'

>>> Encoder('Middle Earth').encode()
b'12:Middle Earth'

>>> Encoder(['spam', 'eggs', 123]).encode()
bytearray(b'l4:spam4:eggsi123ee')

>>> d = OrderedDict()
>>> d['cow'] = 'moo'
>>> d['spam'] = 'eggs'
>>> Encoder(d).encode()
bytearray(b'd3:cow3:moo4:spam4:eggse')
Эти примеры также можно найти в репозитории проекта.
Реализация парсера довольно простая, здесь не используется asyncio, и даже не считывается торрент-файл с диска.
Давайте откроем торрент-файл для популярного дистрибутива Linux Ubuntu с помощью парсера из pieces.bencoding:
>>> with open('tests/data/ubuntu-16.04-desktop-amd64.iso.torrent', 'rb') as f:
...     meta_info = f.read()
...     torrent = Decoder(meta_info).decode()
...
>>> torrent
OrderedDict([(b'announce', b'http://torrent.ubuntu.com:6969/announce'), (b'announce-list', [[b'http://torrent.ubuntu.com:6969/announce'], [b'http://ipv6.torrent.ubuntu.com:6969/announce']
]), (b'comment', b'Ubuntu CD releases.ubuntu.com'), (b'creation date', 1461232732), (b'info', OrderedDict([(b'length', 1485881344), (b'name', b'ubuntu-16.04-desktop-amd64.iso'), (b'piece
length', 524288), (b'pieces', b'x1atxfcx84xc8xfaVxebx12x1cxc5xa4x1c?xf0x96x07Px87xb8xb2xa5G1xc8Lx18x81x9bcx81xfc8*x9dxf4kxe6xdb6xa3x0bx8dxbexe3Lxfdxfd4...')]))])
Здесь мы можем увидеть часть метаданных, например, имя целевого файла (ubuntu-16.04-desktop-amd64.iso) и общий размер в байтах (1 485 881 344).
Обратите внимание на то, что ключи в OrderedDict являются бинарными строками. Bencode — бинарный протокол, поэтому строки в формате UTF-8 не подойдут в качестве ключей.
Реализованный в Pieces класс-обёртка pieces.torrent.Torrent, который использует эти свойства, абстрагирует бинарные строки и прочие детали от остальной части клиента. Этот класс только реализует свойства, используемые в Pieces.
Подключаемся к трекеру
Теперь, когда мы можем декодировать торрент-файл и получить представление данных в виде Python-объекта, нам нужно получить список пиров для подключения. И здесь на помощь приходит трекер. Трекер — это центральный сервер, который отслеживает доступные пиры для выбранного торрента. Трекер не содержит никаких данных торрента, только список доступных пиров и их статистику.
Составляем запрос
Свойство announce в метаинформации — это HTTP URL трекера, к которому мы будем подключаться с помощью следующих URL-параметров:
info_hash— SHA1-хеш словаря с информацией в торрент-файле;peer_id— уникальный ID, сгенерированный для данного клиента;uploaded— общее количество отправленных байтов;downloaded— общее количество загруженных байтов;left— количество байтов, которое клиенту осталось загрузить;port— TCP-порт, на котором клиент слушает;compact— принимает ли клиент компактный список пиров.
Размер peer_id должен составлять ровно 20 байт. Существуют два основных соглашения по генерации этого ID. Pieces следует Azureus-стилю при генерации ID пира, например:
>>> import random
# -<2-символьный id><номер версии из 4 цифр>-
>>> '-PC0001-' + ''.join([str(random.randint(0, 9)) for _ in range(12)])
'-PC0001-478269329936'
Запрос к трекеру с помощью httpie может выглядеть следующим образом:
$ http GET "http://torrent.ubuntu.com:6969/announce?info_hash=%90%28%9F%D3M%FC%1C%F8%F3%16%A2h%AD%D85L%853DX&peer_id=-PC0001-706887310628&uploaded=0&downloaded=0&left=699400192&port=6889&compact=1"
HTTP/1.0 200 OK
Content-Length: 363
Content-Type: text/plain
Pragma: no-cache
d8:completei3651e10:incompletei385e8:intervali1800e5:peers300:£¬%ËÌyOkÝ.ê@_<K+ÔÝ Ámb^TnÈÕ^AËO*ÈÕ1*ÈÕ>¥³ÈÕBä)ðþ¸ÐÞ¦Ô/ãÈÕÈuÉæÈÕ
...Данные ответа обрезаны, так как они всё равно содержат бинарные данные, которые никто не поймёт.
В ответе трекера нас особенно интересуют два свойства:
interval— интервал в секундах до того, как клиент должен сделать новый запрос к трекеру;peers— список пиров, представленный бинарной строкой, состоящей из частей по 6 байт. В каждой части 4 байта отвечают за IP-адрес пира и 2 — за номер порта (так как мы используем компактный формат).
Успешный запрос к трекеру даёт вам список пиров для подключения. Это не обязательно будет список вообще всех пиров, а только тех, которые трекер вам назначил. Следующий запрос к трекеру может вернуть другой список пиров.
Асинхронный HTTP
В Python нет встроенной поддержки асинхронного HTTP, даже любимая многими библиотека requests не реализует asyncio. Поэтому оптимальным вариантом будет использование библиотеку aiohttp.
Pieces использует aiohttp в классе pieces.tracker.Tracker для HTTP-запросов к трекеру. Так выглядит укороченная версия этого кода:
async def connect(self, first=None, uploaded=0, downloaded=0):
    params = {...}
    url = self.torrent.announce + '?' + urlencode(params)

    async with self.http_client.get(url) as response:
        if response.status != 200:
            raise ConnectionError('Unable to connect to tracker')
        data = await response.read()
        return TrackerResponse(bencoding.Decoder(data).decode())
Этот метод объявлен с использованием async и использует асинхронный менеджер контекста async with, с возможностью приостановки во время совершения HTTP-запроса. После успешного ответа этот метод будет снова приостановлен на время чтения бинарных данных ответа в await response.read(). Наконец, данные ответа оборачиваются в экземпляр TrackerResponse, содержащий список пиров или сообщение об ошибке.
В результате использования aiohttp наш цикл событий может свободно планировать другую работу, пока у нас есть исходящий запрос к трекеру.
Если нужны подробности — загляните в модуль pieces.tracker.
Цикл
До этого момента мы всё могли бы выполнять синхронно, однако теперь нам нужно подключиться к множеству пиров, что требует асинхронности.
Функция main в pieces.cli отвечает за создание асинхронного цикла событий. Если опустить некоторые детали argparse и обработки ошибок, это будет выглядеть как-то так (подробности в исходниках):
import asyncio

from pieces.torrent import Torrent
from pieces.client import TorrentClient

loop = asyncio.get_event_loop()
client = TorrentClient(Torrent(args.torrent))
task = loop.create_task(client.start())

try:
    loop.run_until_complete(task)
except CancelledError:
    logging.warning('Event loop was canceled')
Сначала мы создаём цикл событий по умолчанию для этого потока. Затем мы создаём объект TorrentClient с нужным Torrent (метаинформация). Он пропарсит торрент-файл и убедится, что всё в порядке.
Затем мы вызываем async-метод client.start() и оборачиваем его результат в asyncio.Future, а потом добавляем эту future в цикл событий и просим его работать, пока эта задача не будет завершена.
Это всё? Не совсем — у нас есть цикл (не цикл событий), реализованный в pieces.client.TorrentClient, который устанавливает соединения с пирами, планирует запросы и т.д.
TorrentClient является чем-то вроде координатора действий. Он начинает свою работу с создания очереди async.Queue, которая хранит список доступных для подключения пиров.
Затем он создаёт N объектов pieces.protocol.PeerConnection, по одному на каждый пир в очереди. Эти объекты будут ожидать до тех пор, пока в очереди не появится незаблокированный пир.
Так как с самого начала очередь пуста, PeerConnection ничего не будет делать до тех пор, пока мы не заполним очередь. Это происходит в цикле внутри TorrentClient.start:
async def start(self):
    self.peers = [PeerConnection(self.available_peers,
                                 self.tracker.torrent.info_hash,
                                 self.tracker.peer_id,
                                 self.piece_manager,
                                 self._on_block_retrieved)
                    for _ in range(MAX_PEER_CONNECTIONS)]

    # Время, когда мы в последний раз обращались к трекеру (timestamp)
    previous = None
    # Интервал между обращениями (в секундах)
    interval = 30 * 60

    while not self.piece_manager.complete and not self.abort:
        current = time.time()
        if (not previous) or (previous + interval < current):
            response = await self.tracker.connect(
                first=previous if previous else False,
                uploaded=self.piece_manager.bytes_uploaded,
                downloaded=self.piece_manager.bytes_downloaded)

            if response:
                previous = current
                interval = response.interval
                self._empty_queue()
                for peer in response.peers:
                    self.available_peers.put_nowait(peer)
        else:
            await asyncio.sleep(5)
    self.stop()
В общих чертах о том, что делает этот цикл:
- Проверяет, загрузили ли мы все фрагменты.
- Проверяет, не отменил ли пользователь загрузку.
- Делает запрос к трекеру, если необходимо.
- Добавляет все полученные пиры в очередь доступных пиров.
- Спит 5 секунд.
Итак, каждый раз при запросе к трекеру список пиров обнуляется, и если мы не получаем в результате запроса другой список, то PeerConnection не запустится. Это продолжается до тех пор, пока загрузка не будет завершена или отменена.
Протокол пиров
После получения IP пира и номера порта от трекера, клиент установит TCP-соединение с этим пиром. Затем пиры начнут обмениваться сообщениями при помощи протокола пиров. Давайте сначала пройдёмся по разным частям этого протокола, а затем посмотрим на его реализацию.
Рукопожатие
Первое сообщение, которое нужно отправить, это Handshake (рукопожатие). Обмен рукопожатиями инициирует подключающийся клиент.
Сразу после отправки рукопожатия наш клиент должен получить рукопожатие от удалённого пира.
Сообщение Handshake содержит два важных поля:
peer_id— уникальный ID каждого пира;info_hash— The SHA1-хеш для словаря с информацией.
Если info_hash не совпадает с торрентом, который мы собираемся скачать, мы закрываем соединение.
После обмена рукопожатиями удалённый пир может отправить сообщение BitField. Его задача — сообщить клиенту, какие фрагменты есть у пира. Pieces поддерживает принятие сообщений BitField, так как большинство клиентов их отправляет. Однако из-за того, что Pieces на данный момент не поддерживает сидирование, такие сообщения никогда не отправляются, а только принимаются.
Сообщение BitField содержит последовательность байтов. Если прочесть их в бинарном режиме, то каждый бит будет представлять один фрагмент. Если бит равен 1, то это значит, что у пира есть такой фрагмент, если 0 — такого фрагмента нет. Таким образом, каждый байт представляет до 8 фрагментов.
Каждый клиент начинает работу в состоянии Choked и Not interested. Это значит, что клиент не может запрашивать фрагменты у удалённого пира, а также то, что мы в этом и не заинтересованы.
Choked(заблокирован) — в этом состоянии пир не может запрашивать фрагменты у другого пира;Unchoked(разблокирован) — в этом состоянии пир может запрашивать фрагменты у другого пира;Interested(заинтересован) — это состояние говорит о том, что пир заинтересован в получении фрагментов;Not interested(не заинтересован) — это состояние говорит о том, что пир не заинтересован в получении фрагментов.
Считайте Choked и Unchoked правилами, а Interested и Not interested — намерениями между двумя пирами.
После обмена рукопожатиями мы отправляем сообщение Interested удалённому пиру, говоря о том, что мы хотим перейти в состояние Unchoked, чтобы начать запрашивать фрагменты.
Пока клиент не получит сообщение Unchoke, он не может запрашивать фрагменты у удалённого пира. Таким образом, PeerConnection будет заблокирован (в пассивном состоянии) до тех пор, пока либо не будет разблокирован, либо не будет установлено соединение.
Вот к такой последовательности сообщений мы стремимся, когда создаём PeerConnection:
              Handshake
    клиент --------------> пир    Инициируем обмен рукопожатиями

              Handshake
    клиент <-------------- пир    Сравниваем хеши

              BitField
    клиент <-------------- пир    Возможно, получаем BitField

             Interested
    клиент --------------> пир    Даём пиру понять, что мы заинтересованы в загрузке

              Unchoke
    клиент <-------------- пир    Пир разрешает нам начать запрашивать фрагменты
Запрашиваем фрагменты
Как только клиент переходит в разблокированное состояние, он начнёт запрашивать фрагменты у пира. О том, какой фрагмент нужно скачивать, поговорим чуть позже.
Если мы знаем, что у другого пира есть нужный нам фрагмент, мы можем отправить удалённому пиру запрос с просьбой прислать данные, соответствующие этому фрагменту. Если пир согласится, то он отправит соответствующее сообщение, полезная нагрузка которого — просто кусок данных.
Каждому пиру клиент отправляет только один запрос, а затем терпеливо ожидает сообщение с фрагментом до предпринятия следующих действий. Поскольку клиент параллельно открывает подключения к нескольким пирам, в каждый момент у него будет несколько ожидающих запросов, по одному на подключение.
Если по какой-либо причине клиенту больше не нужен фрагмент, он может отправить сообщение Cancel, чтобы отменить отправленный ранее запрос.
Другие сообщения
Have — сообщение, которое в любой момент может отправить нам удалённый пир. Это происходит после того, как удалённый пир получает новый фрагмент и хочет сделать его доступным для пиров, подключённых к нему.
Содержимым этого сообщения является индекс фрагмента.
Когда Pieces получает сообщение Have, он обновляет информацию об имеющихся у пира фрагментах.
KeepAlive —сообщение, которое может быть отправлено в любой момент в любом направлении. Это сообщение не несёт дополнительных данных, а лишь указывает на необходимость поддерживать соединение.
Реализация
PeerConnection асинхронно открывает TCP-соединение с удалённым пиром с помощью asyncio.open_connection. Соединение возвращает кортеж из StreamReader и StreamWriter. Если соединение было успешно установлено, PeerConnection отправит и получит сообщение Handshake.
После обмена рукопожатиями PeerConnection использует асинхронный итератор, чтобы вернуть поток PeerMessages и предпринять соответствующее действие.
Использование асинхронного итератора отделяет PeerConnection от подробностей того, как считывать данные с сокета и как парсить бинарный протокол BitTorrent. Вместо этого PeerConnection может сфокусироваться на семантике вне зависимости от протокола — например, управлении состоянием пира, получении фрагментов, закрытии соединения.
Код в PeerConnection.start выглядит примерно так:
async for message in PeerStreamIterator(self.reader, buffer):
    if type(message) is BitField:
        self.piece_manager.add_peer(self.remote_id, message.bitfield)
    elif type(message) is Interested:
        self.peer_state.append('interested')
    elif type(message) is NotInterested:
        if 'interested' in self.peer_state:
            self.peer_state.remove('interested')
    elif type(message) is Choke:
        ...
Асинхронный итератор — это класс, реализующий методы __aiter__ и __anext__, которые являются async-версиями методов __iter__ и __next__ стандартных итераторов в Python.
В процессе итерирования PeerStreamIterator будет читать данные из StreamReader, и, если данных достаточно, попытается пропарсить их и вернуть соответствующее PeerMessage.
Протокол BitTorrent использует сообщения с переменной длиной. Каждое сообщение имеет вид <length><id><payload>:
length— 4-байтовое целое значение;id— одиночный десятичный байт;payloadявляется переменной и зависит от сообщения.
Таким образом, буфер парсится и возвращается из итератора, как только в нём оказывается достаточно данных для следующего сообщения.
Все сообщения декодируются с помощью стандартного модуля struct, в котором есть методы для конвертации Python-объектов в Cи-структуры и наоборот. Этот модуль использует короткие строки для описания того, что нужно конвертировать. Например, >Ib значит «Big-Endian, 4-байтное беззнаковое целое число, 1-байтовый символ».
Обратите внимание на то, что в BitTorrent все сообщения используют Big-Endian.
Это позволяет с лёгкостью создавать юнит-тесты для кодирования и декодирования сообщений. Посмотрим на тесты для сообщения Have:
class HaveMessageTests(unittest.TestCase):
    def test_can_construct_have(self):
        have = Have(33)
        self.assertEqual(
            have.encode(),
            b"x00x00x00x05x04x00x00x00!")

    def test_can_parse_have(self):
        have = Have.decode(b"x00x00x00x05x04x00x00x00!")
        self.assertEqual(33, have.index)
Глядя на бинарную строку, можно сказать, что длина сообщения Have составляет 5 байт — x00x00x00x05, id равен 4 — x04, а полезная нагрузка содержит 33 — x00x00x00!.
Так как длина сообщения равна 5, а ID использует только один байт, у нас остаётся четыре байта на полезную нагрузку. С помощью struct.unpack мы можем легко конвертировать их в целое число:
>>> import struct
>>> struct.unpack('>I', b'x00x00x00!')
(33,)
Вот так вне зависимости от протокола все сообщения следуют одной и той же процедуре, и итератор продолжает читать из сокета до обрыва соединения.
Разбираемся с фрагментами
До этого момента мы только обсуждали фрагменты — фрагменты данных, которыми обмениваются два пира. Оказывается, что кроме фрагментов есть ещё и блоки. Если вы уже успели пробежаться по исходному коду, то вы могли заметить в некоторых местах упоминание блоков, поэтому давайте разберёмся с тем, чем на самом деле являются фрагменты.
Фрагмент, как ни странно, является частью данных торрента. Данные торрента разбиваются на N фрагментов одинакового размера, за исключением последнего, который может быть меньшего размера. Длина фрагмента указывается в торрент-файле. Как правило, размер фрагментов составляет 512 килобайт или меньше, а также является степенью двойки.
Тем не менее, фрагменты всё ещё остаются слишком большими для эффективной передачи, поэтому их делят на блоки. Блоки представляют собой куски данных, которыми пиры на самом деле обмениваются. Фрагменты используются для индикации того, что у данного пира есть определённые данные. Если бы использовались только блоки, то это бы сильно увеличило размеры всего — BitField стал бы длиннее, количество сообщений Have увеличилось бы, а сам торрент-файл стал бы занимать больше места.
Размер блока составляет 214 (16 384) байт, кроме последнего, который с наибольшей долей вероятности будет меньшего размера.
Посмотрим на пример, в котором .torrent описывает только один файл foo.txt для загрузки:
name: foo.txt
length: 135168
piece length: 49152
Этот маленький торрент можно разделить на три фрагмента:
фрагмент 0: 49 152 байт
фрагмент 1: 49 152 байт
фрагмент 2: 36 864 байт (135168 - 49152 - 49152)
          = 135 168
Теперь каждый фрагмент делится на блоки:
фрагмент 0:
    блок 0: 16 384 байт (2^14)
    блок 1: 16 384 байт
    блок 2: 16 384 байт
         =  49 152 байт

фрагмент 1:
    блок 0: 16 384 байт
    блок 1: 16 384 байт
    блок 2: 16 384 байт
         =  49 152 байт

фрагмент 2:
    блок 0: 16 384 байт
    блок 1: 16 384 байт
    блок 2:  4 096 байт
         =  36 864 байт

в сумме:     49 152 байт
          +  49 152 байт
          +  36 864 байт
          = 135 168 байт
Суть BitTorrent состоит как раз в обмене такими блоками между пирами. Когда все блоки одного фрагмента загружены, этим фрагментом можно поделиться с другими пирами, и им отправляется сообщение Have. Как только все фрагменты загружены, пир превращается из личера (загружающего) просто в сидера (раздающего).
Два замечания по поводу официальной спецификации:
- В официальной спецификации как фрагменты, так и блоки называются просто фрагментами, что может легко запутать. Неофициальная спецификация и другие используют понятие блока в качестве фрагмента поменьше, поэтому его используем и мы.
- В официальной спецификации размер блока отличается от того, который используем мы. Однако если посмотреть в неофициальную спецификацию, то можно увидеть, что принято использовать именно 214 байт, вне зависимости от того, что написано в официальной спецификации.
Реализация
После создания TorrentClient создаётся и PieceManager, в чьи обязанности входит:
- Определять, какой блок запросить следующим;
- Сохранять полученные блоки в файл;
- Определять момент завершения загрузки.
Когда PeerConnection успешно обменяется рукопожатиями с другим пиром и получит сообщение BitField, он сообщит PieceManager о том, какие фрагменты есть у какого пира (peer_id). Эта информация будет обновляться при получении каждого сообщения Have. Благодаря этой информации у PeerManager есть общая картина того, что где доступно.
Когда первый PeerConnection перейдёт в состояние Unchoked, он запросит следующий блок у пира. Следующий блок определяется вызовом метода PieceManager.next_request.
Метод next_request очень просто определяет, какой фрагмент запросить следующим:
- После создания
PieceManagerвсе фрагменты и блоки заранее формируются на основе информации о длине фрагментов, находящейся в торрент-файле. - Все фрагменты помещаются в список отсутствующих фрагментов.
- Во время вызова
next_requestменеджер сделает что-то из следующего:- Запросит заново любой блок, время ожидания которого было превышено;
- Запросит следующий блок текущего фрагмента;
- Запросит первый блок следующего отсутствующего фрагмента.
Таким образом блоки и фрагменты будут запрашиваться по порядку.
Так как Pieces — простой клиент, в нём не реализовывались какие-либо специальные стратегии по выбору фрагментов. Лучшим решением было бы запрашивать сначала наиболее редкий фрагмент, что хорошо скажется на всех пирах.
Каждый раз при получении блока PieceManager сохраняет его в памяти. Когда все блоки фрагмента получены, для него вычисляется SHA1-хеш. Этот хеш сравнивается с хешем, хранимым в торрент-файле, и если они совпадают, то фрагмент записывается на диск.
Когда все фрагменты получены, TorrentClient останавливается, закрывает все открытые TCP-соединения, и программа завершает свою работу с сообщением о том, что торрент был загружен.
Что дальше?
Необходимо реализовать сидирование. Это будет выглядеть примерно так:
- Каждый раз при подключении к нам пира, мы должны отправить ему сообщение
BitField, чтобы сообщить, какими фрагментами мы располагаем; - Каждый раз, когда мы получаем новый фрагмент, каждый объект
PeerConnectionдолжен отправить удалённому пиру сообщениеHave, чтобы сообщить, что у нас появился новый фрагмент.
Для этого нужно сделать так, чтобы PieceManager возвращал список с нулями и единицами, чтобы отобразить, какие фрагменты у нас есть. А TorrentClient должен говорить PeerConnection отправить удалённому пиру сообщение Have.
Дополнительные возможности, которые, вероятно, можно добавить без особых усилий:
- Многофайловый торрент. Тут придётся пошаманить с
PieceManager, так как фрагменты и блоки относятся к разным файлам, это повлияет на способ их сохранения; - Продолжение загрузки. Этого можно достичь проверкой уже скачанных файлов с помощью хешей.
Перевод статьи «A BitTorrent client in Python 3.5»
BitTorrent-Python
This is python implementation of the popular peer-to-peer protocol for file distribution.
This project, was the course project of Computer Networks course at Shahid Beheshti University in Fall 2021.
Table of contents
- Introduction to BitTorrent
- Installation
- How to run
- Usage
- Configurations
- Proposed Approach
- Peers
- Tracker
- Implementation Details
node.pytracker.pymessages/messages.py
utils.py
- A Sample Output
- Conclusion
Introduction to BitTorrent

Before you read this section, it must be noted that there is a complete and well-explained introduction to BitTorrent protocol
in the reference book Computer Networking: A top-Down Approach which all intuition behind this source were inspired by materials in this book.
I also put the three pages of this book which is describing BitTorrent in docs/Computer_Networking_A_top_Down_Approach.pdf.
Here there is a brief intro to BitTorrent:
BitTorrent is a popular P2P protocol for file distribution.
The collection of all peers participating in the distribution of a particular file is called a torrent.
Peers in a torrent download equal-size chunks of the file from one another.
When a peer first joins a torrent, it has no chunks. Over time, it accumulates more and more chunks.
While it downloads chunks it also uploads chunks to other peers.
Each torrent has an infrastructure node called a tracker.
When a peer joins a torrent, it registers itself with the tracker and periodically informs the tracker that it is still in the torrent.
In this manner, the tracker keeps track of the peers that are participating in the torrent.
Installation
Clone the repository on your local system by running the commands below in terminal.
$ git clone https://github.com/mohammadhashemii/BitTorrent-Python
$ cd BitTorrent-Python
There is no third-party package to install. All the packages needed for this project are python built-in libraries.
But it is recommended to use Python version 3.6 or more.
How to run
There are two main modules in BitTorrent, (i) node a.k.a. peer and (ii) tracker. So we must run each of these modules separately:
tracker.py:
node.py: You can create peers as many as you want. An example of creating two nodes is as follows.
(Note that each of them must be run in a separate window of your terminal if you are running this project in a single local computer)
$ python3 node.py -node_id 1
# in another tab of terminal
$ python3 node.py -node_id 2
As you can see, it takes an ID of the node you want to be created. For simplicity, we assume that nodes have unique IDs.
Usage
Excellent! Now the peers are running in the torrent. But there are a lot to do. As it stated in the course project description,
each node can be in two modes. In other words, there are two functionalities for each node:
-
send (upload): At any given time, a node i may want to upload a file in torrent for a neighboring peer.
Firstly, the node i tells the tracker that it has this file on his system and want to be in a state of waiting other peers request for that specific file.
A node can enter this mode by inputting like this:torrent -setMode send <filename> -
download: If node i wants to download a file, it must first informs the trackers that it needs this file.
Thus, the tracker search that file in the torrent and sort the neighbors which own this file based on their upload frequency
list, the more a node uploads, the more chance it has for being selected. Then a fixed number of neighboring peers are selected
for node i for later to request that file from them. Next, node i request that file from those neighboring peers, and
conduct a UDP connection for getting a chunk of file from that peer.torrent -setMode download <filename> -
exit — (Optional mode):
An optional mode named exit has also implemented which is used for letting tracker know that a node has left the
torrent intentionally. But according to the reference book, tracker must automatically notices that a node has left.
This mechanism is described in the project report.Each node and also the tracker has an individual log file in
logs/directory which all the events in the torrent which is related to that node or the tracker will be written in.Also, you can add any files in each node local directory that be participated in the torrent. This can be found in
node_files/.
Configurations
All the parameters and configs which can be modified exist in configs.py. There is a JSON-like variable which is as follows.
{
    "directory": {
        "logs_dir": "logs/",
        "node_files_dir": "node_files/",
        "tracker_db_dir": "tracker_db/"
    },
    "constants": {
        "AVAILABLE_PORTS_RANGE": [1024, 65535],
        "TRACKER_ADDR": ["localhost", 12345],
        "MAX_UDP_SEGMENT_DATA_SIZE": 65527,
        "BUFFER_SIZE": 9216,
        "CHUNK_PIECES_SIZE": 7216,
        "MAX_SPLITTNES_RATE": 3,
        "NODE_TIME_INTERVAL": 20,
        "TRACKER_TIME_INTERVAL": 22
    },
    "tracker_requests_mode": {
        "REGISTER": 0,
        "OWN": 1,
        "NEED": 2,
        "UPDATE": 3,
        "EXIT": 4
    }
}
Proposed Approach:
BitTorrent contains two main modules: (i) peers and (ii) tracker.
There are multiple nodes(peers), and a single tracker in this network.
We will explain each of these modules in details in the following sections.
Peers
When a peer joins the torrent, it registers itself with the tracker and periodically informs the tracker that it is still in the torrent.
A peer functionality can be summarized in two functions:
1. Send (Upload)
A peer can send a chunk of a file to a neighboring peer. In fact, before this happens,
it informs the torrent that it OWNs a specific file. Afterward, the trackers updates its database
and add this peer as the owner of that file. Then, the node is ready to send the file(actually a chunk of that)
to another peer which requested that file. Note that any given time, a peer can send different chunks of various files to
different neighboring peers (Thanks to the threads in programming languages, this is possible).
While the peer listening to requests, if a neighboring peers requests a file, it starts to send an specific chunk of that
file to it. The question is that how does it know to send an exact chunk of a file. We will answer this question later.
2. Download
Downloading a file has two main steps. First step which is known as search step, we must inform the tracker that we NEEDs
a specific file. The tracker after some processing (which is described in the next section), introduce some fixed-number of
peers which it can request that file from. Assume that we send downloading request to N peering nodes for getting a file with size of S
Each peering node, sends S/N bytes of that file to the source peer in parallel.
After gathering all the chunks of the file, they must be re-assembled and be saved in the local directory of that node.
Tracker
As we mentioned earlier, torrent has only a tracker. It manages the torrent and has general information of the peers.
This information contains:
- Peers’ files
- The address (IP and port number) of each peer in torrent
Tracker database is updated periodically by peers. In fact each node, informs the torrent its state via a message periodically,
and the tracker updates its database in a pooling manner. If a peer does not informs the tracker for one cycle, it means
it has left the torrent and its information in the database must be deleted.
As we discussed, each peer may send different messages to the tracker. These messages can be categorized as follows:
| Mode | Description |
|---|---|
| REGISTER | Tells the tracker that it is in the torrent. |
| OWN | Tells the tracker that it is now in sending mode for a specific file. |
| NEED | Tells the torrent that it needs a file, so the file must be searched in the torrent. |
| UPDATE | Tells the tracker that it’s upload frequency rate must be incremented. |
| EXIT | Tells the tracker that it left the torrent. |
We briefly explain what the tracker does when it receives these messages:
1. REGISTER:
The tracker receives this type of message in two conditions. First when a node enters the torrent. By this way, the node informs the tracker that it is in the torrent. Second, every T seconds a node informs the tracker that is still in the torrent.
2. OWN:
When a peer enters the SEND mode, it sends this message to the tracker. Then, the tracker updates its database of files in torrent.
3. NEED:
Obviously, when a peer needs a file, it informs the tracker that it needs file f. The tracker searches the torrent and sort the owners of that file based on a clever trading algorithm. The basic idea is that the tracker gives priority to the peers that are currently supplying files at the highest rate.
4. UPDATE:
When a file has been sent by a peer to some other node, its uploading frequency rate must be incremented. This is done by the tracker.
5. EXIT:
When a peer exits the torrent, all the information which is related to this peer must be deleted from the tracker database.

How these steps work and how they are implemented are explained in the following sections.
Implementation Details:
Before you read this part, it must be noted that we tried to make the codes self-explainable by adding appropriate documentations and comments. But here we describe the general purpose of implementing functions in each file.
node.py
There is a class named Node in node.py which has these fields:
| Field | Type | Description |
|---|---|---|
node_id |
int |
A unique ID of the node |
rcv_socket |
socket.socket |
A socket for receiving messages |
send_socket |
socket.socket |
A socket for sending messages |
files |
list |
A list of files which the node owns |
is_in_send_mode |
bool |
a boolean variable which indicates that whether the node is in send mode |
downloaded_files |
dict |
A dictionary with filename as keys and a list of file owners which the node takes the file from |
By running the node.py, the script calls run(). The following things are then performs:
- Creating an instance of
Nodeclass as a new node. - Informing the tracker that it enters the torrent.
- Creates a thread which works as a timer to sends a message to the tracker to inform its state to it.
- Depending on what command the user inputs, it calls different functions which we will cover them now.
The implementation of run() is as follows:
def run(args):
    node = Node(node_id=args.node_id,
                rcv_port=generate_random_port(),
                send_port=generate_random_port())
    log_content = f"***************** Node program started just right now! *****************"
    log(node_id=node.node_id, content=log_content)
    node.enter_torrent()

    # We create a thread to periodically informs the tracker to tell it is still in the torrent.
    timer_thread = Thread(target=node.inform_tracker_periodically, args=(config.constants.NODE_TIME_INTERVAL,))
    timer_thread.setDaemon(True)
    timer_thread.start()

    print("ENTER YOUR COMMAND!")
    while True:
        command = input()
        mode, filename = parse_command(command)

        #################### send mode ####################
        if mode == 'send':
            node.set_send_mode(filename=filename)
        #################### download mode ####################
        elif mode == 'download':
            t = Thread(target=node.set_download_mode, args=(filename,))
            t.setDaemon(True)
            t.start()
        #################### exit mode ####################
        elif mode == 'exit':
            node.exit_torrent()
            exit(0)
Now we describe the purpose of each function. We tried these explanations be brief but helpful.
Send mode functions:
def set_send_mode(self, filename: str) -> None:
- Send a message(
Node2Trackermessage) to the tacker to tells it that it has the file with namefilenameand is ready to listen to other peers requests. - Create a thread for listening to neighboring peers’ requests. The thread calls
listen()function.
def listen(self) -> None:
- It has a infinit loop for waiting for other peers’ messages.
- Just after it receives a message, it calls
handle_requests().
def handle_requests(self, msg: dict, addr: tuple) -> None:
- The messages from peers can be categorized to groups. First the one which are asking for the size of a file. For this, we call
tell_file_size()to calculate the size of the file. - In the second group, the nodes is asked for sending a chunk of a file. In this condition, it calls
send_chunk().
def tell_file_size(self, msg: dict, addr: tuple) -> None:
- This function is simple. It calculates the file using
os.stat(file_path).stsize. - Then we send the result by sending a message of type
None2Node.
def send_chunk(self, filename: str, rng: tuple, dest_node_id: int, dest_port: int) -> None:
This is a quiet important function. As we said, file chunks must be sent piece by pieces(Due to the limited MTU of UDP protocol).
- Thus the chunk is splitted to multiple pieces to be transfarabale by calling
split_file_to_chunks(). It returns a list of pieces. - Now we iterate the pieces and send them to the neighboring peer withing a UDP segment. The piece is sent within a message of type
ChunkSharing.
def split_file_to_chunks(self, file_path: str, rng: tuple) -> list:
- This function takes the range of the file which has to be splitted to pieces of fixed-size (It this size can be modified in the
configs.py). This is done bymmap.mmap()which is a python built-in function. - Then it returns the result as a list of chunk pieces.
def send_segment(self, sock: socket.socket, data: bytes, addr: tuple) -> None:
All the messages which are transferring among peers and tracker uses this function to be sent. It creates a UDPSegment instance and be sent with socket.socket functionalities.
Download mode functions:
def set_download_mode(self, filename: str) -> None:
- It first checks if the node has already owned this file. If yes, it returns.
- If No, if calls
search_torrent()to ask the tracker about the file owners. - After getting the result from the tracker, it calls
split_file_owners()to split the file to equal-sized chunks.
def search_torrent(self, filename: str) -> dict
- It sends a
Node2Trackermessage to the tracker with mode NEED. The tracker returns the K best peers information which this node can take file chunks of them. (K can be modified in theconfigs.py). - After receiving the result from the tracker, it returns the search result as python dictionary.
def split_file_owners(self, file_owners: list, filename: str): -> dict
This is the most important function of this class. Til now we have the owner of the file which we are going to download. We sort the owners based on their uploading frequency rate. There are 5 main steps we have to follow:
- First we must ask the size of the desired file from one of the file owners. This is done by calling the
ask_file_size(). - Now, we know the size, it’s time to split it equally among peers to download chunks of it from them.
- Now we iterate a thread for each neighbor peer to download a chunk from it. This done by iterating the threads and calling
receive_chunk()for each individual one. - Now we have downloaded all the chunks of the file. It’s time to sort them by calling
sort_downloaded_chunks(). Because they may have received in-ordered. - Finally, we assemble the chunks to re-build the file and saving it in the node directory. This is done by calling
reassemble_file().
Now let’s see how each of these five functions work:
def ask_file_size(self, filename: str, file_owner: tuple) -> int:
This function sends a Node2Node message to one of the neighboring peers for asking the file size.
def receive_chunk(self, filename: str, range: tuple, file_owner: tuple):
- First we sends a
ChunkSharingmessage to the neighboring peer to informs it that we want that chunk. - Then we wait for that chunk to be received.
def sort_downloaded_chunks(self, filename: str) -> list
All the downloaded chunks are stored in self.downloaded_files. But they are in-ordered and must be sorted. So we sort them based on theirs indices and return the result as a ordered list.
def reassemble_file(self, chunks: list, file_path: str):
   with open(file_path, "bw+") as f:
      for ch in chunks:
            f.write(ch)
      f.flush()
      f.close()
There are some more functions to be explained:
def inform_tracker_periodically(self, interval: int):
As mentioned earlier, this function is called periodically to inform the state of the node to the tracker by sending a Node2Tracker message.
It sends a Node2Tracker message to the tracker to tells it that it enters the torrent.
It sends a Node2Tracker message to the tracker to tells it that it left the torrent.
tracker.py
There is a class named Tracker in tracker.py which has these fields:
| Field | Type | Description |
|---|---|---|
tracker_socket |
socket.socket |
A socket for sending & receiving messages |
file_owners_list |
defaultdict |
A python dictionary of the files with their owners in the torrent |
send_freq_list |
defaultdict |
A python dictionary of the nodes with their upload frequency rate |
has_informed_tracker |
defaultdict |
A python dictionary of the nodes with a boolean variable indicating their status in the torrent |
By running tracker.py a function named run() is called which performs the following steps:
- It creates an instance of
Tracker. - It creates a thread with a target of
listen()
The implementation of run() is as follows:
def run(self):
   log_content = f"***************** Tracker program started just right now! *****************"
   log(node_id=0, content=log_content, is_tracker=True)
   t = Thread(target=self.listen())
   t.daemon = True
   t.start()
   t.join()
Now we describe the purpose of each function. We tried these explanations be brief but helpful.
def listen(self) -> None:
- It first creates a thread to work as a timer, for checking the nodes status periodically by calling
check_nodes_periodically(). - Then it enters an in-finit loop for listening to nodes requests. For handling the requests taken from the peers, it calls
handle_node_request().
def check_nodes_periodically(self, interval: int) -> None:
- Every T seconds, this function is called and it is responsible to check if the nodes are still in the torrent.
- It iterates the
self.has_informed_trackerand if its value is true for a peer, it means the node has informed the tracker that is still in the torrent. In other hand, it it’s value is False, it means that specific node has left the torrent and its database must be removed by callingremove_node().
def remove_node(self, node_id: int, addr: tuple) -> None:
It removes all the information related to node with id of node_id and address of addr in the tracker database.
def handle_node_request(self, data: bytes, addr: tuple):
This function is the heart of the Tracker class. Based on message modes comes from the nodes, it calls different functions:
- Mode OWN: It calls
add_file_owner() - Mode NEED: It calls
search_file() - Mode UPDATE: It calls
update_db() - Mode REGISTER: It updates the
self.has_informed_trackerdictionary for a specific node. - Mode EXIT: It calls
remove_node()
def add_file_owner(self, msg: dict, addr: tuple) -> None:
This function adds the node’s file to the self.file_owners_list.
def search_file(self, msg: dict, addr: tuple) -> None:
- It iterates the
self.file_owners_listto find the owners of the file which is needed. Each owner will be appended tomatched_entrieslist. - It sends a
Tracker2Nodemessage to the peer which has wanted from the tracker to search for the file owners.
def update_db(self, msg: dict):
It’s simple. It increments the self.send_freq_list dictionary for a file.
There is also one other utility functions in Tracker class:
def save_db_as_json(self):
We save the database into two separate JSON files: (i) nodes.json which contains the information of nodes and theirs upload frequency rate, and (ii) files.json including the information of files and their owners. Whenever some changes occur in the database we call this function. These JSON files are in tracker_DB/ directory.
messages/
There are multiple python files in the messages/ directory. messages.py has a class named Message which all the messages commuting among the nodes and the tracker are an instance of this class. In fact the other classes in other python files in directory are all inheriting from class Message. The implementation of message.py is as follows:
from __future__ import annotations
import pickle


class Message:
    def __init__(self):
        pass

    def encode(self) -> bytes:
        return pickle.dumps(self.__dict__)

    @staticmethod
    def decode(data: bytes) -> dict:
        return pickle.loads(data)
Other message class which are inheriting Message are as follows:
| Class | Description |
|---|---|
Node2Tracker |
Sending a message from node to the tracker |
Tracker2Node |
Sending a message from the tracker to a node |
Node2Node |
Sending a message from a node to another node |
ChunkSharing |
For file communication |
utils.py
There are some helper functions in utils.py. All other python files have imported this script.
def set_socket(port: int) -> socket.socket:
This function takes a port number and creates a new UDP socket.
def free_socket(sock: socket.socket):
This function takes a socket and frees a socket to be able to be used by others.
def generate_random_port() -> int:
A function that generates a new(unused) random port number.
def parse_command(command: str):
It parses the input command entered from the user.
def log(node_id: int, content: str, is_tracker=False) -> None:
It is called several times by nodes and the tracker to log the events occurred in the torrent. Each node has an individual log file in logs/ directory.
A Sample Output
For better intuition of how this project works and what kind of output we will get by running the codes, we put a sample output of the code. We created a torrent with 4 peers and a tracker. For some snapshots of the outputs go to docs/simulation/.
Conclusion
Downloading movie, music perhaps game or very large size software is a pretty fun activity using BitTorrent communication protocol which helps in distributing large chunks of data over Internet. Fact is that one third of internet traffic contains BitTorrent data packets, which makes it one of most interesting and trending topics.
In this project we implemented a simple version of BitTorrent in Python language programming. Actually BitTorrent has evolved during the last decades and various version of it has been used. This implementation contains the main modules of every BitTorrent network which is useful for getting know how it works.
Of course, these codes has not tested in large scale cases due to the academical nature it has. We highly appreciate in case you give any kinds of feedback (i.e. creating issues, pull requests etc.) if you have found any problem or miss-understanding.
When Python 3.5 was released together with the new module asyncio I was curios to give it a try. Recently I decided to implement a simple BitTorrent client using asyncio — I have always been interested in peer-to-peer protocols and it seemed like a perfect fit.
The project is named Pieces, all of the source code is available at GitHub and released under the Apache 2 license. Feel free to learn from it, steal from it, improve it, laugh at it or just ignore it.
I previously posted a short introduction to Python’s async module. If this is your first time looking at asyncio it might be a good idea to read through that one first.
An introduction to BitTorrent
BitTorrent has been around since 2001 when Bram Cohen authored the first version of the protocol. The big breakthrough was when sites as The Pirate Bay made it popular to use for downloading pirated material. Streaming sites, such as Netflix, might have resulted in a decrease of people using BitTorrent for downloading movies. But BitTorrent is still used in a number of different, legal, solutions where distribution of larger files are important.
- Facebook use it to distribute updates within their huge data centers
- Amazon S3 implement it for downloading of static files
- Traditional downloads still used for larger files such as Linux distributions
BitTorrent is a peer-to-peer protocol, where peers join a swarm of other peers to exchange pieces of data between each other. Each peer is connected to multiple peers at the same time, and thus downloading or uploading to multiple peers at the same time. This is great in terms of limiting bandwidth compared to when a file is downloaded from a central server. It is also great for keeping a file available as it does not rely on a single source being online.
There is a .torrent file that regulates how many pieces there is for a given file(s), how these should be exchanged between peers, as well as how the data integrity of these pieces can be confirmed by clients.
While going through the implementation it might be good to have read, or to have another tab open with the Unofficial BitTorrent Specification. This is without a doubt the best source of information on the BitTorrent protocol. The official specification is vague and lacks certain details so the unofficial is the one you want to study.
Parsing a .torrent file
The first thing a client needs to do is to find out what it is supposed to download and from where. This information is what is stored in the .torrent file, a.k.a. the meta-info. There is a number of properties stored in the meta-info that we need in order to successfully implement a client.
Things like:
- The name of the file to download
- The size of the file to download
- The URL to the tracker to connect to
All these properties are stored in a binary format called Bencoding.
Bencoding supports four different data types, dictionaries, lists, integers and strings — it is fairly easy translate to Python’s object literals or JSON.
Below is bencoding described in Augmented Backus-Naur Form courtesy of the Haskell library.
<BE>    ::= <DICT> | <LIST> | <INT> | <STR>

<DICT>  ::= "d" 1 * (<STR> <BE>) "e"
<LIST>  ::= "l" 1 * <BE>         "e"
<INT>   ::= "i"     <SNUM>       "e"
<STR>   ::= <NUM> ":" n * <CHAR>; where n equals the <NUM>

<SNUM>  ::= "-" <NUM> / <NUM>
<NUM>   ::= 1 * <DIGIT>
<CHAR>  ::= %
<DIGIT> ::= "0" | "1" | "2" | "3" | "4" | "5" | "6" | "7" | "8" | "9"
In pieces the encoding and decoding of bencoded data is implemented in the pieces.bencoding module (source code).
Here are a few examples decoding bencoded data into a Python representation using that module.
>>> from pieces.bencoding import Decoder

# An integer value starts with an 'i' followed by a series of
# digits until terminated with a 'e'.
>>> Decoder(b'i123e').decode()
123

# A string value, starts by defining the number of characters
# contained in the string, followed by the actual string.
# Notice that the string returned is a binary string, not unicode.
>>> Decoder(b'12:Middle Earth').decode()
b'Middle Earth'

# A list starts with a 'l' followed by any number of objects, until
# terminated with an 'e'.
# As in Python, a list may contain any type of object.
>>> Decoder(b'l4:spam4:eggsi123ee').decode()
[b'spam', b'eggs', 123]

# A dict starts with a 'd' and is terminated with a 'e'. objects
# in between those characters must be pairs of string + object.
# The order is significant in a dict, thus OrderedDict (from
# Python 3.1) is used.
>>> Decoder(b'd3:cow3:moo4:spam4:eggse').decode()
OrderedDict([(b'cow', b'moo'), (b'spam', b'eggs')])
Likewise, a Python object structure can be encoded into a bencoded byte string using the same module.
>>> from collections import OrderedDict
>>> from pieces.bencoding import Encoder

>>> Encoder(123).encode()
b'i123e'

>>> Encoder('Middle Earth').encode()
b'12:Middle Earth'

>>> Encoder(['spam', 'eggs', 123]).encode()
bytearray(b'l4:spam4:eggsi123ee')

>>> d = OrderedDict()
>>> d['cow'] = 'moo'
>>> d['spam'] = 'eggs'
>>> Encoder(d).encode()
bytearray(b'd3:cow3:moo4:spam4:eggse')
These examples can also be found in the unit tests.
The parser implementation is pretty straight forward, no asyncio is used here though, not even reading the .torrent from disk.
Using the parser from pieces.bencoding, let’s open the .torrent for the popular Linux distribution Ubuntu:
>>> with open('tests/data/ubuntu-16.04-desktop-amd64.iso.torrent', 'rb') as f:
...     meta_info = f.read()
...     torrent = Decoder(meta_info).decode()
...
>>> torrent
OrderedDict([(b'announce', b'http://torrent.ubuntu.com:6969/announce'), (b'announce-list', [[b'http://torrent.ubuntu.com:6969/announce'], [b'http://ipv6.torrent.ubuntu.com:6969/announce']
]), (b'comment', b'Ubuntu CD releases.ubuntu.com'), (b'creation date', 1461232732), (b'info', OrderedDict([(b'length', 1485881344), (b'name', b'ubuntu-16.04-desktop-amd64.iso'), (b'piece
length', 524288), (b'pieces', b'x1atxfcx84xc8xfaVxebx12x1cxc5xa4x1c?xf0x96x07Px87xb8xb2xa5G1xc8Lx18x81x9bcx81xfc8*x9dxf4kxe6xdb6xa3x0bx8dxbexe3Lxfdxfd4...')]))])
Here you can read see some of the meta-data such as the name of the destination file (ubuntu-16.04-desktop-amd64.iso) and the total size in bytes (1485881344).
Notice how the keys used in the OrderedDict are binary strings. Bencoding is a binary protocol, and using UTF-8 strings as keys will not work!
A wrapper class pieces.torrent.Torrent exposing these properties is implemented abstracting the binary strings, and other details away from the rest of the client. This class only implements the attributes used in pieces client.
I will not go through which attributes that is available, instead the rest of this article will refer back to attributes found in the .torrent / meta-info were used.
Connecting to the tracker
Now that we can decode a .torrent file and we have a Python representation of the data, we need to get a list of peers to connect with. This is where the tracker comes in. A tracker is a central server keeping track of available peers for a given torrent. A tracker does NOT contain any of the torrent data, only which peers that can be connected to and their statistics.
Building the request
The announce property in the meta-info is the HTTP URL to the tracker to connect to using the following URL parameters:
| Parameter | Description |
|---|---|
| info_hash | The SHA1 hash of the info dict found in the .torrent |
| peer_id | A unique ID generated for this client |
| uploaded | The total number of bytes uploaded |
| downloaded | The total number of bytes downloaded |
| left | The number of bytes left to download for this client |
| port | The TCP port this client listens on |
| compact | Whether or not the client accepts a compacted list of peers or not |
The peer_id needs to be exactly 20 bytes, and there are two major conventions used on how to generate this ID. Pieces follows the Azureus-style convention generating peer id like:
>>> import random
# -<2 character id><4 digit version number>-<random numbers>
>>> '-PC0001-' + ''.join([str(random.randint(0, 9)) for _ in range(12)])
'-PC0001-478269329936'
A tracker request can look like this using httpie:
http GET "http://torrent.ubuntu.com:6969/announce?info_hash=%90%28%9F%D3M%FC%1C%F8%F3%16%A2h%AD%D85L%853DX&peer_id=-PC0001-706887310628&uploaded=0&downloaded=0&left=699400192&port=6889&compact=1"
HTTP/1.0 200 OK
Content-Length: 363
Content-Type: text/plain
Pragma: no-cache
d8:completei3651e10:incompletei385e8:intervali1800e5:peers300:£¬%ËÌyOkÝ.ê@_<K+ÔÝ Ámb^TnÈÕ^AËO*ÈÕ1*ÈÕ>¥³ÈÕBä)ðþ¸ÐÞ¦Ô/ãÈÕÈuÉæÈÕ
...
The response data is truncated since it contains binary data that screws up the Markdown formatting.
From the tracker response, there is two properties of interest:
- interval — The interval in seconds until the client should make a new announce call to the tracker.
- peers — The list of peers is a binary string with a length of multiple of 6 bytes. Where each peer consist of a 4 byte IP address and a 2 byte port number (since we are using the compact format).
So, a successful announce call made to the tracker, gives you a list of peers to connect to. This might not be all available peers in this swarm, only the peers the tracker assigned your client to connect. A subsequent call to the tracker might result in another list of peers.
Async HTTP
Python does not come with a built-in support for async HTTP and my beloved requests library does not implement asyncio either. Scouting around the Internet it looks like most use aiohttp, which implement both a HTTP client and server.
Pieces use aiohttp in the pieces.tracker.Tracker class for making the HTTP request to the tracker announce url. A shortened version of that code is this:
async def connect(self,
                    first: bool=None,
                    uploaded: int=0,
                    downloaded: int=0):
    params = { ...}
    url = self.torrent.announce + '?' + urlencode(params)

    async with self.http_client.get(url) as response:
        if not response.status == 200:
            raise ConnectionError('Unable to connect to tracker')
        data = await response.read()
        return TrackerResponse(bencoding.Decoder(data).decode())
The method is declared using async and uses the new asynchronous context manager async with to allow being suspended while the HTTP call is being made. Given a successful response, this method will be suspended again while reading the binary response data await response.read(). Finally the response data is wrapped in a TrackerResponse instance containing the list of peers, alternative an error message.
The result of using aiohttp is that our event loop is free to schedule other work while we have an outstanding request to the tracker.
See the module pieces.tracker source code for full details.
The loop
Everything up to this point could really have been made synchronously, but now that we are about to connect to multiple peers we need to go asynchronous.
The main function in pieces.cli is responsible for setting up the asyncio event loop. If we get rid of some argparse and error handling details it would look something like this (see cli.py for the full details).
import asyncio

from pieces.torrent import Torrent
from pieces.client import TorrentClient

loop = asyncio.get_event_loop()
client = TorrentClient(Torrent(args.torrent))
task = loop.create_task(client.start())

try:
    loop.run_until_complete(task)
except CancelledError:
    logging.warning('Event loop was canceled')
We start off by getting the default event loop for this thread. Then we construct the TorrentClient with the given Torrent (meta-info). This will parse the .torrent file and validate everything is ok.
Calling the async method client.start() and wrapping that in a asyncio.Future and later adding that future and instructing the event loop to keep running until that task is complete.
Is that it? No, not really — we have our own loop (not event loop) implemented in the pieces.client.TorrentClient that sets up the peer connections, schedules the announce call, etc.
TorrentClient is something like a work coordinator, it starts by creating a async.Queue which will hold the list of available peers that can be connected to.
Then it constructs N number of pieces.protocol.PeerConnection which will consume peers from off the queue. These PeerConnection instances will wait (await) until there is a peer available in the Queue for one of them to connect to (not blocking).
Since the queue is empty to begin with, no PeerConnection will do any real work until we populate it with peers it can connect to. This is done in a loop inside of TorrentClient.start.
Let’s have a look at this loop:
async def start(self):
    self.peers = [PeerConnection(self.available_peers,
                                    self.tracker.torrent.info_hash,
                                    self.tracker.peer_id,
                                    self.piece_manager,
                                    self._on_block_retrieved)
                    for _ in range(MAX_PEER_CONNECTIONS)]

    # The time we last made an announce call (timestamp)
    previous = None
    # Default interval between announce calls (in seconds)
    interval = 30*60

    while True:
        if self.piece_manager.complete:
            break
        if self.abort:
            break

        current = time.time()
        if (not previous) or (previous + interval < current):
            response = await self.tracker.connect(
                first=previous if previous else False,
                uploaded=self.piece_manager.bytes_uploaded,
                downloaded=self.piece_manager.bytes_downloaded)

            if response:
                previous = current
                interval = response.interval
                self._empty_queue()
                for peer in response.peers:
                    self.available_peers.put_nowait(peer)
        else:
            await asyncio.sleep(5)
    self.stop()
Basically, what that loop does is to:
- Check if we have downloaded all pieces
- Check if user aborted download
- Make a annouce call to the tracker if needed
- Add any retrieved peers to a queue of available peers
- Sleep 5 seconds
So, each time an announce call is made to the tracker, the list of peers to connect to is reset, and if no peers are retrieved, no PeerConnection will run. This goes on until the download is complete or aborted.
The peer protocol
After receiving a peer IP and port-number from the tracker, our client will to open a TCP connection to that peer. Once the connection is open, these peers will start to exchange messages using the peer protocol.
First, lets go through the different parts of the peer protocol, and then go through how it is all implemented.
Handshake
The first message sent needs to be a Handshake message, and it is the connecting client that is responsible for initiating this.
Immediately after sending the Handshake, our client should receive a Handshake message sent from the remote peer.
The Handshake message contains two fields of importance:
- peer_id — The unique ID of either peer
- info_hash — The SHA1 hash value for the info dict
If the info_hash does not match the torrent we are about to download, we
close the connection.
Immediately after the Handshake, the remote peer may send a BitField message. The BitField message serves to inform the client on which pieces the remote peer have. Pieces support receiving a BitField message, and most BitTorrent clients seems to send it — but since pieces currently does not support seeding, it is never sent, only received.
The BitField message payload contains a sequence of bytes that when read binary each bit will represent one piece. If the bit is 1 that means that the peer have the piece with that index, while 0 means that the peer lacks that piece. I.e. Each byte in the payload represent up to 8 pieces with any spare bits set to 0.
Each client starts in the state choked and not interested. That means that the client is not allowed to request pieces from the remote peer, nor do we have intent of being interested.
- Choked A choked peer is not allowed to request any pieces from the other peer.
- Unchoked A unchoked peer is allowed to request pieces from the other peer.
- Interested Indicates that a peer is interested in requesting pieces.
- Not interested Indicates that the peer is not interested in requesting pieces.
Consider Choked and Unchoked to be rules and Interested and Not Interested to be intents between two peers.
After the handshake we send an Interested message to the remote peer, telling that we would like to get unchoked in order to start requesting pieces.
Until the client receives an Unchoke message — it may not request a piece from its remote peer — the PeerConnection will be choked (passive) until either unchoked or disconnected.
The following sequence of messages is what we are aiming for when setting up a PeerConnection:
              Handshake
    client --------------> peer    We are initiating the handshake

              Handshake
    client <-------------- peer    Comparing the info_hash with our hash

              BitField
    client <-------------- peer    Might be receiving the BitField

             Interested
    client --------------> peer    Let peer know we want to download

              Unchoke
    client <-------------- peer    Peer allows us to start requesting pieces
Requesting pieces
As soon as the client gets into a unchoked state it will start requesting pieces from the connected peer. The details surrounding which piece to request is detailed later, in Managing the pieces.
If we know that the other peer have a given piece, we can send a Request message asking the remote peer to send us data for the specified piece. If the peer complies it will send us a corresponding Piece message where the message payload is the raw data.
This client will only ever have one outstanding Request per peer and politely wait for a Piece message until taking the next action. Since connections to multiple peers are open concurrently, the client will have multiple Requests outstanding but only one per connection.
If, for some reason, the client do not want a piece anymore, it can send a Cancel message to the remote peer to cancel any previously sent Request.
Other messages
Have
The remote peer can at any point in time send us a Have message. This is done when the remote peer have received a piece and makes that piece available for its connected peers to download.
The Have message payload is the piece index.
When pieces receive a Have message it updates the information on which pieces the peer has.
KeepAlive
The KeepAlive message can be sent at anytime in either direction. The message does not hold any payload.
Implementation
The PeerConnection opens a TCP connection to a remote peer using asyncio.open_connection to asynchronously open a TCP connection that returns a tuple of StreamReader and a StreamWriter. Given that the connection was created successfully, the PeerConnection will send and receive a Handshake message.
Once a handshake is made, the PeerConnection will use an asynchronous iterator to return a stream of PeerMessages and take the appropriate action.
Using an async iterator separates the PeerConnection from the details on how to read from sockets and how to parse the BitTorrent binary protocol. The PeerConnection can focus on the semantics regarding the protocol — such as managing the peer state, receiving the pieces, closing the connection.
This allows the main code in PeerConnection.start to basically look like:
async for message in PeerStreamIterator(self.reader, buffer):
    if type(message) is BitField:
        self.piece_manager.add_peer(self.remote_id, message.bitfield)
    elif type(message) is Interested:
        self.peer_state.append('interested')
    elif type(message) is NotInterested:
        if 'interested' in self.peer_state:
            self.peer_state.remove('interested')
    elif type(message) is Choke:
        ...
An asynchronous iterator is a class that implements the methods __aiter__ and __anext__ which is just async versions of Python’s standard iterators that have implements the methods, __iter__ and next.
Upon iterating (calling next) the PeerStreamIterator will read data from the StreamReader and if enough data is available try to parse and return a valid PeerMessage.
The BitTorrent protocol uses messages with variable length, where all messages takes the form:
<length><id><payload>
- length is a 4 byte integer value
- id is a single decimal byte
- payload is variable and message dependent
So as soon as the buffer have enough data for the next message it will be parsed and returned from the iterator.
All messages are decoded using Python’s module struct which contains functions to convert to and from Pythons values and C structs. Struct use compact strings as descriptors on what to convert, e.g. >Ib reads as “Big-Endian, 4 byte unsigned integer, 1 byte character.
Note that all messages uses Big-Endian in BitTorrent.
This makes it easy to create unit tests to encode and decode messages. Let’s have a look on the tests for the Have message:
class HaveMessageTests(unittest.TestCase):
    def test_can_construct_have(self):
        have = Have(33)
        self.assertEqual(
            have.encode(),
            b"x00x00x00x05x04x00x00x00!")

    def test_can_parse_have(self):
        have = Have.decode(b"x00x00x00x05x04x00x00x00!")
        self.assertEqual(33, have.index)
From the raw binary string we can tell that the Have message have a length of 5 bytes x00x00x00x05 an id of value 4 x04 and the payload is 33 x00x00x00!.
Since the message length is 5 and ID only use a single byte we know that we have four bytes to interpret as the payload value. Using struct.unpack we can easily convert it to a python integer like:
>>> import struct
>>> struct.unpack('>I', b'x00x00x00!')
(33,)
That is basically it regarding the protocol, all messages follow the same procedure and the iterator keeps reading from the socket until it gets disconnected. See the source code for details on all messages.
Managing the pieces
So far we have only discussed pieces — pieces of data being exchanged by two peers. It turns out that pieces is not the entire truth, there is one more concept — blocks. If you have looked through any of the source code you might have seen code refering to blocks, so lets go through what a piece really is.
A piece is, unsurprisingly, a partial piece of the torrents data. A torrent’s data is split into N number of pieces of equal size (except the last piece in a torrent, which might be of smaller size than the others). The piece length is specified in the .torrent file. Typically pieces are of sizes 512 kB or less, and should be a power of 2.
Pieces are still too big to be shared efficiently between peers, so pieces are further divided into something referred to as blocks. Blocks is the chunks of data that is actually requested between peers, but pieces are still used to indicate which peer that have which pieces. If only blocks should have been used it would increase the overhead in the protocol greatly (resulting in longer BitFields, more Have message and larger .torrent files).
A block is 2^14 (16384) bytes in size, except the final block that most likely will be of a smaller size.
Consider an example where a .torrent describes a single file foo.txt to be downloaded.
name: foo.txt
length: 135168
piece length: 49152
That small torrent would result in 3 pieces:
piece 0: 49 152 bytes
piece 1: 49 152 bytes
piece 2: 36 864 bytes (135168 - 49152 - 49152)
        = 135 168
Now each piece is divided into blocks in sizes of 2^14 bytes:
piece 0:
    block 0: 16 384 bytes (2^14)
    block 1: 16 384 bytes
    block 2: 16 384 bytes
          =  49 152 bytes

piece 1:
    block 0: 16 384 bytes
    block 1: 16 384 bytes
    block 2: 16 384 bytes
          =  49 152 bytes

piece 2:
    block 0: 16 384 bytes
    block 1: 16 384 bytes
    block 2:  4 096 bytes
          =  36 864 bytes

total:       49 152 bytes
          +  49 152 bytes
          +  36 864 bytes
          = 135 168 bytes
Exchanging these blocks between peers is basically what BitTorrent is about. Once all blocks for a piece is done, that piece is complete and can be shared with other peers (the Have message is sent to connected peers). And once all pieces are complete the peer transform from a downloader to only be a seeder.
Two notes on where the official specification is a bit off:
-
The official specification refer to both pieces and blocks as just pieces which is quite confusing. The unofficial specification and others seem to have agreed upon using the term block for the smaller piece which is what we will use as well.
-
The official specification is stating another block size that what we use. Reading the unofficial specification, it seems that 2^14 bytes is what is agreed among implementers — regardless of the official specification.
The implementation
When a TorrentClient is constructed, so is a PieceManager with the resposibility to:
- Determine which block to request next
- Persisting received blocks to file
- Determine when a download is complete.
When a PeerConnection successfully handshakes with another peer and receives a BitField message it will inform the PieceManager which peer (peer_id) that have which pieces. This information will be updated on any received Have message as well. Using this information, the PeerManager knows the collective state on which pieces that are available from which peers.
When the first PeerConnection goes into a unchoked state it will request the next block from its peer. The next block is determined by calling the method PieceManager.next_request.
The next_request implements a very simple strategy on which piece to request next.
- When the
PieceManageris constructed all pieces and blocks are pre-constructed based on the piece length from the.torrentmeta-info - All pieces are put in a missing list
- When
next_requestis called, the manager will do one of:- Re-request any previously requested block that has timed-out
- Requst the next block in an ongoing piece
- Request the first block in the next missing piece
This way the blocks and pieces will be requsted in order. However, multiple pieces might be ongoing based on which piece a client have.
Since pieces aims to be a simple client, no effort have been made on implementing a smart or efficient strategy for which pieces to request. A better solution would be to request the rarest piece first, which would make the entire swarm healthier as well.
Whenever a block is received from a peer, it is stored (in memory) by the PieceManager. When all blocks for a piece is retrieved, a SHA1 hash is made on the piece. This hash is compared to the SHA1 hashes include in the .torrent info dict — if it matches the piece is written to disk.
When all pieces are accounted for (matching hashes) the torrent is considered to be complete, which stops the TorrentClient closing any open TCP connection and as a result the program exits with a message that the torrent is downloaded.
Future work
Seeding is not yet implemented, but it should not be that hard to implement. What is needed is something along the lines of this:
-
Whenever a peer is connected to, we should send a
BitFieldmessage to the remote peer indicating which pieces we have. -
Whenever a new piece is received (and correctness of hash is confirmed), each
PeerConnectionshould send aHavemessage to its remote peer to indicate the new piece that can be shared.
In order to do this the PieceManager needs to be extended to return a list of 0 and 1 for the pieces we have. And the TorrentClient to tell the PeerConnection to send a Have to its remote peer. Both BitField and Have messages should support encoding of these messages.
Having seeding implemented would make Pieces a good citizen, supporting both downloading and uploading of data within the swarm.
Additional features that probably can be added without too much effort is:
-
Multi-file torrent, will hit
PieceManager, since Pieces and Blocks might span over multiple files, it affects how files are persisted (i.e. a single block might contain data for more than one file). -
Resume a download, by seeing what parts of the file(s) are already downloaded (verified by making SHA1 hashes).
Summary
It was real fun to implement a BitTorrent client, having to handle binary protocols and networking was great to balance all that recent web development I have been doing.
Python continues to be one of my favourite programming language. Handling binary data was a breeze given the struct module and the recent addition asyncio feels very pythonic. Using async iterator to implement the protocol turned out to be a good fit as well.
Hopefully this article inspired you to write a BitTorrent client of your own, or to extend pieces in some way. If you spot any error in the article or the source code, feel free to open an issue over at GitHub.

Torrent clients have been around since 2001 and have been built by large corporations with free and ad-based choices. What if we told you that you could build your own torrent client in Python using freely available libraries? We have a step-by-step process that you can follow to get started in creating your own coded uTorrent or BitTorrent alternative.
How Currently Available Torrent Clients Work
Torrent clients not have any kind of dependency on a centralized server for storing files however it bit of data is saved from individual files in participating computers (peers) in a network in order to facilitate the first process of sharing files. P2P communication control such as BitTorrent breaks the files into pieces and moves them from uploaders to downloaders through the torrent client, a separate program that is able to read all the information in the .torrent file and then connect the users with the exchange data.
It has a check and balance system which has been described below and is applied to make the process foolproof:
- The torrent file which is .torrent carries all the information telling you which systems are part of the file-sharing process. It might also give you details on both files and folders which you are downloading.
- The torrent client makes a connection with the tracker which holds the IP address of the devices there in the swarm. What the tracker does is forwards the address to all torrent clients to make sure that peers are connected.
- Download is started by the torrent clients as it receives enough data it starts to upload the file for your benefit.
The working of torrent clients is surprisingly not very complicated and very simple.
First, you need to select and install the torrent client even before you begin to share or download files. Make the selection carefully as many might come with adware that can cause problems with the system or device. We suggest that you directly download from the client side to avoid downloading malware from third-party sides. If you want security features then there are free-for-downloads then it is ideal go for a premium client.
Once the Torrent client has been installed you need to download the tracker site which carries listings of torrent files. For torrent files, there are only repositories and do not host content on their servers.
After this you can search for the content you intend to download. During this several files are returned, and select ones which have many seeders so the process of the download goes faster. Check to see if you can run the file before downloading.
As files are compatible with programs installed you can begin downloading the content. You can get multiple files but it is good that you prioritize your downloads.
Before building a torrent client you need to know about the .torrent file, peers and the magnet. You require files such as:
- .Torrent file
- Magnet links
The torrent file is where the URL and information are found that allows it to reach the peer. The magnet links allow you to download the torrent files which then lead to the files or media that you are requesting.
When you are choosing trackers, make sure you know the difference between a Public and a Private torrent tracker. Private tracker site registration is exclusive most of the time and by invite only. It also needs you to seed torrents after every download or you may get banned.
Public Tracker:
This is open to all and has a large user base. You can download a shared file from this site even if you are not registered or currently logged into the tracker site.
Private Tracker:
This can be accessed only if you are a registered user who is vetted for trustworthiness (which means you are not online pirating or sharing any copyrighted material) before giving membership.
What you need to get started:
- A Python IDE such as Ninja-IDE or PyCharm to write, edit and compile the code.
- Internet access.
- A Windows or Linux computer to test your client on or use a virtual machine.
Below are the steps required to build your own torrent client using Python:
- You require magnet links for your torrent files for this you can use available APIs such as Py1337x.
- Now, the most important part, this is where you download the torrent. You can use “libtorrent” that works on any operating system. This is C++ focused and is heavily documented for ease of implementation. It is also very stable and if you decide to use it for your Windows 10 or 11 implementation, it doesn’t suffer from constant crashing and unexpected errors.
- To build basic torrent client functions you can use custom-made variables such as for torrent session, handle and status. These will allow you to pull information of a torrent file and manage them.
- If you are streaming videos and would like to have subtitles you can use “subliminal library” and “GuessIt library” to give user-friendly names to the files you download.
Note: Use the above only as guidance and a starting-point and feel free to use it as a project.
ALSO SEE: EZTV Proxy Sites for 2023 – A Huge List.
4 Ready-Made Torrent Clients that you can use instead of making your own
BitTorrent Client
It comes with in-built bandwidth which allows downloading either torrent files or magnet links.
It comes in free but might frustrate you with ads. With BitTorrent pro you can be ad free and watch media in HD by using a torrent downloader.
It has a simple and easy-to-use interface. Find you desired content by searching using the in-built search engine. It has drag and drop feature through which you can quickly and easily customize the interface.
Other features include schedule torrent downloads, limit bandwidth use and managing paired devices.
It also allows private trackers which are not allowed on uTorrent. Moreover, web-based seeding, commenting and reviewing is all part of it.
For now it has 5.4 million users each month, it is not the oldest but also the favorite to download torrent fast in 2022.
qBittorrent

It is one of the best in the market and is simple to use, comes in free and highly functional cross-platform torrent client.
The best thing about this is that it is free of ads. It provides support to queuing torrents, prioritizing torrents, IP filtering yes it is a media player too.
It shall not take too much RAM when downloading files and get regular updates too.
Moreover, it interface is neat which means whether you are a pro or a newbie you won’t have issues using it.
It comes with RSS feed support, bandwidth scheduler and extensions like encrypted connection and support for magnet links.
BitLord
It comes with a minimalistic interface which both if you are a new user or a professional won’t face any difficulty. The main aim is to be simple. The interface is free from all the disruptive content.
With this you can download content as well as stream it at the very same time. You can also stream the content in a media player or Chromecast.
If you are a fan of subtitles while watching movies and TV shows then it automatically generates them.
The best this is that it offers you password protection and torrent creation. Moreover, you can organize downloads into a playlist for easy access.
Vuze
It is an easy-to-use software that even if you are a beginner won’t have any issues. The developers have designed an engaging, intuitive and neat interface. Moreover, with this you can have access to its third-party plug-in library, handing you complete control over the software and allowing you to customize the interface as you like.
Out of many the best feature is that it comes with torrent bundles that allow IP filtering and bandwidth limiting. Moreover, it also offers magnet links and remote control.
With this get you desired torrent and stream the content by using its playback feature. With built-in torrent search engine, you can find any content you want within seconds.
Its free versions are Vuze and Vuze Leap whereas paid one is Vuze plus which provides access to high-end features.
It has many features like in-built anti-virus and the ability to watch media files while downloading them.
You need to be careful while downloading this as you do not want to install bundled package. If you are new to all this then you might face issues with setting it up.
Other projects and software you can build yourself:
- Tutorial to build the Pacman Game easily in C language.
- Python SMS Sender Free Download (With Script).
- Download Weather Forecast Python Project and Predict future weather.
Conclusion
Torrents are not complicated pieces of software if built with simplicity in mind. This article explained in a step-by-step manner how you can create a working torrent client to download torrents and stream your favorite media. This uses various open source libraries such as libtorrent, py1337x and GuessIt.
Do let us know in the comments section if you have ever created such a project or any project to do with p2p networks or clients.
·
5 min read
· Updated
may 2022
· Application Programming Interfaces
Disclosure: This post may contain affiliate links, meaning when you click the links and make a purchase, we receive a commission.
Have you ever wanted to download files in torrent programmatically? Well, in this tutorial, you will learn how you can download files in torrent using Python.
We will be using qBittorrent here, that’s because there is a cool Python wrapper for it that eases everything for us.
To get started, you need to download and install qBittorent official client for your operating system and then install the Python wrapper module using the following command:
pip3 install python-qbittorrentNow before we dive into the code, we need some configurations to set, after you install the qBittorent client, you need to enable the qBittorrent Web UI using the following steps:
- Once you have everything set, launch qBittorrent. On the menu bar, go to Tools > Options qBittorrent WEB UI.
- When the new window appears, choose the Web UI option.
- Check the «Web User Interface (Remote Control)» checkbox.
- You can choose a port (the default is 8080).
- Set username and password (the default is admin:adminadmin).
The following image should make everything clear:
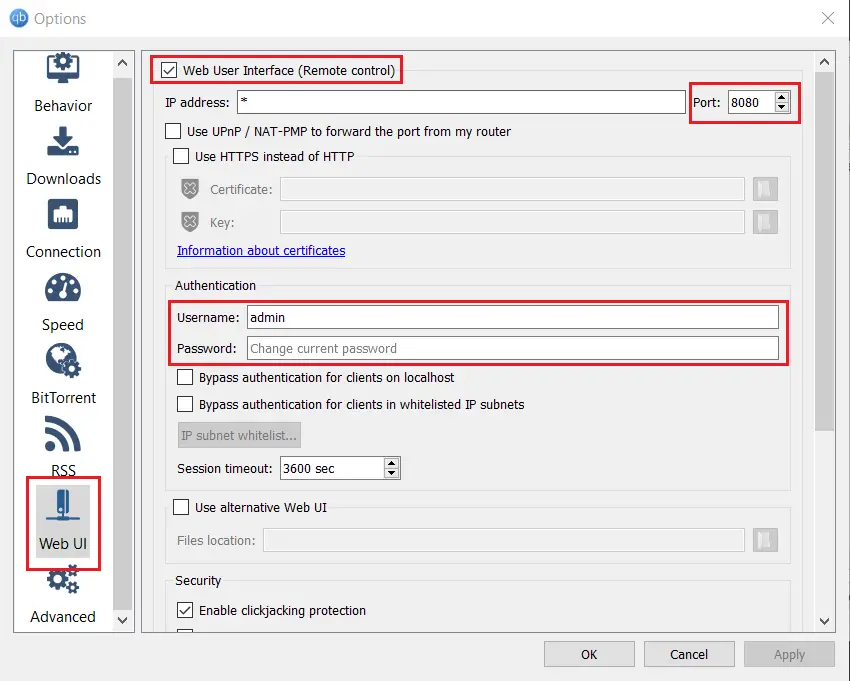 Now that we have enabled the Web UI, you can go to the browser and see the qBittorrent web version using the address «127.0.0.1:8080». You’ll see a small login page as follows:
Put the credentials you set in the configuration, and then log in, now you should be ready to see the qBittorrent Web UI:
 If you’re here, then congratulations! You are now ready to use Python to download torrent files, open up a new Python file (or Interactive Python shell), and import the qBittorrent module:
from qbittorrent import ClientNow let’s connect and login to the web UI:
# connect to the qbittorent Web UI
qb = Client("http://127.0.0.1:8080/")

# put the credentials (as you configured)
qb.login("admin", "adminadmin")
I have chosen this torrent file for this tutorial, please feel free to use any torrent file you wish (just put it in your current working directory and change the name):
# open the torrent file of the file you wanna download
torrent_file = open("debian-10.2.0-amd64-netinst.iso.torrent", "rb")
Note: If you’re not sure what the open() function is doing, check this tutorial.
Let’s start downloading:
# start downloading
qb.download_from_file(torrent_file)
If you’re executing this cell by cell in an Interactive window, you’ll immediately see that a new torrent file appears in both web UI and qBittorrent desktop client as the following figure shows:

Awesome, you can use the savepath parameter to save the resulting file to the path you actually want:
# you can specify the save path for downloads
qb.download_from_file(torrent_file, savepath="/the/path/you/want/to/save")
You can also use the download_from_link() method which takes the magnet URL you want to download:
# this magnet is not valid, replace with yours
magnet_link = "magnet:?xt=urn:btih:e334ab9ddd91c10938a7....."
qb.download_from_link(magnet_link)
You can also do various things, for instance, let’s pause all torrents in the client:
# pause all downloads
qb.pause_all()
Or you can resume them:
# resume them
qb.resume_all()
Or even listing them and showing some useful information:
def get_size_format(b, factor=1024, suffix="B"):
    """
    Scale bytes to its proper byte format
    e.g:
        1253656 => '1.20MB'
        1253656678 => '1.17GB'
    """
    for unit in ["", "K", "M", "G", "T", "P", "E", "Z"]:
        if b < factor:
            return f"{b:.2f}{unit}{suffix}"
        b /= factor
    return f"{b:.2f}Y{suffix}"

# return list of torrents
torrents = qb.torrents()

for torrent in torrents:
    print("Torrent name:", torrent["name"])
    print("hash:", torrent["hash"])
    print("Seeds:", torrent["num_seeds"])
    print("File size:", get_size_format(torrent["total_size"]))
    print("Download speed:", get_size_format(torrent["dlspeed"]) + "/s")
Here is my output:
Torrent name: debian-10.2.0-amd64-netinst.iso
hash: 86d4c80024a469be4c50bc5a102cf71780310074
Seeds: 70
File size: 335.00MB
Download speed: 606.15KB/s
You can also pause and resume specific torrent files using their hash value, this wrapper is rich with useful methods, please check their full API method documentation and the GitHub repository.
Alright, that’s it for this tutorial. This will make you open to many cool challenges, here is an example challenge:
- Getting all website links and extracting only torrent files, and then downloading the files only with .torrent extensions and after that, launching them to download in qBittorrent, pretty neat right? Go for it.
By the way, if you wish to use Python wrapper for the uTorrent client instead, this repository may help.
Want to Learn More?
Finally, if you’re a beginner and want to learn Python, I suggest you take the Python For Everybody Coursera course, in which you’ll learn a lot about Python, good luck!
Read also: How to Transfer Files in the Network using Sockets in Python.
Happy Coding ♥
View Full Code
Read Also
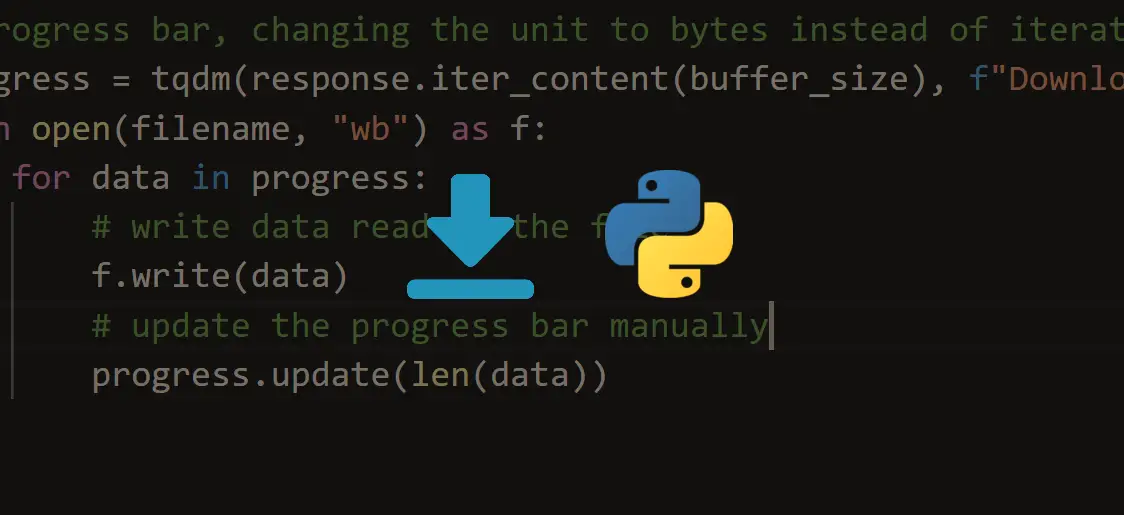
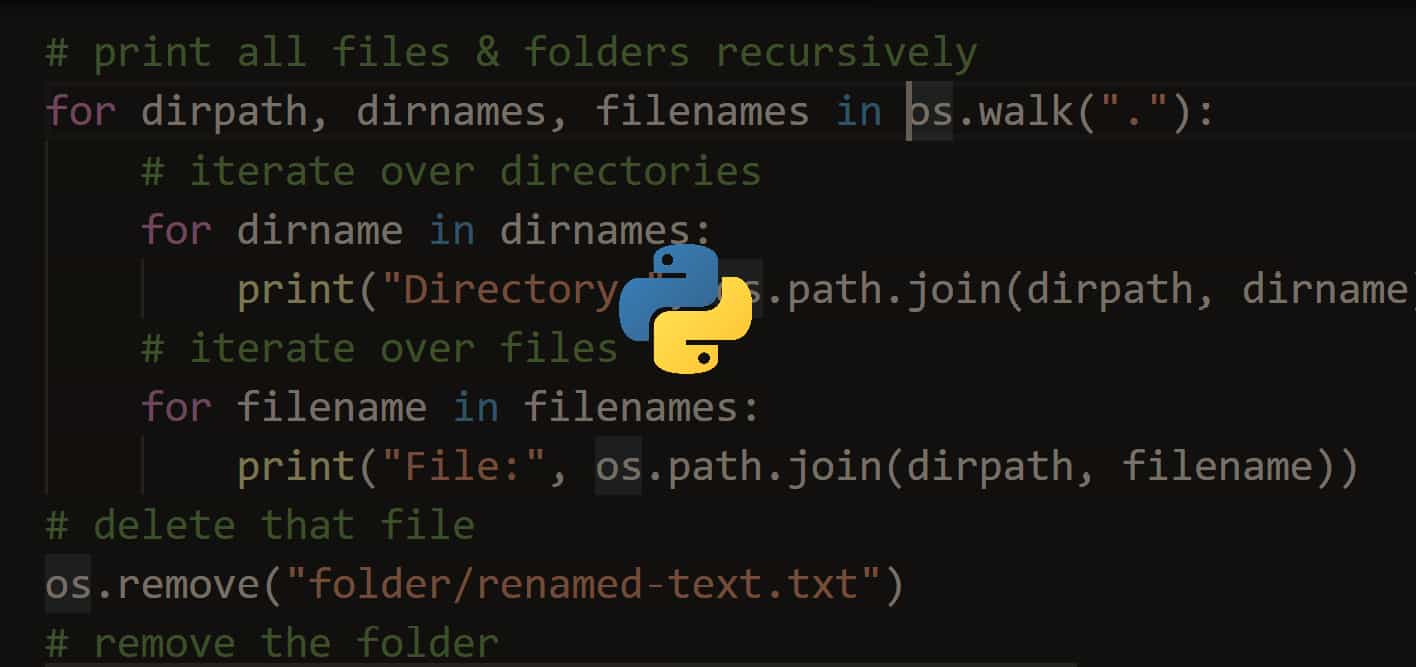
Comment panel
You should try libtorrent (rasterbar). http://libtorrent.org
If you want to write your client in python, on linux, install it with:
sudo apt-get install python-libtorrent
A very simple example of python code to use it to download a torrent:
import libtorrent as lt
import time
import sys

ses = lt.session({'listen_interfaces': '0.0.0.0:6881'})

info = lt.torrent_info(sys.argv[1])
h = ses.add_torrent({'ti': info, 'save_path': '.'})
s = h.status()
print('starting', s.name)

while (not s.is_seeding):
    s = h.status()

    print('r%.2f%% complete (down: %.1f kB/s up: %.1f kB/s peers: %d) %s' % (
        s.progress * 100, s.download_rate / 1000, s.upload_rate / 1000,
        s.num_peers, s.state), end=' ')

    alerts = ses.pop_alerts()
    for a in alerts:
        if a.category() & lt.alert.category_t.error_notification:
            print(a)

    sys.stdout.flush()

    time.sleep(1)

print(h.status().name, 'complete')
I spent the first few weeks of Hacker School writing my own client utilizing the Bittorrent Protocol, and thought I would share some of the things that I learned on the way. This post will cover a general outline of how to approach the project, with a focus on downloading torrent files and a bias toward python.
This post will be broken into two parts, of which this is the first.
- Read the unofficial specification here.
No, really. Read it. There is an official spec as well, but it is vague and much less helpful. Understanding the spec will make this project far easier for you going forward. - Play around with Wireshark.
I also recommend downloading an already-written bittorrent client (I can recommend utorrent or the official bittorrent client – both from the same code base). Then download a .torrent file. These can be found in many places online. Mininova is a good place to look for legal (I think) torrent files.Launch a Wireshark session and open your .torrent file in your bittorrent client (on the clients mentioned above, go to File, Open Torrent, and select your .torrent file). While your torrent downloads, you can watch the packets and messages being sent to/from peers with Wireshark. Filter the Wireshark results with the keyword ‘bittorrent’ and you can see just the bittorrent messages. When your torrent is finished downloading, you can stop wireshark and save your session for later analysis. This information can be helpful in both understanding the spec and also for comparison later when you run into message-passing bugs. Wireshark is cool tool to learn about other network traffic as well, and I encourage you to play around with it.
- View your .torrent file in a text editor.
You’ll notice that there is not really a whole lot here. This is NOT the actual file you want to download. Instead it is a metafile containing information that you will need in order to download the real file.See how it starts with a ‘d’ and ends with an ‘e’ and has plenty of funny ‘#:word’ sections? That’s called bencoding. Bencoding is an encoding that translates a complex set of embedded dictionaries, lists, strings, and integers into a single string. There is an explanation of bencoding in the unofficial spec here. This is good to understand and be able to read.
You’ll likely want to decode the torrent file and save much of the information that is stored there for later use. In particular, you will at least need the ‘announce’ url and ‘info’ dictionary, and within the info dictionary you will need the ‘piece length’, ‘name’, ‘pieces’ (hash list), and ‘paths’ and ‘lengths’ of all individual files. Note that the structure is slightly different for single file vs multiple file torrents. Again, the spec is helpful for explaining the different tags and structure. If you are using python, note that there is a good bencode 3rd party library that can do the encoding/decoding for you. (pip install bencode)
- Connect to the tracker.
The ‘announce’ key in the .torrent metafile gives you the url of the tracker. The tracker is an HTTP(S) service that holds information about the torrent and peers. The tracker itself does not have the file you want to download, but it does have a list of all peers that are connected for this torrent who have the file or are downloading the file. It responds to GET requests with a list of peers.To send a properly formatted request to the tracker, you take the announce key mentioned above as the base url and add certain parameters to the url in the format of ‘announce-url?param=value¶m=value&…’. The url must be properly percent encoded using the “%nn” format, where ‘nn’ is the hexadecimal value of the byte or reserved character. Unreserved characters need not be escaped (see link for reference). For example, the escaped form of the binary string ‘xab’ is ‘%AB’ and the escaped form of ‘x12x34x56x78x9a’ is ‘%124Vx%9A’. In python, the Requests library will take care of this for you (‘pip install requests’). The required parameters are listed in the unofficial spec here. Of note in the parameters are the:
- ‘info_hash’ which you compute as a hash of the bencoded info dictionary from the .torrent metafile using the SHA1 hash algorithm. The python documentation for the hashlib library has more details about hash algorithms. Note that you should not compute this on either the bencoded full torrent file nor on the decoded info dictionary – this should be computed on the bencoded info dictionary only. You can parse the info dictionary out of the original torrent file or re-bencode the decoded info dictionary. If you are using a language with unordered dictionaries (such as python), be careful if you re-bencode the info dictionary that you make sure the dictionary values are appear in sorted order or you will get an incorrect SHA1 hash. The bencode python library will take care of this for you.
- ‘peer_id’ can be anything you want that is 20 bytes long – there is a section in the spec for suggestions for peer id formats.
- ‘left’ – when you are downloading a file for the first time, ‘left’ should be the total length of the file. The .torrent metafile does not give you total length if it is a multi-file torrent, but it does give length of every file expected (the ‘length’ fields) and you can compute total length from that.
- Parse the tracker response
Assuming your GET request is formatted correctly and contains the correct info_hash, the tracker should send you a response with a text document containing a bencoded dictionary. The expected keys of the dictionary can be found here. The ‘peers’ key will contain information about the peers we can connect to for this file. Once we parse these into ip_address:port strings, we can use them to connect to the peers. Note if you get the peers in the binary model that the last two bytes together encode the port number (i.e. ‘x1axe1’ = 26 * 256 + 225 = 6881). - Connect to peers
Peer connections are made through TCP to the appropriate host ip and port. Now might be a good time to consider how or if you want to deal with connecting to multiple peers at the same time, as this will influence how you connect to your peers. Some options are:- The Twisted framework if you are using python. This framework implements event-driven programming and abstracts away many of the lower-level details (pip install Twisted). This is what I used.
- Create your own event-driven programming loop using sockets and select calls.
- Multi-threaded sockets. Good luck!
You can revisit this later and just work on connecting to one peer first, but eventually you will want to consider how you wish to handle multiple simultaneous peer connections.
- Handshake with peers
Once you have a connection to your peer(s), the first contact step is your responsibility. The first message you send should be a Handshake. Parameters for this message are here. The info_hash and peer_id we have seen before. For the current protocol version (1.0), ‘pstrlen’ = 19 and ‘pstr’ = ‘BitTorrent protocol’. ‘Reserved’ is 8 bytes long. Unless you want to support extensions to the protocol, these bytes should all be zeroes (‘x00’).The message you send the peers is the values for the ‘pstrlen’, ‘pstr’, ‘reserved’, ‘info hash’, and ‘peer id’ combined into one long byte string. Structs are a great way to deal with moving to and from bytes and numbers/strings in python.
The peer should immediately respond with his own handshake message, which takes the same form as yours. If you received a peer_id in your tracker response, you should check that the peer_id provided by the peer in the handshake matches what you expect. If it does not, you should close the connection. When serving files, you should check the incoming peer’s handshake to verify that the info_hash matches one that you are serving and close the connection if not.
Part 2 available here.