Время на прочтение
11 мин
Количество просмотров 6.1K

Данный пост является продолжением первой части статьи на Хабре, где было подробно рассказано о развертывании Django стека на MS Windows. Далее будет представлена пошаговая инструкция по созданию инсталлятора, который будет автоматизировать процесс установки стека на других компьютерах без необходимости работы в командной строке, созданием виртуальных машин и т.д., где вся последовательность действий будет сводится к действиям Далее -> Далее -> Готово.
Итак, что должен делать инсталлятор:
- Распаковать все необходимые программы и компоненты в указанную пользователем директорию.
- Выполнить проверки перед установкой.
- Прописать интерпретатор Python в реестре Windows.
- Установить, если ещё не установлены, программные библиотеки зависимостей.
- Создать службы Apache и PostgreSQL, затем стартовать их.
- Дополнительным плюсом будет автоматическое создание программы деинсталлятора, который удалит установленный стек, если пользователь этого захочет.
Среди возможных вариантов установщиков выберем бесплатный установщик Inno Setup, т.к. он позволяет выполнить все вышеуказанные действия, позволяющее создавать установщики без необходимости выполнять много сценариев. По сравнению с программой Wix синтаксис установочного файла имеет формат ini, – легче читать и менять, чем xml. Сегодня конкурирует и даже превосходит многие коммерческие установщики по набору функций и стабильности.
Лучше всего то, что для создания базового установщика вообще не требуется никаких сценариев, поскольку Inno Setup поставляется с графическим мастером, который на удивление хорошо справляется с базовыми установщиками.
Логика установки может быть написана на ЯП Pascal, а не на запутанных пользовательских действиях в Wix. Единственным недостатком его является то, что он создает только exe, формат файлов msi не поддерживается.
Шаг 1. Установка Inno Setup
Дополнительные комментарии здесь не нужны, т.к. скачивание и установка программы инсталлятора тривиальна.
Шаг 2: Создание сценария установки Inno Setup
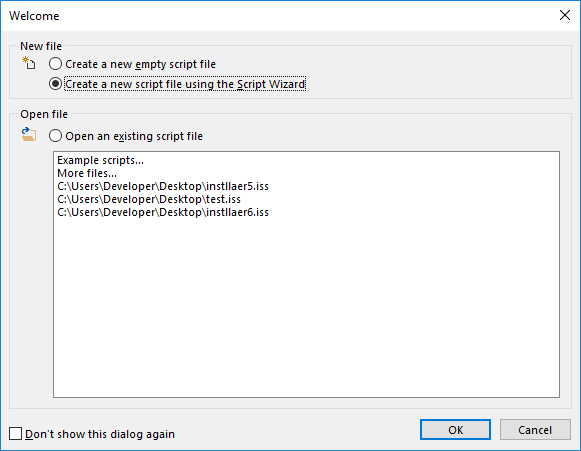
Создадим заготовку сценария установки Inno Setup (файл *.iss) с помощью Мастера сценариев установки.

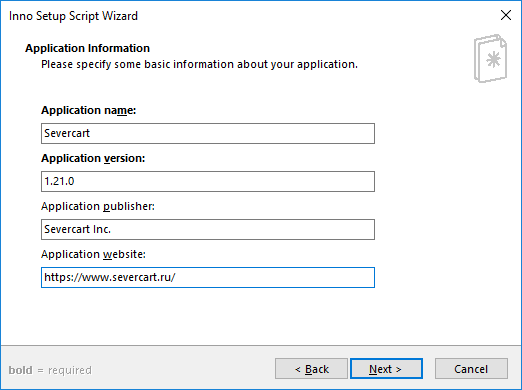


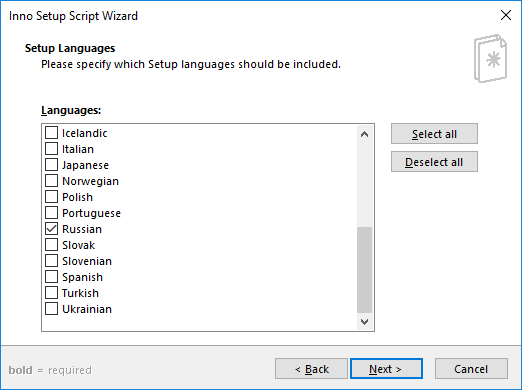
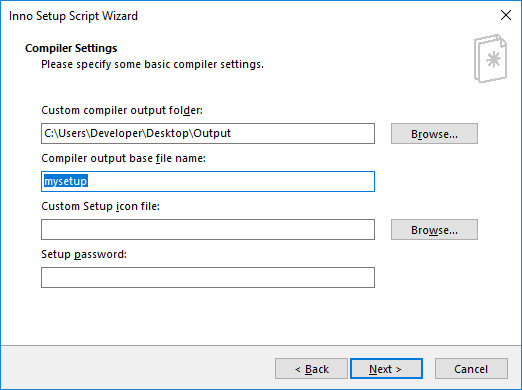

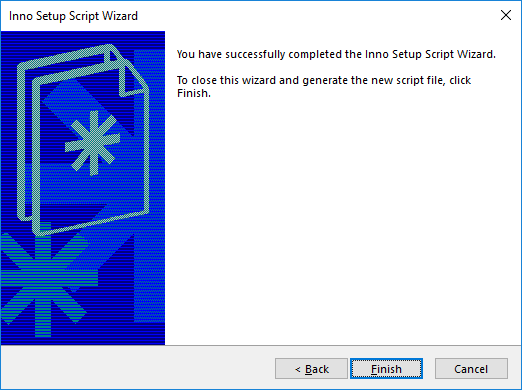
В результате будет создан *.iss файл с следующим содержимым:
; Script generated by the Inno Setup Script Wizard.

; SEE THE DOCUMENTATION FOR DETAILS ON CREATING INNO SETUP SCRIPT FILES!
#define MyAppName "Severcart"
#define MyAppVersion "1.21.0"
#define MyAppPublisher "Severcart Inc."
#define MyAppURL "https://www.severcart.ru/"
[Setup]
; NOTE: The value of AppId uniquely identifies this application. Do not use the same AppId value in installers for other applications.
; (To generate a new GUID, click Tools | Generate GUID inside the IDE.)
AppId={{4FAF87DC-4DBD-42CE-A2A2-B6D559E76BDC}
AppName={#MyAppName}
AppVersion={#MyAppVersion}
;AppVerName={#MyAppName} {#MyAppVersion}
AppPublisher={#MyAppPublisher}
AppPublisherURL={#MyAppURL}
AppSupportURL={#MyAppURL}
AppUpdatesURL={#MyAppURL}
DefaultDirName=c:severcart
DefaultGroupName={#MyAppName}
; Uncomment the following line to run in non administrative install mode (install for current user only.)
;PrivilegesRequired=lowest
OutputDir=C:UsersDeveloperDesktopOutput
OutputBaseFilename=mysetup
Compression=lzma
SolidCompression=yes
WizardStyle=modern
[Languages]
Name: "russian"; MessagesFile: "compiler:LanguagesRussian.isl"
[Files]
Source: "C:severcart*"; DestDir: "{app}"; Flags: ignoreversion recursesubdirs createallsubdirs
; NOTE: Don't use "Flags: ignoreversion" on any shared system files
Шаг 3. Проверки перед установкой
Перед распаковкой программ в каталог и изменения в реестре необходимо проверить, что TCP порты свободны для работы Apache и PostgreSQL, также нужно проверить минимальные системные требования ОС Windows, т.к. как уже оговаривалось в Первой части данной статьи устанавливаемая версия Python будет работать только начиная с версии MS Windows 8 (версия ядра 6.2).
Для выполнения необходимых проверок воспользуемся секцией [Code] установочного файла. Раздел [Code] – это необязательный раздел, определяющий сценарий Pascal. Сценарий Pascal можно использовать для настройки установки или удаления разными способами. Обратите внимание, что создать сценарий Pascal непросто и требует опыта работы с Inno Setup и умений программирования на Pascal или, по крайней мере, на аналогичном языке программирования.
function IsWindowsVersionOrNewer(Major, Minor: Integer): Boolean;

var

 Version: TWindowsVersion;

begin

 GetWindowsVersionEx(Version);

 Result := (Version.Major > Major) or ((Version.Major = Major) and (Version.Minor >= Minor));

end;
function IsWindows8OrNewer: Boolean;
begin
Result := IsWindowsVersionOrNewer(6, 2);
end;
Для проверки доступности TCP портов создадим следующую функцию:
function CheckPortOccupied(Port:String):Boolean;

var

 ResultCode: Integer;

begin

 Exec(ExpandConstant('{cmd}'), '/C netstat -na | findstr'+' /C:":'+Port+' "', '',0,ewWaitUntilTerminated, ResultCode);

 if ResultCode <> 1 then

 begin

 Log('this port('+Port+') is occupied');

 Result := True;

 end else

 begin

 Result := False;

 end;

end;
Вызывать проверочные функции будем в функции InitializeSetup, вызываемой во время инициализации установки. Возвращает False, для отмены установки, в противном случае — True.
function InitializeSetup(): Boolean;

var

 port_80_check, port_5432_check: boolean;

begin

 if not IsWindows8OrNewer() then begin

 MsgBox('Установка невозможна. Программа работает начиная с Windows 2012 и Windows 8.0.',mbError,MB_OK);

 Abort();

 Result := False;

 end;
port_80_check := CheckPortOccupied('8080');
if port_80_check then begin
MsgBox('Установка невозможна. TCP порт 8080 занят.',mbError,MB_OK);
Abort();
Result := False;
end;
port_5432_check := CheckPortOccupied('5432');
if port_5432_check then begin
MsgBox('Установка невозможна. TCP порт 5432 занят.',mbError,MB_OK);
Result := False;
Abort();
end;
Result := True;
Шаг 4. Прописываем Python в реестре Windows
В этом необязательном разделе определяются любые ключи / значения реестра, которые программа установки должна создать или изменить в системе пользователя.
Для этого добавляем ключи PYTHONPATH, PYTHONHOME и обновляем переменную Path.
sys.path содержит список строк, предоставляющих места поиска модулей и пакетов будущего Python проекта. Он инициализируется из переменной среды PYTHONPATH и другими настройками.
PYTHONHOME — домашний каталог Python.
PATH — это переменная окружения, которая ОС использует для поиска исполняемых файлов в командной строке или окне терминала.
[Registry]
Root: HKLM; Subkey: "SYSTEMCurrentControlSetControlSession ManagerEnvironment";
ValueType: expandsz; ValueName: "Path"; ValueData: "{olddata};{app}python;{app}pythonScripts"
Root: HKLM; Subkey: "SYSTEMCurrentControlSetControlSession ManagerEnvironment";
ValueType: expandsz; ValueName: "PYTHONPATH"; ValueData: "{app}python"
Root: HKLM; Subkey: "SYSTEMCurrentControlSetControlSession ManagerEnvironment";
ValueType: expandsz; ValueName: "PYTHONHOME"; ValueData: "{app}python"
Шаг 5. Создаем конфигурационные файлы служб Apache и PostgreSQL
Для создания конфигурационных файлов воспользуемся 2я Python скриптами, которые сгенерируют конфигурационные на основе заданного пользователем пути установки.
Вызов скриптов будет производиться в разделе [Run] установщика.
Раздел [Run] является необязательным и указывает любое количество программ, которые необходимо выполнить после успешной установки программы, но до того, как программа установки отобразит последнее диалоговое окно.
Далее в эту же секцию добавим скрытую установку распространяемые пакеты Visual Studio без которых службы Apache и PostgreSQL работать не будут.
[Run]
Filename: "{app}commonVC_redist.x86apache.exe"; Parameters: "/install /passive"; Flags: waituntilterminated
Filename: "{app}commonvcredist_x86pg.exe"; Parameters: "/install /passive"; Flags: runhidden;
Filename: "{app}pythonpython.exe" ;Parameters: "{app}commoncreate_http_conf.py"; Flags: runhidden
Filename: "{app}pythonpython.exe" ;Parameters: "{app}commonedit_pg_conf.py"; Flags: runhidden
Filename: "{app}commoninstall.bat";Flags: runhidden
Filename: "{app}commonservices_start.bat"; Flags: runhidden
Содержимое файла create_http_conf.py
#!/usr/bin/env python3
# -*- coding:utf-8 -*-

import sys, os


base_path = os.path.dirname(os.path.dirname(os.path.abspath(__file__)))
base_path_un = base_path.replace('\', '/')
apache_conf_path = os.path.join(base_path, 'Apache24', 'conf', 'extra', 'httpd-wsgi.conf')

print('base_path=',base_path)

CONF = """

LoadFile "%(base)s/python/python39.dll"
LoadModule wsgi_module "%(base)s/python/lib/site-packages/mod_wsgi/server/mod_wsgi.cp39-win32.pyd"
WSGIPythonHome "%(base)s/python"


Alias /static "%(base)s/app/static"

Alias /media "%(base)s/app/media"

<Directory "%(base)s/app/static">
    # for Apache 2.4
    Options Indexes FollowSymLinks
    AllowOverride None
    Require all granted
</Directory>

<Directory "%(base)s/app/media">
    # for Apache 2.4
    Options Indexes FollowSymLinks
    AllowOverride None
    Require all granted
</Directory>


WSGIScriptAlias / "%(base)s/app/conf/wsgi_prod.py"
WSGIPythonPath "%(base)s/python/"

<Directory "%(base)s/app/conf/">
<Files wsgi_prod.py>
    Require all granted
</Files>
</Directory>

"""
conf_content = CONF % {'base': base_path_un}

with open(apache_conf_path, 'w') as fp:
    fp.write(conf_content)


# Read in the file
apache_main = os.path.join(base_path, 'Apache24', 'conf', 'httpd.conf')
with open(apache_main, 'r') as file :
	filedata = file.read()

# Replace the target string
replace_pattern = 'Define SRVROOT "%(base)s/Apache24"' % {'base' : base_path_un}
find_pattern = 'Define SRVROOT "C:/severcart/Apache24"'

filedata = filedata.replace(find_pattern, replace_pattern)

# Write the file out again
with open(apache_main, 'w') as file:
	file.write(filedata)
Содержимое edit_pg_conf.py
#!/usr/bin/env python3
# -*- coding:utf-8 -*-

import sys, os

"""
c:/djangostack/postgresql/bin/postgres.exe "-D" "c:djangostackpostgresqldata"
"""


base_path = os.path.dirname(os.path.dirname(os.path.abspath(__file__)))
base_path_un = base_path.replace('\', '/')
pg_conf_path = os.path.join(base_path, 'postgresql', 'data', 'postmaster.opts')


# Read in the file
pg_conf_path = os.path.join(base_path, 'postgresql', 'data', 'postmaster.opts')
with open(pg_conf_path, 'r') as file :
	filedata = file.read()


# Replace the target string
replace_pattern = base_path_un + '/'
find_pattern = "C:/severcart/"


filedata = filedata.replace(find_pattern, replace_pattern)

# Write the file out again
with open(pg_conf_path, 'w') as file:
	file.write(filedata)
Содержимое файла install.bat
@echo off
..Apache24binhttpd.exe -k install -n "Apache" > install.log 2>&1
..postgresqlbinpg_ctl.exe register -N "PostgreSQL" -D ..postgresqldata > install.log 2>&1
Содержимое файла services_start.bat
@echo off
net start "Apache"
net start "PostgreSQL"
Шаг 6: Создаем деинсталлятор
Для любого инсталлятора также необходимо предусмотреть возможность создания программы деинсталлятора. К счастью программа Inno Setup сделает эту работу за нас, за исключением некоторых действий, которые нужно предусмотреть для очистки следов присутствия программы в ОС.
Для этого в секции [UninstallRun] пропишем выполнение bat скрипта Windows для остановки установленных служб, а также их удаления.
[UninstallRun]

Filename: "{app}commonremove.bat"; Flags: runhidden
Содержимое bat скрипта:
@echo off
SC STOP Apache
SC STOP PostgreSQL
SC DELETE Apache
SC DELETE PostgreSQL
Скрипт выполняет остановку служб, затем удаляет службы Apache и PostgreSQL из перечня системных служб Windows.
Шаг 7. Подписание исполняемого файла инсталлятора ЭП разработчика
Сертификаты подписи кода используются разработчиками программного обеспечения для цифровой подписи приложений и программ, чтобы доказать, что файл, загружаемый пользователем, является подлинным и не был взломан. Это особенно важно для издателей, которые распространяют свое программное обеспечение через сторонние сайты загрузки, которые они не могут контролировать. Основные операционные системы будут показывать конечным пользователям сообщение об ошибке, если программное обеспечение, которое они пытаются установить, не подписано доверенным центром сертификации.
Купить сертификат разработчика PFX, например можно здесь. Сертификат приобретается на год.
Предпоследним шагом над работы с инсталлятором будет автоматический запуск программы signtool.exe для подписания готового инсталлятора в формате exe после того как программа Inno Setup завершит свою работу. SignTool — это программа командной строки, которая подписывает файлы цифровой подписью, проверяет подписи в файлах и временные метки файлов. По умолчанию в комплекте поставки Windows программа signtool.exe отсутствует, поэтому скачиваем и устанавливаем Windows 10 SDK.
По окончании установки вы найдете signtool.exe в каталогах:
- x86 -> c:Program Files (x86)Windows Kits10binx86
- x64 -> c:Program Files (x86)Windows Kits10binx64
Для тех, кто хочет познакомиться с программой подписания подробнее посетите официальный сайт разработчика. В нем перечислены все опции командной строки и примеры использования. Двигаемся далее.
Далее настроим автоматическое подписание файла. Выбираем «Configure Sign Tools…» из меню «Tools».

Далее нажимаем на кнопку «Add»

Дадим инструменту имя. Это имя, которое вы будете использовать при обращении к инструменту в сценариях установщика. Я назвал свой signtool, потому что использую signtool.exe.

Вставьте текст, который вы используете для подписи исполняемых файлов из командной строки. Замените имя подписываемого файла на $f. Inno Setup заменит переменную $f подписываемым файлом.
«C:Program Files (x86)Windows Kits10binx86signtool.exe» sign /f «C:MY_CODE_SIGNING.PFX» /t timestamp.comodoca.com/authenticode /p MY_PASSWORD $f
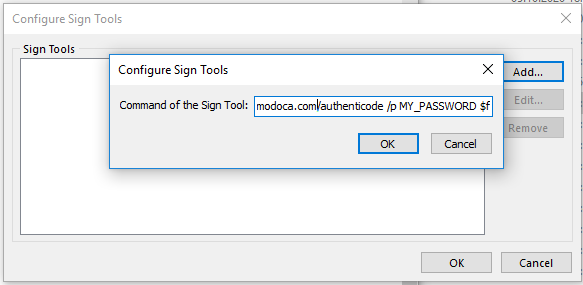
После нажатия OK вы закончите настройку инструмента подписи.

Добавим следующий сценарий в раздел [Setup], чтобы использовать только что настроенный инструмент подписи. Это предполагает, что вы назвали свой инструмент signtool.
SignTool=signtool
Шаг 8. Собираем инсталлятор
Итоговый InnoSetup файл инсталлятора
#define MyAppName «Severcart»
#define MyAppVersion «1.21.0»
#define MyAppPublisher «Severcart Inc.»
#define MyAppURL «www.severcart.ru»
[Setup]
; NOTE: The value of AppId uniquely identifies this application.
; Do not use the same AppId value in installers for other applications.
; (To generate a new GUID, click Tools | Generate GUID inside the IDE.)
SignTool=signtool
AppId={{2CF113D5-B49D-47EF-B85F-AE06EB0E78EB}}
AppName={#MyAppName}
AppVersion={#MyAppVersion}
;AppVerName={#MyAppName} {#MyAppVersion}
AppPublisher={#MyAppPublisher}
AppPublisherURL={#MyAppURL}
AppSupportURL={#MyAppURL}
AppUpdatesURL={#MyAppURL}
DefaultDirName=c:severcart
DefaultGroupName={#MyAppName}
OutputBaseFilename=setup
Compression=lzma
SolidCompression=yes
ChangesEnvironment=yes
; Uninstall options
Uninstallable=yes
CreateUninstallRegKey=yes
;WizardSmallImageFile=logo3.bmp
[Icons]
Name: «{userdesktop}severcart»; Filename: «127.0.0.1:8080/»
[Languages]
Name: «russian»; MessagesFile: «compiler:LanguagesRussian.isl»
[Files]
Source: «C:severcart*»; Excludes: «*.pyc»; DestDir: «{app}»; Flags: ignoreversion recursesubdirs createallsubdirs
[Registry]
Root: HKLM; Subkey: «SYSTEMCurrentControlSetControlSession ManagerEnvironment»;
ValueType: expandsz; ValueName: «Path»; ValueData: «{olddata};{app}python;{app}pythonScripts»
Root: HKLM; Subkey: «SYSTEMCurrentControlSetControlSession ManagerEnvironment»;
ValueType: expandsz; ValueName: «PYTHONPATH»; ValueData: «{app}python»
Root: HKLM; Subkey: «SYSTEMCurrentControlSetControlSession ManagerEnvironment»;
ValueType: expandsz; ValueName: «PYTHONHOME»; ValueData: «{app}python»
[Run]
Filename: «{app}commonVC_redist.x86apache»; Parameters: «/install /passive»; Flags: waituntilterminated
Filename: «{app}commonvcredist_x86pg»; Parameters: «/install /passive»; Flags: runhidden;
Filename: «{app}pythonpython.exe» ;Parameters: «{app}commoncreate_http_conf.py»; Flags: runhidden
Filename: «{app}pythonpython.exe» ;Parameters: «{app}commonedit_pg_conf.py»; Flags: runhidden
Filename: «{app}commoninstall.bat»;Flags: runhidden
Filename: «{app}commonservices_start.bat»; Flags: runhidden
[UninstallRun]
Filename: «{app}commonremove.bat»; Flags: runhidden
[Code]
function IsWindowsVersionOrNewer(Major, Minor: Integer): Boolean;
var
Version: TWindowsVersion;
begin
GetWindowsVersionEx(Version);
Result :=
(Version.Major > Major) or
((Version.Major = Major) and (Version.Minor >= Minor));
end;
function IsWindows8OrNewer: Boolean;
begin
Result := IsWindowsVersionOrNewer(6, 2);
end;
function CheckPortOccupied(Port:String):Boolean;
var
ResultCode: Integer;
begin
Exec(ExpandConstant(‘{cmd}’), ‘/C netstat -na | findstr’+’ /C:»:’+Port+’ «‘, »,0,ewWaitUntilTerminated, ResultCode);
if ResultCode <> 1 then
begin
Log(‘this port(‘+Port+’) is occupied’);
Result := True;
end else
begin
Result := False;
end;
end;
function InitializeSetup(): Boolean;
var
port_80_check, port_5432_check: boolean;
begin
if not IsWindows8OrNewer() then begin
MsgBox(‘Установка невозможна. Программа работает начиная с Windows 2012 и Windows 8.0.’,mbError,MB_OK);
Abort();
Result := False;
end;
port_80_check := CheckPortOccupied(‘8080’);
if port_80_check then begin
MsgBox(‘Установка невозможна. TCP порт 8080 занят.’,mbError,MB_OK);
Abort();
Result := False;
end;
port_5432_check := CheckPortOccupied(‘5432’);
if port_5432_check then begin
MsgBox(‘Установка невозможна. TCP порт 5432 занят.’,mbError,MB_OK);
Result := False;
Abort();
end;
Result := True;
end;


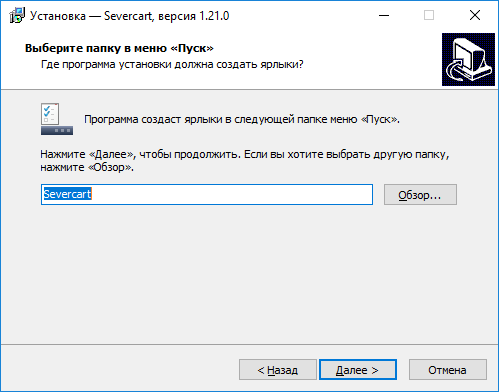
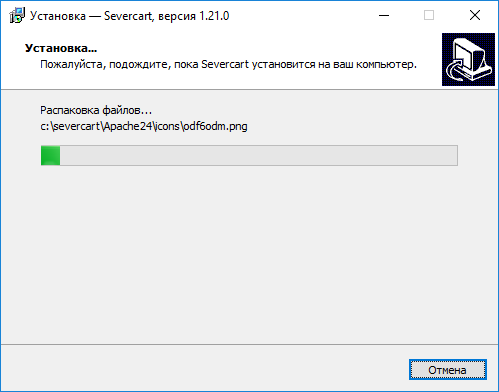
Шаг 9. Проверяем работу инсталлятора


На это всё, спасибо за внимание.
I’m new to python, but I was thinking about making a program with python to give to my friends.
They don’t know much about computers so if I asked them to install python by them selves they wouldn’t be able to do it, but what if I could make an installer that downloads some version of python that only has what is needed for my file to run and make an exe file that would run the .py file in its own python interpreter. I also did a Google search and saw the freezing applications I could use to make the code into exe files to distribute (cx_freeze I use python 3.2), but not all of my friends have Windows computers and I rather have my program so in each new version it auto updates by making a patch to .py file and not completely re-installing it.
I am not looking for anything to make a stand alone executable.
Just some kind of installer that bundles a minimalistic version of the python version you’re using. And an option to have an exe that is just a link to run the python file in the portable python interpreter, just for windows and a .sh file that would do the same for linux.
![]()
asked Mar 31, 2012 at 23:24
![]()
2
Pyinstaller is a good option to convert them to an windows executable.
You can install it in cmd.exe as admin and run pip install pyinstaller or pip install --pre pyinstaller.
you can then run it using pyinstaller. (sorry that i can’t supply a automated script i wrote after a system restore. I’ll write it again soon using pyqt5)
syntax
--onefile— puts the program and it’s files into a exe.
--onedir— put your program into a directory (folder) (faster than--onefileas it does not need to extract files)
-c— create a console app.
-w— create an app without the console.
-i "[Path to .ico or exe with icon. e.g C:FilesCODEIcon.ico]"— create an app without the console.
you can read the rest here.
You can then get inno setup and create an offline installer.
If you need a web installer (it downloads a file and extracts it.) I am currently writing one and would be glad to create one for you.
![]()
answered May 4, 2020 at 16:59
![]()
Regarding Installer Program (for windows).
I think what you are looking for is InstallForge. This is a tool that you can use to build your own installation wizard. This website pythonguis is a tutorial for PyInstaller and InstallForge. You can skip the PyInstaller part and go towards the middle to view the InstallForge tutorial if you are not interested in making your py application executable using PyInstaller, although I recommended it as many have mentioned.
InstallForge has the ability to make your own install wizard which you can program to install your py files or executables in the directory you want and create a shortcut to the application you want your friends to run.
If you don’t have to download the python interpreter version as you stated, if you bundle your py files with Pyinstaller, it will already include the python interpreter version, making it easier to bundle within your InstallForge. Another StackOverflow thread here, explains how you can install python using the command line, assuming you already have the python interpreter installation. To actually download python from the web in an automated way I was not able to find info on a system designed for this, although I’m sure it’s not impossible if you get creative.
After you figured out how you want to bundle, and install your program, you can program your system to auto-update itself with the PyUpdater python module found in pip
answered Jun 7, 2022 at 18:17
![]()
1
Use nuitka. Nuitka is THE python compiler. You can install it from
pip -v install nuitka
You can create a single executable by (for windows)
py -m nuitka --enable-plugin=tk-inter --show-scons --show-progress --onefile --remove-output --warn-implicit-exceptions --warn-unusual-code --windows-disable-console--windows-icon-from-ico=ICON_PATH --windows-uac-admin main.py
or
py -m nuitka --enable-plugin=tk-inter --show-scons --show-progress --onefile --remove-output --warn-implicit-exceptions --warn-unusual-code --disable-console --linux-onefile-icon=ICON_PATH main.py
answered May 3, 2022 at 18:01
![]()
1
Python is an interpreted, not a compiled language. So any standalone program you may want to distribute must bundle the entire interpreter inside it plus the libraries you used. This will result in an enormous file size for a single program. Also, this huge install cannot be used to run other python programs. An only marginally more complicated, but far better solution than this, is to just install the interpreter once and run any python program with it.
I understand that the point of your question was to make a standalone executable, so I know I’m not answering it. But not being able to create executable standalones is one of the caveats of interpreted languages. However, a fundamental point here is about the whole objective of an interpreted language, which is a single interpreter with all the generic functions required to run any python code (which now happily needn’t be any longer than they need to be). So you see, it’s not really a caveat, this was the whole intention of interpreted languages. You might finally find a way to create a standalone python executable that runs on your friends’ computers, but that would defeat the entire framework and idea behind an interpreted language.
answered Mar 31, 2012 at 23:40
![]()
Abhranil DasAbhranil Das
5,5926 gold badges34 silver badges42 bronze badges
5
You can create an inno setup installer.
Steps:
- Build a pyinstaller executable with the following commands:
pip install pyinstaller
pyinstaller --onefile yourfile.py - Use innosetup to create installer.
Refer Inno setup docs or This blog for more info
answered Jan 25, 2022 at 18:18
![]()
1
You can use auto-py-to-exe python package, this is an easy GUI based .py to .exe creator.
- pip install auto-py-to-exe
- open it with cmd command :
auto-py-to-exe
check this site :
[1]: https://pypi.org/project/auto-py-to-exe/
answered Dec 27, 2022 at 6:35
![]()
I am developing a scientific application in Python with a graphical user interface in Qt. Some end-users use OS X or Linux, but most of them are Windows users who are not familiar with Python or with a command-line interface. It is notoriously difficult to distribute Python applications to end-users who are not programmers, and it’s a common criticism that is made against Python.
I thought for a long time that there was nothing that could be done about that. But I recently wanted to find a solution. A complicated installation process can really be a barrier to entry for regular Windows users. So I’ve been looking for days for the right way to create a full standalone installer that installs everything (Python, external packages, and the software) along with icons on the desktop and the Start menu. I tried different approaches and none was satisfying at first. In particular, I tried to combine multiple installers for Python and the numerous external packages (NumPy, Matplotlib, PyQt, etc., coming from Chris Gohlke’s webpage) into a single installer. It looked like something difficult to do, especially when the installers are .exe files and not .msi files. I tried to use some script to launch all installers successively and have the Next buttons pressed automatically, but it was not working very well and it was a bit of a mess.
I finally found a solution that I find quite satisfying. I haven’t found this solution clearly explained anywhere on the Web, so I’m sharing it here. The goal is to distribute any Python application (possibly with a GUI) as a single-file .exe installer. No dependencies, no prerequisites, just a regular setup.exe file that installs everything, including a full standalone, isolated Python distribution, into C:Program FilesMyApp like a regular program. The end-user does not even need to know that the software is written in Python.
This solution can be summarized in two words: WinPython and Inno Setup.
WinPython is a free scientific Python distribution for Windows that is portable, meaning that it is completely isolated from the rest of the system. WinPython can be installed in a folder, which can be moved anywhere, even on an USB stick, remaining entirely functional. WinPython is bundled with a lot of existing Python packages, but the huge advantage is that it includes graphical and command-line utilities to install/uninstall any Python package easily (from a zip or Windows binary installer generated by distutils).
Inno Setup is a free software for creating Windows installers. Building an installer requires to write a plain text script that contains the instructions about what to install and where. It has a lot of features, including desktop and start menu shortcuts, post-install scripts, etc. A wizard allows one to get started quickly and easily.
Here is a summary of what you need to do to create an installer for your Python application. First, create a folder with a WinPython distribution including all your Python dependencies, and your own Python package as well. Second, create an installer that will just copy this folder somewhere on the end-user hard drive, along with shortcuts to run your application. Then, you can customize the installation process as you wish.
Step 1: customize your WinPython distribution
- Create a folder named
MyApplicationsomewhere on your development machine. This folder will be copied toC:Program FilesMyApplicationby the installer. - Download and install WinPython into, say,
MyApplicationWinPython-64bit-2.7.5.0. - WinPython contains a GUI that lets you install/uninstall Python packages. There are a lot of packages built in, but you can remove those that you don’t need for your application. You can also add new Python packages by dragging zip or exe installers (created with distutils) into the GUI.
Step 2: create the installer
- Install Inno Setup.
- Use the wizard to create a new installer file (it is just a
.isstext file). -
Tell the wizard to copy your folder
MyApplicationtoC:Program FilesMyApplication. The ISS code for this looks like this:[Files] Source: "D:DevMyApplication"; DestDir: "{app}"; Flags: ignoreversion recursesubdirs createallsubdirs
Note the
{app}variable which contains the user application path. See the list of Inno Setup constants here.
Step 3: create the shortcuts
Create some shortcuts. Here is the ISS code to create a shorcut in the Start menu launching a Python GUI application:
[Icons]
Name: "{group}Application"; Filename: "{app}WinPython-64bit-2.7.5.0python-2.7.5.amd64pythonw.exe"; WorkingDir: "{app}"; Parameters: """{app}WinPython-64bit-2.7.5.0python-2.7.5.amd64Libsite-packagesmyapplicationscriptsrunmyapp.py"""; IconFilename: "{app}favicon.ico"
This code snippet assumes that the Python script running your application is in myapplicationscriptsrunmyapp.py. You could also have this script somewhere directly in your application folder and not necessarily in your Python package. You can also specify an icon as a .ico file.
You can create shortcuts on the desktop too. See more details here.
Step 4: customize the installation process
Inno Setup allows you to customize the installation process as you wish. Together with Python scripts, you can really achieve anything. For instance, here is how you can run a Python script at the end of the installation process.
[Run]
Filename: "{app}WinPython-64bit-2.7.5.0python-2.7.5.amd64python.exe"; WorkingDir: "{app}"; Parameters: """{app}postinstall.py"""; Flags: runhidden
Here are a few directives that you can use to customize some aspects of the installation wizard (icon, images, colors…):
[Setup]
SetupIconFile=D:Devmyappfavicon.ico
WizardImageFile=wizard.bmp
WizardImageStretch=no
WizardSmallImageFile=wizard-small.bmp
WizardImageBackColor=$ffffff
Python code to install packages
You can create Python scripts that the user runs by clicking on an icon (see the [Icons] section above). You can for instance create a small utility that updates automatically your application by checking the last installer version on a server, and downloading and executing it automatically. Here is some Python code snippet that installs or updates a Python package in the user’s WinPython distribution, from a zip or a Windows package created with distutils.
import sys
from winpython import wppm, utils

try:
    dist = wppm.Distribution(sys.prefix)
    package = wppm.Package(pathtoexefile)
    dist.install(package)
except:
    raise Exception("Unable to install the package.")
Conclusion
This solution may not be adapted to everyone. But I think it is best for regular Windows users who are used to do everything with the mouse and who are scared by command line interfaces. It allows any Python developer to create and distribute a graphical application as easily as for a more standard C++ program. I imagine that games for Windows could be written with Python and be easily distributed like this. Kivy, a Python library used in media applications and games, uses a similar technique as far as I know.
Finally, do take the time to browse Inno Setup’s documentation. It is clear and well organized. And take a look to WinPython, it is nice and powerful, even if the documentation could be better. Actually I may start using it as my day-to-day Python distribution.
Are you jealous of Go developers building an executable and easily shipping it to users? Wouldn’t it be great if your users could run your application without installing anything? That is the dream, and PyInstaller is one way to get there in the Python ecosystem.
There are countless tutorials on how to set up virtual environments, manage dependencies, avoid dependency pitfalls, and publish to PyPI, which is useful when you’re creating Python libraries. There is much less information for developers building Python applications. This tutorial is for developers who want to distribute applications to users who may or may not be Python developers.
In this tutorial, you’ll learn the following:
- How PyInstaller can simplify application distribution
- How to use PyInstaller on your own projects
- How to debug PyInstaller errors
- What PyInstaller can’t do
PyInstaller gives you the ability to create a folder or executable that users can immediately run without any extra installation. To fully appreciate PyInstaller’s power, it’s useful to revisit some of the distribution problems PyInstaller helps you avoid.
Distribution Problems
Setting up a Python project can be frustrating, especially for non-developers. Often, the setup starts with opening a Terminal, which is a non-starter for a huge group of potential users. This roadblock stops users even before the installation guide delves into the complicated details of virtual environments, Python versions, and the myriad of potential dependencies.
Think about what you typically go through when setting up a new machine for Python development. It probably goes something like this:
- Download and install a specific version of Python
- Set up pip
- Set up a virtual environment
- Get a copy of your code
- Install dependencies
Stop for a moment and consider if any of the above steps make any sense if you’re not a developer, let alone a Python developer. Probably not.
These problems explode if your user is lucky enough to get to the dependencies portion of the installation. This has gotten much better in the last few years with the prevalence of wheels, but some dependencies still require C/C++ or even FORTRAN compilers!
This barrier to entry is way too high if your goal is to make an application available to as many users as possible. As Raymond Hettinger often says in his excellent talks, “There has to be a better way.”
PyInstaller
PyInstaller abstracts these details from the user by finding all your dependencies and bundling them together. Your users won’t even know they’re running a Python project because the Python Interpreter itself is bundled into your application. Goodbye complicated installation instructions!
PyInstaller performs this amazing feat by introspecting your Python code, detecting your dependencies, and then packaging them into a suitable format depending on your Operating System.
There are lots of interesting details about PyInstaller, but for now you’ll learn the basics of how it works and how to use it. You can always refer to the excellent PyInstaller docs if you want more details.
In addition, PyInstaller can create executables for Windows, Linux, or macOS. This means Windows users will get a .exe, Linux users get a regular executable, and macOS users get a .app bundle. There are some caveats to this. See the limitations section for more information.
Preparing Your Project
PyInstaller requires your application to conform to some minimal structure, namely that you have a CLI script to start your application. Often, this means creating a small script outside of your Python package that simply imports your package and runs main().
The entry-point script is a Python script. You can technically do anything you want in the entry-point script, but you should avoid using explicit relative imports. You can still use relative imports throughout the rest your application if that’s your preferred style.
You can give this a try with your own project or follow along with the Real Python feed reader project. For more detailed information on the reader project, check out the the tutorial on Publishing a Package on PyPI.
The first step to building an executable version of this project is to add the entry-point script. Luckily, the feed reader project is well structured, so all you need is a short script outside the package to run it. For example, you can create a file called cli.py alongside the reader package with the following code:
from reader.__main__ import main

if __name__ == '__main__':
    main()
This cli.py script calls main() to start up the feed reader.
Creating this entry-point script is straightforward when you’re working on your own project because you’re familiar with the code. However, it’s not as easy to find the entry-point of another person’s code. In this case, you can start by looking at the setup.py file in the third-party project.
Look for a reference to the entry_points argument in the project’s setup.py. For example, here’s the reader project’s setup.py:
setup(
    name="realpython-reader",
    version="1.0.0",
    description="Read the latest Real Python tutorials",
    long_description=README,
    long_description_content_type="text/markdown",
    url="https://github.com/realpython/reader",
    author="Real Python",
    author_email="info@realpython.com",
    license="MIT",
    classifiers=[
        "License :: OSI Approved :: MIT License",
        "Programming Language :: Python",
        "Programming Language :: Python :: 2",
        "Programming Language :: Python :: 3",
    ],
    packages=["reader"],
    include_package_data=True,
    install_requires=[
        "feedparser", "html2text", "importlib_resources", "typing"
    ],
    entry_points={"console_scripts": ["realpython=reader.__main__:main"]},
)
As you can see, the entry-point cli.py script calls the same function mentioned in the entry_points argument.
After this change, the reader project directory should look like this, assuming you checked it out into a folder called reader:
reader/
|
├── reader/
|   ├── __init__.py
|   ├── __main__.py
|   ├── config.cfg
|   ├── feed.py
|   └── viewer.py
|
├── cli.py
├── LICENSE
├── MANIFEST.in
├── README.md
├── setup.py
└── tests
Notice there is no change to the reader code itself, just a new file called cli.py. This entry-point script is usually all that’s necessary to use your project with PyInstaller.
However, you’ll also want to look out for uses of __import__() or imports inside of functions. These are referred to as hidden imports in PyInstaller terminology.
You can manually specify the hidden imports to force PyInstaller to include those dependencies if changing the imports in your application is too difficult. You’ll see how to do this later in this tutorial.
Once you can launch your application with a Python script outside of your package, you’re ready to give PyInstaller a try at creating an executable.
Using PyInstaller
The first step is to install PyInstaller from PyPI. You can do this using pip like other Python packages:
$ pip install pyinstaller
pip will install PyInstaller’s dependencies along with a new command:
pyinstaller. PyInstaller can be imported in your Python code and used as a library, but you’ll likely only use it as a CLI tool.
You’ll use the library interface if you create your own hook files.
You’ll increase the likelihood of PyInstaller’s defaults creating an executable if you only have pure Python dependencies. However, don’t stress too much if you have more complicated dependencies with C/C++ extensions.
PyInstaller supports lots of popular packages like NumPy, PyQt, and Matplotlib without any additional work from you. You can see more about the list of packages that PyInstaller officially supports by referring to the PyInstaller documentation.
Don’t worry if some of your dependencies aren’t listed in the official docs. Many Python packages work fine. In fact, PyInstaller is popular enough that many projects have explanations on how to get things working with PyInstaller.
In short, the chances of your project working out of the box are high.
To try creating an executable with all the defaults, simply give PyInstaller the name of your main entry-point script.
First, cd in the folder with your entry-point and pass it as an argument to the pyinstaller command that was added to your PATH when PyInstaller was installed.
For example, type the following after you cd into the top-level reader directory if you’re following along with the feed reader project:
Don’t be alarmed if you see a lot of output while building your executable. PyInstaller is verbose by default, and the verbosity can be cranked way up for debugging, which you’ll see later.
Digging Into PyInstaller Artifacts
PyInstaller is complicated under the hood and will create a lot of output. So, it’s important to know what to focus on first. Namely, the executable you can distribute to your users and potential debugging information. By default, the pyinstaller command will create a few things of interest:
- A
*.specfile - A
build/folder - A
dist/folder
Spec File
The spec file will be named after your CLI script by default. Sticking with our previous example, you’ll see a file called cli.spec. Here’s what the default spec file looks like after running PyInstaller on the cli.py file:
# -*- mode: python -*-

block_cipher = None

a = Analysis(['cli.py'],
             pathex=['/Users/realpython/pyinstaller/reader'],
             binaries=[],
             datas=[],
             hiddenimports=[],
             hookspath=[],
             runtime_hooks=[],
             excludes=[],
             win_no_prefer_redirects=False,
             win_private_assemblies=False,
             cipher=block_cipher,
             noarchive=False)
pyz = PYZ(a.pure, a.zipped_data,
             cipher=block_cipher)
exe = EXE(pyz,
          a.scripts,
          [],
          exclude_binaries=True,
          name='cli',
          debug=False,
          bootloader_ignore_signals=False,
          strip=False,
          upx=True,
          console=True )
coll = COLLECT(exe,
               a.binaries,
               a.zipfiles,
               a.datas,
               strip=False,
               upx=True,
               name='cli')
This file will be automatically created by the pyinstaller command. Your version will have different paths, but the majority should be the same.
Don’t worry, you don’t need to understand the above code to effectively use PyInstaller!
This file can be modified and re-used to create executables later. You can make future builds a bit faster by providing this spec file instead of the entry-point script to the pyinstaller command.
There are a few specific use-cases for PyInstaller spec files. However, for simple projects, you won’t need to worry about those details unless you want to heavily customize how your project is built.
Build Folder
The build/ folder is where PyInstaller puts most of the metadata and internal bookkeeping for building your executable. The default contents will look something like this:
build/
|
└── cli/
    ├── Analysis-00.toc
    ├── base_library.zip
    ├── COLLECT-00.toc
    ├── EXE-00.toc
    ├── PKG-00.pkg
    ├── PKG-00.toc
    ├── PYZ-00.pyz
    ├── PYZ-00.toc
    ├── warn-cli.txt
    └── xref-cli.html
The build folder can be useful for debugging, but unless you have problems, this folder can largely be ignored. You’ll learn more about debugging later in this tutorial.
Dist Folder
After building, you’ll end up with a dist/ folder similar to the following:
The dist/ folder contains the final artifact you’ll want to ship to your users. Inside the dist/ folder, there is a folder named after your entry-point. So in this example, you’ll have a dist/cli folder that contains all the dependencies and executable for our application. The executable to run is dist/cli/cli or dist/cli/cli.exe if you’re on Windows.
You’ll also find lots of files with the extension .so, .pyd, and .dll depending on your Operating System. These are the shared libraries that represent the dependencies of your project that PyInstaller created and collected.
You’ll want to distribute the entire dist/cli folder, but you can rename cli to anything that suits you.
At this point you can try running the dist/cli/cli executable if you’re following along with the feed reader example.
You’ll notice that running the executable results in errors mentioning the version.txt file. This is because the feed reader and its dependencies require some extra data files that PyInstaller doesn’t know about. To fix that, you’ll have to tell PyInstaller that version.txt is required, which you’ll learn about when testing your new executable.
Customizing Your Builds
PyInstaller comes with lots of options that can be provided as spec files or normal CLI options. Below, you’ll find some of the most common and useful options.
--name
Change the name of your executable.
This is a way to avoid your executable, spec file, and build artifact folders being named after your entry-point script. --name is useful if you have a habit of naming your entry-point script something like cli.py, as I do.
You can build an executable called realpython from the cli.py script with a command like this:
$ pyinstaller cli.py --name realpython
--onefile
Package your entire application into a single executable file.
The default options create a folder of dependencies and and executable, whereas --onefile keeps distribution easier by creating only an executable.
This option takes no arguments. To bundle your project into a single file, you can build with a command like this:
$ pyinstaller cli.py --onefile
With the above command, your dist/ folder will only contain a single executable instead of a folder with all the dependencies in separate files.
--hidden-import
List multiple top-level imports that PyInstaller was unable to detect automatically.
This is one way to work around your code using import inside functions and __import__(). You can also use --hidden-import multiple times in the same command.
This option requires the name of the package that you want to include in your executable. For example, if your project imported the requests library inside of a function, then PyInstaller would not automatically include requests in your executable. You could use the following command to force requests to be included:
$ pyinstaller cli.py --hiddenimport=requests
You can specify this multiple times in your build command, once for each hidden import.
--add-data and --add-binary
Instruct PyInstaller to insert additional data or binary files into your build.
This is useful when you want to bundle in configuration files, examples, or other non-code data. You’ll see an example of this later if you’re following along with the feed reader project.
--exclude-module
Exclude some modules from being included with your executable
This is useful to exclude developer-only requirements like testing frameworks. This is a great way to keep the artifact you give users as small as possible. For example, if you use pytest, you may want to exclude this from your executable:
$ pyinstaller cli.py --exclude-module=pytest
-w
Avoid automatically opening a console window for
stdoutlogging.
This is only useful if you’re building a GUI-enabled application. This helps your hide the details of your implementation by allowing users to never see a terminal.
Similar to the --onefile option, -w takes no arguments:
.spec file
As mentioned earlier, you can reuse the automatically generated .spec file to further customize your executable. The .spec file is a regular Python script that implicitly uses the PyInstaller library API.
Since it’s a regular Python script, you can do almost anything inside of it. You can refer to the official PyInstaller Spec file documentation for more information on that API.
Testing Your New Executable
The best way to test your new executable is on a new machine. The new machine should have the same OS as your build machine. Ideally, this machine should be as similar as possible to what your users use. That may not always be possible, so the next best thing is testing on your own machine.
The key is to run the resulting executable without your development environment activated. This means run without virtualenv, conda, or any other environment that can access your Python installation. Remember, one of the main goals of a PyInstaller-created executable is for users to not need anything installed on their machine.
Picking up with the feed reader example, you’ll notice that running the default cli executable in the dist/cli folder fails. Luckily the error points you to the problem:
FileNotFoundError: 'version.txt' resource not found in 'importlib_resources'
[15110] Failed to execute script cli
The importlib_resources package requires a version.txt file. You can add this file to the build using the --add-data option. Here’s an example of how to include the required version.txt file:
$ pyinstaller cli.py
    --add-data venv/reader/lib/python3.6/site-packages/importlib_resources/version.txt:importlib_resources
This command tells PyInstaller to include the version.txt file in the importlib_resources folder in a new folder in your build called importlib_resources.
You’ll want to adjust the path in the above command to match where you installed the feed reader dependencies.
Now running the new executable will result in a new error about a config.cfg file.
This file is required by the feed reader project, so you’ll need to make sure to include it in your build:
$ pyinstaller cli.py
    --add-data venv/reader/lib/python3.6/site-packages/importlib_resources/version.txt:importlib_resources
    --add-data reader/config.cfg:reader
Again, you’ll need to adjust the path to the file based on where you have the feed reader project.
At this point, you should have a working executable that can be given directly to users!
Debugging PyInstaller Executables
As you saw above, you might encounter problems when running your executable. Depending on the complexity of your project, the fixes could be as simple as including data files like the feed reader example. However, sometimes you need more debugging techniques.
Below are a few common strategies that are in no particular order. Often times one of these strategies or a combination will lead to a break-through in tough debugging sessions.
Use the Terminal
First, try running the executable from a terminal so you can see all the output.
Remember to remove the -w build flag to see all the stdout in a console window. Often, you’ll see ImportError exceptions if a dependency is missing.
Debug Files
Inspect the build/cli/warn-cli.txt file for any problems. PyInstaller creates lots of output to help you understand exactly what it’s creating. Digging around in the build/ folder is a great place to start.
Single Directory Builds
Use the --onedir distribution mode of creating distribution folder instead of a single executable. Again, this is the default mode. Building with --onedir gives you the opportunity to inspect all the dependencies included instead of everything being hidden in a single executable.
--onedir is useful for debugging, but --onefile is typically easier for
users to comprehend. After debugging you may want to switch to --onefile mode to simplify distribution.
Additional CLI Options
PyInstaller also has options to control the amount of information printed during the build process. Rebuild the executable with the --log-level=DEBUG option to PyInstaller and review the output.
PyInstaller will create a lot of output when increasing the verbosity with --log-level=DEBUG. It’s useful to save this output to a file you can refer to later instead of scrolling in your Terminal. To do this, you can use your shell’s redirection functionality. Here’s an example:
$ pyinstaller --log-level=DEBUG cli.py 2> build.txt
By using the above command, you’ll have a file called build.txt containing lots of additional DEBUG messages.
Here’s a sample of what your build.txt file might look like:
67 INFO: PyInstaller: 3.4
67 INFO: Python: 3.6.6
73 INFO: Platform: Darwin-18.2.0-x86_64-i386-64bit
74 INFO: wrote /Users/realpython/pyinstaller/reader/cli.spec
74 DEBUG: Testing for UPX ...
77 INFO: UPX is not available.
78 DEBUG: script: /Users/realptyhon/pyinstaller/reader/cli.py
78 INFO: Extending PYTHONPATH with paths
['/Users/realpython/pyinstaller/reader',
 '/Users/realpython/pyinstaller/reader']
This file will have a lot of detailed information about what was included in your build, why something was not included, and how the executable was packaged.
You can also rebuild your executable using the --debug option in addition to using the --log-level option for even more information.
Additional PyInstaller Docs
The PyInstaller GitHub Wiki has lots of useful links and debugging tips. Most notably are the sections on making sure everything is packaged correctly and what to do if things go wrong.
Assisting in Dependency Detection
The most common problem you’ll see is ImportError exceptions if PyInstaller couldn’t properly detect all your dependencies. As mentioned before, this can happen if you’re using __import__(), imports inside functions, or other types of hidden imports.
Many of these types of problems can be resolved by using the --hidden-import PyInstaller CLI option. This tells PyInstaller to include a module or package even if it doesn’t automatically detect it. This is the easiest way to work around lots of dynamic import magic in your application.
Another way to work around problems is hook files. These files contain additional information to help PyInstaller package up a dependency. You can write your own hooks and tell PyInstaller to use them with the --additional-hooks-dir CLI option.
Hook files are how PyInstaller itself works internally so you can find lots of example hook files in the PyInstaller source code.
Limitations
PyInstaller is incredibly powerful, but it does have some limitations. Some of the limitations were discussed previously: hidden imports and relative imports in entry-point scripts.
PyInstaller supports making executables for Windows, Linux, and macOS, but it cannot cross compile. Therefore, you cannot make an executable targeting one Operating System from another Operating System. So, to distribute executables for multiple types of OS, you’ll need a build machine for each supported OS.
Related to the cross compile limitation, it’s useful to know that PyInstaller does not technically bundle absolutely everything your application needs to run. Your executable is still dependent on the users’ glibc. Typically, you can work around the glibc limitation by building on the oldest version of each OS you intend to target.
For example, if you want to target a wide array of Linux machines, then you can build on an older version of CentOS. This will give you compatibility with most versions newer than the one you build on. This is the same strategy described in PEP 0513 and is what the PyPA recommends for building compatible wheels.
In fact, you might want to investigate using the PyPA’s manylinux docker image for your Linux build environment. You could start with the base image then install PyInstaller along with all your dependencies and have a build image that supports most variants of Linux.
Conclusion
PyInstaller can help make complicated installation documents unnecessary. Instead, your users can simply run your executable to get started as quickly as possible. The PyInstaller workflow can be summed up by doing the following:
- Create an entry-point script that calls your main function.
- Install PyInstaller.
- Run PyInstaller on your entry-point.
- Test your new executable.
- Ship your resulting
dist/folder to users.
Your users don’t have to know what version of Python you used or that your application uses Python at all!
Содержание:
- Создаем структуру проекта
- Редактируем мета-информацию (setup.py)
- Виртуальное окружение
- Создание команд
- Работа с версиями
- Управление зависимостями
- Управление файлами проекта (MANIFEST.in)
- Создание и запуск тестов
- Публикация пакета на pypi.python.org
Одна из действительно полезных вещей в python — это система скриптов установки. Любой, серьезно
увлекающийся python-программированием разработчик рано или поздно сталкивается с ней.
Но из-за гибкости инструментария скриптов установки, их документация весьма раздута.
На текущий момент имеется набор утилит (setuptools, distutils, distribute) выполняющих
одинаковые задачи.
В данной статье я на конкретных примерах покажу как создать и настроить простой python-пакет.
Наш проект будет иметь следующую функциональность:
- Метод возвращающий строку: «Hello World!»;
- Команда helloworld печатающая эту строку в стандартный вывод.
Создаем структуру проекта
Для начала создадим директорию для пакета. Ее минимальный
набор файлов состоит из: файла дистрибьюции (setup.py) описывающего
метаданные и python кода проекта (в нашем случае модуля helloworld).
Также, xорошим тоном считается создание в корне директории файла с описанием проекта: README.txt.
Получаем следующую структуру:
helloworld-project
├── helloworld
│   ├── __init__.py
│   └── core.py
├── setup.py
└── README.txt
Наша корневая директория helloworld-project будет содержать мета-данные пакета и вспомогательные файлы
(тесты, лицензию, документацию и т.д.), а поддиректория helloworld непосредственно сам модуль helloworld.
Теперь отредактируем файл: helloworld/core.py и добавим логику нашего приложения (получение и вывод строки «Hello World!»):
def get_message():
    return "Hello World!"


def print_message():
    print get_message()
Редактируем мета-информацию (setup.py)
Заполним файл описания README.rst:
Description
===========

An example Hello World project.
Теперь отредактируем файл setup.py:
from setuptools import setup, find_packages
from os.path import join, dirname

setup(
    name='helloworld',
    version='1.0',
    packages=find_packages(),
    long_description=open(join(dirname(__file__), 'README.txt')).read(),
)
Note
Убедитесь, что в вашей системе доступны setuptools, в противном
случае установите python-пакет distribute
Этих операций достаточно, чтобы собрать пакет дистрибьюции. Выполните команду
сборки:
В случае успеха вы получите файл: dist/helloworld-1.0.tar.gz. Это полноценный,
архивированный python-пакет и вы можете распространять его среди прочих разработчиков.
Виртуальное окружение
Virtualenv — пакет применяемый для создания изолированного python-окружения. Используем
его для тестирования нашего проекта.
Создадим окружение env:
Команда создаст директорию env внутри нашего проекта и установит туда python, pip и distribute.
Произведем в него установку нашего проекта.
$ ./env/bin/python setup.py install
running install
running bdist_egg
running egg_info
[...]
Processing dependencies for helloworld==1.0
Finished processing dependencies for helloworld==1.0
И протестируем его работоспособность:
$ ./env/bin/python
>>> import helloworld.core as hw
>>> hw.get_message()
'Hello World!'
>>> hw.print_message()
Hello World!
Все работает. Осталось добавить поддержку команды helloworld в консоли.
Создание команд
Для создания команды helloworld изменим файл setup.py:
setup(
    ...
    entry_points={
        'console_scripts':
            ['helloworld = helloworld.core:print_message']
        }
    )
В параметре entry_points мы задаем словарь с «точками вызова» нашего приложения. Ключ console_scripts
задает список создаваемых исполняемых скриптов (в Windows это будут exe-файлы). В данном случае
мы указали создание исполняемого скрипта helloworld при вызове которого будет запускаться метод print_message
из модуля helloworld.core.
Переустановим модуль в наше окружение и проверим работу созданного скрипта (для этого прийдется активировать наше окружение):
$ ./env/bin/python setup.py install
$ source ./env/bin/activate
(env)
$ helloworld
Hello World!
(env)
Похоже все работает.
Работа с версиями
Номер версии важная часть любого проекта. От него зависит обновление пакетов
и разрешение зависимостей. В примере выше мы указали номер версии 1.0 в файле setup.py.
Более правильное решение перенести его в файл helloworld/__init__.py чтобы сделать доступным
в python-коде. По существующим соглашения для хранения номера версии в модуле, используется
переменная __version__.
helloworld/__init__.py`:
Изменим файл setup.py, чтобы нам не приходилось редактировать номер версии в двух местах:
...
import helloworld

setup(
    name='helloworld',
    version=helloworld.__version__,
    ...
Существует множество систем наименования версий в python обычно рекомендуется использовать PEP386.
Можно представить, что обозначение версии состоит из номера мажорного, минорного релизов
(номера багфикса при необходимости), разделенных точками. В последней части версии
разрешается использовать буквы латинского алфавита. Примеры из официальной документации:
0.4       0.4.0  (these two are equivalent)
0.4.1
0.5a1
0.5b3
0.5
0.9.6
1.0
1.0.4a3
1.0.4b1
1.0.4
Управление зависимостями
Добавим функциональности нашему проекту. Создадим команду serve которая будет запускать
вебсервер отдающий страницу со строкой «Hello world!» генерируемой нашим модулем. Для этого
воспользуемся пакетом Flask.
Добавляем файл helloworld/web.py:
from flask import Flask, render_template

from helloworld.core import get_message


app = Flask(__name__)


@app.route("/")
def hello():
    return render_template('index.html',
        message=get_message())


def run_server():
    app.run()
И файл helloworld/templates/index.html:
<!DOCTYPE HTML>
<body>{{message}}</body>
И опишем команду serve в файле setup.py:
...
entry_points={
   'console_scripts': [
       'helloworld = helloworld.core:print_message',
       'serve = helloworld.web:run_server',
       ]
   },
...
Теперь в нашем проекте появилась зависимость от пакета Flask. Без его установки наше приложение
не будет правильно работать. За описание зависимостей в файле setup.py отвечает параметр install_requires:
...
install_requires=[
    'Flask==0.8'
]
Проверим установку зависимостей обновив наш пакет и работу команды serve:
$ ./env/bin/python setup.py develop
...
Processing dependencies for helloworld==0.1
Searching for Flask==0.8
...
$ serve
   * Running on http://127.0.0.1:5000/
Открыв браузер по адресу http://127.0.0.1:5000 вы должны увидеть нашу страницу.
Управление файлами проекта (MANIFEST.in)
На текущий момент при сборке нашего пакета distutils включает в него только python-файлы.
Необходимо включить в него файл helloworld/templates/index.html без которого проект работать не будет.
Чтобы сделать это мы должны сообщить distutils какие еще файлы надо включать в наш проект. Один из способов —
это создание файла MANIFEST.in:
recursive-include helloworld/templates *.html
Данная команда указывает distutils на включение в проект всех html файлов в директории helloworld/templates.
Также придется обновить setup.py:
...
setup(
    ...
    include_package_data=True,
    ...
    )
Теперь шаблоны будут включены в наш проект.
Создание и запуск тестов
Хорошей практикой считается создание тестов для вашего проекта.
Добавим простейшую реализацию, файл tests.py:
from unittest import TestCase
from helloworld.core import get_message

class HelloworldTestCase(TestCase):
    def test_helloworld(self):
        self.assertEqual(get_message(), 'Hello World!')
И обновим setup.py:
...
setup(
    ...
    test_suite='tests',
    ...
    )
Теперь мы можем произвести предварительное тестирование нашего проекта:
$ python setup.py test
running test
running egg_info
writing requirements to helloworld.egg-info/requires.txt
writing helloworld.egg-info/PKG-INFO
writing top-level names to helloworld.egg-info/top_level.txt
writing dependency_links to helloworld.egg-info/dependency_links.txt
writing entry points to helloworld.egg-info/entry_points.txt
reading manifest file 'helloworld.egg-info/SOURCES.txt'
reading manifest template 'MANIFEST.in'
writing manifest file 'helloworld.egg-info/SOURCES.txt'
running build_ext
test_helloworld (tests.HelloworldTestCase) ... ok

----------------------------------------------------------------------
Ran 1 test in 0.000s

OK
Обратите внимание, что для запуска тестов даже не нужно создание виртуального окружения. Необходимые
зависимости будут скачаны в директорию проекта в виде egg пакетов.
Публикация пакета на pypi.python.org
Прежде чем вы сможете опубликовать свой проект вам необходимо зарегистрироваться на PyPi.
Запишите ваши реквизиты в файле ~/.pypirc:
[distutils]
index-servers =
    pypi

[pypi]
username:<username>
password:<password>
Все ваш проект готов к публикации. Достаточно ввести соответствующую команду:
$ python setup.py register sdist upload
Note
Вы не сможете опубликовать пакет helloworld, тк данное имя проекта уже занято.
![]()
Заметка повествует об этапе создания дистрибутива программы на языке python. Что под этим подразумевается? Допустим, вам крайне необходимо передать свою программу заинтересованным в ней лицам. Что будет содержать такая программа? Скорее всего, в ней будут присутствовать библиотечные модули, пакеты и, конечно, файл README или иная документация. Как правильно создать дистрибутив такой программы? Вот об этом и поговорим.
Примерная структура программы:
spam

├── Documentation.txt - документация

├── libspam.py        - одиночный библиотечный модуль

├── README.txt        - описание пакета/установки

├── runspam.py        - модуль запуска программы

└── spampkg           - пакет

    ├── bar.py        - модуль

    ├── foo.py        - модуль

    └── __init__.py
Не забудьте добавить в каждый пакет программы файл __init__.py для указания того, что данный подкаталог является пакетом. Файл __init__.py может быть пустым, а может содержать программный код, выполняющий инициализацию пакета.
После подготовки каталога, нужно создать файл setup.py на самом верхнем уровне и поместить в него код:
# setup py

from distutils.core import setup

setup(name = 'spam',

    version = '1.0',

    py_modules = ['libspam'],

    packages = ['spampkg'],

    scripts = ['runspam.py'],

)
где
py_modules — список всех файлов одиночных модулей
packages — список всех каталогов пакетов
scripts — список файлов сценариев
Если какого-то из указанных компонентов нет в программе, он может быть опущен.
Полный перечень:
name — имя пакета
version — номер версии пакета
author — кто является авором
author_email — электронная почта автора
maintainer — кто сопровождает пакет
maintainer_email — электронная почта мейнтейнера
url — сайт программы
description — краткое описание пакета
long_description — полное описание пакета
download_url — адрес, откуда можно загрузить пакет
classifiers — список строк классификаторов
Теперь займёмся созданием дистрибутива. Для этого, находясь в каталоге с программой, введите в командной строке:
$ python setup.py sdist
В результате в текущем каталоге появится файл MANIFEST и подкаталог с именем dist, в котором и будет находиться архивный файл для установки вашей программы.
Например:
$ ls dist
spam-1.0.tar.gz
Для установки программы из созданного вами дистрибутива, пользователю нужно лишь разархивировать полученный пакет и установить саму программу.
$ tar xvf spam-1.0.tar.gz
$ cd spam-1.0/
$ python setup.py install
- Создание двоичного дистрибутива
Иногда может потребоваться создать двоичный дистрибутив. Например, если приложение содержит «платформозависимые» компоненты. В таком случае следует использовать команду bdist. Например:
$ python setup.py bdist
Теперь все файлы с расширением .py будут скомпилированы (.pyc-файлы).
Таким образом можно создать исполняемый exe-файл для Windows. Из командной строки Windows для этого достаточно выполнить:
python setup.py bdist wininst
После запуска подобного файла в Windows откроется диалог мастера установки. У данного подхода имеется лишь один недостаток: сам интерпретатор python должен быть установлен на машине пользователя. Чтобы этого не требовалось, используйте py2exe.
py2exe можно забрать с sourceforge. К сожалению, на момент написания поста версия python3 ещё не поддерживается.
Для этой утилиты нам нужно немного изменить наш файл setup.py:
from distutils.core import setup

import py2exe

setup(

    windows=[{"script":"spam.py"}],

    options={"py2exe": {"includes":["sip"]}}
)
Далее следуют нехитрые манипуляции:
setup.py py2exe
После этого, как и в случае с bdist, появятся две директории: build и dist, содержащие программу запуска, модули и различные библиотеки. Если вам нужно более подробно ознакомиться с py2exe, обратитесь к официальной документации проекта.
- Сборка расширений, написанных на C/C++
Не секрет, что в python можно включать модули, написанные на C и C++. Питон является мощным и простым языком, но не может потягаться скоростью выполнения с компилируемыми языками программирования. По этой причине иногда может потребоваться использовать модули расширений на C.
Для этого рекомендуется использовать пакет distutils. Нам снова придётся изменить setup.py, дабы он подходил для решения поставленной задачи:
# setup py

from distutils.core import setup, Extension

setup(name = 'spam',

    version = '1.0',

    py_modules = ['libspam.py'],

    ext_modules = [

        Extension("_spam",

        ["pyspam.c", "spam.c"])

    ]

)
где libspam.py — файл с высокоуровневым модулем на python,
pyspam.c, spam.c — исходные файлы на C, составляющие модуль расширения
Для сборки модуля нужно дать команду:
$ python setup.py build_ext —inplace
Так файлы с исходными текстами будут скомпилированы в разделяемую библиотеку. После компиляции модуль можно импортировать:
>>> import spam
или установить для общего пользования, используя команду python setup.py install, как уже было показано выше.
За более подробной информацией о совместном использовании Python и C/C++ идём сюда.