Время на прочтение
8 мин
Количество просмотров 110K
Как сделать текстовую игру? Да как угодно. Как сделать кроссплатформенную текстовую игру на русском с иллюстрациями, звуком, работающими сохранениями, без проблем с кириллицей, и с каким-никаким геймплеем? Да ещё и в свободное время, не отрываясь от основной работы? Вот это уже интересней и на самом деле — довольно несложно. Заинтересовавшихся прошу под кат.

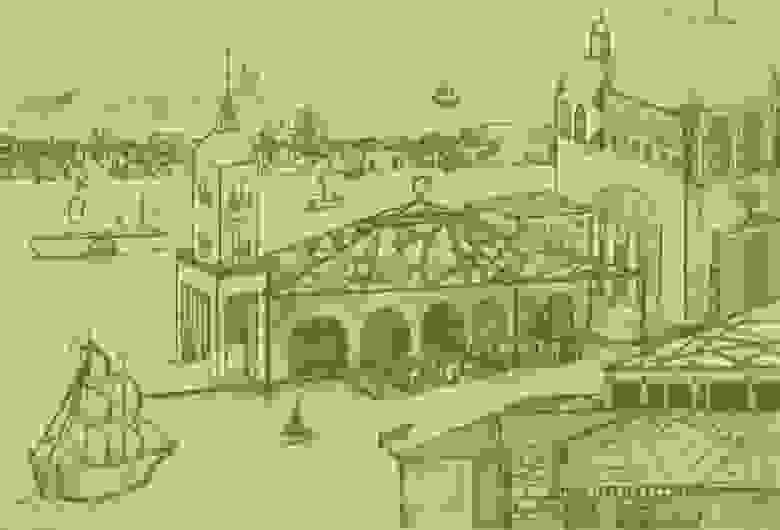
Примерно год назад мы с товарищем задумали сделать небольшую текстовую игру приблизительно в духе Sunless Sea и 80 days: про мореплавание, торговлю, исследование странных поселений и общение со странными личностями. Там должна была фигурировать религия, а лучше несколько, главного героя хотелось видеть не спасителем, героем страны и прославленным мореходом, а умеренно неудачливым предпринимателем/авантюристом, до которого и дела никому нет, а модный выбор между меньшим и большим злом заменить на выбор между добром и добром: никакого набившего оскомину гримдарка ради гримдарка. Довольно быстро придумались основные фракции и персонажи, крупные порты, политическая обстановка и куча симпатичных мелочей вроде подводной охоты на осьминогов (изображена на КДПВ) и гениальной идеи дать почти всем персонажам венгерские имена, которые звучат экзотичней привычных европейских и вызывают некоторую неявную симпатию. В общем, деревянных домиков понабигало немало.
В команде у нас на тот момент был один писатель и один программист (то есть я). Требования в предыдущем абзаце относятся скорее к сетингу и духу игры, так что исполнять их должен был мой товарищ, а передо мной встали вопросы геймдизайна и функциональности движка. Во-первых, большую часть времени игрок будет тратить, читая текст и выбирая действия главного героя. Для этого нужна только сносная типографика и возможность писать сценарий с меню, опциями и переменными. Вскоре подключилась художница, так что надо было думать ещё и об иллюстрациях. Во-вторых, игра про исследования и торговлю, поэтому нужно где-то в доступном игроку виде хранить информацию о собранных слухах и купленных товарах (а также всячески её обрабатывать). И, наконец, в игре про мореходство нужна карта и возможность по ней перемещаться; просто команда “поплыть к тартарам и послушать сказки морских лошадей” явно не соответствует духу проекта. Значит, движок должен ещё и поддерживать хотя бы несложные мини-игры, а не ограничиваться только показом текста и обсчётом игровых переменных.
Почему Ren’Py
Сразу скажу, что писать движок с нуля мы даже не пытались: велосипедостроение увлекательно само по себе, но малоэффективно, если стоит цель всё-таки выпустить игру до выхода на пенсию. Также мы не рассматривали парсерную Interactive Fiction: у неё и на английском языке очень небольшая аудитория, а на русском наш проект, будь он парсерным, мог бы заинтересовать в лучшем случае несколько сот человек. А хочется если не заработать денег, то хотя бы пройти гринлайт и набрать какую-никакую репутацию. К счастью, большинство нынешних англоязычных разработчиков текстовых игр перешло от некоммерческих хобби-проектов к профессиональному геймдеву буквально несколько лет назад. Поэтому основные движки либо опенсорсны, либо, во всяком случае, бесплатны. Давайте посмотрим, что нам предлагают.
Первый вариант, пришедший мне в голову – Storynexus от Failbetter games, разработчиков Fallen London и Sunless Sea. Проекты на нём редактируются через браузер, хостятся Failbetter и через браузер же доступны игрокам. Возможности для монетизации с прошлого года удалили. Главный минус, однако, не в этом, а в том, что в Fallen London большая часть событий представлена картами, выпадающими из колоды, и сделать на Storynexus игру, не использующую эту метафору – задача нетривиальная. Да и вообще намертво привязывать свой проект к стороннему серверу с закрытым кодом, который теоретически может вообще прекратить работу в любой момент, довольно рискованно.
Есть ещё два хороших проприетарных движка для Choose Your Own Adventure, то есть игр примерно нашего типа: ChoiceScript и Inklewriter. Оба обещают прекрасную типографику, простоту разработки (браузерный редактор у Inklewriter, скриптовый язык у ChoiceScript) и возможность коммерческой публикации. К сожалению, оба позволяют делать только чистое CYOA: нет никакой возможности добавлять в игру что-то помимо собственно текста, меню и иллюстрациий. Внимательный читатель воскликнет: “Но как же так? В 80 days ведь был довольно сложный инвентарь и интерфейс путешествий, верно? А в Sorcery! я точно видел боёвку!” Увы, эти системы разрабатывались Inkle Studios под конкретные игры и в редакторе нет ни их, ни хоть какой-нибудь возможности сделать себе такие же. По той же причине (а также потому что он, эм, своеобразный) мы отказались от Twine.
Единственным устраивающим нас вариантом оказался Ren’Py. Это бесплатный опенсорсный движок для визуальных новелл (например, именно на нём сделаны “Бесконечное лето” и “Katawa shoujo”), который довольно легко настраивается для наших задач. Игры получаются кроссплатформенные: сборка дистрибутива под Win/Mac/Linux – вопрос нажатия одной кнопки, причём даже не надо иметь под рукой целевую ОС. Android и iOS также заявлены и Ren’Py-релизы под мобильные оси существуют, но мы сами пока на мобильный рынок не целимся и о разработке для него рассказать не можем. К тому же у Ren’Py очень дружелюбное и живое сообщество на русском и английском.
Простейший сценарий на Ren’Py
Ren’Py написан на Python 2.7 + Pygame и имеет собственный DSL. На этом языке, во-первых, за счёт команд типа “Показать bg_city_night_53.png в качестве фона без анимации” или “Произнести реплику «Cем… СЕМПАЙ!!!» от имени персонажа nyasha1” в императивном стиле пишется собственно сценарий. Во-вторых, подмножеством этого языка является Screen Language, на котором можно в декларативном стиле собирать из ограниченного набора Displayables (то есть виджетов: кнопок, изображений, текстовых полей и тому подобного) экраны и настраивать их функциональность. Если встроенных возможностей недостаточно, то с помощью Python можно добавлять собственные. Этим мы займёмся в следующей статье, а пока разберёмся со сценарием.
Сценарий в Ren’Py состоит из последовательности реплик, действий с экранами и ввода игрока. Про экраны и ввод чуть ниже, а для начала мы разберёмся с персонажами. В визуальной новелле они создаются так (код из официального туториала, с незначительными правками):
define m = Character('Me', color="#c8c8ff")
define s = Character('Sylvie', color="#c8ffc8")
image sylvie smile = "sylvie_smile.png"
label start
    m "Um... will you..."
    m "Will you be my artist for a visual novel?"
    show sylvie smile
    s "Sure, but what is a "visual novel?""
Создано два персонажа: протагонист и Сильви, оба пишут бледно-синим цветом в стандартное окошко внизу экрана. У Сильви к тому же есть портрет, который появится на экране перед тем, как она начнёт говорить. Выглядит это вот так:

Если бы мы создавали визуальную новеллу, то продолжали бы в том же духе, но мы-то не собираемся показывать портреты персонажей, да и иллюстраций пара десятков на всю игру. Большая часть текста вдобавок не является прямой речью персонажей, так что нелогично было бы привязывать её к кому-то из них. Лучше создадим виртуального персонажа-рассказчика:
define narrator = Character(None, kind = nvl, what_color="#000000", size = 12)
Его зовут narrator; это специальное имя, которое отдаёт ему весь текст, явно не аттрибутированный другим персонажам (строго говоря, его зовут None, а narrator, как и m и s в предыдущем примере – переменная, в которую помещается объект персонажа и из которой вызываются его методы, например, say) Аргумент kind принимает два значения: adv и nvl. Первое – это дефолтное поведение, описанное выше, а второе включает nvl-режим, в котором портреты не показываются, а текстовое поле занимает большую часть экрана. Как раз то, что нам было нужно. Этот режим описывается экраном nvl_screen в файле screens.rpy и группой стилей styles.nvl* (файлы screens.rpy и options.rpy соответственно), в которых мы зададим шрифт, фон текстового поля, цвет меню и всё остальное.

label start:
  image bg monet_palace_image = Image('images/1129_monet_palace.jpg', align=(0 .5, 0.5))
    nvl clear
    hide screen nvl
    scene bg monet_palace_image
    $ Ren'Py.pause(None)
   " — Я всегда говорил: твои песенки — дерьмо, Люсьен, и я не понимаю, где ты только находишь музыкантов, согласных это исполнять!"
Разберём построчно: сперва объявляется ярлык start, с которого начнётся игра. Это название зарезервировано и движок всегда будет переходить на него после нажатия кнопки “Новая игра”, где бы в сценарии он ни находился. Всё, что следует за ярлыком, логически находится “внутри” этого ярлыка, поэтому выделяется индентацией: она в Ren’Py работает так же, как и в чистом питоне. Инициализация картинки достаточно очевидна, а вот следующая строчка делает важную вещь: убирает весь текст с экрана nvl_screen. Автоматически это не делается, поэтому, если не расставлять nvl clear в конце каждой страницы, текст спокойно уползёт за пределы экрана и будет выводиться туда, пока экран не будет наконец очищен. Вроде бы мелочь, но на отладку пропущенных nvl clear я потратил намного больше времени, чем готов признать. Свежевымытый экран мы временно уберём, чтобы позволить игроку полюбоваться фоном, покажем фон, включим бесконечную паузу (то есть дождёмся клика) и начнём историю. Как только на nvl_screen начнёт выводиться текст, экран сам вернётся на место.
Строка с паузой, кстати, уже на питоне: для включения единичной строки её достаточно начать с ‘$’, а более длинные куски кода нужно писать внутри блока ‘python:’. Любой код, исполняемый игрой, видит модули самого Ren’Py и явно импортировать их уже не нужно.
Добавляем ветвление и переменные
К этому моменту игра представляет собой читалку, которая показывает текст, меняя при необходимости фоны. Сохранение, перемотка, главное меню и настройки уже работают из коробки. Однако если бы мы хотели написать иллюстрированную повесть, то мы бы её и написали, верно? Добавим перед текстом небольшое меню:
label start:
    menu:
        "Зайти в меню разнообразного дебага":
            $ debug_mode = True
            jump debug_menu
        "Пропустить вступление":
            jump the_very_start_lazlo_nooptions
        "Начать вступление":
            label the_very_start:
                #show screen nvl
                nvl clear
                hide screen nvl
                scene bg monet_palace_image
                $ Ren'Py.pause(None)
               " — Я всегда говорил: твои песенки — дерьмо, Люсьен, и я не понимаю, где ты только находишь музыкантов, согласных это исполнять!"
Теперь после включения игры пользователь (или, скорее, разработчик) сможет при желании войти в режим дебага или пропустить уже готовый кусок вступления и начать тестировать сразу кусок из последнего коммита. Строка show screen nvl закомменчена за ненадобностью – как я уже упоминал выше, экран покажется сам собой, когда на нём обновится текст. Комменты, как видите, работают абсолютно очевидным образом.
Ярлыки, меню и другие индентированные блоки могут быть вложены до произвольной глубины, но на практике мы стараемся дробить текст на эпизоды в десяток страниц. Каждый такой эпизод описан внутри отдельного ярлыка с нулевой индентацией (он уже не обязан быть внутри ярлыка start или даже в одном с ним файле), а переходы из одного эпизода в другой осуществляются прыжками. Так мы не только боремся с десятками уровней индентации, но и обеспечиваем модульность кода: каждый эпизод может тестироваться отдельно и довольно несложно проверить, какие переменные он читает, в какие пишет и куда позволяет перейти.
Внутриигровые меню и переменные устроены абсолютно так же. Поскольку и переменных, и ярлыков даже в небольшом эпизоде на десять минут игры разводится невероятное количество, мы приняли несложный вариант венгерской нотации: имя ярлыка ‘the_very_start_lazlo_nooptions’ состоит из трёх частей: названия локации the_very_start (то есть период от начала игры до первого выхода в море), названия эпизода lazlo (то есть пьянка у Лазло, на которой можно нанять молодых бездельников в матросы) и имени собственно ярлыка. При таком подходе имена получаются достаточно громоздкими, но лучше так, чем обнаружить при тестировании, что три месяца назад кто-то уже создал переменную ship_listing, выставил True бог весть где и теперь крен из одного случайного события влияет на исход другого случайного события на другом конце моря.
Вместо заключения
К этому моменту мы уже воспроизвели на Ren’Py функционал упоминавшихся выше Choicescript и inklewriter. Вроде бы наш кораблик готов к отплытию. В следующей статье я покажу, как можно создавать более сложный интерфейс с использованием экранного языка RenPy и ещё более сложный — на чистом питоне.
Do you have a story idea that you’d like to turn into a novel? How about adding visual appeal and interactivity to that novel?
A Visual Novel might be the game genre you are looking for. And this tutorial is here to help set you up in 10 minutes, with minimal coding experience required. Let’s get started!
We will be using the Ren’Py Visual Novel Engine, which is built on top of Python 2.7. As Python itself is a scripting language, you will be able to «script» your visual novel project in Ren’Py.
Since the arrival of Python 3, Python 2.7 has been sunsetted and is no longer actively maintained. Rest assured — Python 2.7 has all the features we need to create an awesome visual novel. Moreover, the newest release of Ren’Py, Ren’Py SDK 7.4, provides a compatibility mode for Python 3. The developers also express the hope of integrating fully with Python 3 in the next release, Ren’Py 8.0.
How to Download and Set up Ren’Py
You can download the latest version of Ren’Py for your operating system (Windows, Mac, Linux) on its official site.
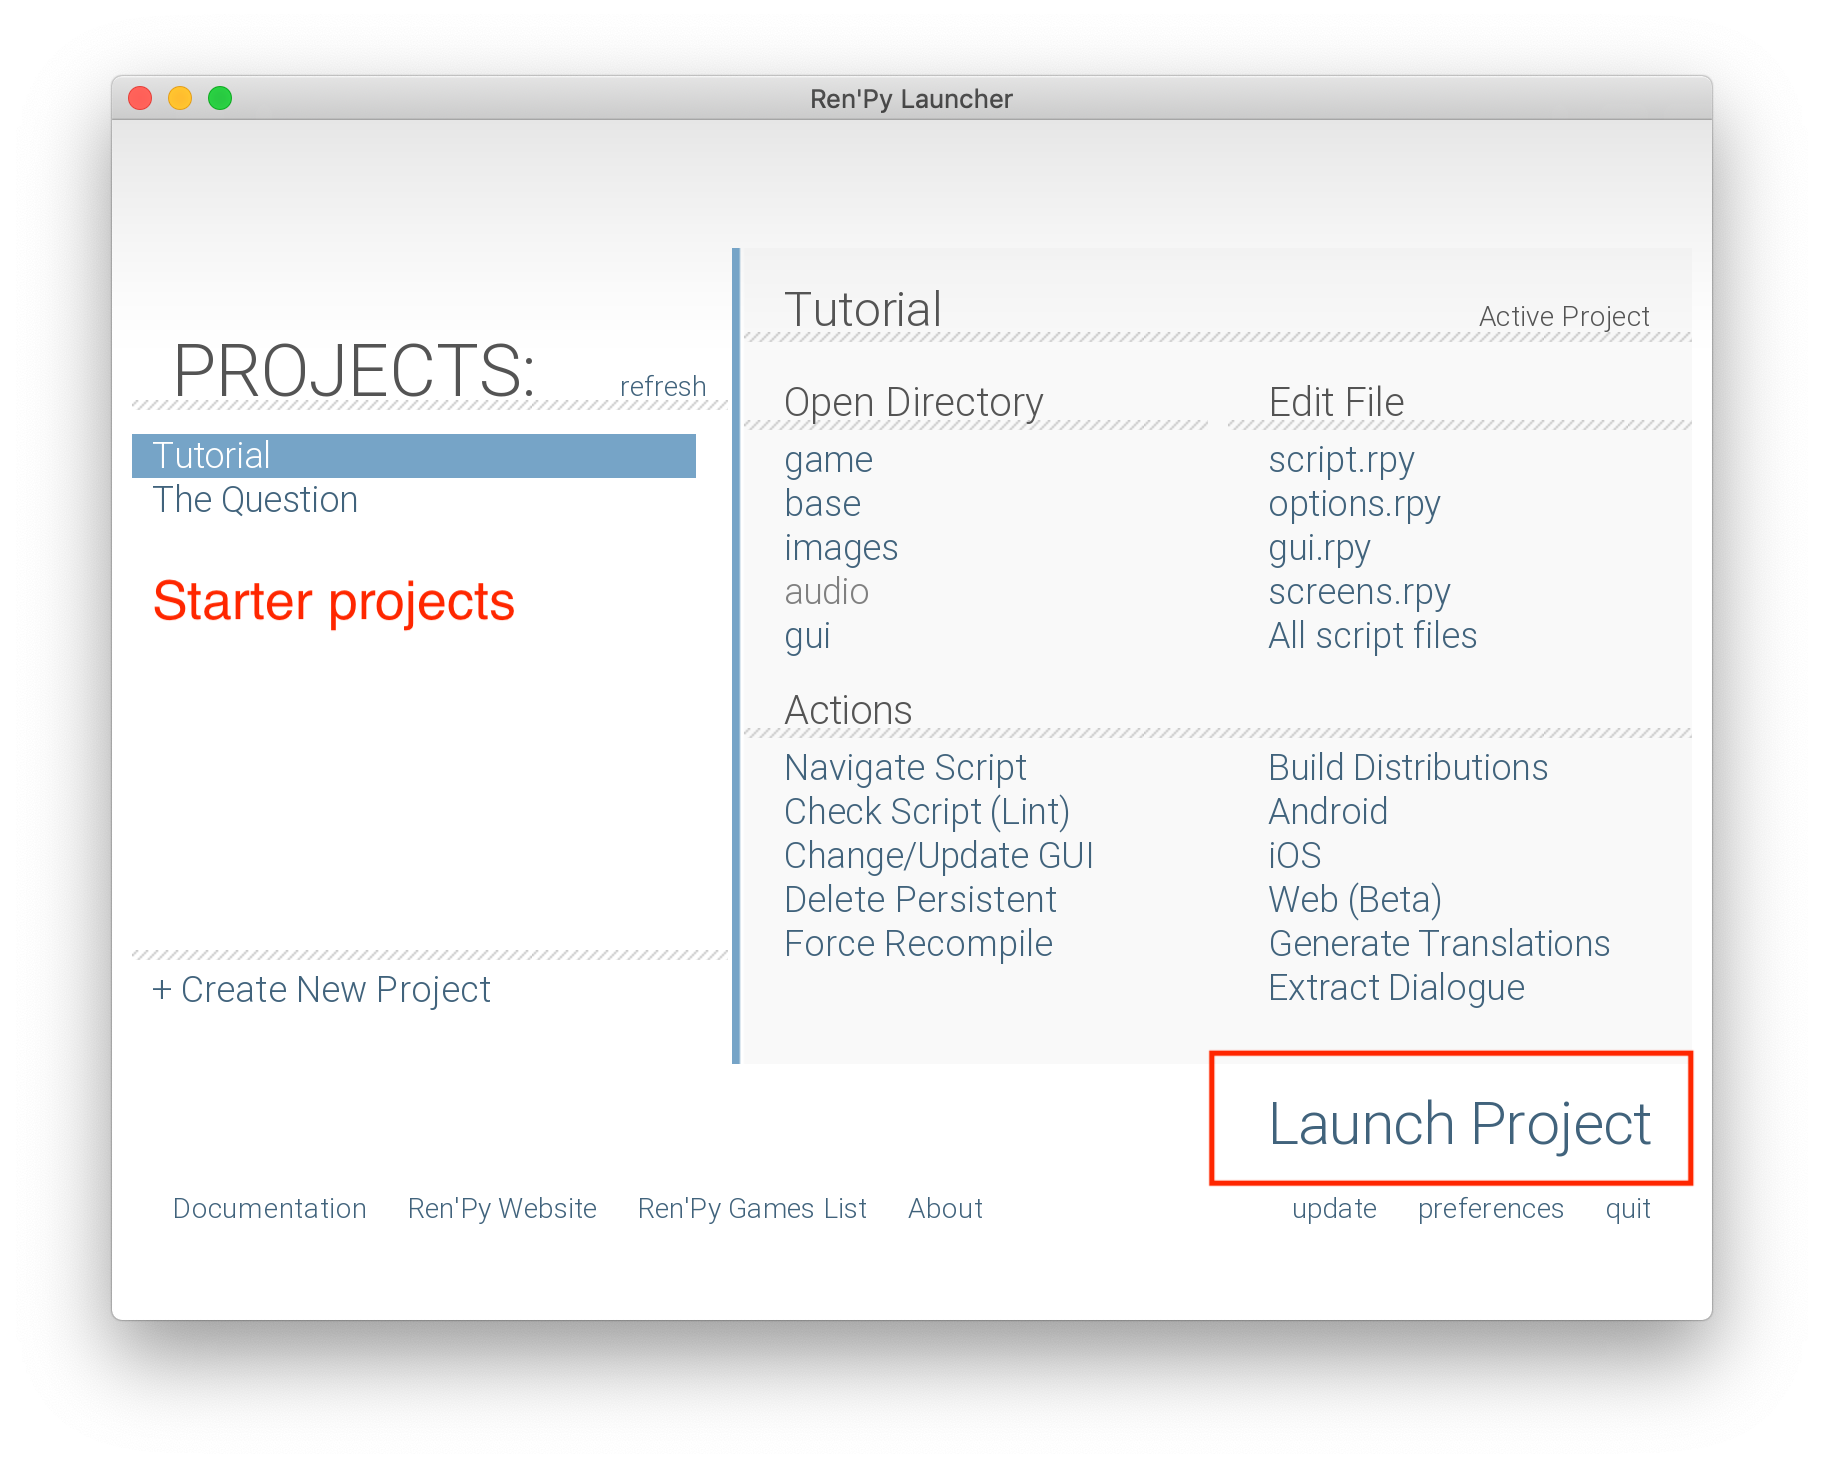
Once you have downloaded and installed Ren’Py, you may open the Ren’Py launcher, select one of the starter projects (Tutorial, The Question) on the left, and click on Launch Project.
Check out the Tutorial to get a sense of the full power of this engine, or The Question to see a very basic visual novel that you can make in 10 minutes.
How to Create a New Project in Ren’Py
Let’s create a new project. I called mine Forest Hike🌲, featuring a simple scene where two kids explore a forest trail.
Pay attention to the resolution you choose: The default is 1280 x 720. When we add images, our background images should also conform to these dimensions.
How to Run the Boilerplate Project
Launch the boilerplate project. Press Start from the main menu. After two brief lines of dialogue, the script ends and we are brought back to the main menu.
How to Script Our Project
Let’s start scripting our game based on the boilerplate.
Text Editors like Sublime Text and Atom both have syntax highlighting for Ren’Py scripts ending in .rpy. Check out this Sublime Text package and this Atom package.
The two lines of dialogue we saw are located in script.rpy. Open that file and its content should look like the following. Just like in Python, lines that start with # are comments and won’t be evaluated as part of the Ren’Py script. The comments and the code below are pretty self-explanatory.
# Declare characters used by this game
define e = Character("Eileen")


# The game starts here
label start:

    # Show a background
    scene bg room

    # This shows a character sprite
    show eileen happy

    # These display lines of dialogue.
    e "You've created a new Ren'Py game."
    e "Once you add a story, pictures, and music, you can release it to the world!"

    # This ends the game.
    return
The label is used for control flow, which we will cover in the following section.
The return statement on the last line is what brought us back to the main menu.
How to Declare Characters and Add Dialogues
Let’s replace the boilerplate character declaration and dialogues with those from our story. Here is how my story goes:
define laura = Character('Laura')
define tom = Character('Tom')

label start:

    laura "Wait up, Tom!"
    laura "Tom!"
    laura "I said wait up!"
    laura "...Tom?"
    tom "Boo!"
    laura "Yikes... not again."
    tom "Are you scared?"
    laura "Not at all."
    laura "Running off like that is dangerous, you know."
    laura "We are in the forest. We could get lost."
    tom "Okay okay mom. I won't do it again."

    return

How to Add Images and Transitions
If you aren’t an artist yourself, you may consider looking for assets in the creative commons domain. itch.io, a marketplace for indie games, is a great place to look for assets.
I found this set of character sprites for my project. For the background images, I simply applied artistic filters to creative commons pictures, giving real-life pictures a nice watercolor aesthetic.
I put all my images inside game/images. Note that it’s okay to use whitespaces in the image file names.
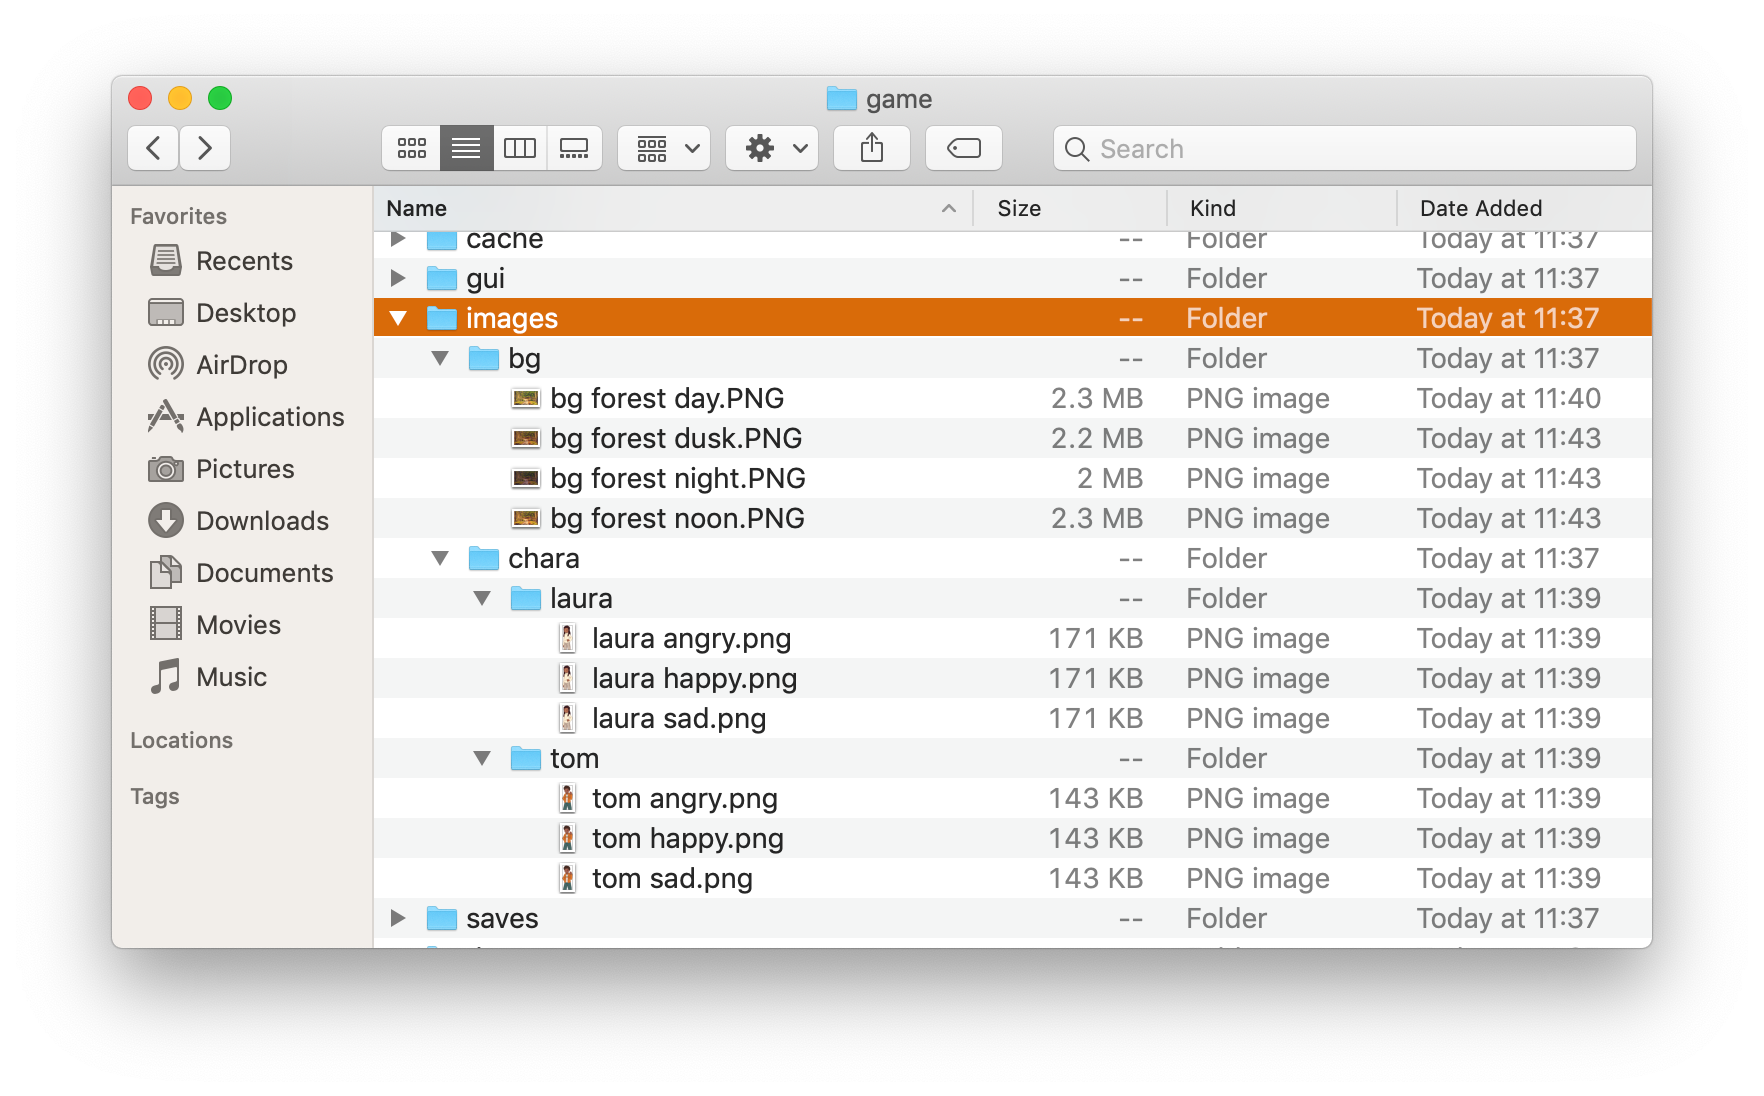
Then we add to script.rpy those images as well as some transitions. Ren’Py applies transitions when it sees keywords like with and at. You can read more about transitions in Ren’Py’s ATL (Animation and Transition Language) docs.
label start:
    scene bg forest day with fade
    show laura angry
    laura "Wait up, Tom!"
    laura "Tom!"
    laura "I said wait up!"
    laura "...Tom?"
    hide laura
    scene bg forest day with vpunch
    show tom happy at right with moveinbottom
    tom "Boo!"
    show laura angry at left with moveinleft
    laura "Yikes... not again."
    tom "Are you scared?"
    laura "Not at all."
    show laura sad
    laura "Running off like that is dangerous, you know."
    laura "We are in the forest. We could get lost."
    tom "Okay okay mom. I won't do it again."

    return

With the addition of visuals, our story is coming together nicely.
How to Add Choices
A game with different branches and endings more than doubles the fun. Adding a choice menu to a Ren’Py script is simple:
menu:
    "Which way should we go?"

    "Left":
        tom "Let's check out the trail on the left!"
    "Right":
        tom "Right is always the right way to go!"
How to Use Python Variables and Control Flow
We may define Python variables in a Ren’Py script and alter the flow of our story depending on their values. Python statements start with a $ or an indented python: block.
Adding variables to our previous choice menu:
menu:
"Which way should we go?"
"Left":
tom "Let's check out the trail on the left!"
$ is_lost = True
"Right":
tom "Right is always the right way to go!"
$ is_lost = False
scene bg forest noon with Dissolve(3.0)
scene bg forest dusk with Dissolve(3.0)
show laura sad at left with moveinleft
laura "It's getting late. Are you sure we aren't lost?"
if is_lost:
show tom sad at right with moveinleft
tom "I hope not, but I have a bad feeling about this."
else:
show tom happy at right with moveinleft
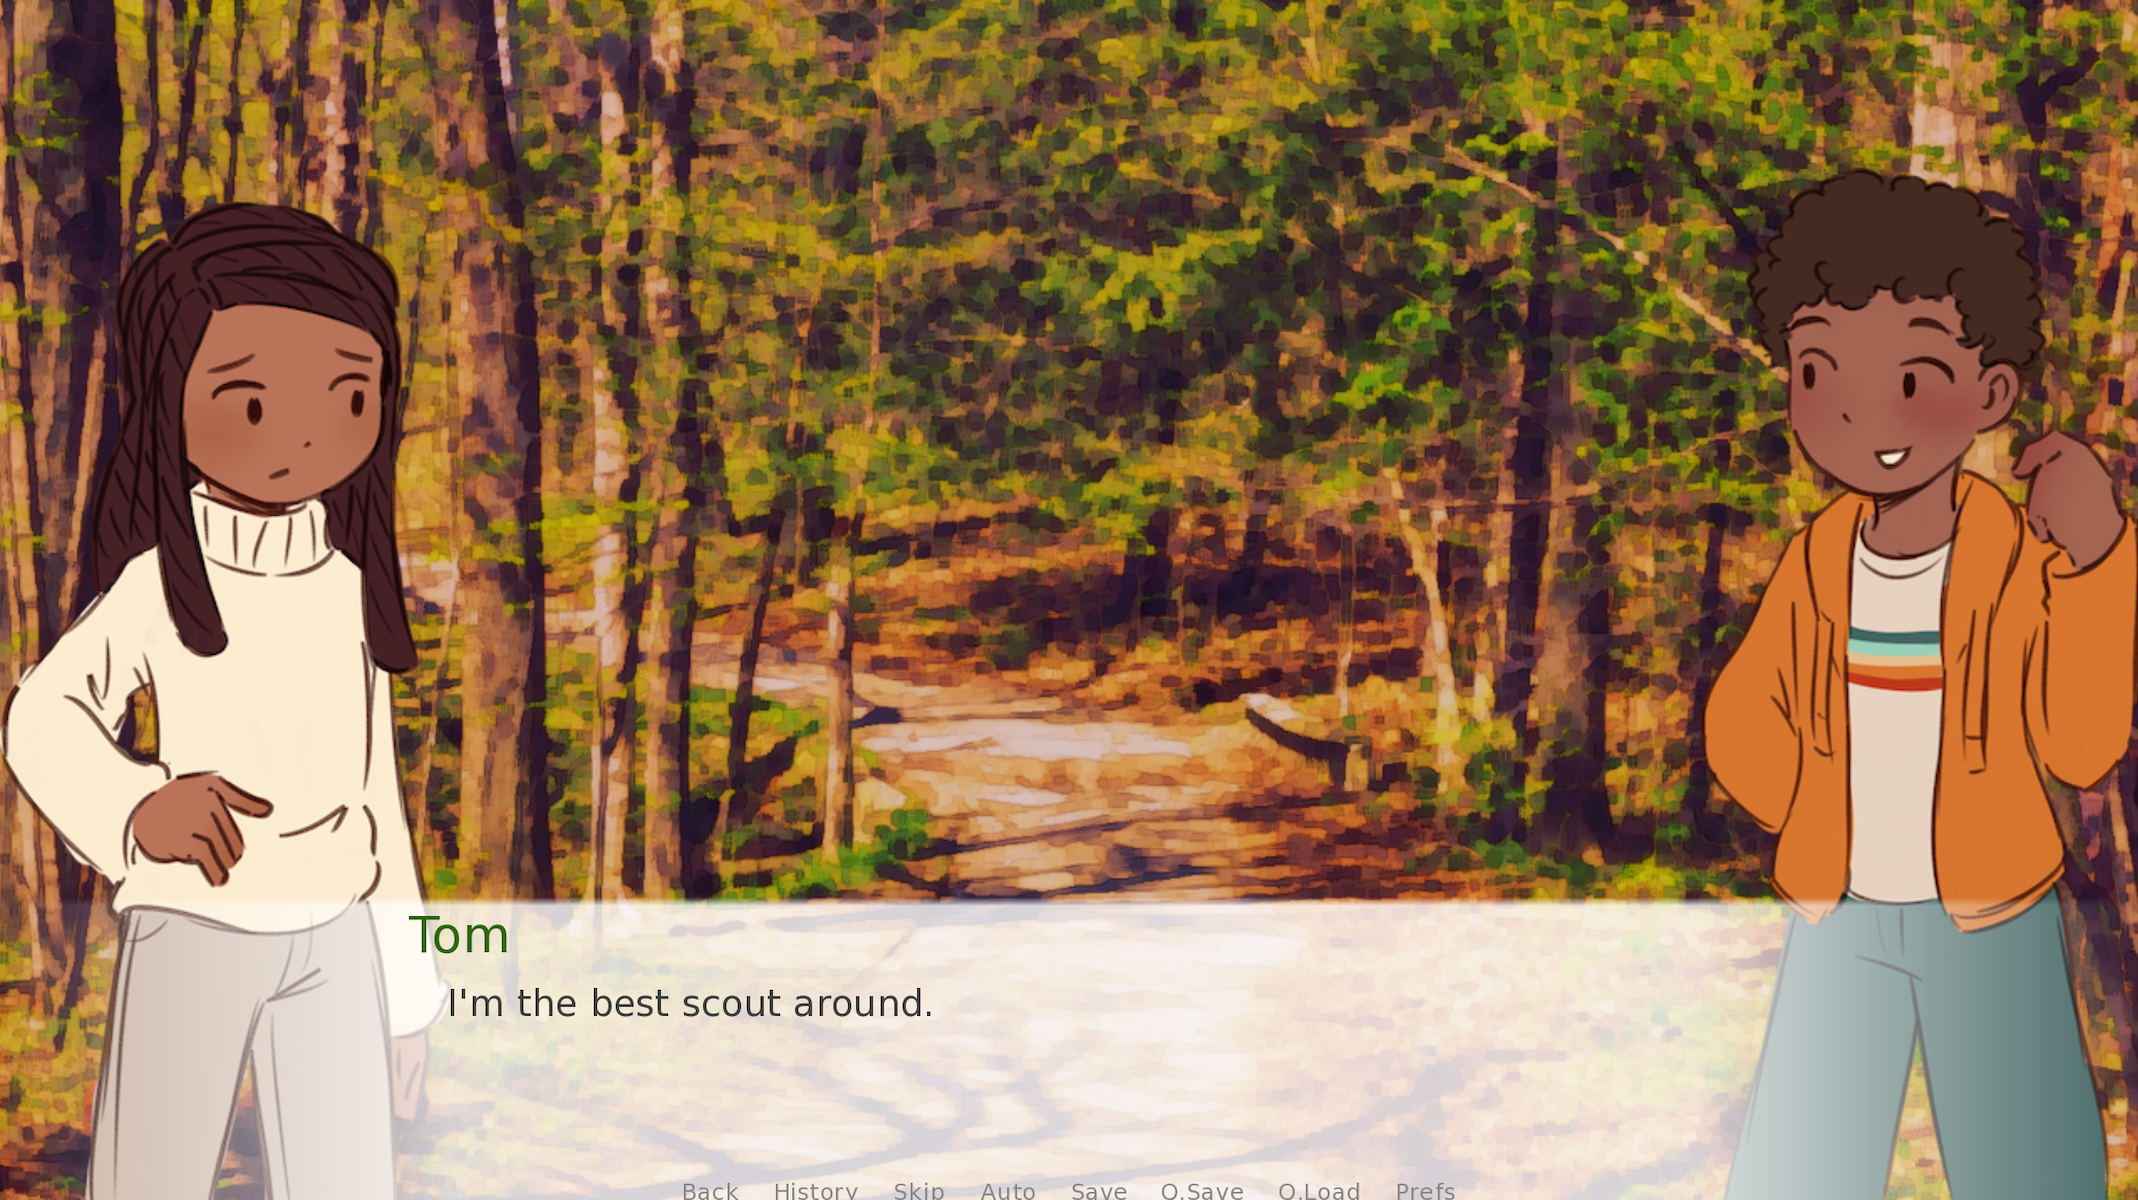
tom "We are fine. Look! There's the end of the trail."
tom "I'm the best scout around."
See the end of this post for my handcrafted resources for working with Python in Ren’Py.
How to Play Music
According to Ren’Py’s Audio docs, playing music and sound effects is as easy as the following:
play music "mozart.ogg"
play sound "woof.mp3"
How to Save and Load the Game
Ren’Py has done all the heavy lifting for us and has a built-in save and load system.
Other Customization You Can Do
Currently in our dialogue, the entire line of text is displayed at once, instead of character by character. We may change the variable preference.text_cps (CPS stands for character per second) in options.rpy like this.
default preferences.text_cps = 20
There is even more that we can customize in gui.rpy (GUI stands for Graphic User Interface, which includes the textbox and menu choice items that we have seen) or screens.rpy.
What Else is Ren’Py Capable of?
Ren’Py’s capability extends way beyond displaying text and images. I may go as far as to say that Ren’Py is about as capable and versatile as Python itself.
With the Pygame module, it is possible to create complex mini games in Ren’Py. I myself have created and open-sourced a few mini games, including a chess engine that integrates with the Stockfish chess AI as well as a rhythm game engine that automatically generates the beat map for any music file.

Ren’Py Chess Game 2.0 by r3dhummingbird
PvP and PvC Chess Game Powered by Stockfish in Ren’Py
 Studio Madeleine Chaiitch.io
Ren’Py Rhythm Game by r3dhummingbird
Play a rhythm game in your Ren’Py Visual Novel game!
 itch.io
Resources
This tutorial should help get you started with Ren’Py. It’s always useful to refer to the official documentation as you learn the more advanced features to add buzz to your project.
I’ve also created some course material to help you brush up on Python fundamentals and their capabilities in Ren’Py scripts.
RuolinZheng08/python-for-renpy-dev
[Udemy Course Material] Python Basics for Ren’Py Developers — RuolinZheng08/python-for-renpy-dev
 RuolinZheng08GitHub

Python Basics for Ren’Py Developers
Learn the Python basics to build complex components like an inventory system or a minigame in your Ren’Py project
 Udemy
Udemy

Check out my course intro video on YouTube:
Thanks for reading and have fun telling your story!
Learn to code for free. freeCodeCamp’s open source curriculum has helped more than 40,000 people get jobs as developers. Get started
Python, Разработка игр
Рекомендация: подборка платных и бесплатных курсов Unity — https://katalog-kursov.ru/
Как сделать текстовую игру? Да как угодно. Как сделать кроссплатформенную текстовую игру на русском с иллюстрациями, звуком, работающими сохранениями, без проблем с кириллицей, и с каким-никаким геймплеем? Да ещё и в свободное время, не отрываясь от основной работы? Вот это уже интересней и на самом деле — довольно несложно. Заинтересовавшихся прошу под кат.
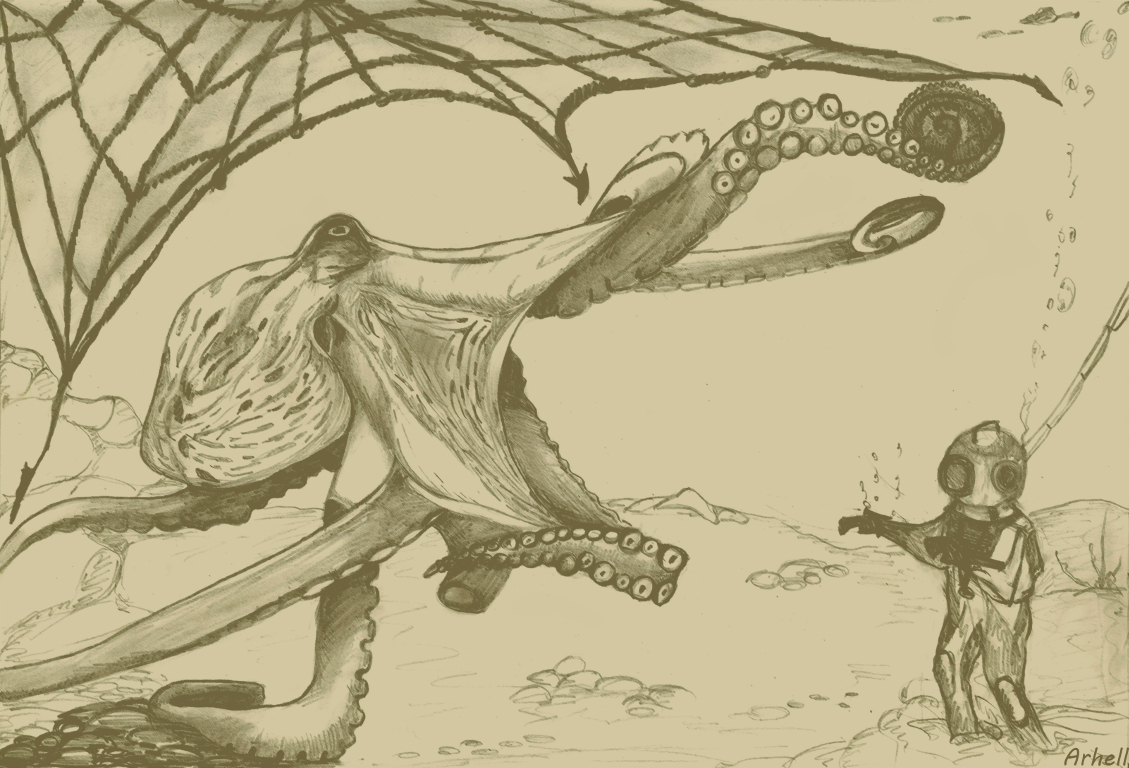
Примерно год назад мы с товарищем задумали сделать небольшую текстовую игру приблизительно в духе Sunless Sea и 80 days: про мореплавание, торговлю, исследование странных поселений и общение со странными личностями. Там должна была фигурировать религия, а лучше несколько, главного героя хотелось видеть не спасителем, героем страны и прославленным мореходом, а умеренно неудачливым предпринимателем/авантюристом, до которого и дела никому нет, а модный выбор между меньшим и большим злом заменить на выбор между добром и добром: никакого набившего оскомину гримдарка ради гримдарка. Довольно быстро придумались основные фракции и персонажи, крупные порты, политическая обстановка и куча симпатичных мелочей вроде подводной охоты на осьминогов (изображена на КДПВ) и гениальной идеи дать почти всем персонажам венгерские имена, которые звучат экзотичней привычных европейских и вызывают некоторую неявную симпатию. В общем, деревянных домиков понабигало немало.
В команде у нас на тот момент был один писатель и один программист (то есть я). Требования в предыдущем абзаце относятся скорее к сетингу и духу игры, так что исполнять их должен был мой товарищ, а передо мной встали вопросы геймдизайна и функциональности движка. Во-первых, большую часть времени игрок будет тратить, читая текст и выбирая действия главного героя. Для этого нужна только сносная типографика и возможность писать сценарий с меню, опциями и переменными. Вскоре подключилась художница, так что надо было думать ещё и об иллюстрациях. Во-вторых, игра про исследования и торговлю, поэтому нужно где-то в доступном игроку виде хранить информацию о собранных слухах и купленных товарах (а также всячески её обрабатывать). И, наконец, в игре про мореходство нужна карта и возможность по ней перемещаться; просто команда “поплыть к тартарам и послушать сказки морских лошадей” явно не соответствует духу проекта. Значит, движок должен ещё и поддерживать хотя бы несложные мини-игры, а не ограничиваться только показом текста и обсчётом игровых переменных.
Почему Ren’Py
Сразу скажу, что писать движок с нуля мы даже не пытались: велосипедостроение увлекательно само по себе, но малоэффективно, если стоит цель всё-таки выпустить игру до выхода на пенсию. Также мы не рассматривали парсерную Interactive Fiction: у неё и на английском языке очень небольшая аудитория, а на русском наш проект, будь он парсерным, мог бы заинтересовать в лучшем случае несколько сот человек. А хочется если не заработать денег, то хотя бы пройти гринлайт и набрать какую-никакую репутацию. К счастью, большинство нынешних англоязычных разработчиков текстовых игр перешло от некоммерческих хобби-проектов к профессиональному геймдеву буквально несколько лет назад. Поэтому основные движки либо опенсорсны, либо, во всяком случае, бесплатны. Давайте посмотрим, что нам предлагают.
Первый вариант, пришедший мне в голову – Storynexus от Failbetter games, разработчиков Fallen London и Sunless Sea. Проекты на нём редактируются через браузер, хостятся Failbetter и через браузер же доступны игрокам. Возможности для монетизации с прошлого года удалили. Главный минус, однако, не в этом, а в том, что в Fallen London большая часть событий представлена картами, выпадающими из колоды, и сделать на Storynexus игру, не использующую эту метафору – задача нетривиальная. Да и вообще намертво привязывать свой проект к стороннему серверу с закрытым кодом, который теоретически может вообще прекратить работу в любой момент, довольно рискованно.
Есть ещё два хороших проприетарных движка для Choose Your Own Adventure, то есть игр примерно нашего типа: ChoiceScript и Inklewriter. Оба обещают прекрасную типографику, простоту разработки (браузерный редактор у Inklewriter, скриптовый язык у ChoiceScript) и возможность коммерческой публикации. К сожалению, оба позволяют делать только чистое CYOA: нет никакой возможности добавлять в игру что-то помимо собственно текста, меню и иллюстрациий. Внимательный читатель воскликнет: “Но как же так? В 80 days ведь был довольно сложный инвентарь и интерфейс путешествий, верно? А в Sorcery! я точно видел боёвку!” Увы, эти системы разрабатывались Inkle Studios под конкретные игры и в редакторе нет ни их, ни хоть какой-нибудь возможности сделать себе такие же. По той же причине (а также потому что он, эм, своеобразный) мы отказались от Twine.
Единственным устраивающим нас вариантом оказался Ren’Py. Это бесплатный опенсорсный движок для визуальных новелл (например, именно на нём сделаны “Бесконечное лето” и “Katawa shoujo”), который довольно легко настраивается для наших задач. Игры получаются кроссплатформенные: сборка дистрибутива под Win/Mac/Linux – вопрос нажатия одной кнопки, причём даже не надо иметь под рукой целевую ОС. Android и iOS также заявлены и Ren’Py-релизы под мобильные оси существуют, но мы сами пока на мобильный рынок не целимся и о разработке для него рассказать не можем. К тому же у Ren’Py очень дружелюбное и живое сообщество на русском и английском.
Простейший сценарий на Ren’Py
Ren’Py написан на Python 2.7 + Pygame и имеет собственный DSL. На этом языке, во-первых, за счёт команд типа “Показать bg_city_night_53.png в качестве фона без анимации” или “Произнести реплику «Cем… СЕМПАЙ!!!» от имени персонажа nyasha1” в императивном стиле пишется собственно сценарий. Во-вторых, подмножеством этого языка является Screen Language, на котором можно в декларативном стиле собирать из ограниченного набора Displayables (то есть виджетов: кнопок, изображений, текстовых полей и тому подобного) экраны и настраивать их функциональность. Если встроенных возможностей недостаточно, то с помощью Python можно добавлять собственные. Этим мы займёмся в следующей статье, а пока разберёмся со сценарием.
Сценарий в Ren’Py состоит из последовательности реплик, действий с экранами и ввода игрока. Про экраны и ввод чуть ниже, а для начала мы разберёмся с персонажами. В визуальной новелле они создаются так (код из официального туториала, с незначительными правками):
define m = Character('Me', color="#c8c8ff")
define s = Character('Sylvie', color="#c8ffc8")
image sylvie smile = "sylvie_smile.png"
label start
    m "Um... will you..."
    m "Will you be my artist for a visual novel?"
    show sylvie smile
    s "Sure, but what is a "visual novel?""
Создано два персонажа: протагонист и Сильви, оба пишут бледно-синим цветом в стандартное окошко внизу экрана. У Сильви к тому же есть портрет, который появится на экране перед тем, как она начнёт говорить. Выглядит это вот так:
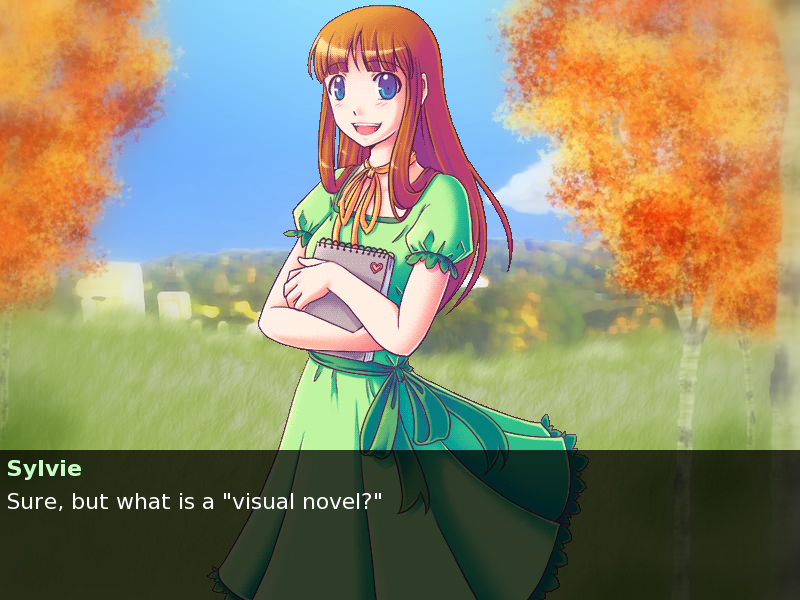
Если бы мы создавали визуальную новеллу, то продолжали бы в том же духе, но мы-то не собираемся показывать портреты персонажей, да и иллюстраций пара десятков на всю игру. Большая часть текста вдобавок не является прямой речью персонажей, так что нелогично было бы привязывать её к кому-то из них. Лучше создадим виртуального персонажа-рассказчика:
define narrator = Character(None, kind = nvl, what_color="#000000", size = 12)
Его зовут narrator; это специальное имя, которое отдаёт ему весь текст, явно не аттрибутированный другим персонажам (строго говоря, его зовут None, а narrator, как и m и s в предыдущем примере – переменная, в которую помещается объект персонажа и из которой вызываются его методы, например, say) Аргумент kind принимает два значения: adv и nvl. Первое – это дефолтное поведение, описанное выше, а второе включает nvl-режим, в котором портреты не показываются, а текстовое поле занимает большую часть экрана. Как раз то, что нам было нужно. Этот режим описывается экраном nvl_screen в файле screens.rpy и группой стилей styles.nvl* (файлы screens.rpy и options.rpy соответственно), в которых мы зададим шрифт, фон текстового поля, цвет меню и всё остальное.

label start:
  image bg monet_palace_image = Image('images/1129_monet_palace.jpg', align=(0 .5, 0.5))
    nvl clear
    hide screen nvl
    scene bg monet_palace_image
    $ Ren'Py.pause(None)
   " — Я всегда говорил: твои песенки — дерьмо, Люсьен, и я не понимаю, где ты только находишь музыкантов, согласных это исполнять!"
Разберём построчно: сперва объявляется ярлык start, с которого начнётся игра. Это название зарезервировано и движок всегда будет переходить на него после нажатия кнопки “Новая игра”, где бы в сценарии он ни находился. Всё, что следует за ярлыком, логически находится “внутри” этого ярлыка, поэтому выделяется индентацией: она в Ren’Py работает так же, как и в чистом питоне. Инициализация картинки достаточно очевидна, а вот следующая строчка делает важную вещь: убирает весь текст с экрана nvl_screen. Автоматически это не делается, поэтому, если не расставлять nvl clear в конце каждой страницы, текст спокойно уползёт за пределы экрана и будет выводиться туда, пока экран не будет наконец очищен. Вроде бы мелочь, но на отладку пропущенных nvl clear я потратил намного больше времени, чем готов признать. Свежевымытый экран мы временно уберём, чтобы позволить игроку полюбоваться фоном, покажем фон, включим бесконечную паузу (то есть дождёмся клика) и начнём историю. Как только на nvl_screen начнёт выводиться текст, экран сам вернётся на место.
Строка с паузой, кстати, уже на питоне: для включения единичной строки её достаточно начать с ‘$’, а более длинные куски кода нужно писать внутри блока ‘python:’. Любой код, исполняемый игрой, видит модули самого Ren’Py и явно импортировать их уже не нужно.
Добавляем ветвление и переменные
К этому моменту игра представляет собой читалку, которая показывает текст, меняя при необходимости фоны. Сохранение, перемотка, главное меню и настройки уже работают из коробки. Однако если бы мы хотели написать иллюстрированную повесть, то мы бы её и написали, верно? Добавим перед текстом небольшое меню:
label start:
    menu:
        "Зайти в меню разнообразного дебага":
            $ debug_mode = True
            jump debug_menu
        "Пропустить вступление":
            jump the_very_start_lazlo_nooptions
        "Начать вступление":
            label the_very_start:
                #show screen nvl
                nvl clear
                hide screen nvl
                scene bg monet_palace_image
                $ Ren'Py.pause(None)
               " — Я всегда говорил: твои песенки — дерьмо, Люсьен, и я не понимаю, где ты только находишь музыкантов, согласных это исполнять!"
Теперь после включения игры пользователь (или, скорее, разработчик) сможет при желании войти в режим дебага или пропустить уже готовый кусок вступления и начать тестировать сразу кусок из последнего коммита. Строка show screen nvl закомменчена за ненадобностью – как я уже упоминал выше, экран покажется сам собой, когда на нём обновится текст. Комменты, как видите, работают абсолютно очевидным образом.
Ярлыки, меню и другие индентированные блоки могут быть вложены до произвольной глубины, но на практике мы стараемся дробить текст на эпизоды в десяток страниц. Каждый такой эпизод описан внутри отдельного ярлыка с нулевой индентацией (он уже не обязан быть внутри ярлыка start или даже в одном с ним файле), а переходы из одного эпизода в другой осуществляются прыжками. Так мы не только боремся с десятками уровней индентации, но и обеспечиваем модульность кода: каждый эпизод может тестироваться отдельно и довольно несложно проверить, какие переменные он читает, в какие пишет и куда позволяет перейти.
Внутриигровые меню и переменные устроены абсолютно так же. Поскольку и переменных, и ярлыков даже в небольшом эпизоде на десять минут игры разводится невероятное количество, мы приняли несложный вариант венгерской нотации: имя ярлыка ‘the_very_start_lazlo_nooptions’ состоит из трёх частей: названия локации the_very_start (то есть период от начала игры до первого выхода в море), названия эпизода lazlo (то есть пьянка у Лазло, на которой можно нанять молодых бездельников в матросы) и имени собственно ярлыка. При таком подходе имена получаются достаточно громоздкими, но лучше так, чем обнаружить при тестировании, что три месяца назад кто-то уже создал переменную ship_listing, выставил True бог весть где и теперь крен из одного случайного события влияет на исход другого случайного события на другом конце моря.
Вместо заключения
К этому моменту мы уже воспроизвели на Ren’Py функционал упоминавшихся выше Choicescript и inklewriter. Вроде бы наш кораблик готов к отплытию. В следующей статье я покажу, как можно создавать более сложный интерфейс с использованием экранного языка RenPy и ещё более сложный — на чистом питоне.

Welcome to the Ren’Py quickstart manual. The purpose of this manual is
to demonstrate how you can make a Ren’Py game from scratch in a few
easy steps. We’ll do this by showing how to make a simple game,
The Question.
The Ren’Py Launcher
Before you begin making a game, you should first take some time to
learn how the Ren’Py launcher works. The launcher lets you create,
manage, edit, and run Ren’Py projects.
Getting Started. To get started you’ll want to
download Ren’Py.
Once you’ve downloaded Ren’Py, you’ll want to extract and run it.
- On Windows, double click on the executable file you download. It will
extract Ren’Py into a folder namedrenpy-<version>. You can change
into that folder and runrenpy.exe. (The renpy.exe file may be presented
as renpy if extensions are hidden.) - On Mac OS X, double-click on the downloaded drive image to mount it as a
drive. When the drive opens, copy the folder namedrenpy-<version>
somewhere else. (Where does not matter, but it has to be moved out of
the read-only drive image. Do not move the renpy app out of the folder it’s in
– it won’t work elsewhere.) Then change into it, and run therenpy
application. - On Linux, unpack the tarball, change into the
renpy-<version>
directory, and then runrenpy.sh.
After running this, the Ren’Py launcher should run.
The Ren’Py launcher has been translated to multiple languages. To
change the language, choose «preferences» at the bottom right, and then
select the language.
Choosing and Launching a Project. You should first see what the
completed The Question game looks like. To do this, start the Ren’Py
launcher, and choose «The Question» from the first screen. Choose
«Launch Project» to start The Question.
You can get back to the Ren’Py demo by doing the same thing, but
choosing «Tutorial» instead of «The Question».
.. ifconfig:: renpy_figures


    .. figure:: quickstart/launcher.png
        :width: 100%

        The main screen of the Ren'Py launcher.

    .. figure:: quickstart/project_name.png
        :width: 100%

        Naming a new project.

    .. figure:: quickstart/resolution.png
        :width: 100%

        Selecting the project resolution.

    .. figure:: quickstart/color.png
        :width: 100%

        Selecting the accent and background colors for the default theme.
Creating a new Project.
Create a new project by choosing «Create New Project» from the
launcher.
If this is your first time creating a project, Ren’Py may ask you to
select the projects directory. This is a directory (also called a folder)
where new projects are created, and is scanned for existing projects. The
directory chooser might pop up below Ren’Py, so be sure to look for it
there.
The launcher will then ask you for a project name. Since
«The Question» is already taken, you should enter something different,
like «My Question», and type enter.
After that, the launcher will ask you to select the project resolution.
1280×720 is a good compromise between game size and image quality.
For the purpose of this tutorial, we will select 1280×720 to match
«The Question» game art, then click «Continue».
The launcher will then ask you to choose a color scheme – an accent and
background color for the new GUI. It doesn’t matter what you pick at
this point, so just pick something you find appealing, and then click
«Continue».
At this point, Ren’Py will process for a bit, and spit out a simple game
template. The template used placeholder art and text, but is runnable, and
supports expected features like rollback, loading, and saving. Choose
«Launch Project» to run it.
A Simple Game
label start:

    "Sylvie" "Hi there! How was class?"

    "Me" "Good..."

    "I can't bring myself to admit that it all went in one ear and out the other."

    "Me" "Are you going home now? Wanna walk back with me?"

    "Sylvie" "Sure!"
This is a very simple Ren’Py game. It doesn’t include any pictures or
music, but it does show a conversation between two characters, and a
line of narration.
To try this out, from the top screen of the launcher select «My Question»
project, and then choose «script.rpy» from under Edit File. If this is
your first time, Ren’Py will ask you to select an editor (we recommend
Editra for first time creators), and will download the editor you choose.
Then it will open the script file in the editor.
Once the editor opens, erase everything in script.rpy. We’re starting
from scratch, so you don’t need what’s there. Copy the example above into
script.rpy, and save it.
You’re now ready to run this example. Go back to the launcher, and
choose «Launch Project». Ren’Py will start up. Notice how, without any
extra work, Ren’Py has given you menus that let you load and save the
game, and change various preferences. When ready, click «Launch Project»,
and play through this example game.
This example shows some of the commonly-used Ren’Py statements.
The first line is a :ref:`label statement <label-statement>`. The label
statement is used to give a name to a place in the program. In this case,
we create a label named start. The start label is special, as it’s
where Ren’Py scripts begin running when the user clicks «Start Game» on
the main menu.
The other lines are :ref:`say statements <say-statement>`. There are two
forms of the say statement. The first is a string (beginning with a double-quote,
containing characters, and ending with a double-quote) on a line by
itself, which is used for narration, and the thoughts of the main
character. The second form consists of two strings. It’s used for
dialogue, with the first string being a character name and the second
being what that character is saying.
Note that all the say statements are indented by four spaces. This is
because they are a block underneath the label statement. In Ren’Py,
blocks must be indented relative to the prior statement, and all of
the statements in a block must be indented by the same amount.
When strings contain double-quote characters, those characters need to
be preceded by a backslash. For example
###
    "Sylvie" "Did you ever hear Lincon's famous saying, "The problem with Internet quotations is that many of them are not genuine.""
While this simple game isn’t much to look at, it’s an example of how
easy it is to get something working in Ren’Py. We’ll add the pictures
in a little bit, but first, let’s see how to define characters.
Characters
Main article: :ref:`defining-character-objects`
One problem with the first example is that it requires you to
repeatedly type the name of a character each time they speak. In a
dialogue-heavy game, this might be a lot of typing. Also, both
character names are displayed in the same way, in the accent color
selected when starting the game. To fix this, Ren’Py lets you define
characters in advance. This lets you associate a short name with a
character, and to change the color of the character’s name.
define s = Character('Sylvie', color="#c8ffc8")
define m = Character('Me', color="#c8c8ff")

label start:

    s "Hi there! How was class?"

    m "Good..."

    "I can't bring myself to admit that it all went in one ear and out the other."

    s "Are you going home now? Wanna walk back with me?"

    m "Sure!"
The first and and second lines define characters. The first line
defines a character with the short name of «s», the long name
«Sylvie», with a name that is shown in a greenish color. (The colors
are red-green-blue hex triples, as used in web pages.)
The second line creates a character with a short name «m», a long name
«Me», with the name shown in a reddish color. Other characters can be
defined by copying one of the character lines, and changing the short
name, long name, and color.
We’ve also changed the say statements to use character objects instead
of a character name string. This tells Ren’Py to use the characters
we defined.
Images
Main article: :doc:`displaying_images`
A visual novel isn’t much of a visual novel without pictures. Here’s another
scene from «The Question». This also includes statements that show images
to the player. This can fully replace the previous section of script, if
you want to try it out.
define s = Character('Sylvie', color="#c8ffc8")
define m = Character('Me', color="#c8c8ff")

label start:

    scene bg meadow

    "After a short while, we reach the meadows just outside the neighborhood where we both live."

    "It's a scenic view I've grown used to. Autumn is especially beautiful here."

    "When we were children, we played in these meadows a lot, so they're full of memories."

    m "Hey... Umm..."

    show sylvie green smile

    "She turns to me and smiles. She looks so welcoming that I feel my nervousness melt away."

    "I'll ask her...!"

    m "Ummm... Will you..."

    m "Will you be my artist for a visual novel?"

    show sylvie green surprised

    "Silence."
This segment of script introduces two new statements. The scene statement on
line 6 clears all images and displays a background image. The show statements
on lines 16 and 26 display a sprite on top of the background, and change the
displaying sprite, respectively.
In Ren’Py, each image has a name. The name consists of a tag, and optionally
one or more attributes. Both the tag and attributes should begin with a
letter, and contain letters, numbers, and underscores. For example:
- In the scene statement on line 6, the tag is «bg», and the attribute is
«meadow.» By convention, background images should use the tag bg. - In the first show statement on line 16, the tag is «sylvie», and the
attributes are «green» and «smile». - In the second show statement on line 26, the tag is «sylvie», and the
attributes are «green» and «surprised».
Only one image with a given tag can be shown at the same time. When a
second image with the same tag is show, it replaces the first image, as
happens on line 26.
Ren’Py searches for image files in the images directory, which can be
found by selecting «images» in the «Open Directory» section of the
launcher. Ren’Py expects character art to be an PNG, WEBP, or AVIF file,
while background art should be a JPG, JPEG, PNG, WEBP, or AVIF file.
SVG files are also supported, but mostly used to customize the interface.
The name of a file is very important – the extension is removed, the file
name is forced to lowercase, and that’s used as the image name.
For example, the following files, placed in the images directory, define the
following images.
- «bg meadow.jpg» ->
bg meadow - «sylvie green smile.png» ->
sylvie green smile - «sylvie green surprised.png» ->
sylvie green surprised
Since the filenames are lowercase, the following also holds.
- «Sylvie Green Surprised.png» ->
sylvie green surprised
Images can be placed in subdirectories (subfolders) under the images directory.
The directory name is ignored and only the filename is used to define the
image name.
Hide Statement.
Ren’Py also supports a hide statement, which hides the given image.
label leaving:

    s "I'll get right on it!"

    hide sylvie

    "..."

    m "That wasn't what I meant!"
It’s actually pretty rare that you’ll need to use hide. Show can be
used when a character is changing emotions, while scene is used when
everyone leaves. You only need to use hide when a character leaves and
the scene stays the same.
Image Statement.
Sometimes, a creator might not want to let Ren’Py define images
automatically. This is what the image statement is for. It should
be at the top level of the file (unindented, and before label start),
and can be used to map an image name to an image file. For example:
image logo = "renpy logo.png"
image eileen happy = "eileen_happy_blue_dress.png"
The image statement is run at init time, before label start and the rest
of the game script that interacts with the player.
The image statement can also be used for more complex tasks, but that’s
discussed :doc:`elsewhere <displaying_images>`.
Transitions
Main article: :doc:`transitions`
In the script above, pictures pop in and out instantaneously. Since
changing location or having a character enter or leave a scene is
important, Ren’Py supports transitions that allow effects to be
applied when what is being shown changes.
Transitions change what is displayed from what it was at the end of
the last interaction (dialogue, menu, or transition – among other
statements) to what it looks like after scene, show, and hide statements
have run.
label start:

    scene bg meadow
    with fade

    "After a short while, we reach the meadows just outside the neighborhood where we both live."

    "It's a scenic view I've grown used to. Autumn is especially beautiful here."

    "When we were children, we played in these meadows a lot, so they're full of memories."

    m "Hey... Umm..."

    show sylvie green smile
    with dissolve

    "She turns to me and smiles. She looks so welcoming that I feel my nervousness melt away."

    "I'll ask her...!"

    m "Ummm... Will you..."

    m "Will you be my artist for a visual novel?"
The with statement takes the name of a transition to use. The most
common one is dissolve which dissolves from one screen to the
next. Another useful transition is fade which fades the
screen to black, and then fades in the new screen.
When a transition is placed after multiple scene, show, or hide
statements, it applies to them all at once. If you were to write:
###
    scene bg meadow
    show sylvie green smile
    with dissolve
Both the «bg meadow» and «sylvie green smile» images would be dissolved in
at the same time. To dissolve them in one at a time, you need to write two
with statements:
###
    scene bg meadow
    with dissolve
    show sylvie green smile
    with dissolve
This first dissolves in the meadow, and then dissolves in sylvie. If
you wanted to instantly show the meadow, and then show sylvie, you
could write:
###
    scene bg meadow
    with None
    show sylvie smile
    with dissolve
Here, None is used to indicate a special transition that updates
Ren’Py’s idea of what the prior screen was, without actually showing
anything to the player.
Positions
Main article: :doc:`transforms`
By default, images are shown centered horizontally, and with their
bottom edge touching the bottom of the screen. This is usually okay
for backgrounds and single characters, but when showing more than one
character on the screen it probably makes sense to do it at another
position. It also might make sense to reposition a character for story
purposes.
###
     show sylvie green smile at right
To do this repositioning, add an at clause to a show statement. The at
clause takes a position, and shows the image at that position. Ren’Py
includes several predefined positions: left for the left side of
the screen, right for the right side, center for centered
horizontally (the default), and truecenter for centered
horizontally and vertically.
Creators can define their own positions, and event complicated moves,
but that’s outside of the scope of this quickstart.
Music and Sound
Main article: :doc:`audio`
Most Ren’Py games play music in the background. Music is played with the
play music statement. The play music statement takes a filename that
is interpreted as an audio file to play. Audio filenames are interpreted
relative to the game directory. Audio files should be in opus, ogg vorbis,
or mp3 format.
For example:
###
    play music "audio/illurock.ogg"
When changing music, one can supply a fadeout and a fadein clause, which
are used to fade out the old music and fade in the new music.
###
    play music "audio/illurock.ogg" fadeout 1.0 fadein 1.0
The queue music statement plays an audio file after the current file
finishes playing.
###
    queue music "audio/next_track.opus"
Music can be stopped with the stop music statement, which can also
optionally take a fadeout clause.
###
    stop music
Sound effects can be played with the play sound statement. Unlike music, sound
effects do not loop.
###
    play sound "audio/effect.ogg"
When a filename is in the «game/audio» directory, and the name without the
file extension can be used as a Python variable (that is, it begins with
a letter, and contains only letters, numbers, and underscores), it is possible
to play that file without using quotes.
For example, if «game/audio/illurock.ogg» exists, we can write:
###
    play music illurock
See :ref:`the audio namespace <audio-namespace>` for more details.
Pause Statement
The pause statement causes Ren’Py to pause until the mouse is clicked.
###
    pause
If a number is given, the pause will end when that number of seconds
have elapsed.
###
    pause 3.0
Ending the Game
You can end the game by running the return statement, without having
called anything. Before doing this, it’s best to put something in the
game that indicates that the game is ending, and perhaps giving the
user an ending number or ending name.
###
    ".:. Good Ending."

    return
That’s all you need to make a kinetic novel, a game without any
choices in it. Now, we’ll look at what it takes to make a game that
presents menus to the user.
Menus, Labels, and Jumps
Main articles: :doc:`menus` and :doc:`label`
The menu statement lets presents a choice to the player:
###
    s "Sure, but what's a "visual novel?""

menu:

    "It's a videogame.":
        jump game

    "It's an interactive book.":
        jump book

label game:

    m "It's a kind of videogame you can play on your computer or a console."

    jump marry

label book:

    m "It's like an interactive book that you can read on a computer or a console."

    jump marry

label marry:

    "And so, we become a visual novel creating duo."
This example shows how a menu can be used with Ren’Py. The menu statement
introduces an in-game choice. It takes an indented block of lines, each
consisting of a string followed by a colon. These are the menu choices that are
presented to the player. Each menu choice takes its own indented block of lines,
which is run when that menu choices is chosen.
In this example, each of the two menu choices runs a single jump statement.
The jump statement transfers control to the a label defined using the label
statement. After a jump, script statements following the label are run.
In the example above, after Sylvie asks her question, the player is presented
with a menu containing two choices. If the player picked «It’s a videogame.»,
the first jump statement is run, and Ren’Py will jump to the game label.
This will cause the POV character to say «It’s a story with pictures and music.»,
after which Ren’Py will jump to the marry label.
If there is no jump statement at the end of the block associated with the label,
Ren’Py will continue on to the next statement. The last jump statement here is
technically unnecessary, but is included since it makes the flow of the game
clearer.
Labels may be defined in any file that is in the game directory, and ends with
.rpy. The filename doesn’t matter to Ren’Py, only the labels contained inside
it. You can think of all the .rpy files as being equivalent to a single big
.rpy file, with jumps used to transfer control. This gives you flexibility
in how you organize the script of a larger game.
Supporting Flags using the Default, Python and If Statements
Main articles: :doc:`python` and :doc:`conditional`
While some games can be made by only using the statements given above,
other games require data to be stored and recalled later. For example,
it might make sense for a game to remember a choice a player has made,
return to a common section of the script, and act on the choice later. This
is one of the reasons why Ren’Py has embedded Python support.
Here, we’ll show how to store a flag containing information about a choice
the player has made. To initialize the flag, use the default statement, before
label start.
# True if the player has decided to compare a VN to a book.
default book = False

label start:

    s "Hi there! How was class?"
The book flag starts off initialized to the special value False
(as with the rest of Ren’Py, capitalization matters), meaning that
it is not set. If the book path is chosen, we can set it to True
using a Python assignment statement.
label book:

    $ book = True

    m "It's like an interactive book that you can read on a computer or a console."

    jump marry
Lines beginning with a dollar-sign are interpreted as Python statements. The
assignment statement here assigns a value to a variable. Ren’Py has support
for other ways of including Python, such as a multi-line Python statement,
that are discussed in other sections of this manual. Ren’Py supports Python 2.7,
though we strongly recommend you write Python that runs in Python 2 and Python 3.
To check the flag, use the if statement:
if book:

    "Our first game is based on one of Sylvie's ideas, but afterwards I get to come up with stories of my own, too."
If the condition is true, the block of script is run. If not, it is skipped.
The if statement can also take an else clause, that introduced a block of
script that is run if the condition is false.
if book:

    "Our first game is based on one of Sylvie's ideas, but afterwards I get to come up with stories of my own, too."

else:

    "Sylvie helped with the script on our first video game."
Python variables need not be simple True/False values. Variables can be
used to store the player’s name, a points score, or for any other
purpose. Since Ren’Py includes the ability to use the full Python
programming language, many things are possible.
Releasing Your Game
Once you’ve made a game, there are a number of things you should do
before releasing it:
- Check for a new version of Ren’Py.
-
New versions of Ren’Py are released on a regular basis to fix bugs
and add new features. Before releasing, you’ll want to click update
in the launcher to update Ren’Py to the latest version. You can also download new
versions and view a list of changes at https://www.renpy.org/latest.html.Rarely, changes to Ren’Py will require you to make a change to your game’s
script. https://www.renpy.org/doc/html/incompatible.html has
a list of these changes. - Check the Script.
- From the front page of the launcher, choose «Check Script
(Lint)». This will check your games for potential errors. Since some of
these errors will only affect users on other platforms, it’s important
to understand and usually fix all errors, even if you don’t see the problem
on your computer. - Build Distributions.
- From the front page of the launcher, choose «Build Distributions». Based
on the information contained in options.rpy, the launcher will build one
or more archive files containing your game. - Test.
- Lint is not a substitute for thorough testing. It’s your
responsibility to check your game before it is released. Consider asking
friends to help beta-test your game, as often a tester can find problems
you can’t. - Release.
-
Once the game has been finished and tested, you should post the generated
archive files on the web somewhere people can see them. (If you don’t
have your own website, https://itch.io hosts a lot
of visual novels.) Congratulations, you’ve released your first visual novel!There are a few places where a game can be announced:
- The Ren’Py Games List helps us keep track of
Ren’Py games being made. - The Completed Games section of the Lemma Soft Forums is a
good place to tell fellow creators about your game.
- The Ren’Py Games List helps us keep track of
More advanced vays of customizing the building of the distribution of your game
can be found in the :doc:`build` section.
Script of The Question
You can view the full script of »The Question» :ref:`here <thequestion>`.
Where do we go from here?
This Quickstart barely scratches the surface of what Ren’Py is capable of.
For brevity’s sake, we’ve omitted many features Ren’Py supports and
simplified others – focusing on the minimum set of features used to make a
visual novel.
To get a feel for what Ren’Py is capable of, please play through the Tutorial,
and perhaps some of the games featured on the Ren’Py website.
You may also want to read the rest of this manual, starting with the :ref:`GUI Customization
Guide <gui>`.
Beyond that, we recommend checking out the Ren’Py section of the Lemma Soft Forums, which
has a section for asking questions, and a cookbook section with libraries and examples meant for reuse. The Lemma Soft Forums are the
central hub of the Ren’Py community, where we welcome new creators and the questions they bring.
Thank you for choosing the Ren’Py visual novel engine. We look forward to seeing
what you create with it!
На примере создания детской игры с загадками
И вновь приветствую всех! Пока продолжение прошлого поста, посвященное основам построения сюжета, еще в процессе написания, я попробую максимально доступно описать методы ветвления сюжета на примере детской игры с загадками (и, возможно, не самой лучшей графикой — не могу же я весь контент показать до релиза?).
Эта статья посвящена техническим моментам реализации новеллы при помощи инструментов движка RenPy, в частности — вариативности сюжетных линий.
В комментариях к прошлой записи несколько раз прозвучал вопрос о том, как реализована параллельность сюжета в новелле Spiritual Cavern, которая уже обзавелась собственной группой на Facebook.
Итак, для примера мы создадим крайне простую новеллу, в которой игрок должен отгадывать загадки кубика чтобы вместе с ним пойти на прогулку.
Спойлер: создание новеллы с графикой и написанием кода заняло 20 минут.
Графика: персонаж и фон
Какая новелла может обойтись без действующих лиц? Подготовим нашего персонажа, который будет загадывать загадки:
События происходят не посреди пустоты, потому нам потребуется фон:
Простейший сюжет
Подготовив материалы, мы можем приступить к составлению сюжета — в нашем примере он будет очень простым:
Суть сюжета очень проста: игрок трижды отвечает на вопросы, в зависимости от его ответа меняется настроение кубика. Кроме того, при каждом правильном ответе мы увеличиваем счетчик «Ответы», от которого в последствии зависит концовка игры: если был дан хоть 1
Итак, приступим. Я не буду описывать полный процесс написания кода в RenPy, так как уроков наэту тему довольно много. Но уделю отдельное внимание тем функциям, которые отвечают за ветвление сюжета.
Написание кода игры
Не пугайтесь, если показанные ниже примеры кода покажутся Вам сложными, или раньше у Вас не было опыта в работе с подобными редакторами — ниже описана структура любой графической новеллы в терминах языка RenPy, а также назначение каждой команды.
Кроме того, при создании нового проекта RenPy создает не пустой файл, а стандартную сцену, которая может быть основой для Ваших первых работ.
Основными конструкциями в RenPy являются:
- label имя_метки — место в коде, к которому в последствии можно перейти при помощи команды jump имя_метки
- scene — команда загрузки фонового изображения из папки images созданного проекта. Важно знать: в случае смены фона требуется заново ввести команду по выводу изображения персонажа.
- show — отобразить картинку (чаще всего — персонажа) поверх существующего фона.
- say — фраза, произносимая персонажем. Чаще всего используется в следующих форматах:Вариант первый: «автор» «фраза» — здесь мы явно указываем, кто говорит фразу и как эта фраза звучит.Однако, для удобства пользователя есть возможность упростить свою жизнь, заранее указав имя автора.Для этого перед меткой начала игры применяется следующая конструкция:define anna = Character(«Anna:»)В дальнейшем достаточно написать anna «фраза», что будет воспринято системой как «Anna:» «фраза»Важно понимать, что нет прямой связи между показываемой картинкой (show) и автором фразы — кроме той, которая формируется у игрока в процессе игры.
- menu — выбор игрока, в зависимости от которого происходит выполнение соответствующего кода, будь то простая фраза либо переход к конкретной метке.
Итак, что же происходит в первом фрагменте кода?
1) мы выводим на экран сцену «bg 1» из папки images нашего проекта
2) от имени игрока (define char = Character(«Я:») перед label start) выводим фразу «Интересно, где же кубик?»
3) плавно (with dissolve) выводим на экран изображение «cube wow»
4) от имени кубика (строка define e = Character(«Кубик:») перед label start) выводим фразу «А вот он я!»
5) после обмена фразами мы переходим к новой для нас команде — menu, отвечающей за выбор игрока и реакцию игры на этот выбор.
Ничего сложного, согласитесь? Требуется лишь следовать правилам составления сцены и корректно вводить команды.
У тех, кто был внимателен при прочтении нашего «сценария», может возникнуть вопрос: а как нам определить, хорошо или плохо заканчивается игра? Всё верно, при помощи команды menu мы можемпредоставить выбор игроку, а в данной ситуации требуется противоположное — сделать выбор на основе данных самой программы.
С этой целью мы добавляем в игру типичный для программ элемент -переменную под названием «answers» и устанавливаем её значение равным нулю.
В дальнейшем, при выборе игроком положительного (правильного) ответа, мы увеличиваем значение этой переменной следующим образом:
Таким образом, после трех вопросов её значение находится в диапазоне от 0 (если не было дано ни одного правильного ответа) до 3 (если все ответы были правильными).
Будем добрыми, и поставим простое условие: отгадал хоть одну загадку — добро пожаловать на прогулку. Для этого нам потребуется конструкция if-else, «если-иначе». Ниже — пример её применения в нашей новелле:
Итоги
Итак, мы создали новеллу, в которой присутствует как локальная (не влияющая на концовку), так и глобальная (определяющая финал истории) вариативность.
Было ли это сложно? Нет — у человека, ранее не работавшего с движком, подобная задача займет не более, чем два часа. Поиграть с Кубиком из нашего примера можно на ПК:
И на Android устройствах:
Стоит помнить: реальные проекты, геймплей которых длится от получаса и более, состоят из десятков, а порой — и сотен сцен, складывающихся порой в довольно запутанную структуру из параллельных сюжетных линий, локальных вариаций и сложных диалогов.
К примеру, в Spiritual Cavern на текущий момент присутствует порядка 1200 строк кода, реализующих первые шесть сцен игры — и, если бы не грамотная организация процесса, я давно потерялся бы в этих дебрях.
А о том, как стоит и не стоит организовывать процесс воплощения новеллы мы поговорим в следующей статье, которая выйдет в Воскресенье. Всем удачи, и приятных выходных!
Привет. Меня зовут Космический Кот. Я начинающий автор визуальных новелл, ютубер и, кроме того, у меня есть небольшой опыт программирования.
Начиная разбираться с созданием визуальных новелл на движке RenPy я заметил, что на русском языке не так много информации, доступной для новичков. Я считаю, что любое творчество должно быть доступно как можно большему количеству людей, независимо от их профессии, навыков или
уровня интеллекта
возраста.
Поэтому я начал серию видео-уроков по RenPy для новичков. Видео рассчитаны на людей, которые мечтают создать визуальную новеллу, но не имеют опыта программирования и не знакомы с Python. Всё, что вам нужно — это любовь к визуальным новеллам, к творчеству и желание учиться и делать ошибки.
RenPy — это просто! И вы сможете создать собственную новеллу, если приложите некоторые усилия.
Базовый курс будет состоять примерно из 40 уроков, в которых будет всё самое необходимое для создания полноценной новеллы с выборами, развилками сюжета, параметрами, разными концовками, галереей.
На данный момент есть уже более 20 видео.
После этого, я перейду на более продвинутые темы.
Добро пожаловать и приятного обучения!
Все уроки с кусочками кода собраны на отдельном сайте.
Список уроков на данный момент:
1. Что нужно для создания новеллы
2. Бесплатная музыка и другие ресурсы
3. Структура проекта RenPy
4. Основы программирования в RenPy
5. Персонажи и реплики
6. Фоны и спрайты персонажей
7. Прозрачность спрайтов и размер фона
8. Изменение расположения спрайтов
9. Быстрое изменение спрайта в диалоге
10. Переходы
11. Монологи и другие хитрости с текстом
12. Основы написания сценария
13. Процесс создания новеллы
14. Орфография в новелле
15. Выбор действий и метки
16. Логические переменные и условия
17. Иконка и «Об игре»
18. Фон и музыка в меню
19. Секретные варианты ответов
20. Ввод имени персонажа
21. Форматирование текста
22. Музыка и звуки
23. Числовые переменные
Плейлист уроков
Renpy is a video game engine allowing indie and professional game developers to build 2D games.
This beginner’s guide will talk about everything you can do with this game engine.
You’ll learn what Renpy is, what you can do with it, how to use it, and finally, how to make a game with it.
If you prefer a video, we made a video of this complete guide that you can also watch.
General Questions
What Is Renpy Game Engine?
Renpy is a cross-platform game engine – used by thousands of fans worldwide – and a powerful toolset for developing visual novels and life simulation games with ease.
But more than a simple visual novel game engine, features can be improved with Python code and Renpy native language, allowing you to add directly in your game customized features.
Also, Renpy is free and open-source, and games made with it can be commercial, shareware, or free.
Renpy is easy to use and works on all major platforms: it’s officially supported on Windows (Vista+), Mac OS X (10.10+), Linux (x86/x86_64), iOS (11+), Android (5.0+), and web browsers (HTML5/Web Assembly).
Where to Get Renpy Engine?
The Renpy game engine can be downloaded directly on the Ren’Py official website.
Is Renpy Easy to Use?
Yes, Renpy is easy to use, especially if you make a simple visual novel or a dating sim.
For more complex features, learning Python code should be required to let your imagination run wild.
Is Renpy Good?
Yes, Renpy is an excellent engine for video games, especially if you want to make visual novels or life simulation games due to the native engine features.
What is really nice with this game engine is also the small but active community around.
You can either join the active community on the Lemmasoft forum or join the Discord one.
Can You Sell Games Built With Renpy?
Yes, you can sell games made with Renpy.
Video games developed with Renpy can be deployed on PC, Mac, Linux, Android, iOS, and web browsers.
That means that if your games meet the marketplace’s requirements, your game could be sold on Steam, GOG, Itch.io, Apple App Store, and Google Play.
Can you Make a Dating Sim Game With Renpy?
Yes, you can make a dating sim with Renpy.
It is probably the most suited game engine for this type of game as most features included by default are made for visual novel and dating sim video games.
Can You Make a Point-of-Click Game With Renpy?
Yes, you can make a point-of-click game with Renpy. You will have to rely on Renpy’s native code built to make things easier for you.
By using image buttons and imagemaps alongside your custom art and plot, you’ll be able to make an adventure game with point-of-click elements.
How to Start with Renpy Game Engine?
Start small!
Do not begin with complex features like a custom turn-based battle system or minigames.
Instead, take the time to make a straightforward game design with your story concept, your character’s style and backgrounds, and define the overall ambiance that you would like to set up in your video game.
That being said, start with a simple visual novel with plot decisions, then you will be able to improve your game, steps by steps, with a dating system based on relationship points, a world map or a city map, or even a life management system with inventory and shop.
From there, you should be able to work on more complex RPG features like a battle system.
But keep in mind, these kinds of complex features don’t provide any value in your game if not set up correctly.
That could be a turn-off for many players, so be aware of that!
Worse, the complexity of these advanced features could discourage you and distract you from the essential task of releasing your game.
So the best way to start making games with this engine is to keep your game simple!
Can You Use Live2D With Renpy?
Yes, you can use live2D with Renpy.
The Live2DCubismSDK Native package will be required for that.
You can download it on the official Live2D website.
Move it to your Renpy game engine root folder as soon as you get the package.
Then you will have to open the Renpy launcher and go into “preferences > install libraries”, and select the “Live2D Cubism SDK for Native” option.
We made a complete guide on Live2D if you’d like to learn how to use Live2D with Renpy.
Starter Guide
Audio
Add Music
If you want to add music to Renpy, you’ll have to learn how the Play statement works.
Learn how to add music to Renpy
Console
Open The Console
To check variables, debug your game, or edit it directly in-game, you will have to open the console.
Learn how to open the Renpy console
Modding
Enable the Console
To enable the developer console even in compiled and published Ren’Py games.
Learn how to enable the console in released Renpy games
Well, that’s it!
Renpy is one of the most powerful game engines to make 2D video games.
It’s also a free and open-source game engine allowing game developers to release their games on desktop (PC, Mac, and Linux) and on iPhones and Android smartphones.
Building a 3D environment with Renpy is not a good idea as the engine is not really suited for this kind of game, resulting in poor performances.
To fully enjoy this game engine, you’ll have to learn how to use Renpy and read the official documentation.

Casual game maker in my free time, I enjoy more working on games and writing tutorials rather than playing video games myself.