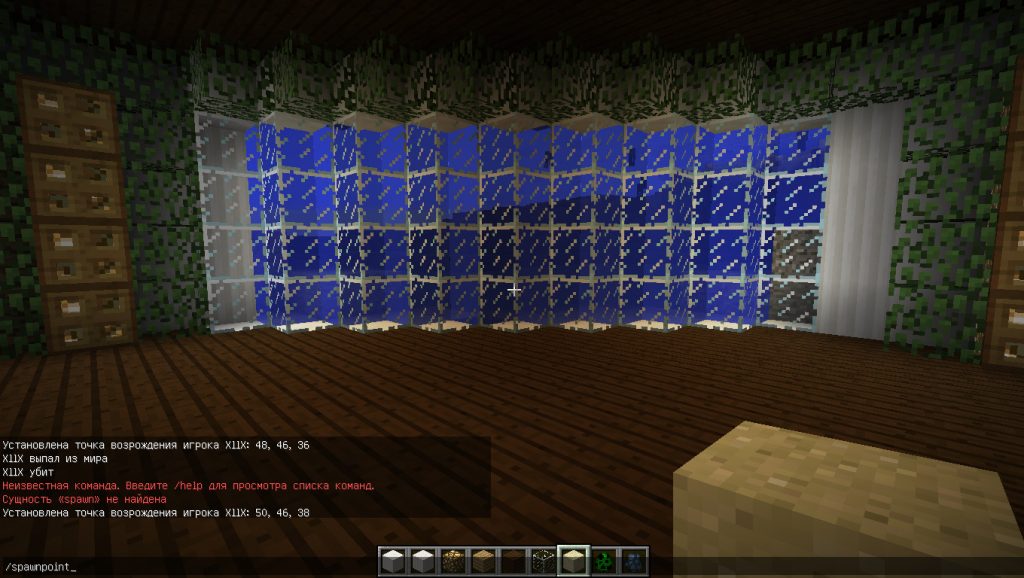
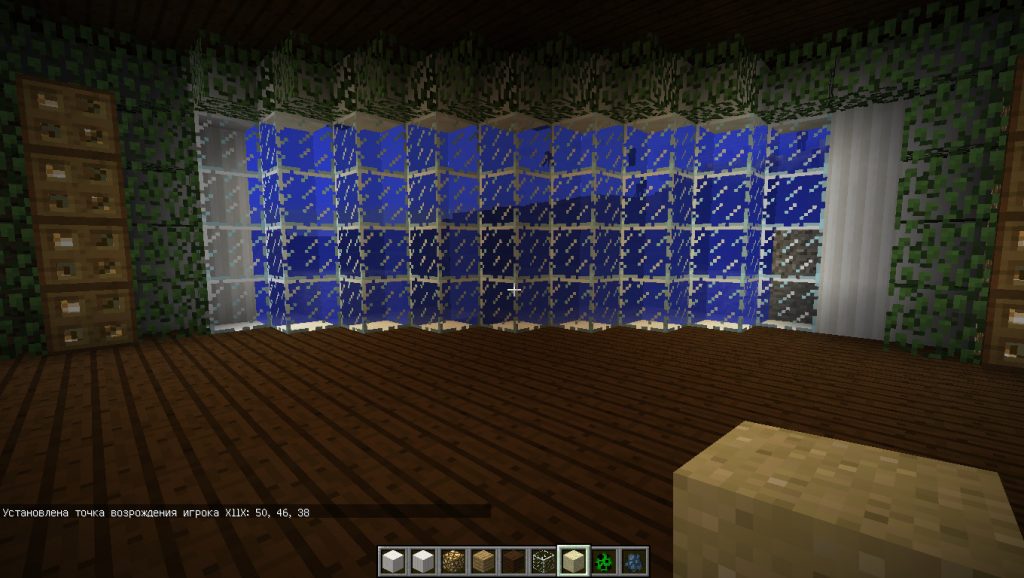
![]() /spawnpoint – игровая команда, которая позволяет устанавливать точку спавна игрока. Это может быть удобной опцией во время игры на сервере, а также, чтобы обезопасить выживание в случае, если нет возможности скрафтить кровать.
/spawnpoint – игровая команда, которая позволяет устанавливать точку спавна игрока. Это может быть удобной опцией во время игры на сервере, а также, чтобы обезопасить выживание в случае, если нет возможности скрафтить кровать.

Аргументы
 Никнейм игрока – Для исполнения команды необходимо указать никнейм игрока или селектор. Если этого не сделать, то команда /spawnpoint выполняется для того, кто исполнял запрос.
Координаты – Прописываются в формате [X, Y, Z]. Обозначают необходимую точку спавна. Узнать координаты можно с помощью меню, открывающееся на клавишу F3.
Как установить точку спавна?
- Необходимо найти подходящее место для точки респавна
- Узнать его координаты в меню по клавише F3
- Ввести команды /spawnpoint X, Y, Z
- Готово!
This Minecraft tutorial explains how to set your spawn point (spawnpoint) in the game with screenshots and step-by-step instructions.
What is a Spawn Point?
Let’s start by first explaining what a spawn point is.
When you die in Minecraft, you will respawn again in your world. The place that you respawn after you die is called your spawn point.
Where is your Spawn Point?
Initially your spawn point is where you started when the world was created but you can change your spawn point at any time.
There are 2 ways to change your spawn point:
- Sleep in a bed. When you sleep in a bed at night, you will reset your spawn point. You can sleep in multiple beds but the last bed that you slept in before you die is where you will respawn.
- Use the /spawnpoint command. This command allows you to quickly set your spawnpoint with a game command (ie: cheat).
For the purposes of this tutorial, we will explore how to use a bed to change your spawn point.
Steps to change your Spawn Point
1. Place a Bed
It is most common for you to sleep in your bed at night during your game. If you don’t have a bed in your inventory, you can quickly make one with a crafting recipe for a bed.
Add the bed to your hotbar and make sure that it is the selected item in the hotbar.
Next, position your pointer (the plus sign) on the block where you want to place your bed. You need at least two blocks to place your bed. You should see the block become highlighted in your game window.
The game control to place the bed depends on the version of Minecraft:
- For Java Edition (PC/Mac), right click on the block.
- For Pocket Edition (PE), you tap on the block.
- For Xbox 360 and Xbox One, press the LT button on the Xbox controller.
- For PS3 and PS4, press the L2 button on the PS controller.
- For Wii U, press the ZL button on the gamepad.
- For Nintendo Switch, press the ZL button on the controller.
- For Windows 10 Edition, right click on the block.
- For Education Edition, right click on the block.
You should see your bed appear on the block that you selected. Congratulations, you have somewhere to sleep at night.
2. Sleep in the Bed
Now that you have placed your bed in your Minecraft world, you need to wait for night (or use a cheat to change to night).
Now that it is night, you can sleep in the bed.
TIP: You can not sleep in the bed during the day!
The game control to sleep in the bed depends on the version of Minecraft:
- For Java Edition (PC/Mac), right click on the bed.
- For Pocket Edition (PE), you tap on the bed.
- For Xbox 360 and Xbox One, press the LT button on the Xbox controller.
- For PS3 and PS4, press the L2 button on the PS controller.
- For Wii U, press the ZL button on the gamepad.
- For Nintendo Switch, press the ZL button on the controller.
- For Windows 10 Edition, right click on the bed.
- For Education Edition, right click on the bed.
While you are sleeping, you will see a Leave Bed button appear. If you click this button, it will return you to your world while it is still night.
If you wait, it will turn to morning and you will automatically wake up standing next to your bed.
Now that you have slept in your bed, your spawn point will be reset. If you die in the game, you will respawn in this location. That is a great way to not get lost in your Minecraft world.
Congratulations, you just learned how to set your spawn point in Minecraft.
Многие хотят поставить спаун поинт там, где им хочется. Например, кто-то строит карту и хочет, чтобы все спаунились в определенном месте. Или же кто-то просто хочет поставить спаун поинт, чтобы было удобнее играть. Так что же нужно, чтобы поставить спавнпоинт в Майнкрафте?
Варианта два:
- Поспать на кровати. Но этот способ не подходит на творческом режиме. И если сломать кровать, то спаун поинт пропадет.
- Прописать команду. Этот способ работает везде.
Сначала рассмотрим первый способ:
Поставьте кровать там, где Вам хочется. Дождитесь (или сами поставьте) ночь и поспите на кровати. Готово, теперь вы будете телепортироваться именно в эту точку, если умрете.
Второй способ:
Для этого встаньте там, где хотите поставить спаун поинт. Потом пропишите такую команду: /spawnpoint .
Потом нажмите на enter. Готово, теперь Вы легко сможете телепортироваться в эту точку.
Но если Вы хотите убрать спаун поинт с этого места, то просто поставьте кровать в любом месте, поспите на ней и сломайте ее.
Также Вы можете сделать свой спаун более красивым: просто постройте какую-нибудь беседку или специальный дом. Так Ваш мир станет более красивым и сам спаун тоже.

![]() /spawnpoint – игровая команда, которая позволяет устанавливать точку спавна игрока. Это может быть удобной опцией во время игры на сервере, а также, чтобы обезопасить выживание в случае, если нет возможности скрафтить кровать.
/spawnpoint – игровая команда, которая позволяет устанавливать точку спавна игрока. Это может быть удобной опцией во время игры на сервере, а также, чтобы обезопасить выживание в случае, если нет возможности скрафтить кровать.
Аргументы
Никнейм игрока – Для исполнения команды необходимо указать никнейм игрока или селектор. Если этого не сделать, то команда /spawnpoint выполняется для того, кто исполнял запрос.
Координаты – Прописываются в формате [X, Y, Z]. Обозначают необходимую точку спавна. Узнать координаты можно с помощью меню, открывающееся на клавишу F3.
Как установить точку спавна?
- Необходимо найти подходящее место для точки респавна
- Узнать его координаты в меню по клавише F3
- Ввести команды /spawnpoint X, Y, Z
- Готово!


NAME
spawn
—
Postfix external command spawner
SYNOPSIS
spawn [generic Postfix daemon options] command_attributes...
DESCRIPTION
The spawn(8) daemon provides the Postfix equivalent
of inetd.
It listens on a port as specified in the Postfix master.cf file
and spawns an external command whenever a connection is established.
The connection can be made over local IPC (such as UNIX-domain
sockets) or over non-local IPC (such as TCP sockets).
The command’s standard input, output and error streams are connected
directly to the communication endpoint.
This daemon expects to be run from the master(8) process
manager.
COMMAND ATTRIBUTE SYNTAX
The external command attributes are given in the master.cf
file at the end of a service definition. The syntax is as follows:
| Tag | Description |
|---|---|
| user=username (required) | |
| user=username:groupname |
The external command is executed with the rights of the specified username. The software refuses to execute commands with root privileges, or with the privileges of the mail system owner. If groupname is specified, the corresponding group ID is used instead of the group ID of username. |
| argv=command… (required) |
The command to be executed. This must be specified as the last command attribute. The command is executed directly, i.e. without interpretation of shell meta characters by a shell command interpreter. |
BUGS
In order to enforce standard Postfix process resource controls,
the spawn(8) daemon runs only one external command at a time.
As such, it presents a noticeable overhead by wasting precious
process resources. The spawn(8) daemon is expected to be
replaced by a more structural solution.
DIAGNOSTICS
The spawn(8) daemon reports abnormal child exits.
Problems are logged to syslogd(8).
SECURITY
This program needs root privilege in order to execute external
commands as the specified user. It is therefore security sensitive.
However the spawn(8) daemon does not talk to the external command
and thus is not vulnerable to data-driven attacks.
CONFIGURATION PARAMETERS
Changes to main.cf are picked up automatically as spawn(8)
processes run for only a limited amount of time. Use the command
«postfix reload» to speed up a change.
The text below provides only a parameter summary. See
postconf(5) for more details including examples.
In the text below, transport is the first field of the entry
in the master.cf file.
RESOURCE AND RATE CONTROL
| Tag | Description |
|---|---|
| transport_time_limit ($command_time_limit) |
The amount of time the command is allowed to run before it is terminated. |
MISCELLANEOUS
| Tag | Description |
|---|---|
| config_directory (see ’postconf -d’ output) |
The default location of the Postfix main.cf and master.cf configuration files. |
| daemon_timeout (18000s) |
How much time a Postfix daemon process may take to handle a request before it is terminated by a built-in watchdog timer. |
| export_environment (see ’postconf -d’ output) |
The list of environment variables that a Postfix process will export to non-Postfix processes. |
| ipc_timeout (3600s) |
The time limit for sending or receiving information over an internal communication channel. |
| mail_owner (postfix) |
The UNIX system account that owns the Postfix queue and most Postfix daemon processes. |
| max_idle (100s) |
The maximum amount of time that an idle Postfix daemon process waits for the next service request before exiting. |
| max_use (100) |
The maximal number of connection requests before a Postfix daemon process terminates. |
| process_id (read-only) | The process ID of a Postfix command or daemon process. |
| process_name (read-only) | The process name of a Postfix command or daemon process. |
| queue_directory (see ’postconf -d’ output) | The location of the Postfix top-level queue directory. |
| syslog_facility (mail) | The syslog facility of Postfix logging. |
| syslog_name (postfix) |
The mail system name that is prepended to the process name in syslog records, so that «smtpd» becomes, for example, «postfix/smtpd». |
SEE ALSO
LICENSE
The Secure Mailer license must be distributed with this software.
AUTHOR(S)
Wietse Venema
IBM T.J. Watson Research
P.O. Box 704
Yorktown Heights, NY 10598, USA
Использование команд на сервере

Любой игрок на проекте Squareland может использовать ряд команд. Чтобы не запутаться, они поделены на несколько категорий: приват, телепортация, торговля и прочие.
Для получения полного арсенала возможностей желательно изучить команды Майнкрафт на сервере для игроков. Они облегчают взаимодействие с окружающим миром, обеспечивают защиту построек, позволяют торговать, помогают ознакомиться с правилами и возможностями проекта. Чат включается на английскую клавишу T. Команда вводится в формате /команда. Через запятую приведены различные вариации написания.
Базовый набор команд для игроков
- /info — Общие сведения.
- /rules — Вывести свод законов сервера.
- /motd — Отобразить дневные сообщения.
- /list, /online, /who, /playerlist — Показать список игроков онлайн.
- /afk — Оповестить об отсутствии.
- /compass — Указывает в какую сторону движется игрок.
- /near, /nearby [расстояние] — Вывести список ближайших людей.
- /getpos [ник] — Отобразит месторасположение игрока.
- /ignore [ник] — Команда включает игнор.
- /me [текст] — Выводит информационное особщение, добавляя ник в начало.
- /msg, /tell, /m, /whisper [ник] [текст] — Личка.
- /r, /reply [текст] — Быстрый ответ.
- /seen [ник] — Узнать время последнего онлайна.
- /whois [ник] — Команда отобразит инфо о персонаже.
- /nick [ник] [nick|off] — Изменение отображения ников.
- /mail [read|clear|send] [ник] [текст_послания] — Доставит сообщение при помощи почты. read — Прочесть, clear — Очистить, send — Отправка.
- /suicide — Самоубийство.
Приват в Minecraft
- //wand — Получить топор из дерева, используемый при выделении территории. ЛКМ — Первый пункт. ПКМ — Второй пункт. Так игроки могут выделить целый куб с блоками, в котором другим запрещается строить.
- /region claim [Текст] — Создание приватной территории с названием после завершения операции разграничения.
- /region addowner [Название] [Никнейм] — Закрепить землю за игроком.
- /region removeowner [Название] [Никнейм] — Лишить прав на владение.
- /region addmember [Название] [Никнейм] — Команда на добавление игрока в регион.
- /region removemember [Название] [Никнейм] — Выгнать игрока.
- /region select [Название] — Выбрать территорию.
- /region info [Название] — Основные сведения о регионе.
- /region remove [Название] — Убрать регион.
- /cprivate [Имена игроков, у которых должен остаться доступ] — Установка защиты на люки, раздатчики, сундуки, двери в выделенном регионе.
- /cmodify [ник] — Команда Майнкрафт позволяет открыть доступ к предметам указанному игроку.
- /cpassword [Ваш пароль] — Активировать пароль на вышеперечисленное.
- /cunlock — Открыть предмет защищённый паролем.
- /cremove — Деактивировать защиту и убрать пароль с предмета.
Телепортация
- /setspawn [группа] — Выбрать место спавна.
- /spawn — Телепортация на спавн.
- /back, /return — Вернуться в последнюю точку телепортации.
- /sethome [название] — Установление телепорта домой.
- /home [Никнейм] [название] — Телепортация в домашний телепорт.
- /delhome, /remhome, /rmhome [название] — Удаление домашнего телепорта.
- /createwarp, /setwarp [название_warp’a] — Создание места телепортации.
- /delwarp, /remwarp, /rmwarp [название_warp’a] — Удаление места телепортации.
- /warp [название_warp’a] [название] — Телепортация в указанное место.
- /world [название] — Телепортация в другой мир.
- /j, /jump — Телепортиртация в место, указанное прицелом.
- /top — Команда телепортации на вершину высочайших построек в Майнкрафт.
- /tp [Никнейм1] [Никнейм2], /tp [Никнейм к кому тп] — Переместиться к нужному игроку.
- /tpa, /call [Никнейм к кому тп] — Принятие согласия на перемещение.
- /tpaccept, /tpyes [Никнейм] — Подтверждение согласия на перемещение.
- /tpdeny, /tpno — Отказ согласия на перемещение.
- /tpahere, /tphere, /s [Никнейм] — Команда Майнкрафт на перемещение определённого игрока.
- /tpall [Никнеймы] — Переместить несколько персонажей.
- /tppos [x] [y] [z] — Телепортировать всех по координатам.
- /tpo [ник] — Переместиться к персонажу.
Торговля
- /balance, /bal, /emoney [Никнейм] — Просмотреть количество денег.
- /balancetop, /baltop [Номер] — Ознакомиться с именами самых богатых людей на сервере.
- /eco, /economy [give|take|reset] [Никнейм] [Количество] — В зависимости от команды: give — Дать игроку деньги, take — Взять деньги у персонажа, reset — Обанкротить персонажа.
- /pay [Никнейм] [Стоимость] — Заплатить персонажу деньгами.
- /sell [ID] [Количество], /sell [hand|invent|blocks] — Продажа: hand — Продажа всего из слота быстрой панели (клавиши 1-9), invent — Продажа всех предметов и блоков Майнкрафт из инвентаря, blocks — Продажа всех блоков из инвентаря.
- /setworth [ID] [Стоимость] — Установить стоимость.
- /worth [ID] [Количество] — Узнать стоимость предмета.